Search the Community
Showing results for tags 'wheel'.
Found 33 results
-
So I got a little something interesting that I believe is a real first in this community and because the holiday was coming up I wanted to make it something really special, I give you a BALDWIN DISK DRIVER. This type of driver was designed and made by the Baldwin Locomotive Works and was used on railroads that ordered locomotives from Baldwin. This wheel was designed and made by me on AutoCAD 2022 and with the help of a humble XYZ Da Vinci 3d printer. It is 62.4 mm in diameter compared to the #13 43.2mm diameter. This took over 20 different attempts to create. It is still imperfect from the color of the wheel for I do not know any steam locomotive from Baldwin that used red colored wheels and the fact that it is not the plastic that is used on BrickTrainDepots wheels. Nevertheless, it still accepts standard axles and connector pieces in the exact same fashion as all of the other steam train drive wheels. Here is the wheel with the connector peg and axle in their respective places. For comparison, here is the disk driver(62.4mm) beside BTD's #13(43.2mm) Boxpok Driver
-

DOOSAN DL420-7 wheel loader
eric trax posted a topic in LEGO Technic, Mindstorms, Model Team and Scale Modeling
I think I can finally say that I'm back to building 100%. I've been wanting to build a wheel loader for many years, but this project always fell lower and lower on the list of things to build. When I created the mock-up of the technic mine I realized it was time to finally build a decent wheel loader. Choosing the specific machine I wanted was not difficult. I always like to stand out. There have already been a lot of yellow machines, so why not an orange one? That's how I decided to build the Doosan DL 420-7: I started building the model in September 2022 and finished it in June 2023. Of course, there were 4 months break at that time for other models. The primary task in the design of Doosan was to make the model as efficient as possible. In my opinion, it worked very well and this is the final result. When I started building I gave up dummy engine almost immediately. I preferred to use this space for massive axles with portal hubs and a solid frame. The Doosans' drive is powered by the XL motor. Above it, there are two motors: L-motor responsible for turning and M-motor moving the bucket. At the beginning of the work I used Sbrick and a Lego rechargeable battery box. During the 16-hour tests at the exhibition, I decided that for even better effect and efficiency I would use Buwizz. Thanks to this, the model has space and the possibility of three control configurations. Sbrick, Buwizz 2.0 or CADA JV1010. The last L-motor lift the arm and it's located behind the front axle. When I made sure that the model works as I expected and removed a few minor defects that were revealed during the tests I started to make building instructions. In addition to a solid frame and pretty well working mechanisms, I wanted the model to look good. The large frame made it difficult for me. In some places I used optical illusions using black bricks. The shape of the arms is bit different compere to the real machine, but this was due to the geometry of the bucket stabilization system. I am happy with the good looking fenders. The rear ones should open but I chose a solid mount. The engine cover have a specific shape. The machine is partly orange, so I had to simplify its details a bit and make possibility to easily buy all the elements in this color. My favorite detail is the radiator grille and counterweight. As you can see, it has a tile on three sides and is mounted on pins. The side parts are build in creator expert style. An additional nice detail is the cabin, which can be removed as one part from the model. To increase the realism, I used RC - MIL SPEC 1.9 ZXL tires that perfectly match the lego technic rims. Below you can see photos and video. There is also a link to the building instructions which also includes motor wires. I spent 250 hours on the presentation and instructions, stickers (with Marton) and I'm curious if you'll like it :) Building instructions: https://reb.li/m/154471 Sticker pack: https://forwartsticker.com/termek/fws95-moc-154471/ Photo gallery: https://bricksafe.com/pages/erictrax/doosan-dl420-7 Video: -

42055 - Bucket Wheel Excavator - MODs and Improvements
Imanol BB posted a topic in LEGO Technic, Mindstorms, Model Team and Scale Modeling
Well, so now we have seen some reviews of the new LEGO models, and modifications and improvements of the other ones, and i think its time for the 42055, so lets start: My first modifications would be improve the force of the bucket, because as far i could see, the bucket is driven by the chains of the conveyor belt, so even an small object is able to stop it (like Sariel showed in his review), i would put an axle going from the gearbox directly to the bucket, or even a motor behind it, so there would not be too much power loss. Another modification i would like to do is in the tracks, i would like to put an small gearbox in the lower frame (i think there is enough space there), to select between some driving types, maybe something like a subtractor gearbox. And for the last, i would improve the turning system of the lower conveyor belt, as we can see in the review of Sariel, there is an small backlash in the system when the excavator changes the turning direction. So post any more idea or suggestion you have for this huge and impressive set. -

[Studio] Planetary wheel hubs 46490c01
MajklSpajkl posted a topic in Digital LEGO: Tools, Techniques, and Projects
Hello everyone, I ventured a bit into stud.io lately and wanted to have Technic planetary wheel hub 46490c01 from set 42099 so after some investigation and suggestions from facebook and instagram I managed to create three separate parts with all connections between them and "the outer world" as well. Feel free to check it out in my bricksafe folder. I suggest putting all three parts together and group them. The hub and the socket can be rotated independently. I hope you find it useful and would appreciate your opinions, especially if you do find any mistakes in geometry or connections. All credits for creating *.dat files for the parts for LDraw go to @Philo - thank you very much. Best regards, Miha -
Hello everybody! This is the first MOC I present on Eurobricks. My most popular MOC yet is the 3 speed auto gearbox (https://rebrickable.com/mocs/MOC-33711/lbrix/3-speed-auto-gearbox-overworked-version/?inventory=1#comments). But now to this gearbox: At first ask yourself this question: Which sense has a normal D-N-R gearbox in a manual technic car? It has no sense. It makes no difference if you are in the forward gear or in te reserve. But with this D-N-R gearbox it makes a difference, because if you are in the forward gear, you can not push the car backward and if you switch in the reserve gear, you can not push the car forward. If you want to build this gearbox into a technic car, you have to connect the grey connectors to the wheels and one of the black ones to the fake engine. For more information check out this MOC on rebrickable (maybe it is not approved yet): https://rebrickable.com/mocs/MOC-47985/lbrix/alternative-d-n-r-gearbox/?inventory=1#comments No I wanted to ask you, what you think about this D-N-R gearbox? Here is an video of my gearbox:
-
My next train will consist of 10 cars, each car weighting about 600g. In order not to overload the locomotive I decided last autumn to equip the train wheel set with ball bearings. At that time I found only the solution using modified train wheel holders from Legopold https://www.flickr.com/photos/162569845@N05/25210157997/ and the solution using technic bricks from legoman666 https://www.eurobricks.com/forum/index.php?/forums/topic/140479-ball-bearings/. My cars are 7wide, the solution using technic bricks requires covering the wheels, but this will exceed 7wide. Using the first method results in a significantly different wheel holder height and I do not like that. So I decided to develop my own solution (if Legopold had invented his improved method https://www.eurobricks.com/forum/index.php?/forums/topic/174266-improved-method-to-equip-lego-train-wheel-holders-with-ball-bearings-no-cutting-of-the-wheel-holder-required/ earlier I probably would not have looked for another solution). This is my result: I milled out the locations for the ball bearings: Except the ball bearings I used only original LEGO parts. For comparison: on the left side the original wheel set, on the right side the wheel set with ball bearings The ball bearings are steadily joined to the axle. Due to the ball bearings the cars now run more smoothly and I do not regret my efforts. Ludger
-

wheel lock for RIM 55982
janssnet posted a topic in LEGO Technic, Mindstorms, Model Team and Scale Modeling
Hi there, While building a small rc car using a RIM 55982 (18 x 14) I needed a way to lock the wheels to be able to drive it with a motor. Almost started drilling holes ..... and then, after removing the tire, it turned out there is a little notch inside the wheel. Looks like it is a space for a tiny piece of plastic to slide in, to lock the axle to the wheel. Exactly what I'm looking for! Have I missed something? Is there a LEGO part that fits this notch and locks the wheel? Or should I make it myself. https://drive.google.com/file/d/1UgLxSAbwba1zWIg1YRPNkqPdqAq3pMu7/view?usp=sharing -

[MOC] General Grievous Wheelbike Chase (constraction figure scale!)
Oky posted a topic in LEGO Star Wars
Hello there! Today I would like to share with you a MOC that is nearly 2 years old. I just never got around to taking and posting good pictures of it until now. It's a constraction figure scale rendition of the scene in Revenge of the Sith where Obi-Wan Kenobi chases General Grievous through the mines of Utapau which won second place in the constraction category at Star Wars Days 2018 and is part of what earned me the Miss Congeniality Award at Bricks LA 2019. Grievous' Wheelbike really rolls, has a working headlight and rotating cannon, and can transform into its walker mode. Boga is fully posable as well. -

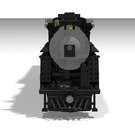
Wild West stern-wheel river-going steamboat (Proud Mary) - real world MOC model
Murdoch17 posted a topic in LEGO Historic Themes
Left a good job in the city Workin' for the man ev'ry night and day And I never lost one minute of sleepin' Worryin' 'bout the way things might have been Big wheel keep on turnin' Proud Mary keep on burnin' Rollin', rollin', rollin' on the river First off: I saw a similar steamboat on LEGO Ideas several years ago and just finally got around to recreating it from the pictures provided. (the project sadly never made it past several hundred votes, it my memory is correct.) I modified it heavily into the version you see here with my own tweaks and twists in the design installed, such as I added a second funnel, revised the placement of said funnels to the front of the ship, and removed the roof off most of the second deck. Oh, and I added three whistles to the top of the pilot's cab like those in set 21317. (Steamboat Willie). Also, my version does NOT have a swing-open right side like the original Ideas model that was my inspiration... thus you cannot get at the inside, and why would you want to? Their is nothing inside at all anyway on my version, save for the blue deck chairs on the top level. The name of the ship is the Proud Mary, after the Creedence Clearwater Revival song of the same name (as quoted above), as I figured it would be appropriate. This model will go with the rest of my Western models, on my Wild West layout. The captain of the Proud Mary is Thaddeus Sweeney, better known as "Old Man Sweet-tooth", for his habit of chewing saltwater taffy when the going gets tough and and giving candy out to the little children whenever he lands at small towns and native american villages such as Lone Tree, Nebraska, or Fort Legoredo, Colorado. He usually plies his brand-new-for-1872 stern-wheel steamboat up and down the Rapid River, with the Missouri River in Iowa at one end, and the the mighty cliff face of Showdown Canyon Springs at the other end in the middle of Colorado. Thaddeus is the only one he trusts to handle his ship, as he says the Rapid River is too treacherous for many newer pilots, as the wrecks that litter the shoreline prove. However, even Captain Sweeney admits from time to time that age is catching up to him, and he has been looking for a suitable first mate for the Proud Mary for some time. -
 REVIEW - 42081 - VOLVO CONCEPT WHEEL LOADER ZEUX INTRODUCTION Cranes, forklifts, cars....can we please get something different for crying out loud?! Well....here it is, something different. Of course, one can argue that this is yet another a front loader, and technically they might be right. But it is a unique in a way. Volvo and TLG make the most of their ongoing collaboration and present us the ZEUX, an Autonomous Concept Wheel Loader. An autonomous car (also known as a driverless car, self-driving car, and robotic car) is a vehicle that is capable of sensing its environment and navigating without human input (source wikipedia). This boils down to the front loader being capable of navigating without human input, therefore lacking the cabin. In order to perfectly sense the environment, it uses a drone sidekick! Some people think this thing is as ugly as....an autonomous concept wheel loader, but I will tell you straight away I absolutely love it. I love the concept, I love the looks and I love the fact that TLG and Volvo actually made a Technic set for this vehicle. And that's that for an objective review. Of course, I will try to be objective in my review, but I won't hide the fact that I am very enthusiastic about this model. Let's deploy the drone and....grab a beer, since this thing will be driving itself. If you see this icon, you can click the image on the left or right side of the image, to cycle through alternative images. PICTURES Pictures can be clicked to view hi-res versions. More pictures can be found in my Flickr album. DISCLAIMER This set has been provided by the CEE Team of TLG. It's not my goal to promote this set. It's my goal to give you an honest opinion about it. Therefore, the opinion in this review is my own and is in no way linked to TLG. SET INFORMATION Number: 42081 Title: Volvo Concept Wheel Loader ZEUX Theme: Technic Released: 2018 Part Count: 1.167 Box Weight: 2,33 kg Box Dimensions: 57,5 cm x 37,0 cm x 11,1 cm Set Price (MSRP): £ 109.99 / $ 139.99 / € 119,99 Price per Part: £ 0.09 / $ 0.12 / € 0,10 Links: Brickset, Bricklink THE BOX The front shows the model with its flying sidekick. The background shows a pile of sand and behind that a skyline with scryscrapers. Apparently, this vehicle is not only meant to be used in remote mining facilities, but also in urban areas. The bottom right tells us the vehicle measures 59 cm in length. If you don't own the 42030 - Volvo L350F Wheel Loader, but you do want the big bucket, now's your chance. You will get four nice big Claas tires with it, in case you missed those. So, this set might be interesting enough for the unique parts alone. BACKSIDE The back is divided in two sections, a top section for the main model and a bottom section for the B-model, another Volvo Concept, called the PEGAX. Needles to say, I am more enthusiastic about this alternate model, than the one for the Rough Terrain Crane. I actually quite like this one, but more on that later. CONTENTS OF THE BOX This box contains: 1x Sealed pack with booklet and sticker sheet 4x Tires 1x Big bucket 1x Bag with rims, actuators and gear rack housing 9x Unnumbered bag BUCKET AND TIRES I didn't think to see another set with the big bucket, but here it is. And four Claas tires, which are turning into a common presence in my collection. I absolutely love these bad boys and I sure hope TLG will some day release a smaller version as well. RIMS AND ACTUATORS A bag containing four rims, two linear actuators and a gear rack housing. BAGS A total of nine numbered bags. HIGHLIGHTED PARTS I was about to show the pictures of the bucket and rim again here, but that's rather useless, since I already posted them in the content section. Other than those parts, there aren't any new or interesting parts. I can hightlight the propellors, but that's about it. 7 BLADE PROPELLOR This propellor in flat silver isn't very rare, but you don't see it every day either. Comes in seven other sets. PART LIST Two pages showing the 1.167 parts. THE BUILD We start by building the front of the chassis. An interesting technique is used near the gear rack. The white part behind the 12T Gear is not a 1L connector. It's actually a 2L Liftarm with Pin and Axle. It rotates between two 5L thin liftarms. I could be mistaken, but it's probably just for proper alignment of the front and rear wheels. Here's a better view of the 2L Liftarm. I should have taken a better picture. REAR The rear wheels are connected to this assembly. Both the front and rear wheels don't implement shock absorbers or any other form of suspension. When you operate the final model, you are inclined to push it down to test the suspension. Unfortunately, to no avail. I reckon autonomous vehicles don't need suspension BOOM This is the boom which will connect to the bucket. Operated manually via a Linear Actuator. Usually manual operation and LA's don't combine very well, because it makes operating the functions very cumbersome. I wonder if this is the case for this vehicle as well. And the boom connected to the chassis. This is actually turning into some sort of vehicle. Feels more like an excavator than a front loader, but that will probably change in a bit. Next we are going to build the.....the.....uhmmm......what is it that we are building here?! It does seem to be sliding out. Ahhh here it is, the....uhmm.....the.....counterweight I presume. This entire big block can slide out to compensate for the weight of a filled bucket. T = F x L comes to mind. Looking at the left image, you see three (six, if you count the other side as well) panels with stickers, red and green lights and "chromed" grills. A couple of steps further down the road you will cover them with other panels (image on the right) and you will never see those decorated elements again. Is this a way to sneak in some parts for the B-model, which uses these panels in a more prominent way. Either way, I was hoping to be able to see these panels in the A-model as well. Ohh wait, you actually can see the panels inside this big paper weight At the rear you can see the 12T Gear, which is not the Hand of God steering, but it is used to move the weight back and forth. The rear is almost done now. We only need to add the antenna and the drone. I am not sure why the drone is positioned like it is, because it is not able to fly off by itself. The antenna is blocking one of the four propellors. I'd say, move it a couple of studs to the front. After adding some panels, the wheels and the bucket to the boom, the Zeux is finished. I enjoyed building this vehicle. It's not that different from a regular Front Loader, but it does have some unique elements. The usual leftover parts. COMPLETED MODEL Of course, it is a matter of personal taste, but in my opinion this vehicle looks awesome! I love the Tech-look with the black and yellow color scheme. I also love the orange accents to highlight important and/or moving parts, like railings, footsteps, etc. And I also love that TLG (and Volvo) went all out and said....let's do this! This collaboration is proving to be very fruitful. Here is video with some background information on how this project started. A cool fact is that kids actually helped shape this model and made some design decisions. The boom has been properly finished with panels at the right place. Feels solid. Operating the functions manually works better than expected. They are actually quite responsive. Here's the list of implemented functions: Four wheel steering Raising/lowering the bucket Raising/lowering the boom Raising/lowering the chassis Extending/retracting the counter weight The three raising/lowering functions are operated by turning the 12T gears, all located near the front wheel. An interesting fact is that the antenna at the back is actually an eye. You would think it is used to look at the environment, but it's primary function is to interact with people walking near the vehicle. By looking at the eye you can see that the vehicle has seen you. The following video gives you some insights: The back looks even more "Techy" than the front, with the drone and the antenna. Click on the image to raise and lower the chassis. Granted, the looks of this vehicle are relying heavily on the applied stickers. It will probably still look cool without them, but you would lose lot of the details. The front loader in attack mode. Ready to strike There has been some debate about the reason to raise and lower the chassis. At first I agreed that ground clearance was a logical reason, but the axles are still near the ground, so that doesn't make sense. Therefore, I think it has to do with transporting the vehicle. If you put this on a truck it will be quite high. Lowering the chassis will solve this issue. And it can be used to change the angle of the boom without moving it. Not sure if this is an actual purpose, but maybe it doesn't cost as much power, since the arm is longer. Just guessing here. And a final image from the left rear of the vehicle. B-MODEL I haven't been able to build the B-model, so I have no idea how the build is. However, by looking at the picture I have a pretty good idea. It is an odd looking vehicle, but at least we get to see the six grey panels Again, one can discuss the looks. It's not the best looking vehicle I have ever seen, but for an autonomous vehicle, it does what it does, haul a payload. I am not entire sure why this vehicle needs to adjust its ride height. Maybe to prevent from the load falling out of the bed. Anyway, I will most likely get a second copy of this set and build this PEGAX hauler. For me, it's two thumbs up for this alternate model. SUMMARY At the beginning of the review I mentioned that I was very fond of this model. Well, that didn't change upon completing the build. I like everything about it. And I find it particularly interesting, and audacious, that TLG and Volvo actually went ahead with this project. This proves that two major brands working together can accomplish great things. I do understand that not everybody will like this model, but if you are remotely interested in robotics and autonomous vehicles, this should appeal to you. Then there is the discussion about manually operating the functions on an autonomous vehicle. Some claim that it should have been full RC. But if you think about it a big longer....an autonomous vehicle being remotely controlled?! That doesn't make sense either. The perfect solution would be to integrate Mindstorms, but that's not feasible for a retail set. It will even be challenge to add the functionality, even for the avid Mindstorms builder. There's simply not enough room in the chassis to place all the motors and sensors. All things considered, I am very happy with these manual functions, and the way they operate, even with Linear Actuators. Not sure whether this is considered a Pro or a Con, but it is worth mentioning that this set doesn't have numbered bags. Both previous Volvo models didn't have numbered bags either. Makes you think that Volvo has something to do with this. For those of you wondering...the MACK did have numbered bags PROS Unique vehicle Cool design and color scheme Another chance to get the big bucket (and big Claas tires) Manual functions work properly CONS Lots of stickers No intricate gearbox. Functions are directly connected to the LA's. Oddly placed drone (is this even a Con?!) SCORE How do I rate this set? 9 DESIGN I know this is highly subjective, but I love the looks of this vehicle. 8 BUILDING EXPERIENCE Enjoyed the build, but there is no intricate gearbox. 8 FEATURES Enough features to keep it interesting. 8 PLAYABILITY For manually operated LA driven functions, they are surprisingly responsive. 8 PARTS Depends on your needs, but another chance to get the big bucket, in case you missed the Volvo L350F. 8 VALUE FOR MONEY Price per part is not particularly low, but you do get a big bucket and four Claas tires. 8,2 I'M LOVING IT FINAL WORDS One last thing to mention is this page at the end of the instruction manual. It contains some of the prototype (I presume) vehicles which have been created during the design process. Thanks you for reading this review. All pictures can be found here.
 -
Hi all,We're back again to show you another old MOC, the Prater Ferris Wheel.The ferris wheel is built on the mechanism of the #4957 LEGO set and the style is that of the Prater in Wien, while the café and the park are invented.The work consists of about 8000 LEGO bricks (80 minifigures included). You can notice plenty of details, including people taking a selfie, fallen leaves, frightened people escaping from the park, jogging guys, pretty girls, elegant couples waiting for their high-class wagon, men at work, plants, bike raks and so on. Here are some photos; you can find more on our Flickr profile. Thanks for visiting! FBros
-

[WIP] Cipher Wheel
Berthil posted a topic in LEGO Technic, Mindstorms, Model Team and Scale Modeling
I'm busy making a mechanical ball counter GBC and designed the below cipher wheel. There will be 5 of them so counting to 99.999 because per event day about 26.000 balls can run through a GBC. Each cipher wheel can be taken out to set to zero because I don't want to turn the wheels back 26.000 times and the end of the day. The mechanism to pass on 1 turn per 10 turns is an excellent design from Pallax. When more parts arrive I hope to finish it soon and present a video. -
Whenever I put train cars on display in my room, they tend to roll away unless I put them at a funky angle, since the shelves aren't level. I designed a set of holders that the Lego train wheel piece sits on so they don't run away: The nice render above is sized for bogies with two studs between the wheel pieces - I designed up holders for single wheel bogies, and holders for bogies from zero to two studs between the wheels as seen below: These should help keep my trains from rolling away. I'll have to do them in gray the next time I have gray loaded into the printer.
-

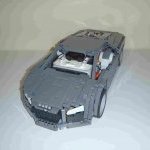
Lego UCS (76023) custom Wheels and Rims
TheTobi posted a topic in LEGO Technic, Mindstorms, Model Team and Scale Modeling
Hey Guy´s :) I have been working on Custom-Rims for the UCS Tumbler. I think now there are more realistic?! What du you Guy think? -
.thumb.png.116032e930e483fb4ebbfdc62183bd34.png)
[TIP] Pure LEGO turn-table based wheel hub
Didumos69 posted a topic in LEGO Technic, Mindstorms, Model Team and Scale Modeling
Modern LEGO wheel hubs are known to suffer from a lot of slack. Other drawbacks are that you can only use them with CVT joints - not with the stronger and more angleable U-joints - and the section inbetween the pin holes of the hub is wider than 1 stud. While playing with one of them I noticed that part of the slack is because the DBG pins don't sit very tight in the wheel's pin holes. It helps a little if you have an axle running through the wheel which extends into the DBG-part of the hub. Now I know @nicjasno sells modified wheel hubs based on small turn tables, which have much less slack than the original wheel hubs. But than you still can only use them with the weak CVT joints. And you have a modified part. So I looked into using a turntable as wheel hub for the 15038 wheel (with 6 pinholes) without modifying it and it gives quite a good result. Better than the LEGO wheel hub: The turn table is attached to the wheel with 2 3L pins. The assembly inside the wheel makes sure the turn table's pinholes are attached to a pin and not to an axle (which would give slack) and sits tight against the inside of the wheel to give stability. Finally an extra belt wheel is attached to the wheel to give even more stability to the 2 3L pins that connect the assembly to the wheel. -
REVIEW - 42030 - VOLVO L350F WHEEL LOADER INTRODUCTION The Nuremberg Toy Fair is always an exciting event when it comes to revealing new LEGO sets. This year was no exception. We finally got to see visuals of the upcoming Technic Flagship. This time LEGO teamed up with Volvo to create an impressive version of the Volvo L350F Wheel Loader. In this review we will find out how TLG's interpretation compares to the actual Wheel Loader and whether it's worth the whopping 220 euro you need to fork out to own this bad boy. The designer behind this model is Uwe Wabra, who has designed other great models like the iconic 8258 Crane Truck and the 8285 Tow Truck. It took him about eight months to design the Volvo L350F. Volvo Spirit Magazine "The Nuremberg Toy Fair in February saw global toy giant the LEGO Group unveil its latest flagship model from LEGO®Technic. With 1,600 individual pieces and the largest individual element ever created for the brand, the Volvo L350F wheel loader is not simply one of the company’s 2014 star performers – it is just as impressive as the real-life machine it is based upon." Read more... Volvo Press Release Volvo Construction Equipment and LEGO® Technic have joined forces to create a miniature remote-controlled L350F Wheel Loader in Volvo livery that not only drives, steers, lifts and loads just like the real thing it also converts into an equally impressive hauler. Read more... Credits Before we continue I would like to thank LEGO for providing the set and the possibility to publish this Exclusive review. Furthermore I would like to thank Volvo and Superkalle (our LDD Moderator) for giving me some very useful Volvo insights. All images can be clicked for hi-res versions. SET INFORMATION Number: 42030 Title: Volvo L350F Wheel Loader Theme: Technic Released: 2H 2014 Part Count: 1636 Box Weight: 3541 gr Box Dimensions: 57,5 x 47,8 x 12,0 cm Set Price (MSRP): 219.99 EUR DE / 169.99 GBP / 249.99 USD Price per Part: DE 0.134 EUR / UK 0.103 GBP / USA 0.153 USD With a price tag of almost 220 euro, this is the most expensive Technic flagship to date. The average price of 0,134 euro part part immediately makes clear that this is no ordinary Technic set. A high price per part normally indicates that a set has lots of special parts, like motors and other Power Function elements. THE BOX The box measures 57,5 x 47,8 x 12,0 cm which is equal to the height and width of the box for the 42009 Mobile Crane Mk II. The main difference is that this box measures a depth of 12 cm instead of the Crane's 9 cm. The additional 3 cm is necessary for housing the new Bucket, which will be discussed later. The difference in weight between the Crane Mk II (4172 gr) and the Volvo (3541 gr) is about 631 gram which is not that much, taking in account that the Crane has 970 pieces more (2606) than the Volvo (1636). One thing is sure; this box will leave little room for other Christmas presents under the tree later this year! FRONT SIDE The front of the box shows an impressive picture of the model, no surprise here. Like with most bigger models the size of the model is printed on the box. When finished, this model will measure a length of 58 cm and a height of 38.5 cm. The front also shows a Power Functions section stating it has "fully remote-controlled driving and digging functions.". The bottom right shows the large number of Power Function components this set contains. BACK SIDE The back side shows the B-model which is the Volvo A25F Articulated Dump Truck. The preliminary image of the back side explicitly showed an iPad with the digital building app. The iPad didn't make if to the final box, which makes you wonder whether the iPad instructions won't be available at all. Could it be that the size of the B-model is pushing the boundaries of building with the iPad app?! Another possibility is that the iPad app will be available later than the release of this set. INSIDE When opening the flip-up cover some cool facts of the real Volvo are revealed, together with a picture of the Power Functions and a demonstration of the manual functions. There's also a picture to emphasize the green engine. Name: L350F Horse Power: 540 HP (397 kW) Weight: 52 metric tons Bucket Volume: 6,9 m3 INSIDE COVER The inside of the cover is devoted to the Power Functions. Again all the PF elements are shown. Two remote controls are used for operating the boom and driving the vehicle. It's not necessary to switch between these functions. Three small pictures explain how the Power Functions are controlled. SIDE The side of the box shows the actual size of the bucket, which measures a width of 18,2 cm! Now it's clear why the box needed to be bigger than last year's flagship. CONTENTS OF THE BOX The box contains: 14 Bags 1 Booklet 1 Sticker Sheet 1 Bucket 4 Yellow Rims 4 Tires 9 Power Functions Components BAGS The box contains 14 bags in varying sizes. Business as usual so far. BOOKLET One of the first times we encounter a single booklet for a set this size. When you have built the 42009 Crane you might have seen this before. The first production runs of the Crane included 6 booklets, which later changed into a single booklet. I really appreciate a single booklet, since it more or less reflects the size of the model. STICKER SHEET Not only does the sticker sheet contain stickers for the A-model, but it includes stickers for the B-model as well, which is pretty unusual. This does mean that you either need to remove the A-model's stickers when you are building the B-model, or buying a few extra parts dedicted to the B-model's stickers. HIGHLIGHTED PARTS This section describes the unique and/or highlighted parts. We'll start with the massive Bucket which obviously is the star of the show! BUCKET This type of bucket is called a Spade Nose Rock Bucket. It's primary use is lifting blasted rock and the spade nose is to obtain maxium penetration when digging into the gravel. On a real bucket, the teeth are interchangeable, because they wear out. Volvo’s range of buckets is very comprehensive, encompassing buckets for all types of jobs and all types of materials; from rock and stone to ore and wood chips. Type: Spade Nose Rock Bucket Capacities: 1,8 – 7,5 m3 Applications: Hard and stony material, shot rock and where good penetration is needed. Options: Pin/hook-on, bolt-on edge, welded teeth & segments. Using a real Volvo with spade nose bucket, you could easily haul over 200 LEGO Volvo boxes and probably more than 300 LEGO Volvo models. The following two images show a comparison in size with the Bucket formerly known as the Big Bucket. The older big bucket is used in 8265 Front Loader. As you can see the previous version can easily fit inside the Volvo's Spade Nose Bucket. Makes you wonder how big the finished model will be!! The distance between the upper and lower holes for attaching the bucket is 5L, where this is 3,5L for the older bucket. POWER FUNCTIONS COMPONENTS The number of Power Functions components is unprecedented. No other Technic set has such a vast array of PF components. Admittedly, the 8043 Excavator also has 9 PF elements, but that set only contains M-motors. 1x Battery Box 2x Infrared Receiver 2x Remote Control 1x M-motor 1x L-motor 1x XL-motor 1x Servo motor All of the four available types of PF motors are included in this set. The new L-motor and Servo Motor are found in the 9398 Crawler and it's Exclusive Edition counterpart, the 41999 Crawler Exclusive Edition. The L-motor is also available in the beforementioned Crane Mk II. What's special about this set, is the return of the XL-motor. This motor was about to become a rare PF motor, since it hasn't been used in an official set since 2009. The last Technic set it appeared in was the 8258 Crane Truck (also by Uwe Wabra). What I really like about the XL-motor is it's coasting behavior. Coasting is performing a natural deceleration of a motor when the power is removed. In simple words; the motor doesn't immediately stall after you stop applying power to it. This results in fluent vehicle deceleration. The L-motor doesn't coast which results in the vehicle abrubtly stopping. I very much dislike this shocky behavior on the crawler, so I am glad TLG used the XL-motor for propulsion. Although it had probably more to do with the torque (40 N.cm for XL vs 18 N.cm for L) than the coasting behavior. WHEELS For the first time we get to see the Wheel 56mm D. x 34mm Technic Racing Medium, 6 Pin Holes in Yellow, which is great for bigger construction vehicles. TIRES I was hoping the, so called, Unimog tires would make their way into an official flagship set at least once more. So I was glad to see TLG apparently had the same thought and used these great tires for the Volvo again. WHEEL AND TIRE ASSEMBLY Below is a picture of the complete wheel and tire assembly. ENGINE CYLINDERS Technic Engine Cylinders come in two variants, Cylinders with Side Slots and a newer version Cylinders without Side Slots. The newer version only got produced in light bluish grey, up until now. One of the characteristic features of Volvo machines is their green engine color, originating from the Penta Corporation. Volvo was founded in 1927 and the first engines were bought from Penta Corporation who made green engines, and so just shipped the same color to Volvo. In 1935 Volvo bought Penta (which became Volvo Penta, the marine division). The engines were continued to be painted green. All engines back then were petrol engines. Volvo's first diesel, VDA, was made in 1945. From the 1950's some engines were painted red, but mostly these were for Volvo Cars, and were petrol engines. As for production Diesel Engines in heavy machinery and trucks, they have always been painted green since the start. THIN LIFTARMS The Black Thin Liftarm 1x7 is not very special, but it doesn't appear in Technic sets that often. The Yellow Thin Liftarm 1x6 used to be pretty rare, since it was only included in the 8457 Power Puller. However, last year this part got reintroduced in the 42024 Container Truck. The Light Bluish Grey Thin Liftarm 1x5 with Axle Holes on Ends was introduced in Black in 2013. This is the first time this part appears in another color. AXLE AND PIN CONNECTOR The Yellow Axle and Pin Connector #6 - 90 degrees was last used in the Technic 8258 Crane Truck in 2009, until it made it's comeback in 2012 in the 5885 Triceratops Trapper. Just like the XL-motor Uwe Wabra is using this part again in a Technic set. PANELS Finally we can see a small selection of panels. Mostly old style Yellow Panel Curved 11 x 3 with 2 Pin Holes and a single Black Black Panel Curved 11 x 3 with 10 Pin Holes. PART LIST Here's the complete list for all 1636 parts. BUILDING EXPERIENCE Enough with the boring part...let's build a Volvo! CHASSIS You start building the chassis and after a few steps, the pendular rear axle is taking shape. The small turntable proves to be an asset to the Technic parts catalogue. Another useful part is the Steering Portle Axle, which is rapidly becoming the workhorse of big Technic vehicles. Ordinarily it's placed vertically to provide higher ground clearance, but as you can see, it can be used horizontally as well. Here you can see images of the front and rear sections, which will be joined a bit later in the build. The front and rear section joined together. The wheelbase does not reflect the size of the finished model. Here's a picture of the articulation mechanism of the vehicle. PF MOTORS The four motors are equally divided over the front and rear section. Because two of the motors (M and L) are placed in the front section, there's no need to transfer gears or axles from the rear section. Three (M, L and Servo) of the four motors are placed vertically, while the XL-motor is placed horizontally in the back. VOLVO D16E LAE3 ENGINE The Volvo D16E LAE3 is a straight six-cylinder high performance, low emission turbocharged diesel engine with direct injection, air-to-air intercooler and Internal Exhaust Gas Recirculation (I-EGR). The engine has a one piece cylinder head with four valves per cylinder one overhead camshaft. Furthermore, the engine has wet replaceable cylinder liners, replaceable valve guides and valve seats. The Engine with V-ACT (Volvo Advanced Combustion Technology) features split injection, optimized air handling and turbocharger with waste gate. High torque at low engine speed gives the engine its characteristic feature: quick response at low rpms, even under load. The three white Round Pin Connectors with Slot are the engines oil filters. Two of them are normal, high flow filters and the third one is a fine filter that is optimized to catch finer particles, but has a slower flow. When engine load is moderate and oil/lubrication need is also moderate, much of the oil is directed to the fine filter. When the engine is working at maximum, all oil is instead passed through the two normal filters. LOAD SENSING HYDRAULIC SYSTEM The L350F features an intelligent load-sensing hydraulic system. Two variable piston pumps provide exactly the flow rate and pressure required at any given moment in time, distributing the power where it’s needed, when it’s needed. When flow is not required in the hydraulic system, all engine power is diverted to the drivetrain. This provides smoother operation, lower fuel consumption, and more precise control of machine and load. You always get full power, regardless of revs. The LEGO version uses three Linear Actuators instead of an hydraulic system. NOTE I made an error placing the LA. The top LA in the picture below should be flipped, resulting in the attachment point being at the bottom instead of the top. Thanks to Jantjeuh for pointing this out. CHASSIS AND BODYWORK At this point the chassis and bodywork are almost finished. LOADER Z-BAR LINKAGE The L350F is a heavy duty, primary production loader intended for multi-shift, high production applications. High breakout force in the digging position, high lift capacity and fast hydraulic speeds are the essential requirements for a primary production loader. The Z-bar linkage is a field-proven, effective linkage in this loader size class. The refined geometry is the same for both standard and long boom and allows common bucket range with an open design. Below is an image of the Linear Actuators operating the Z-bar linkage. ROTATING LIGHT A small detail I particularly like is the small rotating light on the top of the cabin. Other models use a transparent 2x2 Round Brick which is way too big. This smaller version fits better! STEPS The image of the real Volvo on the inside of the box shows the steps on the left side of the vehicle, while they are mounted on the right side of the LEGO version. After some research I found out that the L350F used to have the steps on both sides of the cab, but it was not a safe solution for the operator when he had to climb up the steps into the cab with a lunch box. So late last year Volvo changed the design and eliminated the steps on the left side and made the steps on the rear fender standard. Another cool feature that Volvo included was the “remote door opener”, so as the operator approaches the machine, he presses the remote door opener and the door opens automatically and the entrance lights shine down on the steps for additional safety when climbing into the cab when it is dark. INFRARED RECEIVERS The infrared receivers have been placed nicely behind the cabin, hardly visible. Although the box states that V2 receivers are included, there is no V2 sign on the ones I found in my set. FINISHED MODEL It took me approximately 7 hours to finish this model. I reckon most of you will finish it in about 6 hours. FRONT VIEW The finished model looks stunning! It's really massive. Even though I love the looks of this model, I can't help wondering why TLG didn't make some wheel caps to fill the rims and make the wheels look more massive too. REAR VIEW The rear looks great as well. In this picture the battery box is clearly visible, but from a normal viewing angle, it's almost hidden from sight. BOTTOM VIEW Just as you would expect. Nothing out of the ordinary to see here. THE GAP The side view of the Volvo is one of my main concerns. While the rear section looks massive and lifelike. The front section looks unfinished, especially the part in front of the cabin. Also, the bottom of the first section of the boom could use some more bricks to make it look more immense, just like the real machine. PARTS LEFT Quite a few parts left, even three Axles (5L, 6L and 7L). Of course nothing the bucket can't handle! FUNCTIONALITY This model has quite a few functions. The main four functions are: Articulated Steering Driving Raising and Lowering the Boom Operating the Bucket Besides these motorized functions, there are some manual features. ARTICULATED STEERING Wheel Loaders typically use articulated steering. Articulated steering is a system by which a four-wheel drive vehicle is split into front and rear halves which are connected by a vertical hinge. The front and rear halves are connected with one or more hydraulic cylinders that change the angle between the halves, including the front and rear axles and wheels, thus steering the vehicle. This system does not use steering arms, king pins, tie rods, etc. as does four-wheel steering. If the vertical hinge is placed equidistant between the two axles, it also eliminates the need for a central differential, as both front and rear axles will follow the same path, and thus rotate at the same speed. Long road trains, articulated buses, and internal transport trolley trains use articulated steering to achieve smaller turning circles, comparable to those of shorter conventional vehicles. Articulated haulers have very good off-road performance. (Wikipedia) Steering is controlled by the Servo Motor. There was some disappointment in the community because the steering looked very jerky in the videos from the Nuremberg Toy Fair. I must admit I didn't like it either. The Servo Motor has two modes, on (in either direction) or off. This means there's no gradual steering mode, it's hard left, hard right or straight on. This is illustrated in the images below. Playing around with the LEGO model, I experienced that the steering indeed is a bit jerky, but for playability it isn't as bad as it seems. A solution with Linear Actuators would have been more realistic. But since the Volvo basically is a kids toy, I can accept the jerky steering. LIFTING THE BUCKET The boom and bucket are also operated using Power Functions. Both the boom and the bucket are operated with the remote and both functions are working properly at a nice speed! LIFTING LOAD The Volvo is powerful enough to lift it's own weight. That no surprise, since it can lift up to 1 kg of load!! ENGINE BAY The engine bay can be opened from various sides for maintenance, like changing the oil filters. Opening the back reveals the big green 6 cylinder engine with the cooling fan. The D16E engine has a hydraulically driven, electronically controlled cooling fan and intercooler of the air/air type. The system not only results in quieter operation, but also lowers the fuel consumption. BATTERY REPLACEMENT Replacing the batteries in the battery box is fairly easy. Remove the two axles with red bush and unlock the black long pin with stop bush and you can easily detach the battery box from the vehicle. COMPARISON WITH 8265 Inevitable is the comparison with it's predecessor; the 8265 Front Loader. For a non-flagship set, the 8265 already was an impressive Front Loader. The following pictures show how big the Volvo actually is. It trumps the old Front Loader in every way. SUMMARY The LEGO Volvo is nothing short of spectacular! I might even go out on a limb by claiming that this is one of the coolest LEGO Technic models....ever! If not THE coolest! True, there are better looking models. True, there are technically more advanced models. However, this models combines a lot of factors, like playability, looks and the sheer size is stupendous. Adding the Volvo brand and stickers is the icing on the cake. My all time favorite Technic model is the 8043 Motorized Excavator, since this model combines, looks, functionality and playability. The Volvo shares the exact same properties, but it contains a lot more cool parts than the Excavator, a wider variety of Power Functions for instance, a gargantuan unique bucket and Unimog wheels. In all fairness; reading my own summary, I can only come to the conclusion that I like the Volvo even more than the Excavator! Even though the price is pretty steep, I would definitely recommend getting this set. PROS Offers lots of playability No need to switch between functions Finished model is massive LEGO Volvo looks like a genuine L350F Gargantuan unique bucket Unimog wheels CONS The gap in front of the cabin Front section looks unfinished compared to the rear section Omission of wheel caps to make the wheels look more massive Jerky steering due to servo motor (minor con) SCORE Design 9: Stunning looks and the sheer size is impressive. Volvo stickers are the icing on the cake. Build 8,5: Very enjoyable build, but nothing too spectacular. Functionality 9: Four different fully remote controlled functions, combined with some manual functions. Playability 9: Fully remote controlled and no need to switch between functions. Parts 10: It doesn't get any better than this. Entire range of PF motors (including XL Motor), Unimog Tires, unique Yellow Rims and much more! Value for Money 8,5: Although the price is pretty steep, you get a lot of bang for your buck. 9 Bucket Size Does Matter! Hope you enjoyed it! Thanks for reading and please rate this set at the top of this topic!
-
Bucket Wheel ExcEV3tor - a Mindstormified BWE (EV3)
The_Icestorm posted a topic in LEGO Technic, Mindstorms, Model Team and Scale Modeling
I created this modified Bucket Wheel Excavator some time ago, and I thought I would like to share it on this forum. After building the original BWE, I wanted to try to incorporate some Mindstorms functions into it. I managed to motorise all the active functions, using both an EV3 brick and motors, as well as some PF motors. Functions can be preprogrammed, or can be remotely controlled using an EV3 IR remote. Here is a list of the functions: Bucket wheel rotation and main conveyor belt - PF XL motor Lower conveyor belt - PF medium motor Boom arm elevation - EV3 large motor Lower conveyor swivel - EV3 large motor Superstructure rotation - EV3 medium motor Driving - EV3 medium motor Since I owned an NXT as well, I used it to motorise the small mining truck that was included in the set. There are also some LEDs that illuminate the 'work area', but they don't really do a good job, its just a nice thing to include. Here is a video of the excavator in action, as well as the mining truck (sorry about the poor resolution and bit rate): More info about the machine can be found here: https://www.us.lego.com/en-us/mindstorms/community/robot?projectid=3e125a5b-475c-4a4c-b3ed-e4b4f2192907 Let me know what you think of it in the comments! -
 Hello good people of Eurobricks, The other day I built up the set 8051 motorbike applying some minor modification like different color scheme and some change on bodywork to make it look like more like a stuntbike. These changes did not alter the basic geometry and size. (apart from the rear fork what is one stud shorter.) Despite the fact that I caught the stuntbike feeling quite well (for my taste at least) I couldn't get along with the end product. I figured the wheels were slightly bigger (in diameter) than they supposed to be. So I grabbed my tape measure, digged up some pics on google of real bikes and came to the conclusion that these wheels are about 10 percent out of scale compare to the real proportion. The lack of width made the impression even worse to me. Trying to solve the problem I begun to play around with the old type bike wheels. I found their diameter is just the desired size but these were ridiculously narrow for the job. Searching in the forum here I've seen some builders used two of these rims with this tyre from the set 8448 Street sensation. The flat profile didn't make me happy though. Finally I worked out something using two rims and two tyres of the old type. The result has the right diameter, width, and rounded profile as it should be. (video at the end of the post) Here is a picture to illustrate the proportion problems: Upper left: Original 8051 Upper right: A random naked bike Lower left: my "pimped" 8051 with smaller wheels Lower right: The original wheels of 8051 built into a frame with realistic proportion As I said above the difference isn't huge, but it is there. Here is a few more pic to highlight the point I'm trying to make: I wonder if you guys share my opinion on this subject... Few more pics of these bikes: I know the front tyre sholdn't be this wide, but still better than a single (IMHO) Please note that this "connector bike" is still under development. It is meant to represent the size of bike I found appropriate to the wheel size. On the rear wheel I'm using the rear tyre of 8420 Street Bike. It fits perfectly on the new rim. Also I made a tutorial video, how to make that wide tyre modification: (Purist may find it disturbing . I can ensure you no harm done to any parts. Luckily those old tyres are so soft they can take any abuse.) Hope you can find some usefull in the post. Happy sunday.
 -
BWE planetary gears geometry
The_Icestorm posted a topic in LEGO Technic, Mindstorms, Model Team and Scale Modeling
I got the Bucket Wheel Excavator in September last year, and after building it and modifying it (with Mindstorms), I dismantled it to use the pieces in my other Mindstorms creations. I'm particularly interested in the large yellow planetary gears/rings that come with the set, I hope to use them to create some sort of tank with a rotating turret. However, I'm not too sure about the geometry of the pin-holes in the rings, I don't really know where it is safe to attach a pin in a certain hole. If anyone knows of the correct geometry of the rings, it would be very helpful! -
Hi Friends, I created Lego Racing Wheel, that looks like Formula 1 cars wheel. Now it is much more convinient and easy to play racing games on my iPhone. Enjoy.
-
Due to a large haul of Lego pieces I acquired from a friend, I took a look back at my collection of loose Lego parts to make some room for them. The problem is that I have an overabundance of tires which are very dirty. What should I do to clean them? If my childhood memories are correct, just washing or rinsing them in water alone was never enough; when left to dry, dust re-adhered to the tires in larger quantities -especially when dried off with a napkin. What must be done to get them looking and feeling like new?
-

Custom 40.5mm x 10.5mm wheels + tires
jamesonk83 posted a topic in LEGO Technic, Mindstorms, Model Team and Scale Modeling
Hello, I have created a better scale tire & rim for trucks and light industry vehicles with a proper rim offset. The proportions allow for dual tire mounting and single. Is there any intrest within the community to have something like this produced? (in low volumes) I would look forward to hearing any insight/ feedback - purists need not respond! :) The tire would be a flexible rubber like material, rim would be SLS printed or ABS. -

[Help] Rolling resistance of EV3 Technic Ball Pivots
SevenStuds posted a topic in LEGO Technic, Mindstorms, Model Team and Scale Modeling
I'm in the process of planning an air-powered vehicle that should be able to freely slide in any direction on a smooth, hard surface. For this to work, I thought of using 3 or 4 of these Technic ball pivots to support it: One of them is used in place of a 3'rd wheel in this Mindstorms model: Does anyone have any experience with them as to how freely the bearing rolls inside the ball joint? If a light craft was supported on 3 of these, how much force would require it to roll? Thanks in advance! -
Custom Parts by SevenStuds
SevenStuds posted a topic in LEGO Technic, Mindstorms, Model Team and Scale Modeling
Hi Guys! This topic is where I will be adding updates to the new parts that I make available via Shapeways. There is also a FB page where I'll be posting new designs. For a bit of personal history, I work in the architectural field and 3D modeling has been a passion for the last 12 years. When I finally had a family of my own, I rediscovered the boxes of LEGO I carefully stored from the 80's. Not long after, I decided to combine the two things I enjoy doing: Technic and 3D. Here are some of the parts that are already size approved and available: The GoPro Adapter is the only product that is available pre-printed on Bricklink in a very limited quantity. Since my intention is not to sell via this thread, you can find more details on the Facebook page in my signature. -

Rapid Shooter Trigger (18587) in Wheel Hub (11950/11949)?
GoldCivetta posted a topic in LEGO Technic, Mindstorms, Model Team and Scale Modeling
I was wondering if these parts: Could connect with this part: I want to know if we can use these wheel hubs for smaller wheels that don't have those 3-pin connections, such as these: