Search the Community
Showing results for tags 'truck'.
Found 657 results
-
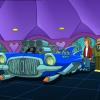
Hello fellow EB members. A small vignette showing a mid century streamline truck in an Octan livery. The driver stops for a well deserved break! You can view all my creations on my flickr account here if you so wish. Regards!
-

Volvo FH and EW 160 Play Set
steph77 posted a topic in LEGO Technic, Mindstorms, Model Team and Scale Modeling
Hi eurobrikers, Here is my current project. A Volvo FH truck destinated to be part of a larger play set using the TLG Volvo EW160. The whole model will have a crane truck full RC, a trailer and the EW160 official lego excavator. As always i build this for my son and so i t needs to be really playable set with lots of function fun to play with. Regarding to this the new Volvo EW160 inspired me. So the concept is to have a fully rc truck with manuals function added to it. The toy will have pneumatics, PFS, RC, manuals functions.... so much for a child to enjoy! My goal with it : Truck : 7 motorised functions + RC PF light = 8 channels on standards Rc official system. Propulsion by L motor Direction by servo on first and second axle with reduction . report to the cab Deploying stabilisator by rotation. Able to set up the stabilisator on 180° : M motor Stabilisator up and down: M motor Crane rotation: M motor First section of the crane arm: M motor Second section of the crane arm: M motor All the these functions are realised and integrated into the framme actually. All working very smothly and with corrects speeds. Time for some pictures of the WIP : I have now to face some difficulties and have to answer some question. What is your opinion guys on these points : 1 Color of the rear crane ? actually thinking for black, to fit with the EW160 design or orange? 2 Position of the two PF receivers, actually in trouble with that, no neat solution 3 tilting bed. The EW 160 is equiped to load a bedactually. Cannot imagine not being able to lift it. The problem is Zero place for an additionnal motor into the frame. Thinking to lift it manualy ? Thanks for your feedback on these points. -

[MOC] 42167 skip loader truck
TechnicMOCer posted a topic in LEGO Technic, Mindstorms, Model Team and Scale Modeling
My alternative model of 42167 Mack LR set - skip loader truck. It features HOG steering and detachable container which can be loaded/unloaded. -
What started out as what to do with 2 chrome fuel tanks has morphed into a monster. Also wanted to design and build a cabover truck so this is what I ended up with. Already have 75% of cab and trailer parts at home. Will get the rest plus forklift parts from Bricklink. Forklift can slide fork hoist back and forward as per prototype. Turning the air cleaner also steers the back wheel.
-
I have just finished building my food truck empire. 8 USA based food trucks and 8 Italian based Piaggio Ape food/drink/toy selling trucks. Donut Food Truck: Piaggio Ape Wood Fired Pizza Truck: Has a LEGO light brick installed to simulate the pizza oven glow. Popcorn truck: The popcorn machine is from the polybag set so the corn can bounce by inserting finger thru rear door and tapping lever. Piaggio Ape Coffee Truck: Coffee machine this side. Coffee bean grinder and top opening milk fridge. With doors down.
-

[MOC] Volvo FH Aero 62 pusher Tractor
Sebeus I posted a topic in LEGO Technic, Mindstorms, Model Team and Scale Modeling
I had seen the Volvo FH Aero cab a couple of times before it was publicly presented but I hadn't decided to actually build a lego version of it until the weekend before the press release Last week my model premiered at the Volvo Trucks Factory in Ghent, where I work. I'm not so happy with how the upper front grille turned out, my previous model really was spot on, in fact I dare even say that that one is the best out there when it comes to that section. But! There is a good reason why this one's upper grille is rather mediocre, I managed to include a cool feature that would not have been possible on the previous model; Cab Tilt! I have more pictures in my Brickshelf gallery, for some reason I am no longer able to embed those in here. You can check these out once the gallery is public: Brickshelf. As you can see in the video, the model is motorized: A System PoweredUp hub sits under the cab, an L motor for drive and angular M motor for steering are fitted in the wheelbase area. The model features front and pusher axle steering. However due to the unbalanced weight distribution I have experienced a lot of issues with the driving stability. The weight on the front axle is massive, giving the rear driven axle a hard time to find some grip on the road. A reflection I had; I'm quite happy with the fifth wheel, it's the first one I ever made and I wanted it to actually look like a real fifth wheel. Strangely no one else seems to care much about a realistic looking fifth wheel. Don't forget to check out my Volvo FH Hooklift! -
Hello people! I want to start showing you some of my latest models, it's quite a lot of time I don't share them here. This is an Iveco T-Way, full RC with PU motors and hub, controlled via Brickcontroller2 and a Joypad. It is equipped with suspensions on all axles (pendular on the front axles and pendular in 2 directions on rear axles). The drive motor is directly connected to rear axles (it "moves" together with the third axle). Stickers are self made. This model is a mod of my original static model, in grey and black version, which features Hog steering, rear pendular suspensions, fake engine and tipping body. Instructions available here: https://rebrickable.com/mocs/MOC-121004/technicprojects/iveco-t-way/#details
-

[WIP] Lifted Truck with 3 steering modes
JLiu15 posted a topic in LEGO Technic, Mindstorms, Model Team and Scale Modeling
With my Ripsaw Tank MOC essentially done by now (just waiting for some final pieces to arrive) and my PAB order for my New Flyer XD60 articulated bus model still yet to arrive (with more pieces coming for that), I've decided to start another MOC in the meantime. This will be my second model combining Control+ and Robot Inventor after my Heavy Duty Skid-steer Loader. It will have two identical axles, each with a steering motor (medium angular motor) to control steering, and thanks to their absolute positioning feature I don't think I'll have to calibrate it every time, like on e.g. the 42099 set. I was originally planning to use Control+ L motors for the steering, and have this be a Control+ MOC, but found the medium angular motor to fit better with the absolute positioning being another plus. I plan on creating a control profile in the Mindstorms app with different sliders for normal, crab, and 4-wheel steering modes. The drivetrain consists of heavy-duty differentials and planetary hubs, so this eliminates the need for significant gearing down inside the chassis. For propulsion, I plan to use 2 Control+ XL motors, with a fake engine driven by a separate motor. This way, the fake engine can run at all times and there will be less friction in the drivetrain. I anticipate building the chassis to be pretty straightforward, as the entire chassis is essentially a mirror image with two identical axles. As for the bodywork, I'm leaning towards a red car-like body. If so, I will probably name this MOC "Red Beryl C", where "C" is for Crawler. It would be the third model in my Red Beryl series, after my Red Beryl GT of 2018 and Red Beryl X of 2019. Let me know what you think, and any suggestions you may have. Photos: The front axle, with planetary hubs, long shock absorbers, and a medium angular motor for steering: The front axle, with the wheels attached. Note that this is the underside, with the heavy-duty differential visible: -
I based this vintage dump truck MOC off the Moving Truck GWP (set 40536) from last year. I made the cab 6 wide and added a new back half. Two each of these brackets are missing from the LDD file: 36841 in black is needed for the front bumper 36840 in yellow is needed for the headlights The rear of the dump truck with the bed lowered. The MOC seats two figures, while the cab doors open and the bed raises to dump the load. Free LDD file available at Bricksafe. Thoughts?
-

[WIP] 5th Gen Toyota 4Runner
damian_kane_iv posted a topic in LEGO Technic, Mindstorms, Model Team and Scale Modeling
I'm a huge fan of the olive green from 42110 and I've been thinking of how to best use the olive green elements from that set. My initial goal was to design a model with working V6, 4-speed sequential gearbox, and AWD. The project has evolved to include part time AWD, central and rear diff locks and an implementation of Toyota's Kinetic Dynamic Suspension System, which modulates anti-roll bar stiffness. I'm working on the second version now. New Update 01/08/2023: My 4Runner model is coming together and approaching complete. Most changes so far are aesthetic, and I have re-designed parts of the body and filled in major gaps. I still need to add seats, steering, gear controls, mirrors, and a rood rack though. I also want to try making this model with alternate colors eventually, and to paint the dark green pieces olive to complete the look. The final model will have a 4 or 5-speed gearbox, fake engine, part-time 4WD, center differential lock, and rear differential lock. I'm also planning to make an RC version with a different gearbox: Brand new front end and headlights I've worked hard on filling gaps head-on 4 NewUpdate 2/19/23: I've been spending a lot of time re-designing my 4Runner moc from the ground up. Work/school has kept me really busy but I've been able to make some progress here and there. My version 2 of the 4Runner has a number of improvements compared to the first version. Overall it is a much more sturdy and functional model compared to the previous design. Playability is way better and the roof feels very sturdy: New suspension is much much better than before. I plan to add pneumatics to front and read for shock absorption in addition to the coilovers that are already present: I'm lot lot happier with the rear axle now. I've finally made a rear axle that has 4 links in a way that I like. I will add the 5th link/panhard rod later. I still haven't found a way to add in the rear diff lock while also creating an axle that is satisfyingly durable with all 5 links. That is a major to-do right now... As a result of the new setup, suspension travel is much greater and satisfyingly responsive: The interior Is much more roomy/spacious now too. I will add seats at the end when I'm satisfied with all of the functions: Finally, I've looked at a lot of other builders including Kevin Moo for inspiration when designing non-right angles. I've used a lot of triangles here to get a design that is compact and strong at the same time: The new chassis has vastly improved rigidity and implements the 4-speed gearbox with a much smaller footprint: Top: Side: Here is a shot of the first version model: The Chassis was originally inspired by filsawgood's Toyota JS as I used it as a test mule for the live axle design: https://filsawgoodltc.blogspot.com/p/lego-suzuki-jimny-sierra-building.html, but it has since evolved -
Just began another baja/ trophy-truck project, the other 2 (or 3) being ”canceled”. I managed to put 2x L motors and 1x servo motor, both Power Functions; it also has positive caster-angle, independent suspension in front and solid axle suspension on the rear, (at least) semi-detachable body and the headlights can be be lit (there are 4 pin-holes for installing lights). Heavily modified version of this
-

[MOC] Ginaf HD 5395
jorgeopesi posted a topic in LEGO Technic, Mindstorms, Model Team and Scale Modeling
It is based on a Ginaf HD 5395 and I chose it due how rare ti is, it looks like it is between a mining and a normal tipper truck, icing on the cake was that fifth driven and steered axle, the challenge was inevitable . It has openable cabin doors and bonnet. Tiltable cabin that hide the 6 in line fake engine. 5 axles, 2 are steered, 2 are drive axles and the last one is a drive and steered axle. All the drive axles have its diff and are connected to the engine. The steering axles are controled by 2 HOG on both sides behind the cabin. The tiltable bed woks with a long linear actuator operated with a lever that has to be used between the first and second axles, they are a hole for it on both sides of the truck. The gate of the bed has two movable connectors to close it. It is a totally modular MOC so it can be easily improved. I hope you like it, I will post a video and I put a couple of pics more to see it better. Here with the 42112 to see better the real size. And now with my other 2023 MOC (if I do not promote myself... ). Ok, ok the last one... Thank you for comment. The WIP thread is here Ginaf HD 5395 Video here Ginaf HD 5395 Video -
[WIP] Ginaf HD5395 (Render added 29 12 2023)
jorgeopesi posted a topic in LEGO Technic, Mindstorms, Model Team and Scale Modeling
It is been a while without building, so good for me whatever it ends... It will be a 10x6 truck with 3 steered axles, the last one is the rare one, I do not know if it will be motorized or not, pneumatic or not, I do not know much so I just keep building. I discarted using bigger wheels because it would be too large but who knows... -

Eurobricker's share your trucks!!!!
CrazyKreations posted a topic in LEGO Technic, Mindstorms, Model Team and Scale Modeling
Hello everyone, I have been in contact with a few fellow eurobrickers and some of them have wanted a truck topic where we can all share different designs for our trucks and trailers. These designs could also include maybe some clever and effecient suggestions to show others how you made your amazing MOC! All forms of trucks are accepted tow trucks to mighty expedition trucks! Post your truck, or gain inspiration from others! For starters I will share mine: A sporty flatbed truck! -
[MOC] Benz-Unimog 4×4 Off-road RV
dls7223685 posted a topic in LEGO Technic, Mindstorms, Model Team and Scale Modeling
Hello everyone, this is the latest work from MTC: Benz-Unimog 4×4 Off-road RV Designed by Muen 1. Function Description ① XL×2:providing power ② Servo×1:steering ③ M×1:2-speed gearbox shift ④ M×3:3 differential locks for front, middle and rear ⑤ SBrick×2 ⑥ Small battery box ×1 ⑦Yellow hard spring ×8 2. Appearance "Modularity" is a design concept that runs through the design of the car from start to finish. From the exterior to the interior, I have modularized all the parts as much as possible, with the obvious benefit that it is very easy to assemble and disassemble, and no longer afraid of transportation. At the same time, each model is clearly positioned before it is designed, which determines the tendencies and trade-offs when designing. The positioning of this car is mainly to do my best to restore the appearance and rich interior of the real car, so this car uses technic parts to build the chassis, and particle parts to build the appearance and interior. The following are photos of the whole car's appearance, and according to the real car's beautiful pictures taken at the same angle, please enjoy. 3. Interior I always think that the interior of an RV is a very important part, so in the process of designing this car, it can be said that the design of the interior took up half of the focus and energy. Another important reason why I personally like RVs is the various storage spaces, which can be a storage space in places you don't expect, so I also built more storage spaces when designing the interior. The following is a detailed introduction to the interior of this car, I hope you can enjoy it. (1)Cab ① Seats The design of the seats uses #99563 to shape the unevenness of the surface, while the base under each seat consists of four #4532 for additional storage space. Behind the front seats are shelf baskets and in-car video for rear passengers to use and provide entertainment during the drive. ② Central Console I divided the center console into two parts, front and rear. For the front center console, there are several storage spaces with three drink holders. At the same time, there is a shift lever, handbrake and a number of function control buttons set up on the side near the main driver. And the side near the passenger side is the air conditioning vents. For the rear center console, a number of storage space and drink placement that must be the regular configuration, front and side air vents and air conditioning adjustment knob. There is a small clock in the middle for the rear passengers to see the time, but also equipped with a blue satellite phone, we all know that the wilderness places or satellite phone more reliable. Here are photos of the combination of the front and rear master consoles (2)Living area The living area is also designed with rich interiors and "modular". There are two main purposes, one is to facilitate the display of the interior, because my first off-road RV work "Conqueror F", in the process of display found that the interior can not be well displayed. the second is to allow the weight of the car to be reduced during the driving process. So the interior of the living area is very easy to remove as a whole. The interior of the rear compartment consists of 9 main parts, let me introduce them one by one below ① Kitchen Due to the limited space, the kitchen is all open, I personally divided it into 3 sections. First is the lower area, which is a variety of storage space for dishes, I also placed a garbage can, specifically for food waste. The second is the middle area, where the cooking is done, the left is the sink, the right is the stove, most RV's kitchen stove is covered, this is no exception. A variety of pots and pans as well as a wealth of spices hanging on the wall, and a range hood directly above the stove. Finally, there is the upper area with a blue microwave oven and two storage spaces. ②Bar I personally like the bar very much, so I also designed a bar in this RV, mainly for making various desserts and beverages during the rest of the day in the car. The lower half of the bar has 2 levels of storage space, mainly for cups and unopened drinks. The upper part is mainly for a small number of commonly used cups and 2 desserts that have just been made, and there is also a beverage machine with 4 different drinks. These 4 drinks are: orange - Fanta; red - Coke; green - Sprite; blue - Mizone. ③ Left side of the entrance door This module consists of three parts. The lower part is a fire extinguisher. In case there is a fire in the process of parking rest or entertainment outside the car, you can get the fire extinguisher nearby at the first time. In the middle is a white fridge, close to the kitchen and bar for easy cooking. The upper part is a small open storage space. ④ Right side of the entrance door This module is also composed of 3 parts, the lower part is a two-layer shoe rack, placed at the door, in and out of the door is convenient to change and put shoes. In the middle is a small storage space, which is mainly used to place umbrellas to prevent rain from touching the wetland board; There are also two hooks for hanging hats. The upper part is the switch box, the whole living area power switch, there is a specific instrument to show the real-time data of the living area electricity. ⑤ Sofa This car is equipped with two large electric sofa, placed opposite, sofa side armrest has adjustment knob and small display screen. Among them, the sofa near the side of the bed, the bottom is installed with a slide rail, moving the sofa, can enter the storage room under the bed. A sliding rail is installed at the bottom of the sofa to facilitate horizontal movement. ⑥ Table There is a table in the middle of the sofa. To expand the limited space, the table can be folded. After the table is folded, flowers can be placed on the table to beautify the interior environment. ⑦ Storage room The living area has 2 large storage units, mainly distributed under the bed. One is the common storage room, mainly placed washing machine, cleaning tools, repair tools and other common items; The other is a hidden storage unit behind the sofa, which can be accessed by moving the sofa and is used for infrequent items such as suitcases. ⑧ Toilet The toilet is equipped with a toilet that can also be used for bathing. There is a hot and cold water sign and a toiletries basket in the corner. ⑨ TV set The TV set is placed above the sofa and facing the bed, so that whether you rest on the sofa or in bed, you can watch TV programs and relax. Finally, a panoramic view of the living area! 4. Some Details (1)Where is the battery box hidden? (2)The living area tank is located below the rear door (3)Where is the spare oil drum hidden? (4)For parking rest and picnic outside the car, there is a foldable table on the back of the door of the living area, and it is equipped with a storage box (5)Because the car chassis is higher, so the left side of the staircase is designed with handrails, when entering the living area, convenient borrowing; There is a clock on the top of the handle, which is mainly convenient to check the time when taking a rest outside the car or having a picnic (6)The shoe rack is by the door (7)A fire extinguisher is placed in the back of the cab. (8)Skylights in the living area can be opened (9)It's 2023, car phone holder must have! Convenient map navigation! Finally! Hope you enjoy it! Thanks for browsing! Benz-Unimog 4×4 Off-road RV From MTC·By Muen·For Gap.Li -
Hello! I designed almost everything I wanted in a width of 5-6 stud. It's time to grow :) The new line of my models is approximately the same scale as the SpeedChampions series. I'll start with the Mack Defence. "offroad'' version 6x6 with short wheelbase civil version 8x6 with long wheelbase and photo nearby :) Thank you for watching! I will be glad to comments :)
-

[MOC] Lego Technic Military Truck (Building Instructions)
makushima posted a topic in LEGO Technic, Mindstorms, Model Team and Scale Modeling
MOC Lego Technic Military Truck Building Instructions: https://play.google.com/store/apps/details?id=max.technic.building.instructions Lego Technic MOC - Military Truck (Building Instructions) Lego Technic MOC - Military Truck (Building Instructions) -
[MOC] - Lego Technic Cartoon Truck (Building Instructions)
makushima posted a topic in LEGO Technic, Mindstorms, Model Team and Scale Modeling
Lego Technic Cartoon Truck (Building Instructions) Building Instructions: https://play.google.com/store/apps/details?id=max.technic.building.instructions Lego Technic Cartoon Truck - Color Version (Building Instructions) Lego Technic Cartoon Truck - Black and White Version (Building Instructions) -

[MOC] Mini vehicles collection [Free instructions]
artemisovsky posted a topic in LEGO Technic, Mindstorms, Model Team and Scale Modeling
I would like to introduce my latest project Mini Formula Racer. I usually make alternative models from the official sets from technic series, but due to the fact that this year TLG has released a tragic package of models for me with reduced functions and strange mixing of incompatible colors in one set, I have plans preparing more no-alternate MOCs. Here's the first one: small formula racer, initially based on old set 8808 but I changed it so much that it's not a studless version of official set. Features working steering wheel, working V6 engine, adjustable mirrors and rear spoiler (DRS), rear diffuser. In this model I didn't add system halo because it looks bad on this scale, also there is not enough space for the differential (the engine is driven by one wheel). Some comparision with 8808 set (built in a different color than the original, yellow color sheme) Free instructions available at Rebrickable -

[TC25] 8479 Barcode Truck
Berthil posted a topic in LEGO Technic, Mindstorms, Model Team and Scale Modeling
40% shrinkage of the 8479 Barcode Truck. Obviously without the electronics and also without the Flex Cables. The idea is to 'program' the truck by road plates. The road plates will have Technic Gear Racks and the truck will have gears catching the gear racks when driving over them. The gears catching (rendered red in the image) will result in movement of the front arm and tipper as in the original model. It will also have HOG steering. I will try to stick to the original green but don't know yet if there will be enough Technic green parts for that. Obviously there is still a lot of work to do but already got the dimensions and steering that I'm happy with. -
A motorized trophy truck model controlled by BuWizz. It is propelled by two RC buggy motors. Features drive, steering, full suspension, and working headlights. Functions/features: Drive Steering Full suspension Working headlights Instructions available on Rebrickable: https://rebrickable.com/mocs/MOC-156104/JLiu15/red-beryl-t/#details This is a MOC with an interesting backstory. I first decided to do my third MOC in the Red Beryl series (after my Red Beryl GT in 2018 and AWD supercar Red Beryl X in 2019) in late 2020 shortly after my first MOC featuring BuWizz and RC buggy motors - my Azure Racer XL. Unlike the finished model, my first attempt used CLAAS Xerion tires and had the RC buggy motors in the chassis instead of having the wheels directly attached to them. I don't recall exactly, but I even included a two-speed gearbox in the model thanks to the inclusion of a drivetrain and differential from the motors. The model turned out much larger than anticipated, meaning the bodywork would have to be very large as well. Given the model was already performing below my expectations, I decided to abandon the project...until two years later. I knew a good first step would be to use smaller wheels, and the spiky treaded tires from the 42124 and 42126 sets seemed to be a perfect fit for a trophy truck. The rear suspension is similar to that of my Azure Racer XL (it even retains the same basic geometry), although it is a solid axle this time instead of the left and right wheels being independently suspended. However, the suspended section is longer on this model, providing a softer suspension with more travel. I guess the shock absorber setup here is not the most realistic for a trophy truck (as most trophy trucks I've seen have their rear shocks more or less vertical), but the suspension setup nevertheless performed well. The front suspension is a typical double wishbone setup with the entire front axle tilted 10.8° for positive caster. Because the front and rear shock absorbers sit approximately half-compressed while the model is on the ground, it did impact the front ground clearance a little, although it was not really an issue when I tested it. The BuWizz unit is located directly in front of the rear axle and is placed low in the chassis to lower the center of gravity. The two RC buggy motors are each connected to its own BuWizz port (as recommended by BuWizz), with another port used for the PF Servo motor for steering. Because there is one port left on the BuWizz unit, I added two pairs of PF LEDs to the headlights. Thanks to the BuWizz speed settings they can shine brighter than when powered by a PF power source, although in my video I did not film it with the lights on as I did not want the BuWizz to cut power from the drive motors. Designing the bodywork was surprisingly challenging. I wanted to stick to pieces I already have as much as possible. The choice of wheel arches/fenders was easy - I used the black arches from the 42126 set paired with fenders from the 42125 set, adding some much-needed curvature to the model. The hood was also straightforward, as it is comprised entirely of 3x13 curved panels. Because the front axle sits at an angle for positive caster, I attached a front bar to it that allowed for an angle normally not achievable with angled connectors. I tried to avoid blue pins as much as possible, using red or gray pins in place of them. The doors were more challenging and it took me a few tries to get the desired result. I wanted to ensure the doors stand out from the rest of the model, but too much curvature looked weird. I went with a design where they slightly recess into the model. The section between the doors and rear fenders was perhaps the most difficult, as it needed to provide a transition from the relatively flat doors to the curved rear fenders. I went with all curved panels and liftarms for this area. I did have to order some new red pieces for the bodywork, namely the curved 1x2 and 3x2 panels at the top edge of the doors and the red 2x3 and 2x5 liftarms in the section between the doors and rear fenders, but the bodywork still mainly consisted of red pieces I already had. System pieces (tiles and curved slopes) are used to fill in the gaps in these areas. The roof was a simple build, although securing it was a bit challenging as it had a tendency to tilt forward. I had to experiment with the A-pillars a little bit but settled on a setup with 7L flex axles. The rear of the model is left rather unfinished to reduce weight, although that is pretty typical of real-life trophy trucks, and the single spare wheel in the back provides just enough weight for the front and rear axles to sit at similar heights when the model is on the ground. The model performed pretty well, and the two RC buggy motors gave it plenty of power. I had wanted to drive a fast off-road MOC at a skate park for years now, and this is my first MOC that I filmed at a skate park. It was fun seeing the model drive up and down the slopes, although it still lacked torque to completely drive over the smaller slopes. I had to be careful with letting the drive motors run at full power as in the Fast and Ludicrous speed settings (or even Normal sometimes) the BuWizz would cut power to the motors when overloaded. Accelerating from a stop on Ludicrous mode was pretty much off the table, although I was able to switch into Fast mode after accelerating on the Normal setting. Two RC buggy motors with their inner outputs geared 3:1 was good for fast driving and small obstacles, although more torque and traction are needed to overcome larger slopes/obstacles. Overall, I'm quite impressed with how this model turned out. Despite having more than twice as many pieces as my Azure Racer XL model, the performance did not suffer much and I had a lot of fun driving it around at the skate park. The suspension is also satisfying to watch, as the model can "float" over obstacles with both the front and rear shock absorbers approximately half-compressed when the model is on the ground. Compared to my first attempt at the model two years ago, it shows that the ideal approach to such fast RC buggy motor-powered models is not to build big, but just big enough to achieve optimal performance. Video: Photos:
-
[WIP] Red Beryl T (Trophy Truck)
JLiu15 posted a topic in LEGO Technic, Mindstorms, Model Team and Scale Modeling
Another RC motor MOC I am working on. This time the RC motors will be configured differently - they are located in the chassis, placed in a cross configuration so that their inner outputs are lined up. There is a 2-speed remote controlled gearbox at the heart of the chassis along with the RC motors and there will be full long-travel suspension. The front suspension module is already complete, and it will be attached at an angle for positive caster. There will still be some gearing down in the rear suspended portion (e.g. with portal hubs) to ensure the model has sufficient torque. As the name might suggest, this is the third model in my Red Beryl series (not sure why I chose that name, honestly ). It'll be a typical trophy truck with either a fully red body or red with black detailing. I've always wanted to use my older-generation Technic panels from the 8436 set, sorta combining two generations of Lego Technic. Like a typical trophy truck, there will be one or two spare wheels in the back. Like my previous MOC, it will all be controlled by BuWizz. Photo: Update: I initially planned this MOC in late 2020 but decided to cancel it after challenges arose. I revived the project with a smaller scale, simpler drivetrain, and newer Technic panels. -

[MOC]◄URAL 4320 6x6►[2023]
Michael217 posted a topic in LEGO Technic, Mindstorms, Model Team and Scale Modeling
Welcome to my garage LEGO!!! Hello! My name is Michael. I'm a Builder from Russia, I love muscle cars! URAL 4320 6x6 The legendary Soviet truck, which has been produced since 1977 to the present! I started collecting in parallel with Dodge at the beginning of the year. Initially, I put ordinary hubs on it and drove around the house very well, but before photographing the finished model, I decided to test it on the street, as a result, it was very hard for the engine, (the old version is on the video) after which, over the past week, I went through the chassis, put the portal hubs, abandoned the fake engine and moved the buggy motor under hood (to make a direct gimbal on the gearbox). As a result, it became slower, but more passable! Description: -Drive Buggy motor -Steering Geek Servo -Managing RCbrick -Permanent ALL-wheel drive 6x6 -Bridges with planetary gearboxes -2x high-speed transmission (the lever is duplicated in the cabin) -The steering wheel turns with wheels -Doors, hood and tank open -Detailed interior and under-hood space -Weight: 2.6 kg Length: 68 cm. Instagram: https://www.instagram.com/lego_muscle_garage/ Join my group in VK: https://vk.com/legomusclegarage All photos on the link: https://bricksafe.com/pages/Michael217/ural-4320-6x6 All photos on the link: https://bricksafe.com/pages/Michael217/ural-4320-6x6 -

42156 Volvo: The Iron Knight - alternate build
Timorzelorzworz posted a topic in LEGO Technic, Mindstorms, Model Team and Scale Modeling
Hi Folks, let me allow to share a new creation. This replica of famous Volvo Iron Knight Race-Truck is completely built with parts only from set 42156 Peugeot 9x8 Hypercar as an alternate model (B-model). Only a copy of donor set 42156 is needed to build this iconic truck. You can buy the instructions for this model here if you're interested in building. Features & Functions openable doors on both sides HoG-steering with removable knob independent push rod suspension in front and back V6-engine with moving pistons connected to rear differential openable lid in back to see suspension working Volvo brand with no sticker detailed design and interior lights that are glowing in the dark modular building with splitted premium PDF-instructions measures 44cm x 20cm x 18cm Impressions Headlights Lights in front are made with fluorescent bars from donor set to represent instantly recognizable headlights. A Lego addicted heart beats higher for the first time when the iconic V-shaped lights are glowing in the dark. No custom sticker Thanks to the inventory I'm happy to share my first model with a completely brick built front to recognize Volvo's brand only with pieces from 42156 and without any need for custom sticker. Suspension The model uses a soft push rod suspension in front and back. Due the fact that this truck is two studs shorter in wide than its base model, the suspension design is not only a simple copy, but an own approach with a way different building instead. Through an openable lid in the back, the suspension can be watched working. Steering Driving and steering the truck works directly with a steering knob on top of the cabin. This steering knob is removable and can be easily pulled out for better displaying the model. Engine The real Iron Knight uses a straight 6 piston engine instead of V6. Due limited inventory and missing crankshaft parts, it was not possible to form a straight working engine out of V6. Some compromises are made here and as a result, this alternate model uses a working V6-engine with moving pistons. Instructions & building process Premium instructions for this model comes in two separate PDF-files with high quality images and building steps very close to the original Lego Technic ones to ensure a satisfying building experience. Building this Iron Knight alternate model starts with the 249 pages long main PDF to finish the rear end first with differential and suspension included. The second instruction file takes over to assemble the entire front section together with a suspension and steering system you never built before. After 132 pages the front section becomes married with the rear end. Frames and structural elements are added to make the model solid. The working V6-engine becomes attached and connected to the rear differential through drivetrain. More parts are added to form characteristic lines and shapes, getting closer to a real looking Volvo Iron Knight. Some parts of the cabin are attached and the drivers seat and doors take place at their final spot of the model. After 381 pages of joyful building in total, this Volvo Iron Knight alternate model is finished in all glory and ready to drive on your shelf or desk. Grab instructions here Crafted in Sweden. Rebricked with passion in germany. Have fun with this 42156 Volvo Iron Knight alternate build. Follow me on Instagram -
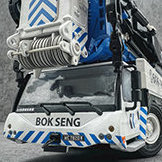
Perhaps the new theme park needs a better transport which can maneuver in the city, right? Based on my previous truck design, I did this for moving the raptors. The tractor section has a turret that can be used for any emergency cases like dinosaur escape, and now raptor transport can go through the city without problem! Hope you enjoy this :) thanks!