Search the Community
Showing results for tags 'Wars'.
Found 116 results
-

List fo best Lego Star Wars MOCs in UCS size with instruction
LateralusArt posted a topic in LEGO Star Wars
I would like to create in one place current list of best Lego Star Wars MOCs in UCS size with instruction available to purchase and build. For now i came up with such a list: Best UCS size: 1. Sandcrawler by Cavegod and Marshal Banana https://www.eurobricks.com/forum/index.php?/forums/topic/159511-moc-cavegods-ucs-sandcrawler/ 2. Imperial Star Destroyer by Raskolnikov https://www.eurobricks.com/forum/index.php?/forums/topic/152690-isd-aggressor-star-destroyer-moc-w-interior-and-instructions/ 3. AT-AT by Cavegod and Jhaelego and (AT-ACT) https://www.eurobricks.com/forum/index.php?/forums/topic/138552-moc-the-ultimate-at-at-walker/ https://www.eurobricks.com/forum/index.php?/forums/topic/117382-cavegod-ucs-at-at-instructions/ https://www.eurobricks.com/forum/index.php?/forums/topic/40849-ultimate-collectors-scale-all-terrain-armoured-transport/ https://www.eurobricks.com/forum/index.php?/forums/topic/154242-moc-minifigure-scale-ucs-at-act/ 4. Super Star Destroyer by Onecase https://www.eurobricks.com/forum/index.php?/forums/topic/160425-moc-executor-class-star-dreadnought/ https://www.eurobricks.com/forum/index.php?/forums/topic/163280-instructions-executor-class-star-dreadnought/ 5. Neblun-B by Mortsev and Dranac https://www.eurobricks.com/forum/index.php?/forums/topic/131170-moc-ucs-medical-frigate-further-improvements-and-instructions/ https://www.eurobricks.com/forum/index.php?/forums/topic/135698-mortesvs-ucs-nebulon-b-medical-frigate-instructions-available/ https://www.eurobricks.com/forum/index.php?/forums/topic/130986-moc-ucs-nebulon-b-frigate-by-dranac/ 6. A-Wing by Anio https://www.eurobricks.com/forum/index.php?/forums/topic/108296-moc-ucs-a-wing/ 7. U-Wing by Starbricks https://www.eurobricks.com/forum/index.php?/forums/topic/146899-moc-ut-60d-u-wing-sb00101-ucs/ 8. Tie Silencer by Starbricks https://www.eurobricks.com/forum/index.php?/forums/topic/158930-sb00201-ts-project-moc-tie-silencer-ucs/ 9. AT-M6 by Jhaelego https://www.eurobricks.com/forum/index.php?/forums/topic/159977-moc-minifig-scale-at-m6/ 10. Zeta Cargo Shuttle by Renegade Clone https://www.eurobricks.com/forum/index.php?/forums/topic/150375-moc-instructions-ucs-zeta-class-cargo-shuttle/ https://www.eurobricks.com/forum/index.php?/forums/topic/146805-moc-ucs-zeta-class-cargo-shuttle/ 11. Ghost by Brickvault https://www.eurobricks.com/forum/index.php?/forums/topic/157602-star-wars-rebels-ucs-ghost-minifig-scale/ 12. Venator by Anio/Polo https://www.eurobricks.com/forum/index.php?/forums/topic/37663-venator-class-republic-attack-cruiser/ 13. Imperial Star Destroyer by Onecase https://www.flickr.com/photos/138419110@N08/32429001358/in/dateposted/ 14. Corvus by RichboyJhaec https://www.youtube.com/watch?v=ghuL-7fUczs&t=937s 15. Zeta-Class Cargo Shuttle by Cavegod https://www.brickvault.toys/collections/all/products/zeta-class-shuttle-minifig-scale 16. Resistance Bomber by Star Bricks https://www.eurobricks.com/forum/index.php?/forums/topic/170102-sb00301-b-project-moc-resistance-bomber-ucs/ https://www.starbricks.net/b-project 17. Kylo Ren’s Command Shuttle by Cavegod https://www.eurobricks.com/forum/index.php?/forums/topic/170401-moc-cavegod’s-ucs-kylo-ren’s-command-shuttle/ 18. Tie Bomber by Yannik Brandt https://www.youtube.com/watch?v=uPGrWnjgpiw Other UCS size: 13. Desert Barge Sail by Baronsat https://www.baronsat.net/baronshop/INSTRUCTIONS-SW-JABBA-BARGE.htm 14. MOD Tie Interceptor by Jazbass https://imgur.com/gallery/SOaVL https://imgur.com/gallery/s70rCm0 15. ARC-170 by SarinoooO S https://www.youtube.com/watch?v=zVqh0saM264 16. First Order Special Forces Tie Fighter by Cavegod https://www.eurobricks.com/forum/index.php?/forums/topic/165197-moc-cavegods-first-order-special-forces-tie-fighter/ 17. TIE Reaper by Jhaelego https://www.eurobricks.com/forum/index.php?/forums/topic/152358-mocldd-instructions-tie-reaper/ https://www.youtube.com/watch?v=T4ulNn9lqZA&t=284s 18. Eclipse-Class Dreadnought by Jorstad-Designs https://www.jorstad-designs.com/product-page/instructions-eclipse-class-dreadnought 19. UCS Rey´s Speeder by Robert Lundmark https://www.flickr.com/photos/133266472@N05/25313457368/in/dateposted/ 20. Millennium Falcon by RichboyJhae https://www.youtube.com/watch?v=H5XcVgqoUbM&t=21s 21. AT-AT by Lego TK-1138 https://www.eurobricks.com/forum/index.php?/forums/topic/107648-ldd-at-at/ 22. Marshall Banana's Millennium Falcon by Brick Customs https://www.eurobricks.com/forum/index.php?/forums/topic/147385-i-made-a-replica-of-marshall-bananas-7500pc-lego-millennium-falcon-instructions/ 23. Jango Fett Slave 1 by RichboyJhae https://www.youtube.com/watch?v=V5Ij_J8VoV8 24. Jango Fett Slave 1 by Brick Customs https://www.eurobricks.com/forum/index.php?/forums/topic/152809-moc-ucs-jango-fetts-slave-1-instructions/&tab=comments#comment-2833300 https://www.youtube.com/watch?v=LDs3AEJgv5I&t=46s https://www.eurobricks.com/forum/index.php?/forums/topic/152809-moc-ucs-jango-fetts-slave-1-instructions/ 25. Jango Fett Slave 1 by Jorstad Design https://www.jorstad-designs.com/product-page/instructions-ucs-jango-s-slave-i 26. Venator-Class Star Destroyer by Elisss_2 https://www.eurobricks.com/forum/index.php?/forums/topic/160651-moc-ucs-venator-class-star-destroyer/ 27. Imperial Light Cruiser by insideLego https://www.eurobricks.com/forum/index.php?/forums/topic/152106-moc-imperial-light-cruiser/ 28. Imperial Interdictor Cruiser by insideLego https://www.eurobricks.com/forum/index.php?/forums/topic/151884-lego-star-wars-imperial-interdictor-cruiser-moc/ 29. Pelta-Class Frigate by insideLego https://www.eurobricks.com/forum/index.php?/forums/topic/152776-lego-star-wars-moc-pelta-class-frigate/ Speeder Bike by NNOPMOC https://www.eurobricks.com/forum/index.php?/forums/topic/109680-moc-speeder-bike/ Hyperdrive ring by syrhilla https://www.eurobricks.com/forum/index.php?/forums/topic/154004-moc-hyperdrive-ring-for-ucs-10215/&tab=comments#comment-2937498 Tie Defender by Cavegod https://www.eurobricks.com/forum/index.php?/forums/topic/145473-mocinstructions-cavegods-tie-defender/ Tie Defender by mcgrah https://www.eurobricks.com/forum/index.php?/forums/topic/147915-mocucs-tied-defender/ TIE Interceptor by ClassicLook https://www.eurobricks.com/forum/index.php?/forums/topic/152675-mod-7181-ucs-tie-interceptor/&tab=comments#comment-3023076 Snowspeeder by drakmin https://www.eurobricks.com/forum/index.php?/forums/topic/96421-moc-t-47-rebel-snowspeeder-instructions-available/ Zenith - Old Republic escort cruiser by Bob De Quatre https://www.eurobricks.com/forum/index.php?/forums/topic/86691-ldd-moczenith-old-republic-escort-cruiser/ X-Wing Red 5 by usfighting https://www.eurobricks.com/forum/index.php?/forums/topic/104810-moc-ucs-x-wing-red-5/&tab=comments#comment-2113271 Tie Bomber by spacepilot3000 https://www.eurobricks.com/forum/index.php?/forums/topic/46759-moc-ucs-tie-bomber/ B-Wing by Cavegod https://www.eurobricks.com/forum/index.php?/forums/topic/30184-moc-ucs-b-wing/&tab=comments#comment-936344 Lamba Shuttle Tydirium by Cavegod https://www.eurobricks.com/forum/index.php?/forums/topic/30185-moc-ucs-lamba-shuttle-tydirium/ Venator Star Destroyer by thire5 https://www.eurobricks.com/forum/index.php?/forums/topic/26049-moc-venator-star-destroyer/ Non UCS size: A-wing Starfighter by Jerac https://www.eurobricks.com/forum/index.php?/forums/topic/168637-a-wing-of-a-wings/ X-wing Starfighter by Jerac https://www.eurobricks.com/forum/index.php?/forums/topic/166523-moc-star-wars-the-x-wing-story/ TIE Defender by Jerac https://www.eurobricks.com/forum/index.php?/forums/topic/169059-the-defender-of-the-empire/ TIE Advanced by Jerac https://www.eurobricks.com/forum/index.php?/forums/topic/161063-sfs-tiex1-advanced/ TIE Interceptor by Jerac https://www.eurobricks.com/forum/index.php?/forums/topic/157444-tie-fighter-tie-interceptor/ TIE Bomber by Jerac https://www.eurobricks.com/forum/index.php?/forums/topic/160174-sfs-tiesa-bomber/ TIE Fighter by Jerac https://www.eurobricks.com/forum/index.php?/forums/topic/157444-tie-fighter-tie-interceptor/ B-wing Starfighter by Inthert N-1 Naboo Starfighter by Inthert https://www.eurobricks.com/forum/index.php?/forums/topic/154913-moc-naboo-n-1-starfighter-breakdown/ Y-Wing by Brickwright https://www.eurobricks.com/forum/index.php?/forums/topic/84780-minifigure-scale-y-wing-instructions/ Snowspeeder by Flying Waffle U-wing Starfighter by Caleb Ricks CR-90 Corellian Corvette - Blockade Runner (Tantive IV) by Mortsev https://www.eurobricks.com/forum/index.php?/forums/topic/155304-instructions-mortesvs-cr-90-corvette-blockade-runner-tantive-iv/ https://www.eurobricks.com/forum/index.php?/forums/topic/139982-moc-ucs-cr-90-corellian-corvette-–-blockade-runner-tantive-iv/ GR-75 by Mortsev https://www.eurobricks.com/forum/index.php?/forums/topic/137021-moc-1-250-mini-ucs-rebel-transport-gr-75-ldd-file/ AT-AT by Raskolnikov https://www.eurobricks.com/forum/index.php?/forums/topic/143010-build-your-own-plus-size-at-at/ https://www.eurobricks.com/forum/index.php?/forums/topic/142646-at-at-moc-plus-sized-but-not-super-big/ AT-ST by Gol https://www.eurobricks.com/forum/index.php?/forums/topic/120770-moc-another-at-st-version-2/ Constrictor II - Playable Interdictor Cruiser by Raskolnikov https://www.eurobricks.com/forum/index.php?/forums/topic/161369-constrictor-ii-imperial-interdictor-w-instructions/ https://www.eurobricks.com/forum/index.php?/forums/topic/137125-moc-imperial-interdictor-cruiser-the-iic-constrictor/ Hammerhead Corvette by Dmarkng https://www.eurobricks.com/forum/index.php?/forums/topic/149057-moc-instructions-dmarkngs-hammerhead-corvette/ AT-M6 by Edge of Bricks (Kozikyo86) https://www.eurobricks.com/forum/index.php?/forums/topic/155317-moc-ucs-first-order-heavy-assault-walker-at-m6/ First Order Xi-Class Light Shuttle by Edge of Bricks (Kozikyo86) https://www.eurobricks.com/forum/index.php?/forums/topic/164439-wip-moc-first-order-xi-class-light-shuttle/ First Order Upsilon-Class Command Shuttle by Edge of Bricks (Kozikyo86) https://www.eurobricks.com/forum/index.php?/forums/topic/168820-moc-mod-first-order-upsilon-class-command-shuttle/ First Order AT-ST Walker by Edge of Bricks (Kozikyo86) https://www.eurobricks.com/forum/index.php?/forums/topic/157323-moc-first-order-at-st-walker/ The Empire over Jedha City by Onecase https://www.eurobricks.com/forum/index.php?/forums/topic/164991-moc-the-empire-over-jedha-city/ https://www.eurobricks.com/forum/index.php?/forums/topic/168072-instructions-the-empire-over-jedha-city/ Mos Eisley Cantina by iScreamClone Mos Eisley Additional Buildings by iScreamClone Carbon Freeze Chamber by iScreamClone Speeder Bike by Anio https://www.eurobricks.com/forum/index.php?/forums/topic/86896-ucs-speeder-bike/ Super Star Destoryer by Anio https://www.eurobricks.com/forum/index.php?/forums/topic/45924-moc-executor-class-super-star-destroyer/ Slave I by Anio https://www.eurobricks.com/forum/index.php?/forums/topic/44221-moc-ucs-boba-fetts-slave-1/&page=3&tab=comments#comment-870935 Tie Fighter by Anio https://www.eurobricks.com/forum/index.php?/forums/topic/26055-moc-tie-fighter-ucs/ Invisible Hand by Anio https://www.eurobricks.com/forum/index.php?/forums/topic/90000-ucs-invisible-hand/ Royal Naboo Starship by Anio https://www.eurobricks.com/forum/index.php?/forums/topic/69102-fully-chromed-ucs-royal-naboo-starship/ Republic Cruiser by Anio https://www.eurobricks.com/forum/index.php?/forums/topic/63769-ucs-republic-cruiser/ Sebulba's Podracer by Anio https://www.eurobricks.com/forum/index.php?/forums/topic/58540-ucs-scale-sebulbas-podracer/ Juggernaut HAVw A6 by Anio https://www.eurobricks.com/forum/index.php?/forums/topic/54597-ucs-juggernaut-havw-a6/ Anakin Skywaker' Podracer by Anio https://www.eurobricks.com/forum/index.php?/forums/topic/32824-ucs-anakin-skywaker-podracer-with-video-and-building-instruction/ AT-TE by Anio https://www.eurobricks.com/forum/index.php?/forums/topic/26375-moc-at-te-ucs/ Super Star Destroyer Executor by Bob De Quatre https://www.eurobricks.com/forum/index.php?/forums/topic/71969-moc-yet-another-super-star-destroyer-executor/ Invisible Hand by L-DI-EGO https://www.eurobricks.com/forum/index.php?/forums/topic/63753-ldd-moc-invisible-hand/&tab=comments#comment-1706242 Star Destroyer by All in the Reflexes https://www.eurobricks.com/forum/index.php?/forums/topic/109505-ldd-mod-ucs-star-destroyer/ Interdictor Class Cruiser by Tommy Styrvoky https://www.eurobricks.com/forum/index.php?/forums/topic/149635-moc-ldd-star-wars-rebels-interdictor-class-cruiser/ Kylo Ren's Upsilon-class Shuttle by LegoStarWarsLDDShop https://www.eurobricks.com/forum/index.php?/forums/topic/121984-lddmod-kylo-rens-upsilon-class-shuttle/ Sith Infiltrator by Anio https://www.eurobricks.com/forum/index.php?/forums/topic/111294-moc-ucs-sith-infiltrator/ Jabba's Sail Barge by Anio https://www.eurobricks.com/forum/index.php?/forums/topic/93733-ucs-jabbas-sail-barge/ Tie Bomber by Volt_Bricks https://www.eurobricks.com/forum/index.php?/forums/topic/122597-tie-bomber-moc/ Tie Interceptor by dream-in-bricks https://www.eurobricks.com/forum/index.php?/forums/topic/142586-moc-tie-interceptor-proportions-study-11-months-later/ First Order Elite TIE Interceptor by Kozikyo86 https://www.eurobricks.com/forum/index.php?/forums/topic/161015-moc-first-order-elite-tie-interceptor/ Naboo N-1 by jameseilers https://www.eurobricks.com/forum/index.php?/forums/topic/137298-moc-ldd-naboo-n-1-starfighter/ Naboo N-1 by samppu https://www.eurobricks.com/forum/index.php?/forums/topic/143685-moc-naboo-n1-royal-starfighter-fully-functional/ Republic Gunship by JBB_777 https://www.eurobricks.com/forum/index.php?/forums/topic/151790-republic-gunship/ Phantom by ScottishDave https://www.eurobricks.com/forum/index.php?/forums/topic/132482-moc-lxf-minifig-scale-phantom-from-star-wars-rebels/ AT-AT by Anio https://www.eurobricks.com/forum/index.php?/forums/topic/148170-mod-anios-at-at/ https://www.eurobricks.com/forum/index.php?/forums/topic/68782-moc-ucs-at-at/ B-Wing by Renegade Clone https://www.eurobricks.com/forum/index.php?/forums/topic/120744-update-to-my-b-wing-design/ ATT by Anio https://www.eurobricks.com/forum/index.php?/forums/topic/92952-ucs-aat/ Tie Fighter by barneius https://www.eurobricks.com/forum/index.php?/forums/topic/168825-moc-mod-instructions-imperial-tie-fighter/ INCOM T-70 X-Wing Fighter by All in the Reflexes https://www.eurobricks.com/forum/index.php?/forums/topic/120731-moc-ldd-ucs-incom-t-70-x-wing-fighter/ Delta Class DX-9 Stormtrooper transport by michaelozzie https://www.eurobricks.com/forum/index.php?/forums/topic/138962-moc-delta-class-dx-9-stormtrooper-transport/&tab=comments#comment-2972462 Imperial Light Cruiser by insideLego https://www.eurobricks.com/forum/index.php?/forums/topic/152106-moc-imperial-light-cruiser/&tab=comments#comment-2905998 Y-Wing Clone Wars Era by IcarusBuilds https://www.eurobricks.com/forum/index.php?/forums/topic/150483-mocwipldd-minifig-scale-clone-wars-btl-b-y-wing-starfighter/&tab=comments#comment-2900145 X-Wing by cehnot https://www.eurobricks.com/forum/index.php?/forums/topic/144361-moc-the-x-wing-strikes-back/&tab=comments#comment-2708149 Imperial Shuttle by michaelozzie https://www.eurobricks.com/forum/index.php?/forums/topic/117375-wip-imperial-shuttle/&tab=comments#comment-2641053 Venator Class Star Destroyer by _Samibotss_ https://www.eurobricks.com/forum/index.php?/forums/topic/117625-ldd-moc-venator-class-star-destroyer/&tab=comments#comment-2438441 X-Wing by PoweredbyNorth https://www.eurobricks.com/forum/index.php?/forums/topic/71783-ucs-xwing-2nd-edition/ Nebulon B-2 by Walter Kovacs https://www.eurobricks.com/forum/index.php?/forums/topic/39040-ucs-scale-nebulon-b-2/ B-Wing by krispy https://www.eurobricks.com/forum/index.php?/forums/topic/78051-moc-minifig-scale-b-wing-with-instructions-and-ldd/&tab=comments#comment-1483742 Hammerhead Corvette by Jorstad Design https://www.jorstad-designs.com/product-page/ucs-hammerhead-corvette-rogue-one-1 Hammerhead Corvette (Rebels) by Jorstad Design https://www.jorstad-designs.com/product-page/ucs-hammerhead-corvette-star-wars-rebels Imperial Immobilizer 418 Star Destroyer by Jorstad Design https://www.jorstad-designs.com/product-page/ucs-imperial-immobilizer-418-star-destroyer Venator-Class Star Destroyer by Jorstad Design https://www.jorstad-designs.com/product-page/ucs-venator-class-star-destroyer Lucrehulk-Class Battleship by Jorstad Design https://www.jorstad-designs.com/product-page/instructions-lucrehulk-class-cargo-hauler UCS size MOCs which maybe will have instructions in the future: Imperial Star Destroyer by Onecase https://www.flickr.com/photos/138419110@N08/32429001358/in/dateposted/ Desert Skiff by Anio https://www.eurobricks.com/forum/index.php?/forums/topic/167855-ucs-desert-skiff/ http://www.brickshelf.com/cgi-bin/gallery.cgi?i=6575752 Imperial Landing Craft by Cavegod https://www.flickr.com/photos/42956921@N08/sets/72157625732347132 GR-75 by Cavegod https://www.flickr.com/photos/42956921@N08/sets/72157629813069766 UCS Tantive IV - CR-90 Corvette by Kit Bricksto https://www.eurobricks.com/forum/index.php?/forums/topic/154956-moc-ucs-tantive-iv-cr-90-corvette/ AT-AT by LiLimeFromDaFuture https://www.eurobricks.com/forum/index.php?/forums/topic/160363-new-ucs-at-at-teased/&tab=comments#comment-2948642 Marshal Bananas' Lambda Shuttle by Hamsha https://www.eurobricks.com/forum/index.php?/forums/topic/163286-moc-my-version-of-marshal-bananas-lambda-shuttle/ Corvus by RichboyJhaec https://www.youtube.com/watch?v=ghuL-7fUczs&t=937s Kylo Ren's Command Shuttle by Cavegod https://www.flickr.com/photos/42956921@N08/44571254002/in/dateposted/ Kylo Ren's Command Shuttle by leeCTA https://www.eurobricks.com/forum/index.php?/forums/topic/152498-moc-ucs-kylo-rens-command-shuttle/ Resurgent-Class Star Destroyer by Kommander https://www.eurobricks.com/forum/index.php?/forums/topic/157783-wip-ucs-resurgent-class-star-destroyer/ Zeta-Class Cargo Shuttle by Cavegod https://www.eurobricks.com/forum/index.php?/forums/topic/160397-ucs-zeta-class-cargo-shuttle/ https://www.flickr.com/photos/42956921@N08/sets/72157677086731271 Jedi Interceptor by Anio https://www.eurobricks.com/forum/index.php?/forums/topic/155066-ucs-jedi-interceptor/ Venator Class Star Destroyer by Ellisss_2 https://www.eurobricks.com/forum/index.php?/forums/topic/144269-ucs-wip-moc-venator-class-star-destroyer/ Y-Wing Clone Wars Era by Hold0511 https://www.eurobricks.com/forum/index.php?/forums/topic/140165-moc-ucs-y-wing-10134-clone-wars-era-wip/ UCS size MOCs without instructions Imperial Star Destroyer by Jerac https://www.flickr.com/photos/jerac/14160821890/in/dateposted/ https://www.eurobricks.com/forum/index.php?/forums/topic/96373-moc-isd-chimaera/ X34 Landspeeder https://www.eurobricks.com/forum/index.php?/forums/topic/104680-moc-ucs-x34-landspeeder/&page=3 https://www.flickr.com/photos/128945222@N04/16427154461/in/album-72157649885427838/ Jabba's Sail Barge by markus1984 https://www.eurobricks.com/forum/index.php?/forums/topic/93982-ucs-sail-barge-moc/ Jabba's Sail Barge by Chris Wight https://www.flickr.com/photos/60627060@N08/27505296025/in/dateposted/ UCS Tie Bomber by Cavegod https://www.eurobricks.com/forum/index.php?/forums/topic/57860-ucs-tie-bomber/&tab=comments#comment-1030745 AT-AT by Maciej Szymański https://www.flickr.com/photos/dmaclego/22732985008/ Lambda Shuttle by Marshal Banana https://www.eurobricks.com/forum/index.php?/forums/topic/151977-lambda-shuttle-and-star-destroyer-mocs/ Imperial Star Destroyer by Raskolnikov https://www.eurobricks.com/forum/index.php?/forums/topic/130922-moc-imperial-star-destroyer-tyrant/ https://www.eurobricks.com/forum/index.php?/forums/topic/146195-video-if-anyones-curious-how-the-isd-tyrant-opens-up/ Millennium Falcon by Marshal Banana https://www.eurobricks.com/forum/index.php?/forums/topic/118890-moc-millennium-falcon-still-the-coolest-spaceship/ Upsilon-class command shuttle by Renegade Clone https://www.eurobricks.com/forum/index.php?/forums/topic/119078-moc-upsilon-class-command-shuttle/ Star Destroyer Finalizer by AnkTales https://www.eurobricks.com/forum/index.php?/forums/topic/167737-moclego-star-destroyer-finalizer-moc-with-10000-bricks/ https://www.youtube.com/watch?v=VGKzLs1yfmc Venator-class Star Destroyer "Atelles" by Philipp Neumann https://www.flickr.com/photos/39520243@N03/sets/72157620671087561 https://www.eurobricks.com/forum/index.php?/forums/topic/135771-finished22-meters-long-venator-class-star-destroyer-atelles/&tab=comments#comment-2705649 Venator by Lego Customs 0401 https://www.eurobricks.com/forum/index.php?/forums/topic/138280-moc-wip-big-venator-project/ Venator-Class Star Destroyer by Alec Doede https://www.flickr.com/photos/17634665@N07/22228506166/in/dateposted/ Clone Turbotank by Rick Zonneveld https://www.flickr.com/photos/115031425@N04/sets/72157649468729312 https://www.eurobricks.com/forum/index.php?/forums/topic/102744-clone-turbo-tank/ Executor - Super Star Destroyer by Tigrouaugustin https://moc.bricklink.com/pages/moc/mocitem.page?idmocitem=5853 https://www.eurobricks.com/forum/index.php?/forums/topic/146361-moc-exécuteur-super-star-destroyer-185-m-73-pouces-61-pieds-in-progress/ Executor Super Star Destroyer by BerraBZ https://moc.bricklink.com/pages/moc/mocitem.page?idmocitem=3252 Mon calamari MC80 Home One by Baciccia_1978 https://moc.bricklink.com/pages/moc/mocitem.page?idmocitem=419 Mon Calamari MC80 Liberty by Baciccia_1978 https://moc.bricklink.com/pages/moc/mocitem.page?idmocitem=417 UCS Sith Fury-Class Sith Interceptor by markus19840420 https://www.flickr.com/photos/71475401@N07/29328813276/in/album-72157644753191459/ https://www.eurobricks.com/forum/index.php?/forums/topic/139693-sith-fury-class-interceptor-tor-idsmo-r4-final/ Vehicles from Original Trilogy which would be great to have instruction to UCS size MOC: -Jabba Sail Barge -Tie Bomber -Landspeeder X34 -Sentinel-class landing craft (maybe Cavegod will made instruction) -Desert Skiff (maybe Anio will made instruction) -Tantive IV Blocade Runner (maybe Kit Bricksto will made instruction) -Tie Interceptor (there were some mods to Lego UCS Tie Fighter?) -GR-75 (maybe Cavegod will made instruction) -Home One -Mon Calamari If You know about anything else worth adding to list please leave the comment i will update the list. -

The Search for Pyerce: Part The Second [Factions Ep. 7 - Cat B][O7 - Mandalore - CE]
Miscellanabuilds posted a topic in Factions Archive
*Your entry has earned 32 XP* https://www.instagram.com/p/CJoqfSApmO5/ (apologies for the lack of an imbed, I as having trouble getting the photo to upload. Not as complete of a MOC as I wanted it to be, but I ran out of time.) (Edit: other pics https://www.instagram.com/p/CJrYdx9JYc1/ and https://www.instagram.com/p/CJrYjd2J1XF/) The Empire was exactly where the data chip had said. A transport been hiding in Mandalore, right under our noses. It didn't tell us where Pyerce was, however- he was too smart for that. I gathered my team. It was time for The Great Purge... this time on the Empire. Our small strike team was all we needed. At the location, numerous Imperial scumbags were getting ready to leave off world. We dispatched the ones on the outside with ease- we lost no lives yet. "Alright team," I said over comms. "We don't know if Pyerce is here, but if he is, it's going to be heavily guarded. Prepare for anything." I never expected the operation to be a trap. After we were deep in the building, the building exploded. My entire team died. Even Eencar Nacio perished. It was the first day I wept since we lost Mandalore. I was going to blow the Empire straight back to Krell. -
The Search for Pyerce [Factions Ep. 7 - Cat A][O7 - Mandalore - CE]
Miscellanabuilds posted a topic in Factions Archive
*Your entry has earned 12 XP* Word has spread that the Imperial Pyerce maybe on our home planet of Mandalore. Nabare sent me out to see what info I can find. I walked through the city streets of Mandalore. The informant was supposed to be at a cantina just around the corner. I sat in one of the stools and waited for him. Turned out he ran the joint. He came to the bar and started conversation. A shot blasted out. I turned to see an imperial not far away. This had been an ambush. The blast should have killed me at point blank range- good thing I had beskar. I pulled out her blasters, shooting both the imperial as she ran and the informant. Searching the imp scum, I found a data chip. Turns out that doshing informant got her the intel she needed. We were going to find Pyerce- at least I hoped. -
When the Neo Classic Space Federation puts out a galaxy-wide call to take part in a podrace on the Moon, the call is answered by the Blacktron Future Generation. Although Benny's racer, 'LL-UC45' uses cutting edge tech, the Future Generations 'WhiteGilled BlackFish' has never lost a race. The stage is set for a white-knuckle showdown as these old foes race each other across the dusty plains of the Lunar surface. A month to design and build. 3,000 pieces (ish, don't know wasn't keeping count) and a lot of left over discarded bricks, my Star Wars/Classic Space mashup moc is done. The full album is on my Flickr page here: https://www.flickr.com/photos/164260086@N06/albums/72157716664021747
-
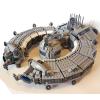
Hello there ! Here is my first post on Eurobricks and I wanted to share with you my latest Star Wars MOC : ‘’Underground Clone Base On Kashyyyk’’ This Moc takes place during the end of the Clone Wars and represents a base that would have been dug in the deep jungle of Kashyyyk. I’ve try a lot of new and advanced building techniques for me. For all the fans of the Lego Star Wars games, there are two little details I think you’re gonna like ;) If you want a cinematic video of this MOC, here it is : https://www.youtube.com/watch?v=LBlj2BaSDEI Underground Clone Base On Kashyyyk by Hugo, sur Flickr Underground Clone Base On Kashyyyk (back) by Hugo, sur Flickr Underground Clone Base On Kashyyyk (top) by Hugo, sur Flickr Underground Clone Base On Kashyyyk (-2 and -1) by Hugo, sur Flickr Underground Clone Base On Kashyyyk (-3) by Hugo, sur Flickr
-
I picked up my new B-Wing a few days ago, and after building it I was left a little underwhelmed. The overall design of the model is OK, given its size, but there was something about it that really bugged me,,, The wings. They seem out of proportion to me, too large for the scale of the ship, and it makes the final model look rather spindly. I've already modified mine to reduce the size of the stabiliser wings, and to let them sit closer to the body when folded. However, this is what I have planned (if I have the necessary parts that is): After making an LDD model of the B-Wing using the official build instructions, I've been having a bit of a tinker with the ship, and I think I've made a few improvements. Modified B-Wing .lxf file Changes... Shortened the s-foils. Redesigned the wing-tip cannons (and got rid of those irritating missile shooters). Shortened the main wing and gave it a straight edge, mimicking the UCS version. Moved the weapons pod a little higher up to make it look a little more sturdy. Altered the lower wing mounting points so that the wing is now aligned with the axis of the ship. Bulked out the body in a few places, and filled the void behind the engines. Things to do... Thicken the 'neck' where the cockpit joins the rest of the ship. Increase the size and move further forward the flare between the cockpit and the two cylinders, to match the flare on the main wing. I'm a loooooooooong way off from making anything as impressive as Jerac's Chimaera, but we all have to start somewhere .
-
Hello, I had a desire to make a "classic spaceship". And having 75176 Resistance Transport Pod it looked like a good start to make a spaceship. Then getting 70821 Emmet & Benny's 'Build & Fix' Workshop! And using at least one of my 70841 Benny's Space Squad I have most of the spaceship. But then finding a extra 70660 Spinjitzu Jay for cheap I threw him in to the set. I am saying Jay stoled the spaceship from Benny because Benny was the original pilot. The next thing you are wondering why is it called the "Mini-Beetle" first it kinda looks like a bug, second the inside reminds me of a minivan, and I couldn't think of a better name. Now for the action shot. As you can see the ship has (two photon launchers on top of the ship with two ion cannons in the front of the ship. Plus, it has a single distortion drive (you can see the space "warp" in the back). With two sub light thrusters for the extra mobility. Ok, now for the rest of the pictures. (Sorry, for any poor picture quality I took the pictures on my cellphone.) http://www.brickshelf.com/cgi-bin/gallery.cgi?f=578780
-
Heyho folks! Last weekend I started to built this litte version of a First Order Siege Dreadnought for the "IdS-MiMi 2018 - Minimize Me" contest. Not that huge and heavy like my other MOCs but still fun and engaging ;D In this album you can find more pictures and a breakdown of this tiny ship! Greetings Kommander
-
Upon receiving the 2016 Clone Turbo Tank I soon became curious of it's potential. I had seen rather negative reviews with the Tank as the subject matter, and soon became worried that I had made an unwise purchase. However, I happened upon BrickBros UK YouTube channel and soon thought of an idea. Perhaps I could turn this around. Using pieces from the Clone Turbo Tank I began work first on a Venator-Class Star Destroyer. Within a short period of time I became convinced that this particular vessel wouldn't work, so I decided to start over again and attempt a Pelta-Class Frigate due to the 2016 Rebel Combat Frigate being on my mind. Once finished and run out of plates I glared down upon my abomination and decided that I would rather see what Eurobricks may try. So here I leave you with a quandary. Imagine: The Galactic Republic ordered a shipment of cruisers from Kuat-Drive Yards to be delivered to Coruscant. Upon arrival it became apparent that there had been some sort of misunderstanding: the shipment contained only Turbo-Tanks! Instead of succumbing to dread, republic engineers decided to use the parts from the tanks to construct the cruisers they had ordered. Your Goal: (If you choose to accept it) Construct an alternate vessel using ONLY parts from the 2016 Clone Turbo Tank. This can either be done in LDD or reality. Upon completion upload an image (or more) to this topic. I suggest for the LDD creation that you use the following file: Clone Turbo Tank Sadly, due to my economic status there will be no prizes for a "winner." However, the best looking ship will most certainly join my fleet of Republic Vessels. The following vessels would be appreciated: + Consular-Class Cruiser + Pelta-Class Frigate + Aquarius-Class Light-Cruiser + Acclamator-Class Frigate + Venator-Class Star Destroyer I would share images of my failed attempt but I fear that its disturbing complexion my cause a disruption in your appetite or cause nausea. I thank you dearly for reading this long and rather odd post. I do hope that you attempt this challenge and post your own creation, whatever it may be! I wish you the best of luck, and may the alternate building begin!
-

[Instruction] UCS First Order Resurgent-class Star Destroyer
Kommander posted a topic in LEGO Star Wars
UPDATE: Instruction avaiable - at BrickVault UCS First Order Resurgent-class Star Destroyer by Kommander, auf Flickr Size: 109cm x 52cm x 25cm Parts: 7855 LEGO STAR WARS UCS FO Resurgent-class Star Destroyer Render by Kommander, auf Flickr UCS First Order Resurgent-class Star Destroyer by Kommander, auf Flickr UCS First Order Resurgent-class Star Destroyer by Kommander, auf Flickr And some instruction pages. Instruction by Kommander, auf Flickr You can find more pictures HERE Original post: Hey Eurobricks I wanna share with you my new project - a First Order Resurgent-class Star Destroyer in UCS-scale. To avoid another long time MOC in WIP Nirvana I started this time with little help from LDD. Dimensions, main frame, angles... took me about a year to set these parts. Because of the LDD file I generated instructions and and part lists for me. On the picture you can see an early version of the ship and one of the latest with much more details. For the moment only one digital render of the ship. There will be some adjustments/tweaks in the "real" version but most of it works fine for me. I already finished the main frame with the instructions... and its good! More pictures will be on flickr Greetings Kommander -
Hi Guys! It's already 2 months ago I made this MOC but I forget to share here with you so... I show you my MOC of the AT-DT! I let you watch the showcase video. And the quick scene I made for a LEGO Convention. Free PDF Instructions are available on Rebrickable : https://rebrickable.com/mocs/MOC-18202/BricksFeeder/at-dt-walker/ Don't forget to mention me if you use this design. ) Let me know what you think about! See you soon!
-

Brick Flick: Trooper Trouble: A Lego Star Wars Story
SteampunkDoc posted a topic in Brick Flicks & Comics
Just realized I haven't posted a film here in a while. Might as well change that! A Stormtrooper gets into a little trouble... My first attempt at melding live action and stop-motion animation. It was made for a compilation of funny videos that had a tight deadline, and so is a bit rushed. However, I hope you enjoy it anyway. -

[MOC] Aratech C-PH Patrol Speeder (from Solo : A Star Wars Story)
Bricks Feeder posted a topic in LEGO Star Wars
Hi guys! This is my minifig’s scaled ARATECH C-PH Patrol Speeder bike used by the Imperial Patrol troopers. It appears just few seconds in the second Starwars spin-off movie called Solo : A starters story but I very appreciate its design! :) Special Credits for the inspiration of some parts to : Luca s projects (<a href="https://www.flickr.com/photos/158356948@N03/28684534188/in/faves-150499648@N03/">www.flickr.com/photos/158356948@N03/28684534188/in/faves-...</a>) BricksStudios (<a href="https://www.flickr.com/photos/154427736@N03/28517703548/in/faves-150499648@N03/">www.flickr.com/photos/154427736@N03/28517703548/in/faves-...</a>) Showcase and Tutorial Video : Parts list : https://rebrickable.com/mocs/MOC-15136/BricksFeeder/aratech-c-ph-patrol-speeder-from-solo-a-star-wars-story/#comments I hope you enjoy the build even if it's not perfect! :) keep on building! -
Travel the LEGO® galaxy in the ultimate Millennium Falcon! Ten years ago, the 10179 - Ultimate Colletor's Millennium Falcon made its appearance. For one whole year it was the biggest official LEGO set ever. Unfortunately, only a year later the 10189 - Taj Mahal was released, deposing the beforementioned Falcon. Of course, it still remained the biggest Star Wars LEGO set ever, packing a whopping 5197 pieces. At the time I just came back from my dark ages (more info in my 75144 - UCS Snowspeeder Review) and the thought of forking out 500 euro for a LEGO set didn't even make it to the consideration phase. Two failed scam attempts later (in hindsight, they were too good to be true), I still didn't own the pinnacle of LEGO Star Wars vehicles. Around 2013 I resented not getting the 10179 so much, that I decided to start Bricklinking the parts. Several (a lot) of orders later I got most of the parts. Obviously, I skipped the riggings (80 euros each), the radar dish (60 euro) and the light bluish grey levers (1 euro a pop). I did buy black riggings for a couple of cents though. You never know what can be achieved with a little spray paint. Collecting the parts was actually half (possibly more) of the fun. After I stored the inventory in boxes I never got around to building that hunk of junk. I started working on it a year or two ago, but I never got passed the chassis. It has been taking up spacein the LEGO room for quite some time. Until recently. When I got word that I would be getting the new UCS Millennium Falcon, which is simply called 75192 - Millennium Falcon by the way, I felt the need to finish the old one, so I could do a proper comparison. Since my parts were stored with other LEGO parts it took forever to find all the pieces, so the build was actually quite tedious. Let's say I was glad that it was done. I will go into more details about both builds later. The Millennium Falcon from the saga has changed owners more than a few times, so you must be wondering how I obtained the Corellian Freighter. Well, we played a game of Sabacc and when another player thought he was winning, I countered, "Not so fast, it appears I have an Idiot's Array". I had a good feeling about that! For those of you still thinking "What the hell is an aluminum falcon?!", I recommend consulting the Wookiepedia. "This amazing LEGO interpretation of Han Solo’s unforgettable Corellian freighter has all the details that Star Wars fans of any age could wish for, including intricate exterior detailing, upper and lower quad laser cannons, landing legs, lowering boarding ramp and a 4-minifigure cockpit with detachable canopy. Remove individual hull plates to reveal the highly detailed main hold, rear compartment and gunnery station. This amazing model also features interchangeable sensor dishes and crew, so you decide whether to play out classic LEGO Star Wars adventures with Han, Leia, Chewbacca and C-3PO, or enter the world of Episode VII and VIII with older Han, Rey, Finn and BB-8!" PICTURES Normal pictures can be clicked to view hi-res versions. Whenever you see this icon, you can click the image (or swipe your mouse (or finger) from left to right) to change the image. Clicking on the left of the image will show the previous pictures, while clicking on the right side will show the next picture. More pictures can be found in my Flickr album. Pictures of the official press release can be found in this Flickr album. DISCLAIMER This set has been provided by the CEE Team of TLG. It's not my goal to promote this set. It's my goal to give you an honest opinion about it. Therefore, the opinion in this review is my own and is in no way linked to TLG. 75192 Millennium Falcon™ Ages 16+. 7,541 pieces. US $799.99 - CA $899.99 - DE 799.99€ - UK £649.99 - DK 6999.00 DKK *Euro pricing varies by country. Please visit shop.LEGO.com for regional pricing. Number: 75192 Title: Millennium Falcon™ Theme: Star Wars Released: 2017 Part Count: 7541 Box Weight: 14,4 kg (approx) Box Dimensions: 53,5 cm x 45,5 cm x 38,5 cm Set Price (MSRP): US $799.99 - CA $899.99 - DE 799.99€ - UK £649.99 - DK 6999.00 DKK Price per Part: US $0.107 - CA $0.112 - DE 0.106€ - UK £0.086 - DK 0.928 DKK Links: Brickset, Bricklink How do you start a review of a set this big?! Well, just like any other review, with the box The main difference between this box and most other boxes is that this one is ginormous! Weighing over 14kg (14,4 kg according to the freigh letter), this is by far the biggest official LEGO set box you will see for a long time. It's not very likely that TLG will produce a non Star Wars set this big and it's not likely that TLG will produce an ever bigger Star Wars set in the near future either. Of course, this is mere speculation, because you never know what TLG will come up with. Most likely, there will be a new Taj Mahal in the near future and I will have made a fool of myself with this comment, but let's wait and see how long it will hold. The box measures 53,5 cm x 45,5 cm x 38,5 cm. The width and height are slightly less than some of the other big boxes, but the tremendous depth makes up for it. I need to find some good usage for the box, since I don't want to throw this away after building the set. Maybe pack some parts and/or other LEGO inventory in it. FRONT AND BACK SIDE The front of the box isn't cluttered with marketing gimmics or any other distractions. It shows what this set is all about...The Millennium Falcon! Granted, there are some Tie Fighters flying around and in the back you can see a Tibana gas mining colony floating in the clouds of planet Bespin, but other than that it clearly shows the star of the set. Showing Cloud City leads to believe that the front art is depicting a scene from The Empire Strikes Back, arguably the best movie in the saga In case the front image doesn't convince you, the rear side of the box emphasizes on some of the key characteristics of this new UCS version. It shows several interior sections, interchangeable radar dishes, removable gunnery station and a brand new cockpit canopy element. The rumors about an interior were true after all. Albeit not a very big interior, but an interior nonetheless. At least, there's more interior space than in the previous UCS MF. If you are not paying attention, there's a fifty-fifty percent chance you will end up opening the box on the wrong side. You need to open the side with the top and side blueprint images of the Falcon. Red and green icons have been printed to show you where to cut the sealings. In one's excitement, they can be easily missed though. To be honest, I totally missed them. I was simply lucky to open the box on the right side. The other side shows a partial bottom view blueprint, along with an action scene near the Death Star and a flavor text explaining in eight different languages why this is a must have set for all LEGO and/or Star Wars enthusiasts. It says: "You missed out on the 10179, haven't you? And you have regretted it ever since?! This is your chance to bring balance to the Force. This is the prophecy. You really need to get this set. No matter what it takes. You could sell a kidney. Or one of your kids. Maybe your wife. What are you waiting for?!". If you open up the box on the right side, you will be welcomed by the instruction booklet. Correction, the enormous ring bound instruction manual. As with other luxurious products, it starts with the unboxing experience. When you pick up the manual you realise the uniqueness of this set. Not only the size of the manual, but the weight as well. It weighs almost 3kg, which is unprecedented. Most LEGO sets don't even weigh 3kg, let alone the instruction manual. This is something you probably don't want to see when unboxing a luxurious UCS set like this, a sticker sheet. Unfortunately one has been included, which means that not all parts are printed. Even though I would prefer to have printed parts, I have come to peace with sticker sheets. It's simply not feasible to turn every stickered part into a new element. One can argue that for a set like this, exceptions could or should be made. Looking at the time it took for TLG to completely sell the initial stock, I don't think that it makes much of a difference. The outer box packs four inner boxes, containing a total of 66 bags. Four bags are unnumbered and the other bags are divided into 17 stages. Cool thing about the inner boxes is that combined they show a cool blueprint-like image of the Falcon. Each of the boxes shows a quote related to one of the movies. Box 1: She may not look like much, but she's got it where it counts, kid Box 2: I've made a lot of special modifications myself Box 3: It's the ship that made the Kessel Run in less than 12 parsecs Box 4: She's the fastest hunk of junk in the galaxy UNNUMBERED BAGS These are the four unnumbered bags, containing special parts. I will include thumbnail images for the bags used in each step in the building sections. The book contains no less than 466 pages with 1379 building steps, divided over 17 stages. I expected the build to be divided over more than 17 stages, but some stages contain multiple subassemblies. I have taken pictures of some of the pages. Of course, I haven't included all the goodies. That would spoil the fun. Click on the images to scroll through the pages. These pictures were taken after building the set, which explain some dents and bruises. The dark pages are easily smudged by the way. Or click on one of the thumbnails to view a high resolution picture. For some people the sticker sheet is even more annoying than Jar Jar Binks, but I have accepted the fact that not every part can be printed. It would be cool to have a printed UCS plaque though. That would probably be feasible (TLG pretty please). I really do like the hallway stickers though. I have read that some people don't like 'em, but I would go as far to say that I love 'em. They way they give the flat parts a more or less forced perspective look works really well in my opinion. Given the part count, this set doesn't contain a lot of very special parts. However, it does contain some cool printed trans clear parts, and not to forget the re-issued 10179 radar dish and boat mast riggings. CANOPY ELEMENT This part was first seen in the Ninjago Ice Tank from The LEGO Ninjago Movie. Upon seeing this new part in that set, it was immediately trans-clear (hehe, pun intended) that this part would also be used as a canopy element for the (at that time) rumored new UCS Millenium Falcon. Looks like one of the Apollo capsules, doesn't it? Creating a Saturn V in this scale would definitely make it an even bigger set than the Falcon. PRINTED TRANS-CLEAR 6X6 DISHES Besides the printed canopy part, this set comes with two types of printed 6x6 Radar Dishes, one with and one without handle. TRANS-LIGHT BLUE RIBBED HOSES Instead of 1x2 tiles, this version of the UCS MF uses six Trans-Light Blue Ribbed Hoses to comprise the hyperdrive engine. BOAT MAST RIGGINGS Here they are, back by popular demand. RADAR DISH While it does look like the original radar dish, it's actually a different part with a different print. Thanks to @LEGODrongo01 for pointing out the different print. All the new parts can already by found in the Bricklink Inventory. The part list is spread out over four pages. The previous UCS Falcon had only a two-page part list, which shows that the variety of parts in this set is way higher. Click on the image to scroll through the pages. Or click on one of the thumbnails to view a high resolution picture. The side of the box shows the array of included minifigures. Not counting the two Porg and BB-8, you get seven cool minifigures. Chewie and C3PO have been around for a while and they don't appear to be aging Even though a relatively new design on both figs, we have seen these before. The other five minifigs are divided into two crews. One for The Empire Strikes Back version of the Falcon and one for The Force Awakens. Cool thing about the crew for The Empire Strikes Back is that Han and Leia both have respiratory masks, used when they venture outside the ship, looking for Mynocks. Younger han is looking as slick as he does in the movies. Leia is ever so stylish, even in her thick jacket and gloves. The second version of the crew is the one we have seen in The Force Awakens, and it's comprised of older Han, Finn, Rey and good old Chewie. Chewie has taken a liking to Rey, which provides some continuity after certain events in the movie. We will probably see more of that duo in the upcoming installments. For certain in The Last Jedi, which will air in a couple of months. The picture belows shows the line-up of the actual figures. Except for Chewie and C3PO all of the figs have a double side head, revealing another facial expression or setup on the back. This picture shows the alternate faces. It isn't really sharp, sorry about that. As I mentioned earlier, I have built the previous (10179) Millennium Falcon recently. I didn't really enjoy the build. Part of this was because I had to lookup every part in a bigger inventory, which was very time consuming. Another issue was that I didn't really like the way the model is built, loosely attaching the panels to the frame. All in all, I experienced it to be a tedious build. I sure hope the build is better executed in the new version. STAGE 1: FRAME Bags: 6 (and the beams from the 2 unnumbered bags) Build duration: 2 hours (approx.) The frame is reminiscent of the old (10179) chassis. The designer more or less copied the way the 10179 was built. The reason behind this is explained in the instruction manual, but it basically boils down to "never change a winning team" or winning design in this case. The main difference between the two versions is that the new version uses more colors than the old one. I was expecting the chassis to be a complete color vomit, but that's not the case either. Using colors like tan, dark tan and brown, the chassis has a Steampunk feel to it. The 10179 used a lot of 3L Pin with Bush in red and I was surprised to see them included in light bluish grey. I was expecting them in red again. It somehow makes sense, also because red 3L Beams are used in red. It doesn't really matter since you won't be seing the pins anyway. A relatively new part, which hasn't been used in the 10179, is the 3L Pin Connector with 2 Pins and Center Hole. This part is used to keep the Technic Beams tightly together and provide rigidity to the frame. Click on the image to see a comparison between the old and new frame. STAGE 2: LANDING GEAR Bags: 3 Build duration: 45 minutes (approx.) During this stage six of the seven landing struts will be built. The last one will be built during a later stage. The image below shows the subtle differences between the new (left) and old (right) landing gear. The main difference is the 6x6 Webbed Radar Dish, instead of the 4x4 Round Brick. Looking at the actual Falcon from the movies, you can see that the 6x6 Dish is a better representation of the right scale. Comparing the old and new landing gear, it's clear that both models are built using the same scale. The size of both struts is identical. When you click on the image below, you can attach the landing gear to the frame. When you look at the attached landing pads, you can see that the vehicle is actually resting only on the middle axle. Turning the model in the upright position reveals the frame with six of the seven landing struts attached. STAGE 3: DEJARIK CONTROL ROOM AND FRAME ADD-ONS Bags: 5 Build duration: 1 hour 45 minutes (approx.) This stage introduces the first minifigures. Chewie, C3-PO (human cyborg relations) and two porgs make their appearance. Unfortunately they are in a bit of a predicament. The porg can't reach the Dejarik table, Chewie wants to blow it up and C3-PO needs to do some construction. Always wear your helmet by the way, safety first! CONCEALED CANNON The starboard bow bay of the ship contains a concealed blaster cannon. The guns pops out when you slide the panel to the side. The two pictures below show the mechanism. MAIN HOLD In contrast with the 10179, this model features several interior areas. One of them is the main hold which features a seating area with a Dejarik holographic game. This game was introduced in Star Wars IV - A New Hope. The main hold also features an engineering station with turning minifigure seat and a doorway with passageway decoration. Sorry if you have a bit of OCD, like me. This picture is killing me. My fingers are itching. The designer chose to add the Dejarik table early on, so when you need a break from building, you can play a game of holographic chess The fact that you add something of an interior early on in the build is really joyful. The 10179 was a rather dull build and adding these little rooms to the model, makes the build lots more enjoyable. I absolutely love everything about the main hold. The seating area is very cleverly built, the turning seat is properly built and not just the standard minifig chair. I also love the passageway decoration, with the forced perspective. It gives you the feeling that the room is bigger and that it's connected to other parts of the ship. It even has the combat remote training helmet, which Luke was using during his training. He failed miserably, until Obi-Wan put down his visor and let Luke use his senses to counter the combat remote. Thumbs up for the main hold. The main hold is actually hanging underneath the frame. This is a very practical solution to have an interior, while maintaining structural integrity. After adding the forward landing strut, the model looks like this. STAGE 4: REAR COMPARTMENT AND FRAME ADD-ONS Bags: 4 Build duration: 1 hour 45 minutes (approx.) After building the main hold, we continue by building the rear compartment, which is the engine room. Even though this room isn't very big, it packs all the important details, like the hyperdrive, computer consoles, two doorways and two hatches leading to the escape pods. The room also contains the hidden floor compartment where Rey and Finn try to hide from Han and Chewie. The compartment is hidden underneath the 2x4 Technic Plate with 3 Holes. Unfortunately, Han knows his own ship like no other, so they were easily found. Like the main hold, this room is attached to the frame using 3L Pins with Bush. Basically the compartments are hanging underneath the frame. This proves to be a proper mechanism, since they are well secured. I am very happy with both interior compartments. Some of you might feel disappointed that it's not one big interior, but given the size of the model, the frame should be very rigid. There's a trade-off between rigidity and playability. The designer managed to pack a lot of iconic details from the movies into this model. Han and Leia have joined the party. They are already inspecting the Millennium Falcon for Mynocks. Han is sure he heard one near the bottom of the ship, but they can't seem to find it. Makes you wonder where it is hiding. STAGE 5: SRB42 SUBLIGHT DRIVE Bags: 4 Build duration: 1 hour (approx.) During this stage the stern section of the vehicle is built, including the sublight drive. The SRB42 was a sublight drive manufactured by Girodyne that equipped the CECYT-1300 light freighter. The engines formed a long strip on the stern of the vessel that became known as a "wide bar" engine. I have never been a fan of the Boat Mast Riggings used to build the grill for the wide bar engine. It feels like a cop out. So I was very surprised that the new versions uses the exact same solution. There's only one good reason for using the riggings again and that's giving the fans the opportunity to get a hold of another set for their Bricklinked 10179. If so, thanks TLG, I really appreciate it. If not, I would be very interested to know why these parts have been used again. STAGE 6: FRONT MANDIBLES Bags: 4 Build duration: 1 hour (approx.) The ship is slowly taking shape. We are still missing the iconic front mandibles, which are used to lock the cargo payload. The mandibles hold various sensors and an anti-concussion field generator. There is also the freight barge clamp so the YT-1300 can act like a barge or tugboat and push around large cargo. Also on the port mandible there is the shield generator and projector. On the inner side of the mandibles there is a freight loading arm. At this point it's getting increasingly more difficult to take a proper photograph. STAGE 7: MANDIBLE BOTTOM PLATING Bags: 3 Build duration: 45 min (approx.) When building the 10179 this was the point after which it was mostly building panels to cover up the frame. Something tells me that's no different for this model. I have a bad feeling about this STAGE 8: DURALOY PLATING Bags: 3 Build duration: 45 min (approx.) Plating, plating and more Duraloy plating, rated 102 RU (Resistance Units). The bottom panels are quite hard to attach. The pins don't easily align with the hole, so it needs some pushing and pulling. In hindsight, one of the center panels was not entirely in the right position, giving the grey minifig baseplate not enough room. Problem solved, however the ship took some damage from lifting it and bumping it into the slanting cealing I have. Nothing the Falcon can't handle though. Roughly half way the build and we have spent around 10 hours building. So the estimated building time at this point is around 20 hours. STAGE 9: MANDIBLE TOP PLATING Bags: 3 Build duration: 1 hour (approx.) After building the bottom mandible plating, building the top mandible plating feels somewhat repetitive. Even though there are subtle differences, you are more or less building the same panel four times. On the bright side; the plating and mandibles do look a lot better than the previous version. So, when you are done with the repetitive section, you will be filled with joy. The hunk of junk is starting to take shape. The front side is mostly done and the greebling looks very cool. STAGE 10: BOARDING RAMP AND BOTTOM LASER CANNONS Bags: 5 Build duration: 1 hour (approx.) The boarding ramp features a neat little Technic mechanism, which allows the ramp to be lowered and raised. Other than that it's a pretty basic ramp. You are clearly looking at the bottom side of a plate. It's not a big deal, but it would have been nice to see a more studless solution. This section is fitted underneath the vehicle and it packs the bottom Quad Laser Cannons. The shape is definitely rounder than that of the previous UCS version. Apparently, we did make some progress over the last decade STAGE 11: ESCAPE POD CORRIDOR PLATING Bags: 3 Build duration: 30 min (approx.) One of my favorite improvements over the older version is the hull plating of the escape pod corridors. There's some confusion about the number of escape pods and where they are positioned. The floor plan has changed several time during the course of quite a few years by now. With lack of a definitive conclusion, I assume that the Falcon has two escape pods, located at port and starboard side of the vessel. Let me know if you think I am an noob, making this assumption One thing that was slightly bugging me after finishing the complete model is the visibility of the tan plate. You will cover up the model with several panels, but the tan 1x2 part of the plate (the actual plate is bigger) is clearly visible. It wouldn't hurt to cover it up with a dark bluish grey tile, or even making the plate ifself dark bluish grey. STAGE 12: REAR PLATING AND HEAT RADIATING VENTS Bags: 4 Build duration: 45 min (approx.) Since it's the fastes hunk of junk in the galaxy, the engines will get rather hot. To prevent extreme temperatures, the Falcon has heat radiation vents at the back of the vehicle. Here you can already see four of the six vents, installed by no other than Big Deal himself, with a little help from BB-8. This picture also clearly shows that there is ample room for another engineering or cargo section. STAGE 13: MORE REAR HULL PLATING AND MORE HEAT RADIATING VENTS Bags: 2 Build duration: 1 hour (approx.) Closing up the starboard stern section of the hull. The port stern section of the ship will be covered by a removable panel, allowing you to show the engineering section. The same goes for the panels covering the main hold with the Dejarik table. The hole covering the main hold is fairly small, so it's hard to be able to appreciate all the details in the room without having built the model. Of course, your friends and relatives will already be impressed by the rest of the model, so it's not that big of a deal STAGE 14: FRONT CENTER AND SIDE HULL PLATES Bags: 2 Build duration: 45 min (approx.) During this stage you will use the parts from two bags to make the front cross-shaped hull plating. I forgot to take a picture when I had built it, so here's one from a later stage. STAGE 15: ESCAPE PODS AND HULL PLATING Bags: 3 Build duration: 1 hour (approx.) One of the most significant changes, compared to the 10179, are the escape pods. Using several modern pieces allows for making shapes, which were impossible back in the days. While these new pods look way better than the old ones, I do think that the actual pods should be a hybrid version of the old and new ones. The new versions omit the tapered shape of the pods, clearly shown on the "actual" Falcon. That being said, I do love this design, together with the attached corridors. STAGE 16: COCKPIT AND CORRIDOR Bags: 4 Build duration: 1 hour 15 min (approx.) Nearing the end of the build, it's time to create the iconic cockpit section. Some of might argue that having basically two parts to represent the entire cockpit is not what LEGO is all about, but I beg to differ. Having such a detailed model requires a well formed cockpit. And these new parts allow for that. And the trans-clear one is printed, unlike the one used on the X-Wing. All things considered, I think this is a great solution. Did you know the cockpit is actually made of a material called Transparisteel? The cockpit canopy can be detached, which allows you to seat the crew in the otherwise very basic cockpit. No fancy stuff going on in there. No sign of the faulty compressor, Rey expertly circumvented. The cockpit allows four people to be seated. However, occupying four seats is only possible when you don't have any objections of someone invading your personal space, it's quite cosy. The better setup would be to have someone "riding bitch", like Chewie for example. As you can see the cockpit can actually be closed with a crew of four. The rounded corridor to the cockpit is nothing short of magnificent. This is arguably the best improvement over the old version. The shape is so much better than the plates and hinges solution. I am still not a big fan of the way you need to slap on all the panels though, but given the circumstances, the ones on this model do fit way better than the ones on its predecessor. STAGE 17: FINAL PLATING, GUNNERY STATION AND RADAR DISHES Bags: 4 Build duration: 1 hour 15 min (approx.) And now, the end is near. And so I face the final curt....building stage! The last stage is used to finalize the model, building the top quad laser cannons, operated via the gunnery station. One of the two 6x6 trans-clear printed radar dishes is used to provide some visibility. The inside of the gunnery station is very plain. Since this section is easy to open and it gives you a wide view of the interior, it could do with some extra greebling or decoration. You will also be building two versions of the radar dish. After Han was captured on Bespin, Lando took command of the Falcon once more to search for him, and later flew the ship at the Battle of Endor, where it entered the Death Star II and destroyed it from within. During this battle, the starship's circular military-grade sensor dish was knocked off as Calrissian piloted it through the Death Star's interior. Other than that it's cool that you can switch between the two versions, it's extremely kind of TLG to include the old style dish. This is a nice gesture, whether on purpose or not, towards the ones who have Bricklinked the old Falcon and skipped the unique parts. Be aware though, that it's not exactly the same part. It's a new part with a new print. As it turns out, Han and Leia were looking in all the wrong places. The Mynock is hiding behind the UCS plaque. FINISHED MODEL There she is...the new and improved YT-1300 492727ZED. Isn't she an ugly beauty! It measures a length of (approximately) 84 cm, it's 56 cm wide and 21 cm high. Total building time was approximately 17 hours, which is way less than I anticipated. Having numbered bags makes a world of difference. For Technic I usually account for 250 parts per hour and I know I do more with "regular" LEGO bricks. Having numbered bags result in doing around 450 parts per hour, not rushing things. I still like to take my time and try to enjoy the build, even when I am writing a review. And let's be honest, you don't want to rush building a unique and expensive set like this. Take your time and enjoy. Speaking of enjoying the build; even though this model is constructed in more or less the same way as the 10179, I found this build much more enjoyable. Part of it can be ascribed to not having to look ages for some of the parts, although some people actually love this. The interior sections are quite fun to build and they do add some identity to the model. Other than that, it is still mostly building panels. Building this model is definitely not as much fun as building a Modular Building for example. However, the end result is very rewarding, which kind of makes up for that. The combination of studded and studless design is spot on. At first sight I wasn't very enthusiastic about the design. I figured it looked to much like the old version and it should have been more studless. I even remember being a tad disappointed when I saw the first pictures. I wasn't even sure it was the real deal. However, when the press release images appeared and I looked at it in more detail, I realized that the design is actually very good. There's a great balance between studded and studless, which accounts for the Falcon still being a hunk of junk and not a very modern sleek looking spaceship. FRONT MANDIBLES Like the radar dish, the front mandibles can be altered to depict the later version of the ship. And by later I don't mean the one in The Force Awakens, but the one in The Last Jedi. Apparently, something is going to happen and the mandibles play an important role in it. Will it be tugging another spaceship? Who knows?! Well a lot of people do know, but I am not one of them. So, like most of you, I need to wait until the movie comes out. Part of me was hoping for a different engine setup, but this is not the case. Well, the 1x2 trans-dark blue tiles have been replaced by trans-light blue hoses. At first I thought it used 1x1 trans-light blue rounded bricks, which would immediately explain the high part count, but to my surprise only six hoses were used. Here's a picture of the entire crew posing in front of the ship. Old Han must feel weird, looking at the younger version of himself. In one of the most recent trailers there was a Porg in the cockpit of the Millennium Falcon. I have a Jar-Jar feeling about it. I don't mind some comic relief, as long as it's not overdone. Let's hope for the best. Porgs were an avian species native to the planet Ahch-To, where Jedi Master Luke Skywalker made his exile in the years following the Battle of Endor. The creatures, who dwelled on the cliffs of the island where Skywalker lived, could build nests and fly. Baby porgs were known as porglets. LEFTOVER PARTS As you can see, the leftover parts mainly consist of the usual smaller parts, with the long tubing as the exception. Yes, it's normal to have a spare. If you have any other spare parts than these, you should probably check the manual to see where you missed a part. COMPARISON WITH 10179 Inevitably, this model needs to be compared with the 30 year anniversary edition. I have already done some comparisons in this review and now we will take a look at both finished models. Upon glancing the images, one might think it's the same model. Some people didn't even realize the second version was the older model. Of course, there are some things that definitely give it away. First of all, the new version is a bit more colorful. The dark tan and green parts, placed on the hull here and there, provide some appeal to the design. I do like the fact that it's a bit less dull to look at, but from an accuracy point of view, one can debate whether it isn't too much?! Unless, the falcon will be covered in mud in The Last Jedi. Then it would perfectly depict some of the mud still attached to the hull. I do admit that the overall look is way better with some color on the model. Another difference is the use of more studless and more rounded elements. This provides for a more modern look, while still maintaining the characteristic scruffy look of the Falcon. And of course the cockpit section, with the molded canopy part, is significantly different and way better looking. While the old version does have the tapered forms for the escape pod corridors, I do like the new design better. In 2027 we will probably get a version combining the two designs to make the perfect shape Another difference is the way the engine exhaust vents are made. The new flat round tiles provide a nice smooth surface, while the old one was more studded. It's also clear that there has been a major improvement in the greebling. First of all, there's more variation and secondly, it's better executed. The holes in the mandibles are slightly smaller, but they aren't round anymore. So, the hole size is more accurate, while the shape isn't. All things considered, the old Falcon didn't look bad at all, but the new version is more up to par with the contemporary building techniques and looks. It's the logical evolution. This review is already very picture heavy, so I have chosen not to include a gazillion pictures of the old version as well. But if you are interested, you can click this link to open my Flickr album with some additional pictures, also of several building stages. COMPARISON WITH THE MOVIE VERSION It's nice to see a comparison with the 10179, but that's actually not as important as a comparison with the movie version. After all, it's modeled after that. Having discussed the cockpit and escape pods already, I like to focus on the top view, representing the actual shape of the vessel. By clicking or sliding the images you can reduce the opacity, revealing a blueprint I found on the line. I am not sure who made it and how accurate it is, but I have compared it to several other blueprints and models, and it seems to be accurate. Thank you unknown internet user for letting me borrow your picture The overall shape and size do match quite nicely. The mandibles have a slightly different angle, but there's only so much you can do with LEGO. Given the fact that LEGO basically only has a couple of angles, I'd say it's a job well done. The shape and location of the gunnery station is spot on. The engine vents and the equipment access bays aren't placed in the proper position though. The equipment access bays aren't even round anymore. The openings are smaller than in the 10179, but the shape isn't very accurate. To be clear; for me this is considered nitpicking, but I wanted to point it out anyway. Other than some minor inconsistencies, I do like to express that nothing in the design seems way off or is bothering me beyond belief. Well, except maybe for those tan plates I mentioned earlier hehe. Admittedly, at first I was somewhat disappointed and thought the new Falcon was underwhelming. Using the boat mast riggers again and being the same scale, I figured it was more of an evolution than a revolution. However, upon closer inspection of the hi-res press release images, I soon figured that there was more to it than I initially figured. The rumored and highly anticipated interior was indeed present. Albeit not a very big interior, but an interior nonetheless. The sheer size and fantastic looks of the model are nothing short of spectacular. This set being more of an evolution instead of a revolution actually makes sense. But in terms of building the model, I was hoping for a somewhat different setup than the previous version. Of course, it didn't help that I had built the previous version only days before this one, which emphasized the similarities. That being said; I did enjoy this build much more than building the 10179. The two interior sections were a very important aspect of enjoying the build. TLG managed to pack a tremendous amount of detail in both rooms, depicting lots of iconic aspects from the movies. I also like the sticker simulating the depth in the hallways, a forced perspective if you will. This gives you the sense that you can actually walk around in the ship. Well, that a minifig could walk around, of course. I know the part count is already very high, but how cool would it have been to have two rooms on the other side as well. Possibly two simple storage bays. The set is well built, but like the older Falcon, it's mostly a matter of slapping panels onto the frame. The finished model feels a bit more sturdy than the previous one, but the panels are still loosely connected, so they are not actually attached to the vehicle. They do seem to fit better, but you still can't hold the model upside down without panels falling off. Not that it's necessary to do this, but if you want to hang it on the wall, you will need to come up with a solution. There's always lots of debate about which minigures should have been included, instead of the ones TLG decided to put in the set. For me personally, I couldn't be happier with the setup in this set. The possibility to switch crews is very cool. I'm really taking a to the new crew, so I will definitely display it with the new ship setup and new crew. Maybe I will even put it in a display case and build a Jakku setting around it. For now, I have decided to like the two Porgs. Maybe I will revise this statement after seeing the new movie. The color vomit is actually not too bad in this set. I expected a lot more different colors used in the chassis, but the designer kept it nice and clean, using different shades of tan, combined with some bright accents. For me the tan color works really well in the chassis. Except for the two plates that is I never imagined I would bring this up in a review, but the size of this set can actually pose a problem. Usually, I disassemble my sets, especially the Technic sets. I do like to keep some of the UCS Star Wars sets built and I do have some display space behind my desk. This set will fit that display space, but if I use a display case, I need to find another place for it. But where?! I have the big Technic Porsch on my desk at work and I was contemplating on putting this there instead. That way I can look at it for approximately 40 hours a week. That's more time than I see @Kitty Not to mention the second (old) UCS Falcon I need to store/display somewhere. First world problems, I know. But it can seriously be an issue to give the model the proper display space it deserves. I have tried sneaking it into the living room, but somehow she noticed. Not sure what gave it away. Let's not pretend that we don't need to discuss the most important aspect of this set, the price! For some people price isn't an issue, but the majority of the fans will scratch behind their ears a couple of times before forking out this kind of cash. On the other hand; seeing the queues at the LEGO Brand Stores at midnight, makes you wonder if price really is an issue. There seem to be lots of fan willing to part from their cash in favor of getting this unique set. Not all of them are genuine fans, but this review is not the place to discuss that. Fact of the matter is that TLG sold out quickly, even at this price. Obviously, I was lucky to get it for the review, but otherwise I would have definitely purchased this set. This might sound a bit stupid, but this set isn't more expensive than the Snowspeeder, when it comes to price per part. Yes, it is expensive, but it's a huge number of parts. It's not an overpriced set. At least not more overpriced than other Star Wars sets. TL;DR To conclude this review I like to point out that this set is a must have for every Star Wars fan, even if you are only a casual LEGO fan. The biggest LEGO set ever released respresenting the most iconic ship of the Star Wars universe! I absolutely love the looks and the inclusion of the interior sections. The range of minifigs is spot on and the set is an absolutely eye-catcher. I rate it: 9 out of 10 MINI CONTEST Escaping from a fleet of Imperial ships, Han Solo, Chewbacca, and Princess Leia fly the Millennium Falcon into an asteroid field. Landing inside an asteroid, the crew wear breath masks to brave uncertain atmospheric conditions outside the Falcon. Soon they discover mynocks, energy-feeding parasites, chewing on the ship's power cables. As the asteroid begins to rumble, they quickly find that they are actually inside the gullet of a huge space slug. This is a scene from The Empire Strikes back. The picture below shows the Space Slug as seen in the movie. TLG has released a promotional LEGO set depicting this scene. You have a chance to win one of these rare promotional sets. What do you need to do? Tell us what you think of the new Millennium Falcon and post a mini build in this topic of your version of a space slug. It doesn't need to be this space slug, it can be any space slug. We're not taking this too serious, so by all means, go for a fun build. You will have at least two weeks to post your build. After two weeks I will choose a lucky winner, possibly two POLL Unfortunately, It's likely that the poll still isn't working. I would be great if you can express your opinion in a post in this topic
-
[pid][/pid] 253B Hi everyone, I have just updated my Napoleon's La Grande Armée. It contains more than 225 minifigures, including 130 regulars, hussars, grenadiers, artillery men, heavy cuirassiers etc. I hope You'll like it. More photos: jackdaw2211, on Flickr. army10 by jackdaw2211, on Flickr army4 by jackdaw2211, on Flickr
-

[MOC] Microscale Republic Gunship with Video and Instructions
Guy smiley posted a topic in LEGO Star Wars
Hey guys! You may have seen this build on my photostream, or The Brothers Brick, but I thought I would post it here as well so the Eurobricks exclusive crowd would get to see it as well! I want to be more active on other forums besides Flickr this summer too. The nose decals are by Tbone_tbl on Flickr, I found them on MOCpages here: http://www.moc-pages.com/moc.php/72865 I added the door designs and sized them correctly. I made a YouTube video on my channel that showcases the models and shows how to build them check it out here: Thanks for looking! -
As a long time Star Wars fan and Eurobricks lurker I’ve been massively impressed with some of the work coming from designers to then be published on BrickVault.Toys and have the upmost respect for BrickVault for expanding their offerings in this way - Having seen the great selection on offer I came to Eurobricks to try to scout out some of the designers and their work but found than other than, Jerac’s incredible Tie Fighter pictures and the discussion thread regarding the UCS Sandcrawler made by the fantastic CaveGod there was little relevant threads and I wanted to find people who had bought directly through there website, how they felt about the designs and instructions. For me personally I’d like to take on The Ghost and Tie Fighter collections and would love some feedback from people who are going through the process of building or have already built using these instructions and how the model sits. I created this Thread as a place where instructions and designs from Brickvault could be discussed as I know they are expanding there Star Wars Range soon as mentioned in a recent LiveStream, if the mods feel like this discussion can he held elsewhere or there is already a topic for this please feel free to close this thread. I am looking forward to hearing from you and if any of the designers or BrickVault see this post I’d like to say a massive freaking congratulations on expanding the opportunity for consumers to own new and exciting models :)
-

[WIP][MOC] Echo Base Hanger Display for UCS Millennium Falcon
JangoFett140 posted a topic in LEGO Star Wars
Not one to start small for a few weeks now I've been working on flushing out the Echo Base Hanger display I want to build for my UCS Millennium Falcon. I've been planning this since the set was announced but couldn't really start till I had the set in hand to base everything off. It will be in a glass coffee table I'll be building to display it. The planned layout is currently 47.5" by 41.75" but I may go to 47.5" x 47.5". I'm going to use Stricklybricks 50x50 baseplates with one set getting trimmed down. I'm trying to be as accurate as possible and get all the little details I'm finding as I research that I haven't seen before. This will also display some of the rest of my collection so the ships inside will be a mix besides the Falcon. My 99 X-Wing and probably one of Cehnot's beauties and 4 different official speeder sets spanning the years. I'm using Migui94's Falcon as a placeholder as I work to confirm sizing in addition to the physical test layout I have set up. I see that last week Cehnot also started basically the same project with similar goals but he is going for the whole hanger while I only have room for some of it with size limitation. Can't wait to see his take shape and maybe collaborate on a few elements. I'm building in Stud.io first since I don't have the money to start buying all the bricks and figure it out by physical trial and error. So to get started with where I am at here is an over view of the layout. I have a lot of detailing to do on the walls but I've been waiting till I had the structural strength and sizing dialed in first as I kept tweaking. I originally had 2 full bays but they wouldn't hold an X-Wing so I widened it and also ended up raising them to fit the vents. This top down view with the yellow fence shows the 41" width. and the potential space if I expand to 47". I'm going to curve the wall behind the Falcon some more but I'm not going to go all the way around to keep the sides of the Falcon visible through the sides of the table. This front view of the bay shows the vents in the top of the bays. My current thought was stickers to detail the vents but i will probably revisit them to look ate a brick based option but scale is a limit here. The Cat Walk for the X-Wings is an item that has been done but lacking in detail. I used Enderman eye plates for the side detailing. The current support beam X cross braces are temporary. After much thinking and tinkering I decided to design and print custom pieces to go there. The 3L bar on top will be cut in half to finish the top rail on the ends. I do like Cehnot's top rail better though and may try to rework mine based on his. Some small detail builds I have are the (quite silly) Treadwell 1016 droid briefly seen twice (somehow it gets on top of the Falcon with treads...). I also have a fuel tanker cart seen between the Falcon and the X-Wing. The floor light took days to get the scale right and try to be easily lit from below. The plan it to get vinyl stickers for the sides to cover the trans-clear plates then put an LED under them trough a hole in the baseplate. Not shown here is that the front 1x2 plate is clear while the 2 under the slope grills are trans med blue to get the right light out the back. I have lots more to do but finally felt I had enough to start sharing. Any suggestions on how to improve something are welcome! I will also be overhauling the Falcon itself to be more ESB accurate. Haven't yet decided on adding an interior since it will be in a closed display. -JF140/Cody -
Introduction; This MOC is my first attempt, specified in landscape, of this size. The Story; "... In a galaxy far far away, somewhere in one of its corners, there is an unknown and isolated planet. In the center of the area where life has been developed, lies its oldest structure. A stone column with unknown carvings. But this is not the only peculiar thing about it. Every year, it lights up on its own and an abrupt hum is emitted. The next moment, something magical is happening! It's like the whole planet is coming alive - a heady aroma is overflowing everywhere, the flowers bloom, animals wake up and everyone enjoys this magical moment. This day has arrived, and all three tribes of the planet have gathered to celebrate the day of life. Everything rolls pleasantly, until a clank and a thunder shakes the calm atmosphere that prevails ... " 1. Honoring the Monolith MOC by George Patelis, on Flickr 2. Crashing Site 3. Crash Crater 7. The Ceremony 8. The Stream I am looking forward for your comments! You can find more pictures of my creation on my FlickR
-
From Twilight of the Apprentice: Here's a *mini* playset inspired by the climatic duel at the Sith Temple on Malachor - only Vader and Ahsoka's part of the duel for this one. No Inquisitors or moving platforms. I only used spare bits and scraps from my depleted brick stock, so that's why the build is kinda small and not really accurate with the real exterior form of the temple. If I get more black slopes for the base I can probably finish it someday. For now, it gets a great Star Wars location represented on the shelf. The SW Rebels shelf: sadly lacking in location playsets. Sorry for the quality of these snaps, my lightbox is in the shop. ;) So we've got part of the base of the temple leading to the tip of the top where there is a bit of Tron-style redness. A couple of ground features: a rectangular slab and one of those petrified black figures. Would look nice with three or four more similar features surrounding the temple. The tip of the temple lifts off revealing a very small play area, only enough to fit (cram) Vader and Ahsoka in there. There's a little Sith holocron attached to a 2x2 plate with stud in the very middle. It's a free build. I wanted to keep the color scheme limited to match the temple from the episode. Just black, dark red and red with trans-red. I used a bit of purple for the ceiling of the top of the temple... in the episode there's this awesome purple glow that coats the room when the obelisk starts sparking up during the duel. However I'm not satisfied with the application of the trans-red features here and will be trying to re-jig those over time. Maybe there should be more grills and they should be placed in rows for maximum Sith-Tron effect. Maybe someday we will see a really intricate and huge MOC based on this temple with all the trap and stuff with Maul, moving platforms, etc. For now I just wanted a space to display Vader and Ahsoka together from (A-Wing vs Vader's TIE) together. I also really wanted to place the obelisk (which speaks to Ezra and Kanan) but it just wouldn't fit at this reduced scale. I did manage to get the Sith holocron in there, something for Ezra to take. TLG has poisoned me into adding the obligatory play features! Feedback of any kind for this little build is encouraged, but I've even more stoked to see someone else take a stab at this scene/playset. Since Rebels is ending Monday, now is a great time to pay tribute to a series that gave us some great new Star Wars builds to play with.
-
Hi, I'm Jake and I just launched a Kickstarter campaign. We're looking to gain backers for our project, which is to create one-of-a-kind figures for people to enjoy! We do star wars figures too if you have a design that you would like printed.
-
Hey Guys, This is my first post on the site and I'm looking for some feedback on my work in progress Crait MOC. I started prototyping a few hours ago and started on the trench. I would appreciate any feedback. Thanks, Baylez, If you want higher resolution pictures head to my flickr @, https://www.flickr.com/gp/147808246@N03/R09PD6
-
DEAR LEGO STAR WARS FANS!!!! If you have found your way to this account, you are either interested in the world of LEGO Micro-building... or you just clicked on a wrong link somewhere and are now very surprised to be surrounded by these tiny marvels of creations... or not. If the former is true then, welcome. In 2011 I received my first STAR WARS Advent Calendar for Christmas, and was blown away by the sheer ingenuity and accuracy capturing the looks of iconic ships in truly micro form. Naturally, I had to have a go myself! I built a few... I was pleased... I built some more... and here we are nearly 6 years later, and I am still building them. I began by reading my first LEGO STAR WARS Visual Dictionary (DK) and building a micro of EVERY SINGLE SET IN THE BOOK! With that now exhausted, I moved onto the 2014 edition with more sets... I built all of those too. So now I just build a micro of every new star wars set that has, is, or will come out since 2014, amongst other iconic and less well-known ships from STAR WARS 'non-canon' such as the Old Republic, Freemaker Adventures, Yoda chronicles to name but a few. With a back catalogue of over 270 mini micros and counting, this truly is the World's largest Encyclopaedia of STAR WARS micro kits. Enjoy! -- JamesArts It would mean a lot to me as a budding MOC builder if you checked out my flickr: https://www.flickr.com/photos/151467275@N04/albums and my YouTube Channel (JamesArts Bricks UK): https://www.youtube.com/channel/UCmYOMZz6DyvM1euY2qrRfpA/featured?disable_polymer=1
-
Been working the past few days on a small, simple Y-wing. The idea is that, instead of spending nearly $150 on 3 TLG y-wings I could instead design my own, cheap versions for army building. The plan is to, at Christmas, open up a Bricklink package and have the pieces for three of them, which is why they have to be simple and inexpensive. In total there are three: One normal-sized vessel, one slightly smaller and stubbier, and another that I made to resemble a Hasbro Y-wing toy for a battle pack idea. However, I can't decide on which one to mass produce. Any suggestions would be great, and please, help me decide! #1 is the battle pack. #2 is the normal-sized one. #3 is the slightly stubbier one.
-
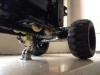
[TC11] Wheeled Scorpion
PKW posted a topic in LEGO Technic, Mindstorms, Model Team and Scale Modeling
Hi all, i've finally started my tc11 entry, i was playing around some building techniques i've improved on all my project and i initially wanted to build a robot with a razer like drive (omniwheel at the back and normal wheels at the front) but i found that drive inefficient and with a lot of friction, so i decided to built the "most compact 4x4 rubber-band powered flipper + lifter combo " and i'm not sure how it will end, but i came up with a concept chassis (it has working drive and lifting wedglets and it comes from the first idea of my entry (a sliding disk bot, but there are too many spinners here)), the problem is that i need to fit there the reloading motor (XL) the battery box and the two receivers/sbrick and i'm not sure i can (mainly because i've built a lot of compact robots and there were a lot more space than in this one) so i may came back to design a more efficent 4wd omni+standard drive and have a bigger footprint but i'm not sure, meanwhile (i'm currently building the mechanisms) enjoy the concept: drive: 2 XL motors, 4WD with friction gears main weapon: rubber-band powered flipper v2 (hoping for 2hg flipping, before it was ~1) reloaded by and xl motor secobndary weapon: lifting wedglets powered by and M motor (no electronics here) current size: 26x27 stud, with retracted weapon(battle position)