Search the Community
Showing results for tags 'scale'.
Found 81 results
-

[TC25] 42069 Extreme Adventure - 2/3 Scale
Zerobricks posted a topic in LEGO Technic, Mindstorms, Model Team and Scale Modeling
I chose this set, cause it's one of my favourite official sets, I really like the styling, functionality and details @grohl managed to cram into it. Started working on this idea yesterday in LDD, currently some 50% done, please note that not all colors are defined yet. It will feature all of the functions from the original 42069, here you can see the fake engine: And of course, the intricate door opening mechanism which I still have to test IRL: Still have to finish the tent-lifting mechnism, rear slide-out drawer and the rear doors. The only issue was with that I had to replace the purple with another color, so I chose Dark Azure, but other than that so far so good. -

[MOC] Case QuadTrac 620 & Elmer HaulMaster 2000
mktechniccreations posted a topic in LEGO Technic, Mindstorms, Model Team and Scale Modeling
Hello guys, few days ago i finished and released my latest MOC. And here i want to share it with you and it a bit more technical aspect of it. if you are interested. (My english may have few errors) Main one is the tractor, as you can see its Case QuadTrac 620 articulated tractor, aimed for 1:17 to match with trucks and other farm machinery, mainly eric´s if there is collector who appreciate that. but this scale is also big enought to pack everything needed and look good, and small enough for not needing large uniform boring surfaces. On the outside it may look like pure system thing, but on the inside its packs 6 PF motors. two of which are L motors for drive, 3x M motors, two for sariel.pl pneu/switch combo (two independend systems) and third is in the rear of the body for PTO output. and last is standard servo which uses opposide steering rack system for quick response in oposite of standard linear acctuators, this system is in my opinion even more compact, reliable and more enjoyable to play with. However if exposed to very large resistance it may throw timing off. (i dont recomend steering while stationary on carpet or floor). Secondary features are : Connected steering wheel to the servo system while the cabin itself has suspension. Driver seat is rotatable to the right side as the original. left staircase swings away from the path of tracks while being steered to the left. and full suspension on all 4 tracks and also rotating rear section for compenstate for uneaven surfaces. Everything is powered by 2x buwizz 2.0 bricks. It may seems like an overkill for instructions but i chose to not make too much compromises. i wante model that can do it all, exept it cant lift things because its lack of three point hitch. About the trailer. Its mostly System bricks and creator style creation with minimum of technic features so i will not talk much about it, but it has three functions. first is PTO input which powers conveyor on the floor of the bin and it also diverts into auger conveyor to spin worm gear at the end to look like there is actual function to it. However it cant move real stuff. Second function is pneumatic support leg at the bottom, so after attaching it to the tractor with pin and connecting all the hoses. you can remotely operate entire trailer. Third feature is extending auger conveyor to simulate real operation of this kind of machine. I am aware of few off-scale bug on this model. main one is taller track system due to including suspension. and shorter trailer bin. If you are interested in instructions they are on my RB profile: https://rebrickable.com/users/Klein.Creations/mocs/ There is one independent video review and one video of my own. i hope you will appriciate and enjoy both of them. -
Hello Eurobricks community! Let me introduce my latest MOC - Hummer H1 out of Lego pieces. It has approx 3800 parts, incl 7 Motors. Functions are: - Independent suspension of all wheels - 3 RC differentials like in the real model - 8 Cylinder engine - module build - easy removable hood and body. - 4 L motors for drive- Servo for steering- M motor for the winch- L Motor for diffs lock VIDEO: All photos: https://bricksafe.com/pages/Aleh/mercedes_770/hummer_instructions To start this model I was inspired of two things: 1) This video 2) Humvee from CADA Most wanted render: Building instructions are available: https://rebrickable.com/mocs/MOC-174585/OleJka/hummer-h1/#details
-

Eurobricker's share your trucks!!!!
CrazyKreations posted a topic in LEGO Technic, Mindstorms, Model Team and Scale Modeling
Hello everyone, I have been in contact with a few fellow eurobrickers and some of them have wanted a truck topic where we can all share different designs for our trucks and trailers. These designs could also include maybe some clever and effecient suggestions to show others how you made your amazing MOC! All forms of trucks are accepted tow trucks to mighty expedition trucks! Post your truck, or gain inspiration from others! For starters I will share mine: A sporty flatbed truck! -
1:10 Scale Motorized Acura/Honda NSX Supercar
Zerobricks posted a topic in LEGO Technic, Mindstorms, Model Team and Scale Modeling
After building the 1:8 scale Spano GTA, I wanted to make something more compact, yet even more functional for the BuWizz camp 2021, which got postopned to 2022. The rules behind this model stated to build a 1:10 scale representation of a real existing car, which has to have a working gearbox, fake engine and working steering wheel. After researching different types of super and hypercars, I chose the Acura/Honda NSX since it had several good pros compared to the more famous brands like Ferrari or Lamborghini: The real car has a smaller profile, which means a lower weight It uses a hybrid AWD system, which would come in handy for the LEGO model for accelerating and braking on all wheels Engine powering is a V6, which doesn't take as much space as the typical V8, V10 or even V12 Since it's a less known supercar, my LEGO version could be the first one in such scale I used a simillar technique as with Spano GTA where I imported the 3D model into the Lego Digital Designer and used it as a 3D reference. Using this technique I ended up with a really close representation, and it really shows: As you can see in the gif above, not only does the model look very good, it's also full of functionality: 4x BuWizz motors for driving All wheel drive 2 Speed gearbox Working fake V6 coupled directly to the drive motors Working steering wheel 2x BuWizz 3.0 for control Double wishbone suspension on all wheels Dimensions and weight ended up as following: Length: 45 cm Width: 20 cm (without mirrors) Height: 12.5 cm Weight: cca 1,5 kg Here is how the model's underside looks like, drive motors are driving two independent gearboxes in order to evenly spread the mechanical load. This kind of a setup also cancels out any side forces on the central drive axle, thereby reducing friction and wear: In order to cram all the powertrain components in the rear the drive motors are placed in a V shape. This way there is just enough space between them for a functional V6 engine and a PU medium motor which switches the gearbox: Thanks to the compact powerline and driveline, the interrior is very spacious and both seats are almost 1:8 scale sized, measuring 6 studs wide. There are even stoppers and interrior details on the doors themselves: ž The end performance of the model is higher than what I expected, there is enough torque to freespin all 4 wheels, jump over ramps and top speed in high gear is almost 20 km/h! You can see how well it performs the video: To conclude, this is my first 1:10 scale supercar which also ended up extremely compact, functional, robust and good looking. I also think a 1:10 scale may be beneficial when it comes to reliability and robustness, since models tend to weight half the weight of their 1:8 counterparts while still incorporating a simillar level of functionality and details. Having said that, this will not be my last 1:10 supercar and I think for the next one I will ditch the gearbox and simply drive the wheels directly from the motors without any weak differentials. -
 Hello everyone! Before I start I want to wish all of you to stay healthy, survive and win the disease! Today at my birthday I decided to share with you my latest MOC. This is a brand new Liebherr LR 11000. From the previous model, it took only some boom sections and proportions. The chassis and superstructure built from nothing and were rebuild several times. Below please let me share with you some dry specifications of the model: - Crane is about 2 meter high - weights 5 kg - requires at least 5 big battery boxes for been fully operated - can be managed by 3 sBrick units. - has 10 PF motors (4 are in the chassis) - Has 9 pneumatic cylinders + a pump - Has a full-size V6 diesel fake engine like the real crane - Has 6 winches, 3 of them are installed to the boom like in the real crane, but none of the motors are on the booms. - Crane is able to assemble and disassemble back from horizontal to working condition without any human help. - Has 4 pneumatic features, three of them are operated from the cabin, two of them are operated from the operators work seat Now is hte time for it's features: - Driving and steering - one XL motor per each track. Torgue increased 1:25 - Slewing by 2 M motors - L Motor for SA Frame winch - L Motor for the Main boom winch - M motor for the luffing jib winch - M motor for the secondary hook winch - L motor for the main hook winches - Pneumatically adjustable operators cabin - Pneumatically adjustable derrick counterweight horizontally - Pneumatically adjustable derrick counterweight vertically - Pneumatically rising chassis for (dis)assemble. - L motor for the pump and V6 engine - Individual Sbrick custom profile - 3 Pair of lights: - Front LED - Cab LED - Main hook winches LED Here is the link to photos, I'll post some directly here: https://bricksafe.com/pages/Aleh/2020-lego-liebher-lr-11000 Bonus: Here is the performance of the superstructure stability without boom and without counterweight(!), only one battery box insalled for fotors activity. Boxes are full with batteries (24 pcs) Easy to fix the front suspension: https://bricksafe.com/files/Aleh/2020-lego-liebher-lr-11000/IMG_2983.jpeg/800x600.jpg 1,5 kg load. Please enjoy and feel free to ask any questions.
 -
See more:
-
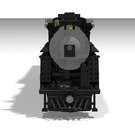
First, some context: Here's a shout-out to Daedalus304 and his ATSF #2926 4-8-4 locomotive, for this locomotive of my own shares quite a lot of cosmetics with 2926. Onto my project: Santa Fe 3463 was built on October 30th, 1937 for the Santa Fe Railway as a passenger locomotive and was assigned to crack passenger trains that ran from Chicago, IL to La Junta, Colorado along with its sister locomotives. 3463 was assigned to lightweight trains such as the Chief when they first rolled out, but given their power, they were assigned to heavier trains on the Chicago-La Junta Division in January of 1938. This locomotive pulled trains like the aforementioned Chief, the Scout, The Oil Flyer, and even the Fast Mail Express. In fact, one of these 3460 class Hudsons', No. 3461 set a record for the longest run without any maintenance stops, the only exceptions of course were fuel and water. No. 3460 was given a very special streamline shrouding which earned it the nickname "The Blue Goose" and was the ONLY streamlined locomotive to run on Santa Fe rails. 3463 would soldier on until 1953 when it pulled its last train The Antelope. In 1956, it was put on display outside what is called the Stormont Vail Event Center in Topeka, Kansas, and has remained since. There was an attempt to get this locomotive restored by the CSR in 2012, however, legal issues plagued this for 5 years and after that, the favor was to go to the CSR in 2018. But even then, there were more turn of events that still render the locomotive dormant. To me, the poor girl's restoration was doomed from the start and personally, I would like to see her back in operation someday. This model demonstrates the Hudson in 1/35th scale, it is roughly 11-12 studs wide, approximately 17 studs tall and 113 studs long. This thing is LOADED with details, even an (almost) perfect valve gear system. 6 L-motors are the current power source in place, 2 in the locomotive to keep the drive wheels in order and 4 in the tender, this may be upgraded later but I doubt it. This train HAS been assembled before, however, it was HEAVILY flawed. Faulty drive design with the side rods and gear ratio, too small drive wheels of the incorrect design (I ordered #13 boxpok drivers a while back) which as far as design goes to the wheels, drivetrain, and cosmetics has been resolved. You can check out my wheel by searching for Baldwin Disk Driver. That very same driver will also be going on this locomotive in the future. I even went ahead and designed some special parts that will be incorporated into the locomotive as well. This locomotive is a design that dates back to October of 2021 and by spring of 2023, I plan to have it completed by then unless something comes up. Who knows, I may enter it into the Brick Train Awards if the timing is right and I may have a consist running by the summer of 2023 as well, but I cannot say for certain because the locomotive and tender will come first. For the most part it is complete, but still could probably use a few tweaks before being finalized. With that out of the way, here is the photo gallery of my engine. Here is the valve gear on the LEFT side of the locomotive Here is the valve gear on the RIGHT side of the locomotive I did my best to capture the cab. Unfortunately, I could only find ONE picture and the picture in question is the one with the locomotive in its current condition, that being derelict. Here, we have a water glass on the left, In-Cab signals in the middle, Steam pressure gauge is located below the signals, Speedometer is to the right of the firebox followed immediately after the throttle. The brakes are located below followed by the power reverse on the cab floor. Oil "stoker" is located under the water glass along with gauges.
-
Hi guys! At least I has finished my next MOC and want to introduced the finished model to all of you! Welcome my International Lonestar truck! It's dimensions are: - Lengh: 101 stud or 80 cm - Width: 31 studs or 25 cm without mirrors - High: 37 studs or 30 cm excluding antennas and exhaust pipes. It consists of more than 5000 Lego parts, including 9 motors. It has: - Great Charbel's 8 speed gearbox, modified by me to the 16 speed one by adding high/low gear to the main output. It has a special shifter. It's all RC. - Independant powerfull pneumatic brakes on each wheel. Inspired by Sheepo's Peterbilt. - Pneumatically controlled fifth wheel. - Independant suspencion on front and dependant one on the rear axles. - Suspended driver's and passenger's seats, doors with locks and shock absorbers. - Detalized interior. - Inline 6 cylinder engine like the real truck. Power functions is described at the picture below, I think this is more interesting than just to read. Also I include pneumatics sheme. Enjoy the pictures please, I hope some video will apear nowadays. Unfortunately, rear differentials can't cope with such a huge torgue and truck cant drive fast on the floor, sorry. Please visit my Bricksafe page for more photo. Building instructions are available here: https://rebrickable.com/mocs/MOC-9788/OleJka/international-lonestar-truck/#comments VIDEO AVAILABLE NOW!!
-

Technic ans Scale models at Bricking Bavaria 2022
functionalTechnic posted a topic in LEGO Technic, Mindstorms, Model Team and Scale Modeling
Hi everyone Last weekend the Bricking Bavaria 2022 took place in Fürth, Germany. LEGO builders from around Europe travelled to Fürth to show their models. This year large cranes, lang heavy load transporters and even a technic locomotive in scale 1:17 were shown. It was really inspiring to meet other builders and learn about their building techniques, concepts and how their model work. For all people who had not the possibility to come to BB22 I cut a video with as many models in action as possible. -
Today will (possibly) be the day, when NASA will finally launch the first mission of it's new moon program - Artemis The mighty Space Launch System will start from pad 39b Taking it's payload - the Orion ship and ICPS stage to the moon This little copy of SLS is made using the same technology - from the leftover parts of the shuttle (from ideas set) The launch tower is no less interesting It has a black stick that holds the rocket upright And it also has a function - by turning the knobs on it's top you may swivel the umbilicals and service bridge I hope you like my model. Don't forget to watch the launch today at 18:17 utc Godspeed, Artemis! P.S. We'll hope that it won't be Scrub Launch System for the second time
-
The 1st of July is an important day for the Greek Parliament building. This year marks 87 years since July 1st, 1935, when the 5th National Assembly solemnly began its work in the new Plenary Hall of the Parliament, thus establishing the role of the building that remains the same to this day. Wanting to honor the history of my country and highlight one of the country's most emblematic neoclassical buildings, I decided to build it with the use of LEGO (in the spirit of the Architecture series) the parliament building, as well as the square with the monument dedicated to the Unknown Soldier. Hellenic Parliament by George Patelis My model consists of 4,842 pieces and measures 35cm x 51cm x 19cm and marks my first attempt to create something in Architecture style. The flag, which is the only non-LEGO element, is my wife's creation, using the macrame technique. More photos can be found on my FlickR account! Below, you can read some of the most important historical elements of the building; The Parliament Building, was built from 1836 to 1843 in the design of Friedrich von Gaertner, to house the palaces of Othon. In 1922, the palace ceased to be used and due to the circumstances after the Asia Minor Disaster, they were housed in it government agencies, private social agencies, and various international organizations. In 1925 a small building was erected in the grounds of the Old Palace, which is known to this day as "Palataki" and in 1928 the Monument to the Unknown Soldier, designed by the architect Emmanuel Lazaridis, was built and thus changed the facade of the building in relation to the surrounding area. Then, in November 1929, the Government of Eleftherios Venizelos, after many discussions, decided to house the Parliament together with the Senate, in the building of the Old Palaces. The works for the conversion of the building into a House of Parliament and Senate were plans of the architect Andreas Kriezis, and it was the most radical intervention in it, after the initial construction and gave it its present image. Finally, some of the most important aesthetic interventions on the outside of the building were the placement of the statue of Harilaos Trikoupis and Eleftherios Venizelos, works by the sculptor Yiannis Pappas, in the western enclosure of the building, and in 2003 the placement of the statue of the Mother of Christos Kapralos in the eastern precinct. (Source)
-
"Wrecker, easy with my ship. "Your ship?" My Midi-Scale collection expands again with this nanofig-scaled Havoc Marauder from the Bad Batch series. Despite the small size, I once again went for a full SNOT look and paid close attention to proportions of the original shuttle. The build comes with a discrete, transparent stand to be displayed in flight mode. ► Instructions for the Havoc Marauder are available at Rebrickable or via email at flyinspace.mocs@gmail.com More pictures on my Flickr page.
-
164C Ahoy! She is finally complete and here are a whole bunch of photos. She appears in most photos as I have her on display - turning to port under full sail, flying her red flag of attack, with guns ready for a full broadside. Approximate dimensions of the Crow, based on a 1:40 scale. Length - 128 ft Beam - 55 ft Height from waterline - 115 ft First, some shots displaying functional minifig areas of the build, like the midships. Poop deck. "I think this compass is broken, Captain." Dining cabin. Then we move fully below decks. Fore to aft, the crew quarters (note the rat in the brig to the left of frame - it took me ages to find one of them and so disappointing that it looks more like a possum then a rat ). Main gun deck: And, astern, the galley. Next, some model type shots, that show the crow as she appears on her display base. The final crow design on the main course. The crew bids you and your ships fair winds and following seas... until such time as her Captain stops playing his organ ( ) and sets the Crow on the hunt. There are more images on flickr https://www.flickr.c...57645632299833/ Hope you enjoy the images.
-
What do you think.. are the Speed Champions just a tiny bit too big for a Modular Building Layout, or do they fit in?
-

[MOC] Full Lego Technic locomotive - in 1:22,5 scale
Paperinik77pk posted a topic in LEGO Train Tech
Hi all, these days I'm working a lot with Lego Technic, since I've bought some parts to experiment a bit this new world. I'm used to build old Lego Technic from the 80's and 90's...but these new sets are very very complex, and require a lot of time to figure out where and how to put a certain part. So , back to the Stud.io I started designing again...and came out with this thing: It's similar to old steam trams, to the GE 2/2 and HGE 2/2 locomotives, to some service railway cars...to the alternate 7720 model. Oh, well...it's a box and it's similar to all those boxy things! Dimensions are 13/14 stu...holes, units? for width and 25 for body lenght. Both buffers add an additional 6 studs to overall lenght. I'd say it is a small 1:22,5 locomotive, like my old yellow shunter with PuP. Since I'm still not so much able to recreate details such as doors and ladders...I simply avoided them. Pantograph is designed to use a rubber band for the moment - it could be nice to make it foldable with some gears! At least the body is self-consistent and can easily be removed. The battery is fixed on the central upper part of the body, right in the middle to increase weight on all 4 traction wheels. Rods are somewhat triangular and quite strange, but they're strong! Other kinds of rod arrangements can be done. Using a normal gear transmission could also avoid rods at all. The boxy body gives me the internal space to experiment for transmissions and motors. This chassis probably will change a zillion of times like the one of my XXL locomotives. In the picture above, you can see the possibility to have the double gauge solution (left axle is L-Gauge and right axle is configured for 45mm G-Gauge track). The gear you can see in the middle of left axle shows the possibility to implement a cog railway system using Lego flexible track. I sincerely do not know if the 45mm cog tracks could work with a Lego gear - so let's limit the cog solution to original Lego track It can become also a fancy Tram locomotive, like the "Gamba De Legn" ("Wooden Leg") used in Milan for many, many years. But for this one - I'm still struggling to create a proper, working engine. I've seen few full Technic locomotives, but it's really fun to build them! I hope you like it!!! Ciao, Davide -
Ever wondered what a large scale caravan would look like? Here, I've made one that has pretty awesome features! Here's the interior! First, there's the kitchen with a cupboard, drawers, microwave oven, 2-burner cooktop and a radio! 2-person bed with quilt! I still need to know how I could make a fridge/freezer that can store a lot of food! Luxurious Dining Suite with 2 upholstered chairs, coffee mugs & fruit bowl! Folding Entry Steps! The drawbar. Here, there's 2 gas bottles, jockey wheel, safety chains and even a security lock on the coupler! The sunshade on the kitchen window can be closed for travel! The shutters on the front & back can be opened & closed too! The entry door can also be opened! Waste Water Pipe Interchangeable Number Plates, depending on which Australian state you live in! (I live in South Australia!) Stabilizer Jacks Those new 'Flat Tile 1x1 Half Circle' (Part #24246) pieces make nice trailer lights! Number Plate Light Here's the food! Additional Features: Two Spare Wheels Removable Roof Opening Side Windows Outside Light Now if only there was going to be a car that could go perfectly with the caravan... Maybe a Holden Kingswood or Belmont Wagon! Thanks for reading!
-
[MOC] 1:22,5 Scale - G Gauge (45mm) - Toy Locomotive (Mark II) and new LGB-based "gondola" wagons
Paperinik77pk posted a topic in LEGO Train Tech
Hi all! Here we go again with big Lego trains running on 45mm G Gauge track! Some of you may remember the yellow Toy Train locomotive I prepared back in 2019 -it was one of my first experiments with G-Gauge trains. This little locomotive was based on a small Powered-Up battery box and a Medium motor. Here it is during a night run on the new 45mm copper track with wooden sleepers I restored to be used on my small garden railway. Here's a detail of the old chassis with the original 1,667:1 gear ratio. This solution proved to work fine on a flat track at home, but was completely useless on the garden line, which can be easily considered a "mountain railway". A 3:1 gear ratio worked better, but gears were too stressed and speed was ridicolous. Plus, with some wagons, the motor always needed to work at full speed. Therefore, back to the lab, I completely revisited the heart of the locomotive, and updating some details on the exterior. Here it is, the Mark II (TADAAAAAAA) !!! And...what's new??? Actually, at body level, it did not change so much from the older one . Handle bars, and headlights have been modified and a new exhaust scoop has been added over the hood (there's no more a red On/Off button). The real new part is under the bodywork: A completely new chassis has been introduced, and now features a new 4-ports PuP Hub and a more efficient Large Motor. Gear ratio is now 2.779:1. It is very strong and smooth - the big battery/bluetooth hub helps traction (which can be increased with the use of rubber bands around the wheels), and the L-Motor is a great improvement over the M-Motor. I've prepared some workflows on the PuP application to work at 25/50/75/100% of the power. The chassis can be detached from the body with four "fast unlock" pins, so changing the batteries is now an easy task. Then, with a locomotive now up to the task of garden railroading, I needed some rolling stock. I've some LGB wagon bases with studs on top (item number 94063) which are the perfect chassis for some wagons I've designed in Stud.io. Both axles are steering, to help the wagon working on tighter curves. So here it is the small gondola , in a bright blue color: And the tan/beige gondola with taller sides: The LGB chassis runs smoothly and really helps the whole train to roll better. Sometimes these things are available (used or new) with an acceptable price, so I get them. A final photo of the consist (fat least for the moment)! Next to come, a passenger and a closed freight wagon with sliding doors (let's see who comes first). I'll try it on the garden railway soon and give some feedbacks (for now only some pretty satisfactory tests were conducted on homemade ramps) I hope you like it!!! Ciao! Davide -

Volvo FH16 6x4 scale 1:17 - Build log
Kio Liex posted a topic in LEGO Technic, Mindstorms, Model Team and Scale Modeling
Finally I found the time and motivation to continue the work on my Volvo FH16 6x4. Earlier I got the 2 speed transmission to work by a M motor, raise and lower the rear axle by a M motor, steering by a servo motor and drive back and forward by a L motor. The last few day I got the fifth wheel to work by a M motor and I also fitted the fake inline 6 cylinder motor. I have finally began to work on the cosmetics, beginning with the fenders. Yesterday I changed fuel tank design, I started on the cabine where the rough outline and design is done. I have also chosen that I am using the CADA battery, as it is 2.4 Ghz, have 4 channels and has a controller that I can build on. This battery box have been mounted and all the wires have been routed in a clean and controlled way, with bricks on key places to prevent the wires to go into all the gears. Now all that's missing is the doors, interiors, the front grill and some minor details. Note about the colours, they shall all be coordinated when I am done, some bricks are not the right colour. I think that the black cabine will make many of the details blend into the cabine, hence I am thinking of making it white or red. What do you think, shall I go with black, white or red cabine? Enjoy the pictures. -
hi there, i just finished the "Rocket 69" from Fallout 4, since that really is one inspiring design they pulled off with this one hope you like it! Rocket 69 from Fallout 4 by Ron Dayes, auf Flickr Fallout 4 69 top view.lxf by Ron Dayes, auf Flickr Fallout 4 Rocket 69 back view.lxf by Ron Dayes, auf Flickr Fallout 4 Rocket 69 side view.lxf by Ron Dayes, auf Flickr cheers!
-
[MOC] Mammoet PTC-200-DS RIng Crane
Aleh posted a topic in LEGO Technic, Mindstorms, Model Team and Scale Modeling
Hello everyone, let me introduce my latest MOC – Mammoet PTC-200-DS Ring Crane made of Lego Technic! This particular model attracted me for a long time, but since I saw it on YT installing the highest wheel in the world at UAE, I decided to investigate it’s building.So I started from calculating it’s scale and number of wheels required. Railway ring set up crane’s scale. Then I decided to make 4 ¼ carriers with two 1/8 halves inside, each on 4 train wheels. So, all in all I required 32 train wheels. So, I started to look for them on BL.Building started from these 1/8 carriers. I wanted each wheel to be driven to spread the torque all over the chassis. So each ¼ carrier is driven by L motor. Totally 4 L motors rotate 32 wheels for crane rotation :)Then I started to build main superstructure (half). Build two similar halves and connect them. Then installed winches, counterweight box and booms. There is not too much information about this crane in the network, so my build is based on some youtube videos and browsed images of the crane. I would not able to get any info from the company directly. So the crane may have some differences from the real model. And for some reason I can't say this is a scale model. For examble real crane has two rings with 64 wheels on each. Obviously, I can't build a model on 128 train wheels - this sclae is simply out of my budget.I was dreaming of a crane which would be able to lift up to 1 kilo. Luckily, this crane one can easily uplift even 1,5 Kg 😊Crane is powered by classic PF elements: 4 L motors for drive + steering rotation, 4 XL Motors for 7 winches. I recommend using 4 BBBoxes as a counterweight. Although only one is connected and needs to be charged. It would be simple to switch crane management to SBricks or Buwizzes (as there are five separate functions, you’ll require 2 sbricks or two buwizzes). Installing PU system instead of PF may become a challenge, especially for carriers. If you have only one battery box - this is not bad, crane is stable even with one battery box as a counterweight, but, obviously, it can't lift a lot or make a horizontal poisition. Crane is 210 cm high in the current configuration at it's highest position. Can lift 1500 gramms or maybe even 2000, but I didn't give it a try to save parts from stress. Fully RC with 5 channels with 3 IR receivers. Can be layed horizontally and back to working position without human help. More images Ah, building instructions are already complete and ready: https://rebrickable.com/mocs/MOC-77733/OleJka/mammoet-ptc-200-ds-ring-crane/#details -
Hello guys, let me introduce my latest creation - this Rolls-Royce Phantom EWB VIII generation. I was always dreaming to build something like this, so it last I could implement it. Car is fully manual! It has complex suspension - Front with anti-roll bar, akkerman, pneumo disc brakes Rear - Multilink with pneumo disk brakes V12 fake engine, connected with Didumos 8th speed gearbox Openable doors, hood and bonnet. Rear doors are opening via big linear actuators. Interior has dark tan installations, imitating natural leather, each of 4 seats is adjustable in two dimensions + support for head Adjustable support for legs, two TVs, remivable tables, vine glasses. Front interior has crystal-installation above the glove box. Stereosystem with 8 dynamics Video of it's features is in the progress. All photos: https://bricksafe.com/pages/Aleh/wip-sedan/rolls-royce_phantom-ewb-2021
-
My son saw a small "foil pack" X-wing somewhere online. We got the instructions from Bricklink and build one. When he got The Ghost in one of those small bags it was the same size as the X-Wing. That's not right. It motivated me to build The Ghost in the same scale. So 6 studs equals 15 meters. http:// http:// Here it is with a couple of the X-Wings. We made 12 red squadron and 12 blue squadron for a much bigger project the Ghost will be involved in. Also, the bag Slave One is the correct scale. No need to redo it! http:// I made a Razor Crest too. But it was the design by obijon. Sorry for the kitchen counter photos. Space is limited right now! http:// http://
-
Ciao all, you have already seen my E.656 topic last week, but after posting it, I realized both the locomotive and coaches were wrongly shaped. First of all I tried to build a mockup, and move it around some Lemax track - I had bad luck, since the radius is too tight and the locomotive is badly bent, looking unrealistic. So for the moment I decided to redesign it as a static only, more solid model. Plus, during the rebuilding the "nose" was redesigned so it's more pointy. The locomotive now is longer by one stud, due to central cover for articulation (I wonder which is the correct English term!) being now in exact 1:87 scale. Since I was already working, I prepared also the freight version, called E.655, which had a gear ratio adapted for better pulling power than speed (120km/h). Then I remade all the pictures with the coaches, since the UIC-X in Livery Red/Gray paint scheme adopted an underbody protection. The express train is now more precise than its first version and I'm more happy with it. Now it is the perfect replica of my Lima H0 train I had many many years ago! It seems very elegant with all coaches in coordinated colors...but in reality Italian trains of the era were composed by coaches in different color styles. Now, having made the famous "Caimano", I needed to go on , and design the "Tartaruga", or E.444 (yes, we have a nickname for quite everything ). Modern and elegant, the E.444 has been the fastest Italian locomotive for a long time. Having the possibility to play with colors, I tried to recreate some coaches in their various paint schemes, to recreate a typical Express train of the 80s. In the picture below you can find UIC-X coaches in "Grigio Ardesia" (a kind of dark "stone gray" well fitting the Lego Dark Bluish Gray), the already seen Livery Red/Gray UIC-X, and the colorful "Eurofima" in Orange. The "Grigio Ardesia" UIC-X are a bit older then the Red/Gray ones, but not all were converted, so it was not strange to see both in Italian consists. Older UIC-X do not have the underbody protection, as far as I could understand (please correct me if I'm wrong). Now that we've seen the E.656 and the E.444, let's go back to an older model, the great E.646 and its freight version, the E.645: This has the same base as my E.656 (in reality the chassis of the E.646 was then used as the starting point to create the "Caimano"), but has a more...boxy body and it's full of grilles of different shapes. It has some different choices for headlights due to the lack of some parts in green and Dark Tan. The first E.646 locomotives featured a body similar to the E.636 and E.424. Another step back in the family of articulated locomotives...and now we're coming to the first one of the dynasty, the E.636. In its "Castano-Isabella" paint scheme (Reddish Brown and Dark Tan), this was quite a mess for me. This model requires a slight modification (I cannot do in a better way) of the "tiles with clips" parts, holding the headlights: these parts must be sand-papered on one side to fit under the "nose". I tried it before drawing the final version. Other parts did not fit or were not available in right colors. I love this locomotive, but her cabin is a nightmare! Let's make her pull an end-of-the-70s express! The E.636 group of locomotives has a special member, nicknamed "Camilla". It seems a "Caimano" but it's not. The E.636.284 was involved in a fatal accident. Cabin was completely destroyed and the engineer lost his life. The cabins were designed in the 40s, so were not so secure. Nonetheless, the locomotive was not scrapped, since it was quite intact in all its main parts. Therefore, an experiment was performed (in order maybe to renew all the 636), and a cabin from an E.656 was fitted. A particular paint scheme was used. The nickname "Camilla" is due to the name written on the unfinished new cabin by one of the workers (after the name of his beloved grilfriend)...and became the official name of the locomotive, which remained the only 636 with this body. It still is operational and historically preserved. And now, last but not least, the smaller (but not less important, since it started the whole family of these modern shaped locomotives!) E.424. Same cabin as the E.636, so same needed modification to clips parts. This one is made in 80s "Navetta" color scheme , which was used in the last employment for this little all-purpose locomotive: Commuter reversible trains. For this reason the last (or first? ) coach was a semi-pilot one, with all remote controls for the locomotive. Here it is the Semi-Pilot MDVE type coach (all other coaches of the consist are MDVC type). It is nicknamed "MAZINGA" - which is the Italian pronunciation of "Mazinger", the famous big robot featured in the 70s Japanese cartoon. It was called this way, since it resembles a robotic head That's all (for the moment)! I hope you like these trains - I will try to go on with designs on this scale since these are really fun! Ciao! Davide
-
Custom RC Semi-Tractor truck
CrazyKreations posted a topic in LEGO Technic, Mindstorms, Model Team and Scale Modeling
Hello Eurobricker's I just wanted to show you one of my latest builds. Its an RC semi truck that has the ROOF based on a Scania Crew-cab! Love it or hate it here it is. Features Differential in the rear. Opening doors Spacious Cabin Detailed Interior Full RC L Motor and an M motor Working 5th wheel Easily removable battery box. Love it or hate it there it is. Please give me some feedback, I haven't made instructions yet as I don't know if anyone will be interested in building it!