Search the Community
Showing results for tags 'starwars'.
Found 248 results
-
 Hello, this is my first proper thread so forgive me if it’s a little amateurish in layout. With that said i’d like to begin by saying i’ve been working on this project on and off for a few years to get my 75054 AT-AT walking, having tried out the mechanism for the official LEGO walking AT-AT i’ve found that it is not stable enough nor satisfying. Since then I have been through multiple iterations of trying to get each leg moving but with only one off the ground at a time. As you can see in the pic from DK’s StarWars Vehicles book the mechanism for connecting and moving the lower leg relative to the upper leg seems to be similarly joined enough that it can be replicated using a linkage but making those linkages move in the correct sequence is the difficult part. The ankle on an AT-AT keeps three legs at a time level in the ground as well as lifts one other leg by moving it up when it takes a step. I have only ever found one person who has managed this in a non LEGO model so it’s possible: https://www.youtube.com/watch?time_continue=3&v=34tgu7ULkeM&embeds_referring_euri=https%3A%2F%2Fwww.google.co.uk%2F&source_ve_path=Mjg2NjY&feature=emb_logo That was 15 years ago. Here are some of my attempts: These two images use two sets of half beams to raise, lower and flatten the beams holding the leg, allowing up down movement, connected to the lower half beams are some linkages to move the leg back and forth, the fault of this one is it was not smooth nor stable. front Back (blue and red beams provide strength) This mechanism uses clutch gears going in a forward direction to move the bars down, half beams make them move up and down in turn, this reduced vertical space taken up, the failure of this is lack of connection points and strength as well as clutch gears probably not being able to support the weight. This was the most promising one, strong too but was unfortunately not quite walking in the right motion, it was not fully stable either. From further study I have noticed that the legs only bend in one direction so i’ve placed a stopper on each one to mimic this, I imagine this will add to the challenge. But i’ve seen people on eurobricks work magic with technic so I figured I should ask here for some help to find a solution.
 -
Hi, As the Star Wars Episode I - The Phantom Menace - turns 25 (already!!!) this year, and some sweet sets (ekhm...droideka) coming along, I decided to also build one of the icons of the film, and, dare I say, one of the most beautiful Star Wars ship designs ever, the Naboo N-1 starfighter. So, as the N-1 minifig scale built by @Inthert is the pinnacle of this design nearly impossible to improve upon, I went for the model in much smaller (I guess it is mini or larger micro...) scale with an aim to build it as sleek as possible utilizing metallic parts as much as possible. So here it is: N-1 N-1 N-1 N-1 N-1 N-1 I apologize for links, as I could not embed the links as pictures in the post from Flickr properly (don't know why..)
-

[MOC] Minifig Scale Clone Wars "The Twilight" G9 Rigger Freighter
IcarusBuilds posted a topic in LEGO Star Wars
I've been working on this build since '7680 The Twilight' set came out in 2008. It started out as just modding the set to give it some interior, and slowly evolved with the continuous advances to LDD. Building this was the driving force behind designing my minifig scaled Delta-7, because I wanted to ensure that it would fit inside like in the show. I've gone through countless revisions to my design, even as far as starting from scratch at least 3 times. With every redesign came more research and I learned more and more about the design of this ship. I learned about a lot of things that never made it into the show. Things like that this ship actually has 3 levels to it, and that it uses an elevator to get between them. That they used 2 distinct 3D models of the ship and would switch between them during episodes, etc. It has been a long journey, but I'm finally happy enough with my design to share it. So into the details; Currently the ship sits at a total of 11,259pcs, measuring in at 102 studs (81.6cm) long by 132 studs (105.6cm) wide, by 37 studs (29.6cm) height (landed) or 84 studs (67.2cm) height (both outriggers extended). In other words, this thing is pretty big, still not as big as the Ghost, but it is the same length as the UCS Millenium Falcon. While I did find images and video of the majority of the interior I sacrificed a few of the unseen rooms in lieu of having more structure to hold the whole thing together. I did however keep all of the main areas, this includes the cockpit, cargo hold, connecting hallway and the boarding area. Comparing my build to the official Lego set. Here is a comparison between my Twilight, the UCS Millenium Falcon and my Ghost. As well as some comparisons with some of the official images that used to be on StarWars.com, I couldn't get the angles exactly right, but they're close enough to compare. And as a final note, I am currently in the process of building this monster, I have been slowly gathering pieces for the last few years, I have about 80% of the total pieces required, though I'm sure I'll have to make some modifications as I go. I will be posting updates as I go, but for now, here are my bins of parts, please forgive the unsorted disaster that they are currently in. -
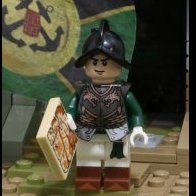
"Chess Ko Sebulba." Anakin Skywalker, 32 BBY "Chess Ko Sebulba." Anakin Skywalker, 32 BBY by Nicholas Goodman, on Flickr "Chess Ko Sebulba." Anakin Skywalker Mos Espa, 32 BBY by Nicholas Goodman, on Flickr "Chess Ko Sebulba." Anakin Skywalker Mos Espa, 32 BBY by Nicholas Goodman, on Flickr "Chess Ko Sebulba." Anakin Skywalker Mos Espa, 32 BBY by Nicholas Goodman, on Flickr
-

[MOC]-BW3001 - Pre-Orders Open! UCS Kintan Strider Speeder Bike
coreyschaaf posted a topic in LEGO Star Wars
UCS Kintan Strider Speeder Bike As featured in the Book of Boba Fett • by Corey Schaaf | BrickWars.net It's been fun putting this build together. I've worked with so many different people on executing this project. From working with a manufacturer for a custom case, to my signature Printed UCS Plaques, the unique serialized tiles that's different for every build, to the UCS Stickers from a company in the UK - to the final print production of my Limited Edition UCS Instruction manual — I can just about call this one complete. Pieces: 2,285 + 2 Minifigs Weight: 71.5 oz | 4.7lbs Width: 57.6 cm | 22.7 in Length: 25.6 cm | 10.1 in Height: 24.8 cm | 9.7 in Estimated Part Costs: $375-$450 My manual is built in the same way my original UCS instruction manual for the Resistance Troop Transport ship was designed but in a much smaller print run. Only 150 copies of my manual will be available. Email subscribers will be notified when the pre-sale starts, so if you're interested, I would encourage you to visit https://BrickWars.net/moc-bw3001 and signup via the email link at the bottom of the page. You can find all the details and specifications on my website for this build at https://brickwars.net/moc-bw3001. If you have any questions, feel free to ask! You can also give me a follow me on https://www.instagram.com/brickwarsnet/ as well. New Video of MOC Just added -
I have to admit that I haven't been very active here in the past months, but I'm back now with a little ROTJ-Scene to celebrate 40th anniversary: Hope you all like this little vignette!
-
Hello People, today I'm introducing my new sig fig for the shaterred empire. This is Commander TK-2005 aka Jack. An extremley loyal trooper of the empire ready to execute orders without questioning them.
-
Please excuse my mugshot in this post but a banana for scale just wasn't cutting it. I've just completed work on a pretty big Nebulon-B. A re-make of a midi scale version of the ship I created 3 years ago. Unlike that one however, for this model I matched it to blueprints and screenshots every step of the design and build process (see final image below). The Nebulon-B turns out to be a far sleeker and streamlined ship than it appears to be at first glance. Hopefully I've captured some of that with my build. Instructions are available on Rebrickable here: https://rebrickable.com/mocs/MOC-131500/Rubblemaker/movie-accurate-nebulon-b-escort-frigate-midi-plus-scale/#details Full album can be found on Flickr here: https://www.flickr.com/photos/164260086@N06/albums/72177720304383285 Thanks for looking. :)
-
Hi everyone - for those who already have or plan to buy and build the UCS Luke Skywalker's Landspeeder (set #75341), I've created an 'Enhanced Edition' of the model that you may be interested in! Fixes and enhancements are: - Reduced the length (by 2 studs) of the overly long nose of the standard model to give it a more accurate & balance look. - Added forward and rear removeable panels to show new internal details including power plant and anti-grav units in the rear; and fuel tank, sub-frame, piping and cabling details at the front. (I used the X-34 Landspeeder diagram from the Star Wars Complete Vehicles 'amazing cross sections' book as my reference when designing the internal details.) - Fixed the left hand side & top wobbly engines issue. Modification instructions are on Rebrickable here: https://rebrickable.com/mocs/MOC-126009/Simon Lenz/ucs-landspeeder-enhanced-edition/#details Video mod explanation & walkthrough can be found here: https://youtu.be/MYEt0IpRcI8 Full photo gallery here: https://bricksafe.com/pages/SimonLenz/ucs-luke-skywalkers-landspeeder---enhanced-edition
-
[MOC] 7754 Home One Mon Calamari Star Cruiser Revisited
legolux1973 posted a topic in LEGO Star Wars
Hello to the community. Here my (digital) redesign of the LEGO Star Wars Sets 7754 Home One Mon Calamari Star Cruiser from 2009. It was my first Design / MOC in 2020 (January). You'll find some pictures below. The holographic briefing room can be simply detached from the hangar, similar to the original (they're connected with pins). The A-Wing is a mix from the Sets 75175 (main structure), 75003 (the front) und 7754 (detachable engine). There're are however no flickrcanons or springshooters anymore. ;-) A friendly user draw attention to a huge bug I completly forgot to consider and to test: the A-Wing is probably too long (or large) to rotate completely 360 degrees. Shame on me. :-( The choice and design of the minifigures is very basic, I had to work with the parts that exist actually in Bricklink Studio. As usual I tried to avoid rare / expensive parts as much as possible, the old printed AT-AT Dish and (maybe) the long 32 Axle should be the only ones. This will avoid frustration for users when I change mind and decide however to create building instructions. I hope you like the MOC. Home One Mon Calamari Star Cruiser 7754 Revisited by legolux1973, on Flickr Home One Mon Calamari Star Cruiser 7754 Revisited by legolux1973, on Flickr Home One Mon Calamari Star Cruiser 7754 Revisited by legolux1973, on Flickr Home One Mon Calamari Star Cruiser 7754 Revisited by legolux1973, on Flickr Home One Mon Calamari Star Cruiser 7754 Revisited by legolux1973, on Flickr Regards, legolux1973 -

[MOC] TIE Interceptor™ (ROTJ 40th Anniversary Product Concept)
Rui Miguel posted a topic in LEGO Star Wars
TIE Interceptor™ (ROTJ 40th Anniversary Product Concept) By Rui Miguel “Greetings exalted ones” From the Galaxy Far Far Away I bring you the TIE Interceptor. One of my favourite Empire Starfighters from Star Wars. When I was 12 years old in 2006 I remember receiving on my birthday the set 6206, it was a blast back then, but little did I know it would be the last time seeing another release of this specific class. In 2023, The Return of The Jedi will be celebrating its 40th anniversary so I asked myself: what would a TIE Interceptor look like nowadays? I feel like this is one of those long overdue Star Wars vehicles, us LEGO fans hope to see with a modern take and add to our collections. This is my attempt to fill that gap in your collection. As with my previous projects, I brought into my MOC the same design process in order to present a product concept that could identify with the official LEGO product standards. Bellow you can get access to the PDF file of the building instructions and the Bricklink studio file of the model (without minifigures). You can upload to Bricklink and generate a wanted list of LEGO parts needed to order. Download Links (Google Drive): - PDF Building Instructions (23 MB) Here - Bricklink Studio file (375 KB) Here Features: - 545 pcs (Starfighter and Stand only) - Removable and playable Starfighter - Stand display - Printed tile not included - 4x Spring Shooter Darts I'm very happy to finally be able to share this with fellow LEGO Star Wars fans and I hope my MOC inspires LEGO to consider making a TIE Interceptor in the future, that would be awesome. If you have the opportunity to build my version and add it to your collection I hope you have a fun experience while building, playing and displaying 😉 Until the next project, May The Force Be With You If you haven't, check out my other projects SDCC Ghost Rider Midnight Race Utapau Defense - Crab droid -
Utapau™ Defense By Rui Miguel Hello there! Utapau™ Defense is a product concept I made as a fictional LEGO set. With the AT-TE Walker set from Star Wars Episode 3 revealed this year I decided to make this small Minifigure pack; introducing a Crab droid as seen in the movie. I noticed a demand amongst fans to have a Crab droid in LEGO form, so from model design, building instructions to packaging I set my skills on this challenge. I’m a fan of Star Wars and LEGO so during the design process I was very concerned about making and presenting as close as possible a LEGO Product experience and at the same time balancing a low-cost and easy-to-purchase/find existing LEGO parts. With the Bricklink studio file you can upload to Bricklink and generate a wanted list of LEGO parts needed to order. Features: - 46 pcs (crab droid only) - Articulated legs - Stud shooter Download Links (mega): PDF building Instructions https://mega.nz/file/CUEyFY4B#HfHeCytByif_Nxb9NzPaEhB8RcS7DQGO1uouP2AAvAY Studio file (.io) https://mega.nz/file/rNlghaAI#R5Knv6paNJlIy_xFu9mrY0A_6jTSB64xKmwWteSs7ds I haven't post anything for a while but this model is the first of a wave of projects I’m really excited to finally share with you fellow LEGO and Star Wars fans who are reading this. I hope you like my work and have fun building and playing. Feel free to leave a comment😉 Feedback is always appreciated 😊 May the Force Be With You
-

[MOC] Collaborative - 84cm long Raider Class Imperial Corvette - Instructions available
Rubblemaker posted a topic in LEGO Star Wars
Hi all, After almost a year of work, myself and another builder named Bruxxy are both really proud to announce the launch of our Raider Class Imperial Corvette from Star Wars Battlefront 2. Shortly after the release of my Rebel Corvus (from the same game) via Brickvault last August we both started work on a collaborative build of the Imperial version. Bruxxy took on the role of digitally designing the new exterior over the interior structure of my rebel version and then I took over and build tested it, refining and re-working many areas inside and out. The end result is this 5484 piece, 84cm long, 48cm wide behemoth. Instructions are available from www.brickvault.toys. The full album can be found on my Flickr page here: https://www.flickr.com/photos/164260086@N06/albums/72177720299155448 Thanks for looking :) -
I confess the Star Wars theme is far from my favorite thing, and I know, this is far from a winning material. However, I just wanna have fun. I had just one small Star Wars set in 1999 (Luke Vs 2 speed bikers) when I was young, the only part I could find was a very used chrome lightsaber. I don't have any Star Wars Sets since then. So I made this Greebling stuff just for fun. I hope, at least, to make some of you laugh :) Lego - Star Wars - "The place where Luke's hand fell" by Sérgio Batista, no Flickr
-
Error 404
-
securing sith artifacts on mustafar by Tom, on Flickr
-
Boarding of the Tantive IV Boarding of the Tantive IV, Above Tatooine 0BBY by Nicholas Goodman, on Flickr Boarding of the Tantive IV, Above Tatooine 0BBY by Nicholas Goodman, on Flickr
-
The Ultimate Rancor, a real desk amplifier. It will stand on its own but prefers a base. You can get the LXF file from: http://www.repubrick.com/index.php?option=com_virtuemart&view=productdetails&virtuemart_product_id=3942&virtuemart_category_id=176&Itemid=144〈=en
-
There are not many fictional spaceships as recognizable as the x-wing. Because of that, most of us had built one at some point of time. After all, it is both iconic and pretty simple: long, thin nose, four wings on hinges, cockpit somewhere in the middle and long guns on wingtips. It was built so many times it is as boring as it is popular, which is why I never attempted doing it. If not BrickVault, with whom I am cooperating on making models with instructions, I would probably never make my own. Eventually though popular demand made it an obvious choice and so I started. What was initially a build stuck somewhere between one TIE or another, took me about four months to complete, which is huge for such a relatively small ship. Let me present you the finished product first. Because we were not entirely sure which color variant is the best, I ended up making three - this way everybody will have one which fits him! So: are X-Wings simple? I just can't emphasize on how wrong was I. There are so many things that need to be done right. Thin wings. Front fuselage which has no parallel surface and has an annoying stripe which interferes with structural work inside. Rear fuselage which is neither rectangular or hexagonal, it is something else. And don't even get me started on the cockpit situation. LEGO part designers made one cockpit which has good front, but bad back, and then the new one has good back, but bad front. Had they merged the designs into one it would be perfect, and without it we can only pick whether we will have abnormally wide nose section, or abnormally square-looking cockpit. Altough there are many great X-Wing designs in the AFOL world, most notably those from Atlas, Cehnot, Inthert, Mike Psiaki and Dmac, among many others, most have their noses either studded, or with jagged edges. So instead of starting with the wings, I started with the front fuselage, as it was the most difficult part. And after all what can be hard with simple wing-opening mechanism? This was the fist sketch. I had no clue how to join this all, and tried all possible cockpit pieces, but I liked the idea of using hinges to make smooth upper sides of the ship. But since my designs modelled in LDD end up being... uh, not too perfect, I had to move to real bricks, and fast. So immediately after a batch of pieces including the cockpit arrived, I made the real version of the nose. ...yeah, so it does not look like the LDD one, because the LDD one was really bad. This one features a lip I was pretty sure was the standard feature of the x-wing, later I discovered that the lipped version is a hangar model, and miniature model has none of it. Also, I noticed the fuselage is already too high so it will have to be lowered later on. Here it has some of the rear fuselage, and first of many variants of nose tip. So far so good. Except it totally did not hold together, so... I also got a hunch that something odd is going on with the proportions at this stage, but "eeh this is a prototype, I will get back to it later". Having front part more or less done, I started doing the wing gearbox: It worked well enough so far, so I could return to the nose area. It was too high, nose top was too long and some of other proportions were wrong. So I fixed it: The X-wing's cockpit front panel does not line up with top surface of the nose, there is a slight angle change. I wanted to have that, but obviously overdid it badly... it looks sort of vulture'ish here too, due to the nose, doesn't it? There. Much better, isn't it? I added cheese slopes on top of 2x2 slopes behind the canopy so I could make the cockpit lower in relation to rear fuselage. I also made a better nose tip. Even the bottom was shaping up quite nicely. By that time, however, issues with wing mechanism became too apparent. It clogged often, was wobbly because each wing was held only on one technic beam, and tended to detach bottom fuselage panels every time when it was opened. Something had to be done, which meant another major rework. Eventually after about two weeks of tinkering, I maged to find a solution which in short space (6 studs) contains an 2x2 gearbox and two attachment points per wings, with added benefit of entire assembly built sideways which greatly helps with wings stability. What the final model uses for wing mechanism is an evolved version of this mechanism. Notice how the control knob is on the bottom of the ship... With wing core situation solved, I could move on to landing gear, which proven to be super simple but effective. Building, however, is not just about the design itself. Sometimes you have to tend for the workplace as well, because I eventually ended up with such a situation: ...so where is that part? In the apartment I was renting back then, I did not really have enough space for building. Or, anything really. ...so I moved. How often do you move to finish a MOC? :D This was just before the departure. Having the workspace situation resolved, I could get back to work. By that time I also got most of the parts I required to finish the ship, so I made all the components or their placeholders, and pondered why it still felt wrong. It took me a while, but this happened to be caused by rear fuselage. You see... I had it like on the left, while it should be more like the one on the right. Easy to fix? Except because the ship has no internal frame, it is held by the outer parts. So any rework in this area was causing issues everywhere else. I figured out a way. Yup, from that moment on, the tile-to-clip connection is main structural connection of the ship. Basically the idea is that front fuselage attaches to rear fuselage by these areas (and similar on the underside), and they all together "wrap around" the wing structure. It holds together surprisingly well, to the point it ended up being the final solution! This was the version tested by BrickVault. In case of some harder models, and X-Wing totally qualifies, we do an additional verification step to ensure all works. The results of the tests were, if I remember correctly: - landing gear collapses - nose top part cannot be attached properly - angled fuselage sides cannot be angled properly - rear fuselage top part randomly pops off not to mention several issues with the instruction itself. ...and what do you mean R2 doesn't fit? Here during debug of the front cover issue. If you work in IT, you know these dreaded words: "hmm it works for me". Yet for brickvault guys, this connection was not possible because the jumper tile was too deep. The issue, as usual, was caused by a part being placed far away, in this case - under the cockpit. Making instructions introduces entire new class of problems. How often do you debug a MOC? Now, remember what I said about the control gear being installed on the bottom? The idea was that an axle would go through the stand, with a nice knob to spin the gearbox to open/close the wings. Unfortunately though, the force required to open up wings is so high, the axle bent and twisted in a way which made operation through the stand impossible. It surprised me, because turning it with fingers is reasonably easy. This issue I did not solve. The only thing I could do was to move control point from the bottom to the top. This triggered YET ANOTHER F**** REWORK, this time of both the underbody top fuselage panels. I lost count here, but it seems the rear part was redone about 5 times totally, with smaller numerous adjustments during the way. The story came to an end after four months of work, several rebuilds, several totally wrong ideas, and a lot of beer drunk. I hope this wall of text is interesting for someone. Thanks for reading and tell me what you think! ------------ This build was done with collaboration with BrickVault. You can watch a video review here: Instructions are available here: https://www.brickvault.toys/collections/all
-
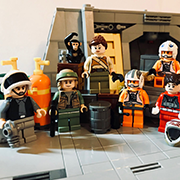
An Imperial detachment searches the streets of Mos Eisley, looking for a pair of hard to find Droids. Sandtroopers Deploy to Mos Eisley, 0BBY by Nicholas Goodman, on Flickr SandTroopers Deploy to Mos Eisley, 0 BBY by Nicholas Goodman, on Flickr SandTroopers Deploy to Mos Eisley, 0 BBY by Nicholas Goodman, on Flickr
-
An Assembly Area on Geonosis, 22 BBY Clone Troopers assemble with Jedi evacuated from the Geonosian Arena. An Assembly Area on Geonosis, 22 BBY by Nicholas Goodman, on Flickr
-
A couple Scout Troopers Patrolling the Forest Moon of Endor, 4 ABY. Patrol on Endor, 4 ABY by Nicholas Goodman, on Flickr
-
This is the collection of lightsabers I have designed. It includes most of the well-known sabers in the star wars universe, like Darth Vader, Anakin, Obi-Wan, Ahsoka, etc. And there are also a lot of not-very-well-known lightsabers that I have designed like Quinlan Vos, Ventress (from Dark Disciple), Mara Jade, Anakin Solo, etc. There are 37 total lightsabers. I may do some more in the future because there are some important ones that I haven't done yet. test by ice chips, on Flickr This is an image with the names of the respective owners of the lightsabers in the Star Wars universe all with names by ice chips, on Flickr And these are probably the ones that a lot of people are familiar with the most: UntitledModel by ice chips, on Flickr I did have to get very creative with a lot of these sabers because since I designed most of these with a 4x4 circular width, I was kind of limited in what I could do. That's just the way it is when designing sabers. Once you pick a width, there are some limitations you have to stick to. But nevertheless, I think these turned out really good. I included lightsabers from all across Star Wars. The Prequel trilogy, Original trilogy, videogames like Fallen Order, KOTOR & SWTOR, and EU legends. What are your thoughts on these sabers? And which one is your favorite? I'm kinda curious to see what saber people think is the best one. And I'll include a link to the instructions for these. This particular link is for the entire collection, but on my Rebrickable profile, I have all of these sabers listed individually as well. https://rebrickable.com/mocs/MOC-88594/RendiliBricks/lightsaber-collection/#details
-
A small Diorama of the Battle of Scarif "Make 10 Men Feel Like 100" "Make 10 Men Feel Like 100." - Rogue One by Nicholas Goodman, on Flickr
-
Shortcuts Core RulesFactions/Member SkillsThe MapOther details Welcome! Welcome to Factions. A home for MOCs from all eras of Star Wars loosely tied together by a map-based strategy game. The game itself takes place after the battle of Jakku, but builds can represent any planet in any era of Star Wars. The goal of the strategy game is to find and control Holocrons. They are revealed by exploring planets and winning challenges. There are many different factions you can petition to join. Being a part of a faction allows you to participate in 'episodes' (challenges), build freebuilds to earn in-game XP, tags, and other rewards, as well as other aspects of the game. You'll have a main character in-game, and through your building, you can advance your character and help your faction win. Getting Started Private Message (PM) a faction leader to ask to join their faction. Each faction has it's own style, storyline, and aesthetic, so you'll need to create a character in line with whatever faction you petition to join. Faction description, requirements, and contact info can be found in each faction's post at the top of the Factions subforum. You may only create one character, even if you change factions; make it a good one with a flexible storyline. Create your character, upload a 100x100 picture to your preferred image host, and fill out the Character Creator form. You can choose any name for your character but please keep it appropriate. Players may change factions at any time, but faction leaders do not have to accept new recruits. Alternatively, when builders have earned 75 XP they can create their own faction. Introduce yourself in the Introduction and Discussion topic. Fill out the Character Creator form to have your character added to the active players list. (optional) Create a signature using this generator created by @Bob De Quatre. Please note that it does not currently support Flickr photos for the avatar. We hope to fix this soon. Read up on the Core Rules here! Where to Post What This subforum, Factions, is used for this game. As such, you should only post your entries to Star Wars Factions here. The Core Rules contains the rules; questions about the rules should be asked in this topic. Players should introduce characters in this Introduction and Discussion topic and fill out the Character Creator form. All posts in this Introduction and Discussion topic should be Out of Character. Each faction will have their own way of communicating, so check with your faction and discuss your upcoming builds, Works-in-Progress (WIPs), strategies, and storylines through whatever method your faction leader proscribes. Announce your free builds in your faction topic to receive feedback, but make sure to also fill out the appropriate form to have it scored. Episodes will be announced in their own topics, and you will be able to use those topics to ask questions about and discuss the specific episode. Important Links Link to Submittal Form Player Index Link to Character Creator Form Link to Faction Change Form Link to Planet IP Values Link to Team IP Values General Discussion Signature Generator Public Score Sheet