Search the Community
Showing results for tags 'crane'.
Found 150 results
-

Volvo FH and EW 160 Play Set
steph77 posted a topic in LEGO Technic, Mindstorms, Model Team and Scale Modeling
Hi eurobrikers, Here is my current project. A Volvo FH truck destinated to be part of a larger play set using the TLG Volvo EW160. The whole model will have a crane truck full RC, a trailer and the EW160 official lego excavator. As always i build this for my son and so i t needs to be really playable set with lots of function fun to play with. Regarding to this the new Volvo EW160 inspired me. So the concept is to have a fully rc truck with manuals function added to it. The toy will have pneumatics, PFS, RC, manuals functions.... so much for a child to enjoy! My goal with it : Truck : 7 motorised functions + RC PF light = 8 channels on standards Rc official system. Propulsion by L motor Direction by servo on first and second axle with reduction . report to the cab Deploying stabilisator by rotation. Able to set up the stabilisator on 180° : M motor Stabilisator up and down: M motor Crane rotation: M motor First section of the crane arm: M motor Second section of the crane arm: M motor All the these functions are realised and integrated into the framme actually. All working very smothly and with corrects speeds. Time for some pictures of the WIP : I have now to face some difficulties and have to answer some question. What is your opinion guys on these points : 1 Color of the rear crane ? actually thinking for black, to fit with the EW160 design or orange? 2 Position of the two PF receivers, actually in trouble with that, no neat solution 3 tilting bed. The EW 160 is equiped to load a bedactually. Cannot imagine not being able to lift it. The problem is Zero place for an additionnal motor into the frame. Thinking to lift it manualy ? Thanks for your feedback on these points. -
.thumb.jpg.be7f3ef7c74531e8a3ac98ae1e300e94.jpg)
[MOC] [WIP] Crawler crane in 1:20 scale
Bogdan Valceanu posted a topic in LEGO Technic, Mindstorms, Model Team and Scale Modeling
Hi guys, I’ve been following the forum for some years not, but I’ve been mostly a “lurker in the dark”. But, after 2.5 years designing and building when I had some spare time, I can finally share my 1:20 crawler crane MOC with you. For now it has somewhere around 40.000-60.000 parts (don’t know exactly how many). I’ve tried to build it as close as possible to a real crane in terms of assembly and functionality, with the usual constrains that you have with building out of Lego at this size and scale. As a disclaimer (and as a direct apology to Lego purists), the slewing bearing is not lego, but a cross roller bearing. The drive of the bearing is Lego, using the ¼ gear racks from the 42055 BWE. Took me about 6 monts to find a bearing that fits in size with the internal gearing of the gear racks, so that the driving axles still fit trough. Also, if you look really close, there were some occasions where I got out the Dremel for some adjusting (mainly panels), as I didn’t want to sacrifice strength, or design. Again, sorry to the purists. The crane is powere by 4 BuWizz, one in each central counterweight (between the crawlers), and one in each superstructure counterweights. I love the fact that you can still operate the BuWizz while it’s charging, so I have a power bank battery next to each BuWizz. Like this you get hours and hours of play time even with a large heavy model like this. The drive is as follows: - Each crawler is powered by 4 PF XL Motors (and one BuWizz per crawler) geared down 240:1. The motors don’t drive the ends of the crawler, but 8 sets of 2 gears underneath each of the crawler chassis. Due to weight reasons I used metal axles from Eezo’s Brick Machine Shop from the US. -Slewing is done again by 4 PF XL Motors which sit in the base of the superstructure. - Each winch is driven by a PF L motor. They were powered by 2 PF L motors, but because the winches are worm-driven I had some issues with them not running synchronous and overloading the motors. The winches can be individually taken out from the superstructure for maintenance and use 1mm wax rope. Structurally the main building technique for the crawlers, undercarriage and superstructure is an array of 5x7 technic frames. I’ll come back on another post with some pics of the various building techniques and technical details. Maybe I’ll also do a more detailed video on this sometime soon. The crane is not finished yet. I still need to build the superlift tray and telescope, which will be EV3 controlled so that it self-adjusts, and sadly I need to rebuild all the boom. Until a main boom length of 4.5m everything is ok, but with more than that it starts to bend too much. In the video below I’ve build 4m of boom, because it was pretty windy when we shot the video. The goal would be 7m someday. I want to keep the boom in the main boom+short fixed jib configuration. A luffing jib would be easier to lift (most large Lego cranes that I saw are built in a luffing jib configurations), but as I work in wind turbine assembly, I want to build the boom configuration that we use mostly. Here some pictures from the assembled crane: https://www.flickr.com/photos/164584645@N03/ And here a video about the crane (without wanting to advertise for the channel) As mentioned before, I’ll follow-up with some more pics from the building phase and building techniques. I hope you guys like the crane. -
 Hello everyone! Before I start I want to wish all of you to stay healthy, survive and win the disease! Today at my birthday I decided to share with you my latest MOC. This is a brand new Liebherr LR 11000. From the previous model, it took only some boom sections and proportions. The chassis and superstructure built from nothing and were rebuild several times. Below please let me share with you some dry specifications of the model: - Crane is about 2 meter high - weights 5 kg - requires at least 5 big battery boxes for been fully operated - can be managed by 3 sBrick units. - has 10 PF motors (4 are in the chassis) - Has 9 pneumatic cylinders + a pump - Has a full-size V6 diesel fake engine like the real crane - Has 6 winches, 3 of them are installed to the boom like in the real crane, but none of the motors are on the booms. - Crane is able to assemble and disassemble back from horizontal to working condition without any human help. - Has 4 pneumatic features, three of them are operated from the cabin, two of them are operated from the operators work seat Now is hte time for it's features: - Driving and steering - one XL motor per each track. Torgue increased 1:25 - Slewing by 2 M motors - L Motor for SA Frame winch - L Motor for the Main boom winch - M motor for the luffing jib winch - M motor for the secondary hook winch - L motor for the main hook winches - Pneumatically adjustable operators cabin - Pneumatically adjustable derrick counterweight horizontally - Pneumatically adjustable derrick counterweight vertically - Pneumatically rising chassis for (dis)assemble. - L motor for the pump and V6 engine - Individual Sbrick custom profile - 3 Pair of lights: - Front LED - Cab LED - Main hook winches LED Here is the link to photos, I'll post some directly here: https://bricksafe.com/pages/Aleh/2020-lego-liebher-lr-11000 Bonus: Here is the performance of the superstructure stability without boom and without counterweight(!), only one battery box insalled for fotors activity. Boxes are full with batteries (24 pcs) Easy to fix the front suspension: https://bricksafe.com/files/Aleh/2020-lego-liebher-lr-11000/IMG_2983.jpeg/800x600.jpg 1,5 kg load. Please enjoy and feel free to ask any questions.
 -
.thumb.jpg.2335d10c31c9ffa7029728589340e12f.jpg)
Kenworth K100 Crane Truck
efferman posted a topic in LEGO Technic, Mindstorms, Model Team and Scale Modeling
My entry for the crane contest will be a Kenworth K100 with X outriggers in 16studs width scale. I doesnt want make a scale model of an existing crane so you and me will be maybe surprised. 100_1584 by Michael Wirth, auf Flickr -

Remote Controlled Tower Crane - MOC
Timorzelorzworz posted a topic in LEGO Technic, Mindstorms, Model Team and Scale Modeling
Hello everyone, this model of a Tower Crane is made only with 1166 pieces and controlled with either smart device or physical remote. In order to all functions of that model, you get a complete overview in this article how to build and how to control this crane. You can find instructions here if you're interested in building this model. Summary of Functions & Features remote controlled with PoweredUp 2-way-gearbox to select between functions motorized hook, trolley and 360° crane rotation Hub with batteries as counterweight modular building with extendable tower Minifigure scale to fit City layouts openable cabin 83cm superstructure length 70cm tower height Impressions Electronic components The crane uses the newest PoweredUp electronics to power all the functions. In order to remotely control this model, a physical remote pad is not mandatory because the crane is also controllable with optional smart device and PoweredUp app. Shaped with some system pieces, the PoweredUp 2-port hub with batteries included fits perfectly as counterweight and is easily replaceable. Simply turn on the hub by finger press and connect them to either PoweredUp app or physical remote to let the fun begin. The official set 76112 Batman RC Batmobile offers all electronic PoweredUp components they are needed to control this Tower Crane. Trains (60197, 60198, 60336, 60337) from the City theme are also nice and welcome starting packs for electronics, because they all include one PoweredUp hub and a physical remote pad, which then requires only 2 additional medium motors. Controlling the crane Heart of the design and probably the most interesting part building this model is the controllable gearbox behind the cabin. Where motor A controls the movement of the trolley, the functions of motor B are selected through gearbox. The following configurations are possible when playing with this crane and two motors together: Motor A - Motor B Trolley - Hook Trolley - neutral Trolley - 360° rotation For the crane it is very important to have a neutral position for rotating the superstructure. In case this function is unselected, the crane can freely rotate and prevent from falling. This is a feature that can be also seen on real Tower Cranes. All functions are secured with clutch gears to prevent damage. The winch for the hook has also a safety mechanism included. This holds the cargo even when the function is unselected. Controlling the crane is thinkable easy. In the PoweredUp app it just requires a profile with two slider - one for motor A and one for motor B. That means that this crane is controllable with a custom profile or even with the available one from Batmobile. Keep in mind that controlling the model does not require a smart device by using the physical remote pad. Building the crane Splitted in separately parts, building this Tower Crane feels like constructing the real thing. Official strings (part 37597, 56823) are used in this model that are widely used with many lengths in other Technic sets. Of course you can use any other strings you want. The crane uses a modular building style where each part of the tower fits to each other. The inventory includes all parts that are required to build exactly one middle section, but it is still possible to omit and to create a crane with a lower height of the tower. Furthermore the height of the tower can be extended by replicating a middle section stacked to each other. A higher tower then requires a longer string for the hook for sure. The following inventory shows only the parts they are needed to build one more middle section: Made with Minifigure The cabin can be opened to put a Minifure (without hair or hat) inside. Since this Tower Crane is made in Minifigure scale, it matches perfectly each layout with Trains or Construction vehicles also in the City theme. Instructions Premium instructions for this model consists of 283 pages with high quality images and building steps very close to the Lego Technic ones. The instructions helps alot on how to connect strings and wires correctly. Following are some example pages to show the quality of instructions: Goal with this model was to create a Tower Crane that is not that big and expensive and buildable for everyone. Tons of hours are spent to experience with balancing and stability. The end result is pretty neat, the crane works just perfect but dont expect too heavy loads on it. The model fits all standards for easy building and color-coded components. If you're interested in building this model, you can buy instructions here and support me and my future work. Have fun with this Remote Controlled Tower Crane. Follow me on Instagram for updates and news -
Dear all, Another year, another crane. This time it's a crane in the size range of the 42042. The crane hase the same track size and width, and shares more or less the same frame, but this time in black, also I decided for now not to motorize the tracks. The body has also more or less the same size and structure as the 42042, but I tried to make the body less wide. The crane has 4 motors, 2 L-motors for the 2 winches on top, one XL-motor for slewing and 1 angular motor for the 3rd winch. They're all housed in the body and connected to the battery box aft of the main body. The 2 ballast boxes each hold 150grams of ballast. The building showed me it's indeed difficult to make a rugged build, due to the flexing of lego parts because of sideways movement of the crane boom. this was almost complete fixed with the installation of the 2 springs and some additionals beams for support at the front of the body. For now the crane can lift 350 grams in its highest and most comfortable position. The cabin has an openable door and can be tilted upwards(not seen here) I used the good old lego metal hook with 50 g of ballast stuck to it, I didn't use a turntable this time because it would make the hook too bulky and too big Here's a view of the panels removed, you can see the placement of the motors and the winches, the winch of the hook is directly connected to the angular motor, without any gears The last photo is for scale, in it's highest position the crane reaches 1,35 m, additional sections can offcourse be added
-

[MOC] Liebherr LTM11200 crane
Jeroen Ottens posted a topic in LEGO Technic, Mindstorms, Model Team and Scale Modeling
Hi, Probably not the wisest move with three other projects ongoing, but a couple of weeks ago I couldn't resist starting again on designing the Liebherr LTM11200 crane: Some of you may remember the first version of this, which I designed a couple of years ago: This time however I try to iron out all the kinks that were present in the earlier version. It is still work in progress and even though the performance has improved over the earlier version I am still far from a smooth operating, well working machine. Especially the retracting of the outriggers and the whole steering system are still pretty poor performance wise. As you can see I have changed the colour scheme to a more available white with orange livery. Comments, questions and advice are welcome Leg godt Jeroen -

[REVIEW] 42082 - Rough Terrain Crane
Jim posted a topic in LEGO Technic, Mindstorms, Model Team and Scale Modeling
REVIEW - 42082 - ROUGH TERRAIN CRANE INTRODUCTION The biggest set of the second wave of 2018 sets is the Rough Terrain Crane. Actually, it is THE biggest Technic set ever, with 4057 parts, surpassing the 42055 - Bucket Wheel Excavator, which has 3929 parts. This set contains 128 parts more than the BWE. Which immediately raises the question; has TLG purposely made this set bigger, so it has the highest part count ever? The reason I am asking out loud, is that there has been some debate in the Technic Forum about the growing size of the sets, related to the functions. Some say that the part count is intentionally high, without adding significantly more (or better) functionality. While I do see a trend in sets getting bigger (i.e. higher part count, thus higher price), I don't think that TLG designers are filling their workday finding out ways to add lots of unnecessary parts. I do like to think that the style of building is adapting/evolving to the contemporary standards/requirements. Of course, I don't want to sound too naive, because at the end of the day, it's all 'bout the money. It's all 'bout the dun dun do do do dumb. I don't think it's funny to..... Anyway, why not use this review to dive into this delicate matter. Before we start I like to point out that I do like big sets. The experience of opening the box and seeing the plethora of parts is overwhelming. On the other hand, with Technic sets getting more and more expensive, I can understand that people stop buying the (bigger) sets. In this review, I simply want to find out if this set could have been made with, let's say, 3000-odd parts while maintaining the same functionality. Another thing I'd like to address in this review is the use of extra elements (playable items), like a chains, tools etc. There has been some debate about this in the Technic forum, so I like to give you my opinion. If you see this icon, you can click the image on the left or right side of the image, to cycle through alternative images. PICTURES Pictures can be clicked to view hi-res versions. More pictures can be found in my Flickr album. DISCLAIMER This set has been provided by the CEE Team of TLG. It's not my goal to promote this set. It's my goal to give you an honest opinion about it. Therefore, the opinion in this review is my own and is in no way linked to TLG. SET INFORMATION Number: 42082 Title: Rough Terrain Crane Theme: Technic Released: 2018 Part Count: 4.057 Box Weight: > 5kg (I forgot to weigh the box, because my kitchen scale couldn't handle it.) Box Dimensions: 57,5 cm x 47,2 cm x 16,5 cm Set Price (RRP): £ / $ 299.99 / € 229,99 Price per Part: £ / $ 0.074 / € 0,056 Links: Brickset, Bricklink So, with an RRP of 229 euro, the price per part comes down to 5,6 cent per part, which is a steal. It's even slightly less than the BWE (5,9 cents per part). This makes it one of the cheapest Technic sets in terms of price per part. Let's compare some stats with previous flagships. COMPARISON WITH OLDER SETS 2011 - 8110 - Unimog - 189 euro, 2048 parts, 9,3 cent per part. 2012 - 9398 - 4x4 Crawler - 169 euro, 1327 parts, 12,8 cent per part. 2013 - 42009 - Mobile Crane Mk II - 199 euro, 2606 parts, 7,7 cent per part. 2014 - 42030 - Volvo L350F - 219 euro, 1636 parts, 13,4 cent per part. 2015 - 42043 - Arocs - 199 euro, 2793 parts, which is 7,2 cent per part. 2016 - 42055 - BWE - 229 euro, 3929 parts, 5,9 cents per part. 2017 - 42070 - All Terrain Truck - 249 euro, 1862 parts, 13,4 cent per part. 2018 - 42082 - Rough Terrain Crane - 229 euro, 4057 parts, 5,6 cent per part. All of these sets have Power Functions, some more than others. The Volvo is literally packed with Power Functions, which explains the high price and low part count. A potential candidate for a comparison with the 42082 - Rough Terrain Crane is the 42009 - Mobile Crane Mk II. The 42009 packs 2606 parts for 7,7 cent per part, while the 42082 packs 4057 parts for 5,6 cent per part. So, the universally praised Mk II crane has a 37,5% increase in price per part. Or the 42082 has a 27,3% decrease in price per part, depending on how you want to look at it. That is 5 years ago, and I'm not taking inflation into account. In other words; for 30 euro extra you get 1451 extra parts. This comes down to 2,1 cent per parts, which isn't bad at all. Some of you might argue that this is not the way to compare two sets, but these numbers are based on RRP and part count, which are numbers we can work with. Since this set has four of the big Claas wheels, a gearbox, and not a lot of PF, I could also compare it to the 42070. But that set was way overpriced, so I don't think that would be fair. The average price of a part in a flagship, based on these 8 sets, is 9,4 cent. So for 229 euro you can expect 2155 parts. You get 1901 more than that. Thus drawing the preliminary conclusion that this set is big, but the price is more than reasonable. Of course, the original debate wasn't focused on the price per se, but whether the models are getting unnecessarily big. Let's carry on unboxing so we can find out. THE BOX The front of the box shows the model and its Power Functions components, a Battery Box and a Large Motor. No sign of new Powered Up elements yet. It also shows a picture of the model with an extended boom, measuring 100 cm high till the end of the boom and a chassis size of 48 cm long. Going by the size this isn't some two-bit crane. But size doesn't always matter. The box has the same width and height as last year's flagship (42070 - 6x6 All Terrain Truck), but it's a couple of centimeters deeper. INSIDE FLAP Like the 42070, this box also has the flap, common to flagship sets. The inside shows a big picture of the model, which is most likely almost 1:1 scale. It's pretty impressive, that's for sure. You can also see that the upper body with the boom can rotate freely, thus 360 degree. This means that most of the mechanics, and battery box, are probably placed in the upper body and not in the chassis. This makes sense, and we have seen it before. Another picture shows the boom can be raised up to 60 degrees. BACKSIDE The back is divided into two sections/sides. The left side shows the functions of the main model, while the right side shows the alternative model, a Mobile Pile Driver. I will express my love for the B-model later this review CONTENTS OF THE BOX The box contains: 1x Inner box 1x Sealed pack with two booklets and the sticker sheet 4x Rim 4x Tire 25x Numbered bags (8 of which are in the inner box) INNER BOX The inner box contains the sealed pack with instruction booklets and sticker sheet. And it contains the bags for steps 1 to 4. INSTRUCTION BOOKLETS Two instruction booklets. One for the chassis and one for the crane. Makes you wonder if one person can start building the chassis, while the other starts working on the crane. STICKER SHEET Quite a few stickers to decorate this model. A construction vehicle just isn't the same without black and yellow stripes. And of course, a bunch of stickers indicating how to operate the functions. POWER FUNCTIONS ELEMENTS A battery box and a large motor. TIRES These, so called Unimog Tires, seems to be very common nowadays, but they have only been used in two Technic sets before. RIMS Four big red rims, also used in the 42054 - Claas Xerion and the 42077 - Rally Car. TIRES ON RIMS Here a picture with the tires fitted on the rims. NUMBERED BAGS A total of 25 numbered bags. HIGHLIGHTED PARTS Actually there is only one interesting part in this set and that is the 11 x 11 Curved Gear Rack (or banana gear as some call them) from the 42055 - Bucket Wheel Excavator in a new color black. I am very happy that this gear has appeared in a color which can more easily be used in a MOC, for example an EV3 Robot Not sure why I forgot to take a picture of the part itself, but here is a picture of the subassembly. This set contains a total of eight of these curved gear racks. PART LIST A whopping 4.057 parts, but still only two pages with parts. THE BUILD Bags, bags, bags and more bags. Lucky for us, they are numbered. If you like a challenge, open all the bags and create a big unsorted pile. That will keep you busy for quite some time. I will simply go from step to step As expected we start with the chassis. And to be more precise; with the gearbox in the chassis. Really, orange pins?! Yes, really! Right off the bat, lots of gears are added to the chassis. A white clutch gear is used in the bottom of the chassis. This indicates that these gears/axles will be connected to the Power Functions. At the end of the first step the center of the chassis has finished. This chassis with center gearbox is kind of reminiscent of models like th 8110 - Unimog and the 8258 - Crane Truck. Lots of gears, densily packed in a small space. There's little room left. The bottom of the gearbox. This set contains the 5x7 frames in two colors, light bluish grey and black. This is what you can do with two different color frames. I am not really fond of these kind of solutions, but I understand it can be convenient. Ohhh, and then there's the green liftarms. Because we need green in a red vehicle. I reckon someone opened up the bucket with green dye, so we do need to use more of these of parts in green Actually, I am being semi-serious here. The Forest Machine uses these liftarms in green, so it's probably cost-effective to use them in multiple sets. We are seeing this with other parts as well. For example, the beforementioned orange 3L pins with bush and white 1L connector, etc. TLG tends to minimize the overall number of different parts used in (Technic) sets. I reckon this has something to do with optimizing their warehouse space. New parts are added every year and storage space is limited. Instead of using five different colors TLG uses one (maybe two) color. Doing this over the entire range of sets will save up a lot of space. Technic seems to be the ideal theme to use these kind of strategies. And it adheres to the "color vommit in the chassis" strategy. One of the wheel assemblies. As you can see there is no actual suspension. Not even pendular suspension. Which seems odd for an Rough Terrain Crane, but I am no expert. Here's the subassembly attached to the center of the chassis. An almost similar assembly attached to the other side. Instead of green liftarms, this one uses orange ones. This way you can more easily tell the sides apart. This is actually not a bad thing. I have mentioned it before, but I am actually a big fan of the color vommit approach. Altough I must admit that using these orange 3L pins with bush is definitely pusing it. Blue might have been a better choice, but that would have confliced with the Bugatti color scheme. Therefore, I think TLG made the decision to use orange in this as well. By the way; this set does also contain 40 of these 3L pins with bush in black. The picture below shows how you can align the wheels. After aligning them, you slide the 16T gear in position. When I was building the set, I wondered why there was space between the gear and the liftarm, but it soon made sense. A subassebly for the outriggers. I do like the design, but as with most outriggers on Technic models, they op...e....ra.....te.....ve......ry......slow......ly. I would love to show you a video of the outriggers, but since it's Tuesday now, I don't have enough time to lower them before the embargo date of this review Just kidding of course. They do take a while, but since they are outriggers I find this acceptable. As long as the other functions aren't that slow. The chassis with front and rear wheel assemblies, and the front and rear outriggers. This is what you would expect from a crane this size. No unncessary use of extra parts so far. Next stop is the V8 engine with white oil filter and orange propellor/fan. I really like the oil filter. It's simple, but it adds detail to the model. The choice of orange as the color for the propellor seems odd, but it's likely a safety precaution. The emphasize that this is a part you need to watch, since it will be rotating when you move the crane. Not entirely sure, but it must be something along these lines. After the engine you will be building the connection between the chassis and the upper structure (crane body). This is done by using eight curved gear racks and an ingenious system in between. Click on the images to construct the ring. At that point you will attach the rims and the chassis is done. Worth noting is that the wheel caps in the rims use a lot of extra parts. Per cap approximately 12 parts are used, which boils down to 48 extra parts, just for the caps. This picture will be very hard to shoot with the crane attached, so I will give it to you now. This model implements Ackerman Steering Geometry. Or Reversed Ackerman Steering. Or even Reversed Reversed Ackerman Steering hehe. Not sure what the consensus in the forum was. I am no expert on steering assemblies, but Ackerman Steering boils down to the inner wheels turning at a different angle than the outer wheels, due to the fact the outer wheels have to travel a wider diameter. Ackerman Steering is something Technic fans like to see in models. For more information I suggest you start with Wikepedia and go from there SECOND BOOKLET This is an interesting part in the build. Reminds us of the 8043 - Motorized Excavator. Admittedly, I didn't think of this myself, but it has been addressed in the forum. Since the two 20T Bevel Gear with Pinhole have been placed on opposite sides of the actuators, this results in them turning in a different direction when the boom is raised (or lowered). Basically, this means that when the boom is raised, one of the LA's extends, while the other retracts. If one of the 20T gears was placed the other way around, this problem would not occur. Of course, the turning direction of one of the axles feeding the LA should be reversed for this to work. Since the gears attached to the LA's only rotate a tiny fraction when raising the boom, it leads me to believe that this is a calculated flaw. In this video I try to demonstrate the issue at hand. You continue to work your way back to the rear of the superstructure. Again, lots of gears and space which will be filled with gearboxes. This is the point in the second booklet where you can't build any further, untill you finish the first booklet. At this stage you will attach the upper section to the chassis. The boom is really massive. Feels solid like a rock. I am impressed with the sturdyness of this boom. It does a lot of panels and H-frames, so it's only logical, but I was still impressed. No wormgear to extend the boom this time. The other side of the boom with a white clutch gear for safety. The boom attached to the crane. Needless to say I am having a hard time getting the entire boom in the picture. The back of the upper section is closed with panels. The black ones can be removed for easy access to the battery. There are two gearboxes on the top of the crane. The left (bottom) one is to switch between crane and chassis functions. The right (upper) one is to switch between raising/lowering the boom, extracting/retracting the boom and lowering/raising the hook. The chassis functions are rotating the super structure and raising/lowering the outriggers. COMPLETED MODEL It is rather difficult to shoot decent pictures in the photo studio. I sure hope sets won't get much bigger than this. Looking at this model, I think TLG has done a remarkable job with this Rough Terrain Crane. The black chassis, with red elements, combined with the red super structure looks spot on. Lots of technic gears and elements provide an interesting build. I love how the two (or three) gearboxes work together. Here you can clearly see the gearbox on this side of the chassis is used to rotate the crane. Because of the weight, the chassis tends to bend a little, but nothing to worry about. The boom of the crane can exend way more than this, but that makes is impossible for me to take pictures. A close up from the front of the vehicle. The cabin door swings open to reveal the interior of the cabin. And one from the reaar. I'm sorry I don't have anymore pictures of the completed model, but I think you have seen most of it. You can find out more by building it yourself FEATURES AND FUNCTIONS This model packs features you would expect from a mobile crane. Raising/Lowering the boom Extracting/Retracting the boom Raising/Lowering the hook Raising/Lowering the outriggers Four wheel (Ackermann) steering Working fake engine Other than that there are some details like two cabinets which can be opened to store some gear. TLG has even added some walls which can be turned into part of a house or cabin. OUTRIGGERS Okay, let's get this out of the way. The outriggers are slow, really slow. I turned them on this morning and when I came home from work, they were halfway. Obviously, I am joking...I didn't go to work today. It's not that bad, but it would be nice if they operated a wee bit faster. You do need to use the four plates for them to properly reach the ground. STEERING AND DRIVING For a set this size steering and driving work properly. Even better than I expected. CRANE The thing I am most impressed with are the crane functions. These work like a charm. And, unlike the 42043 - Mercedes Arocs, this gearbox (or rather gearboxes) is very easy to understand. One look at the stickers is all it takes to be able to operate this thing. It offers a ton of playability. Linking gearboxes, instead of direct connection to a motor, can cause some slack. This can be seen when turning the crane. But this is just a minor gripe, just like the outriggers. DOOR A nice detail is the sliding door. PLAYABLE ITEMS It's time to talk about the added playable items, like this toolbox. Some people don't feel this is necessary and some even seem to be a bit annoyed by it. I have addressed this in my 42069 - Extreme Adventure review where I state that I like these added details. And I still do. The Forest Machine also packs some extra's like a chainsaw, some logs etc. Actually, I see it in most of the Technic sets. What I have seen is that this greatly enhances playability for younger LEGO fans. I am absolutely aware that this is a 11+ set, so it is not designed for a 5-year old. But seeing a 5-year old play with these Technic models and use all the extra items in the set for his "story" makes you realise that by adding playable items to a Technic set, it suddenly becomes a set for all ages. So, a handful of extra parts might be enough to prepare a 5-year old for Technic enthusiasm later down the line. After all, he (or she) is the future Technic target audience. Therefore, I am 100% in favor of adding these little details to Technic sets, even if these sets are 11+. PART COUNT And now for the part count discussion. No doubt this model could have been made using less parts. It you take away the playable items, wheel caps, grey construction panel and outrigger plates, you already save a couple of hundred parts. In the old days a Technic model used to be liftarms with gears inside. These days are over. Models are becoming more and more realistically looking, which means that less of the interior is visible. This also goes for the boom for example. In the old days we would have seen the interior of the boom and now it's covered with panels. I am not convinced that TLG is deliberately adding parts to the boom just to have more parts. I think TLG is doing this because they need to compete with other toys in the stores and these toys look like the real thing. Therefore TLG wants its models to look more like the real thing to, resulting in adding panels and other embellishments. Granted, TLG's marketing department won't mind having the biggest Technic set every year, so they can use this in Ads. Like I said in the introduction; I am a fan of big sets. I love putting together a 4057 part set. But I reckon people are more upset about the price of bigger sets than the part count. This can be a false assumption, because I know not all AFOLs think like this. But if TLG had used 3057 parts instead of 4057 they could have easily maintained the same RRP. 3000 parts at 229 euro is 7,6 cents a piece, which is still rather cheap. So my conclusion is that TLG might have upped the part count a bit, but still presented this set at a very affordable price. We already see this set popping up for around 179 euro, which boils down to 4,5 cent a piece, which is extremely affordabl for a Technic set. For me it would have been an issue if TLG priced this set at 349 euro RRP. Then I would have figured TLG was doing it on purpose. Basically, this is a UCS-like Technic set and you get it for 229 euro, or less if you do some online shopping. Personally, I think this is extremely good value for money. Of course your mileage may vary, but this is how I see things. B-MODEL The B-model, a Mobile Pile Driver, is a cop out, nothing more, nothing less. I mean, seriously?! 4000+ parts and we get a model that is 95% the same as the original model. And if that's not the worst part, it's ugly AF, as some people would like to phrase it. The Pile Driver extension looks like something I could have built....when I was four . Maybe, well probably, I am insulting someone at The LEGO Group, but I can only hope that they were lacking time and/or resources, so they came up with this at the last moment. The argument of time is rendered invalid, because this is what you can in a couple of days. Well, maybe not everybody, but @nico71 was able to turn this set into a front loader. Nobody will probably argue that this would have been a better B-model. Not sure what TLG's policy is regarding alternate models but the 42030 isn't in production anymore, so I don't see any reason not go for something like this. The rear view of the model. And even the grey construction elements can be turned into something useful. SUMMARY I am a big fan of this set. It packs a lot of functionality and parts, for a decent price. The forum contains pages and pages with potential improvements, but that's out of scope for my review. Almost every set gets improved by AFOLs, so that's no surprise. Bottomline is that this is great set for existing AFOLs and new AFOLs alike. I can remember coming out of my dark ages in 2005, building the 8421 - Mobile Crane, which had a whopping 1885 parts. I remember the endless quantity of parts coming out of the box. Imagine a set with more than twice the part count. And again, this doesn't automatically mean a better set, but you will be impressed when you open this box. Much has been said about the color vommit in the chassis of this model. I have grown fond of color vommit, because I like the variety in the parts. I do enjoy seeing all the colored parts. However, using orange 3L Pins with Bush is pushing it to the limit, especially on a red model. I would have preferred blue instead of orange. My final conclusion is that for around 200 euro, you do get a LOT of value for money. I can see myself getting an extra copy, just because of that. I would almost go as far a stating that this could be considered a UCS Technic set. PROS Good looking model Properly working functions (even Ackermann steering) Several (linked) gearboxes Great parts pack (especially for people new to Technic) Very affordable, almost cheap CONS Some slack due to drivetrains and gearboxes Outriggers operate very slowly No suspension No special parts besides the new curved gear rack in black SCORE How do I rate this set? 9 DESIGN I love the looks, color scheme, everything. 9 BUILDING EXPERIENCE Very enjoyable build with several gearboxes and other functionality. 8 FEATURES Great features, with some room for improvement. No suspension though. 9 PLAYABILITY Implemented features provide lots of playability. 8 PARTS Mostly common parts, but you do get a lot of them. 10 VALUE FOR MONEY Price goes down to 4,8 cent per part if you shop around. It doesn't get any cheaper than this. 8,8 UCS ANYONE? Thanks you for reading this review. All pictures can be found here. -
.thumb.JPG.06b89e5883516bc1ca4c78486eaf6542.JPG)
[MOC] SANY SCC40000A
Kladovec posted a topic in LEGO Technic, Mindstorms, Model Team and Scale Modeling
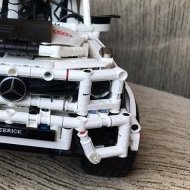
Hello, this is a model (MOC) of real existing lattice crane from China - Sany SCC40000A. Crane with capacity 4000 tons, his overall height can be over 200 meters. To transport that massive crane require more than 200 heavy transport trucks. My model is little smaller - height is max 3.4 meters and I really don´t know how much it can lift. I didn´t try - maybe several kilograms. Only to the first braking bricks :-). It took me several weeks to make it in LDD, several weeks to collect all the parts and build, some issues during build has occured, but nothing serious. I also made building instructions if you wish to build. Total parts count 10388. It is fully remote controled via IR receivers. 14 power function motors - 4 XL motors in the main undercarriage which control each tracks and 2 IR receivers, 4 XL motors in the rear ballast trailer one motor for each tracks and 2 IR receivers, 4 L motors in the superstructure for 4 winch drums and 2 IR receivers, last 2 M motors are located in the derrick with 1 IR receiver, this M motors control last two winch drums. Two rear winch drums in the superstructure are for the main boom, two front winch drums are for the lufffing jib. Winches located in the derrick are for main and auxiliary hooks. Crane can be made with Sbricks or Buwizz also. In rear ballast blocks are hidden non lego counterweight with aproximetly 3 kg. Building instructions: https://rebrickable.com/mocs/MOC-135246/kladovec/crawler-crane-sany-scc40000/ Video: https://youtu.be/IQzy3cn-eiU More pictures: https://bricksafe.com/pages/kladovec/sany-scc40000 -
 https://www.youtube.com/watch?v=uUW5Z1O_SzQ MOC information(Kudos to Huib van der Hart) Number of parts: 12205 PCS Size: 145*21*32 cm Weight: 15.5KG PF Electrical parts: 5XL motor, 3L motor, 6M motor, 2 servomotor, 2 sets of Bluetooth lithium Introduction to the model: Can realize the front and back movement, two kinds of steering mode switch, support crab line movement. Chassis support arm supports remote deployment. There are simulated V8 engine walking implementations that can be linked. The counterweight module can be raised remotely using a rope. The lifting of the boom is pushed by a third-party electric push rod, and the hook rope is remote control. Boom expansion is manually controlled. The overlift device is manually controlled.
 -

Technic ans Scale models at Bricking Bavaria 2022
functionalTechnic posted a topic in LEGO Technic, Mindstorms, Model Team and Scale Modeling
Hi everyone Last weekend the Bricking Bavaria 2022 took place in Fürth, Germany. LEGO builders from around Europe travelled to Fürth to show their models. This year large cranes, lang heavy load transporters and even a technic locomotive in scale 1:17 were shown. It was really inspiring to meet other builders and learn about their building techniques, concepts and how their model work. For all people who had not the possibility to come to BB22 I cut a video with as many models in action as possible. -

[MOC] Unimog U400
MajklSpajkl posted a topic in LEGO Technic, Mindstorms, Model Team and Scale Modeling
Hello everyone! I can't believe it's been 18 months since my last MOC actually finished. Well, here is the latest to join the party: Unimog U400... and no, it isn't a MOD of 8110, that one is two times bigger ? Sadly, I don't have the 8110 to shoot them side by side, but I will try to borrow it so that the "daddy&son" bonding moment can be documented Maybe I'll be good enough to even finish the video until New Year... but then again, probably not so soon, not to mention the instructions...? Unfortunately, I move in a much slower time dimension ? Features: TRUCK: • Should be around 1:16ish, scale, tires as a starting point, • Buwizz powered, • XL for drive + fake 4in line engine with fan, • servo for steering with working steering wheel, • M motor for front and rear PTO, • L motor for compressor, pneumatic attachment front and rear, • M motor for bed (activated with PF switch), on the same buwizz output as the compressor, bed can be raised in all three directions, • cabin tilt (manually, a bit poor - two orange tiles below direction light must be removed), • detailed cabin with opening doors, • live portal axles, front with “floating” differencial • 3 differentials • trailer hitch with additional PTO, CRANE • Crane outriggers and rotation over a PTO, • 3 manual pneumatic valves for operating the crane, WINCH • manual clutch to cut off the PTO, • automatic brake against unwinding, PLOUGH • pneumatic valves for raising and switching sider, GRITTER • PTO powered double auger (two salt compartments) + rotating dispenser, • manually operated stands WINTER IS COMING! I hope you like it. Please be patient about the video...I will prepare it as soon as possible. Best regards, Miha P.S.: Some more photos of the axles and the under side can be found here. -

Harbor Container Crane
Foton posted a topic in LEGO Technic, Mindstorms, Model Team and Scale Modeling
I would like to build something like this crane. Remotelly controlled. With camera in cabin. Inspiration is similar video simulator in visitors centra at Maasvlakte || (Rotterdam). Basic concept: control center: Tablet for view + (tablet for control with SBRICK |or| Mindstorm cube with joysticks builded on motors ) crane: 3 axes of movement + un/lock container (similiar to real one Twistlock) , PF or Mindstorm motors + Sbrick/Mindstorm cube For now I have working twistlock. And trying to figure out how move it from above by string, so no motor will be on locking frame. See pictures in G album https://photos.app.goo.gl/MFoRXg1i62n1gXPd7. -
42042 Crawler Crane Mod (moc)
2ndgen posted a topic in LEGO Technic, Mindstorms, Model Team and Scale Modeling
I'm sure there's hundreds of these things modded up, and here is another take on the blue crawler. Added a couple sections, strengthened a few attachment points, added a few little details, took out clutch so it can pull pretty good now. Next job will be figuring out how to get a subtracter underneath this. (Any suggestions) Well there it is, simple mod but I like the look of it, a few things could probably be refined, and as always any pointers or wrong doings, I'd love to here it. https://bricksafe.com/pages/2ndgenguy/raptor/42042-crane-mod.-moc (Credit to silvio.tristram on rebrickable for the hook) -
I really like the new city space line and 60229 is my favorite of the line. But there are two aspects of it that I thought should be improved to live up to the name of the set. The crane needed more range of motion and the truck needed to be longer to actually carry more of the rocket components. I extended the truck by one axle and the length of the bed, so that it can properly carry the shuttle portion and single rocket boosters (they still hang off though). The most serious mod is adding another axis of motion to the overhead crane, built on two baseplates. I used the new rollercoaster tracks for this which worked well. I also built a ramped platform for the truck to bring its bed height closer to the bed of the rocket transporter. Lastly I added a cab and supporting railings and ladder to the crane so that it can actually be operated by someone instead of mysteriously moving on its own. Enjoy and comments are appreciated!
-

Off-road Truck with Crane (42126 Alternate)
CrazyKreations posted a topic in LEGO Technic, Mindstorms, Model Team and Scale Modeling
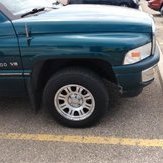
Hi everyone, we had our Raptor set parts sitting around and after we built a Jeep Gladiator out of the Raptor we decided to build something packed with little features that will add extra value to this licensed set. We present to you an Offroad Truck with a crane! Please visit this blog post on our website https://www.crazykreations.com/post/42126-offroad-truck-with-crane for more info on this model and don't forget to like and follow us on Rebrickable and sign up on our website for discounts on more MOCs and alternates. Features: Clean and working V6 engine under the hood openable hood with a stand to keep it open hog steering (removable top nob) opening doors interior snorkel exhaust 2x4 drive solid axle set up throughout model new front axle that has improved steering Outriggers with an easy lock wheel chocks that are stored at the side of the model outrigger pads (recommend making custom ones**) crane arm with extendable boom Rebrickable Link https://rebrickable.com/mocs/MOC-108236/CrazyKreations/42126-off-road-truck-with-crane/#details -
42082 - Rough Terrain Crane - MODs and improvements
Cumulonimbus posted a topic in LEGO Technic, Mindstorms, Model Team and Scale Modeling
The upcoming 42082 Rough terrain crane has inspired a whole list of possible improvements because I believe that at this scale some cool functions could/should be modeled (in random order): Two stage outriggers, preferably PF controlled Multiple steering modes (minimal 2: 4WS and front wheel steering) Pendular front axle Luffing jib, folding away against the boom Second winch for secondary hook Replace LA’s which lift the boom with an actuator with a longer stroke for bigger range in the boom angle Cosmetic changes to cabin, engine cover and upper structure to resemble real cranes more like Grove or Terex Some of these are probably overly ambitious and I’m not claiming to be able build all these MODs in one single model, but I am curious to see how far I can take this. My first step is to take a look at possible two stage outriggers. So far I’m tinkering in LDD to find mechanisms for the horizontal stage which are rigid enough to support the Crane and compact enough to fit on both ends of the 42082. I think it must be possible to fit the outriggers in a module measuring 5x7x23 studs. The ultimate goal would be to lift the crane from its wheels, but considering the size and weight of the 42082, I would be happy if the outriggers can simply provide actual support. Progress so far: -

[MOC] Mini Mobile Crane [Free Instructions]
SaperPL posted a topic in LEGO Technic, Mindstorms, Model Team and Scale Modeling
Here's my most recent "quality" build that I couldn't show off for some time: Feature video: Free instructions on Rebrickable: https://rebrickable.com/mocs/MOC-72143/SaperPL/mini-mobile-crane/#details EDIT: The MOC has landed on Build-A-MOC store as a set for purchase: https://buildamoc.com/products/mini-mobile-crane Render: Photos: Drivetrain? I hope you'll like it :) Check out my youtube channel and rebrickable instructions for more small scale stuff like this. -

[MOC] GROVE GMK5250L Mobile Crane
mitx2529 posted a topic in LEGO Technic, Mindstorms, Model Team and Scale Modeling
Hi, as a crane fans, i'm happy to introduce my lastest building GROVE GMK5250L in scale 1:20 it's a revise version to my last crane project more accurate appearance and gear functions are more effective the 6 panel boom max can reach around 140 cm after extendend, and the crane high is 165-170 cm The angle of rise can reach 82 degrees, just like the real crane the counterweight is datchable Thanks for viewing and appreciate any feedback! 07/08/2021 the video added 09/09/2021 the instruction is available on rebrickable https://rebrickable.com/mocs/MOC-86030/mitx2529/grove-gmk-5250l-mobile-crane -

LEGO IDEAS Classic Space PERMANENT PLANETARY STATION
Operacion Saturno posted a topic in LEGO Sci-Fi
https://ideas.lego.com/projects/43814e85-ead4-46d0-886c-b024d6156756 2800 piece Space Base The base is composed of four modules: Vehicle Hangar, Habitation quarters, Command center, Lab module. Click the link for more images. I tried to upload an image, but won't let me. -

[TC20] 6352 Cargomaster Crane
Jundis posted a topic in LEGO Technic, Mindstorms, Model Team and Scale Modeling
Hi guys, many ideas came to my mind, but I ended up with a model from my childhood as I had way more System models back then. There was one I loved so dearly: I already had a layout in mind and it seems it fits perfectly. The scale will be determined by the small tractor tires and will be about 3:1 (8:3 to be exactly). Functions will be: - Steering of outer axles (operated from upper frame) - Extending outriggers (operated from upper frame) - Pushing down outriggers (each of it indipendently) - extending boom - lowering of the hook - lifting of the boom The model of course comes with the little blue tractor (steering and fake 2-cylinder engine) and the cargo container. It may even have the right scale for a technic figure... hmm :-) At least for now, the lower frame is a rather straight forward built. The outriggers work in my first test, but need way more stabilisation on the frame.... -

[MOC] Mini Off-Road Crane
weavil posted a topic in LEGO Technic, Mindstorms, Model Team and Scale Modeling
I set out to make a mini crane. I then had the Idea to use 42082 as the reference and make a mini version. Making a smaller version of a Lego model can be hard to do because some aspects can't be, or hard to scale down. This was true here as using the wheels as the point for scale and some of the 42082 can't be scaled in half. So I just rolled with it and had a good model, but I didn't like how I did the features. Mainly the outriggers were independent and I wanted them all to function as one. It took me longer then I will admit, but mission accomplished! It has: 4 wheel steering Raise and lowering boom Extending boom Outriggers Winch and extension uses 3L friction pin with stop bush to "lock" them A few more pictures are on Bricksafe. Instructions: Rebickable instructions -

Maintenance Of Way (MOW) track construction train with steam and diesel locomotives - real world WIP
Murdoch17 posted a topic in LEGO Train Tech
Does you track need to be repaired after a major storm? Want to connect Point A to Point B with a brand new rail-line? Did the Flying Kipper have another accident on the main line? Or maybe you want to upgrade the signaling and double track the line at the same time? Call out the Maintenance Of Way (MOW) train to fix all these problems and more! This train consists of a late-1950's diesel locomotive, or a mid-1930's large eight-driving wheel steam engine and six specialty cars: - a (working!) crane car - depressed-center rail wagon - a (working!) ballast hopper - a tanker car - workman's tool car - caboose The 4-8-4 steam loco is new-to-me, and began life as a 2-8-4 Berkshire type built by Plastic_Goth and purchased from Rebrickable a seen here. To make this steamer, I upped the wheel count of @Plastic_Goth's locomotive by another leading axle, making it into a 4-8-4 Northern-type from the original 2-8-4 as built in the instructions. The new piston / wheel assembly is entirely my own work, as is the completely new 7-wide tender. The inside of the cab features two gauges and the firebox door. This model was originally a ALCO MRS-1 built by @SavaTheAggie, but has been so severely modified that it no longer looks like the prototype loco. So I went searching And found another ALCO locomotive, a RSD-12 that looks like my loco. Both my model and the prototype have the six wheels, and the same basic hood and cab design. The long hood of the loco has been designated the rear with a double red light. This car carries liquid weed killer for use after the track has been laid. This stream crane model was heavily inspired by Whoward69's instructions for a set of crane and match truck train cars. I modified the original model seen here. (sadly, it seems his Flickr profile and pictures has been deleted) I originally meant for the crane to have ropes to move the boom, but it got confusing on which rope went where so for now it's moved by the H.O.G. (Hand Of God) method. The crane can spin around in 360 degrees and lift anywhere up to 90 degrees straight up. (Their is a double set of pins keeping the boom from going too low, as well.) The heavy-duty depressed-center wagon has brick-built arms to secure the cargo of prefabricated railroad track in place. This model was inspired by a coal hopper on an older website called LGauge .com. I turned the old finger hinges into new pin-orientated ones and colored the car yellow to match the MOW paint scheme. The hopper's bottom doors open and can dump 1 x 1 round plates / bricks onto the tracks for ballast. This old passenger car carries the workmen and their tools. The caboose features two ladders (one per side) and more of those fancy printed 2 x 4 tiles. If you like what you see in this topic, check out the home base of the train and assorted other vehicles in this thread here! Thoughts? Comments, Suggestions, & Complaints always welcome! -
[MOC] Mammoet PTC-200-DS RIng Crane
Aleh posted a topic in LEGO Technic, Mindstorms, Model Team and Scale Modeling
Hello everyone, let me introduce my latest MOC – Mammoet PTC-200-DS Ring Crane made of Lego Technic! This particular model attracted me for a long time, but since I saw it on YT installing the highest wheel in the world at UAE, I decided to investigate it’s building.So I started from calculating it’s scale and number of wheels required. Railway ring set up crane’s scale. Then I decided to make 4 ¼ carriers with two 1/8 halves inside, each on 4 train wheels. So, all in all I required 32 train wheels. So, I started to look for them on BL.Building started from these 1/8 carriers. I wanted each wheel to be driven to spread the torque all over the chassis. So each ¼ carrier is driven by L motor. Totally 4 L motors rotate 32 wheels for crane rotation :)Then I started to build main superstructure (half). Build two similar halves and connect them. Then installed winches, counterweight box and booms. There is not too much information about this crane in the network, so my build is based on some youtube videos and browsed images of the crane. I would not able to get any info from the company directly. So the crane may have some differences from the real model. And for some reason I can't say this is a scale model. For examble real crane has two rings with 64 wheels on each. Obviously, I can't build a model on 128 train wheels - this sclae is simply out of my budget.I was dreaming of a crane which would be able to lift up to 1 kilo. Luckily, this crane one can easily uplift even 1,5 Kg 😊Crane is powered by classic PF elements: 4 L motors for drive + steering rotation, 4 XL Motors for 7 winches. I recommend using 4 BBBoxes as a counterweight. Although only one is connected and needs to be charged. It would be simple to switch crane management to SBricks or Buwizzes (as there are five separate functions, you’ll require 2 sbricks or two buwizzes). Installing PU system instead of PF may become a challenge, especially for carriers. If you have only one battery box - this is not bad, crane is stable even with one battery box as a counterweight, but, obviously, it can't lift a lot or make a horizontal poisition. Crane is 210 cm high in the current configuration at it's highest position. Can lift 1500 gramms or maybe even 2000, but I didn't give it a try to save parts from stress. Fully RC with 5 channels with 3 IR receivers. Can be layed horizontally and back to working position without human help. More images Ah, building instructions are already complete and ready: https://rebrickable.com/mocs/MOC-77733/OleJka/mammoet-ptc-200-ds-ring-crane/#details -

Controlling the Rough Terrain Crane
Skookumjim posted a topic in LEGO Technic, Mindstorms, Model Team and Scale Modeling
I have for a while wondered about using robotic components to automate/control the Lego Rough Terrain Crane ... this has now happened using the Mindstorms Robot Inventor hub with 5 medium stepper motors and a distance sensor ....while keeping the original power functions large motor to avoid further destruction of the original model. One motor switches turntable rotation, another switches the drive from turntable to jib while a third switches power to the original motor. Two further motors switch the six way gear selector for hook and jib. the distance sensor is used to limit turntable rotation to accommodate the relatively short cable lengths. The resulting construction works well.... the crane can both remote controlled and programmed. https://www.dropbox.com/sh/82vqyjvd2zledp0/AAA736uPmlzo9hL-sIWdGS8la?dl=0