Search the Community
Showing results for tags 'Space'.
Found 776 results
-
Inspiration From : StarTrek spacecraft named "Shuttlecraft type-07 Hawking", "Galileo Shuttle", and "Danuble class warp shuttle" [Futuron] Shuttle "The Chip" by Horlack, on Flickr
-
Hello I guess as my first ever post on this forum, not 100% sure this is the right spot for this kind of post, but I should introduce myself, I am a 34 year old from Australia, who has always had a passion for Lego but could never really afford it when I was a kid. But now having a 3 and 4 year old boy of my own who are completely obsessed with Lego, i have recently rediscovered my love of this simple toy. I have gone from building mostly sets, to creating my own designs. My aim is to make every design I do as something that my boys would love to play with so playability to me is everything. Anyway that's enough of that, I am wanting to show off one of my first designs, I really enjoy a challenge and I definitely had one with this project. I am a Sci-fi nerd and love Star Trek, in particular everything Klingon so I was very disappointed that Lego never got the star trek licence. I am currently working on building this Bird of Prey, at this stage I have only made the cockpit and neck, but have the parts for the wing and disruptor ordered. I am really looking forward to seeing how this Stud.io design that I have spent so many hours on turn into a real product. My main concerns for the build is how strong the wing hinge attachment is as there is quite a lot of weight on them. But I will find out in the next week or so when all my parts arrive and I can trial it. Hope you all find it interesting, I believe it turned out pretty good, with a few play features included, such as the dining hall, opening cockpit, adjustable wings and shooting disruptors. Model Details (according to Stud.io) 4335 pieces 74cm wide, 68cm long. 4.3kg I wanted to add more pics but it seems I can only upload 1 due to the size. See if I can work around this. Also if you are interested, I currently have a Lego Ideas set in the support stage. Its a minifigure scale SpaceX Falcon 9 Rocket, again showing my love for all things space related. any support will be greatly appreciated. https://ideas.lego.com/projects/2a60e3c2-c86f-4154-8be3-6fb148943362/statistics I am very interested to hear what you all have to say about my Bird of Prey, any issues you see or possible problems I will have turning this into a real model. Thank you very much for reading this. :) Any ideas on how to post more pictures? I am not that tech savy. Thanks Ok I made a Flickr account to show some of the other photos. I have also ordered custom Klingon minifigures and Batleths to hang in the dining hall. https://www.flickr.com/photos/192336319@N06/
-

[MOC] NCS - 6890 Cosmic Cruiser, Version Intergalactic Girl
Horlack Bricks posted a topic in LEGO Sci-Fi
6890 - Cosmic Cruiser, Version Intergalactic Girl With 4 parts Bionicle / Hero Factory All WYSIWYG. [NCS] 6890 - Cosmic Cruiser, Intergalactic Girl by Horlack, on Flickr [NCS] 6890 - Cosmic Cruiser, Intergalactic Girl by Horlack, on Flickr [NCS] 6890 - Cosmic Cruiser, Intergalactic Girl by Horlack, on Flickr [NCS] 6890 - Cosmic Cruiser, Intergalactic Girl by Horlack, on Flickr (CLICK FOR ZOOM) -
I open hostilities for next week. 👀 My Crazy Futuron Heroes. And silly name. Go challenge, and do the same, with your Crazy Heroes Team, just for the fun ! ah ah ah ha ! Halloween - Crazy Futuron Heroes by Horlack, onr Flickr Halloween - Crazy Futuron Heroes by Horlack, on Flickr Halloween - Crazy Futuron Heroes by Horlack, on Flickr Halloween - Crazy Futuron Heroes by Horlack, on Flickr In my 6 favorites, I hesitate between "Iron Beach Sado", contraction of Baywatch with David Hasselhoff, Iron Man, and the Mandarin with his whip "Red Falcon Hood", contraction of Red Hood (or Deadpool) and Red Falcon, with Harley's baseball bat. "Spider Jedi Fakir", contraction between Spiderman, a Jedi Sith, and a Fakir from Indiana Jones. "Harley's 12 labors", Harley's 12 labors on roller skates, with the batman belt, the helmet of an Xwing pilot and the arms of Hercules "Atomic Love Lantern", contraction of Maggie Simpson, with the lantern of Green Lantern, and the X-rays of Dexter. "Explosive surfboard Batgirl", Batgirl who do boardsurf explosively, underwater, with a site/safety helmet or construction hat Maybe BatGirl, lol
-
Hey guys! I have a MOC I want to share. I call it the Star Catcher. It transforms from this: To this: More pics in my flickr album. Thanks!
-

Benny's Classic Space models - spaceships, robots, and buildings!
Murdoch17 posted a topic in LEGO Sci-Fi
(When the base and any other digital creations are built in real life, I will add those pictures into this page.) This is the beginning of a journey through the wormhole to a mini-figure called Benny and a civilization on the cusp of greatness. His continuing mission: to seek out new lifeforms, to explore unknown worlds, all in the name of of science and awesomeness. The year is 1980-something, the name of the theme is Classic Space. Classic Space fortress walls The base as it was ordered... will post a picture of the complete setup when built in real life. Here is the front gate of my space base to let the train (or road vehicles) through. It can safely open and close still using the HoG (Hand of God) method without impacting the flow of 9v current (still need to add those 9v tracks..) through the rails... though I wouldn't suggest driving through it with the door closed! This is one of twelve walls sections, held together with the other modules by four Technic pins.(two on each side) This is one of four of the corner modules. I redesigned these since last time to be less parts intensive and have fewer gaps in the wall. Astro Bot Recharge / Repair bay The inspiration behind this large robot-recharge port model is mainly inspired by the mech repair bay from 2006 set 7709. (Sentai Fortress) from Exo Force. I can attach the robot to a small mound behind each foot, where it holds it there by two studs per heel. The dark gray thin sidewall pieces located on three sides of the foot make sure Astro Bot 33 won't wiggle side-to-side and disengage from his charge port prematurely. The wall supports the mech repair bay and also gives me another two brand-new wall sections (in length) in for the base to play with at the same time! Classic Space HQ / Benny's skyscraper - 76038 MOD This building was inspired by my brother's take on set 6398, Central Precinct HQ. He added a back staircase module (which I have removed in favor of an older 2015 Avengers tower-inspired model / MOC I made a couple weeks back), while I removed the prison cell and changed the color scheme from white and black to blue and white with trans-yellow glass. The windows and doors were also modernized, and the large spinning sensor array added to the roof. I've also added connectors to the main base walls, which means the building is fully integrated into my Classic Space base. As previously stated, the rear was inspired by set 76038, Attack on Avengers Tower, from the Age of Ultron movie. This ultimately meant that the 1990's-style model's floors had to be stretched upwards by two bricks each in height to match the newer model's floor-plan. I really like the sleek wraparound window on the top floor of the building, as it is where personal Benny's office is. He gets to look out on the space base, and marvel at how things have changed since his creation in 1984. The right side wall opens up to reveal the inside of the building. Ground floor is official meeting space, second and third floors are for monitoring the radio telescope and other such devices across the galaxy. Fourth floor is the break room, while the fifth floor is Benny's personal office. (Note: On the outdoor patio on floor three is the monument to Jens Nygaard, the gone-but-not-forgotten creator of Classic Space.) The rear tower folds open for access too, and like the side wall, locks shut on a Technic pin. Here you can also see Benny's desk. Lunar Crater Crawler vehicle This model is based off 60192 (Arctic Ice Crawler) from the 2018 CITY Arctic theme, this MOD is called the Lunar Crater Crawler and moves boulders with it's larger gripping claw tool. It can seat one fully-suited astronaut figure. It also has printed controls in front of the space seat. Floodlights sit on the sides of the craft, allowing you to see on the dark side of the moon, while there is a clip for a handheld radio should you need to contact the command base. The rear should feature the Classic Space logo on a 4x2 slope, while a bumblebee stripe printed 1 x 2 tile goes above the logo. This printed pieces will be applied in real life once it's built. Lunar Armored Marauder hover-transporter The new set 75311 (Imperial Armored Marauder) has been transformed into a Classic Space version, complete with revised forward-facing side guns. All the hatches still open, but I couldn't use space seats inside this one, but there are plenty (four per vessel) of 2x2 modified tiles with just enough room for air-tanks in the model... at least I hope that will be the case! The rear of the Marauder. I just need to buy two copies of my digital file as shown, as that's at least $15 total cheaper than buying two sets and recoloring them after the fact. Any thoughts on this MOD? Classic 1950's Moonraker automobile Inspired by this recent @hachiroku build here, I have completed this new early 1950's car for Benny, who seems pretty happy with it. Looks pretty classy, right? The two doors open, but the obligatory black space seat is missing, because any more height and Benny would not fit inside. The rear has a license plate, the classic space logo, and two coverings partially obscuring the rear wheels. The roof is held on by four studs, and is as such removable. As a courtesy to the driver instead of the space seat, I have included a light bluish gray upholstery for the back of the seat. Classic 1980's Security Forces Jeep (x2) This model was heavily inspired by set 75916: Dilophosaurus Ambush from the first series of Jurassic World sets. I have turned that jeep into a Classic Space vehicle by subtracting most of the features and adding the CS logo to this piece on the trunk and a space seat for the driver. This CS version has a trans-yellow windscreen and a revised roll-cage. The rear of the vehicle has a spare tire, license plate and tail-pipe while the roll-cage folds back to allow for you to place the driver in the seat. Cosmic Explorer This is a heavily modified set 70816 (Benny's Spaceship, Spaceship, SPACESHIP!) to features a new canopy from set 75176 (Resistance Transport pod) for the front windscreen, plus a rear turret that elevates and rotates in lieu of the radar dish and repair robots. To match the new canopy, the crew quarters were enlarged and opening roof remade, but the wings still fold out via the same Technic mechanism as in the original set 70816. More recently, I added a new nose to the ship inspired by DC comics set 76028. (Darkseid Invasion) The rear of the ship features the three main engines. The sensor array that was once near here was replaced by a four-barrel repeating laser turret that can rotate a full 360 degrees and elevate to 180 degrees, allowing for cover fire in almost any direction. The wings fold out if the center engine is pushed inwards, ready for the foam-tipped missiles to be engaged and aimed at any Blacktron III enemies... I did remove those yellow missiles, as they were too touchy and could fire accidentally. The main canopy has been heavily modified to allow for crew to go between the engineering and navigation sections without having to exit the ship. The Unikitty-seat area was replaced with a opening canopy for the engineering and fire-control crew to see outside from their stations near the Imagination Reactor. Deep Space Fighters These ships are deep space fighters of the Galaxy-class. Each seat one figure and have enhanced hyper-drive making it nearly as fast as LL-929. (Benny's spaceship) This ship was designed to be a heavily-armed fighter, and features an enclosed cockpit allowing for long distance travel such as from system to system if in an emergency. The rear of each of the two ship's features two engines made up of four smaller rockets. Here is the cockpit, which can seat 1 pilot figure per ship. Interstellar Frigate I really like this ship and have since I first saw it, I just had to wait for the instructions for set 75293 (Resistance IT-S Transport from Star Wars) to come out to make sure it could be built in real bricks with the changes I had in mind. (which were quite a lot!) I'm so glad I chose to do it in LDD first before just buying random bricks, as it required SO many modifications to the design (including an actual windscreen and extended cargo bay!) and changing other colors, that I would have been completely lost just swapping parts out at random. The eight engines are attached in a completely different way to the set design, as 2 x 4 bricks with three Technic holes going straight down don't exist in LDD. This new design was the only suitable way to get them to work on the ship in a very tight space. Also, I added double raised fins to the rear of the ship, for that extra retro '80's space flair. The cargo bay is quite spacious for troops or freight as it has been elongated by four studs from the set's original length. (You can see it is loaded with five yellow space-crates above) The roof of the cargo bay comes off, while the landing ramps fold up / down for loading or unloading of cargo / security personnel. The front of the ship has a space seat for a single pilot with two large laser forward-facing cannons. The pilot's cabin also features actual controls and a real front windscreen. (unlike the stickers and tiles in the original set!) The cockpit roof folds away, just as it did in the original set, which you can partially see here. K8-E the robot dog - Benny's best friend After meeting the Doctor (Who?) and his K-9 (pronounced Canine) unit, Benny decided he wanted a pet. So he bought himself a retired space police bot named K8-E (it's pronounced Katy) who helps Benny with his maintaining his SPACESHIP! and home base of the fleet. The two robot dogs eventually teamed up to sabotage a Blacktron and Dalek peace treaty from being signed, thus keeping the Universe safe from their plans for conquest for the moment. K8-E even took a laser shot from the Blacktron secondary leader, saving K-9 from being killed in the midst of them leaving the self-destructing Dalek ship. When reunited with Benny and the Doctor a short while later, the robot dog was fixed up and given the nod of approval from the Doctor, and a happy farewell from K-9, who left with the Doctor in the TARDIS to go to parts unknown looking for the Daleks fleeing from their loss at the hands of K8-E & K-9. From then on, K8-E has been keeping Benny company while awaiting the return of K-9 and the Doctor. K8-E is actually modified from set 8399 (K-9 Bot), which is a 2009 Space Police III set. Astro-Bot 33 - Classic Space's Giant Robot You may ask yourself: "Why would the Classic Space fleet want a giant robot?" The answer is a simple one: "Who in their right mind wouldn't want a giant freaking robot!?!?!" This Classic Space version of Build Better Bricks' Iron Giant with the head of the previous @hachiroku version of the model's head added on. (consider it a mashup of the two Iron Giant models!) I made it into CS colors (black, light / dark grays and blue) with red and green light parts, and two yellow / black bumblebee stripe tiles. The rear of the robot. The 4 x 2 slopes on the arms are supposed to have this print. The mouth now can open to allow for posing... but unfortunately, it doesn't play nice with the shoulders, so the mouth must remain closed until I can figure out a better solution. Another thing that didn't work well was the rotating waist: it operated too jerkily and was hard to operate, so I removed that feature. Conveyex Crawler-Transporter This is a heavily modified Classic Space version of 2018 Star Wars set 75217 (Imperial Conveyex Transport). It's length has been doubled and the visible weapons have been removed, to make more room for passengers. Behind the trans-yellow glass of the former cargo-cars are seats, so that workers can get to Benny's space base without driving in themselves. (Call it a commuter light-railroad system, without the "rail" part!) The vehicle can be shortened or lengthened in modular sections depending on the needs of the specific mission, but in this particular case it has two crawler engine units, and two cargo hauler segments that can easily detach for maintenance or to drop more segments in / out. On each of the engine units is the dual drivers compartments, located on either side of the tread behind the square openings. Each car seat four figures, meaning the whole train hauls eight people (+ their air-tanks!). ....and yes, two of the handles on the doors are upside-down in all the pictures. Classic Space figures These are all my Classic Space figures. The thirteen green figures are the soldiers of the group, while while the six red suited people are scientists. The three blue figures are Benny (in helmet), Penelope (with pigtails), and Unikitty who are the officers of the group. The two other figures, (the red android and the robo-dog) are T-3PO, who serves as the translator to other species and computer systems, while the robo-dog is K8-E who happens to be Benny's personal pet / security guard. The astronauts you see here are the famous "Lost Six". These half-dozen brave souls were with Benny in 1988 when the space station they were on was ambushed by Blacktron I forces and blasted into a black hole. Benny managed to escape the station before it entered the gravity field, but only just in the nick of time. (He could not reach his ship mates due to a computer error with the hatch systems.) Benny's suit was damaged in the escape, and he still wears it like that to this day as a reminder of his failure to get his crew off in time. This is the last picture of the Lost Six, with Benny out of frame because he took the picture. (He was supposed to be in the picture, but he forgot to set the timer on that take.) Will we ever see these brave men and women again? Only time will tell! Meet AstroKitty (in blue) and PuppyNaut (in white)! I've had AstroKitty built like this since 2014 when I got Benny's Spaceship (x3) from the original LEGO Movie line. I had to find a novel solution to the head-falling-off problem. (double the body width and pretend it's a bigger spacesuit) I was very sad to see Lego never released a blue one of the upside-down 1 x 3 tile parts with hole used in the newer Unikitty! sets seen around 2018 to correct this error. I did, however, note the new arrival of Puppycorn, Unikitty's energetic younger brother from the TV show and was disappointed to see he never had a Classic Space variant, besides the "Alien" version. (which I don't count as actually being Puppycorn.) So, in short, I made one from his Dalmatian costume, made to be double wide like AstroKitty. Sadly, there is no Classic Space logo on Puppynaut, as there is on Astrokitty. (This drives my OCD nuts!) ...oh, and they have headlamps on both their helmets, to provide light in dark environments and a convenient hole for the unicorn horn to fit into. I have used what was left of the word astronaut as originally worded by LEGO, as in ASTRO goes with KITTY; so thus PUPPY gets hitched to NAUT. Thus, we get PUPPYNAUT to describe him. EDITED 5/21/21 added some newer models to the post. As usual, Comments, questions and complaints are always welcome! -
Hello Dear Eurobricks Members :) Every project which I made in M-Tron space had wheels, but M-Tron is in space, so it will be nice to have something which can fly ;) So I am proud to introduce to you my first M-Tron spaceship :) This is small and fast transporter to carry M-Tron containers. Comments and advices are welcomed :) M-Tron Spaceship by Ryszard Bosiak, on Flickr M-Tron Spaceship by Ryszard Bosiak, on Flickr M-Tron Spaceship by Ryszard Bosiak, on Flickr M-Tron Spaceship by Ryszard Bosiak, on Flickr M-Tron Spaceship by Ryszard Bosiak, on Flickr M-Tron Spaceship by Ryszard Bosiak, on Flickr M-Tron Spaceship by Ryszard Bosiak, on Flickr M-Tron Spaceship by Ryszard Bosiak, on Flickr M-Tron Spaceship by Ryszard Bosiak, on Flickr M-Tron Spaceship by Ryszard Bosiak, on Flickr M-Tron Spaceship by Ryszard Bosiak, on Flickr M-Tron Spaceship by Ryszard Bosiak, on Flickr M-Tron Spaceship by Ryszard Bosiak, on Flickr
-
recolored PUG-Z spaceship from LEGO Worlds game - with alien pilot mini-figure (MOC)
Murdoch17 posted a topic in LEGO Sci-Fi
This model was taken from a Rebrickable MOC of the LEGO Worlds spaceship "PUG-Z" that user "TOB1 bricks" recreated here. I took the free instructions' MOC, and changed them (I removed the toilet, as it was causing problems with the roof) and altered the colors from orange, yellow, and bright light orange to a predominantly black and red model with some light / dark grays thrown in for good measure. I also modified other parts of the ship, making the radio antennas a bit shorter and adding trans-green "freeze" blasters to the ship where the forward-facing lights used to go. The rear of the ship has this 2 x 2 round symbol for the ship's owner / affiliation, along with tow small booster rockets alongside the main engine. The top opens up / out and the computer wall folds down to become a bed. (I had to take the toilet out as it wasn't playing nice with the roof in LDD.) Oh, and the landing legs fold backwards for flight. Here we see the owner of the ship (and his laser pulse rifle), who is a methane breathing reptile-like alien named Zath-ann. He wears a rebreather to properly function in oxygen-based environments and doesn't take it off in his ship because he hasn't got it converted to a methane-orientated life support system yet... it's on the to-do list though. Special thanks to Carl Greatix (designer for TT games) & Mark Stafford for the in-game model. Any thoughts on this MOD? Comments, questions, and complaints always welcome! -

Working Orrery
Jcreations912 posted a topic in LEGO Technic, Mindstorms, Model Team and Scale Modeling
Hey everyone! Welcome to my latest LEGO Ideas project - a kinetic sculpture of an Orrery where the earth goes round the sun and the moon round the earth. Go support it here: https://ideas.lego.com/projects/bc099c6a-9cf0-427b-a35e-3aff4599b150 Build This build consists of the Sun, the Earth and the Moon, built on a vintage/antique style base. The Moon revolves around the Earth while the earth revolves around the Sun. The mechanics are hidden nicely inside the base. I have put a lot of effort into making the model as sturdy as I can, and the motion as smooth as possible. The model was built to look as nice as possible, with a detailed, brick-built version of the Earth. Dimensions of the build: 35x18.5x28 (LxBxHcm) Pieces This model has 1200 LEGO Bricks (give or take a few). I built the model digitally to check! Aim My aim with this model was not to make a 100% accurate scientific model of an orrery, but rather to make something that looked great on display, while still being functional. I also wanted to make the design as compact so as to keep it affordable. Another important aspect of this project was the varied build experience - a combination of Technic and System bricks to create an interesting and fun build. This model would also have a very wide appeal - from space and astronomy fans to technic fans, as well as people who like collecting models for display. Hope you like this project! Don't forget to support and share! :D -
I was 8 years old when I got my first Lego Classic Space set LL918. I remember I spent hours with catalogs looking at LL924 and the Galaxy Explorer LL928. When I got LL928 from my grandma I was thrilled and couldn't let go. I even took it with me on holidays. Galaxy Explorer Dropship by Giorgio Chronas, auf Flickr A few years later I saw the Galaxy Commander in the store. At the time, due to my father's job, I was living in an a developing country in Africa, where Legos were very rare. I was gazing at the store window, nearly paralyzed and probably with a wide open mouth. I had just past my birthday and for Christmas time I would have to wait a long time. As quickly as I could I ran back home broke that piggy bank into pieces, took everything I had and ran back to the store. I still remember the feelings I had when building this spaceship and looking at every new part as if it were yesterday. Galaxy Commander Dropship_1 by Giorgio Chronas, auf Flickr Now, decades later, being an AFOL I still love space topics, specially neo classic space models from other Afols. A few years ago I remember seeing Wolf Leews modernized version of LL928 (and 924 and 918) in LegoIdeas and having exactly the same feelings. I tried to push it in LegoIdeas but unfortunately it did not make it to the threshold. Wolf Leews, if you see this post, thanks for sharing the instructions. I have your models in my showcase ever since. The idea of an own classic space model did not let go of me. It took me again years of thinking how to approach this topic. My problem was I wanted everything. I wanted to have a command centre, several spaceships, some robots some cool versatile and functional vehicles, a garage where the vehicles would go for repair, a habitat, a repair bay for the robots. And I wanted the antagonists as well: Blacktrons! And I wanted everybody to build up his own space station. Uff! Galaxy Explorer Commander Dropship I knew this was impossible. Then my Lego Pueblo came to mind. It was a 4in1 set proposal at LegoIdeas that you could buy multiple times and stack to each other building up your own Pueblo village. My Lego Pueblo did not make it to the threshold but if I did such a concept once, maybe I could do it again. Many months of thinking and planning what to do, which bricks to use, color scheme, how to combine classic space with Blacktron, drawing and doing research followed. Then I started building. The target was a 3in1 space creator set with three different scenarios that you could combine forming a big space centre. Each scenario should have its own theme and its own playability concept. At the same time some models of one scenario should connect to models of other scenarios, so at the end you have one big unity. I also needed a story. As I love sci-fi and astronomy this part was the easiest one for me. What came out was space station "Antares", a 3in1 space creator set, where New Classic Space searches for Legonit ressources and Blacktrons trying to steal it from them. One alternate build is the Mining Outpost, the other one is the Bot Repair Bay and one is the Galaxy Dropship. 9 Antares Classic Space3x by Giorgio Chronas, auf Flickr With the Galaxy Dropship I combined the features of the Galaxy Explorer and the Galaxy Commander and built a mashup that had its own look. Like the Galaxy Commander the dropship can be split into a space fighter and the cargo bay. Like the Commander it may hold a space lab. But it also may hold a space buggy like the Galaxy Explorer. Since the space buggy is from scenario Mining Outpost, I decided it may also hold the truck from its own scenario. Then I continued. The Galaxy Dropship may hold the trailer the fuel or plasma tanks or even a small space fighter which actually is the cockpit of the robot of scenario Bot Repair Bay. The set seems to be huge, too big, but actually it is only big when the set is acquired multiple times. As a single set it has less bricks than the biggest official LegoIdeas set. I hope you like it and support it at LegoIdeas. It is another attempt to bring back some space without StarWars. 5 Antares Galaxy Dropship by Giorgio Chronas, auf Flickr 6 Galaxy Dropship Hangar by Giorgio Chronas, auf Flickr Guys I do not want to bore you too much. Please take a look for yourself at LegoIdeas. Check out the three different video animations (search for "Legocionado" at YouTube) and take a look at the pics of the updates at LegoIdeas (I have made some animated gifs explaining the concept). Here are the direct links: To LegoIdeas "Antares": https://ideas.lego.com/projects/447bf8bd-a7e8-4c0d-9918-59c668b23018 2 Antares Classic Space by Giorgio Chronas, auf Flickr To YouTube animated video for the "Galaxy Dropship":
-
Nexus Force ALCO RS-11 diesel loco with freight train - LDD MOC (so far)
Murdoch17 posted a topic in LEGO Train Tech
A utilitarian space / Arctic freight train for my ice-bound Nexus Force base... it may not look very spacey, though. (I tried, it's more difficult than it looks!) This MOC features: - ALCO RS-11-like four axle diesel loco - boxcar with removable top and opening doors. - Nuclear waste flask car. Try not look at the glass sections for very long! - two couple of sectioned gondolas loaded with comet / meteorite samples.... and maybe a few frozen aliens inside! - bay window caboose for nuclear flask guards and train crew This model was originally a ALCO MRS-1 (which you can see in his instructions store here) built by @SavaTheAggie, but has been so severely modified that it no longer looks like the prototype loco. So I went searching and found another ALCO locomotive, a RS-11 that looks (kind of) like my new loco. Both my MOC and the new prototype have the four wheels, and the same basic hood and cab design as the MRS-1 that preceded it. I changed out the original grille bricks at the rear for grille tiles SNOTed-in sideways for a more consistent look when compared to the roof vents. I added back in Sava's maintenance cabinets from the MRS-1, yet attached them differently using newer parts. I also shortened the frame by six studs to fix the spacing problem created by the missing two wheels. The long hood of the loco has been designated the rear. The printed Nexus Force logo (from CITY Arctic 2014) goes on the curved 2 x 2 x 2/3 slopes on the front and rear hood ends, underneath the lights. This boxcar was heavily inspired by Time Gould boxcar design from the dying days of the 9v-era, otherwise known as 2008. (You can see it and his entire vintage train it came from, here on Rebrickable for free.) The roof comes off this car type and the loading doors open up. This nuclear waste flask car is loaded and ready for delivery to a waste storage facility at an undisclosed location. These open air gondolas are loaded with icy meteorite fragments, which may or may not contain hostile alien life frozen inside! No interior on this part of the train, as it's too crowded inside due to needed SNOT-work for the bay windows. This car was originally puzzled-out from this MOC's pictures. I'm already parting out the diesel engine, but the train will have to wait. You can see more details on the arctic / space base shown above in this thread in the Sci-Fi forum. Be warned, it needs to be updated with some newer stuff I designed! Thoughts? EDITED 9/6/21: added nuclear car photo and updated the main picture. -
A simple space shuttle. IMG_5526 by Nom Carver, en Flickr IMG_5527 by Nom Carver, en Flickr IMG_5528 by Nom Carver, en Flickr IMG_5529 by Nom Carver, en Flickr IMG_5530 by Nom Carver, en Flickr IMG_5531 by Nom Carver, en Flickr
-
I have seen some wonderful remakes of SW in Ice Planet colors, see below. Have you seen or made any MOCs in past space themes that were inspired by SW ships? Maybe even improved them? Please post them to give us inspiration. This photo was found on Reddit and I would love to make my own MOC diorama as well.
-
LEGO IDEAS Classic Space PERMANENT PLANETARY STATION
Operacion Saturno posted a topic in LEGO Sci-Fi
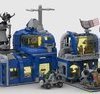
https://ideas.lego.com/projects/43814e85-ead4-46d0-886c-b024d6156756 2800 piece Space Base The base is composed of four modules: Vehicle Hangar, Habitation quarters, Command center, Lab module. Click the link for more images. I tried to upload an image, but won't let me. -
Here is Mr Moon: Wind the handle, Mr Moon will roll his eyes as another spaceship orbits him looking for a place to land… "Hooray, we’ve planted our flag!" Oh, looks like Mr Moon blew the flag down again! I'll be upfront, I did this for the ongoing LEGO IDEAS 'Out of this World Space Builds' contest. But, It wasn't always mechanised though, I agonised about my initial idea which was just going to be 'The man in the moon'. I thought I could do a simple Brick Sketches in homage to Chris McVeigh. I just felt that it lacked pizzazz! So I noodled about adding Classic Spacemen, and microfigures and flags, but it just felt like a perfunctory attempt. After talking with an artist mate of mine [a muggle or Noffler (Not A Fan oF LEGO) as I like to call them] I decided to try to add some form of movement. Here is a little video of the mechanism I eventually got to work in action: If the video doesn't play properly, it can be found here too (turn off sound though - my kids are doing homeschooling in the background!). I'm kicking myself a little because there was a prototype mechanism using the yellow racks I had and some more dbg and brown technic pieces that I appear not to have documented photographically :-( Someone on IDEAS has suggested adding the option of a cow to replace the spaceship with if you wanted and I love that idea. I'm close to the 250 part limit. Some trimming is possible in the part count of the mechanism I think owing to a lack of parts in my collection. I actually spent about £15 on a couple of Bricklink orders that included the black curved gear racks and a couple of bigger black plates. I'm going to have a play to see if I can figure something out... guess I'll be buying a cow sometime this week! I feel like I need a disclaimer, I realise I don't post much on Eurobricks, I'm more of a lurker here in the last few years (this was after I realised I was saying the same things in a few places!). I do feel bad for asking for support, but I really would appreciate the extra exposure sharing this here hopefully gives my submission. Please accept my apologies if you feel I'm being mercenary by posting this. For anyone who is willing to make a comment or lend support to my submission, my entry can be found here. I appreciate any thoughts or criticism and thank you for taking the time to read my post.
-
The following creations were built to commemorate the 20th anniversary of the 1999 Lego Racers computer game. Pieces new and old have come together to form these newly revised versions of the 8 boss cars. Please enjoy! 1) Captain Redbeard As you can see, Captain Redbeard's new ride uses the microbuild of his ship from set #40290 as a base for this off-road beast of a racer. But it still retains the large exhausts and rear mounted pirate flag from his original car. The sails make this the tallest vehicle in the collection so far. .
-
The Dark Voyager is a fast spaceship, which travels trough the darkest areas of space, searching for planets and civilizations for plundering. Pictures: 01_Dark_Voyager by Mathijs Bongers, on Flickr 02_Dark_Voyager by Mathijs Bongers, on Flickr Pictures also on Flickr: https://www.flickr.com/photos/mathijslegofan/albums/72157719552192766 I hope you like this micro-scale spaceship
-
Quick build form last week:) The Arcadian Exploration Vessel is a large spaceship, which travels through space to discover new planets and civilizations. The spaceship has two cockpits and at the bottom a third large cabin where the rest of the crew stays. The spaceship has a large radar on top. Pictures: 01_Arcadian_Exploration_Vessel by Mathijs Bongers, on Flickr 02_Arcadian_Exploration_Vessel by Mathijs Bongers, on Flickr Pictures also on Flickr: https://www.flickr.com/photos/mathijslegofan/albums/72157719534921366 Hope you Like it :)
-
Welcome to the wonderous world of Yesteryears' view of the future! Where the moon is being colonized, robots are commonplace in our homes, atomic power is everywhere, and outer space is the new frontier! Here we see two Retro-futuristic trains together: the longest one is the "Nucleus Express" atomic-powered express passenger train, while the shortest one is the "Astrotrain" diesel passenger four-car train set, and the middle one is the "Moon Mover" diesel-powered freight service, with all three sporting streamlined Classic Space color schemes. ASTROTRAIN I already have a real-world Aerotrain LEGO model completed, and was fiddling around while bored when I came across this Classic Space version of the train from 2018. I had to take out the upside-down slanted coach windows because the parts don't exist in trans-yellow yet. I added different windows, red and green directional lights, and a bigger horn that looks like a thruster pod. I used black wheels instead of gray ones because they are cheaper and easier to find, but you'd never know that because I hid them behind SNOT'ed panels that look more like the prototype. Then, I deviated wildly from the GM Aerotrain and added a Baldwin Sharknose type-end to the front of the engine to make it even more unique. The classic space 4 x 2 slope from Benny's spaceship goes right below the headlight, of course. Also, as a side note, a 9V motor can be added to the engine for shows alongside my CS base / vehicles. (I don't own a 9V motor or track, but some GtwLUG members do and have offered to try out my locos wit h 9V power in the past.) The engine has been thoroughly made into a futuristic space locomotive... which wasn't too hard as it was already pretty forward-thinking designed originally. The roof is now removable, with seating for a driver and dual weight bricks for adding traction to the 9v motor. (when it has one for shows) As a concession to using trans-yellow as a window color, I had to remove the original slanted GM Fishbowl-bus style windows that were used on the original Aerotrain due to lack of parts in that color. The rear of the train has no coupler as it's "supposed" to be a part of one complete train-unit. Here we can se the original aerotrain working slightly at my dads. link to video showing Aerotrain in motion at Flickr Please excuse the pineapple couch, its my dads, as is the borrowed 9v equipment. The motor sadly only can pull three cars and at full speed only or not at all. But, it is a step towards having it run at train shows! (if anyone can help me figure out how to get the motor to move more than three cars, or add the video to my actual post, please respond below! Thanks to a suggestion by @XG BC, the locomotive now has weight bricks over the (potential) motor, so it should be ready for 9v power for shows next year. NUCLEUS EXPRESS PASSENGER TRAIN Heavily inspired by @Electricsteam's long-awaited Atomic Streamliner project, (as seen here ) I have designed my own Atomic-Age wonder for my "Moon Mover" fast freight service. It is, as is Electricsteams' engine, a fission powered turbine loco with 4-4-2 "Atlantic" wheel arrangement. This engine lacks the full streamlining of other locos, but it does have the nose streamlined. This allows for easier working on the nuclear powerplant that powers the engine's movement. Unlike the slower Earth trains, the Nucleus type of space-train is super-streamlined, and can go up to speeds of up to 180 MPH on it's special track, with super-elevated curves and a long straight-away over 101+ miles, all while using Positive Train Control (PTC) on the the mostly double-track mainline, where all vehicle crossings are flyovers and switches virtually non-existent once out of the city limits. Here are the three coaches for the Nucleus train. The inside of all the cars for this train look the same - three seats for each car. This dome car features spectacular views of Earth through it's car-width rooftop window. The rearmost-car features a large observation window. ASTRO-BASE COMMUTER RAILROAD STATION This commuter station will be the departure point for my two Classic Space trains. It features a very low floor with two accessibility ramps to get at the two train tracks - one run through and one stub end. There are two benches, two ticket machines, and a single double-sided analog clock. The manned ticket booth (for those uncomfortable or unfamiliar with the electronic machines) has a sign above it saying the train terminal's name, which is named Astro-Base. This is because it is located next to my Classic Space moon-base. Here we see the other side of the run-through track. OTHER STUFF The two identical doors of the space base has been re-designed to handle train tracks so the trains can enter and exit the walled-in base and the doors still open and shut. Atlantis City (located in Copernicus crater on Earth's moon, in XL shape and yellow on the map), the great domed wonder of the solar system, has a rail system to get people to work at it's outlying un-domed facilities. The interstellar transport hub of Reinhold is the next stop, and is the terminus for all the public passengers / galactic tourists. (The Reinhold crater is in green here) The following two branch lines are for specific crewmembers only: The Lansberg line is for power / shield generation over the city and surrounding land areas. It also was where the original city was located, before the original founders relocated to Copernicus Crater and founded the Great Glass City as we know it today. (Lansberg is in violet / purple crater) The Gambart line is for military personnel only, as it where the top brass pour over charts and make way for the latest improvements in "laser scanner" technology. (This one in the Blue with yellow rim crater) Potential new tracks could be laid to the planned 100,000 seat stadium in the older Stadius crater (barely visible near Copernicus crater) for Sportsball events. New tracks could also be laid past the space hippies encampment at Hortensius Crater (small yellow crater), but has been continually voted down by protesting neo-hippies, as it would bring bad vibes to their region by the loud construction vehicles just to get to the ice mines of the Mare Insularum. (No one has managed to get through to them that there is no sound in a vacuum!) (Photo from Google Earth, with railroad lines drawn and story by me. The colorful moon landscape background is from early 1960's NASA maps that I thought were really cool. More stuff will come as I think of it, so keep your eyes peeled for updates to this thread! UPDATED 7/11/21 This Zephyr-like loco is going to replace the engine at the head of my Astro-train. I decided to do this for one reason: motorization! I will soon be able to put a 9v motor at the head of the train, running it via electricity for shows with Gateway LUG. The inter-car connection is the same as before, and most of the needed parts for the engine (plus one more passenger car!) will come from the pervious loco. Thoughts?
-
Top view with locations Impostor Green is waiting for red... The Reactor and upper engine. Upper part of the ship including the cockpit at the front below the arch. Views Side View The accessories of the characters can be easily swapped around and shared between them creating impostor and non impostor versions as well as looks of different skins, like in the game. Added a ghost version of the famous red player design. If you like it, it is also a set on LEGO ideas: https://ideas.lego.com/projects/29f9ebe5-b5a0-4fdb-bbaf-86f9e96d0865 http://tinyurl.com/amonguslego
-
1950's Astro Bot 33 and retro style Classic Space car - real world (revised) MOC builds
Murdoch17 posted a topic in LEGO Sci-Fi
This Classic Space version of Build Better Bricks' Iron Giant with the head of the previous @hachiroku version of the Giant's head added on. (consider it a mashup of the two Iron Giant models!) The car was also inspired by this Hachiroku build here, and was originally made by me in September 2020. I have just now revised this early 1950's car for Benny with new mudguards that cover the (enlarged) two rear wheels. I made both MOC models into CS colors (black, both "new" grays, and blue, with white for the car roof) with red and green indicator light parts (on the robot only), and two yellow / black bumblebee stripe tiles with a printed 4 x 2 slopes on the arms / car trunk lid. (They aren't shown, but have this print) The gray jumpers near the robot's waist are for power conduits, so he can be recharged without consuming (costly!) metal products via his opening mouth. Speaking of which, the mouth now can open to allow for posing... but unfortunately, it doesn't play nice with the shoulders, so the mouth must remain closed until I can figure out a better solution. Another thing that didn't work well was the rotating waist: it operated too jerkily and was hard to operate, so I removed that feature. The rear of the robot. Not sure if it's a feature, but the arms won't go down any further to the sides... I tried everything I could think of, but no dice. This is because the arms can't be removed without destroying the awesome-looking - and very intricate - torso. Looks pretty classy, right? The two doors open, but the obligatory black space seat is missing, because any more height and Benny would not fit inside. The rear has a license plate, the classic space logo, and two coverings mostly obscuring the rear wheels. As a courtesy to the driver instead of the space seat, I have included a light bluish gray upholstery for the back of the seat. As usual, Thoughts, Suggestions, Comments, & Questions of any kind are always welcome! So, what do you think? -
In the depths of space, a rest stop is a welcome sight. The Asteroid Bar has parking, fuel, entertainment and food for anyone in the system. The bar itself is a popular haunt for travellers and locals alike. Regulars always have someone new to meet, compete with or scam! There are some familiar and not so familiar faces to spot. I built this as a display for a local Comic Con in 2019, the parking area is lit up by EL wire, with a battery box hidden under the fuel pumps. The dance floor is a construction over a grid that holds fairy lights with a few different colours and lighting patterns, I tucked that box aside as I wanted to change the pattern throughout the day. Because it was for a comic con, I wanted to build something that was fun to look at and spot characters from pop-culture and also fun aliens and robots that I made up myself. It went down very well at the con and was a fun build. However I have more SciFi plans afoot, so these photos from the day are the best I'm going to get, this is ear-marked for take-down and a new creation. Apart from the dance floor, I want to work this into future layouts (if we ever get to do them again!) Who can you spot? Do at least a few of my joke scenes and references hit?
-
Blacktron 3 bio-mechanical cyber-dragon (76177 MOD) fights Classic Space robot - with story
Murdoch17 posted a topic in LEGO Sci-Fi
This dragon was designed as a prototype biological-machine hybrid for scouting out in space for objects of unfamiliar origin in Blacktron 3 territory. It used a recently-discovered dead race of space dragons' DNA in combination with robotic technology to quickly achieve this goal. As the DNA was degraded significantly, and the robotic tech tried and tested, it was felt to combine the two would provide a failsafe option in case a suddenly aware cyber-being became a reality: a over-ride of the nervous system by a massive electrical pulse, which would kill it dead by it's own power source. (basically, a kill switch) This code would be given by a super-secure signal delivered via hyperspace to wherever the creature was to kill it in three minutes of becoming aware. (This would be considered a mercy killing by Blacktron standards, as the being in question would be confused and in pain from cyber implants and lack of knowledge of this time / place after it's race had been wiped out.) The first 13 prototype cyber-beings developed were deemed unworthy of being used for various reasons, such as overloading of fusion core upon primary boot-up. The 14th version, called DRAG-00N (after going alphabetically through the first 13 letters before arriving at prototype "N", plus the two number spaces for possible future firmware upgrades.) was finally approved for further tests by Blacktron High Command three Earth-years (and millions of stud-credits spent) after starting the project. The entire BT3 high command wanted to be there in person upon full boot-up, but decided not to, as it was bad luck in there eyes to be there in person after so much failure. Hologram representation would have to suffice. It was a very smart move, considering what happened next. The DRAG-00N, upon final boot-up, became aware within seconds, and, being so firmly entrenched with it's technological implants, deleted the fail safe from it's memory banks in the first minute, before it could even be sent out by the high command. While the creature killed everyone in a 12 mile radius of the laboratory where it was built / born, (It was still too unsteady to kill everyone by flying around yet.) the high command scrambled to get it's codes secured. They had realized the being would slice communication channels to anticipate any strikes against it... Needless to say, they failed to do that quickly enough, and in addition, it armed the planet's missiles and reactor core against any intruder coming near the planet for as long as time still marched forward or the planet's system existed. It then left the system it was born in, but scorched everything living on that sorry rock before doing so. It flew to the next system over, which happened to be controlled by the Unitron Security League and destroyed several worlds for everything resembling life above cockroaches. (By this point, the Blacktron Commanders had been informing anyone who would listen about it's rouge robot, and trying to stop retaliatory attacks against THEM for something they technically had no control over.) It decimated everything in it's path to the galactic core, leveling worlds and entire systems in it's wake using it's seemingly-endless Atomic fire breath. The only thing that was thought of to give ALL systems regardless of political orientation a fighting chance of mounting a galactic resistance to their new menace, was a lone, very old Astro-bot, numbered 33 and owned by Classic Space Command. Thirty-three was awakened, and sent on an intercept path, using all possible hyper-speed to reach the Galaxy Core all in 10 minutes. There, it met it's opponent in the field of battle, above the black hole that sits smack dab in the Galactic Core's very heart. The dragon stuck first, and managed to tear off a panel on the front of ol' 33. The robot managed to get in some good shots with it's laser-eyes, before the dragon starting to use it's atomic breath at close range. This had a devastating effect on 33's weapons circuitry, and almost killed the robot on the spot. Thankfully, backup arrived in the form of several fleets of varying allegiance, all bonded by the goal of killing DRAG-00N. It was a fierce battle, with several capital ships destroyed or made immobile. One Spyruis cyber-slicer frigate was thrown into the black hole itself for trying to hack the cyborg's implants by said cyborg. Eventually, a hail of fire finished off what 33 had started: the beast died with a final act of vengeance on it's attackers: it initiated the meltdown countdown of it's fusion core, which would kill everyone in the vicinity, including the assembled fleets of most of the galaxy's forces. The Astro-bot then threw the burning hulk into the black hole, which then took the brunt of the explosion when it finally died. Astro-bot 33 went on to be fixed up and completely overhauled, but not before the assembled fleets gave there unanimous congratulations to the giant robot in the form of a treaty to mark the day, the 3rd of May here on Earth, as "Galactic Robo-Savior" day. Blacktron command even commented, saying it would destroy all materials within the dead planet where the cyborg was born concerning said creature, once it was deemed possible to do so... rumor speculates, however, that some extra copies of parts of the being's cyber-mainframe were removed from the lab it was born in before final boot-up for placement with "top scientific personnel" for future study. No one alive today knows the whole story on that... or do they? NOTES: Yes, this model is build-able, and it will be built soon. The model is missing parts, I know, it just doesn't have them in LDD. Also, the robot is missing some panels, as they don't fit in LDD... which won't matter when it is build in real life. Speaking of the bot, it's a Classic Space version of Build Better Bricks' Iron Giant with the head of the previous @hachiroku version of the model's head added on. (consider it a mashup of the two Iron Giant models) you can see more screenshots of the 'bot here at this thread for all my Classic Space models. Any thoughts? -
I know this MOC has been out for a while, but I had a lot of fun building this model recently so I thought I'd share the video I made on it + a few pictures. This MOC was designed by Jack from BrickVault and instructions are available from his webstore. There is an issue one key step in the instructions/build to be aware of. I talk how about how to fix the issue in my video. It's an easy fix! Enjoy! Photos of the completed model are available here: https://www.flickr.com/photos/160655025@N08/albums/72157719038400947
-

Lego 6979 UFO Interstellar Starfighter unboxing and review
Alpha Draconis posted a topic in LEGO Sci-Fi
Preface This theme means a lot to me, even though I never owned any myself when I was a kid since I wasn't old enough at the release to be interested in these kind of sets. I did, however, have a lot of old 90s Lego catalogues from my older cousins, who passed them down to me. When I was a bit older I acquired a taste for this line, but it was discontinued for years at that time, so I had to wait. Opening this set sealed really meant a lot to me, since I always wanted to do this. In the future I intend to hunt down all other UFO sets, preferably sealed and I might do a review on those as well. I made this review so that you can see how it was like to unbox and assemble this set back in 1997 and because I never found a similar modern review of the set, when I was looking to buy it. There are a lot of reviews on it, but I couldn't find any that would include a sealed box. I tried my best to make this review as comprehensive as I can. This is my first review so any feedback you might have is welcome. I hope you enjoy this review! Information Set name: Interstellar Starfighter Set number: 6979 Number of pieces: 292 Year released: 1997 Minifigures: 3 Price (then): 80.00 USD Theme: U.F.O. Introduction Description of the theme on Brickipedia: »The UFO Aliens come from the planet Humorless. They spend their time fighting the Exploriens and Roboforce, and scare Earth farmers in their free time. They have the ability to read minds. They have droids do their work for them, though they usually steal those droids, like in Andy Droid's case. Alpha Draconis is their leader.« source U.F.O. alien species is called Zotaxian. Their backstory differs from region to region - promotional materials back in the day weren't in sync and thus we get different backstories – in some versions Zotaxians even invaded then equivalent of Lego City, while in other versions the story was confined to space themes only. source A thing to mention is that aliens from Insectoids theme are also Zotaxians and come from the same planet as U.F.O. aliens. For different reasons, depending on the local promotional materials issued at the time they had to flee their native world and find a new home. U.F.O. theme was also featured in Lego Racers video game from 1999. There was a racing map where both U.F.O. and Insectoids themes were interlaced. I got this set sealed via BrickLink. The box was in overall good contention, aside from some print wear. But most importantly, no dents! You can check BrickLink listings for this set here. The box Here's the front view of the box. Wear on the edges shows that it was sealed for almost 24 years but I guess that is a necessary evil and not really that important. This is the front of the box with its flap up, revealing transparent windows showcasing some elements of the set. Yes, I learned that was very common for Lego sets at the time but I grew up with sets that had simpler boxes with no flaps so this feels alien to me... I'll see myself out Upon closer inspection we can see what is showcased – 2 minifigs (Alpha Draconis on the right, Andy Droid on the left). Above them (the very top of the window) are 2 transparent neon-green circular pieces that the U.F.O. theme is most known for. They form cockpit canopy of the starfighter. Between the figures are alien helmets – black one on top (Alpha Draconis') and below it one in grey (Chamon's). Fun fact is that Chamon (the 3rd figure in the set that the grey helmet belongs to and has shoulder pads, just like Alpha Draconis) is not showcased in this transparent window, but his helmet is. Instead, Andy Droid was chosen to be showcased. I wonder what was the reason for this? On the very bottom of the largest window is the battery box that takes 9V battery. Yes, this set has electronic parts that produce visuals (and also some audio but I don't think that was the designer's intention – more on that later). Immediately below is another tiny window, showcasing the cockpit lights. Lastly on the very bottom we have a line of 5 small transparent windows. The contents showcased are (from left to right): electric wire with brick, 2 magnets, red electric micro motor, 2 magnets, electric wire with brick. Below are additional pictures of the box. The top of the box. An observation – I noticed a number imprint on the top of the box (4217). I have no idea what this was used for. Maybe something to do with production and/or distribution system back in the 90s? Left side of the box. Bottom side of the box. A closeup of legal and production information on the bottom of the box. It says the set was made in Billund, Denmark. Right side of the box. The back of the box, showing mostly alternative builds - a practice that is not that common for set packaging nowadays. Below are pictures of box seals, which can be found on the front of the box, under the flap. This is where you are supposed to open the set. You have to take the cardboard with transparent windows off in order to access the box contents. Unboxing Like mentioned before, you have to open the box from the front, with its flap out of the way. I cut the seals with a knife along highlighted areas and the lifted the cardboard with transparent windows up from the box to access its contents. This how contents of the box are distributed in the box. The box is divided in several compartments (light green cardboard), each holding specific bags of parts or larger parts. Items showcased via transparent windows are held in a separate packaging which sits on top of the compartments. Instructions and promotional materials are located on the very bottom , under cardboard compartments. Another imprint on one of the green compartment cardboard (4107390). Here are all box contents stretched on a table. These are all parts that not packed in any plastic bags or additional packaging inside the box. Above 2 pictures show all the printed elements excluding minifigures and their accessories. On the left are the instructions, in the middle are promotional materials and on the very right is a ... poster? Indeed, you get a cool one-sided poster with this set. This was a very pleasant surprise and I guess that a much more common practice in the past. This is a separate packaging, containing all the elements that are showcased via transparent windows on the packaging. These are all plastic bags containing the remaining bricks. Plastic bags are of the old type, of course, with holes all over them to enable air circulation. Nothing remarkable otherwise. Note the bag on the very bottom right-hand side contains the only sticker this set has, 2 light grey 1 x 12 beams, along with 9 optic fibres (they might be difficult to observe in this picture). This is the only sticker in the set. For those unfamiliar with the theme – this sticker is somewhat special because it changes colour based on heat. The idea is that you put your finger on it and it then changes to green colour, revealing U.F.O. symbol as shown in above picture. These are optical fibres you get in the set. 9 in total, 8 to use and one spare. Above are shown all electronic components of the set. On top is the battery box, below it are (left to right) black electric twin lights, red micro motor and light grey fibre optics electric element. Lastly there are two black electric wires with brick. Finally, you also get four black cylindrical magnets. Minifigures UFO Red Droid/ Andy Droid This is the only minifigure in the set without a helmet or a shoulder armour. It is the only robot in the set and supposed brother of more known Ann Droid from Exploriens theme. source The minifigure sports quite interesting printing (front of the minifig only), with U.F.O. logo on the top left-hand side of the torso, remaining printing looking like exposed wiring and electronic components to me. Below are additional pictures of the minifigure from remaining angles. Red UFO alien / Chamon One of 2 Zotaxians in the set, also referred to as the Red UFO alien. The figure sports grey alien helmet and a black shoulder armour. Printing on the minifigure itself is also only present on its front. The only other printing can be found on the front angle of the helmet, looking to me as a brain with interlaced cybernetic implants. Below are pictures of the figure with all its accessories from the remaining angles. Here is the front view of Chamon without its helmet and shoulder armour. The face is one of the more memorable ones for me – that grin makes the figure look both funny and creepy at the same time. The printing on the torso and legs is also quite detailed but looks more organised to me that, say, the printing on Andy Droid's torso. Mandatory U.F.O. logo is also present on the torso, this time on the top right-hand side. Below are pictures of Chamon figure with no accessories from remaining angles. Alpha Draconis The only (consistently) named minifigure in the U.F.O. theme. Although his role is again not consistent in promotional materials between regions, he is supposed to be the leader of Zotaxians in some capacity (ranging from dictator of planet Humoreless to leader of the Zotaxian fleet). He was also featured both as a playable character and an npc in the legendary Lego Racers video game from 1999 (although he was missing his shoulder armour). He is most famous for his black helmet and grey shoulder armour. Printing on the helmet is the same as on Chamoin's helmet, but the torso and leg printing are a tad different. Below are pictures of the figure with all its accessories from the remaining angles. Here is Alpha Dracoins without his accessories. His face print looks to me almost bug-like. I wonder if this connected somehow with Insectoids theme? His torso printing is different from Chamon's and Andy Droid's. There are no electronics in sight, only a large U.F.O. logo in the middle of the torso. There are hints of electronics shown on his leg printing. Printing is, again, only present on the front of the figure. Below are pictures of the figure from different angles. Building the set I unfortunately didn't take any pictures of the set assembly but to be honest there is not much I can say on that except the instructions did not age too well. There are no required parts shown for each step of the building process so you have to have a keen eye for details and every step feels like a game of finding all the differences between pictures. My worst fear was that I would end up with an extra piece at the end that I knew I missed somewhere. Fortunately it did not come to that and I'm rather proud of myself for achieving this These are all the extra pieces of the set – one optic fibre and one trans-red electric light bulb cover. The back of the instructions. Assembled set This is the assembled Interstellar Starfighter. I'll try to capture as many angles as I can. The front view – one of the best angles in my opinion. Angled front view. You can clearly see black electric wires coming from the battery box just behind the main cockpit and going to micro motor and optics fibre element hidden behind a printed trans-neon green element located in the middle of the starfighter. The back of the starfighter. Another side view. Front view of the fighter, more level with the ground. Definitely not one of the good-looking angles. Side view, more close to the ground. Another side view from ground level. Top view. Next to 6900 Cyber Saucer. Another feature of the set is that it has a smaller detachable space craft. The main ship Magnets on the back of the main ship are used to connect main ship with the smaller detachable space craft. Below are some pictures of main ship only. Above is the bottom of the main ship. It is clear that the preferred angle to look this set at is from above. Detachable space craft Below are some pictures of the smaller space craft. It is assembled from two smaller circular pieces with a trans-neon green cockpit. On the top of the latter is where the only sticker is located. Do the electronics work? Not all. The twin lights in the cockpit work flawlessly, while red micro motor is dead, effectively rendering fibre optics in the back bust. The grey fibre optics element works on its own though. Fibre optics in the back should flash one optic at the time. This is caused by rotating a Technic rod in the grey fibre optics element, allowing only one fibre optic to be lit at the time and providing flashing of all fibre optics. Rotation should be achieved by using the red micro motor, while grey optic element only provides red light. But since micro motor is dead only front twin bulb lights in the cockpit work. The micro motor is known to produce some noise so that's what I was referring to when I said there was some unintentional audio produced by electronic parts. Better working front lights and optic element than nothing! I have heard that these red micro motors are a bit iffy anyway, so this is something I was half-expecting. A gif and a picture showing working front cockpit lights, proving I am not full of... err... brick? A side note: when taking the battery box out of the set it's a good idea to utilise one of the holes in the plate below the battery box in combination with a Technic or a normal rod to push the battery box out of the set from below first. Otherwise the bottom battery cover might stick to the plate and you'll end up tearing the upper portion of the battery box out of the set while the bottom will be stuck to the plate. When this happened to me it caused me a mini heart attack (the crack noise mostly) but fortunately I did not break anything. Using this method is a safer alternative. Note that none of the parts used on the rod assembly on the picture above are a part of this set – I borrowed the tip of one of the s-foils cannons on my UCS X-Wing. Conclusion Opening this set was a very interesting experience for me and it was hard for me to be objective when reviewing this set. The price of this set sealed is also something that a lot of people would find hard to justify. But for someone like me, who adores the theme it was worth it. I would not recommend this set sealed to anyone however – you have to be either a big fan with the means to buy it, otherwise just get a used set. Sure you'll miss all the fun unboxing experience and the parts might be in poor condition/broken but it's going to be way cheaper. On the other hand, if you are a big fun with a budget – go for it, just don't expect all electronics to work. Hopefully this review will make you help make the decision whether to buy this set either sealed or used. Design: 8/10. The front of the fighter looks really nice but the main issue I have is with detachable space craft. No full circular shape - what were they thinking? Parts: 8/10. Electronic parts, along with circular parts and minifigures are really nice, it's a shame that the red micro motor is not working though. Build: 5/10. Oh how building instructions have improved. Hats off to any former kids building large sets before required parts for every building step were established as a norm. It's a game of concentration and patience. The build itself is nice but it's the instructions that bring the experience down significantly. Minifigures: 10/10. The helmet design, shoulder armour, printing... these figs have it all in my view. Still one of the best figures TLG ever produced and they aged really well too. Playability: 8/10. Lots of functionalities present on this set. From flashing lights and detachable smaller space craft to alternate builds – you decide how to play! Price (sealed): 6/10. I don't think I paid an unfair price for this set but it was still substantial. I know other older sets with higher demand sell for way more, so I can't complain too much. The price could always be better though. I hope you enjoyed this review and that you got to know more about the theme in general or just learned something new about the set. On display.