Search the Community
Showing results for tags 'crawler'.
Found 113 results
-
.thumb.png.116032e930e483fb4ebbfdc62183bd34.png)
[MOC] Rocky 42099 B model
Didumos69 posted a topic in LEGO Technic, Mindstorms, Model Team and Scale Modeling
Rocky - 4WD Rock crawler buggy I would like to present to you 'Rocky', a rock crawler buggy with a body tilting angle that averages the angles made by the front and rear axles. My shot at a 42099 B-model. Instructions are available on Rebrickable. When I saw the first images of 42099, I noticed that the amount the body tilts sideways, is mostly defined by the rear axles angle, because that axle's suspension is the hardest - it carries the battery/control unit - and it's not pendular. That got me thinking; wouldn't it be nice to make a setup in which the body tilting angle averages the angles made by the front and rear axles? Just like how a Mars Rover averages it's body angle between it's rocker bogies - with a differential - but now sideways, not lengthwise. That way it should be possible to mimic the character of 4-link suspension, which is often seen in rock crawlers. So that was my objective with this B-model and the nice thing is that this model contains exactly the parts needed to build something like that. Axle articulation Here is the setup that interconnects front and rear axles. Like in rocker bogie suspension, you should regard the body as the differential house. The body tilting angle is defined by the two axles that point sideways. I used 4 gears in the differential itself to minimize slack in the system. There is some rotational slack of course, but this is even further reduced by 1:3 given the 20:60 gear ratio with the turntables. Center of gravity Besides the differential, the center module also houses the battery/control unit, because that unit includes the tilting sensor and I wanted the tilting sensor to show the tilting angle of the body. I also wanted to keep the center of gravity low and centered. However, putting the unit in this central spot did cause issues later on... The battery/control unit - not depicted here - plays an essential role in form-locking the whole center module. The battery/control unit can be slided out sideways after removing a few pins and parts. Spring suspension Besides axle articulation, I of course also wanted to include actual spring suspension, so I attached two main suspension arms to the turntables, one for the front axles and one for the rear axles. I suspended the main suspension arms with springs placed between the turntables and suspension arms. The springs are mounted differently to the front and rear suspension arms, giving the car a little more lift in the back, which adds to a nice inclination, or rake angle, of the whole model. The whole model nicely sinks into the spring suspension under its own weight up to about 40% percent of the overall spring travel. Drivetrain I wanted to have the most simple drive train possible, so the motors are directly attached to the frames holding the differentials. This is a crawler and with the new portal hubs, there is no need for any up or down gearing. The motors add to the stiffness of the main suspension arms. I also wanted to have a track width that is two studs wider than the stock 42099 build. After some playing around I found out I could use the new CV-joints the other way around to make that possible. Steering For steering I wanted minimal slack and double sided steering rods like in the stock 42099. I limited the steering angle to make sure the maximum angle the CV-joints make, does not cause any damage. I noticed the CV-joints start wobbling when the angle they make is too big. The steering rack assembly - as well as its back side counterpart - use a trick to minimize unintended movement (slack): The assemblies are 3 studs deep and incorporate 3L axles with end-stop. The end-stops are sticking out of the assemblies and make them slightly deeper than 3 studs. For this to work the end-stops need to slide along a smooth surface. This trick makes for a very nice fit with little play and still allows the assemblies to move very smoothly. Ground clearance To increase ground clearance I used a double wishbone setup, not suspended, to take advantage of the extra lift provided by the inclined wishbones. The rear wishbones are inclined more than the front wishbones, because there the CV-joints don't need to deal with the steering angle. At this stage I also added a set of minimalistic fenders ;-). Bodywork Finally, bodywork. This was the most challenging part for me. It needed to be removable, to provide access to the battery/control unit and I wanted it to live up to my foolproof standards. The whole model can be lifted by the roof or by the A(?)-pillars. At this stage I practically used all the pins that came with the set, so I had to do a lot of backtracking to get some pins available. I ended up using all pins, including the ones that came as spare parts. Interior RC don't have interior . When I wanted to test drive with a first bodywork attempt, I found out the hard way that I could not reach the on/off button of the battery/control unit. I had not taken that into account. Eventually I found a solution in making the roof openable, as if it were a hood, just by releasing two pins. The red 10L axle in the back can then be used to turn the controller on. After opening the roof, it can be removed easily, after which the sides of the body can be removed separately to access the battery/control unit. All together this has been a great experience. Especially the limited and pre-defined set of parts made it a real challenge. It forced me to revisit all constructions over and over again, and leave in only what is essential, without making concessions to my self-imposed building standards. I ended up using 828 of the 958 parts. -
.thumb.jpg.be7f3ef7c74531e8a3ac98ae1e300e94.jpg)
[MOC] [WIP] Crawler crane in 1:20 scale
Bogdan Valceanu posted a topic in LEGO Technic, Mindstorms, Model Team and Scale Modeling
Hi guys, I’ve been following the forum for some years not, but I’ve been mostly a “lurker in the dark”. But, after 2.5 years designing and building when I had some spare time, I can finally share my 1:20 crawler crane MOC with you. For now it has somewhere around 40.000-60.000 parts (don’t know exactly how many). I’ve tried to build it as close as possible to a real crane in terms of assembly and functionality, with the usual constrains that you have with building out of Lego at this size and scale. As a disclaimer (and as a direct apology to Lego purists), the slewing bearing is not lego, but a cross roller bearing. The drive of the bearing is Lego, using the ¼ gear racks from the 42055 BWE. Took me about 6 monts to find a bearing that fits in size with the internal gearing of the gear racks, so that the driving axles still fit trough. Also, if you look really close, there were some occasions where I got out the Dremel for some adjusting (mainly panels), as I didn’t want to sacrifice strength, or design. Again, sorry to the purists. The crane is powere by 4 BuWizz, one in each central counterweight (between the crawlers), and one in each superstructure counterweights. I love the fact that you can still operate the BuWizz while it’s charging, so I have a power bank battery next to each BuWizz. Like this you get hours and hours of play time even with a large heavy model like this. The drive is as follows: - Each crawler is powered by 4 PF XL Motors (and one BuWizz per crawler) geared down 240:1. The motors don’t drive the ends of the crawler, but 8 sets of 2 gears underneath each of the crawler chassis. Due to weight reasons I used metal axles from Eezo’s Brick Machine Shop from the US. -Slewing is done again by 4 PF XL Motors which sit in the base of the superstructure. - Each winch is driven by a PF L motor. They were powered by 2 PF L motors, but because the winches are worm-driven I had some issues with them not running synchronous and overloading the motors. The winches can be individually taken out from the superstructure for maintenance and use 1mm wax rope. Structurally the main building technique for the crawlers, undercarriage and superstructure is an array of 5x7 technic frames. I’ll come back on another post with some pics of the various building techniques and technical details. Maybe I’ll also do a more detailed video on this sometime soon. The crane is not finished yet. I still need to build the superlift tray and telescope, which will be EV3 controlled so that it self-adjusts, and sadly I need to rebuild all the boom. Until a main boom length of 4.5m everything is ok, but with more than that it starts to bend too much. In the video below I’ve build 4m of boom, because it was pretty windy when we shot the video. The goal would be 7m someday. I want to keep the boom in the main boom+short fixed jib configuration. A luffing jib would be easier to lift (most large Lego cranes that I saw are built in a luffing jib configurations), but as I work in wind turbine assembly, I want to build the boom configuration that we use mostly. Here some pictures from the assembled crane: https://www.flickr.com/photos/164584645@N03/ And here a video about the crane (without wanting to advertise for the channel) As mentioned before, I’ll follow-up with some more pics from the building phase and building techniques. I hope you guys like the crane. -
.thumb.JPG.06b89e5883516bc1ca4c78486eaf6542.JPG)
[MOC] SANY SCC40000A
Kladovec posted a topic in LEGO Technic, Mindstorms, Model Team and Scale Modeling
Hello, this is a model (MOC) of real existing lattice crane from China - Sany SCC40000A. Crane with capacity 4000 tons, his overall height can be over 200 meters. To transport that massive crane require more than 200 heavy transport trucks. My model is little smaller - height is max 3.4 meters and I really don´t know how much it can lift. I didn´t try - maybe several kilograms. Only to the first braking bricks :-). It took me several weeks to make it in LDD, several weeks to collect all the parts and build, some issues during build has occured, but nothing serious. I also made building instructions if you wish to build. Total parts count 10388. It is fully remote controled via IR receivers. 14 power function motors - 4 XL motors in the main undercarriage which control each tracks and 2 IR receivers, 4 XL motors in the rear ballast trailer one motor for each tracks and 2 IR receivers, 4 L motors in the superstructure for 4 winch drums and 2 IR receivers, last 2 M motors are located in the derrick with 1 IR receiver, this M motors control last two winch drums. Two rear winch drums in the superstructure are for the main boom, two front winch drums are for the lufffing jib. Winches located in the derrick are for main and auxiliary hooks. Crane can be made with Sbricks or Buwizz also. In rear ballast blocks are hidden non lego counterweight with aproximetly 3 kg. Building instructions: https://rebrickable.com/mocs/MOC-135246/kladovec/crawler-crane-sany-scc40000/ Video: https://youtu.be/IQzy3cn-eiU More pictures: https://bricksafe.com/pages/kladovec/sany-scc40000 -
Here's a model I actually completed a year ago in order to be unveiled in time for the BuWizz picnic back in 2021, but we all know how things went... Anyway since the picnic did happen last weekend, I decided to unveil my most powerful offroader. The basic design is based on the Wildcat 4x4, but this version adds more power, a 2 speed gearbox and a third axle to the formula. As with the older version, each axle has independent suspension, plus the entire axle can pivot or swing, effectively giving this model double suspension setup. Indepedent suspension is great at absorbing small bumps when driving quickly, while the axles pivot along the terrain when crawling. The driveline was quite a challenge. In order to transmit the power from 12 motors to the wheels, each wheel ended up having it's own dedicated 2 speed-gearbox. The final driveline is extremely compact and efficient, with only 3 gears engaged at any given time. There are also no differentials or perpendicular drives, so nothing that can break or skip. Each gearbox is actuated by a PU M motor using worm gears, which prevent any unwanted skipping out of the gear. This way each wheel is powered by 2 BuWizz motors via a dedicated gearbox: The following gif shows how the front axle is designed along with the whole model: Here you can wee, how the front axle tilts in order to adjust to the terrain: The rear axles are made in the same way as the front axles, minus the steering. Rear axles are also designed to work in tandem, when one goes up, the other goes down. When one tilts left, the other tilts right. This way the rear suspension is extremely flexible: And finally here are some specs of this beast: Length: 52 cm Width: 26 cm Height: 20 cm Weight: 2,5 kg Top speed: 15 km/h (rounded up) To complete the presentation, here's a video of the model in action, a big thanks out to @braker23, @Sariel and @kbalage for the footage. Final thoughts... this is my most potent offroader to date. The sheer amount of power, torque and speed is hard to wrap your mind around for a model made entirely of small plastic pieces. Having said that, I think there are still few areas to improve: Tendency of the front wheels to fall off at hard bumps - A lighter version would help to reduce stress on the hubs and wheels. Could use a higher steering angle - Would have to find a way to integrate steering racks inside the transaxles. Protection againt depbees and dirt entering the drivelines - Something that would also not reduce the ground clearance, tiles might work.
-

[MOC] Lego Jeep Cherokee
filsawgood posted a topic in LEGO Technic, Mindstorms, Model Team and Scale Modeling
Hi all! My new model - is realisation in Lego - off-road custom based on the legendary american SUV - Jeep Cherokee (XJ). Everything according to the canons - axles, a rear differential lock, winch, snorkel, fenders, footrests, thick-walled pipe bumpers, an expeditionary trunk, chandelier and big wheels. -

[MOC] Lego Technic Chilli Crawler
PunkTacoNYC posted a topic in LEGO Technic, Mindstorms, Model Team and Scale Modeling
I present to you my Lego Technic Chilli Crawler! This is a complete makeover and overall improvement from my previous Carrot Crawler: http://www.eurobrick...howtopic=112037 Yes, I know. This is the second crawler that I named after a vegetable; expect more! Features: - Triangulated 4-link live axle suspension using 4 soft, black shocks. - 4x4 with one PF XL motor mounted parallel* to each of the two axles. A final gear ratio of 1:5.001, yes this may seem slow, but the enormous Super Swamper tires make up for it. - Speaking of that, 4 RC4WD Super Swamper tires. No, they are not Lego, I got them from a nearby hobby shop. - One L-motor for steering in the front axle, geared down via worm gear to 8 tooth gear, then a 12 tooth gear to a 40 tooth gear. The 40 tooth gear drives another 12 tooth gear that moves a 13L gear rack. - Portal hubs for all four wheels. Standard Lego Unimog for the rear axle for rigidity; custom triangular plate portal hubs on front axle for a steering pivot point closer to the center of the tire. - Good articulation, about ~55-60 degrees. - Controlled with an SBrick. - Powered by a Lego rechargeable LiPo battery. - Green Chilli Stem** * The mounting of the drive motors parallel to the axles was a must for this crawler. By doing so, I have not only eliminated gear slippage as there are no perpendicular gears, but there is also a ton more ground clearance in both the front and rear axle. The rear axle especially as the motor is actually on TOP of the axle. Crazy, huh? ** Makes the crawler look so much cooler. Challenges: - As with all 4-link suspension setups, the mounting and placement of both the links and the shock absorbers proved to be a rather annoying, tedious part of the process. I have, however, managed to make a VERY rigid triangulated setup where the shocks are not bent or warped in any way. - The mounting of the two lower links on the front axle was also difficult as there was virtually nowhere I could mount these links onto. I was able to (somehow) securely mount both the lower links and the shocks of the front axle onto 7L and 9L beams on either side of the motor. - Mounting the motors parallel to the axles proved to be hard, but actually somewhat straightforward when it came to the rear axle. I had been so used to having drive axles perpendicular to the axle like on my previous crawler. The mounting of the front drive motor was difficult in the fact that its power is transmitted through various gears and the motor itself is connected to the axle by two plate beams and a pin or two. Although the front drive motor is still not completely rigid, I have had no problems with gear slippage whatsoever in either axle. Some pictures: And finally, here is the youtube video: I welcome any suggestions or comments you may have. I will, however, say in advance that I DO NOT plan on making a body for this crawler as I designed it for performance purposes mostly, a Lego "comp-crawler" as you may call it. Thanks, pt -
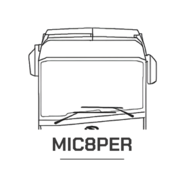
[MOC] Rock Crawler - 42114 C-model
mic8per_ posted a topic in LEGO Technic, Mindstorms, Model Team and Scale Modeling
RC Rock crawler. Features AWD drive without differentials using 69730 "Large angular position motor"(As it has realy good torque), Steered by L-motor, and springless suspension (concept by superkoala). Lack of differentials gives nice off-road perfomance, but the crawler has big steering radius due to that.42114 C-model. You can buy instructions here: https://rebrickable.com/mocs/MOC-81106/mic8per/42114-rock-crawler/#details Video: -
[MOC] Lego Technic Cactus Crawler
PunkTacoNYC posted a topic in LEGO Technic, Mindstorms, Model Team and Scale Modeling
Hey Everyone! Here is the successor to my Lego Technic Chili Crawler, the Cactus Crawler It took about half of a year of design and revision to reach its current state, of which I am proud of. THE VIDEO: youtube Features: - 3 L-Motors for drive (two in the rear axle, one in the front) - M-Motor and a small linear actuator for front steering - Rigid, triangulated 4-link suspension for the front axle, with large, soft, black shock absorbers - Extremely rigid 2-link rear suspension with ball-joint pivot point on top of the axle, similar to that found in the RC "Mantis" crawler - 100% Lego-legal custom curved rear links that, with how the main cab is shaped, provide exceptional ground clearance towards the rear of the crawler, allowing it to climb up relatively large vertical structures such as street curbs - Very minimal, light bodywork - BuWizz for extra power and SBrick for a great, custom control scheme Note: By the time I finished designing the cab and it's battery enclosure, BuWuzz had not yet come out with the update for their iOS app that allows a single joystick/slider to control multiple outputs, so I was forced to use an SBrick with the BuWizz, providing the extra power from the BuWizz, but with the ease-of-use and great custom control profiles of the SBrick. When used with the SBrick, the BuWizz does in fact still provide more power than the standard Lego 8878 LiPo battery box. - RC4WD 1.9" Krypton scale tires - Two green pieces so that I can call it the Cactus Crawler ;) LXF hopefully coming soon, the tires can easily be found with a quick google search of their name. YES, I know, there is no body. This is meant for performance, meaning I made the cab as small, light, and rigid as possible. I will be able to reply intermittently throughout the day. I figured I'd put this up now anyway! pt -

[MOC] Launch Umbilical Tower + Crawler for Saturn V 1:110
Janotechnic posted a topic in LEGO Technic, Mindstorms, Model Team and Scale Modeling
Hello, after quite some time I have found my way to Eurobricks forum... And even if it's not brand new anymore, in my first post I would still like to introduce my biggest MOC: The Lego Technic Launch Umbilical Tower (LUT) for the Lego Ideas Saturn V with integrated Crawler. Special feature: For the basic variant, you only need the parts from three Technic sets: 42055 BWE, 42082 RTC and 42098 car transporter. With the given parts from these three sets, I tried to match the proportions and add details as good as possible. As I dearly missed some details (e.g. the fuel pipes), I added some upgrades to the LUT. But this means to leave the parts bank of the three mentioned sets, and add some more parts. So far I have upgrades for the fuel pipes, a red crane front, more red parts at the tower, and better looking launch pad surface. These functions are fully motorized: Driving forwards/backwards Steering left/right Elevator in the tower up/down Turn the swingarms into start or supply position Hammerhead crane turn left/right Hammerhead crane rope up/down Manually: Damper arm up/down for the transport position Longitudinal position of the rope on the crane Release tail service masts on the launch pad Video to show the functions: https://youtu.be/pB5tYQBT_tY (please ignore my errors in the rendering, and: YES, it was intended to not use the real names ) Building instructions and more pics are available here: rebrickable And the last link: My insta account to follow me: instagram And now some pics: The basic variant: Upgraded variant: Real picture of my MOC: Comparison for the proportions of the original LUT: Feel free to comment or raise some questions! -
Not all ideas are good ideas and even the powerful and experimented Kuat Drive Yards (KDY) engineers can fail utterly. The AT-AC or All Terrain Armored Crawler is a perfect example of one of these false good ideas. While the supremacy of the AT-AT on the field was not to be demonstrated anymore, particularly after the crushing imperial victory on Hoth, the Imperial Army still complained about the AT-AT expensive cost per unit and its highly demanding maintenance. KDY engineered went back to their plans and after a few months, they proposed the AT-AC. The concept was quite simple, starting from the successful AT-AT, they replaced the costly maintenance-intensive articulated legs by continuous track systems. AT-AC by Veynom, on Flickr When presenting the AT-AC to the Imperial Army, KDY was proud to claim that it was significantly less expensive than the original AT-AT, that it required only one third of the AT-AT maintenance time, while still retaining the same firepower and robust protection. Unfortunately, the first field deployments quickly demonstrated all weaknesses of the AT-AC. Because of its great armor and protection, it was heavy and because it was heavy, it was really slow when crawling, its speed approaching ridiculous levels when the landscape was not ideal. The second issue comes from the change of height. While crawling on the ground, the AT-AC was no more inspiring fear but also found itself very limited in its fire coverage ability. AT-AC by Veynom, on Flickr As consequence, the limited number of assembled prototypes have been assigned to 3rd class garrisons on planets with limited local technological civilizations. Surprisingly, the troopers reported only positive feedback about their AT-AC. These were offering comfortable, reliable and well protected transportation and the lack of agility was not a real issue when battling primitive tribes and species. It is even rumored that some COMPNOR officers would have confessed that with AT-AC on Endor instead of AT-ST, the rebellion (not to mention the despised Ewoks) would never had won. AT-AC by Veynom, on Flickr One last remark about the AT-AC. According to several concurring sources, it would have been nicknamed Crawling Armored Transport (C.A.T.) among the troops. COMPNOR supposes that it may related to some kind of resemblance to an animal on one of the remote planets where the AT-AC operates. AT-AC by Veynom, on Flickr Disclaimer: the above is 100% fiction. This MOD is based on set 75288 (the 2020 AT-AT) with the track system design from the Sandcrawler 75220 (from 2018), some detailing here and there, and a bit of color swap. Free instructions are available on Rebrickable. Just click here.
-

Broken (?) technic servomotor 88004
Anomander posted a topic in LEGO Technic, Mindstorms, Model Team and Scale Modeling
Hi all, I'm new here, but been an AFOL for a few years after my "dark ages". I'm a collector - I like the big cars and constructions machines, so recently I decided to get the Crawler 9398 before it goes out of production and get ridiculous prices... I really liked the suspension, looks and the possibilites with the PF parts that we get in this set. So I got a new one, and unfortunately the servomotor (the one used for steering) seems to broke after just 6 days (I still used the 1st set of batteries on it, it wasn't used in any hard conditions or abused in any way, used only indoors). The servo does not autocenter anymore after releasing the controls. This is my first IR remote set, so I don't have many ways to troubleshoot if it's the servo or the IR receiver fault (tried both channels, new batteries, didn't help). Wrote to lego support, but I don't have any proof to show that I bought this set recently (lost the docket), still didn't get any reply from them (it's 4 days). I took a look inside the servomotor, there was a lot of white grease inside it, removed most of it and it started working again after reassembling, but then finally broke the next day (again no autocenter, this time for both directions). I made a youtube movie that shows how it behaved before I took it apart - has anyone seen something like this, is there any fix? I must say I'm a bit disappointed with this set and lego quality - my previous 'flag ship' 42009 came with 2 missing parts, and now this... -

CRAWLER (100mm suspension travel)
Tomas TECHNIC posted a topic in LEGO Technic, Mindstorms, Model Team and Scale Modeling
This crawler is driven by two PF L motors with total gear ratio 1:5. It has got no differential to ensure best terrain performance. Each wheel is steered by a PF servo motor which is located in the front axle. The main feature of this creation is the extra soft suspension. The shock absorbers are compressed about 50% in idle position. It offers 100mm of suspension travel thanks to the long axle arms. The outdoor performance of this crawler is surprisingly good. Maybe you think that L motors are not strong enough but I can make sure that they are. Even powered just with a standard battery box with rechargeable batteries. I have also build axles with XL motors but they definitely weren't as good as axles with L motors. Mostly because their bigger size. Check this nicer page with more photos: https://tomastechnic.com/crawler/ -
Small 4x4 off roader
piterx posted a topic in LEGO Technic, Mindstorms, Model Team and Scale Modeling
Hi guys! I'd start saying this thread is more to ask you some suggestions than to show you the model itself :P I think i already told you that the shop wich is sponsoring me http://www.mangiobricks.com asked me to build something that they can sell as a custom model right? At first, they wanted the fiat panda i made last year but i wasn't satisfied by it due to its untidyness... so i made something that i think it's better and wich performs better than every expectations i had As it's made to be sold (hopefully) i couldn't call it with the real counterpart name....but i think it should be quite clear where i took inspiration from :P it's really simple and it's made trying to use the less amount of pieces possible to keep everything clean and tidy performances are really good, even if the most of the weight is in the back of it, it crawls really good having some nice ground clearance and good speed as well! i don't know how many of you could be interested in buying something like this as many of you are great reverse engineers :P but let's say you have the chance to buy a custom model, how would you prefer it? i mean, do you think i should make it with motors or just ready to be motorized? what else could i change to make it more attractive? should i add more functions or just stay on "less is more" concept? ill wait for your suggestions guys! in the meanwhile have a look at some pictures of it! hope you'll like it :) -

[MOC] Rock-Bouncer
mktechniccreations posted a topic in LEGO Technic, Mindstorms, Model Team and Scale Modeling
Hello my friend. This is my another asset to this forum in form of a off-roader/rock-crawler in this particular case its more like rock-bouncer, the reasons are follows. This MOC is powered by 3L Power function motors, which two of them are located in the rear axle, to help during uphill climb with more torque requested on the rear axle and overcome any obstacles Gear ratios are as followos, from motor to the axle its 3:1 to speed up the model, and afterwards it connected to new planetary hubs with theire respective ratios, steering is controlled by one servo and everything is controlled by one buwizz brick. Instructions are avaible at rebrickable: https://rebrickable.com/users/MK.Technic/mocs/ More photos on bricksafe page: https://bricksafe.com/pages/MK.Technic.Creations/rockcrawler-2l Video -
 Motorized model of a crawler crane with Mindstorms EV3. Features driven tracks, and superstructure functions controlled by an automated distribution gearbox. Functions/features: Driven tracks Boom elevation Boom extension Winch Superstructure rotation Ever since TLG released the rotary catch pieces from the Bugatti set I sought to incorporate it in a distribution gearbox so that I could control 4 functions with 2 motors. However, I did not want the play experience to be constantly interrupted by shifting the gearbox. For instance, if I used PF and installed a stepper mechanism to control the gearbox, I'd constantly have to count how many "shifts" I've done to ensure the right function is engaged. With that in mind, I realized Mindstorms EV3 is the perfect solution to this - by simply utilizing a touch sensor, the mechanism can detect how far the shifting motor has rotated thus automatically selecting the right function. The gearbox, which sits at the heart of the superstructure, features a cam attached to the shifting motor to hit a touch sensor. When a command is received from the remote, the shifting motor rotates until the touch sensor is pressed, then the EV3 tells the shifting motor to rotate a certain number of degrees to select the corresponding function. This utilizes a switch/case for the remote, and because it features up to 11 button combinations all superstructure functions are controlled from the same channel (channel 2 on the remote). This gives controlling the model a very natural feel, and sometimes I even forgot that I was controlling a distribution gearbox because the EV3 shifts it so seamlessly. As for driving, it too uses a switch/case for the remote. Because it's just a simple tank drive, the commands for this are much more straightforward compared to the gearbox functions. Driving is controlled from channel 1 on the remote. Additionally, there are sound effects that play while operating the crane. Pressing the left two buttons together in the 1st channel starts the engine (thus starting the program), and pressing the right two together stops it (thus ending the program). Because the PF IR remote uses levers instead of buttons, this effectively makes the model inoperable with only a PF remote. The EV3 remote feels more natural for controlling this model too, as some superstructure functions (boom elevation and superstructure rotation) involves pressing two buttons simultaneously. In the end, I'm pretty satisfied with how this model turned out. I was initially worried that this gearbox I had in mind won't work as smoothly as I imagined, but it turned out to work flawlessly. It often made me forget that I was even controlling a gearbox as the EV3 does the shifting for me. Of course, there's still areas that could be improved - for instance, the boom extension and winch operate pretty slowly. Not using a worm gear in those mechanisms probably would've helped, but that would mean the mechanism becomes "unlocked" as soon as the gearbox disengages it. Occasionally the gearbox would jam, making me restart the program, but overall the finished model met my expectations. Video: Photos:
 -

[MOC] The Ultimate Pickup
Attika posted a topic in LEGO Technic, Mindstorms, Model Team and Scale Modeling
Hi there, I've developed a very annoying habit in the last few years. I randomly build pickups and other 4x4's. Even bought a real one. Anyway, the latest one is quite a biggy (sizewise) thanks to the planetary hubs. I've found a trick build them into solid axles with a practical ground clearance. This trick is going to be conroversial here. But start up with the video instead: All pics to be found here: https://bricksafe.com/pages/Attika77/ultimate-pickup In the comments under the video, noble members of our community noted, that there are parts which could solve the 1/4 stud misery. (if you don't know what is that, off you go, and whatch the video to the end! ) One of these is the 14t gear from the old diffs: I've made the attempt, but due to that collar on the bottom (top on the pic) it is too wide and puts srain on the drivline, making it hard to turn it by hand, so it is off the table unfortunatelly. So I speak for myself when I say, cuting those axles worth it. Not a rare piece, and costs 1 cent on bricklink, but only because there is no smaller value in the currency itself. In return the design prooved itself very reliable. Another "weakness" of the axle is the inperfect geometry. The wheelhubs aren't completelly vertical. There is about 1 degree tilting inside on the top. /---\ Before overdramatising this atribute, think, if you've noticed it in the video? Apart from the axles, the rest of the truck is the product of those years I've mentioned above. The essence of it is a simplest possible drivetrain: And a steering solution refined for non-rack steering: (The render is made of an older version, hence the different connector) If you don't belive your eyes, yes I choose to use 4x2 beams to form steering arms. It looks savage, but it is doing the job very well, brings ackerman geometry in the game. It does not hold the wheels rock solid of course, but in practicality it isn't noticable on the field. I've got a rack steering solution as well, but that brings the servo down A, onto the front axle (I don't do that. Ever ) B, into the mid chassis, where I don't have room for that. So we keep that for another build. Also has a working steering wheel using the rear output from the servo. ame old bevel system I've been using in most of my builds. Check the 1st episode of the pickup saga for more on that. Suspension Solid axles on a 3 link setup. It is kinda made up design, slightly inspired by the rear suspension of my Isuzu Trooper. Changing the shocks, or their hinge point on the top, gives 3 different ride height and suspension stiffness. The black, soft springs give a softer, relaxed, lower stance to it, while the dark grey shocks (known from the set 8880) are lifting the truck to a practical maximum, but still can reach full articulation. Not in all situations good to have your truck up in the sky. Like the climbing in the video. With low shock setting it made 52 degrees, but 47 "only" on big wheels and lifted shocks. The center of gravity moves with your ground clearance. That's about it, the rest is smoke-screen, like the body, and fancy doors. Oh, here is a fun fact: When it came to the seats, I realised I have 2 adjustable seats salvaged from a lorry build from about 5 years ago. Luckily they fit perfect so just made a rear bench in the same style. A non adjustable lazy style. Please feel free to ask about it, or just say something about cutting axles. I hope you find something useful here to take home with you. -
Greetings! On my opinion Pasaana market scene with old Lando is one of the most prominent in SW9 thanks to the crawler he is using. Sadly it is on the screen only for about 2 sec or even less. Here is my MOC with the crawler and scene - feel free to comment. Thanks!
-
.thumb.jpeg.019d538e6955d37410627e0d5e3cb08d.jpeg)
[MOC] Vintage tractor
Parazels posted a topic in LEGO Technic, Mindstorms, Model Team and Scale Modeling
The crawler tractor with a realistic steering system. It is driven by a one XL-motor. 4 levers let you: - start engine; - select between 2 speeds (forward and rear); - steer. You have to pull the two central levers to turn the tractor left or right. Once being released the steering levers automatically return to their zero position. Update: -

GMC c4500 Ironhide
kazak-fr posted a topic in LEGO Technic, Mindstorms, Model Team and Scale Modeling
GMC c4500 Ironhide He killed a total of about 20 evenings after working on the assembly. Spent about 2000 parts. The design of the entire filling is very complex, a gearbox with a double clutch and a double row of gears (so as not to disrupt under loads) and two gears (lower and higher), differential units (no one has yet seen that there are blocks of both bridges on similar lego cars ), the suspension so that when it works, it doesn’t hurt anything even when the wheels are turned up and the maximum squeeze, a connected winch, plus the location of all the motors in the mind (1 servo, 2 M-motors and 3 L-motor drive), battery pack and two receivers while the center of gravity was like mine it’s lower, plus the design and appearance itself all this made me explode my brain and spend a lot of time. 2017 year problem with photo, not loading https://www.youtube.com/watch?v=IxqSjZ2bfek&feature=youtu.be Thank you for watching -
[MOC] The Wannabe Tatra
Attika posted a topic in LEGO Technic, Mindstorms, Model Team and Scale Modeling
Good people of Eurobricks, let me give you my first take on the planetary hubs: Please excuse me for the lenght of the video, it's meant to show the developement stage by stage. I had big expectations towards the new hubs, since they've been announced. I realised, these hubs will solve the problem of the stress on drivetrains, yet will raise a new challenge. Due to the increased torque on the wheels, the frame (chassis) and the bracing of the suspension will be the new weak link. A wanted to have a finalized rig to the date of the release of the hubs. The backbone of the design came from a five years old chassis concept, it was a non motorized chassis: To mimic the geometry of the new hub, I've used the old ones with some extension, so it can be easily swapped, when time comes: The concept of the chassis came together quite well, thanks to using techniques well practiced in my early years. But there was still a long time till the release of the new hubs. Driven by curiosity, I've planted two PF XL motors in the middle of the chassis, making them drive two axles each. One for the front axles, one for the rear ones. No additional gearing has been added, the motors were connected straight to the differentials. Of course it had to be tested, hat's the part around one minute into the video: https://youtu.be/PGQpUrOS-NQ?t=59 Came with a surprisingly satisfying result, despite the usage of the old cv's and hubs, yet it was understandably far from being a "crawler" it meant to be. Also at this point I was short of claas tyres, so I've used some similar size rc tyres on the front 4. Got the tyres eventually, still a lot of time till the hubs coming though. As the final design was gonna use 4 buggy motors, time came to make the change: Same principals, like with the XL motors: No gearing added (slow output used), 2 motors drive the front, other 2 for the rear axles. Now feeding that much buggy motors would require 4 buwizzes. Or one well sized rc lipo that can comfortably supply 2 sbricks. 4 buwizzes cost about 400-450 pounds, while the lipo comes for 30 pounds. Any question? At this stage (still no new hubs) it was an obvious, yet pretty crazy idea to hit the tarmac. So I did. That's what you see at 2:16 in the video: https://youtu.be/PGQpUrOS-NQ?t=136 I had a lot of trouble that day with the bluetooth connection, brought a head on crash int o a container. It was heart-, but no plastic breaking. Finally the hubs came by the post and the picture got full. I've also planted another servo for steering (2 in total now) Indoor durability test at 3:27 https://youtu.be/PGQpUrOS-NQ?t=207 Climbing test (60 degrees) at 4:18 https://youtu.be/PGQpUrOS-NQ?t=257 Hereby I apologize for the dark enviroment at this recording Peek on the suspension at 3:12 https://youtu.be/PGQpUrOS-NQ?t=191 Lego should not be used outdoors... ahm, okay... Outdoor test from 4:55 in the video. https://youtu.be/PGQpUrOS-NQ?t=295 I came to the verdict, that the new hubs worth their money. In a usage that abusive, you see in the video the hub-cv connection definitelly require some lubrication. I've been using silicone oil and no downside appeared so far. Here is the difference it makes: That's it so far, a little spoiler at the end of the video. Hope it's gonna catch some expert eyes... -

[MOC] Jeep Wrangler Expedition - Update: Instructions and manual version
HorcikDesigns posted a topic in LEGO Technic, Mindstorms, Model Team and Scale Modeling
Hi, ___ EDIT __________________________________________________________________ __________________________________________________________________________ HERE ARE INSTRUCTIONS FOR CURRENT VERSION: (description later in this topic) https://rebrickable.com/mocs/MOC-28281/Horcikdesigns/offroader-for-overland-adventure/#bi ___________________________________________________________________________ ___________________________________________________________________________ This is my latest attempt at building offroad car. JEEP Wrangler Expedition by Horcik Designs, on Flickr Introduction and Motivation I built it for the Kostky.org TROPHY, adventurous event and AFOL meeting that is inspired by Camel Trophy series, and was held by Kostky.org (CZ+SK LUG) at 5th August 2017 for the very first time. It was awesome day, and I hope that there will be more. Here is the the official video from the event. There were really great cars there. The car itself The car was built to fit the rules of the competition. That means reserve "fuel" in the car during whole race before refuelling, remote control (no wire connection between truck and controller, S-bricks allowed) and representative appearance. So I decieded to go with the force, and installed two XL motors for the drive, geared down in 3:5 ratio, and two L motors, each for the winch (1:8) and steering (mini LA). I also reduced gearing to the minimum, due to minimal energy-consumption. (I nearly did the whole race to single Li-Po BB) The car is not perfect, it is very heavy (approx. 1500g), so it does not allow to use CV joints in the front axle for smooth wheel rotation. They managed to withstand the race, but in the finish (before the big uphill from the first video) they were strongly damaged, mostly because of big steering angle. Well, I hope that the video will say enough, if you have any questions, feel free to ask me. :) Photos: JEEP Wrangler Expedition by Horcik Designs, on Flickr JEEP Wrangler Expedition by Horcik Designs, on Flickr JEEP Wrangler Expedition by Horcik Designs, on Flickr JEEP Wrangler Expedition by Horcik Designs, on Flickr JEEP Wrangler Expedition by Horcik Designs, on Flickr -
Speed-build video: https://www.youtube.com/watch?v=bvelE1MXuaA
-
 So here's the idea: seeing as all large and complex Technic submissions have failed on LEGO Ideas so far, I set out to create a very small and simple, yet fully functional 4x4 crawler. This is the result, which can be considered the 9398 set on a budget ;) as it offers pretty much the same functionality in a considerably smaller package. If you're willing to give this project a shot at becoming a set (a Technic Ideas set would be nice, at long last), please support it here: https://ideas.lego.com/projects/ba4cebf3-1f80-497d-9ecb-faee2dbc1df3 Photos and description: http://sariel.pl/2018/11/4x4-jeep-wrangler-trailcat/
 -
 Hello All! It is winter time, so I am bit more busy on Legoing. After seeing, that @Didumos69 started his 4x4 buggy project, I looked into a bit deeper the Ultra 4 racing, and the rigs been driven in this extreme events. Finally the video, what I linked to his topic, triggered the work on another MOC: the Ultra 4 buggy. Here is another video to see the interesting bits of independent suspension system on this beast: Still, I might end up with IFS (independent front suspension) and solid axle with torque bar for the rear, but the body is heavily inspired by the Lasernut buggy. Parameters: 2x L motors 1x servo motor AAA battery box - in order to be replace ability with BuWizz in case IR control Let's look at into the progress a bit, maybe it is interesting to read. I started on 28. november with LDD model. To set the proportions, and the body ideas, I usually place the essential parts free in space first. Check the real inspiration thing and the very first sketch: After that I added the electronic parts, to check the necessary minimum space. (Unfortunately Stud.io has corrupt models, so some cover parts of the motors are just not present.) At this stage, I built the front axle, to see how can I integrate the steering. The answer is: massive fail. So back to drawing table, I deleted the 5x7 frame, and started to figure out, how to connect the needed fixation points for swingarms, servo. Due to this, the model gets more complex than I thought, but buildability is always first! I recommend to check meanwhile IRL building too, or at least stop by and thinking about how to add the related parts. I was hopeing for a simple MOC, but I ended up already a pretty complex assembly, so I made each step with double check. Later on, I will try to add groups in LDD to represent the buildability order too. So far the front module with steering and IFS is ready, the middle module is almost done, I am wondering about interchangable solid axle or independent solution for the rear - not sure yet. Also the color is to be decided yet, as the springs type as well (soft or hard). I think if soft ones will be OK, than I go for white body, as it presents the "rollcage" better. In case the yellow hard shock absorbers will be needed, of course the only choice is: full MEAN black body. This picture shows the advantage of the white body, and also a comparison for tyre types: 3740 on the left, 45982 on the right, both on 56908 wheels. So far 407 parts, and I guess it is about 70-75% ready. I need to figure out how to fix the roof, and create a solid, but easily disconnectable rear module. Necessary parts are ordered, so real build pics might come in couple weeks first. And how is the road presence? I guess it will be pretty much like a punch in the face. p.s.: Yet another WIP, I hope for long winter nights, to finish at least some of my unfinished projects...
 -
 Hello guys! At last I can represent to all of you my latest MOC. It's a Lego Technic Liebherr LR 11000 Crawler Crane. I tried to build a copy of a famous Liebherr-brand crawler crane. If to be honest it was my dream to build a human-high technic crane. This model is approx two meters high. It has five independent winches! Real crane has six, but two of them goes to one hook, what was not necessary to represent in lego version. Except string crane is build of 100% Lego. As a counterweight I used three big battery boxes in the superstructure and three ones in the additional counterweight carriage. Below I will list crane's functions. RC: 1,2) Chassis drive and steering - one L motor for each track. 3) Superstructure rotation 4) Operator's cabin uplifting via small linear actuator 5) Main boom winch 6) Luffing Jib winch - winch is located on the main boom like in the original model 7) First hook winch 8) Second hook winch - winch is located on the main boom like in the original model Manual: 1) Derrick boom winch - needs only when assembling/disassembling crane 2) Addiction counterweight extensioin - need to balance crane under heavy loads 3) Addiction counterweight up/low - need to balance crane under heavy loads or without a load 4) Addiction counterweight steering - need to steer wheels in the counterweight carriage when superstructure rotating and need to make wheels parallel to move crane forward or backward 5) Chassis uplifting - chassis have installed four small linear actuators which can lift the chassis under the ground to put on tracks like in the real Liebherr!! As TLG doesn't have any pulleys of 0.5 stud wide and with the pin hole in the center and 3D parts are too expensive I decided to drill the original ones. Firstly I used 4 mm drill to make a round hole instead of an axle, after 4,5 mm and finished with the 5 mm drill. No any part was broke. And this time I already has video to show you: And a couple of photos. https://bricksafe.com/pages/Aleh/liebherr_lr_11000 Hope you will like it. Feel free to ask any questions. Also very appreciate critics. But for sure my wife definitely will not stand another crane To start building i was inspired by the set 42042 - I love it too moch!