Search the Community
Showing results for tags 'tanker'.
Found 20 results
-

small 1930's OCTAN gas station with vintage tanker truck - MOC
Murdoch17 posted a topic in LEGO Town
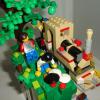
This building was heavily inspired by a Winter Village MOC by Brick City Depot from who I bought a copy of some instructions from in 2015. (The link to his store's site is here.) I added a back wall to the building, made it look more late 1920's / early '30's by adding painted wooden siding, and removing the Christmas-time items. Also, several items are missing prints in these pictures that would be fixed in real life. Please note: Both these OCTAN models go with my Hogsmeade-style MOCs... and yes, I know that doesn't make sense with Harry Potter cannon. I don't really care, it looks good next to them so thus it stays! The front of the building with the two art-deco gas pumps. The four yellow 1 x 2 tile parts should have warning stripes pointed on them, and the twin pumps should have OCTAN labeling on top as well. This rear portion of the building is new, along with the removable roof section. It's a little crowded inside, with two shelving racks, a service counter w/ cash register, and a printed poster for Radiator Springs on the wall. The gas tanker is a mashup of the truck in set 10222 (Winter Village Post Office) and the one in Indiana Jones set 7683 (Fight on the Flying Wing) and should have OCTAN branding on the sides of the tank. It can seat a single driver figure at the wheel, too. The rear features tank controls and a rubber hose for filling up the gas station's underground tank. Thoughts on this future addition to my expanding small town? -
Maintenance Of Way (MOW) track construction train with steam and diesel locomotives - real world WIP
Murdoch17 posted a topic in LEGO Train Tech
Does you track need to be repaired after a major storm? Want to connect Point A to Point B with a brand new rail-line? Did the Flying Kipper have another accident on the main line? Or maybe you want to upgrade the signaling and double track the line at the same time? Call out the Maintenance Of Way (MOW) train to fix all these problems and more! This train consists of a late-1950's diesel locomotive, or a mid-1930's large eight-driving wheel steam engine and six specialty cars: - a (working!) crane car - depressed-center rail wagon - a (working!) ballast hopper - a tanker car - workman's tool car - caboose The 4-8-4 steam loco is new-to-me, and began life as a 2-8-4 Berkshire type built by Plastic_Goth and purchased from Rebrickable a seen here. To make this steamer, I upped the wheel count of @Plastic_Goth's locomotive by another leading axle, making it into a 4-8-4 Northern-type from the original 2-8-4 as built in the instructions. The new piston / wheel assembly is entirely my own work, as is the completely new 7-wide tender. The inside of the cab features two gauges and the firebox door. This model was originally a ALCO MRS-1 built by @SavaTheAggie, but has been so severely modified that it no longer looks like the prototype loco. So I went searching And found another ALCO locomotive, a RSD-12 that looks like my loco. Both my model and the prototype have the six wheels, and the same basic hood and cab design. The long hood of the loco has been designated the rear with a double red light. This car carries liquid weed killer for use after the track has been laid. This stream crane model was heavily inspired by Whoward69's instructions for a set of crane and match truck train cars. I modified the original model seen here. (sadly, it seems his Flickr profile and pictures has been deleted) I originally meant for the crane to have ropes to move the boom, but it got confusing on which rope went where so for now it's moved by the H.O.G. (Hand Of God) method. The crane can spin around in 360 degrees and lift anywhere up to 90 degrees straight up. (Their is a double set of pins keeping the boom from going too low, as well.) The heavy-duty depressed-center wagon has brick-built arms to secure the cargo of prefabricated railroad track in place. This model was inspired by a coal hopper on an older website called LGauge .com. I turned the old finger hinges into new pin-orientated ones and colored the car yellow to match the MOW paint scheme. The hopper's bottom doors open and can dump 1 x 1 round plates / bricks onto the tracks for ballast. This old passenger car carries the workmen and their tools. The caboose features two ladders (one per side) and more of those fancy printed 2 x 4 tiles. If you like what you see in this topic, check out the home base of the train and assorted other vehicles in this thread here! Thoughts? Comments, Suggestions, & Complaints always welcome! -
1930's freight train with 1898-style 4-8-0 Mastodon steam locomotive - real life MOC
Murdoch17 posted a topic in LEGO Train Tech
It is the early 1930's. The dark days of late 1929 has worsened into a economic depression of truly epic proportions. Worse, the drought starting in summer 1930 (lasting until above average rains stopped it in 1941) caused the dreaded Dust Bowl and the mass migration of (most) of an entire generation of farmers and their families westward. This time frame also led to the rise of hobos, wandering, jobless people trying to use the one mass transportation still running across the dusty, windswept nation: The freight trains. The backstory on this train is as such: The engine, number 6519, runs daily from Lawrence, Kansas yard to where it finally services the Rust-eze factory in Moberly, Missouri. The line branches off and curves to the left in Columbia Missouri, while the main goes straight on to St. Louis. The rest of the regular freight is worked at the Columbia yard, expect for the acid tanker and the two marked generic boxcars. That tanker goes to the factory too, as it's a chemical component for Rust-eze. Rumor has it that the Rust-eze plant will be moving closer to St. Louis, or even shutting down soon, maybe by early 1934. The engine used to be a heavy-hauler out on the main, but has been relegated to branch line work, as it's 1898-vintage pistons are wearing a bit thin and she is overdue for a overhaul. Unfortunately, with the current depression, she has been reassigned to light branch work with a limit on her speed. Hopefully, they will scrape up the money to get her in the shop soon. This early 1900's-era engine model was first designed as a 2-8-2 Mikado before having the front pony truck removed and a 4 wheel bogie from set 10194 (Emerald Night) added instead, turning it into a 4-8-0 Mastodon - type. The rear pony truck was removed as well, with the 79111-style boiler shortened and cab re-arranged. Then, as of late September of this year, I completely rebuilt her from the wheels up to use the Disney engine boiler you see here. The running gear was originally a Scotnick invention from his 9F, but now comes from my MOD of the Constitution Train Chase set. So, basically, the only thing original left is the tender. Together, these several different engines from four different eras and five separate builders come together to create this one steam engine, which I have numbered 6519. The coal tender was inspired by Anthony Sava's Pacific 4-6-2 model's oil tender with the letters "BRS" added in the middle of the tender using printed 1 x 1 tiles. I was inspired by this photo by JB Lego to build this boxcar as seen here. They are made to haul pallets of cargo, specifically Rust-eze chrome restorer in 55-gallon drum containers for commercial packaging at this facility into smaller containers. Inspired by the green tractor trailer from CITY set 4204 (The Mine), this bathtub gondola is carrying boulders from the mine destined for the gold refinery where they will be opened up and the metal extracted to make coins and ingots. This drop side flat car was first part of set 2126 (Train Cars), but it didn't really have a purpose. It was hauling uprooted evergreen trees in the set, but that didn't look very good, so I changed it to generic freight. (My layout's resident hobo and his trusty guitar usually catch a ride on this piece of rolling stock.) The hobo is trying to get home to his family, which lives in Glenncoe, Missouri. Sadly, he picked the wrong train, as this only get's him halfway there. He's going to have to ride the blind of a steam engine tender on a passenger run to get home. (that's the area between the first car and tender, it's very dangerous because you're balancing on the coupler!) This dangerous liquid tanker was modeled after a real tanker car you can walk through in the Museum of Transportation's collection in St. Louis, Missouri. The real deal hauled hydrochloric acid for Monsanto starting in 1940 up into the late 1960's. I'm backdating the car ten years to fit into my mid-'30's freight train. I have adapted this UK inspired model of a brake van by Fireglo450 (see it here) to once again be a more American-inspired caboose. The caboose has no interior, and the red marker light can go on either end of the model to represent the end of whatever train it is being hauled behind. Here you can find other topics of interest mentioned in the text, or that are similar enough to be placed alongside time frame-wise I have this passenger train, that goes along with the freight train in this time period. (No, the hobo does not ride this one home.) and this branch-line station that is from the same late-1890's era, and on the main line from the San Francisco to New York (via St. Louis, of course!) Here we see the (100% fictional) Moberly, Missouri, Ruste-eze Factory. It seems to have made it to better times, with this picture taking place in the early 1950's. Any thoughts, comments, or complaints? -
"I've been working on the railroad, all the live-long day!" This train consists of a ALCO diesel locomotive (specifically a RSD-12 type) and six cars: - a (working!) crane car - depressed-center rail wagon - a (working!) ballast hopper - tool / worker bunk car - weed killer tanker - wide-vision bay-window caboose. The train model features several neat printed pieces found in several Juniors sets and and seven generic track workers. (as seen below) ...while the roadbed crew consists of: -Bucket-lift truck from set 3179 (Repair truck) -Dump Truck from set 7789 (Lotso's dump truck) Drill vehicle MOD from 7936 (level crossing) Front end-loader from set 7630 (front end-loader) ...and a official's inspection car MOC - not yet built This model was originally a ALCO MRS-1 built by Anthony Sava, but has been so severely modified that it no longer looks like the prototype loco. So I went searching And found another ALCO locomotive, a RSD-12 that looks like my loco. Both my model and the prototype have the six wheels, and the same basic hood and cab design. The long hood of the loco has been designated the rear with a double red light. (no picture taken yet of this car) This car is not your ordinary tanker car - it contains weed killer for use on the ballast the train lays down. This stream crane model was heavily inspired by Whoward69's instructions for a set of crane and match truck train cars. I modified the original model seen here. I originally meant for the crane to have ropes to move the boom, but it got confusing on which rope went where so for now it's moved by the H.O.G. (Hand Of God) method. The crane can spin around in 360 degrees and lift anywhere up to 90 degrees straight up. (Their is a double set of pins keeping the boom from going too low, as well.) Here we see how the crane is hooked up to the depressed center flatcar most of the time. The heavy-duty depressed-center wagon has brick-built arms to secure the cargo of railroad track in place. This model was inspired by a coal hopper on an older website called LGauge .com. I tunrned the old finger hinges into new pin-orientated ones and colored the car yellow to match the MOW paint scheme. The hopper's bottom door open and can dump 1 x 1 round plates / bricks onto the tracks for ballast. (no picture taken yet of this car) This is the workers tool car. In reality it's empty, but it's supposed to have rows of racks for tools, and a special box for broken tools to be fixed when they get back to the division HQ. The caboose features two ladders (one per side) and more of those fancy printed 2 x 4 tiles. This is where the job site foreman has a little office. The med kit is also located here. This is the headquarters for my Maintenance of Way operations for Brick Railway Systems. I was inspired by set 60009 (Helicopter Arrest) from 2013 for most of the building, while most of the inside details came from set 10027 (Train Engine Shed) in 2003 a whole ten years before the other set was even produced. As for the billboard on the roof, I borrowed the letter's design from my brother's model (with his permission), and put them on a billboard to spell out OCTAN. The tracks on the side of the building are for my ALCO RSD-12 and it's accompanying six car work train to sit and await their next task. The inside on the lower floor is furnished with a lathe, drill press, fire extinguisher, oil drum, and a vise. The upper floor (the break room) has a table, a few chairs, coffee machine (with paper cups!), fireplace, and a recycle bin. I will be updating this with the two missing pictures soon. As for the digital items, I will built them as funding allows. As usual, Comments, Questions and Complaints are always welcome!!
-
OCTAN diesel refueling depot with Santa Fe Bluebonnet F7 units
Murdoch17 posted a topic in LEGO Train Tech
Inspired by set 149 (Fuel Refinery) from 1976 as seen above (pic from BrickSet), this model takes the 4.5v era Shell refinery and turns it into a two-bay diesel locomotive / oil burning steam engine fuel depot for the modern PF age. The new refueling depot model features two floors with removable roof sections, two track-bays for servicing locomotives, plus a 1950's style tanker truck inspired by set 8486 (Mack's team truck, which hasn't been built yet.) The Santa Fe Bluebonnet model proudly uses no stickers, only printed parts. It's road number (327) is of a real-world Santa Fe bluebonnet engine, one that no longer survives after it's eventual conversion to a CF7 and scrapping sometime later. Sadly, all the Santa Fe F-series diesels were converted to CF7's, (whole body shell stripped away for viability reasons) and boy, were they ugly. Not many of the CF7's survive today, if any. As a side note, the locomotive bays are tall enough to let any official car through, including the double stacked container car from the Maersk train. The upper floor of the depot features a control station for monitoring the flow of fuel from the tanks on the roof to the service bay, or from the as-yet-unbuilt tanker truck to the storage tanks. The roof of the facility comes off in two sections. The upper floor features a opening door to the tanks and staircase to the lower floor and the flow-monitoring systems. Emergency fuel shutoff valve and fire extinguisher are at the top level next to the door to the tank area. This is a heavily modified version of set 8486 (Mack's Team Truck) 1950's style semi truck, like the one seen in the 1970's Spielburg movie "Duel". This time, it's a tanker truck in the OCTAN colors scheme. The model can seat one mini figure at the wheel, and features opening doors, a removable roof and a detachable tanker trailer. The tanker section features a moving stand to keep the tank stable when the cab is not there. The trailer is supposed to feature this print on both left, right and rear sides of the tank where the white 1 x 4 tiles are. The idea for this bluebonnet came to me in 2014 when I came upon @raven1280's very similar model, as seen here. I didn't want to use stickers at that time like he did, so I waited, modifying and tweaking the design until the parts came out in the correct colors to warrant it's building. (Particularly the windscreen!) Inside of the cab unit. Inside of the booster unit, with cab unit connected on the left hand side of this locomotive. (Yes, I placed it backwards to what it should be!) (NOTES: Real life model 98% done, just need the tanker truck built.) As usual, Comments, Questions, Suggestions & Complaints are always welcome! -
Classic Town / Legoland style 4-studs up to 6-studs wide Truck & Fuell Tanker Semitrailer built in Classic Town Shell colors 14 by George Legoman, on Flickr 06 by George Legoman, on Flickr 09 by George Legoman, on Flickr 10 by George Legoman, on Flickr 11 by George Legoman, on Flickr 05 by George Legoman, on Flickr 03a by George Legoman, on Flickr 01 by George Legoman, on Flickr
-
Hell again, wanted to share another moc I made, this one was more ambitious, and contains a lot of pieces for such a small model. I quite like trucks, semi's etc, so I did a whole series of them in LDD, and took the plunge to get the actual bricks to make one, the Shell Tanker. It's a little nod to set 671 Sgell Petrol Tanker which I had as a a kid. It's a small model only 4 studs wide, but I tried to put as much detail as I could in it. such as the mirrors on the cab, smokestack, shovel for spills ;). I had an idea for the trailer, borrowed from the small enterprise I did, which worked out well for a rounded brick based tanker. The cab on it's own, with the mirror showing, it's own petrol (gas) tanks, smoke stack and shovel ;) The trailer has a kick stand to support it on it's own when detached from the cab, and I tried put in some details as best I could such as the control gages tile and valve in this shot; On the other side, the hose connectors to supply the fuel at the Lego Town petrol station: A last shot of the whole tanker, from a different angle: A few more photos on my Flickr: MOC Shell Tanker Thanks for looking again, and hoped you liked it. As a final thought, with some colour changes, this could become an Octan Tanker as well.
-
My first IRL MOC! Just 20 studs long. Also my first real BL order, man is that a learning experience in itself. I made three with the intent to sell two to cover my cost in the third, but they look good together so I'm keeping them all! Link to LDD .lxf file https://drive.google.com/file/d/17IfTRjH6xD9hLf4vkaMDg6bxapVdKN4U/view?usp=drivesdk
-
FebRovery is on again! Now I came up with a Tanker Rover. FebRovery Tanker - Front by Kamal Muftie Yafi, on Flickr FebRovery Tanker - Rear by Kamal Muftie Yafi, on Flickr More information in my blog!
-
Milk Tanker building instructions Parts list
-

[MOC] Peterbilt 379 & Polar Tanker (1:13)
Bricksonwheels posted a topic in LEGO Technic, Mindstorms, Model Team and Scale Modeling
Well, it is great to see a forum dedicated to scale modeling, so its not more then fitting to put my latest work here: A Peterbilt 379 with Polar tanktrailer. A large (1:13) scale Lego tanker combo had been on my list for a long time. I made a small 1:22 Kenworth cabover with milktrailer in the past, and had plans for a 1:16, but in the end started work on a full 1:13 scaled combo. My 2012 dumper combo was getting old, and I wanted something new to bring to shows as well. Now I wouldn’t be myself not to take a new build a bit further again, and this one should be extremely detailed, coloful, and fitted with lights. Once more I hooked up with my good friend Rob from Brickstuff.com, and this time we didn’t make compromises. We even added a custom controller/effect board, powered by a USB Varta 10400 mAh powerpack that is located in the sleeper! There are lights everywhere including over 60 driving / contour lights, but as a special feature the underside of the chassis of both tractor and trailer are equiped with over 180 RGB LEDs to simulate the glow effect seen on showtrucks. This really gives amazing effects. A custom remote control is split into two channels that control the contour lights and the underside seperatly. Effects include color changing and strobes. It took me 5 months to build this truck and some 9000 bricks went into this, including electro-plated chromed bricks by Bricks4all.nl. My buddy Jaap Kroon (Jaap Technic) printed the stickers for me, a job well done! And a shot in the dark: A video is on my flickr stream: https://www.flickr.com/photos/bricksonwheels/ -
This Retro styled gas station is a throwback to the glory days of the Drive In Theaters, Route 66, tail-fins on cars, & full service every time you fill up. You used to get this with every gasoline purchase: - Check lights - Fill gas tank - Check oil - Washer fluid refill - Check Tire pressure Fast & Friendly service guaranteed! (Now how's that for good customer relations!) The model was originally built in 2012. It was modeled after the 2011 CARS set 8487, (Flo's V8 Cafe) but made larger and without the launcher and car wash. I recently changed the color scheme to OCTAN colors, (red white & green) plus I added a truck of unknown origin from 2014 (I think my brother may originally have built it.) I'm not 100% sure where it came from as it's been on my computer for so long. This gas station has eight retro-style stand-up pumps, and three lanes for cars to sit while pumping gas. As a side note, this part should go where the 2 x 4 x 3 brick is above the door while two of these 1 x 4 tiles should go on the stand-up sign. The model's rear swings open to reveal the the clock, four-flavor soda fountain, and the attendant's desk. Their is also a storage area under the soda fountain. The back of the model features a rear exit. I think my brother may originally have built this truck, but I'm not 100% sure where it came from as it's been on my computer for about three years. The rear of the truck. The driver's doors open, and so do all four storage compartments. The complete LDD file is available here, if you want it. Remember: Comments, Question & Complaints are always welcome! EDIT 1/9/17: added new pictures and an updated ldd file with tanker truck.
-
-
I've needed some tankers for a layout which will be exhibited in some of my LUG events and I've made these three models. I've always liked vertical tankers since 7730 set:) More pictures could be seen here: https://www.flickr.c...eposted-public/ LEGO Tanker small 2.2 by Severus A, on Flickr LEGO Tanker medium 2 by Severus A, on Flickr LEGO Tanker small 1.1 by Severus A, on Flickr
-
Thank you for watching. Cat walk.
-
Hello Community! It's been quite awhile since my last MOC. But I wasn't passive. In the meantime I've upgrated some of my models, especially the ones of my petroleum plant fire brigade "Jade Öl AG". So, let's start with a new special tanker equipped with a high reachable Turret, mobile water cannon and a heavy duty pump. It carries 7,000 liters of water and 3,000 liters of foam to the scene. You'll find a few more pics in the gallery on my blog. So, hope you like it. Comments and critics are welcome as usual. More MOCs to come. Regards!
-
Adventurers - 1920's military Land, Sea, & Air vehicles
Murdoch17 posted a topic in LEGO Action and Adventure Themes
Lord Sam Sinister is in a evil partnership with Lord Ogel, dictator of the industrial country of Vladeck. They are currently (as of January 1925) scouring the world for an artifact named Poseidon's Trident, with the latest lead having them head for the southern tip of South America. Sam is accompanied by his personal battleship named "Sinister Purpose", two diesel-powered submarines, a new series of stealth aircraft and a small battalion of troops and land vehicles. He also has all his underworld contacts, including but not limited to: Senor Palomar, Alexis Sinister, Barron Von Baron, Max Villano, and more, ready to help him with his quest. Lord Sam's mission is to find the Trident and with it, help Ogel conquer the seas (and the world). His only real opposition is Johnny Thunder and his friends Major Quentin Steele, Jake Raines, & Pippin Reed, plus their small fleet of vehicles. This is Sam Sinister's personal battleship, the "Sinister Purpose". It features two anchors, three smokestacks, and four turrets. I have given the turrets the ability to move the triple-gun barrels up and down and swivel side to side. (In the real world, this battleship was originally designed for my brother, Austin, who later discarded the project.) Here is one of the two identical submarines used by Lord Sinister and his forces. This one is named the "Red Fox", while the other is named the "Black Wolf". (In reality, this submarine was gotten from Brickshelf back around 2011. I don't remember who did it, but it is Studs Not On Top, also known as SNOT, for 90% of the build.) Here is the LDD file for both submarine and battleship: http://www.mocpages.com/user_images/80135/1426187247m.lxf This prototype stealth aircraft is nicknamed "The Stalker" for it's ability to creep up on a target and follow without being noticed, before it blows the enemy craft into oblivion. (When Indiana Jones set 7683's (Fight on the Flying Wing) pictures was first leaked in dark grays, I was impressed... but then they went and changed it to dark green in the final, released version. Well, now I changed it back! I removed the unavailable parts, turned the regular green and dark green to light and Dark bluish gray. The cockpit is no longer hinged, making it much stronger, plus the rear guns no longer swivel, eliminating that weak point. The cockpit is supposed to be the Star Wars Jedi star fighter dark-bluish gray-print-on -transparent-black part) The fleet of vehicles at Sam Sinister's disposal includes two dozen fighter aircraft. These fighters are not as advanced as the flying wing above, but still can hold their own against almost anything thrown at them. (This model was originally set 6745. (Propeller power) I turned into that micro scale model into a plane that a mini-figure can sit in. it was turned from red, white, and yellow into a slew of military-looking grayish hues.) LDD file for the aircraft here: http://www.mocpages.com/user_images/80135/1426185143m.lxf This fearsome piece of machinery is used to cut down trees in the path of the land forces. It is currently being heavily used in South America as the search for the Poseidon's Trident grinds on in the Amazon Jungle. (I bought the original set 7626 (Jungle Cutter) in Summer 2008. I wanted to make it it in dark gray to match my two trucks but gave up after trying to order the parts from Lego. (I didn't know about Bricklink at that time) Well, now the shoe is on other other foot and here it is, in full grayish glory!) Here is a fuel supply truck of the convoy currently running back and forth from the battleship Sinister Purpose to the head of the group pushing further inland. These trucks are the weak point of Sinister's forces. Destroy them, you halt the progress towards the Trident. (This model is almost a stock part of 7683. (Fight on the Flying Wing) I simply redid the rear tank to keep it from spinning.) These trucks may be empty now, but usually they are filled with troops protecting the convoy searching for the Trident. (These are made from 7622. (Race for the Stolen Treasure) Since the fabric part is so VERY expensive, I found a solution in the Eurobricks Official sets LDD topic. I took the cover from the trucks built by user ADHO15 and redid some portions to be cheaper (I.E. thinner tires) and better coordinated color-wise.) This vehicle is one of many used by the forces of Evil to search for Poseidon's Trident. This particular car usually holds an officer of the Vladeck Armed forces, Special Recovery Division, which looks to capture objects of power through less-than-legal means. (The car seen here was originally part of set 7622, Race for the Stolen Treasure, as the machine gun hauling support vehicle. I have put a roof on it and turned it into a officer's car.) Here is the LDD file for the land vehicles: http://www.mocpages.com/user_images/80135/1426185434m.lxf Johnny Thunder will need to bring his A-game to stop Sam Sinister this time. Comments, questions, and complaints welcome! -
Hello! Two years after I posted my third tiny RC, the Mercedes Citaro ( ) I made my fourth one! It’s the replica of one of the most specific trucks. I’m sure you have already realised it on the small picture, before you opened its mocpage! The type of it is Renault Magnum. The idea of building this truck at this scale and with this brand method is quite old, but other projects and university stole the time. So I’m very happy, that it’s ready! Hope you like it, too! The length of the whole vehicle is 45 studs. The width of the tractor is 6,4 studs (16 plates), the width of the trailer is 6,6 studs (16,5 plates) without mirrors and other design elements. The scale is minifig scale. It has the two compulsory functions of a tiny RC, propulsion and steering. It contains approximately 820 pieces. The video: Because of two developments, the motions of the truck are absolutely lifelike. It’s possible to solve almost all extreme situations, which happen with trucks in real life! You may realised that the trailer is not exactly horizontal. If both axles are fixed, the front wheels don’t touch the ground. The weight of the trailer is on the front axle, the other axle and the wheels on it are only decorations. It was a real challenge to figure out the front! I used almost every direction. I'm very proud of the result Technical detailes: You may remember my yellow Daf truck, the grille of it is my body icon everywhere ( ). The Renault is similar to that, everything is in the semi-trailer, but it has two very important differences (the two developments). Propulsion The motor drove the wheels of the trailer at the Daf. It meant that the truck couldn’t move, the trailer couldn’t push the tractor if the angle of the trailer and the tractor was too close to 90 degrees. In this truck the rear wheels of the tractor are the driven wheels. You can see the method on the pictures, how I brought the spinning from the trailer to the tractor. The right angle is not a problem any more! Steering I used two cardan joints in this truck and in the older one, too. The difference is the aim of the joints. Two joints rotate the axles into vertical position in the Daf. One of them compensated the angle, which exists in bends. It means that the motor can’t rotate the axle, if the angle of the trailer and the tractor is smaller than 135 degrees. The cardan joint can’t spin above this angle. In the Renault two joints have the task of compensation. So right angle is not a problem any more! By the way we still have the with the steering. I tried to use servo motor, but it was a fail. The motion goes through a wormscrew, many gears and the two cardan joints from the motor to the steered wheels, so the backlash is big. The servo motor can’t bring back the wheels into middle position after steering. Servo motor is useful, if it is as close to the steered wheels as possible. For example in a bus. In a Mercedes Citaro… If you are technic fans, you may remember that we can find cardan joints between the wheels and motor in 9398. But that set is very big, so the same difference is smaller problem there, as at minifig scale.We are transporting something very dangerous! My previous tiny RCs: Daf, Routemaster, Mercedes Citaro The LDD file is avaiblable on Mocpages. It doesn't contain some elements of the steering mechanism between the two front wheels, it's the meaning of the lime plates. You can see these elements on the pictures or in the video. Thanks for visiting and I hope, it’s not too late to wish you a happy new year!
-
Hello everyone, time for some retro again . I wanted to show you one of my latest creations. But it’s been a while since I completed it. Anyway. It’s a very special fire apparatus – a tanker truck. This one is in service for a refinery company fire brigade in the city of Farnheim. The trailer is filled with 23,500 liters of foam and serves as a logistic feeder or as a distributor into the water network at emergency scenes. This tractor-trailer is not able to start fire fighting operation on its own, because it hasn't any pump or a water cannon installed. You always need a pumper, too. I used the same building technique for the tank that I used for another small foam truck (shown below). It gives a sleek and clean design to the hull. It also allowes to put on a two-tone paint scheme with some intergrated details like lighting at the rooftop, flashlights a the rear end and side markers. As for a little personal touch I clipped on a german flag (a reminiscence of the Soccer World Cup back in July). And its little brother: Hope you like it. Thanks for watching. Critics & comments are welcome as always. Regards!
-
I love LEGO® trucks. I just can't help myself when a new civilian range comes out; last year's range was great, and this year's looks set to continue the current trend. My love of, specifically, petrol tankers can be traced back directly to this set - one of the first sets I remember owning, and ground-breaking for its time. But time has moved on, and LEGO sets have become far more intricate. The release of an Octan tanker relatively soon after 2010's 3180 Tank Truck is rather surprising; in this review I'll check out the latest offering and see how it compares to its (slightly) older sibling. Incidentally, 3180 was one of the first sets I reviewed early in my EB Reviewers Academy career. If you compare to my earlier review, you can see how I've (hopefully) improved! Review: 60016 Tanker Truck Set Information Name: Tanker Truck Number: 60016 Theme: CITY Release: 2013 January Wave Parts: 191 Figs: 1 Price: GB £17.99 | US $19.99 | EUR 19.99 - 22.99 | AU $29.99 | CA $24.99 | DKK 179.95 Links Brickset ... Shop@Home ... Bricklink ... Peeron (not yet listed) The Box Click for a full-frontal view in various sizes Once again, Orthanc dominates the LEGO CITY skyline, while our Tanker breaks the fourth wall into the familiar blue CITY livery. It's a tried and tested formula, dating back a full ten years to the advent of World City in 2003, but still looks fresh. The box is deep, measuring 260 x 188 x 70 mm (W x H x D); it's the same height as 3180 but considerably narrower and shallower. This set is GB £3 pricier than 3180, which had 30 more pieces; the smaller box size therefore represents an environmentally-conscious move by TLG (or, for the cynics among you, a cost-saving in logistics ). HEY! Look at these features! Ladder, gun-on-a-hose, coffee mug replete with petrol fumes, ladder again, and cab the dude can sit in! What more could you want? We'll examine these features in depth in due course. Click for larger sizes The usual CITY modular build is alluded to, rather than demonstrated this time: we are shown two bags falling from the box but not what they build. However, LEGO's new subversive 'Pokemon' Collect Them All! strategy once again appears, but there are only two other civvy sets this year, so you'll have to go back and complete your collection with last year's. And you should - they're good! The little petrol pump that accompanies the tanker gets its moment in the limelight on the top of the box: Quite why it's isolated in a field on the City outskirts is anyone's guess, and I'm still uncomfortable with the driver's delight at drinking coffee in the close proximity of flammable liquids, particularly as it occurs to me now that the black tubing might well represent Diesel. At least he isn't smoking! Apologies, by the way, to Americans: please substitute 'gas' for any appearance of the word 'petrol'. Contents The thumb-tab box opens to reveal two polybags, instructions, and sticker sheet fitting quite snugly inside. They are accompanied by two loose parts: the hose-and-gun combo. Only one is required in the set; whether the second will appear in everyone's, or I've just been lucky, remains to be seen. Decal Sticker Sheet Oooh, shiny! The sticker sheet is printed on white material that is rather reflective, and required careful photography to remain clear. As has been the trend of late, the front of the cab is stickered, but as we shall see it doesn't entirely replace the usual grille tiles. There's a sticker for the petrol pump (top left); the rest go on the truck. The Instructions The single booklet is of good quality, and features a display very similar to the box front, but with a slightly broader panorama. The Gagne Kid guards the rear, presumably to deter people from sneaking a look at the inventory. The Modular Build is demonstrated on the inside front cover: Bag Two's cab and tank builds don't connect directly without Bag One's chassis; obviously the disembodied wheels don't. Having looked at this page, naturally by now you would have poured all the parts onto the carpet, albeit in separate piles. Too late, the opposite page warns us not to do this. Winding the hose onto the reel could prove challenging to younger kids; or at least doing it neatly (it's tricky enough for adults). Maybe I'm underestimating the capabilities of the average 6-year-old. I should remember that programming the VHS caused young Rufus far less trouble than his elders! [VHS = archaic system for recording moving pictures onto magnetic tape, for those interested in ancient history.] You might have noticed the part call-outs on the previous picture. Yes, they are present throughout: This surprised me, in such a small set. With typically only 1-3 parts per step, it isn't strictly necessary, but I for one won't complain. Towards the rear we find the latest CITY range diorama, showcasing the new yellow cement mixer , and the strange 1950s-throwback recovery truck : The two sets from 2012 promoted in the 'Collect Them All!' series also feature here: 4433 Garbage Truck and 4432 Dirt Bike Transporter . The latter is a great set! I'm secretly hoping the garage at the left appears as a set soon. The set inventory is found on the last two pages: you can see them here and here. The Parts Bag One builds the chassis, along with the petrol pump and solitary figure: There isn't a huge amount of interest here. Most of the incongruous blues and browns will be buried in the final model. I'm pleased to see the black flexible tube make another appearance here; it was in 3180 too. The yellow taps, not surprisingly, are the modern variety, without the little hole at the end; one of them is spare. I have a sudden inexplicable desire for spaghetti carbonara followed by biscotti with Vin Santo: Opening bag two, I was momentarily alarmed at the prospect of flick-fire missiles appearing in CITY sets. Fortunately, that is not their use here, though the cynic in me wonders whether TLG is trying to demonstrate alternative uses for these ubiquitous pieces. Otherwise, there isn't really anything of note here, with the possible exception of ... ... this piece, which is found once in both bags: It's a 2x2 brick with studs on one side. It's new to me, but I note that it first appeared in Bag End at the end of last year, and in several sets this year. It's potentially very useful for SNOT work. The Figure The sole figure included in this set wears blue overalls, unlike the 'Oil' jacketed figure from 3180. Let's call him Diesel Dave. He has a rather bland, amiable countenance; I'd rather he had an unshaven scowl. The torso is nice, with some lovely detailing; the black vest under a medium blue shirt, all surmounted by the darker blue (presumably denim) overalls with wrenches and a pencil in the pocket. But it's nothing new: this torso first appeared in 2006. The back is featureless. The Build The first thing built is the little free-standing petrol pump. We'll see it complete later; here I've part-disassembled it to show a simple but nice technique: Three 2x2 white jumpers are used to centre the upper part, and allow attachment of the bluish-grey wheel. The 2x2 black tile is attached to the two white 1x1 bricks with stud on one side; I had wondered why one of the new 1x2 bricks with side studs wasn't used, but you can see that another of these white 1x1 bricks is used in the model, and it makes economic sense to use as small a part variety as possible. The black tile itself will be stickered, and represents the pump's display; the whole is capped by a 2x4 tile offset via its centre anti-studs. The black tube is a little too rigid to allow posing of the figure holding the pump unless both are connected to a baseplate or other studded surface, unfortunately; about the only viable pose on a smooth surface is shown here. Building the chassis will be a familiar routine to anyone who has experience of LEGO's trucks. Long plates form the spine; 2x2 axle plates are separated by either 1x2 tiles or plates; I'm not sure why the tiles were used rather than the 1x2 green plates along the length. Note the black 2x6 modified SNOT plate at the end: this is surmounted by a 1x4 SNOT brick, forming a 2x4 grid of studs for the secure attachment of the rear SNOT panel. The spine is strengthened with more long plates and the rather incongrous brown bricks, which don't show in the final model. I didn't think the 'mustard dispenser' would fit into the cupboard, but it does! Getting it out again requires nimble fingers or vigorous shaking. The front-end SNOT panel has a green modified 2x6 SNOT plate; the top studs mesh with the black 2x4 tiles for extra strength. There's a lot of tiling (or part-tiled plates) on the upper surface here; this allows the cab section to be removed easily should you wish too. The rear end is topped by a 4x10 plate; this leaves a gap underneath which would indeed be found on many trucks, but there's a visible red plate under there. In the final inset you can see the rear-end SNOT panel; the grille-tiled area is a plate lower, which looked a little odd, but there's a good reason for this, as we shall see. I took a lot of extra pictures; if you want to see more steps, check out the pseudo-timelapse in the Flickr display in the spoilers: Bag Two starts with the cab, which is based on a green 6x6 plate. Two friction cylinders form the exhausts; it is into these that the flick-fires will go. I remember a lot of complaints from about three years ago about the lack of doors on LEGO CITY vehicles; it's good to see that TLG has listened and they appear to have returned to stay. The rear of the cab is formed from large wall panels; this leaves a couple of gaps but they aren't too obvious on the finished set. Note the use of the 1x2 SNOT brick here, allowing placement of the steering wheel, and permitting easy reconfiguration to right hand drive for those parts of the world where British influence persists. Yet another of those rather useful modified SNOT plates allows a strong attachment of the windscreen: The obligatory coffee mug takes pride of place, and the whole is capped by the usual 4x6 wedge panel. I like the new wing mirror technique; it means the mirrors can't be adjusted, but this also means they're unlikely to get knocked out of place when you're posing for display or photos. The tank itself is an Octan-themed sandwich which will be familiar to owners of 3180. There is a slight difference: the red plates are the same length as the big green bicurved slopes, meaning that the front and back halves can be separated until the top 1x8 tiles are applied. The two bluish-grey wheels on the top are an aesthetic improvement over the 2x2 round plates on 3180. Cab and tank are applied to the chassis, the wheels are attached ... ... and the truck is complete! We'll look at the overall appearance in the next section. The Complete Set Look! I put the stickers on! Actually, I enlisted the help of a passing monkey who did a demonstrably better job than I'd have done. Let's take a look around, starting with the sides. Both sides are similar; the right side has the 2x3 cupboard and a dark bley grille brick in place of the reel and clip found on the other side: The lines are smart; there are a few exposed studs above the reel/cupboard sections, but at least they are a consistent colour unlike the rear section of 3180. I particularly like the step in the red stripe from the cab to tank sections. The back end is a little 'square': made more apparent by the slight inward slope of the ladder. This can of course be corrected, but as we shall see the ladder tends to prefer this position. The cab looks quite imposing from the front, and is very realistic. It's helped by the sticker over the white 2x4 tile; if you look back to the first picture in this section, you can see how the sticker continues neatly the red and green stripes from the sides. From the back, you can see how the recessed grille tiles of the lower SNOT panel accept the end of the ladder. This is the cause of the inward-sloping ladder; if you don't like this, you can easily insert a 1x4 plate under those tiles, but this will cause the ladder to slope slightly the other way. You might prefer this. The exposed Technic holes of the large green and white curve-slope blocks are a little ugly - a fault carried over from 3180 - but it isn't too obvious. Features Now we can analyse how the features so proudly espoused by the box rear stand up to scutiny. Dude sits in cab, and doors open. As is frequently the case with LEGO trucks, getting the dude into the cab takes a little work - often you have to remove the windscreen as well as the white roof panel, which means the doors will come off too. In this shot, the gap in the black layer between the front headlights is a little obvious, but it isn't the end of the world. [There should be a little recess under between the two sets of headlights, caused by the cab suspension in this type of vehicle, but it's more pronounced because the black plates at the sides are set a stud back from the tiles; I don't think it would be possible to correct this. - Thanks Phazon for pointing this out.] Dave climbs the ladder in the second shot. I don't have much else to say about this. The hose-reel is really the centre-piece of Tanker sets. I remember being amazed by the hose in 1978's 671 Shell Tanker. As I recall, that one was simply a length of hose that you had to stuff into the cupboard - no winch mechanism there - but it was an awesome feature. Here, as in 3180, the reel winch is super. Dave's got a bit tangled here. Fancy a hot dog? Dave has mustard if you need it. Yes, I know, it's a fire extinguisher. As I mentioned before, it can be a little tricky to remove. It's not really an intentional feature, but the flick-fire parts atop the exhausts can be extended slightly for that 'RC' look, should that take your fancy. The bley parts on top of the black exhausts look a little odd. This is a good angle to admire the roof on the tank: the wheels are a smart improvement over 3180. Again not a feature, but it needs pointing out: The rear axles have an open space above, which exposes a red plate from the chassis. On the plus side, with the white 2x2 jumper and green 1x2 plates, this continues the Octan theme; I'd expect a real truck not to be painted in this area, and you can easily substitute these parts for bley or dark bley if the exposed colours bother you. Comparison I never applied the stickers to 3180, so in the interest of fairness I've made the comparison with the 'bare' 60016. To see the stickers on 3180, there's an official picture on Brickset. I actually prefer the newer cab front - even without the sticker, it's neater and more imposing than the heavily-grilled 3180. Here you can see the difference in the wing mirrors; each method has its advantages: 3180's mirrors are adjustable, but more fragile and prone to getting knocked; 60016's are longer, which may be more realistic, and rigid. Obviously, 3180 is a tractor-trailer (semi-container) arrangement compared to 60016's single chassis. 3180 is therefore longer, and more manouverable; in addition, it is perhaps a little more realistic: while examples of both types exist in real life, in the UK at least most tanker trucks you'll see on the road have a tractor-trailer configuration. The single-chassis tankers might be found more commonly at airports, for example. Less obvious is that 60016 is a taller model. It's also neater: a complaint of mine about 3180 was the exposed studs at the rear (see this picture from my rather embarrassing early review). As I've mentioned previously, the white tiles and bley wheels on top of the tank are smarter than 3180's studded round plates. Sadly, the little pump from 3180 has done a runner so I can't compare those. The difference in height is made clear in this front-to-front comparison: 3180's cab livery is a little fussy. I prefer the staggered red stripe on 60016; the red stripe on 3180 is absent at the front. 3180 gets a point for having a footplate enabling easier access to the cab; 60016's dark bley wheel arches are arguably less jarring than 3180's white ones. I'm not really sure about the necessity of orange beacons on the cab roofs of either; however, the rounded lights on 60016 are more realistic - and less obtrusive - than 3180's cones. Visible here are 3180's gearstick, and the provision of both mustard and ketchup! Conclusion 'Here - that'll be £2.98 for your five millilitres of petrol, sir.' Tanker trucks are a staple - a necessity - of the LEGO Town/CITY range and have been since 1978. 2013's latest addition provides a smart, attractive addition to the range, and its Octan livery is compatible with other fuel-carrying vehicles or features from the CITY and even Trains lines; it will even sit quite happily alongside the earlier 3180. As a standalone set, it's a little lacking in play features, though perhaps there is no less than we should expect; it is crying out for a new Octan petrol station to be added to the CITY range - we haven't seen one since 2007. I hope you'll agree 60016's tanker is a beautiful truck - the livery is clean and flatters the shape of the vehicle; its lines are smart and a definite improvement over some of 3180's rough edges; even the stickers look great! My only real criticism, aside from the somewhat lacklustre figure, are that as an single-chassis vehicle it lacks a degree of realism compared to most articulated tanker trucks that I see on a typical British road. Scores Design: 10 I think this is a beautiful truck. I simply love the colour scheme, which is brought to life by carefully-designed stickers, and which flatters the clean lines of the truck. The cab's front is tastefully rendered, and the whole very realistic - you could almost imagine you were looking at a scale model. Build: 8 Never repetitive, and with a few interesting techniques, it's a fun build, albeit perhaps better suited to a younger builder if you prefer a challenge. There are a good few tricks in SNOTting to be admired, and a minor lesson in offsetting in the build of the pump. Parts: 6 There really isn't much you probably don't already have in your collection, especially if you own 3180. The figure is rather old-hat and a little disappointing if you're on the lookout for new faces or torsos; I'd have preferred a quirkier set of facial features, for a start - as he is, Dave is a little devoid of personality. Playability: 7 Compared to some other CITY vehicles, there isn't much to do with this set on its own. It comes into life as a service vehicle for a larger town, and would be particularly happy accompanying the recent Airport set... but most of all, it's pining for a new Petrol Station. Please! Value: 7 £17.99 represents a significant hike of this price niche. The similarly-sized 'Collect them all!' sets from 2012 were all £14.99, as indeed was the 30-piece larger 3180. Inflation sucks, and I'm sure TLG knows what it's doing, but it's a little pricey for the collection of parts. The whole, however, is a thing of beauty, and I for one won't regret the outlay. Overall: 75% My score: 9/10 Aesthetics wins over arithmetic here - I love this. I think you will too. Thanks for reading - I hope you enjoyed the review! Please leave comments. Rufus Compare the evolution of the Octan tanker and my reviewing skills in my 3180 review! My flickr set If you like my reviews, and would like to learn how it's done, please consider joining the Reviewers Academy: