Search the Community
Showing results for tags 'unimog'.
Found 62 results
-
.thumb.jpg.2335d10c31c9ffa7029728589340e12f.jpg)
Third Party Tires for Lego Technic Rims
efferman posted a topic in LEGO Technic, Mindstorms, Model Team and Scale Modeling
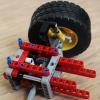
you know that the lego tires are often too wide for their diameter or the pattern is only street legal and nothing for real offroad driving. now i have found some RC crawler tires which fits nearly perfect to the 8110 unimog rims. the tires came from the german manufacturer ansmann and have the number 211000224 the diameter is 108mm and the width is 40mm or 4,25"x1,45"- 1,9" they are ballon tires with a very soft rubber compound and with a foam inside here some pics if you know some other compatible third part tires, please tell it us.- 692 replies
-
- where can I buy these wheels
- Third Party
-
(and 3 more)
Tagged with:
-
Next project (while I wait for my Cabover Truck Bricklink orders to come in) is a Unimog camper. I like to use the bigger doors for my truck creations and all online MOCs used the small door so this is a complete new build. Also I have lots of LEGO service packs with the blue train doors and windows so blue it is: Inside has toilet/shower, overhead cupboard, oven and hot plates, fridge and seat/table that converts to a bed. Still have to design fuel tank, batteries, jerry cans for underside. Here is the render so far.
-

[MOC] Unimog U423and U530 1:20 Scale
Thirdwigg posted a topic in LEGO Technic, Mindstorms, Model Team and Scale Modeling
I'm about ready to upload my 100th MOC to Rebrickable, and as I thought about how I wanted to celebrate, it became clear to me that the only appropriate celebration would be another Unimog (is this getting old yet?). Someone on youtube asked me to make one using the tires from the 42122 Wrangler/42139 ATV. I was only too happy to oblige. At the start of 2022, my goal was to upload my 100th MOC to Rebrickable by the end of the year, so that's my deadline. Considering all the MOCs made in the scale of the Anthem/Transporter/42128, I wanted to keep it as close to these trucks as I could. The best I can tell, the scale for these trucks is about 1:20 which would put a 3000mm wheelbase with a 2200mm wide U423 at about ~18.5 studs and ~15 studs wide(I'm not doing 14) (check my math @1gor). There was a moment I thought this would fit the scale of all the Thirdwigg Farm vehicles, but that standard seems to be closer to about 1:22. A chassis draft has been started. It was helpful to complete the Knunckbook Truck recently, as some of the build techniques apply here (I might use the crane too). Right now I have the following: Steering RWD with portal axle (sorry @jorgeopesi does the portal axle make up for the lack of four wheel drive this time?) Rear suspension Engine Bed tipper Front PTO Rear/Top PTO with on/off Front/Rear/Bed attachment points I am not sure about the engine right now. I tend to like the old cylinder parts even if they are a funny scale for most builds. But the 2 cylinder looks tiny here, and a 3 cylinder crankshaft messes with the gearbox and steering. I may still try an axle with stop engine yet, which will also help the reliability of the front PTO. I'm building with intent to have some attachments, but I want to get the truck done. So we'll see what things I can add and maintain my focus. More updates soon..... -

[MOC] Unimog U4000/5000 1:21 Scale
Thirdwigg posted a topic in LEGO Technic, Mindstorms, Model Team and Scale Modeling
In what now seems to be a yearly occurrence, I have started another Unimog. The reception I received from last years U423 was so good, that I thought I would continue in the theme at some point. Then someone suggested I do a U5000 with a camper body. I'm not sure the camper body will happen but the build ideas was intriguing enough and I was up for another build, so I decided to take up the challenge. I wanted to build to follow in the footsteps of the U423, so I kept the scale the same, which is roughly the same as the Anthem/Transporter 1:21 standard. The U5000 usually has a 3250mm or 3850mm wheelbase. So the wheel base will be 20 studs for the short wheelbase, and 24 studs for the long wheelbase. 15 studs is the width. As is often the case, I built a little placeholder body, and then set it aside for a number of weeks. But the build kept sitting without any changes, because I could not come up with any idea to set the build apart. The U423 works well because of all the attachments you can add, which gave some direction the chassis. The U5000 basically has tipper bed, or a camper body, or a crane with a bed. There are firetruck options that look good, but basically are a large container filled with tools on the back. Since I could not come up with anything, I started to take the build apart, and I took these pictures. Then I had an idea while browsing some images. Many of the Unimog rebuilds and Unimog adventure packages add winches to their trucks. This gave me the inspiration I needed, so I jumped back into the build. This also solidified the functions intended: Steering with HOG RWD with portal axle Rear suspension Two speed transmission Engine Bed tipper Front winch with lock Rear winch with lock Bed attachment points I quickly built another draft, and decided on a simple single cab with a tipper bed. We will see where this project goes, but I am happy enough with what I have so far, that I know it will turn into something. Maybe it will be a single build, and maybe it will turn into an extensive "system" project just like the U423. Any suggestions to improve this build or any additions to make this more of a system build are welcome. -

Systems tractors and other machinery
1gor posted a topic in LEGO Technic, Mindstorms, Model Team and Scale Modeling
Ladies end Gentleman, I (miss)use a freedom to present you my version Unimog U423 in 1:17.5 scale to fit future models that I plan to built. (At the end I have decided to make models in 1:15 scale) Since introduction of new Unimog Implement carrier, I was very impressed with possibility to make my own LEGO Unimog Implement carrier that would fit my other models in proper scale. At that moment all my models were something in between 1:16 or 1:17 Scale and like @Bricksonwheels nicely said once truth is always somewhere in between. Then rumors about new tractor tire started to fill the comments here on Eurobricks abnd because most of my mocs are tractors some things got upside up. First question was - what can I do and make decision for future models and which scale to use...After a while i remembered my good friend Ingmar ( @2LegoOrNot2Lego... ) and his U.S. trucks since LEGO produces 62.4 x 20 Truck tires in some respected range of years so far, and set 42043 (one of my favorite) is still assembled. So I take a look around what was not so difficult, since I drive some 100 miles every day because of my daily job and started documenting trucks and tires on them. After seeing that some tire dimensions are always repeating I've decided to look at on-line brochure and ask tire sellers to see which is the most common tire dimension. The result (currently) for European built trucks was tire with approximately 1100 mm overall diameter ( mostly 315/80R22.5) and for U.S trucks this is 43.2" (which is also approximately 1100 mm for 11R24.5 tire). So when you want to calculate you would end up with following scale 17.5 (1100 / 62.4). So every truck can be represented with that tire which has very good steering capabilities and grip level is (for me) satisfying. Finally I can make Unimog that has all characteristic features for this vehicle; portal axles, all wheel drive with central differential...like on image ...and then the shock - I could not integrate hub reduction based on gear 16 tooth and gear 8 tooth partially inside wheel... well back to the drawing board and I felt like Wile E. Coyote After several month of brainstorming I've decided to buy this wheel (which is actually quite expensive) and what a pleasant surprise Portal axle hub fits nicely inside this wheel (wheel from set 5571). The only problem was that 68.8 X 24 tires are to soft for planned weight on Unimog, so I have to think about something in the future, but major problem was solved and development of Unimog for living room can start. My goal was to make something like this versions with some 175 mm wide mudguards which gives about 18 studs overall width for model. Currently you can see front axle which should probably be redesigned to make some 2-3 studs "gap" between tires and mudguard and a Wheel that will be used for Unimog. At the moment I did not decide to make short or long version (long version has enough space to use central differential). Model dimensions: - length 40 studs - wheelbase (probably) 26 studs - height 23 studs - width 18 studs Model should have this features: - all wheel drive - fully independent axles with 4 links suspension - portal hubs - front wheel steering - in - line 4 cylinder fake engine - cab tilting - hood opening - door opening - motorized front and rear pto - preparation for additional attachment or platform... (motorized) Current images are here (but due to free time I doubt that I'll be able to make a video) Please make your suggestions, comments, criticism and admins do not hesitate and correct or warn me for everything that is not correct with Eurobrics rules. (After few years of building this models, I have decided to make all models in compromise scale 1:15, of course if something new in term of tires does not come up from LEGO...)- 592 replies
-
- 1:15 scale
- jcb
-
(and 3 more)
Tagged with:
-
[MOC] Benz-Unimog 4×4 Off-road RV
dls7223685 posted a topic in LEGO Technic, Mindstorms, Model Team and Scale Modeling
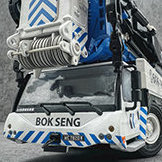
Hello everyone, this is the latest work from MTC: Benz-Unimog 4×4 Off-road RV Designed by Muen 1. Function Description ① XL×2:providing power ② Servo×1:steering ③ M×1:2-speed gearbox shift ④ M×3:3 differential locks for front, middle and rear ⑤ SBrick×2 ⑥ Small battery box ×1 ⑦Yellow hard spring ×8 2. Appearance "Modularity" is a design concept that runs through the design of the car from start to finish. From the exterior to the interior, I have modularized all the parts as much as possible, with the obvious benefit that it is very easy to assemble and disassemble, and no longer afraid of transportation. At the same time, each model is clearly positioned before it is designed, which determines the tendencies and trade-offs when designing. The positioning of this car is mainly to do my best to restore the appearance and rich interior of the real car, so this car uses technic parts to build the chassis, and particle parts to build the appearance and interior. The following are photos of the whole car's appearance, and according to the real car's beautiful pictures taken at the same angle, please enjoy. 3. Interior I always think that the interior of an RV is a very important part, so in the process of designing this car, it can be said that the design of the interior took up half of the focus and energy. Another important reason why I personally like RVs is the various storage spaces, which can be a storage space in places you don't expect, so I also built more storage spaces when designing the interior. The following is a detailed introduction to the interior of this car, I hope you can enjoy it. (1)Cab ① Seats The design of the seats uses #99563 to shape the unevenness of the surface, while the base under each seat consists of four #4532 for additional storage space. Behind the front seats are shelf baskets and in-car video for rear passengers to use and provide entertainment during the drive. ② Central Console I divided the center console into two parts, front and rear. For the front center console, there are several storage spaces with three drink holders. At the same time, there is a shift lever, handbrake and a number of function control buttons set up on the side near the main driver. And the side near the passenger side is the air conditioning vents. For the rear center console, a number of storage space and drink placement that must be the regular configuration, front and side air vents and air conditioning adjustment knob. There is a small clock in the middle for the rear passengers to see the time, but also equipped with a blue satellite phone, we all know that the wilderness places or satellite phone more reliable. Here are photos of the combination of the front and rear master consoles (2)Living area The living area is also designed with rich interiors and "modular". There are two main purposes, one is to facilitate the display of the interior, because my first off-road RV work "Conqueror F", in the process of display found that the interior can not be well displayed. the second is to allow the weight of the car to be reduced during the driving process. So the interior of the living area is very easy to remove as a whole. The interior of the rear compartment consists of 9 main parts, let me introduce them one by one below ① Kitchen Due to the limited space, the kitchen is all open, I personally divided it into 3 sections. First is the lower area, which is a variety of storage space for dishes, I also placed a garbage can, specifically for food waste. The second is the middle area, where the cooking is done, the left is the sink, the right is the stove, most RV's kitchen stove is covered, this is no exception. A variety of pots and pans as well as a wealth of spices hanging on the wall, and a range hood directly above the stove. Finally, there is the upper area with a blue microwave oven and two storage spaces. ②Bar I personally like the bar very much, so I also designed a bar in this RV, mainly for making various desserts and beverages during the rest of the day in the car. The lower half of the bar has 2 levels of storage space, mainly for cups and unopened drinks. The upper part is mainly for a small number of commonly used cups and 2 desserts that have just been made, and there is also a beverage machine with 4 different drinks. These 4 drinks are: orange - Fanta; red - Coke; green - Sprite; blue - Mizone. ③ Left side of the entrance door This module consists of three parts. The lower part is a fire extinguisher. In case there is a fire in the process of parking rest or entertainment outside the car, you can get the fire extinguisher nearby at the first time. In the middle is a white fridge, close to the kitchen and bar for easy cooking. The upper part is a small open storage space. ④ Right side of the entrance door This module is also composed of 3 parts, the lower part is a two-layer shoe rack, placed at the door, in and out of the door is convenient to change and put shoes. In the middle is a small storage space, which is mainly used to place umbrellas to prevent rain from touching the wetland board; There are also two hooks for hanging hats. The upper part is the switch box, the whole living area power switch, there is a specific instrument to show the real-time data of the living area electricity. ⑤ Sofa This car is equipped with two large electric sofa, placed opposite, sofa side armrest has adjustment knob and small display screen. Among them, the sofa near the side of the bed, the bottom is installed with a slide rail, moving the sofa, can enter the storage room under the bed. A sliding rail is installed at the bottom of the sofa to facilitate horizontal movement. ⑥ Table There is a table in the middle of the sofa. To expand the limited space, the table can be folded. After the table is folded, flowers can be placed on the table to beautify the interior environment. ⑦ Storage room The living area has 2 large storage units, mainly distributed under the bed. One is the common storage room, mainly placed washing machine, cleaning tools, repair tools and other common items; The other is a hidden storage unit behind the sofa, which can be accessed by moving the sofa and is used for infrequent items such as suitcases. ⑧ Toilet The toilet is equipped with a toilet that can also be used for bathing. There is a hot and cold water sign and a toiletries basket in the corner. ⑨ TV set The TV set is placed above the sofa and facing the bed, so that whether you rest on the sofa or in bed, you can watch TV programs and relax. Finally, a panoramic view of the living area! 4. Some Details (1)Where is the battery box hidden? (2)The living area tank is located below the rear door (3)Where is the spare oil drum hidden? (4)For parking rest and picnic outside the car, there is a foldable table on the back of the door of the living area, and it is equipped with a storage box (5)Because the car chassis is higher, so the left side of the staircase is designed with handrails, when entering the living area, convenient borrowing; There is a clock on the top of the handle, which is mainly convenient to check the time when taking a rest outside the car or having a picnic (6)The shoe rack is by the door (7)A fire extinguisher is placed in the back of the cab. (8)Skylights in the living area can be opened (9)It's 2023, car phone holder must have! Convenient map navigation! Finally! Hope you enjoy it! Thanks for browsing! Benz-Unimog 4×4 Off-road RV From MTC·By Muen·For Gap.Li -

[TC25] 8110 Mercedes Unimog U400
TechnicMOCer posted a topic in LEGO Technic, Mindstorms, Model Team and Scale Modeling
Had some issue with front axle after raising front suspension (because was too low) in Extreme Cruiser, and didn't have idea how to slove that, so I decided to make something more functional. This mini Unimog is 3x smaller than original one: So far it has HOG steering and pendular suspension on the front axle and mostly done cab. -
[MOC] Unimog U5000 Trial Truck
Teo LEGO Technic posted a topic in LEGO Technic, Mindstorms, Model Team and Scale Modeling
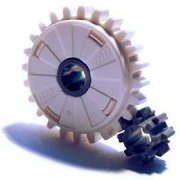
Hey everyone! After almost a year and a half of working on it whenever I had time, my model of a Unimog U5000 truck is finally complete. It has the following functions: 4x4 Drive with 2 PF XL motors Steering with PF M motor and linear actuator Remote diff locks, front and back, using pneumatic actuators Remote 2-speed high-torque gearbox BuWizz power More photos on my BrickSafe: https://bricksafe.com/pages/Teo_LEGO_Technic/unimog-trial-truck The whole idea of this model was to build a truck that could both travel at a fairly fast speed as well as work very well offroad, which meant it needed a gearbox. It also meant it needed differential locks so that turns could be taken smoothly at high speed with diffs unlocked, and offroad terrain could be tackled better with diffs locked. The main goal of this model was to create a drive train that wouldn't allow any gear slippage or breaking even under tension in low gear. My solution for this was to use @Sariel's heavy-duty gearbox (http://sariel.pl/2011/02/2-speed-heavy-duty-linear-gearbox/), as well as the new differentials from the 43109 Top Gear car. However even those differentials can't take as much torque as I wanted to put on them, and neither can the universal joints leading to the axles. For this reason, I decided to speed up the transmission before reaching the universal joints and differentials to reduce torque, then slow it back down afterwards between the diffs and the wheels. This would cause a bit of power loss to friction due to the increased number of gears, but it would reduce the torque on the sensitive components and allow me to send more total torque to the wheels. The result is that the 2 powerful XL motors are sped up 5.01 times or 1.8 times (in high and low gear respectively) before reaching the diffs and universal joints, and then slowed down 11.67 times at the wheels. Therefore the final gear ratios in low and high gear are as follows: High gear - 2.33 : 1 Low gear - 6.5 : 1 The result is that the drivetrain is indestructible and never breaks even when run with a BuWizz on ludicrous mode and the wheels come to a standstill. The most complicated part of this build was fitting all of the functionality in the front axle - linear actuator steering placed close to the pivot to increase the range of motion, lots of gear reduction, portal axles, and a differential locking mechanism. Although the result is quite good in my opinion - thanks @Zerobricks for the custom portals - the final construction wasn't as sturdy as I would have liked, and this was the main issue with the final model. The steering has less power than I would have liked with the small actuator, and the custom portal axles bend outwards under pressure when steering over rugged terrain. Overall however I'm quite satisfied with the final result Thanks also to @functionalTechnic for the advice, and to everyone else who contributed to the WIP thread: Enjoy! - Teo- 8 replies
-
- trial truck
- unimog
-
(and 4 more)
Tagged with:
-

[MOC] Trial Unimog - Zetros (42129) alternate
gyenesvi posted a topic in LEGO Technic, Mindstorms, Model Team and Scale Modeling
Hi All, Although I have posted a few pictures previously, I wanted to make a proper writeup of my Trial Unimog alternate of the Zetros set (42129), because I think sharing the design process is valuable for people around here. Also, I am going to share my thoughts about the set itself as a parts pack. But for the curious ones, here's an action video of the end result and a short summary of the features: Features: - good actual outdoor performance :) - permanent AWD, no differentials - 2-speed gearbox, faster gearing than Zetros - relatively large increase in ground clearance - 4-link suspension on the back, large articulation, soft suspension - 3-link suspension with Panhard rod on the front, slightly larger and softer articulation than the Zetros - opening (and lockable) doors and trunk bed When building alternate models, I always try to build something different from the A model, both functionally and in its looks. So when considering what to build out of the Zetros, keeping the Mercedes brand but going for a different form factor, my first idea was a G-Wagon - quickly taken by Grohl himself. Then I though, let's fall back to a Jeep - also taken quickly by Tim.. Unimog was on my list of potential alternates, but I wasn't sure about it yet. But one thing was sure: I wanted to improve the actual off-road performance over the Zetros. So putting the form factor aside a bit, I started experimenting with chassis and suspension designs. One option I had in mind was to keep the live axle setup, but improve it to make it actually useful for off-roading: increase suspension travel, ground clearance and responsiveness. Furthermore, I wanted to see how lightweight the axles could be built, because the Zetros's axles are pretty bulky. I was okay with doing away with the diff-lock, since I wanted to use the M motor for a 2-speed gearbox anyway (just like others). During experimentation with axle designs and suspension travel, I have realized that the 3-link live axle setup of the Zetros is not only limited by the springs' short travel, but also by the 3rd link on the top. That link cannot rotate sideways on the chassis side and is mounted very high on the axles, and as the axle tilts, its top can move sideways significantly, and as the link cannot follow it sideways, it limits the axle's tilting movement; hence very limited articulation. The setup only works for a short range of movement as on the Zetros, which is limited anyway by the springs, but cannot work for a setup that aims for more articulation. One way out of this is to allow the 3rd link to rotate and follow the side movement of the tilting axle, but then the axle needs fixing sideways. There are two ways to fix that. Either a 4-link triangulated setup, or a 3-link setup with a Panhard rod. Although the Zetros does use a Panhard rod at the front, it is unrealistically mounted and too short, that would cause kind of bump-'steer' for larger axle articulation (not exactly bump steer, but more like shifting the whole axle sideways). So after taking the limited number of suspension parts into account (only 6 towball sockets left out of 10 since 4 must be used for mounting the front wheel hubs, and only 1 6L link available in the set), I opted for the following design: on the rear axle, I used 4 towball sockets for a 4-link triangulated setup with long links, allowing the upper links to rotate sideways and follow the movement of the axle. The springs are attached to the middle of the lower links. This allows for long upwards movement of the axle at the end of the links, and makes the suspension much softer even with the hard springs. Pretty solid and allows for large articulation, just what I wanted. Furthermore, the axle itself is quite slim and rigid, and has good ground clearance, especially in the middle where it's most needed (as proven by my off-road tests). The front axle was more challenging. First off, increasing the ground clearance is only possible with one trick: the towball socket liftarms must be built at an angle, going upwards in the middle, and that limits possibilities. Second, the steering motor and its mounting takes space on the axle, and is in the way for the suspension mounting points. I have experimented with two other options: steering through a driveshaft coming from the chassis, but the placement of the motor in the chassis was problematic do to space required by all other motors and the battery, along with the largely articulated suspension design; second I tried to put the steering motor above the front axle, actuating steering through a linkage system. Although, this worked quite well mechanically (verified with the Powered Up app), unfortunately, the Control+ app itself killed this direction: the app limits the steering motor angle to about a 25 degrees less than the calibrated range, which is normally 90 degrees or motor rotation, resulting in about 65 degrees in case of the Zetros (that's why it's steering is so bad by the way). Now in my alternative steering design, the max calibrated angle would have been 45 degrees, and the 25 degrees minus by the app resulted in about 20 degrees of movement, resulting in almost no actual steering at the axle. Pretty sad that you can build something mechanically sound and then not able to control it with the app :( So I fell back to mounting the motor on the axle, and used the remaining 2 towball sockets for two lower links, which again, I built longer to allow for a bit more articulation. Luckily, I was able to mount the motor in a way that it allowed to use the single 6L link as the 3rd link, allowing free sideways tilting movement of the axle, as it is attached to a towball pin on the chassis end as well. I also experimented with the spring mounting technique of the rear, but it was weak and wobbly on the front without the 4-link setup, so I went back to mounting the springs on the axle. However, I managed to move the springs closer to the center of the axle, resulting in both slightly larger articulation and softer suspension. Finally, the axle is fixed sideways by a long Panhard rod going from one end of the chassis to the other end of the axle, eliminating bump 'steer' quite well even at larger articulation. As a side note about parts, it would be really nice if the set had another 6L link somewhere, for example as a Panhard rod on the rear axle. It could be used to build another 4-link suspension to the front, and also as a steering link in an independent setup (which is problematic to build for other reasons as well). So after sorting out the two axles and the suspension, I though this could be used in a Unimog chassis. Though not too different in form from the Zetros, but at least it keeps the brand. Furthermore, I decided to make it different in its functions: the first step was focusing on a proper suspension. The second was the drivetrain. And that also caused some difficulties. Unimogs are short. You'd think that's not a big problem at this scale, as many RC Unimogs have been built before, but it is with the latest drivetrain parts. The new CV joint with a sliding axle hole is a whopping 8 studs long!! (Compare that to a 3L U-joint; sure, the CV joint has the axle built in on one side, but this construction limits builds quite a bit. Not sure why the new sliding variant needed to be 2 studs longer, I thought it would be just 1 longer, enough for the sliding, which is typically about half a stud, but 1 stud max). So two of those, plus, two non-sliding ones at 6 studs length, and your driveshaft is already 28 studs long. Add to that the amount of space required by the differentials (2 studs on each end until the axle center), and your axle distance cannot be less than 32 studs. Add one more to get a nice odd length middle section, and we are at 33 studs from axle to axle. It is quite long for a Unimog. (As a side note, I tried to split the driveshaft in two halves, shifted sideways in the opposite direction to let them overlap in length and hence make things shorter, but it did not work out due to the axle length limitation of the CV joint part and also space limitations from the motors). So because of this, and other considerations I decided to do away with the differentials altogether. It saves 2 studs in length. It allows for a slightly faster 12T / 20T gearing; the Zetros is just too slow. Furthermore, it allows for larger ground clearance, as the differential does not stick out from the axle. It even allows for a slimmer axle design, as there is more space in all directions, such as for mounting the steering motor. And last but not least: no differential - no need to lock them :) With unlocked differentials the off-road performance would be bad anyway. Once I settled for the length and the drivetrain, I needed to place the remaining motors and the gearbox. I was able to sandwich the gearbox between the drive motors, and put the gearbox's driveshaft motor on top, the flip-flop beams and the frames proved to be very useful for building a strong but lightweight chassis. The final challenge was the driveshaft from the gearbox motor. I am not sure why TLG used this motor here as it is super cumbersome to work with. It needs substantial down-gearing (and the right amount for your actual application, which is 180 degrees final turn for a gearbox, but 90 degrees for a diff-lock), a clutch mechanism for safety and physical end stops for calibration. These all take up space as they need to be routed somewhere. Things would have been much easier with another L motor.. (Maybe to make the set slightly cheaper? Or TLG is trying to get rid of these motors on stock? They don't seem to fit well into the PU system without positional control.) Anyway, finally the chassis of the Unimog was complete. I used the remaining CV joints to connect the drive to the spinning fan in the front :) The rest was just bodywork and placing that big hub somewhere. I opted for roughly the same position in the cab as the Zetros, but with the cables inside, to allow easy access to the batteries for replacement. For the design and styling, I took some inspiration from online sources like this one because of its color scheme, but I wanted to minimize the cab length as there weren't enough panels for a 4-door version. I built the cab with no opening hood to make it solid :) And also made the doors lockable to avoid them opening automatically when driving around.. Finally, the black panels were just the right size and amount to cleanly finish the bed, both the sides and the floor. The bed floor opens (but lockable) to see the gearbox, and to give room for accessing the batteries. I have also added fenders and the usual decoration like the rollbars, exhaust pipe, mirrors, ladders. Here are some renders of the whole build. As you can see, I did not use any green parts, as they would have only added clutter to the otherwise clean bodywork I think. Some more notes about the parts of the set apart from the ones mentioned above. The set has a good amount of paneling and beams and connectors, although the green parts are a bit less useful since they are limited in number and size. Another shortcoming of the set is the available gears. It has all sizes, but their number is lacking in some cases and hence high gearing ratios are hard to achieve. For example if you try to deviate from the default drivetrain, those gears will be missing for example for a simple down-gearing for the gearbox motor.. More images can be found on Bricksafe. Building instructions are available on Rebrickable. I did not know too much about Unimogs in the beginning, but during the research and designed process I actually came to like Unimogs quite a bit. I like that they are compact but seemingly efficient machines, and the trial versions actually look pretty cool. And I am actually quite happy with the end result. Let me know how you like it and your opinion on the set's parts! Cheers, Viktor -

[MOC] Unimog 4×4 Off-road RV
dls7223685 posted a topic in LEGO Technic, Mindstorms, Model Team and Scale Modeling
Hello everyone, this is the latest work from MTC: Unimog 4×4 Off-road RV Designed by Muen Function Description: ① 2×XL: providing power ②1× servo: steering.×M: 2-speed gearbox shift. -3×M - 3 differential locks for front, middle and rear. -2×SBrick. -1×Small battery box. -8×Yellow hard springs. -

[MOC] Unimog U400
MajklSpajkl posted a topic in LEGO Technic, Mindstorms, Model Team and Scale Modeling
Hello everyone! I can't believe it's been 18 months since my last MOC actually finished. Well, here is the latest to join the party: Unimog U400... and no, it isn't a MOD of 8110, that one is two times bigger ? Sadly, I don't have the 8110 to shoot them side by side, but I will try to borrow it so that the "daddy&son" bonding moment can be documented Maybe I'll be good enough to even finish the video until New Year... but then again, probably not so soon, not to mention the instructions...? Unfortunately, I move in a much slower time dimension ? Features: TRUCK: • Should be around 1:16ish, scale, tires as a starting point, • Buwizz powered, • XL for drive + fake 4in line engine with fan, • servo for steering with working steering wheel, • M motor for front and rear PTO, • L motor for compressor, pneumatic attachment front and rear, • M motor for bed (activated with PF switch), on the same buwizz output as the compressor, bed can be raised in all three directions, • cabin tilt (manually, a bit poor - two orange tiles below direction light must be removed), • detailed cabin with opening doors, • live portal axles, front with “floating” differencial • 3 differentials • trailer hitch with additional PTO, CRANE • Crane outriggers and rotation over a PTO, • 3 manual pneumatic valves for operating the crane, WINCH • manual clutch to cut off the PTO, • automatic brake against unwinding, PLOUGH • pneumatic valves for raising and switching sider, GRITTER • PTO powered double auger (two salt compartments) + rotating dispenser, • manually operated stands WINTER IS COMING! I hope you like it. Please be patient about the video...I will prepare it as soon as possible. Best regards, Miha P.S.: Some more photos of the axles and the under side can be found here.- 42 replies
-
- moc
- mercedez-benz
- (and 5 more)
-

[MOC][MOD] Unimog U 4023/U 5023
gvo25 posted a topic in LEGO Technic, Mindstorms, Model Team and Scale Modeling
Hello all, With the possible release of lego technic mercedes Zetros, I decided to rebuild my Technic unimog U400 into an unimog U4023. I could do this thanks to the recently aquired Claas Tractor Tyres and the abundant parts of the Liebherr - I find the Liebherr a fantastic set for parts - I modified the cab and I will integrate 2 control+ L motors and 1 XL control+ motor for drive. First I started with the cab, the chassis I'll do next The cab is build on the same base of the U400 cab The cab is not 100% true to the original, lack of various grilles, the front wheel arches are not integrated in the cabin, the air intake etc, but I find it a great start if i can say so myself. The cab features lockable doors Here is a foto of the cab on the original U400 unimog chassis with Claas Tyres. So the next project is to rebuild the chassis with the control+ motors and I also plan to rebuild the front bumper to match the U4023 bumper. Hope you liked it so far -

42126 Unimog U1400 Snowplow - alternate build
Timorzelorzworz posted a topic in LEGO Technic, Mindstorms, Model Team and Scale Modeling
Hi folks, I'm happy to introduce my alternate build from the official set 42126 Ford F-150 Raptor, the Unimog (UniMOC) U1400 with Snowplow attachment. As the little brother of 8110 Unimog U400, this model in 1:17 scale uses 1264 parts of the inventory from the set 42126 Ford F-150 Raptor and 2 spare parts included in the set with a total of 1266 parts. Having the set 42126 Ford F-150 Raptor, all parts are available to build this alternate model and no other parts from other sets are required. The two spare parts from 42126 to build this Unimog U1400 alternate are: Instructions are available on rebrickable Follow this link to my page for more content Functions & Features HoG-steering independent suspension in front and back working 4-piston engine under the hood openable doors detailed interior openable hood to reveal engine attachment for Snowplow, moveable in high and tilting angle fully closed tipper bed with openable lid and lock additional snow shovel 40cm x 20cm x 18cm Impressions Sticker The model 42126 Ford F-150 Raptor uses many sticker for the lights in front and back, which are reused in this Unimog U1400. The images above shows some custom sticker, which are not part of the 42126 model and not mandatory to build this alternate Unimog U1400. Those custom sticker are optional and only used for better and more realistic look. If you have the ability to print custom sticker, feel free to do to polish up this model. Below this is how the front of the model looks like without any custom sticker, but with the original headlights of the Raptor... ...and without any sticker, for custom headlights for example. Instructions The premium instructions with high quality images as usual comes with 254 pages for a challenging but satisfying building experience. For a 18+ set, this alternate model is not more difficult to build than the Raptor. The instructions are available at Rebrickable. Here are some example pages of the instructions: Unimog U1400 in real Have fun with this replica of Unimog U1400 alternate build and feel free to build and discuss. I know this model is not 4x4 and it can't be 'cause the Raptor is not 4x4 and there are no parts in 42126 to do that. -

[MOC] Unimog 437
Thirdwigg posted a topic in LEGO Technic, Mindstorms, Model Team and Scale Modeling
I guess you could say I couldn't make up my mind about the kind of Unimog I wanted to make next. So I decided to make a platform that would support multiple versions. Features: Interchangeable platform Long and short wheelbase options Standard and Doka cabs, removable Manual control PF control (drop in) Front and rear suspension Steering 4x4 with I-4 fake motor Opening doors and hood Tipper bed options Feel free to check out thirdwigg.com to learn more about the build. Manual SWB with tipper bed. Manual LWB Doka with tipper bed. Power Functions (XL drive, Servo steering) LWB with cover. Manual LWB with canvas bed showing the suspension travel. You can find more pictures on my flickr. I have been adding instructions for the various versions here, and more will be added over the coming weeks. Someday I'll make a camper, because, everyone needs a camper. This was a fun project, and I loved the way it turned out. I have the LWB on my desk right now, and I keep getting distracted from work. I hope to add additional options for the system at some point, and will take other suggestions for versions to add. Hope you enjoy.- 28 replies
-
- instructions
- suspension
-
(and 3 more)
Tagged with:
-

Lego Mini Unimog U1200 1:18 MOC
dpi2000 posted a topic in LEGO Technic, Mindstorms, Model Team and Scale Modeling
Hello, EB friend Unimog again! At the invitation of a Lego friend. The building style is old school, the highest degree of imitation, more close to the real Unimog's chassis. Those portal axles are very compact, the only problem is the turning circle radius, still not improvement. I tried another chassis, steering is controlled by M motor+92693, but it didn't work out. Information: L29 x W16.6x H19cm. Weight:960g XL motor x1 , Servo motor x1. I hope you'll like it, again. Instructions for free ;) https://rebrickable.com/mocs/MOC-85863/dpi2000/lego-mini-truck-unimog-u1200-118-moc/ -

MOC Review by CrazyKreations Red Unimog U2150 L Heavy Truck by ikorgik
CrazyKreations posted a topic in LEGO Technic, Mindstorms, Model Team and Scale Modeling
Red Unimog U2150 L Heavy Truck by ikorgik IGo to CrazyKreations.com to find out how you can get a MOC review and an interview!!!I A designer who goes by the name ikorgik has designed an amazing lego technic U2150 Unimog L. Now I have the pleasure of interviewing him on this amazing model, but before we start to go into some details about the Unimog let's get to know the designer. Interview. Can you tell us something about yourself? Who is behind ikorgik? Ikorgik: My name is Artem, I am 32 years old, I work as a graphic designer, I live in Moscow in Russia When did you discover your love for lego? Ikorgik: The first set I had when I was 6 years old, it was small sets of Lego city, castle, aquazone, wild west, I still remember the catalogue of 1996. The cherished dream was the 5571 Giant Truck set. Then Lego was replaced by computer games, walking with friends. I started collecting Lego models again in 2019, saw some BrickGarage RM8 videos, and bought myself 42077 and 42095. Now I buy many new sets and something from the old ones. Lego has always liked the fact that you can build something of your own. Did you get inspired to make this model? ikorgik: There is a group of Lego fans in Moscow who organize races once a month. They prepare specific conditions for each race and based on them, the participants build their models, for this race it was necessary to build a truck on 62mm wheels. Before that, I was building a small Unimog on 56 mm wheels from the new jeep wrangler, and I became interested in building the same one on 62 mm. After I built the Unimog, I decided to put new buggy wheels on it, and it turned out that it looks amazing on them. How long did it take you to build this model? Ikorgik: I built two Unimogs in two weeks, in the evenings, the main idea was to make almost identical models, but with different electrics, on Power function and Control plus. Walk us through your line of thinking when you were designing this model? Ikorgik: I try to build models of real cars, as a rule, these are SUVs, I start from the size of lego wheels and build according to the blueprint. This car had to have a suspension, the interior of the car, the car should go well on stones and sand, I paid no less attention to the external similarity. I tried to make the truck look like a real one and with good driving qualities. Was the design of the truck heavily limited to the parts you had earlier? Ikorgik: Lego construction is always a search for compromises, there are a lot of cool old parts, there are new ones, but they are not always at hand, this has its own charm, you have to look for loopholes, come up with solutions that are not always obvious. So there were no strong restrictions, if something did not work out the first time, I redid it, just so it happened with the grey Unimog. Do you buy sets with the intention of designing them? Or do you buy parts individually? Ikorgik: More often I buy sets, I start from the details, the basic sets are on the shelf for about a month, then I disassemble and start assembling something of my own, but I also buy on bricklink separately. What’s your favourite lego theme and why? Ikorgik: My favourite ones are, model team lego, Creator, Expert, and of course Technic, these are the 3 most favourite directions, model team lego and Creator, Expert, exceed their elaboration, complexity, you can admire them for hours. In Technic, most of all, I like the opportunity to motorize cars, make them drive slowly over obstacles, or quickly on a flat surface, supplement them with a winch, install lighting, or a bunch of other things that can come to mind. The MOC. I hope you all enjoyed the interview, Ikorgik showed gave some insight on how to design a MOC and a few hidden tips that can help everyone to become better MOC builders. Now let's check out this model, here is the description that was found on Rebrickable. That he wrote on the MOC's page: A copy of the Unimog U2150 L heavy truck model, working suspension, all-wheel drive. The model uses an electrician Powered UP, two L motors for movement, 1 L motor for turning, powered by a large hub Powered UP. To see more of his high-quality photos please go to his >>>>bricksafe link<<< First Impressions. I am also privileged enough to ask an experienced MOC builder who goes by the name OldEnoughBrickFan to give us his first impressions of this model. From: OldEnoughBrickFan: Ikorgik’s Unimog U2150 is another example that this is possible to create great design or functionality using a surprisingly small scale. Looking at MOC dimensions we can assume this is pretty much fitting the Corvette or Car Transporter scale. An impressive model of the worldwide known vehicle and I can see why it’s U2150 version – not complicated car body style along with light’s mounted in the massive front bumper making it very nice fitting in Lego elements scaling(I missing small blinkers to be pushed in “pins” on sides, the bulb trans orange elements 58176, like in Claas Xerion set) I must check how it’s made one day, unfortunately, I must get the Wheels to do it. An interesting and very nice fact about MOC is having two versions – this one with Control+ and the second – Dark Bluish Gray Unimog based on Power Functions and BuWizz control unit. Everything packet in digital PDF instructions with pretty reasonable prices. Final thoughts. This model is well designed, well planned and also it just looks amazing. Ikorgik truly put in soo much thought into making this Unimog one of the best online. As OldEnoughBrickFan has said, I think this is an excellent example of how to marry an excellent design with fantastic functionality. If you wish to purchase this model please go to this Rebrickable Link. The instructions are generated on Studio And are of HIGH QUALITY. Red Unimog U2150 L Heavy Truck by ikorgik A designer who goes by the name ikorgik has designed an amazing lego technic U2150 Unimog L. Now I have the pleasure of interviewing him on this amazing model, but before we start to go into some details about the Unimog let's get to know the designer. Interview. Can you tell us something about yourself? Who is behind ikorgik? Ikorgik: My name is Artem, I am 32 years old, I work as a graphic designer, I live in Moscow in Russia When did you discover your love for lego? Ikorgik: The first set I had when I was 6 years old, it was small sets of Lego city, castle, aquazone, wild west, I still remember the catalogue of 1996. The cherished dream was the 5571 Giant Truck set. Then Lego was replaced by computer games, walking with friends. I started collecting Lego models again in 2019, saw some BrickGarage RM8 videos, and bought myself 42077 and 42095. Now I buy many new sets and something from the old ones. Lego has always liked the fact that you can build something of your own. Did you get inspired to make this model? ikorgik: There is a group of Lego fans in Moscow who organize races once a month. They prepare specific conditions for each race and based on them, the participants build their models, for this race it was necessary to build a truck on 62mm wheels. Before that, I was building a small Unimog on 56 mm wheels from the new jeep wrangler, and I became interested in building the same one on 62 mm. After I built the Unimog, I decided to put new buggy wheels on it, and it turned out that it looks amazing on them. How long did it take you to build this model? Ikorgik: I built two Unimogs in two weeks, in the evenings, the main idea was to make almost identical models, but with different electrics, on Power function and Control plus. Walk us through your line of thinking when you were designing this model? Ikorgik: I try to build models of real cars, as a rule, these are SUVs, I start from the size of lego wheels and build according to the blueprint. This car had to have a suspension, the interior of the car, the car should go well on stones and sand, I paid no less attention to the external similarity. I tried to make the truck look like a real one and with good driving qualities. Was the design of the truck heavily limited to the parts you had earlier? Ikorgik: Lego construction is always a search for compromises, there are a lot of cool old parts, there are new ones, but they are not always at hand, this has its own charm, you have to look for loopholes, come up with solutions that are not always obvious. So there were no strong restrictions, if something did not work out the first time, I redid it, just so it happened with the grey Unimog. Do you buy sets with the intention of designing them? Or do you buy parts individually? Ikorgik: More often I buy sets, I start from the details, the basic sets are on the shelf for about a month, then I disassemble and start assembling something of my own, but I also buy on bricklink separately. What’s your favourite lego theme and why? Ikorgik: My favourite ones are, model team lego, Creator, Expert, and of course Technic, these are the 3 most favourite directions, model team lego and Creator, Expert, exceed their elaboration, complexity, you can admire them for hours. In Technic, most of all, I like the opportunity to motorize cars, make them drive slowly over obstacles, or quickly on a flat surface, supplement them with a winch, install lighting, or a bunch of other things that can come to mind. The MOC. I hope you all enjoyed the interview, Ikorgik showed gave some insight on how to design a MOC and a few hidden tips that can help everyone to become better MOC builders. Now let's check out this model, here is the description that was found on Rebrickable. That he wrote on the MOC's page: A copy of the Unimog U2150 L heavy truck model, working suspension, all-wheel drive. The model uses an electrician Powered UP, two L motors for movement, 1 L motor for turning, powered by a large hub Powered UP. To see more of his high-quality photos please go to his >>>>bricksafe link<<< First Impressions. I am also privileged enough to ask an experienced MOC builder who goes by the name OldEnoughBrickFan to give us his first impressions of this model. From: OldEnoughBrickFan: Ikorgik’s Unimog U2150 is another example that this is possible to create great design or functionality using a surprisingly small scale. Looking at MOC dimensions we can assume this is pretty much fitting the Corvette or Car Transporter scale. An impressive model of the worldwide known vehicle and I can see why it’s U2150 version – not complicated car body style along with light’s mounted in the massive front bumper making it very nice fitting in Lego elements scaling(I missing small blinkers to be pushed in “pins” on sides, the bulb trans orange elements 58176, like in Claas Xerion set) I must check how it’s made one day, unfortunately, I must get the Wheels to do it. An interesting and very nice fact about MOC is having two versions – this one with Control+ and the second – Dark Bluish Gray Unimog based on Power Functions and BuWizz control unit. Everything packet in digital PDF instructions with pretty reasonable prices. Final thoughts. This model is well designed, well planned and also it just looks amazing. Ikorgik truly put in soo much thought into making this Unimog one of the best online. As OldEnoughBrickFan has said, I think this is an excellent example of how to marry an excellent design with fantastic functionality. If you wish to purchase this model please go to this Rebrickable Link. The instructions are generated on Studio And are of HIGH QUALITY. Purchase Instructions I hope everyone enjoyed this Review on the Red U2150 Unimog L Heavy truck by Ikorgik. Please leave comments and share this article. Purchase Instructions I hope everyone enjoyed this Review on the Red U2150 Unimog L Heavy truck by Ikorgik. Please leave comments and share this article.- 2 replies
-
- unimog
- crazykreations
-
(and 5 more)
Tagged with:
-

[MOC] Unimog U400
Thirdwigg posted a topic in LEGO Technic, Mindstorms, Model Team and Scale Modeling
This MOC has been sitting on my desk for a while as I finished instructions. This U400 is a modification of my U500 from a couple of months ago. I think I like this one better. Features: Steering Four wheel drive Suspension Front and rear PTO Front and rear pneumatic takeoff Front and rear attachment points Three way tipper bed Tipping cab Instructions are available at Rebrickable.com. I hope you enjoy! -

[MOC] Unimog U500 (405.201) (Instructions Posted)
Thirdwigg posted a topic in LEGO Technic, Mindstorms, Model Team and Scale Modeling
Finished 01.01.2021 A couple of years ago I started a modular Unimog project with the hopes of having a build that would be flexible enough to support a number of different versions and options. It certainly was. However, the Unimog 437 project was intended to provide a U500 cab option, but for a couple of reasons (namely those tires), it was not a great fit for the project. So in the back of my mind I figured I would do a proper U500 version at some point. The 437 was pretty popular, and it fits within my current design language; mid-sized, manual, truck/car, feature packed. Then when I saw the first reviews of the 76139 Batmobile set, and saw the new 68.7mm tires, and I knew it was time to resurrect the project. I would keep the scale at 1:17.6 as I did with the 437, and those tires would equate roughly to a 445//65/R22.5. Off to the races! I am partial to the 1st generation (2000-2013) U500, plus @I_Igor did a great 423 series already (Eurobricks). Also, I like the 500 more than the 300 or 400. The 300 looks tiny, and the 500 SWB gives me two extra studs on the wheelbase (24st) over the 400 (22st). I guess if I have enough space I'll switch to a 400, but I (generally) never need less space. I pulled a PDF for the scaling, and I started to set my build parameters. I build my MOCs by making a first draft with all the constraints: wheelbase, length, height, width, and general bodywork ideas. I try to keep the colors correct, but if the part is not in front of me, I move on to replace later. Then I start working in features, and rebuild as needed. The first draft came together pretty quickly. While I managed to buy the first tires available on Bricklink, I was not willing to wait for their arrival before I started building. At this point, I determined the features of the truck: Front and Rear Live Axle Suspension (sans portal axles) (With dual leading/trailing links and Panhard rods) Front Steering Fake Motor Tipper Bed Tipping Cab Front PTO Rear PTO Rear Bodywork PTO Front Mounting Plate Modular Rear Bed Attachment Points Realistic Bodywork The tires arrived in time for the second night of building, and they look perfect. By now, all the functions were in place. Loosely. Below you can see the general Front Mounting Plate, and the front PTO. Currently in front of the bed is a Gear that will power features on a mounted body (al la TC9 Entry) Below you can see the rear bed system. I have found this three way tipper option to work great on my 437 and the MAN TGS truck. The control input is currently on the left side, but it will need to move. The orientation of the lift is backwards, which does not allow for good tilting leverage. Turning the mechanism around will need to move the input to the rear. This compounds the issue with the rear PTO. It is currently in place just above the hitch, but will need to move when the tipper input is placed in the rear. Few U500s have a rear PTO, so I'll have to decide if this is a feature I want to retain. More to follow... Until the next post, hope you enjoy the next Thirdwigg Motors project.- 55 replies
-
- manual
- suspension
-
(and 3 more)
Tagged with:
-

8110 - Unimog - MODs and Improvements
tripletschiee posted a topic in LEGO Technic, Mindstorms, Model Team and Scale Modeling
I think, it would make sense to open a new thread for the Unimog 8110 U-400, that includes all the MOCs, changes, improvements on the Unimog. It should also contain all the new attachments, equipments, that people build. It should show their ideas and what they are creating for this cool set. I am looking forward to see your creations! I'll start today. I implemented a pneumatic driven cargo bed. It is driven by the original motorized pump and works pretty well. The lifting angle could be better. So there is still room for inmprovments. For more pictures of this MOC plesae vistit my Flickr-page or (after publishing) my Brickshelf-folder. Regards, Gerhard -
[MOC] Scale Lowbed Trailer
Pat-Ard posted a topic in LEGO Technic, Mindstorms, Model Team and Scale Modeling
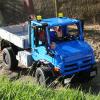
Hi folks, yes, I did it again. And no it ISN'T a Unimog :) But hey, it's trailer for it ;) Since all my models are in the same scale (nearly 1/12.5) the trailer has to be too... The model is a four axle lowbed...Overall length is 1100mm the bed is 115 studs long and 25 studs wide. Part count round about 2.500 parts. I got major help with the base and rear ramps by efferman - thanks again :) Enough words - pictures: LDD version: WIP pictures: And now the final model: Video will follow when the temperatures are lower... Have fun watching... Pat -

Lego Mini Trial Unimog 406/427 MOC
dpi2000 posted a topic in LEGO Technic, Mindstorms, Model Team and Scale Modeling
Pan Dong presents. New mini truck, they are based on Unimog trucks. 4 wheel steering, this function is the focus of the building. Short wheelbase, portal axles, lightweight body. Two chassis models, like a RC car, one has server motor for steering, the other linear actuator and M motor . But , Both have the problem of turning to the imaginary position. L motor x2 for drive. I hope you'll like it.thankyou for watching. 樂高科技迷你卡車,Unimog 406/427,董攀設計,謝謝觀看! 這次拼裝的重點,在相對較短的軸距,實現四輪轉向,然後輕量化車身結構,模擬RC車的懸架扭動姿態。有兩種底盤模式,一個採用伺服馬達轉向,另一個是小推桿加M馬達。兩個L馬達驅動,RC輪胎。四輪轉向真是靈活很多,攀爬時候的優勢明顯,不過因為前後各採用兩組萬向節傳動,導致有明顯的虛位問題。伺服馬達轉向,效率直接,但是轉向有類似軸效應現象,車頭會左右擺動。小推桿加M馬達的組合,姿態很棒,不過向上攀爬時後橋壓力大,還是建議採用不轉向的後橋,會更加結實可靠。 Unimog 427 Upgrade Version Unimog 406- 29 replies
-
In long time built something. Not for real, this is digital build. Something like Unimog 13xx firefighting truck. Frond doors should be openable, maybe also front hood. Rear compartment also is accessible. hopefully right forum section.
- 2 replies
-
- firegighting
- truck
-
(and 1 more)
Tagged with:
-

Imanol BB´s MOCs and MODs (And possibly good ideas)
Imanol BB posted a topic in LEGO Technic, Mindstorms, Model Team and Scale Modeling
Hello people, as i have seen some topics made by some members were they share their creations, modifications and ideas, i thought it was a good idea to start my own topic about that, this way i can avoid filling other topics with too many information by saving all that information here and just posting small texts in those other topics. To start, i would like to share some creations which i worked on: Model Team Nissan Frontier. This is one of my oldest models, i made it even before i knew about Eurobricks, and i would like to share it with you because you might like it or modified it: This model features front independent suspension, rear leaf spring suspension using 5.5 axles, HOG steering, working doors, bonnet and tailgate, 5 seats and a towing hitch; its very possible that some parts are with wrong colors or there could be outdated building techniques, but i think that is not too bad for one of my first LDD models (i am no sure, but if i have enough time and inspiration i could make it in real Technic parts), The LXF: http://bricksafe.com/files/imanol/nissan-frontier/Nissan Frontier.lxf. Model Team Paramount Group Marauder MRAP. Again, one of my oldest models, it is made at a pretty small scale but it could still be considered as "model team" (i think), it has pendular suspension in both axles which are damped by cross-axles which act as leaf springs, it has HOG steering, working winch and doors, a spare tire and 2 turrets that can be mounted on the roof: The LXF: http://bricksafe.com/files/imanol/paramount-marauder/Paramount Group Marauder.lxf Technic Unimog U500 Long Chassis (I have called it UNI-MOC) You might have seen it in the latest posts at 8110´s Mods topic ( http://www.eurobricks.com/forum/index.php?/topic/57543-8110-unimog-mods-and-improvements/&page=78 ), it is a 64 studs long and 24 studs wide model which i started to make because the modifications in the 8110 got to a too high level and i wasn´t satisfied with the whole model, i created this new model to hold all of my wanted functions and details, this model has some designs from other builders: Madoca´s Tatra 2-speeds gearbox (slightly modified to fit in this new chassis), Efferman´s planetary rims, a modified version of Didumos knob gear driven axle and a 3-side dumping system and dropping sides inspired by Kumbbl´s modifications, it was also made by some help and inspiration by Pat-Ard: This Unimog has 4 M-Motors, 2 L-Motors, 2 XL-Motors, 3 IR RC Receivers, 2 AAA Battery Boxes and 3 PF Switches (brick-built with ugly colors), why so many motors? well, as you might know, the 8110 had only one M-Motor inside it, which was meant to drive the 3 main functions of the set (front PTO, rear PTO and the pneumatic pump) the problem was that the functions couldn't be used simultaneously, you couldn't power front and rear PTO´s at the same time or with the pneumatic pump and because this system uses a gearbox and axles to engage and transmit the power to the different parts, this results in a lot of friction and power losing (other of the reasons of why i started this MOC), other thing that bother me about the 8110 was the proportions of it, it was very tall with lifted wide axles, but very thin cab and bed which made it look silly, the chassis had no space for all the functions that i wanted, i couldn't place enough motors or functions on it, and the axles were another problem, the steering pivot and angle was a disappointing, the tires couldn't steer too much with the half pins, and if you removed them, the mudguards and the surrounding elements needed to be placed far away from the tires to avoid them from colliding, these are few of the reasons of why i started to make my own version of this UGN class of Unimog (which are U300, U400 and U500). Some of the good features of this model are: Improved steering pivot (2 studs closer to the wheels compared to standard portal hubs) Wheels and portal hubs can handle more torque without jamming parts The axles are more compact (less tall), so the chassis can move even lower for a more realistic performance Front steering by L-Motor Rear steering (By M-Motor) with the same axle design as the front one Anti-roll bars in both axles, which help a lot to handle with weight and give a lot of stability, and they can be easily removed for serious offroading Remotely shifted 2-speeds gearbox by M-Motor Directly driven pneumatic pump (L-Motor) and PTO´s (M-Motors) for less power losing 3-side tipping 37 studs long 23 studs wide dump bed with dropping sides using a V2 large pneumatic cylinder Drive by 2 XL-Motors So, these are some of my models, i hope you like them, and i hope to upload more of them, i will try to do my best with all them, let me know what you think about this topic and the models, and any suggestion is well received Thanks. -
Hello everyone, As promised in the official Jurassic World thread, I'm sharing the LDD models I made of some of the JW vehicles. Like many of you, I was a little disappointed by the vehicle builds in this theme and wanted to make my own more movie-accurate versions of some of them. Most are heavily inspired by offical LEGO builds (mostly from the City line). Note that the stickers are obviously missing from the vehicles so I'm afraid you'll have to use your imagination for that part. The first vehicle is loosely inspired by the Textron Tiger armoured truck which appears towards the end of the movie. It is based on the offrad pickup truck from the 1st Avengers movie (set 6867). I turned it into a two-seater and added the rear section. JW Textron Tiger 1 by Elrond Half-elven, sur Flickr JW Textron Tiger 3 by Elrond Half-elven, sur Flickr Up next is the Mercedes-Benz Sprinter van used by the ACU to track the I-rex. This one is based on an ambulance from the City theme (set 4431). JW Sprinter 1 by Elrond Half-elven, sur Flickr There's enough room for about 4-5 figures in the back but it's a tight fit... JW Sprinter 4 by Elrond Half-elven, sur Flickr The next vehicle is the ACU 6x6 G36 from the same scene. This one is an original design but I'm still not 100% please with how it turned out. Hopefully you'll still like it and maybe some more talented builders will improve it. JW 6x6 1 by Elrond Half-elven, sur Flickr JW 6x6 3 by Elrond Half-elven, sur Flickr Here's how it looks next to the Sprinter van. JW by Elrond Half-elven, sur Flickr Next is the G-class SUV, which is pretty much JW's version of the Jeep Wrangler. I made two versions of this one, the first of which is pretty much a recoloured police SUV from set 4440. JW Mercedes 1 by Elrond Half-elven, sur Flickr I then made a second version of the car, which is a two-seater with working doors. JW Mercedes 2 by Elrond Half-elven, sur Flickr And finally, we have the Unimog. I used City set #60083 (which is a much better representation of a Unimog than the JW one) as a base for this one and tried to improve the official LEGO design from the JW theme. JW Unimog 1 by Elrond Half-elven, sur Flickr JW Unimog 2 by Elrond Half-elven, sur Flickr The rear section was made shorter and I completely modified the interior but you can still fit standing minifigs in there without problems. JW Unimog 3 by Elrond Half-elven, sur Flickr Here's an example of the vehicle with a different rear section (this one is inspired by set 4205). JW Unimog 4 by Elrond Half-elven, sur Flickr JW2 by Elrond Half-elven, sur Flickr If you guys like them, here's the LDD file containing all the vehicles: Jurassic World Vehicles.lxf Thank you for stopping by. ;)
-

Need help with scaling
17Liftarm posted a topic in LEGO Technic, Mindstorms, Model Team and Scale Modeling
Hi, i'm having problems with consistency of finding the correct scale when building with unimog tires (Tire 94.3 x 38 R) are you building on the 1:10, 1:12 scale or 1:11 scale? The unimog tires are about 4 1/4 inches in diameter. Some semi tires are 22 1/2 and 36 inches in diameter. A semi is about 8 1/2 feet wide. Do the math:

