Search the Community
Showing results for tags 'tow truck'.
Found 27 results
-

1:10 Large - scale motorized 4x4 Tow truck
Zerobricks posted a topic in LEGO Technic, Mindstorms, Model Team and Scale Modeling
I don't usually post my work projects here, but every so often there is a special one that I really want to showcase more in detail. Today I want to show you one of my all-time favourite projects, which is packed both full of functionality and a very high level of detail. Before we go into the details, lets' first let's talk about the idea behind it. We (the BuWizz team) have been cooperating with Slovenian AMZS (Slovenian Automobile Association) for a while now and they are the ones who allow us to record the various speed breaking and such events on their polygon. An idea emerged for a project to design and loose replica of their existing Tow Truck which is to be used for education purposes. Here's how one of their tow truck looks like: I decided to use this specific model as an inspiration of my representation and here were the basic starting functions and features: 1:10 scale Capable of lifting and towing an actual 1:10 model like 42125 All Wheel drive Working gearbox Realistic suspension Highly detailed As with most of my projects, i first started working in LDD and this is what the first prototype looked like: I took some liberty with the shape, notably I removed the crew compartment in order to better the lift arm details. As the project progressed, so did the amount of functions, features and details until I ended up with this long list: Motorized with 11 motors Powered by 2 BuWizz 3.0 Pro bricks All wheel drive powered by 4 BuWizz motors Working gearbox with a high and low gear 3 differential locks Independent suspension in the front Solid rear axle in the back which uses 3x13 curved panels as leaf springs Working V8 engine connected to the drive motors Functioning steering wheel linked to the steering rack Motorized lift which can unfold, raise and lock onto thr wheels of the towed vehicle A motorized winch in the rear Working front LED lights Opening doors, hood and compartments Detailed engine bay with battery, air filter and washer fluid Compartments filled with details such as fuel canisters and various tools Other details include cones and fire extinguishers 3D printed braking discs in the front for show Total piece count is around 3060 parts Just over 3 kilograms 51 cm x 24 cm x 22 cm when folded excluding mirrors Capable of lifting and towing a 1:10 scale car like 42125 even up a steep hill Top speed of 10 km/h Here's an overview of the model and the basic mechanical functions: Driveline is powered by 4 BuWizz motors. The motors drive a 2 speed gearbox and a fake V8 engine: Gearbox is powered by a PU M motor and uses 2 mini linear actuators to switch between low, neutral and high gear: Each of the 3 differentials has it's own lock, actuated by a wave selector and powered by a PU M motor: Steering system is powered by a PU L motor and uses two steering racks in order to both steer the wheels and turn the steering wheel: Finally, there are several more PU M motors used to power the rear arm. The main actuators lift the whole arm and are powered by 1 PU M motor: Another PU M motor is used to unfold the lower part of the lift arm using 2 mini linear actuators: Finally another PU L motor is used to lock the wheels with two more mini linear actuators. The driveline is designed in such way that the arm can swing a bit while cornering: The lifting arm had to be designed to be as strong as possible, yet thin enough to slide under the car we want to tow. The final version was under 2 studs high and capable of lifting a 2 kilogram heavy model with ease: With all the details finalized and the parts omptimized in the LDD version, it was time to build the real deal: As mentioned above, the model is full of details that can be accessed by opening the various compartments: The rear view showing the folded tow arm and the 2 large actuators used to lift it: Few more pictures of the model next to the real deal: Of course no Technic photoshoot wouldn't be complete with the most important photo of them all, the underside: The underside was left open and exposed intentionally, so that the gearbox, the differential locks and steering system can be observed. Of course as with all the projects, this one also had some issues, the biggest being the use of 3x11 curved panels as the rear leaf springs. Originally only a single pair was used to support the weight in the rear and the additional load of a towing vehicle, but it soon proved too much for them and over time they ended up breaking. That is why for the final fix, they were doubled, to increase the stiffness and durabilty of the rear axle: Other than this, there were no other major issues with the model. The driveline has yet to skip a gear, the joints are holding (even the small CV joint used in the front left side) and the model ended up being robust enough for some really rough driving. As mentioned at the start of the topic, this is one of my best models to date, I'm really happy with the amount of sheer functionality, features and details I managed to cram in it and it will forever hold a special place in my heart. To wrap up this already long topic, here's a couple of videos of it in action: -
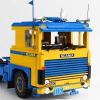
So this was something I did out of pure boredom. Back in October, I had ordered the 7638 Tow Truck off of eBay for a good price, but then I thought that it didn't really match well with my gas station. Recently, City has been doing nods to a lot of its classic sets in current city sets. In 2015, there were two nods. One was a tv chopper in set 60097, which was rather eerily similar to the TV Chopper from 1998. There was also this space set, which was a nod to a classic set. But I don't remember what it was. 2018, they did 60183 Heavy Cargo Transport and in 2021, they had the 60289 Air Show Transport; both of which were obvious nods to the 6357 Stunt Copter N Truck. It came to my mind of.....what would a revival of the tow truck from the 6337 Fast Track Finish set look like. So with that being said, here is a pic of my nod to the old Octan tow truck. For the side stickers, I had some Xtra sticker packs where I got the Octan labels from plus another Octan label that I got from eBay. My method to making this MOC, which is basically a recolored 7638, was really just to replace all the orange with white and all the bottom with red and green. I also replaced the blue lights with orange lights as those are what we use as warning lights here in the states (Just to clarify to our members from other countries). This MOC was pretty simple come to think of it. Now the tow truck is ready to help out any car that is broken down in town. https://www.instagram.com/p/ClbQHRxrfrO/?utm_source=ig_web_copy_link
-
The forever project
2ndgen posted a topic in LEGO Technic, Mindstorms, Model Team and Scale Modeling
Months of collecting pieces is finally showing a bit, on the 8285 tow truck. Changing this set, as much as I can, to a white model, with black or red, thought it would be fun...... Next task, how to suspend it without it looking to high and staying with a solid front axle, struggling with this alot. Suspension is a bit of a mess, but working on it. I have kept all the original pieces seperate, I'm not sure why but my brain said I had better lol. -
Hello people! This summer I've updated several MOC vehicles in my town. Hope you'll enjoy! first, the taxi: now converted to 6-wide and a few more realistic touches; The TV van has been updated too; Tow truck totally rebuilt; more realistic look for the hot rod; total rebult for the ambulance too; Mail delivery van converted in a 3-wheeled van (like an Ape Piaggio) so it can move with more agilty into narrow streets; and finally the car transported, with updated mechanism: Hope you liked these vehicles and if you want to see more check my flickt gallery: Salvatore | Flickr
-

42128 Heavy-Duty Tow Truck [VIDEO REVIEW]
Sariel posted a topic in LEGO Technic, Mindstorms, Model Team and Scale Modeling
It may come as a surprise but I really don't enjoy being negative towards LEGO sets. So it came as a relief to me that 42128 seems to be one of the best Technic products in the last few years, and it's incredibly reasonably priced on top of that. Fans of trucks, of highly functional Technic sets and of pneumatics should all be very happy with it, especially seeing as you can buy two of these for the price of a single Zetros set. I only wish the colors were different and the stickers less trashy, but that may just be a matter of personal test. -
[TC20] 8846 Tow truck studless
mic8per_ posted a topic in LEGO Technic, Mindstorms, Model Team and Scale Modeling
I have started building the 8846 Tow truck studless remake for the "[TC20] Technic Studless Recreation Contest" I have started with the front axle: As you can see, I will use a bit wider tires, also It will be one stud wider, so it will be 13, not 12 studs wide. Then, I have built the rear axle, and almost finished the chassis. This is all progress for now, more in next post. -
 Good Day. Today I present a military tow truck inspired by the JSDF one. The base truck is (Mitsubishi) Fuso Super Great FX 6x6 - the self-defence force exclusive variant. My model has full suspension, with "leaf springs" (flexaxles) all around. Drive is permanent 6x6 with 1x M-motor (was decent without cabin and superstructure, but with those added the performance became abysmal), steering is done via another M-motor downgeared with a wormgear. In-cabin steering wheels is moved via a micromotor with rubber belt drive. The truck is built in Tecnic figure scale, with customised front tires to make up for lack of proper width tires in TLG inventory. The crane is completely manual, with all functions controlled via gears on the outside. The function list is: -Outriggers capable of lifting the rear -Boom elevation -Boom rotation (no gearing, just swiwels with some friction to keep it in place) -Boom extension (with stops via a ratcheted gear and an end-stop to prevent the boom from falling out) -Hoisting -Rear winch All in all a mediocre build, but quite happy about it considering how disinterested I was in building something recently. A major improvement would be a L-motor for drive, but there's not enough space in this chassis, a perfect fit would be the mini motor Efferman shown a prototype of. Steering is a tad floppy as well, it was caused by my preferrance for a higher ground clearance, although even if it weren't floppy, the CV joints have a teenncy to pop out due to all the stress (heavy model with suspension and no differentials). The boom has a low weight limit, topping out at about 200g, heavier loads cause the boom to flex until it breaks - unless it is fully contracted, in which case I was able to lift about 400g. I have a complete chassis with a partial cabin lxf file, but I doubt anyone would be interested in building it, so I'll upload the model as is on [https://brickshelf.com/gallery/LXF/mitsubishiFXtowtruck/mitsubishi_fuso_super_great_fx.lxf]Brickshelf[/url] . Video: Photos: Cya!
 -

42108 Tow Truck alternate build
Timorzelorzworz posted a topic in LEGO Technic, Mindstorms, Model Team and Scale Modeling
Hello folks, I wondered why there is no official alternate build for the 42108 Mobile Crane (sometimes lovely called Yellow Parts Pack), so I decided to create this cool American Tow Truck as an alternate model. This alternate uses 1172 parts from the main model. Spare parts are not needed. The dimensions of the truck are as follow: 52 cm (L) x 15 cm (W) x 18 cm (H) with extended wheel lift (20.5 in x 5,9 in x 7 in) The model reaches a total height of 40 cm (15,7 in) with fully extended arm. In scale, it fits the 42078 Mack Anthem or 42098 Car Transporter very well with those tires. The functions are as follow: HOG-Steering workable 6-cylinder inline engine with nice clicking-sound under the hood openable hood with locking function both doors can be opened raising/lowering the boom - operable on both sides of the model extendable arm working winch with locking function extendible wheel lift Because the lag of differential in the main model, the inline engine is just driven by one wheel and not by the entire axle. The playability of the American Tow Truck is just great. You can use either the wheel lift to hook and tow cars or other trucks, or you can use the giant boom to rescue some crashed vehicles with the strong winch. The model is based on a real American Tow Truck. Here are some pictures of the model you easily can build on rebrickable: With realease of 42107 and some rare panels in red, this model can be build to 100% in red instead of yellow. Blue, black and white are also possible with a few changes. Since 42115 and the release of lime panels and connectors, this truck can be fully build in lime instead yellow with some minor changes. instruction The instruction comes in high quality and clear images for builders with an age of atleast 10 years. With 5 parts per step, the instruction is very easy to follow and has 234 total pages with a total of 347 steps. The model is divided into several submodels and steps with different camera views as common for modern Technic sets. Rendering the rope was a bit tricky because it counts not as a part, but the instruction steps are very clear and understandable to deal with it. And the best thing is: You do not need to make or release the nodes on the rope - you can use the rope with nodes on both ends from the main model as it is. Here are some random example pages of the instruction: You can find this MOC with building instruction on rebrickable: here Finally a cool 360 degress view and review -
 Hi everyone, I have just finished building the lego Technic all terrain tow truck. Unfortunately none of the power functions are working, other than the steering option (i.e. wheels turn left and right). So my truck won't move forward, backwards, the outriggers won't move either. The batteries in the remote control are brand new so that isn't the issue. I have also tried other remote controls from different sets-the other remote controls light up (so again their batteries are new) but the truck still won't move forwards/backwards etc. The receiver may be the issue however I don't have another one to check if that is the problem. Has anybody else encountered this problem? If yes, how did you resolve it? Could it be a problem with the motor? Many thanks in advance, Sher
 -

[MOC] Flatbed Tow Truck
KevinMoo posted a topic in LEGO Technic, Mindstorms, Model Team and Scale Modeling
Hi, everyone! It’s been a long time since I posted my last MOC on EB. Today I’m gonna show you one of the projects I’ve been working on lately: a flatbed tow truck / US style wrecker. This is the biggest MOC I’ve made so far...And it is packed with loads of features & functions. Some general specs: Weight: over 4 KG Parts used: over 3800 pcs Dimensions: 760mm (L) x 170mm (W) x 220mm (H) It features: - V8 fake engine - Openable doors - Working headlights - Independent suspensions on front axle - Pendular suspensions with shock absorbers on rear axles Motorized functions: There are 8 motorized fuctions in total, powered by 9 PF motors, remotely controlled by 1 IR Controller + 1 IR Speed Controller (channel switching on both controllers is needed), simple structure with no gear box: - 2 XL for propulsion - 1 Servo for steering - 1 M for opening bonnet - 1 M for wheel lift lowering & raising - 1 M for wheel lift reaching out & retracting - 1 M for bed tilting - 1 L for bed sliding - 1 L for winch A video showing all functions: (Original video on YouTube is 60fps, don’t know why it doesn’t work here) I managed to hide all motors inside the chassis, including the one that powers the winch. I’ll talk about it later. Some more video clips: (Again, all 60fps) This is the propulsion motors assembly. 2 XL hard-coupled with 12-teeth bevel gears, and has a total gear ratio of 25 : 9 before power reaching rear-axle differentials. That’s enough torque to propel this heavy truck. Rear axles have pendular suspensions, connected by 3 small turntables. Soft springs are for balancing. Structure is solid enough to bear the load, but I also designed a similar one with extra support on the middle turntable. It’s 1 stud longer so I didn’t use it on this already long truck. This is what the chassis looks like.I was wearing latex gloves for anti-sweating... Eight 200mm-long PF extension cables were used to connect motors to IR receivers and IR receivers to battery pack. They were well hidden right underneath the battery pack. Now let’s take a look at the bed. In the picture above, the arrows indicate how power goes up the bed. Red ones are for bed sliding while green ones are for the winch. I decided not to put a motor on the bed because it is ugly and too big. A real flatbed’s winch motor is fairly small compared to its size and usually unnoticeable. As a result, I have to compromise on deck height... More photos: At last, I have to say I’m not satisfied with this MOC for several reasons: Deck height: just too high for a flatbed. As I will not compromise on a visible motor on bed, height increased at least 3 studs. Loading angle: about 19 degrees, not a good number Most importantly, too long and too heavy. Front wheels and Servo are working under high pressure, even with 3 hard springs on each side the front part is still overburdened. Perhaps an extra pair of wheels in the middle would solve the problem, but it will lose its aesthetics and no longer looks like a longnose US truck. I didn’t want to publish it at the beginning because it’s imperfect, but I spent too much time on it and don’t want to waste it, so finally created this topic and shared it with you. Again, see my other creations on Rebrickable at: http://rebrickable.com/designer/musenkevin And my YouTube Channel: https://www.youtube.com/c/KevinMoo Enjoy! -

1950's automobile repair shop with flat-bed tow truck - 75972 / 75953 MODs
Murdoch17 posted a topic in LEGO Town
I was inspired by set's 75972 (Dorado Showdown) and 75953 (Hogwarts Whomping Willow) to create this small town auto repair shop with flat-bed tow truck called Smokey's Garage. The building features a raised platform for cars (such as the Anglia) to roll onto and be worked on, with folding ramps to keep the broken-down vehicle in place. NOTE: The front of the building is missing sixteen of this part in dark bluish gray above the second floor windows and the side door on the first floor. Also, two of these printed 2 x 4 tiles go on the hanging sign out front of the garage. The front of the building, with the ramps lowered for receiving a broken-down car. The rear of the building folds open to allow access to the inside. The upper floor is the break room, with a rock-n-roll album on the table, and hi-fi stereo system in place to rock around the clock..... at least during business hours! Here is the album piece. The rear of the building. This truck is basically a stretched version of the hover-vehicle in the Dorado Showdown set. It is missing two light-bluish gray ones of these (used as the back of the headlights in the set) as they don't fit where they are supposed to go in the model due to a LDD glitch. I added regular-size wheels, and safety stripes to the deck, which sadly does not lower into a ramp like a real truck would... but it does just barely fit the Anglia IRL! Here is the flatbed tow truck and the '67 Anglia in real bricks, plus the two workers Charlie "Smokey" Jones (on left) and Caroline "Carol" Jones (on right). Smokey owns the garage when this picture is taken (It's 1969 in-universe) and does the heavy diesel work and home cooking, while his wife Caroline does the gasoline engines and book keeping. They have a daughter, named Josephine Jones (nicknamed "Jo" and isn't present here) who is in training at trade-school to become a mechanic. She will shortly join the family business in 1970, and takeover from diesels when Smokey dies in 1976. Carol stays on until 1983, when she retires to work on restoring a Ford Model A as a pet project. Jo renames the business "Jo's Garage" in 1985 after moving to a new location (seen in set 10264, Corner Garage) in the downtown area when the older building became too outdated and small. She continues to run the garage today, even bringing her son Franklin into the family trade as of 1997.. NOTES: I just bought the Dorado Showdown when it was $18 (US) from Amazon and then I went and subtracted all the parts I could find for this project in my own parts bins from the BrickLink file. The truck and Anglia themselves are finished already without ordering anything, and the building is down 200+ bricks from when I started looking for parts... still need to order around 520 more. Keep your eyes peeled for real-world pictures of the vehicles, coming soon! -

42070 Drive Problem
Maaboo the Witch posted a topic in LEGO Technic, Mindstorms, Model Team and Scale Modeling
Got a problem with 42070 which I bought a few weeks ago. Just recently the vehicle started making a snapping noise every so often when driving it around. I cannot for the life of me figure it out. Everything else seems to work fine. I'm aware that others such as @Twedo have had this issue; can anyone help me out? Cheers for any info! -
Here is a sneak peak of one of my biggest projects up to date: Project started with a new type of a gearbox, which uses only two toothgears at any time in order to transfer power from motors efficient to the wheels: Here are a few specs of the model: Length cca. 80cm when folded Width cca. 30cm Height cca. 25cm Weight cca. 4,5 cm Dual rear live axles in the back independent suspension in front 4 electrically controlled gears + 1 additional electro-pneumatically controlled gear Working towing arm in the back capable of lifting weights of over 1kg Dynamic lights All functions controlled by 3 Sbricks Currently we have snow here and I can't shoot a video as planned I will post more info as soon as I manage to take more photos and a video.
-

[WIP] Longnose tow truck in 42008 scale - design question
Erik Leppen posted a topic in LEGO Technic, Mindstorms, Model Team and Scale Modeling
I'm building a tow truck, and I'm running into a problem with the design of the functions. First, let's do an image of what we're talking about. As you see, it's a smaller-scale version of a tow truck similar to 8285, but with an extra axle. The wheels will be those from 42024 and other sets. Because of the scale, there is probably not enough room to add PF. So right now I'm aiming to have it manual. As far as I can see now, there will be the following functions: steering main boom raising/lowering main boom extension main boom winch car lifter raising/lowering car lifter fold out/in outriggers The steering is done and controlled by the gear on the roof. The car lifter fold in/out will be manual with a knob at the back. Remaining are 5 functions. The question I'm having now is, how to drive those. Of course, with the model being manual, I could just add a knob for every function. But this doesn't sound like the most technically challenging option, so I am thinking of adding some kind of switchbox. But, 5 functions is kind of an unwieldy number, ecause it requires 3 switches with 1 being half-used. Currently, the outriggers are driven by knobs on the side, and I could leave it that way and have 4 functions running from the switchbox, but this feels kind of incomplete as well. So I'm unsure about where to go from here. So I'm looking for some advice. What do you think? Are there other options? What would you do? -
MOC: Jamie Davis Heavy Rescue Team Tow Trucks from Highway Thru Hell
timtosino posted a topic in LEGO Town
Jamie Davis Heavy Rescue is a towing company based in Hope, BC Canada (about 2 hours from where I live) whose main operations are on the Coquihalla Highway and are featured on the TV Show "Highway Thru Hell". I posted my Jamie Davis Rotator back in 2014 and said I wanted to eventually try to do the same truck in 7 wide. After seeing 4000022 I wanted to try to use those techniques on a new 7 wide truck but around that same time, I heard that Jamie had sold his prized truck the Rotator. When Season 5 of the show started airing last fall I started building the next biggest truck in his fleet which is even newer, a 50-ton Tri-Drive Western Star along with a smaller tandem unit and a Toyota Tundra for Traffic Control. Heavy Rescue 117 is a Western Star Tri-Drive Century tow truck with stabilizers, and a side puller (3rd winch on the driver's side). Used for recovering Semi-Trucks and other large vehicles. HR 116 is a Western Star Tandem Tow Truck with sleeper cab. Smaller than 117, but tandems can do just a much work as the biggest trucks. IR 104 is an Incident Response Truck for flagging traffic control. Toolbox in bed. Dispatched to secure accidents before the bigger trucks arrive or roadside service to smaller passenger vehicles. Full Album: https://www.flickr.com/photos/tim_tosino/albums/72157681702229046 Still working on Al Quiring's Truck aka "The Green Monster" which is unit as big as 117 and a VSA Highway Maintenance Snow Plow (all in 7 wide) and I may just tackle Jamie's Newest Truck HR 126 (which hasn't made an appearance on TV yet) in time for our local con (http://www.brickcan.com) -
[WIP] Whimsical off-road tow truck
suffocation posted a topic in LEGO Technic, Mindstorms, Model Team and Scale Modeling
After more or less coming to terms with the failure of my first MOC, I started looking around for another model I could try my hand at and eventually came across Zblj's off-road crane. I thought it was pretty cool but I still wanted to build another tow truck, so I scoured the web for something that might be a cross between Zblj's off-road crane and a wrecker. Luck was not on my side, however, so I decided to just wing it and not worry about how unrealistic my model might be. Since I love building by trial and error but am not too keen on piecing together massive models only to have to tear them down because of some silly design flaw, I took a sort-of-modular approach. So far I've got a very rudimental rear axle, some outriggers and a distribution gearbox. This is the rear axle (the pics suck big time as usual). I'm not too fond of those 2x1 rubber bricks, so I took advantage of the space and used soft shock absorbers instead. The setup is basically a heavy-duty version of the Actros 42043's. Down-gearing is 3-to-1. Nothing special about the outriggers: And this is the heart of the truck-to-be: This module has 5 L motors. Four are hard-coupled to provide propulsion to the vehicle; the fifth will drive the various functions through the gearbox, which is just a basic distribution system with each segment driving a function either way (42042 style). The functions should be as follows: Right side, top to bottom: - tow arm - tow fork - tow winch - front winch Left side, top to bottom: - cabin tilt - middle and rear outriggers - rear spade outriggers (I don't think that's their real name - anyway, the same kind of outriggers on the 42038 truck) - compressor (one-way switch, of course) I went with L motors rather than XL ones since the former are easier to incorporate into a build and are less likely to tear apart the U- and CV-joints. The model will probably be around 100 studs long and 23 or 25 studs wide, so I expect it to weigh around 5 kg, which the four L motors should be able to handle comfortably. To prevent excessive friction and power loss, the crane (whenever I get round to it) will have its own motor and battery box. Hopefully I'll get the truck done by the end of the year and also be able to take some decent pictures at long last. -
[not entirely MOC] Very short diary of a half-failed tow truck
suffocation posted a topic in LEGO Technic, Mindstorms, Model Team and Scale Modeling
Just finished my first almost-Moc - a clumsy attempt at making a tow truck. The cabin is a complete rip-off of the Arocs - by the time I got to that building stage I was drained and just wanted to get it done. Furthermore, by mounting the Arocs cabin I was able to assess how half-baked the rest of the truck looks in comparison. I also stole some ideas from D3K but didn't pull them off even half as well. Please forgive the atrocious pics - it's the best I can get out of my lousy phone. http://bricksafe.com...ds/my-first-moc Features: - 8x4 - pendular suspension on all axles - proportional steering on front axles - side and back outriggers - tow fork - tilting cabin - 360° rotating crane - fake engine (straight 6) - pole reverser The truck is driven by 2 XL motors, with 1 M motor for steering. The other functions are driven by 1 L motor; six are activated via three selectors near the back, whereas the crane is controlled via another two selectors on the crane itself. I didn't have the foresight to include an anti-roll bar - hence, whenever the truck negotiates a curve it tilts and jams. Lesson learnt - I'll rebuild the whole thing once I figure out how to work the anti-roll bar into the very limited available space. I also need to rework the geartrain, since a few of the functions are a tad too fast. Any tips on pendular axles with anti-roll bars and on how to make the truck look less like a bubble truck would be greatly appreciated =) Cheers! P.S.: Massive props to D3K - I hope you read this, mate, because your work was a huge inspiration and really kept me going even when I was about to give up. -
[MOC] '32 Ford "Tow Rod"
Norton74 posted a topic in LEGO Technic, Mindstorms, Model Team and Scale Modeling
Take a classic '32 Ford Hot Rod, paint the whole machine in bright yellow, add a crane on the back and you've got the weirdest Tow Rod ever created! My latest work is based on my previous Ford Roadster cutomized with a classic LEGO crane from early era. I love using old pieces to build my models and the "string reel winch with metal handle and crane arm complete with string and metal hook" fits perfeclty on this crazy Tow Rod. Below the back with the vintage crane and the custmomized license plate The Green "T" seems having some troubles...the yellow machine tows the "T" at the Speed Garage for mixing up, soon it will be back fit. If you have a problem with your car, now you know who to call: Norton74 24 hr Towing Service. You call, we haul! Cheers Norton74 @ Facebook -

Toyota FJ40 6x6 Tow Truck MOD
KirTech LAB posted a topic in LEGO Technic, Mindstorms, Model Team and Scale Modeling
Hello all! I want to show my modification of Toyota FJ40 (designed by RM8). We needed a tow truck for Moscow competition and I had only one weekend to create this model. The result is promising but it needs some improvements because the rear cardan shaft is very unreliable. The model is controlled with SBrick. To be continued :) So let's watch the movie: Thanks for watching! -

Lego Technic 8258 Alternative Model: Tow Truck MOC IR
MrTekneex posted a topic in LEGO Technic, Mindstorms, Model Team and Scale Modeling
Hello to all! This is an alternate of set 8258 Crane Truck 1800 pieces Size: 61x17x21 cm Weight: 2,1 Kg Gearbox for operating motorized functions - Outriggers - Third lift axle - Crane (raise) - Crane (extension) Other functions: - HOG steering - Towfork - Fake v8 engine - Winch - Opening hood - Opening doors Hope you like it Building instructions available here. http://mrtekneex.alt...ilding8258.html -

[MOC] Kenworth K100E Aerodyne Heavy Recovery Vehicle
Dennis Bosman posted a topic in LEGO Technic, Mindstorms, Model Team and Scale Modeling
Finally my Kenworth K100E is ready. I took a while before it was done. I start building this model back in the summer of 2011, when I came back from the UK. Heading for the ferries I also took a short visit to the yard of Neil Yates Recovery. I knew they have a K100 and I was very pleased it was parked there at that moment. Building is wasn't an easy task. It would become my first US truck on a large scale and with the use of chrome parts. I hardly had some in my collection and I had to buy everything; that's rather expensive. I had a chassis and the exterior of the cab but then I decided to build a smaller version first; my previous K100 with Holmes twin boom. That one turned out very well and I continued building the NYR wrecker in 2013. It's my largest solo vehicle so far, with the exception of the large Liebherr mobile crane I built during the 90s. I took quite some pictures which can be viewed in my Flickr stream; here you can see some details as well. -

[MOC]Tow Truck
legosamigos posted a topic in LEGO Technic, Mindstorms, Model Team and Scale Modeling
Hello Eurobrickers! Today I would like to show you a tow truck. Few months ago I`ve started to build my tow truck and finally I finished it, does it mean, I finished earlier, but I had to prepare a video. I wanted to use the in my tow truck, but unfortunately, I had to resign. The tow truck is full motorized and it has 3 lockers for equipment on each side, working fake 8 V engine and above all, the main functions of the tug, and so drive, steering, outriggers, winch, towing arm with folding and rotating fork and a tower with a sliding and lifting the boom. In the lockers there are some tools, spare wheel, 2 battery boxes, 2 fire extinguishers and arrows warning. I built also a Hot Rod, so will be 2 MOCes in one. And then I had to rebuild the tow truck, does it mean, I added a fairing and... ...I extended forks. before and after Dimensions: Length: 75 cm Width: 20 cm Height: 22 cm Max. heigt with with extended boom: 77 cm Weight: but I think it is heavier Face to face with 8285 set and compare with 8285 i MOD 9397 set Power Functions: drive - XL motor steering - M motor outriggers - M motor lifting boom - L motor extension boom - M motor towing arm - M motor wheel lift - M motor winch - M motor 4 x IR remote control 4 x IR receiver 2 x battery box 3 x extension wire (20 cm) Full Brickshelf gallery, Bricksafe gallery Sorry for a long video ;) -

[REVIEW] 42008 - Service Truck
mostlytechnic posted a topic in LEGO Technic, Mindstorms, Model Team and Scale Modeling
Lego 42008 Service Truck Thanks to EuroBricks for making this review possible! As I looked at the recent Technic sets, this was one that I thought looked interesting, but not enough to buy. So when the opportunity to review it came up, I jumped! It's a European-style heavy tow truck with pneumatics and motors, so that's pretty cool. And it's GREEN. It's a surprisingly uncommon Technic color. There's the 2015 24 Hour Race Car, but other than that and some of the small sets, this is it. So there should be lots of new part availability and so forth for people to geek out over. Let's see how it looks.... Name: Service Truck Set Number: 42008 Pieces: 1276 Price: $129.99 Minifigs: n/a Theme: Technic Year of Release: 2013 Links: Bricklink Peeron Brickset The Box A normal Technic box. Except for the exciting info in the bottom corners indicating that this set has BOTH Power Functions and pneumatics. That's pretty rare but very cool. The Back of the Box A lot more detail back here - both the main and B models are shown with their functions and sizes highlighted in a multitude of languages. With all the details I'm surprised that the HOG steering isn't identified anywhere. The main model does show that there IS steering, and most Technic fans see the gear on the cab roof and immediately know what that means, but I was surprised it isn't called out anywhere. As for the B model, instructions are online only, not printed, but that's normal. It seems to have a lot of functionality for a B model but is very similar to many other Technic sets with a claw arm and trailer. The Contents There are a TON of bags in here. Small ones with small parts, big ones with big parts, some PF parts, and a bag full of pneumatic stuff (including precut hoses, unlike old pneumatic sets). Oh, and 3 manuals and a sticker sheet in a bag together. No cardboard, but the books are enough to be reasonable protection for the stickers. Seriously though, SO. MANY. BAGS. The REALLY? The reason for so many bags? Not just the 1200+ parts, but also bags like this. There are TWO identical bags like this. Why on earth weren't they combined? I just don't get it. I'm sure there's something in Lego's packaging and logistics to explain it, but I don't see it. The Manuals Three thin books. Not much to say, other than this is a 2013 set so one book has that Win kid on the back. Eek. The Sorting Instructions So Lego obviously thinks you should sort the parts. Makes sense, since there are no numbered bags or anything like that. Just 1200 and some parts to look through. Being Technic, it's easier, since there's tons of black pins and blue axle pins and so forth, but there's still a lot to look through. However, sorting it right either needs a bunch of dedicated space, or a bunch of containers. I had neither, so I did this: The Part Sorting, Sort Of That's most of the parts, in the box. I kept them sort of sorted by size. There are a few things I left out - the wheels, big panels, pneumatic and PF parts, etc, but that's 90+% of the parts right there. Not TOO bad, and as long as you're careful, you can move the box around when you need to clean up for the night. It does how how oversize the box is though! The Stickers A BUNCH of stickers for this set. And they're not terribly useful for anything else. They're very specific to the tow truck, and they're mostly cut for the Technic panel shapes so they'd be weird on anything else. They do add a LOT of detail and color to the finished set though, so for once I will actually use them! The First Step The first actual page of the manual. I'm used to manuals having a picture of what you're making at the front - makes sense when it's a City set with multiple vehicles. Here? I just found it hilarious to see the finished truck there at step 1. The manual is standard Technic though - plain blue background, part callouts, and lots of sub-assemblies. The Build, 1 After a few pages, we have this. Anyone used to modern Technic can figure it out pretty quickly. This is the steering for the two front axles. As usual, it's some great engineering. The green beams under the arms of the second axle make the distance from the pivot point to the gear rack different, giving different turning radii to the axles. It may not be exactly right due to the limits of Lego parts, but the concept is certainly there and the functionality of the set is better due to it. The Build, 2 More pages, more pieces added. Again, any experienced Technic builders can recognize what's happening here. A vertical axle for the HOG steering, some frame at the front for a cab to be built off of, and some beams out the back to start building the body of the truck. And of course, a bunch of random-seeming pins and parts that'll be used for connections later. The Build, 3 Now things start getting interesting. This is the main gearbox. There's two red driving rings with then the dark grey gears to transmit the power to the light grey gears below. I'd bet money that the axle between the driving rings will be powered and there's gears coming that'll drive both axles from that simultaneously. And as an important note - the axles below (with the light grey gears) are NOT connected all the way through. The gap in the beams below the red driving rings is a gap in the axle as well, so there's 4 totally separate outputs on this gearbox. The Build, 4 This is now rotated and flipped from the last pic of the gearbox (note the axle with the universal joint in each photo). But I was right - the tan gears let the center axle drive both of the side axles with the driving rings. A motor will get connected in there and then we have 4 outputs, 2 of which could run at the same time. There's the axle with the universal joint, the black axle above the three tan ones (parallel to the u-joint), the back left output which gets redirected and ends up going to the dark grey 8 tooth gear in the top middle, and then the back right output which is not currently visible. The yellow connector sticking off to the right is a control handle to shift between two outputs, and there's a matching one on the right. All in all, a LOT of complexity in a small space! The Build, 5 That universal joint gets connected to another in order to take an off-center drive axle and connect it to a centered linear actuator. It also of course allows the LA to pivot. The Build, 6 The pneumatics appear! This grey cylinder is a pump. Turning the tan axle will rotate the short blue liftarms and power the pump. I'm sure this will connect into the gearbox for power, but there's a ways to go before we get there. The Build, 7 Actually, nope, I was wrong. That frame with the pump mounts right into the gearbox and onto the chassis. I've also added the winch, so now 3 of the 4 outputs from the gearbox are in use (large LA, pump, and winch). You can't see it, but the motor is also installed under the gearbox to drive it. The Build, 8 The 4th output of the gearbox drives these mini linear actuators. The drive is coming in on the gear closest to the camera and then the other 2 gears transfer power up to the far LA in sync. The Build, 9 Here's what those mini-LAs drive. A pair of spade-type outriggers. Since this is a heavy-duty tow truck that'll often need to pull loads out of ditches and so forth, these can dig into the ground for a lot of holding force. The Build, 10 Time to set the chassis aside for a while and build this. It's interesting how differently they can use identical pneumatic cylinders. The one in the black section can only swing the lower piece through a 90 degree angle. The one on top, despite a 2 stud stroke, manages to move the 15L beams a massive 9 stud distance thanks to the clever lever design using the 3x5 L beam and 5L beam. The Build, 11 So much added, so fast. The arm from the previous step attaches to the large LA to form the main crane arm of the truck. The pneumatic tubes all come together to a pair of valves to control those functions. Mechanically, the truck's pretty much done and there's still a book and a half to go in the instructions. That's a lot of bodywork to be added! The Build, 12 The bodywork starts with the cab. The battery box sticks in the usual Technic truck location behind the cab. Thankfully, it gets a sticker with green and red arrows that will help with knowing direction for functions later. The seats are black and grey instead of the blue that they often are. This is also an unusual case of a bare connection that ends up in a finished model. See the pin sticking forward between the seats? It's one of these used to stabilize the vertical axle that will be the steering. Only the pin on one side is needed, but this piece () wasn't available yet. The Build, 13 And that takes care of the cab. A few stickers here, but there's lots left on the sheet. Susanne gets a nice license plate too. It almost actually feels bland though. Especially once the rest of the truck is done and stickered, it feels like there should be more detail on each side of the grill here. And the black tubes for the sides of the windshield are a cheat. They don't line up vertically - the bottom is a stud farther forward than the top, so it needs to be something angled. It makes sense, most windshields ARE angled, but where many Technic vehicles would use axles there, there's no easy way to modify the bottom to put a connector for an axle instead (the top could take an axle though). That's why it's tubes - they have enough flex to do it. As for functionality, the doors open. That's about it. There's enough going on in the back of the truck I can forgive it though. The Build, 14 Here is one of the side panels. The other side is just a mirror image. It's a nice decorative panel, but why didn't they put one more of the small triangular panels above the "service" to smooth out the slope some more? Anyway, once you put these two side panels on and add the wheels, it's all done. The Side Comparison The side panels REALLY add a lot to this design, so I wanted to show exactly how much "mess" they're hiding. All the mechanicals of the bare truck are so cluttered by necessity, where the panel just smooths everything out and makes it look less Lego. I like the finished look. And since each panel is held on by just 3 pins, they're easy to remove to get to the battery box or fiddle with the internals. The Good Here's everything in the "deployed" position. You'd never actually use them all at once, but here it is. The crane arm has a decent amount of height, considering it's usage on a tow truck, and the extension on it works well enough. It's also good that the main boom uses an LA rather then pneumatics so you have height control. Full up there would be WAY too high for the wheel lift! Now that we have tires on, check out the front steering. Nice engineering making the dual steered axles do different angles like that. It's not something we see on real trucks here in the USA since the dual-front axle design is not common, but it's nice to see implemented. The Bad There are several small things that annoy me (and those of you with OCD will feel the same I'm sure) so let me point a few out. Each side of the truck has a flip-up panel with one of the gear shift levers underneath. There's a sticker to indicate functions, but due to the design of the truck, the sticker isn't centered over the lever. What? Look at the hoses coming off the small pneumatic cylinder on the hoist. They get in the way of the wheel lift coming up all the way. I'm not sure why they didn't design it with those hoses coming off the other side of the cylinder - I might have to mod it and see if there's a reason I'm not seeing now. There also is no good place to put the hook. As I played around with the truck, it kept snagging on other parts as they moved. The outriggers only come just to the table surface. They don't extend far enough to actually dig into the ground if you had it on dirt. but that's probably ok. They're nice looking but a little flimsy, so if they extended further, since most kids will use this on a hard surface, they'd try to lift the back end of the truck and fail. Access to the battery box switch is fairly tight. It looks roomy enough, but as a 6'3" guy with man-hands, it's tight getting my fingers in there to control it. Too bad they didn't use the PF switch and put it somewhere more accessible. The Video Note when I show the pneumatics at the end, there's an issue with the pump. Since there's very little tubing and no air tank, it builds up to max pressure very quickly. That leads to a loud clicking sound when the pump is running, since it's being forced to compress with no room for the air to go, and then the pump slams back open as soon as the gear turns a bit further. It's loud and annoying. Once you start using the functions, it quiets down, but then gets loud again a few seconds later. The Conclusion So, what's my conclusion on this set? Pretty cool! This was one of a series of service trucks in a short span - 2012 had the Pick-Up Tow Truck, and 2011 had a Flatbed Tow Truck - but you have to go back to 2006's famous 8285 Tow Truck to get a more direct comparison. I've built the 8285 and it's an awesome truck, but different in many ways than this one. 8285 is much larger and has a bigger piece count, so everything is bigger. However, that leads to a lot of empty space in the truck. There's not many Technic vehicles made that have as much empty room in them as the 8285. Also, 8285 had no motor, so you had to pump the pneumatics by hand. This one is much nicer in that regard. Overall, I like it better. For a non-flagship set, this packs a TON of features. The Ratings Value: 10/10 - It's so close to the famous 10 cents a part mark, and there's so many useful parts. Lots of panels, PF, pneumatics, so it's solid. Design: 8/10 - As a whole, great, but there's a few details that could be improved. Minifigs: n/a - Playability: 9/10 - Lots of functions, and it's in a common Technic scale so I bet it would work well for towing other vehicles around. It'd be better for smaller fingers than mine though. Parts: 10/10 - It's got both pneumatics and PF, plus if you want green Technic, it's the only place to go. It's the only source of 1x7 beams, the best source for 1x9 and 1x13 beams, and the only current(ish) source for green panels. Overall: 9/10 - Very solid. -
Multifunctional Aerodrome Tow Truck
KirTech LAB posted a topic in LEGO Technic, Mindstorms, Model Team and Scale Modeling
Hello All!!! After my holiday i’ve come back with new ideas, so there is the first one. I was inspired by Filsawgood’s Airfield Tug and decide to create my own version of this machine. I am glad to present a scale model of non-existent Heavy Multifunctional Aerodrome Tow Truck in a technic-figure scale. The model is 77 cm long, 23 cm wide (without mirrors), 13 cm high (without exhaust), the weight is 4,45 kg. It took me about 1,5 months to create it. Short video presentation: And winter test-drive: The model have eight RC functions (seven useful + compressor) and manual controlled winches and lights (total 12 motors). - moving (three XL-motors); - independent front and rear steering (two servo-motors); - lifting jacks (M-motor, eight pneumatic cylinders); - cab lifting (M-motor, two pneumatic cylinders); - front PPTO (M-motor); - rear PTO (buggy-motor, slow output); - winches (two L-motors); - light (twelve LED pairs). The transmission is very simple but rather reliable, one motor per axle with 1:3 reduction and differential gear. There are no safety devices in winches because I want to get maximum power. So i provide a fast-unwind mechanism. Winch hook is used like a movable pulley giving theoretically double gain in efficiency. All mechanisms are covered with protective covers. The accumulators turns on/off on the top of the model. There is a lightning switch in the rear part of the truck. The model have lightning around the periphery. Pneumatic is working due to four-pump compressor and RC valves. The lifting jacks are the old-type large pneumatic cylinders mounted on the chassis. Lifting cab function improves operator survey. It is very useful if we connect external mould-board. The mould-board height is controlled by using PPTO. Rear PTO is used for different attached implements. For demonstration I’ve constructed an external boom-crane (the length – 89 cm, width – 22 cm, transportation height – 19 cm, boom length – 95 cm, weight – 3,65 kg). We need to connect crane to the main tow truck for lifting jacks activation. Comfortable crane transmission creation was non-trivial task. I’ve took all the controls out to the operator cab (every lever changes the direction of its own function). Manual control allows to rotate tower, rise and extend the boom. At the small angles we need to rise boom with rear winch because actuators can’t conduct such big load. Another cool feature of the crane is wheels hiding. It is necessary because the wheels prevent tower rotation. I try on my white-stripped rims from 41999: More photos: https://flickr.com/photos/141718063@N06/albums/72157669696422836 Thanks for watching! Hope you like it! -
I got the Highway Pickup set a few weeks ago, and put it together in the main configuration, (its a 3 in 1 Creator set) but felt it looked a little off. To me, it was way too short a truck for the size of the cab. It also had a really steep angle to the flatbed when loading a car onto it, in its original configuration. So I decided to make it a little longer. I added a 4 x 12 plate to the back end of the flatbed, and reinforced it underneath to handle the extra length. I am still a little unhappy with how it looks, the wheelbase is a little short still, but I'm not going to mess with that part of it. It looks good enough now for me. I can even haul the Palace Cinema limo on it. The truck is a little bit oversize for minifies maybe?!