Search the Community
Showing results for tags 'studless'.
Found 44 results
-
Hello Speed Champions and City fans, It was my entry to Bricklink Designer Program Series 3 and 4. It has received many kind comments and support, but unfortunately it has not been selected, therefore I decided to make the instructions available here: https://rebrickable.com/mocs/MOC-177592/_TLG_/school-bus I always loved American style school buses, therefore I decided to design one to Bricklink Designer Program Series 3. It is not actually based on a real one, but it contains many typical details: the black bumper rails and STOP arms on the sides, the crossing arm, the side and rear doors, the rearview and crossover mirrors, the mudguards, the warning lights etc.. The roof assembly can be removed as one piece and in this case the internal details are visible: there is a driver seat with steering wheel, dashboard, gear shift, passenger seats and even a fire extinguisher. It is 8 studs wide, studless build in minifigure scale and fits perfectly to Speed Champions cars or to a LEGO City. There are many working details: the front and rear doors, the STOP arms, the crossing arm and windshield wipers. I wanted to create a clean build and tried to fill every unnecessary gaps and hide unnecessary studs, therefore some tricky, but legal build techniques are used. The set includes three minifigures: a driver, a school girl with a pen and backpack and a school boy with a brick built backpack. The model has space for 17 minifigures: one driver and 16 passengers. If the passengers are kids with short, rigid legs, then they can stand on the seats. The building instructions guidelines have been followed. It is built from the palette "BDP Series 3", so there are some color and part restrictions. The color "Bright Light Orange" would be a bit more authentic, but the available parts are restricted, therefore I decided to use "Yellow" and I am satisfied with the result. The STOP sign is very rare part and it is not available in this palette, therefore it is replaced by a simple, white, circular sign with a sticker. The door 43967 is also not available in yellow, therefore it is replaced by a brick built one, however, in this case I was able to add some extra details: a black door handle, bottom window and red lights. I hope you like my design, I appreciate any feedback. Thanks for visiting, _TLG_ School Bus - Bricklink Designer Program 3 - 01 by László Torma, on Flickr School Bus - Bricklink Designer Program 3 - 02 by László Torma, on Flickr School Bus - Bricklink Designer Program 3 - 03 by László Torma, on Flickr School Bus - Bricklink Designer Program 3 - 04 by László Torma, on Flickr School Bus - Bricklink Designer Program 3 - 05 by László Torma, on Flickr School Bus - Bricklink Designer Program 3 - 06 by László Torma, on Flickr School Bus - Bricklink Designer Program 3 - 07 by László Torma, on Flickr School Bus - Bricklink Designer Program 3 - 08 by László Torma, on Flickr School Bus - Bricklink Designer Program 3 - 09 by László Torma, on Flickr School Bus - Bricklink Designer Program 3 - 10 by László Torma, on Flickr
-
Hello Lotus, James Bond and Speed Champions fans, The Lotus Esprit S1 is a sports car built by Lotus Cars from 1976 to 1978 at their Hethel, England factory. It has a rear mid-engine, rear-wheel-drive layout and it was featured in the 1977 James Bond film The Spy Who Loved Me, where a car famously converted into a submarine after a road chase. The car used in the underwater scenes is nick-named "Wet Nellie". Building instructions are available on the following link: https://rebrickable.com/mocs/MOC-178962/_TLG_/lotus-esprit-s1-007-james-bond-submarine-conversion It is a studless build in the new, 8 studs wide Speed Champions style. I wanted to create a clean model which is as accurate as possible in this small scale. I prefer the brick built solutions to keep the flexibility of the used parts in further builds, and therefore only two vehicle registration plate stickers are used. My intent was to keep the width-length-height ratio of the real car and this size makes it possible. The model contains lots of details: for example the black stripes on the sides, door handles, detailed tail lights etc.. Maybe the most challenging one was the front and the front bumper with brick built headlights. I tried to fill every unnecessary gaps and therefore some tricky build techniques are used. The car can be converted to submarine. The model has space for two minifigures with helmets or small hairs. Thanks for visiting, _TLG_ Lotus Esprit S1 - James Bond - Instructions 01 by László Torma, on Flickr Lotus Esprit S1 - James Bond - Instructions 02 by László Torma, on Flickr Lotus Esprit S1 - James Bond - Instructions 03 by László Torma, on Flickr Lotus Esprit S1 - James Bond - Instructions 04 by László Torma, on Flickr Lotus Esprit S1 - James Bond - Instructions 05 by László Torma, on Flickr Lotus Esprit S1 - James Bond - Instructions 06 by László Torma, on Flickr Lotus Esprit S1 - James Bond - Instructions 07 by László Torma, on Flickr Lotus Esprit S1 - James Bond - Instructions 08 by László Torma, on Flickr Lotus Esprit S1 - James Bond - Instructions 09 by László Torma, on Flickr Lotus Esprit S1 - James Bond - Instructions 10 by László Torma, on Flickr Lotus Esprit S1 - James Bond - Instructions 11 by László Torma, on Flickr
-
Hello Corvette and Speed Champions fans, The Chevrolet Corvette (C3) is the third generation of the Corvette sports car that was produced from 1967 until 1982 by Chevrolet for the 1968 to 1982 model years. Engines and chassis components were mostly carried over from the previous generation, but the body and interior were new. It set new sales records with 53,807 produced for the 1979 model year. Building instructions are available on the following link: https://rebrickable.com/mocs/MOC-176144/_TLG_/corvette-c3-stingray It is a studless build in the new, 8 studs wide Speed Champions style. I wanted to create a clean model which is as accurate as possible in this small scale. I prefer the brick built solutions to keep the flexibility of the used parts in further builds, and therefore only two vehicle registration plate stickers are used. My intent was to keep the width-length-height ratio of the real car and this size makes it possible. The model contains lots of details: for example the front bumper, the emblematic side grills, the side view mirrors, the embedded tail lights, the fuel cap etc... I tried to fill every unnecessary gaps and therefore some tricky build techniques are used. The instructions includes some modification ideas, for example front blinker and alternate side grill, see picture 6, and luggage rack, see picture 5. The model has space for two minifigures with helmets or small hairs. Thanks for visiting, _TLG_ Corvette C3 - instructions 01 by László Torma, on Flickr Corvette C3 - instructions 02 by László Torma, on Flickr Corvette C3 - instructions 03 by László Torma, on Flickr Corvette C3 - instructions 04 by László Torma, on Flickr Corvette C3 - instructions 05 by László Torma, on Flickr Corvette C3 - instructions 06 by László Torma, on Flickr Corvette C3 - instructions 07 by László Torma, on Flickr Corvette C3 - instructions 08 by László Torma, on Flickr Corvette C3 - instructions 09 by László Torma, on Flickr Corvette C3 - instructions 10 by László Torma, on Flickr Corvette C3 - instructions 11 by László Torma, on Flickr
-
Hello Creator and Disney fans, Mickey Mouse is a legendary American cartoon character co-created in 1928 by Walt Disney and Ub Iwerks. Steamboat Willie is a 1928 American animated short film directed by them. It was produced in black and white and this cartoon is considered the debut of both Mickey and Minnie Mouse. Building instructions are available on the following links: https://rebrickable.com/mocs/MOC-171558/_TLG_/mickey-mouse-steamboat-willie This is a studless model and everything is brick-built, stickers are not used. I wanted to create a clean model which is as accurate as possible in this scale. It includes many typical details: the shoes, the pants with buttons etc.. Maybe the most challenging one was the head with some tricky build techniques. Thanks for visiting, _TLG_ Mickey Mouse, Steamboat Willie - Instructions 01 by László Torma, on Flickr Mickey Mouse, Steamboat Willie - Instructions 02 by László Torma, on Flickr Mickey Mouse, Steamboat Willie - Instructions 03 by László Torma, on Flickr Mickey Mouse, Steamboat Willie - Instructions 04 by László Torma, on Flickr Mickey Mouse, Steamboat Willie - Instructions 05 by László Torma, on Flickr Mickey Mouse, Steamboat Willie - Instructions 06 by László Torma, on Flickr
-
Hello Creator and Disney fans, Mickey Mouse is a legendary American cartoon character co-created in 1928 by Walt Disney and Ub Iwerks. The longtime icon and mascot of The Walt Disney Company, Mickey is an anthropomorphic mouse who typically wears red shorts, large yellow shoes, and white gloves. This is a studless model and everything is brick-built, stickers are not used. I wanted to create a clean model which is as accurate as possible in this scale. It includes many typical details: the yellow shoes, the red pants with white buttons etc.. Maybe the most challenging one was the head with some tricky build techniques. Thanks for visiting, _TLG_ Mickey Mouse - instructions 1 by László Torma, on Flickr Mickey Mouse - instructions 2 by László Torma, on Flickr Mickey Mouse - instructions 3 by László Torma, on Flickr Mickey Mouse - instructions 4 by László Torma, on Flickr Mickey Mouse - instructions 5 by László Torma, on Flickr Mickey Mouse - instructions 6 by László Torma, on Flickr
-
Hello Lamborghini and Speed Champions fans, The Lamborghini Diablo is a high-performance mid-engine sports car built by Italian automobile manufacturer Lamborghini between 1990 and 2001. It is the first production Lamborghini capable of attaining a top speed in excess of 320 kilometres per hour (200 mph). Building instructions are available on the following links: It is a studless build in the new, 8 studs wide Speed Champions style. I wanted to create a clean model which is as accurate as possible in this small scale. I prefer the brick built solutions to keep the flexibility of the used parts in further builds, and therefore only one Lamborghini logo sticker and a standard vehicle registration plate sticker are used. My intent was to keep the width-length-height ratio of the real car and this size makes it possible. The model contains lots of details: for example the emblematic taillights, the side air intakes, the side view mirrors and rear details with the double exhausts etc... Maybe the most challenging one was the hood tilt and some half stud offsets in the inside structure. I tried to fill every unnecessary gaps and therefore some tricky build techniques are used. The model has space for two minifigures with helmets or small hairs. Thanks for visiting, _TLG_ Lamborghini Diablo - Instructions 1 by László Torma, on Flickr Lamborghini Diablo - Instructions 2 by László Torma, on Flickr Lamborghini Diablo - Instructions 3 by László Torma, on Flickr Lamborghini Diablo - Instructions 4 by László Torma, on Flickr Lamborghini Diablo - Instructions 5 by László Torma, on Flickr Lamborghini Diablo - Instructions 6 by László Torma, on Flickr Lamborghini Diablo - Instructions 7 by László Torma, on Flickr
-
Hello Lamborghini and Speed Champions fans, The Lamborghini Aventador LP700-4 is a mid-engine sportscar produced by the Italian automotive manufacturer Lamborghini. In keeping with Lamborghini tradition, the Aventador is named after a Spanish fighting bull that fought in Zaragoza, Aragón, in 1993. The Aventador is the successor for the Murciélago and was made by hand in Sant'Agata Bolognese, Italy. Building instructions are available on the following links: https://rebrickable.com/mocs/MOC-149528/_TLG_/lamborghini-aventador-lp700-4 It is a studless build in the new, 8 studs wide Speed Champions style. I wanted to create a clean model which is as accurate as possible in this small scale. I prefer the brick built solutions to keep the flexibility of the used parts in further builds, and therefore only two types of stickers are used: simple black ones to cover the visible parts of the headlights in the front air intakes, and the Lamborghini logo. My intent was to keep the width-length-height ratio of the real car and this size makes it possible. The model contains lots of details: for example the emblematic headlights, the front and side air intakes, the side view mirrors and rear details with the wide exhaust etc... Maybe the most challenging one was the hood tilt and some half stud offsets in the inside structure. I tried to fill every unnecessary gaps and therefore some tricky build techniques are used. The two trans-clear headlight parts "Slope, Inverted 45 2 x 1" (part 3665) are very rare, it never released in a set, but is available on Bricklink in some webshops. Of course they can be replaced for example by white, black, light bluish gray or dark bluish gray versions. The parts 86996 and 42446 are also rare, but the picture 7 shows an alternate side view mirror solution. It is a very low build, and can roll well only on flat surfaces. It is more of a display model then a toy for small children. The model has space for two minifigures: one with small hair or helmet in the driver's seat and one either without hair or withour leg. Thanks for visiting, _TLG_ Lamborghini Aventador - Instructions 1 by László Torma, on Flickr Lamborghini Aventador - Instructions 2 by László Torma, on Flickr Lamborghini Aventador - Instructions 3 by László Torma, on Flickr Lamborghini Aventador - Instructions 4 by László Torma, on Flickr Lamborghini Aventador - Instructions 5 by László Torma, on Flickr Lamborghini Aventador - Instructions 6 by László Torma, on Flickr Lamborghini Aventador - Instructions 7 by László Torma, on Flickr Lamborghini Aventador - Instructions 8 by László Torma, on Flickr Rear wing version added :), it is a free addition the original design: Lamborghini Aventador rear wing - Instructions 1 by László Torma, on Flickr Lamborghini Aventador rear wing - Instructions 2 by László Torma, on Flickr Lamborghini Aventador rear wing - Instructions 3 by László Torma, on Flickr
-

Again 1996, Again 8480 - Now with instruction!
msk6003 posted a topic in LEGO Technic, Mindstorms, Model Team and Scale Modeling
Finally finish my version of studless 8480 Space shuttle. I got idea in 1 year ago but started and finish recently. This model use 1 C+ dumb battery, 1 C+ L motor, 1 spike essential's small motor and 1 chinese C+ extension cable, 3 red light brick. Feature Motorised Cargo bay open/close Crane with satellite up/down Crane with satellite rotate(limit in 90') Satellite solar panel expend/close Sequential rear booster light Manual Folding landing gear using lever on left wing Moving flap using lever on right wing Moving flap in vertical tail fin Working lever in cabin(Second transmission lever for B model) It's also easy to change batteries, as you only need to remove the vertical tail fin and two motor switchs. I planned also made B model later. Instruction finish! A model B model -
Hello modular building and City fans, This modular Gothic Cathedral was my entry to Bricklink Designer Program Series 1. I have received many kind comments and support, but unfortunately it has not been selected, therefore I decided to make the instructions available here: https://rebrickable.com/mocs/MOC-148170/_TLG_/gothic-cathedral Kit is available here: https://buildamoc.com/products/gothic-cathedral It is not actually based on a real building, but it contains many typical details: lancet arches, double lancet arch windows, a ridge turret, flying buttresses, portals with series of receding planes, rose windows etc., and there is a matching street lamp too. The roof assembly can be removed as one piece and in this case the internal details are visible: there is an altar with a cross, a candle holder, a church tabernacle, a brick built bible, there are benches, an organ, a holy water stoup etc.. The middle door on the facade and the side doors open outward, and work perfectly, the side doors on the facade open inward and they can be opened if the door handle pieces (the taps) are removed, but it is not se easy to close them in this case. It is a studless build, the unnecessary studs are hidden by tiles. When I started the design, the first version included appr. 4600 parts, so I had to optimized and simplified it a bit, but I am still really satisfied with the result. For example it could be very nice if there was trans color plates in the holes of the window fences, but it would mean too much additional parts (and I am also not sure if it is a legal technique). The building instructions guidelines have been followed. It is built from the palette "BDP Series 1", so there are some color and part restrictions. The part 15744 could be awesome as rose window on the facade, but unfortunately it is not available in black or light bluish gray. However, the technic gear 40 tooth works too. The bells could be pearl gold or something similar, but the best available option is the black which is ok. I hope you like my design, I appreciate any feedback. Thanks for visiting, _TLG_ Gothic Cathedral 01 by László Torma, on Flickr Gothic Cathedral 02 by László Torma, on Flickr Gothic Cathedral 03 by László Torma, on Flickr Gothic Cathedral 04 by László Torma, on Flickr Gothic Cathedral 05 by László Torma, on Flickr Gothic Cathedral 06 by László Torma, on Flickr Gothic Cathedral 07 by László Torma, on Flickr Gothic Cathedral 08 by László Torma, on Flickr Gothic Cathedral 09 by László Torma, on Flickr
-
Hello Trabi and Speed Champions fans, Trabant 601 (or Trabant P601 series) is one of the most iconic Eastern Bloc cars of my childhood. It was a Trabant model produced by VEB Sachsenring in Zwickau, Saxony. It was the third generation of the model, built for the longest production time, from 1964 to 1990. As a result, it is the best-known Trabant model and often referred to simply as "the Trabant" or "the Trabi". During this long production run, 2,818,547 Trabant 601s were produced overall and it was the most common vehicle in former East Germany. Building instructions are available on the following links: https://rebrickable.com/mocs/MOC-137852/_TLG_/trabant-601 https://www.mocsmarket.com/lego-mocs/trabant-601/ It is a studless build in the original, 6 studs wide Speed Champions scale and fits perfectly to the new City style cars too. I have minimized the number of the stickers to keep the flexibility of the parts in further builds, therefore only two standard vehicle registration plate stickers and a Trabant logo sticker are used. I wanted to build the model as accurate as possible in this small scale, therefore it contains lots of details: for example the iconic head and rear ligths, the front grill, the side view mirror, the door handles etc... Maybe the most challenging one was the wheel and mudguard detail with a half stud offset. The model has space for one minifigure with small or middle sized hair. If you prefer the Universal version, then you need only 3 extra parts and it is an easy modification. Thanks for visiting, _TLG_ Trabant 601 - instructions 1 by László Torma, on Flickr Trabant 601 - instructions 2 by László Torma, on Flickr Trabant 601 - instructions 3 by László Torma, on Flickr Trabant 601 - instructions 4 by László Torma, on Flickr Trabant 601 - instructions 5 by László Torma, on Flickr Trabant 601 - instructions 6 by László Torma, on Flickr Trabant 601 - instructions 7 by László Torma, on Flickr
-
Hello Skoda and Speed Champions fans, Skoda 105 is one of the iconic Eastern Bloc cars of my childhood. It was a rear-engined, rear-wheel drive small family car that was produced by Czechoslovakian car manufacturer AZNP in Mladá Boleslav, Czechoslovakia between 1976 and 1990. Engine sizes were 1.05 and 1.2 liters respectively. The color scheme of this model is based on my father's first car. Building instructions are available on the following links: https://rebrickable.com/mocs/MOC-93968/_TLG_/skoda-105/#details https://www.mocsmarket.com/lego-mocs/skoda-105-building-instructions/ KIT is available on MOCHUB: https://www.mochub.com/moc/skoda-105 It is a studless build in the original, 6 studs wide Speed Champions scale and fits perfectly to the new City style cars too. I have minimized the number of the stickers to keep the flexibility of the parts in further builds, therefore only two standard vehicle registration plate stickers are used. I wanted to build the model as accurate as possible in this small scale, therefore it contains lots of details: for example the front ligths, the front grill with the narrow chrome line and Skoda logo, the side view mirrors and the rear view mirrors, the door handles, the black rubber stripe on the sides etc... Maybe the most challenging one was the C pillar solution. I tried to fill every unnecessary gaps and therefore some tricky build techniques are used. The model has space for two minifigures: one on the front seat with small or middle sized hair (the rear view mirror assembly has to be removed in this case) and one on the rear seat without any hair. I prefer the model as it is shown on the pictures, but there are some modification possibilties: a) a rear windscreen can be added (there is a more detailed explanation in the last step), b) many of Skoda 105 cars has side view mirrors only on one side, c) on the real cars the color of the door handles and side view mirrors are sometimes black on the other ones they are chrome. Thanks for visiting, _TLG_ Skoda 105 - Instructions 1 by László Torma, on Flickr Skoda 105 - Instructions 2 by László Torma, on Flickr Skoda 105 - Instructions 3 by László Torma, on Flickr Skoda 105 - Instructions 4 by László Torma, on Flickr Skoda 105 - Instructions 5 by László Torma, on Flickr
-
Hello Ferrari and Speed Champions fans, The Ferrari Daytona SP3 is a limited production mid-engine sports car produced by Italian automobile manufacturer Ferrari, unveiled on 20 November 2021 for the 2023 model year. The design references to 1960s race cars, it is a modernization of the 330 P4, with the body work consisting distinguished low driver's seating position, raised front and rear wheel arches, and the Targa top design. Building instructions are available on the following links: https://rebrickable.com/mocs/MOC-131689/_TLG_/ferrari-daytona-sp3 https://www.mocsmarket.com/lego-mocs/ferrari-daytona-sp3/ It is a studless build in the new, 8 studs wide Speed Champions style. I wanted to create a sleek model which is as accurate as possible in this small scale. I prefer the brick built solutions to keep the flexibility of the used parts in further builds, and therefore only Ferrari logo and simple light gray head lights stickers are used. My intent was to keep the width-length-height ratio of the real car and this size makes it possible. The model contains lots of details: for example the emblematic front and hood grilles, the side and rear intakes, the side view mirrors etc... Maybe the most challenging one was the brick built narrow black and red lines on the front. I tried to fill every unnecessary gaps and therefore some tricky build techniques are used. On the pictures the red grills on the front are connected only by half studs. However, if you prefer more sturdy models, then full connection is usable too, it is a bit less accurate, but looks decent too. It is a very low build, an can roll well only on flat surfaces. The model has space for two minifigures. I suggest to use helmets, or small hairs, and the upper part of the seats have to be removed in this case. Thanks for visiting, _TLG_ Ferrari Daytona SP3 - instructions 1 by László Torma, on Flickr Ferrari Daytona SP3 - instructions 2 by László Torma, on Flickr Ferrari Daytona SP3 - instructions 3 by László Torma, on Flickr Ferrari Daytona SP3 - instructions 4 by László Torma, on Flickr Ferrari Daytona SP3 - instructions 5 by László Torma, on Flickr Ferrari Daytona SP3 - instructions 6 by László Torma, on Flickr Ferrari Daytona SP3 - instructions 7 by László Torma, on Flickr
-
Hello, Violator is a legendary studio album by English electronic music band Depeche Mode. It was first released on 19 March 1990 by Mute Records internationally, and by Sire and Reprise Records in the United States. Preceded by the singles "Personal Jesus" and "Enjoy the Silence", the album propelled the band into international stardom, and also yielded the singles "Policy of Truth" and "World in My Eyes". This is a studless build based on the original LP cover. Everything is brick-built, stickers are not used. The size is 48 studs x 48 studs x 5 plates high. The rose head and the "Depechemode" assemblies are a bit tricky too, but the most challenging was to design the "violator" assembly. Building instructions are available on the following links: https://rebrickable.com/mocs/MOC-122576/_TLG_/depeche-mode-violator-lp-cover or https://www.mocsmarket.com/lego-mocs/depeche-mode-violator-lp-cover/ (The 8x16 tiles were ordered directly to this MOC and after I received them, I realized they are matte black. Of course they could be replaced by for example 2x4 tiles which are gloss black as the most of the tiles.) Thanks for visiting, _TLG_ 01 Depeche Mode - Violator, LP - Instructions by László Torma, on Flickr 03 Depeche Mode - Violator, LP - Instructions by László Torma, on Flickr 02 Depeche Mode - Violator, LP - Instructions by László Torma, on Flickr
-
Hello Speed Champions fans, Black Arrow is a ficticious hypercar which was designed for a "Hypercar building contest" hosted by sfh_bricks on Instagram. I tried to design something really cool inspired by the cyberpunk culture. Building instructions are available on the following links: https://rebrickable.com/mocs/MOC-119144/_TLG_/black-arrow-hypercar-concept It is a studless build in the new, 8 studs wide Speed Champions style. Some rules had to be followed: only certain types of car bases, wheels, fenders and windscreen are allowed, cockpit have to be closed, fixed dimensions (wheelbase, width, and maximum length), build must fit a full minifig with helmet. I prefer the brick built solutions to keep the flexibility of the used parts in further builds, and therefore stickers are not used. My intent was to keep the build smooth and to add lots of details: for example the air intakes, the rear wing, the side view mirrors etc. . Maybe the most challenging one was the double headlight. I tried to fill every unnecessary gaps and therefore some tricky build techniques are used. There are two versions of the front assembly : 1) the double headlight version which is a bit more extreme and 2) the simple headlight version which is more solid and sturdy. The model has space for one minifigure. I suggest to use a helmet or small hair. Thanks for visiting, _TLG_ Black Arrow 01 by László Torma, on Flickr Black Arrow 02 by László Torma, on Flickr Black Arrow 03 by László Torma, on Flickr Black Arrow 04 by László Torma, on Flickr Black Arrow 05 by László Torma, on Flickr Black Arrow 06 by László Torma, on Flickr Black Arrow 08 by László Torma, on Flickr Black Arrow 07 by László Torma, on Flickr
-
Hello Porsche and Speed Champions fans, Porsche 906 aka Carrera 6 is a street-legal racing car from Porsche. It was announced in January 1966 and 50 examples were subsequently produced, thus meeting the homologation requirements of the FIA's new Group 4 Sports Car category to the number. The type would also compete in modified form in the Group 6 Sports Prototype class. For the year of the car's debut in 1966, it achieved numerous victories. The main inspiration came from a plastic toy car which I received as a child. Building instructions are available on the following links: https://rebrickable.com/mocs/MOC-106735/_TLG_/porsche-906 It is a studless build in the new, 8 studs wide Speed Champions style. I wanted to create a sleek model which is as accurate as possible in this small scale. I prefer the brick built solutions to keep the flexibility of the used parts in further builds, and therefore only a standard vehicle registration plate sticker is used. My intent was to keep the width-length-height ratio of the real car and this size makes it possible. The model contains lots of details: for example the emblematic front, the side view mirrors, the side air intakes etc. . Maybe the most challenging one was the iconic headlight, lots of solutions were tested before the final one. I tried to fill every unnecessary gaps and therefore some tricky build techniques are used. The model has space for one minifigure. I suggest to use a helmet or small hair. Thanks for visiting, _TLG_ Porsche 906 - Instructions 1 by László Torma, on Flickr Porsche 906 - Instructions 2 by László Torma, on Flickr Porsche 906 - Instructions 3 by László Torma, on Flickr Porsche 906 - Instructions 4 by László Torma, on Flickr Porsche 906 - Instructions 5 by László Torma, on Flickr Porsche 906 - Instructions 6 by László Torma, on Flickr Porsche 906 - Instructions 7 by László Torma, on Flickr Porsche 906 - Instructions 8 by László Torma, on Flickr
-
Hello Ferrari and Speed Champions fans, the Ferrari F40 (tipo F120) is a mid-engine, rear-wheel drive sports car engineered by Nicola Materazzi with styling by Pininfarina. It was built from 1987 to 1992, with the LM and GTE race car versions continuing production until 1994 and 1996 respectively. As the successor to the 288 GTO (also engineered by Materazzi), it was designed to celebrate Ferrari's 40th anniversary and was the last Ferrari automobile personally approved by Enzo Ferrari. At the time it was Ferrari's fastest, most powerful, and most expensive car for sale. Building instructions are available on the following links: https://rebrickable.com/mocs/MOC-99799/_TLG_/ferrari-f40 https://www.mocsmarket.com/lego-mocs/ferrari-f40-building-instructions/ It is a studless build in the new, 8 studs wide Speed Champions style. I wanted to create a sleek model which is as accurate as possible in this small scale. I prefer the brick built solutions to keep the flexibility of the used parts in further builds, and therefore only Ferrari logo stickers are used. (If you preferred a better shaping instead of a real rear side grill, then 2pcs of parts 61409 could replaced by 2pcs of tiles and some additional stickers, see the picture 3.) My intent was to keep the width-length-height ratio of the real car and this size makes it possible. The model contains lots of details: for example the emblematic front, hood , side and rear intakes, the narrow black line on the front and sides, the front turn signals, the side view mirrors etc... Maybe the most challenging one was the iconic rear side with the vehicle registration plate and the rear spoiler, here there is a half stud offset. I tried to fill every unnecessary gaps and therefore some tricky build techniques are used. The model has space for one minifigure. I suggest to use small or middle sized hair. Thanks for visiting, _TLG_ Ferrari F40 - instructions 1 by László Torma, on Flickr Ferrari F40 - instructions 2 by László Torma, on Flickr Ferrari F40 - instructions 3 by László Torma, on Flickr Ferrari F40 - instructions 4 by László Torma, on Flickr Ferrari F40 - instructions 5 by László Torma, on Flickr Ferrari F40 - instructions 6 by László Torma, on Flickr Ferrari F40 - instructions 7 by László Torma, on Flickr Ferrari F40 - instructions 8 by László Torma, on Flickr Ferrari F40 - instructions 9 by László Torma, on Flickr
-
Hello Magnum, Ferrari and Speed Champions fans, this targa topped 1984 Ferrari 308GTSi Quattrovalvole (pictures 1 and 6) was made famous by the television series Magnum, p.i. in which the series' lead, Thomas Magnum (Tom Selleck) drove the car around Oahu for eight seasons while on his investigations, from 1980 to 1988. Several 308 GTS cars were used, a new one for each season, most being auctioned off after filming and all with the license plate ROBIN 1. The berlinetta version of this model is called Ferrari 308GTB Quattrovalvole (pictures 2-5 and 7-8). The design inspiration of this model came from a Ferrari 308 Matchbox which I received as a child. Building instructions are available on the following links: https://rebrickable.com/mocs/MOC-64110/_TLG_/magnum-pi-ferrari-308-gts-gtb-quattrovalvole/#details or https://www.mocsmarket.com/lego-mocs/instructions-moc-magnum-p-i-ferrari-308-gts-gtb-quattrovalvole/ They are a studless builds in the new, 8 studs wide Speed Champions style. I wanted to create a sleek models which are as accurate as possible in this small scale. Only two stickers are used per model: the rectangular Ferrari logo, and the vehicle registration plate, to keep the flexibility of the used parts in further builds. My intent was to keep the width-length-height ratio of the real car and this size makes it possible. The models contain lots of details: for example the emblematic air vents on the hood (black on GTS and red on GTB), the front bumper with the turn signal lights, the tilted front grill, the rear three quarter window with black cover, the turn signal lights on the front side, the black stripe on the sides, the side-view mirrors, the tiltable seats etc.. Maybe the most challenging one was the iconic rear side with the vehicle registration plate, here there is a half stud offset. I tried to fill every unecessary gaps and therefore some tricky build techniques are used. The model has space for two minifigures. I suggest to use small hairs. Without the seats and the two interior tan tiles minifigures with bigger hairs can be used too if they are leaned back. Thanks for visiting, _TLG_ Magnum's car 01 - INSTRUCTIONS by László Torma, on Flickr Ferrari 308 GTB Q. 02 - INSTRUCTIONS by László Torma, on Flickr Ferrari 308 GTB Q. 03 - INSTRUCTIONS by László Torma, on Flickr Ferrari 308 GTB Q. 04 - INSTRUCTIONS by László Torma, on Flickr Ferrari 308 GTB Q. 05 - INSTRUCTIONS by László Torma, on Flickr Magnum's car 06 - INSTRUCTIONS by László Torma, on Flickr Ferrari 308 GTB Q. 07 - INSTRUCTIONS by László Torma, on Flickr Ferrari 308 GTB Q. 08 - INSTRUCTIONS by László Torma, on Flickr
-

[TC20] Super Car - 8880 studless
Shumo Lego posted a topic in LEGO Technic, Mindstorms, Model Team and Scale Modeling
8880 can be called my favorite set of a series of Techniс, and I have long wanted to touch it by assembling it from modern parts, because I don't have any old ones, and it's too expensive to buy the original set. Getting started: Some teaser: Almost done: Final result: Description: All the features of the original set are preserved: steering of all wheels from the handle on the roof and from the steering wheel in the cabin, a model of a v8 engine with a fan, a 4-speed gearbox, all-wheel drive with three differentials, independent suspension of all wheels; Additional functions: Opening the engine compartment with a support, lifting the headlights with a lever from the cab; Comparison with the original: I'm sorry that I published all the photos at once, and not sequentially. This is my first competition for Eurobricks, and I did not immediately understand the rules. I hope I did everything right :) -

[TC20] Studless 858 Boxer Engine
Saberwing40k posted a topic in LEGO Technic, Mindstorms, Model Team and Scale Modeling
So, I had a lot of ambition, and good ideas for my studless remake. Originally, I was going to do a studless version of set 6957 Solar Snooper, a set from my childhood. Unfortunately, my mental illness kicked in, and I was left at a week before the original deadline with no model to enter. But, I wanted to build something, so I looked at Technicopedia for inspiration, and landed on set 858 Auto Engines. This set is unique, because as many Technic sets feature an engine, only this one is dedicated to engines. The model I chose was the 'Boxer" engine, as that is one that I could improve on, without adding any functions. Now, the original engine is not actually a boxer, as the pistons do not reach top dead center at the same time. In addition, a 6 cylinder boxer should have the pistons clocked 120 degrees apart, which would have been impossible to do with the parts at the time. With all of the advanced parts introduced since 1980, I was able to correct both of these issues. Now, the engine is a proper boxer, with the pistons clocked 120 degrees apart. Aside from that, there is one other major functional difference. On the original model, the distributor is just a rotating shaft that does not actually do anything. On my model, I was able to add a rotating contact piece that connects to each of the spark plug wires in sequence. The engine also has a belt driven fan, just like the original. My model also features the detailed exhaust pipes and spark plug wires. As for scale, I think my model is about 50% larger, given that I used 3 stud diameter pistons, versus the 2 stud pistons of the original. But, the scale increase allowed me to make the crankshaft and pistons much more realistic and functional. Believe it or not, the fan was actually one of the biggest sticking points for me in terms of what to use. No brick built fan felt right, so I used the fan tail from 8068, which is actually a repurposed wheel cover. Unlike the original, the belts are configured in such a way that they can be added easily, without any bent paper clips. Size comparison with 42123. My engine is roughly the same width, and about 2/3rds the length. LDD cutaway to show the crankshaft. Video:(No Sound) https://bricksafe.com/files/Saberwing007/tc20-studless-858-boxer-6-engine/20210808_175126_1.mp4 So, that's my entry, a new version of the 858 Boxer engine. -
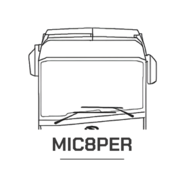
[TC20] 8846 Tow truck studless
mic8per_ posted a topic in LEGO Technic, Mindstorms, Model Team and Scale Modeling
I have started building the 8846 Tow truck studless remake for the "[TC20] Technic Studless Recreation Contest" I have started with the front axle: As you can see, I will use a bit wider tires, also It will be one stud wider, so it will be 13, not 12 studs wide. Then, I have built the rear axle, and almost finished the chassis. This is all progress for now, more in next post. -

[MOC] American Style Semi Truck
SaperPL posted a topic in LEGO Technic, Mindstorms, Model Team and Scale Modeling
Hello I'd like to present my small-scale RC semi truck. It has PF Servo, XL motor and sbrick mounted in the cab/frame and the battery is neatly mounted in the trailer that also has a two-stage ramp driven by single L motor and Technic strings. The cables go through the hole in trailer saddle (big turntable) to connect sbrick with battery and ramp motor with sbrick at the back of sleeping cab. Full gallery: https://imgur.com/a/2uPHku There is an alternate configuration for potential standalone/without trailer use: Hope you'll like it :) -
 Hello fellow Technic fans, let me present to you my tribute model to the well known, iconic set 8880 As a new member I should introduce myself, but I did that already in the forum designed for the very purpose so I just link that here http://www.eurobrick...howtopic=134093 and we can jump to the main subject. I've been encouraged by a commenter on youtube who is a member here to share this MOC of mine on this forum as maybe this will give you a rest after the frustration caused by the much anticipated 42056. Don't get it wrong, I don't mean to fill the gap it left (I read the topic too and share the feeling), but hopefully can give you a few minutes of entertainment. I admit it is a sensitive piece of history to touch, but I hope you recognize that the respect towards the original model what was driving my hands while I was designing this plastic homage. Probably some of you have already seen the video on the youtube. For those who didn't let me link it: Instead of making a new description I'll use the one that I made for the vid and pepper it with some images: The original set 8880 has been released in 1994. Sadly that time I was living my dark age (life without lego). Now it's been 4 years that I got back in business, dark age is over and this set is weightly responsible for that change in my life. First I was just reading about it on Blackbird page. Long story short I could manage to get one, and as an old school lego fan (being child in the 80's) it straight enchanted me and determined probably my whole life (hobbywise at least). In the same time I really admire the modern studdless system of lego and it inevitably ended up in the demand in me to build a studless version of it. I've built it first in 2013, but in lack of sources (parts and talent) it wasn't really desirable, nor "smart". Since then I keep rebuilding it time to time and always ends up better and better. According this I wouldn't say this is the last or the best of it, but at the moment this is the stage of its evolution. This is where the name I gave came from. A few words about the details: Body: As you can see I did not use panels but kept the wireframe like appearance as it is one of the benchmark of the original set. Speaking of which I have to admit I did change the shape of the front a lot, even eliminated the concealed headlights due to the feeling that time has passed and it's not cool anymore. But to pay back what I took, I've designed a hood what follows the geometrical concept of the boot. If you listen closer, when the hood opens, the headlights are sliding backward. Rest of the body I think speaks for itself. Interior: Not much to say about it, seats, dash , keeping the colour scheme. Gearbox: Now that is a tricky one. That was the first problem I've been facing with as due to the size of the model I needed a narrow 4 speed gearbox with central differential, but I could not find a decent one anywhere. Crowkillers Paul had the 6 speeder, but it was too wide for my car and Sariel's 4 speeder has been designed for two wheel drive. So I've spent the next month and a half to develop a new one from scratch. Of course if there is a central diff it should be lockable, so it is. And it makes a very compact structure with the gearbox itself what comes handy in modular building. Edit: that was years back. From here it seems rediculously long time, but I let you decide. Here is a deidcated video about this gearbox: Steering: Unlike in the original, there is no ackermann geometry in my model, but please blame lego as it is the field where the part developement goes backward. Anyway the front steering is pretty simple, but for the rear I had to use a rod mechanism, since the compact gearbox left no room for an axle to go trough without compromising the aesthetics. It comes however with certain benefits, as with minor modification on the linking can change the steering lock of the rear wheels. I've applied the smalest as I've found it more realistic. The real life 4 wheel steered cars have only 3-5 degrees on the rear. Ground clearence adjustment: No witchcraft, a worm gear and an 8 tooth gear paired up on each wheel to lift and lower the shockers trough an axle. That's it. Friend of my accidentally discovered (by opening the boot) that this coupe can be converted easily to a hatchback... To be honest I did not consider this as a requirement when I was designing the model. I've made a couple of colour variations too as it appeared above. There is more hi-res pics on my brickshelf: http://www.brickshel...ry.cgi?f=562855 Building Insructions: https://bricksafe.com/files/Attika77/8880-evo-tribute-model/Attika_s_8880_EV_Tribute_by_1963maniac.pdf Feel free to share your opinion or ask about it Thank you for your attention. Attika
 -
[MOC] The Ultimate Pickup
Attika posted a topic in LEGO Technic, Mindstorms, Model Team and Scale Modeling
Hi there, I've developed a very annoying habit in the last few years. I randomly build pickups and other 4x4's. Even bought a real one. Anyway, the latest one is quite a biggy (sizewise) thanks to the planetary hubs. I've found a trick build them into solid axles with a practical ground clearance. This trick is going to be conroversial here. But start up with the video instead: All pics to be found here: https://bricksafe.com/pages/Attika77/ultimate-pickup In the comments under the video, noble members of our community noted, that there are parts which could solve the 1/4 stud misery. (if you don't know what is that, off you go, and whatch the video to the end! ) One of these is the 14t gear from the old diffs: I've made the attempt, but due to that collar on the bottom (top on the pic) it is too wide and puts srain on the drivline, making it hard to turn it by hand, so it is off the table unfortunatelly. So I speak for myself when I say, cuting those axles worth it. Not a rare piece, and costs 1 cent on bricklink, but only because there is no smaller value in the currency itself. In return the design prooved itself very reliable. Another "weakness" of the axle is the inperfect geometry. The wheelhubs aren't completelly vertical. There is about 1 degree tilting inside on the top. /---\ Before overdramatising this atribute, think, if you've noticed it in the video? Apart from the axles, the rest of the truck is the product of those years I've mentioned above. The essence of it is a simplest possible drivetrain: And a steering solution refined for non-rack steering: (The render is made of an older version, hence the different connector) If you don't belive your eyes, yes I choose to use 4x2 beams to form steering arms. It looks savage, but it is doing the job very well, brings ackerman geometry in the game. It does not hold the wheels rock solid of course, but in practicality it isn't noticable on the field. I've got a rack steering solution as well, but that brings the servo down A, onto the front axle (I don't do that. Ever ) B, into the mid chassis, where I don't have room for that. So we keep that for another build. Also has a working steering wheel using the rear output from the servo. ame old bevel system I've been using in most of my builds. Check the 1st episode of the pickup saga for more on that. Suspension Solid axles on a 3 link setup. It is kinda made up design, slightly inspired by the rear suspension of my Isuzu Trooper. Changing the shocks, or their hinge point on the top, gives 3 different ride height and suspension stiffness. The black, soft springs give a softer, relaxed, lower stance to it, while the dark grey shocks (known from the set 8880) are lifting the truck to a practical maximum, but still can reach full articulation. Not in all situations good to have your truck up in the sky. Like the climbing in the video. With low shock setting it made 52 degrees, but 47 "only" on big wheels and lifted shocks. The center of gravity moves with your ground clearance. That's about it, the rest is smoke-screen, like the body, and fancy doors. Oh, here is a fun fact: When it came to the seats, I realised I have 2 adjustable seats salvaged from a lorry build from about 5 years ago. Luckily they fit perfect so just made a rear bench in the same style. A non adjustable lazy style. Please feel free to ask about it, or just say something about cutting axles. I hope you find something useful here to take home with you. -
Hello, let's start the race! It is my own hypercar concept with a minifigure. I reused some details of my earlier idea called "Hypercar concept 1", but I wanted to build this car even more dynamic. It is a studless model built from standard LEGO elements. The overall size is similar to the Speed Champions sets, but the wheels are from City sets as I wanted to keep the height to length ratio closer to the real sports cars. If you like this car, please share and support it on Lego Ideas: https://ideas.lego.com/projects/146d40fc-49de-4af5-8173-4c73892a003e Many thanks! Street racer 01 by László Torma, on Flickr Street racer 04 by László Torma, on Flickr
-
Hello Speed Champions fans, Trabant 601 is a legendary car of Eastern and Central Europe. This is its studless model in Speed Champions scale. If you like it, please keep alive this project and support on Lego Ideas to become a real set (only 3 supporters are missing in the next hours to reach the first milestone): https://ideas.lego.com/projects/77b0428c-c46c-47b0-984c-1fd7c97a2948 I wanted to create a relatively accurate model, and some details were challenging in this small size. Firstly I needed smaller wheels than my other builds in this scale, the size of the actual ones are equal to the Mini Cooper (Lego 75894) ones. It was clear too that the City mudgards will not fit to this size, therefore I created a brickbuilt one. The connection of the wheels are tricky a bit which helps to keep the room between the wheels and the mudguard proportional. I wanted to create an accurate front, and I added simple white stickers to the direction indicator lamps to keep the orange parts visible on the front only. The most common colors of this car are the light blue and white (broken white). I decided to use white pieces as the roof element of Mini Cooper (part 6018101) is ideal as hood and roof, and I have this item only in this color. The rear of the car is a bit tricky too as I wanted tilted lights similarly to the real ones. The back lights could be red transparent elements, but I was not able to buy them in that color. I had to buy some elements of "brick, modified, 6191" to the sides too, and it was available only with "Nitro" stickers, but my son said that these stickers are cool, so I kept them. I wanted to use as less stickers as possible as I don't really like them, because they restrain the applicability the stickered elements in different builds. There is picture without the "Nitro" sticker and an other one without any stickers. The set includes a minifigure with a baseball hat and with an additinal red helmet. Trabant 601 by László Torma, on Flickr 02 Trabant 601 by László Torma, on Flickr 03 Trabant 601 by László Torma, on Flickr 04 Trabant 601 by László Torma, on Flickr 05 Trabant 601 by László Torma, on Flickr 06 Trabant 601 without Nitro sticker by László Torma, on Flickr 07 Trabant 601 without any stickers by László Torma, on Flickr My other Speed Champions scale model in "LEGO Town" forum is the Audi R8:
