Search the Community
Showing results for tags 'lego'.
Found 2800 results
-
This is my first entry for the Colossal Castle Contest under the Medieval Dungeon category.
-
Introduction: Have you ever dreamed of that moment when your ultimate wish finally comes true as you step out of the shuttle and, reaching down to touch the rocky surface of your destination, finally and irrevocably demolish your childhood impressions of the moon as a blob of Swiss cheese? Yeah, me neither. If you happened to be able to fit inside a LEGO brick, you could come pretty close in this 7467 International Space Station set. But although I’m short, I’m not quite that short. So I’ll stay on the outside, and see if I can bring you a different perspective on the appealing mess of solar panels, extending arms, and moving clips that this set is. Your first look at it comes courtesy of Brickset. Second, a boxed shot from BrickLink. Next I’ll present you with my picture of this seven-paneled, heavily stickered set. Looks pretty technologically advanced. I’d like to see what size those panels would be to scale! Product Details: Name: International Space Station Number: #7467 Theme: Discovery Year: 2003 Pieces: 162 Minifigures: 0 Price: USD $15.00 Source: Brickset Interested in building it yourself? You can download the instructions here! Instructions: Since this is such an old set, and one that was given to me used, I don’t have the box. But I do have the instructions, so never fear, you’re not getting out of all the paperwork! Here’s a random page. The booklet has a nice solar system atmosphere. And the back inside pages. Is anyone else wondering why the minifigure size shuttle gets the same size solar panels as this set? Let’s take a look at the back. It’s rather curiously square, but all in all, the instruction booklet is pretty nice. I mentioned the stickers earlier, and I’ll take the opportunity to state the obvious and say that they are already applied. Only two are missing, to the best of my knowledge (the two sides of the shuttle’s tail fin); I’ll point that out more specifically when we get there. I counted twenty-eight total (sure glad I didn’t have to apply all those myself!). Of those, three at least are STAMPS (STickers Across Multiple PieceS) and two others might be STAMPS if they hadn’t gotten ever so slightly crumpled somewhere along the line. But! There is one piece of printed goodness! Spot me if you can! Build: Below is a shot of the complete parts selection available in this set. I didn’t dare to take the pieces with STAMPS apart but the rest is dismantled. And yes, that’s twenty-four clips (sixteen white 1x1s and four double sided old grey arms). With all the random solar panels and what not sticking out all over, I figured a “barebones” view might help. Next up – remember those twenty-four clips? This thing is insanely poseable. What does I.S.S. stand for, you ask? Well, it might stand for International Space Station, but Insane Series of Solar panels is another good guess. Now a view from the back: Note the chrome plated piece on the end of the metal detector! Now let’s take a good look at the shuttle! For such a small build, it’s really nice. Note the missing tail fin stickers, and the printed nosepiece! Also notice the placing of cones inside a brick with two technic pin holes. If I recall correctly, that would be an “illegal” technique by today’s standards. The technic pin holes are ever so slightly smaller than the size of a stud, I believe. Snap it on the Insane Series of Solar panels and you’re ready to go! Of course, extreme poseability brings problems of its own with it. “Houston, we have a problem!” Important! Smoke and excess flame NOT included in the International Space Station. As for the building experience itself, if you like clipping things together, and if you like mind boggling almost-not-quite mirror image building, you’ll love this. For the rest of us, it’s not bad, as long as you aren’t too concerned about following the instructions in every jot and tittle. Conclusion: So here we are, wrapping up our look at the International Space Station. It’s got a few things going against it; the excessive amount of stickers, the fact that it can easily be inconveniently posed, and (in my opinion) the “old” greys. On the other hand, it is impressively tall, surprisingly sturdy, and includes a very neat little shuttle. So let’s systematize this and see what we’ve got! Playability: 6/10 – Like I said, this thing is pretty well over the top in terms of poseability. But on the other hand, there isn’t really a whole lot to do other than swoosh the little shuttle around. To be sure, swooshing shuttles is sometimes satisfying, but other times you just want to have an all-out battle. So it ranks just above average for me! Design: 8/10 – It is pretty cool, that I’ve got to admit. Also, given the projections sticking out all over the place, the final build is remarkably sturdy and the attachment point for the shuttle is at the perfect spot. Swooshablility: 9/10 – Obviously, you’re not going to be swooshing the station itself around – at least, I hope not! – but when it comes to the shuttle, that thing really can be fun! Price: 9/10 – Let’s just say that if you find this for $15 dollars, it’s a bargain! Right now it is priced at just over $85 dollars new on BrickLink. It has quite a few nifty white pieces, lots of clips which I’m always using and losing, and stands at a satisfying size. Personally, I’m not a fan of the old greys so that counts against it, but otherwise it’s a nice, well priced set… that is, it was. Overall: 8/10 – Well above the average score, this set is aesthetically appealing without completely losing all play value. While I can’t see the seven year olds flocking around it, it seems to be pretty eye catching for slightly older children. And space has always been an intriguing theme! So… we have lift off! Now let’s go and disprove this Swiss cheese thing once and for all! Important! Smoke and excess flame NOT included in the International Space Station.
-

[TUTORIAL] 6 wheel power functions wheel set on 7725 (cutters option)
Dread Pirate Rob posted a topic in LEGO Train Tech
Government Warning: Lego Bricks were harmed in the making of this tutorial. Good evening! I recently converted my 7725 to Power Functions because I don't have a 7740 to convert to power functions. It just didn't look right on four wheels and I could not fit a technic mechanism and M motor in there... So I present the cutters guide to 6 wheel bogies. (If someone has already done this please let me know so that I can give them credit, I didn't turn up any results like this when doing a Google) 6 wheel Lego power functions motor on 7725 by Canvas Rails, on Flickr 6 wheel Lego power functions motor on 7725 by Canvas Rails, on Flickr 6 wheel Lego power functions motor on 7725 by Canvas Rails, on Flickr 6 wheel Lego power functions motor on 7725 by Canvas Rails, on Flickr 6 wheel Lego power functions motor on 7725 by Canvas Rails, on Flickr 6 wheel Lego power functions motor on 7725 by Canvas Rails, on Flickr 6 wheel Lego power functions motor on 7725 by Canvas Rails, on Flickr 6 wheel Lego power functions motor on 7725 by Canvas Rails, on Flickr Power functions 7725. by Canvas Rails, on Flickr Purists, please note, the lance was already broken by a careless child so I am recycling, not abusing a perfectly good piece (The 1.5 pin was just an innocent bystander. Sorry). The trick is to get the cut as close to the short end of the 1.5 pin as you can without compromising the structural integrity of the short end. You will know what I mean if you get it in the wrong spot. The effect is similar to the burning tyre rolling past Indiana Jones. Does anyone have a solution that does not involve a knife? -
If or When Lego Dimensions ends I'd like the final set to be Lord Vortech. Lord Vortech would come in a pack like the Portal Pack and have 2 mini builds. Lord Vortech and the builds would be capable of using every ability in the game except for Doctor Regenerate Lord Vortech comes with his staff and he can perform the following abilities Boomerang Grapple Illumination Magic Magic Shield Levitate Objects Acrobatics Master Builder Relic Detector Flying Laser Big Transform Dive Target Tracking Super Strength (Aka Cracked) Mind Control Fix-It Hacking Spinjitsu (Only on Spinjitsu switches) X-Ray Vision Mini Access Pole Vault Chi Technology Stealth Drone (Summons X-PO) Invulnerability Vine Cut Rainbow Atlantis Deflection Access Tardis Interior (Interior is 10th doctor version) The first mini Build a vehicle build that can be made into a terrain vehicle, a water vehicle and a aerial vehicle. Build one is the driving one and can perform the following abilities Shoot Tow Bar Accelerator Switch Time Travel (BTTF version) Silver Lego Blowup Hazard Protection Dig Drill Speed Build 2 is the sailing one and can perform the following abilities Float on water Shoot Dive Growth Hazard Cleaner Hazard Protection Ice Breath Build 3 is the flying one and can perform the following abilities Shoot Shoot fire Flight Stealth Flight Docks/Cargo The second model is a giant Cosmic Brick Build one can perform the following abilities Weight Switch Tardis Gyrosphere Switch Stealth Build two can perform the following abilities Arcade Stations Laser deflection Electricity Taunt enemies Build three can perform the following abilities Portal Gun Sonar Smash Suspend Ghosts Trap Ghosts This will change as more Lego Dimensions packs and updates are released. Please let me know if I've missed any abilities or if any abilities are redundant.
-
New Adwenture Lego Museum Robbery.. Have a good time..
-
Russian aircraft carrier "Admiral Kuznetsov" with escort ships. Scale 1: 350, LDD. For aircraft carrier group, I used the newly built model aircraft carrier "Admiral Kuznetsov" and the latest version of my ships project 956, 1135m, 1155 and 11551 built on the scale of 1: 350. More pictures you can see on my page Model aircraft carriers built using a set of documents from the Sluban M38-B0388. Since Sluban uses a large number of original parts, practically the whole ship had to be rebuilt. At the same time, I made a number of improvements to the weapons and design.
-
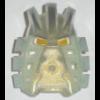
Hello and welcome to my first Review on Eurobricks! I got this Bootleg Version of Breez from my Mom who was in Thailand 2 weeks prior. Since there are hardly any Reviews about Bootleg Figures, I thought it was a good idea to make a Review out of this obscure find. Since I don't have anything like a light box, I "crafted" one myself with a chair and 2 sheets of paper,so I apologize for this low-bugdet decision, I hope you can still see everything clear and sharp. So is this a good copy or does it belong in the trash? Let's get started! Box: Front: Bootleg 2 by Dosenbrot!, auf Flickr The Front of the box, the figure came already assembled. There's also the instruction manual printed on the backside of the cardboard. Back: Bootleg 1 by Dosenbrot!, auf Flickr Here we have the Earth Tutelary, War for the invader from Space. Gotta love the broken English these Knock-offs have. Interesting Parts: Special Parts: Bootleg 3 by Dosenbrot!, auf Flickr Here are the most interesting parts of the set. The Torso bone has an axle connection right under the upper ball joint, which would be really useful for MOCs. You cant really see it here so I made a second picture of it. The Silver Leg shell just states "Hero" on it. The Torso shell has a very cool texture on it which gives it some extra detail. Instead of the 2.0 Head, there are using a red Glatorian Head, also the Headgear has an Axle Connector. Torso-Bone: Bootleg 4 by Dosenbrot!, auf Flickr The Torso bone again, now you can clearly see the axle connection port. In my opinion the most useful part of this whole figure. Color-Comparison: Bootleg 5 by Dosenbrot!, auf Flickr On the left side we have the Bootleg parts. The Colors are pretty spot on, but you can clearly see the difference between them, especially on the silver headgear. But the brick quality isn't that bad actually, its quite good for a Bootleg. The Figure: Front: Bootleg 6 by Dosenbrot!, auf Flickr Breez from the front. Yes, she has blue spikes instead of red ones. I dont know how you can mess this up but they did. Edit: Thanks to Kalhiki I just saw that she also has the 1.0 Core instead of the 2.0 one! Back: Bootleg 7 by Dosenbrot!, auf Flickr The Back. Nothing special to see here. Posing: Pose 1: Bootleg 8 by Dosenbrot!, auf Flickr While it has a more cheaper plastic than the official LEGO, it kinda has a good quality. Bricks have enough friction for more comlicated Poses and they dont fell like they will break off that easy. Pose 2: Bootleg 9 by Dosenbrot!, auf Flickr This also works, thanks to the hand having enough friction to hold the whole figure. Final Verdict: Bootleg 10 by Dosenbrot!, auf Flickr A final picture. Verdict: You know, for a "cheap knock-off" the quality off the bricks is pretty good, especially since you need it for Action Figures so they don't break too fast. It also has some nice Parts, especially the Torso. But would I combine this one with my real LEGO? Probably not. So all in all, a pretty solid set. I hope you enjoyed my Review, leave me a comment down below and thanks for Reading! Cheers!
-
Introducing my most popular MOC to date! Chibimus Prime! Featuring - 32 points of articulation - Facial Expressions!!! - Transforms!!! This MOC took me around a week from conceptualisation to completion. The reason to go Chibi (cute in Japanese) style for Prime was to capture the essence and look of Optimus Prime and keeping the transformation simple. As such much emphasis is placed on the retaining as much key aesthetics on Prime with a bit of artistic liberties and personal input. Please visit my Flickr album for Chibimus Prime for more pictures and detailed description! Thank you! https://flic.kr/s/aHskeWNToB (PS: Somehow I can't add more than one picture on the thread, not sure why)
-

Hello! I am new to Eurobricks but not LEGO!
AAG Spitta - LEGO Channel posted a topic in Hello! My name is...
Hello Eurobrick community! I am new here, but I have been collecting LEGO since I was around 6. I love it! I have had a LEGO YouTube Channel now for around 1 yr and 4 months and have racked up 1.6K Subscribers ( Link here: www.youtube.com/aagspitta ) I am excited to get to know more of you guys! -AAG Spitta -

Undeletable bricks in Lego Worlds
SNIPE posted a topic in Digital LEGO: Tools, Techniques, and Projects
Hi, I have been removing lots of land in Lego worlds (including water and clouds) and have came into a problem where some black bricks simply will not delete. I have tried the following methods: Remove Terrain tool - left click Remove Terrain Tool - right and left click (this keeps the red delete cube from moving about) Smooth terrain- this just adds more undeletable black bricks Lower terrain - this just adds even more undeletable bricks The brick building tool cannot delete them because it can only delete bricks that you have placed from the brick pallette here is a screen shot of the problem: Large Picture:http://bricksafe.com...undeletable.png Any ideas how I can delete it, it looks ugly sticking up when everything else is prefectly smooth. The floating floor area is also undeletable. Edit: I could share the world file so you can actually go into it and try and delete the bricks. Regards, Snipe -

[MOC] Batmobile - Batman's vehicle from 1989 + mini-diorama Gotham
Kalais posted a topic in LEGO Licensed
Batmobile I built appeared in two films by Tim Burton - Batman (1989) and Batman Returns (1992). Batman (1989) along with The Dark Knight (2008) is one of my favorite movies with the guy in black suit. Read more Bigger photos and full story here: LEGO Gallery - Batmobile - Batman's vehicle from 1989 Follow my new MOCs and articles at: Facebook | Flickr | Google+ --- Notice: This is a shortened version of the post from LEGO Blog - Bricks' Treasure. -
Does anyone know of a rather good way to make wheel arches, specifically like on the back of a Ford F250, to go around a 6 stud diameter wheel? I have experimented with these, but either way I line them up the two-stud protruding bit ruins the curve. I plan on having the entire assembly stick out from the body by half a stud, using jumper plates. Thanks in advance!
-
Please subscribe my youtube channel.. thanks everyone.. https://www.youtube....GXlpSqKrWuf-TKA
-
Name : Strike Gundam Code name : GAT-X105 Series : Mobile Suit Gundam Seed / Seed Destiny Material : LEGO Compare with the mini figure. LEGO Strike Gundam by demon demon demon, trên Flickr The face is hand-made, it's like the mask in Bionicle series. Here is some posing style : My two next MOC : Freedom Gundam : http://www.eurobricks.com/forum/index.php?showtopic=139168&hl= Astray Gundam : http://www.eurobricks.com/forum/index.php?showtopic=117605&hl= Thanks for visiting !
-
My first LEGO set was 7993: Service Station from the LEGO City theme. http://brickset.com/...Service-Station It is quite nostalgic for me, as I got for Christmas in 2007. I don't like LEGO City that much any more, unfortunately. What was your first LEGO set?.
-

Lego Technic Animation 3D - Escavator 8043
3DTutorials posted a topic in LEGO Technic, Mindstorms, Model Team and Scale Modeling
hello guys this my model lego Escavator in 3D with Softimage : Please escuse me for my English, I am French:) I have make the 3d téléchargant textbooks(manual workers) on the site of légo and here is the result Do not hesitate has to tell me that you think of it :) Other one of my video: -
The Head - No, it is not the understated as just another AT-AT, because it won’t be, but for the matter of this topic, it is, momentarily, just a head. Though merely a head, it makes a rather astonishing display piece by itself. Aside from the towering height and lumbering movement of this terrifying machine, the head is quite formidable in appearance, resembling that of a fearsome beast. - In the course to build my original creation of the greatly revered imperial walker of the grand army of the empire, I amass a wealth of reference material concerning studio models, replicas, on-screen images, artwork, etc., to meticulously build the perfect LEGO incarnation that is indubitably authentic to the movies. I have been building this minifigure-scale AT-AT for quite some time—I recall since 2012 with the start of the body section. However, as of recently, since early 2015, I have built the head for this admirable tool of destruction. - Furthermore recently, I have been constructing the infrastructure of the body, acquiring additional parts & correct colors, making considerable amount of alterations, but I have postponed most of this to venture off and design my original minifigure-scale T-47 Airspeeder (Snowspeeder) in LDD, which turned out into a successful MOC and will be a great companion. I planned after that to resume progress with the AT-AT, but after I was inspired by anothergol’s innovative use of paint rollers and mudguards for the waist of his articulated AT-ST, I was just motivated to jump ahead and create my own creation of the imposing “chicken walker” beforehand. Mine, which will implement those techniques of his that I mentioned early, but also the 5 x 5 Scala dish. Interestingly, my own creation first turned out MF-scale, then evolved into UCS scale, then separated into two projects: a MF-scale and UCS scale! A considerable amount of progress has been completed on both projects, with the MF-scale almost finished and the UCS scale having feet and the waist finished. However, for concern of the UCS model, I have postponed its progress to focus on the MF-scele—to complete that and finally resume progress with the MF-scale AT-AT walker. - Regarding this MOC of the AT-AT head, you should notice that I deliberately took some liberty in the greebling located at the bottom. This was a compromise due to the thickness of some elements and from the lack of elements that could properly represent those tiny details, in this scale, authentically. I was as well tight on space for building the main cannons. I originally wanted to attribute a sliding action to them, as if they were in action, but this was unfortunately omitted due to a number of things, which includes: space, structure, scale, parts, etc., which also brought them closer together than intended. Along with other things, like the lack of other small details on the face and others things, that is practically as far as inaccuracies go for it. Nevertheless, one extra detail I have included, which I have not seen previously before represented, are the light fixtures atop the medium support blasters mounted on the cheeks. Then among other characteristics, I can grasp the head by the neck and jerk it around without any parts coming undone, with exception to the roof because it is not fixed together (kinda like other @@ heads I know of ). That rigid likability is attributed to the infrastructure constructed exclusively with Technic & modified plates (w) Technic elements, which also clutches the sides securely in place and almost seamlessly with other aspects. For this fact of such a packed, robust, complex infrastructure, there is no interior, likewise for the whole body—I never had intentions to include such luxuries anyway, but I congratulate those who did. - To determine the dimensions of a MF-scale AT-AT walker, I first acquired theorized dimensions of the actual walker from an in depth survey of its structural components, capabilities, practical role, and tactical uses: here. Wookieepedia is informative in some areas, but it claims the walker is taller than it is longer, which it is clearly not. Besides the overall dimension of the walker’s height and length, this technical commentary also provides a reasonable measurement of its width, diameter of the footpads, and other aspects like the height of boarding hatch. I also found this useful: here. To find the MF-scale, it took some little conversion of average human being height, minifigure height, dividing, multiplying, then more multiplying, but it came out to be around 20in/50cm. Some time on, I took the actual height of my model from toe to the main section of the body and acquired the measurements around 21in/53.34cm, then rework some steps back to get the plausible measurements of 85ft/26m. For the footpads, each are 12 studs in diameter and its height a few measures above a minifigure's chin. So the model is rather on scale for minifigures’ height, as well other aspects in general scaling, as according to the probable height of an actual AT-AT walker. - If there is any misconception about the visor of the command viewport being transparent red, I have some valid reasons to put those to rest. At first, if you notice the moment when five imperial walkers are advancing towards echo base, only the lead walker exhibits a red visor. During the scene, where General Maximilian Veers oversees the battlefield through the viewport the visor is transparent clear. Logically, if the visor was transparent red it could not beam as so bright as it did in a cloudy, snow filled day—not even in a sunny day. Though it appears black this is due to the overcasting shadow from the outside portion of the viewport. Therefore, the red lighting is believably a system for operations in low light periods or environments, to preserve the crews vision in these circumstances, while still being able to function about in the walker. - Well, if you are still reading, I am done for expressing this MOC, for I believe I have covered everything concerning the model and relating to it that was on my mind to say. So, you can finally enjoy the photos and express your own thoughts, criticisms, questions, etc. below. However, bear in mind that I will not be giving out any form of direction that will describe or depict how it is built—I appreciate that this is understood in advance of your comments. Much appreciated, LiLmeFromDaFuture
-
 At our Youtube channel, you'll find a video of our fully automated train layout. It will be displayed on Lego World Utrecht 2015 from October 25 (Sunday) until October 27 (Tuesday). The video shows the layout in our test room. The train layout contains eight EV3 bricks and one NXT brick to control all the Lego objects. The layout is controlled by a PC application (Microsoft.NET) that has been written by our team. Enjoy the video and maybe we'll meet in Utrecht. /Hans
 -

What you think ? LEGO Life Aquatic "let me tell you about my boat
T-Brick27 posted a topic in Brick Flicks & Comics
Hey All, I've been working hard on my first big LEGO project, where do you all think I should show it off ? Here's the vid : https://www.youtube.com/channel/UCJ06Ns_hEe6JQaobQUnmDMw?view_as=public Flickr: https://www.flickr.com/gp/133518136@N08/XeN223 Thanks!! -

Royal Brick Customs Shop October 2015 - New Printed Cape Designs
RoyalBrickCustoms posted a topic in Buy, Sell, Trade and Finds
Hi everyone, I am pleased to announce the [re]release of 6 (new) cape designs. Be sure to check out the full line of custom LEGO-compatible fabric products that Royal Brick Customs Shop has to offer, here: www.bricklink.com/store.asp?p=RBCCapes -
Mihai Marius Mihu and I would like to share our collaboration, the Rivers of Hell from Greek mythology. Please visit the group on flickr for the concept art developed during the project as well as studies of some of the builds: https://flic.kr/g/qZVdL For now, just enjoy the pictures. Acheron by Mihai Marius Mihu, on Flickr The Acheron, river of woe, is the first river reached by the dead on their final journey. Countless souls are whisked across the black depths by Charon, ferryman of Hades. Each soul pays but one coin to cross yet Charon’s wealth must equal that of Midas himself. Styx by The Deathly Halliwell, on Flickr The Styx, river of hate, tumbles from cliffs and past a thorny shore. This river, central to the oaths of the Gods, offers no comfort to the souls of the dead. On its shore stalk the Erinyes, visiting justice upon criminal souls. Cocytus by Mihai Marius Mihu, on Flickr The Cocytus, river of wailing, pools its stinking depths around those who deserve unending torture. This foul swamp offers little reprieve to Sisyphus as he again approaches the summit, thinking that this time may be his last. Here also Ixion turns on his wheel, mud and flies coating his flesh for eternity. Lethe by The Deathly Halliwell, on Flickr The Lethe, river of forgetfulness, winds through the cave of Hypnos and across the plains of Hell. It is here that spirits come, drinking deep of its waters and forgetting their mortal lives. Atop his cave, Hypnos dreams. Phlegethon by The Deathly Halliwell, on Flickr The Phlegethon, river of fire, churns through the bowels of Hell, boiling the souls of the damned. As it coils down to the deepest depths of Hell it approaches that prison of the titans, dreadful Tartarus. The great guardian beast Cerberus patrols this river as well as it travels the borders of the underworld. Thanks for viewing!
-
Hello, I have uploaded my Lego Ideas Doctor Who Review (21304). In German, right now. May be, I will upload a nother one in English, as well But I try to show you many details of this fantastic set with great colours and building technics. And many images, you can find right here. I have to tell you: This set is so much fun, but I don't know the BBC series. But now, I have to check it out soon. If you have any questions, please feel free to ask me at any time. Have a nice weekend Andres
-
Hello, it is good to see, that Lego Designers are building MOCs, too. I have met John Ho a few weeks ago at the Skærbæk Fan Weekend in Denmark. For example, John is the creator of the Darth Vader Buildable Action Figure (75111). And during the design process of that figure, he has created a great MOC - a kind of "Brick"-home, a statue. If you like, you can check out the images right here. The next step should be a true to scale Death Star for the Darth Vader Action Figure: That would be awesome. Have a nice weekend Andres
-
Hi everyone! Here's one of the next of two figures we hope to release this year, Galactic Hero. Here's the info: Galactic Hero Pad printed double sided head, front and back torso, front legs Parts (as seen in the pictures): Dark Tan hair (custom dyed LEGO part - 92746 - by customBRICKS); lt. flesh head and hands; tan torso, arms, and legs. Includes 1 BrickArms DL-44, light transparent blue light sword and silver lightsword hilt. Only 25 were printed of him (with just a couple left), as I was printing him for a side project I am working on. What do you guys think of him?
-
My first street modular. This is a 16 wide structure built in the modular style. It has 3 floors. The front exterior is finished but it has no interior and the back is incomplete. It's still a WIP. Please go here to find other views. Thanks for looking!

.thumb.png.9e4550e6d7606030f9d13d7d604b4ec6.png)