Search the Community
Showing results for tags 'Star Wars'.
Found 1299 results
-
Hello everyone! I would like to apologize if it is not allowed to show our lego’s collection… it is considered as spam may be? Sorry in this case. It includes MOCs (LDD0xx), MODs (xxxx+LDD0xx), Lepin figures ("-F" from "false")... from all the episode films (I-IX), with referenced names from Wookieepedia (https://starwars.fandom.com/wiki/Main_Page). This videos had already existed, but today they have been updated because of the Chistmas adquisitions. The LDD files are available if someone wants any of them, feel free to improve them. I hope you like it!
-

EPISODE 4 - Hyperdrive Malfunction!
MKJoshA posted a topic in Mysteries: A Star Wars Role-Playing Game
As each team race to control the asset in P10 they send a fleet of ships to secure their next forward base. But something happened to the hyperdrives! Now each team has a crew lost in space. They will need to use their wits and skills to get out of this mess. Dark Side Our ships are out there somewhere. Thank goodness the Imperial training manual has proper procedures for just such an occasion. As long as our troops keep a cool head and follow the guidelines all will be well. Mercenaries What!?! Did someone forget to refill the coolant on our hyperdrives? Once we get out of this mess someone is going to have hell to pay! Light Side Adrift in space you say? Well what else is new. After all we faced in rebellion against the Empire a little hyperdrive trouble shouldn't slow us down too much! Contest Specifics: Each team can build in any of the 3 categories. But they will need to work as a team to make sure their builds don't overlap. At least one build for each of the categories has to be entered before a second can be built in any of them. For example, the Light Side could build 1 entry for Cat A, 1 entry for Cat B, and 2 entries for Cat C. But they couldn't build 3 entries for Cat C and none for Cat A or Cat B. Another example, the Dark Side could build 1 entry for Cat A and 1 entry for Cat B and none for Cat C. The idea behind this rule is to foster teamwork and comradery. Cat A: Show what happened to the hyperdrive. Maybe your nav-computer had a malfunction and dropped you out of space too early. Maybe a Porg chewed through a critical wire. This scene should be set on a ship if applicable (think inside the Millennium Falcon) or in space if it's a small snub fighter. Cat B: You managed to land on a planet's surface. Show what the surface looks like and how you manage to set up a temporary base camp. Cat C: You are not alone! Pirates are in the area and have found you. Show either a scene in space or aboard your ship where you repel the pirates. Or show a scene on the planet's surface with a conflict between you and the pirates. Each team will pick a starting point from a square they already control. The Dark Side can pick from O17, L10, M10, or N10. The Light Side can pick from P6 or H16. The Mercs can pick from T10, S10 or K5. Each team should post here which square they want to pick as their starting point by Jan 15th. At the end of the challenge, using a random number generator, a route will be chosen and an end point 2 jumps from the starting square. Please consult the map for strategic reference. For example, if the Mercs choose K5 as their starting point it could be that the starting point would be Borosk and two jumps from there could be Qiilura in K7. Or if the Dark Side chose M10 as their starting point it could be that Kattada would be the starting point and two jumps from there could be Quellor in N12. You can depict any kind of planet. If it doesn't match your ending square we'll assume it's an uncharted one The Rules: All entries must be entered using this form: Link to Submission Form All rules in the Core Rules topic apply unless otherwise stated in this explanation or the rules above. There are no restrictions on the size/form/content of the builds other than the specifics described above. Each person can enter up-to 3 MOCs for this contest. It can be 1 in each Category or 3 in the same Category. Co-ordination between your fellow teammates is important to ensure the right amount of entries per category! All entries will earn XP for their team based on their score. Winners will earn additional XP. The Episode will run from Jan 5th to Mar 11th. As long as it is still Mar 11th somewhere in the world, you can still enter. Entries posted after the deadline will be disqualified from the episode and will only earn normal XP points. The criteria by which your MOCs will be scored is 1) Storytelling, 2) Aesthetics, and 3) Technical Ability. You can earn up to 10 points in each category for a max total of 30 points per entry. This episode/contest is open to all players of Mysteries, even if they joined EB or signed up for the game after the episode has begun. All entries must be new creations, not posted anywhere else prior to the start date of this episode. You can use creations for this contest in other forums or contests, but it should not have been displayed before the start date for this contest. All entries must be built from real LEGO or with Lego Digital Designer. 3rd party parts may be allowed if used to customize characters and in small quantities. I.E. guns or decals. 3rd party bricks are not allowed to be intentionally used (if you have a Megablock 2x2 brick in a wall of Lego bricks you won't be penalized). You may do a 'full-blown photo edit' with all the text, effects, background compositing, support erasing, and other effects on one picture. All your other pictures may have no editing other than color adjustment or background removal for a solid-color background. For obvious reasons, any photo editing that changes the shape, functionality, or color (not tint or adjustment, but actual color) of a LEGO piece is prohibited,. All entries are considered WIPs (Works In Progress) until the deadline passes. Until the deadline has passed, you are allowed to change and improve your MOC. The Prizes: At the end of the contest an end point will be chosen for each team. All MOCs entered for this contest will be assigned this square for XP. The team with the most points will gain an extra 25 XP to be placed where they choose. Second place will get 15 XP and 3rd place will get 10 XP. All extra XP should be placed within 2 weeks of the contest ending. -
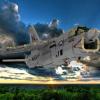
As beautiful as it is, not everyone has either the funds nor the display space for the UCS Star Destroyer. To that end, I offer a highly detailed yet modestly sized alternative that is a modification of an existing set, 75055. This is a model of Vader's Imperial-I class Star Destroyer Devastator as seen in Rogue One and A New Hope, but can also be reconfigured using easily swapable modular parts into an Imperial-II class Star Destroyer as seen in The Empire Strikes Back and Return of the Jedi. The original set has had the internal playset removed, a complete ventral hull added with main hangar, detailed engines, and two new command towers. The model has been slightly enlarged to 1/2700 scale and is 23.5" long. The command tower, main batteries, and dorsal axial cannons are modular to convert between versions. The Mk I also has removable waist mounted quad cannons and engine thrust vanes. Completing the model is a display stand and a microscale Tantive IV Corellian Corvette, that while slightly overscale still fits perfectly in the main hangar and can be attached there. I used photos of the original Devastator filming model from A New Hope and the larger Avenger filming model from The Empire Strikes Back as reference. More pics available at https://www.flickr.com/photos/rx79gez8gundam/. Star Destroyer - 75055 Mod by Justin Davies, on Flickr Star Destroyer - 75055 Mod by Justin Davies, on Flickr Star Destroyer - 75055 Mod by Justin Davies, on Flickr Star Destroyer - 75055 Mod by Justin Davies, on Flickr Star Destroyer - 75055 Mod by Justin Davies, on Flickr Star Destroyer - 75055 Mod by Justin Davies, on Flickr Star Destroyer - 75055 Mod by Justin Davies, on Flickr LEGO Star Destroyer - 75055 Mod by Justin Davies, on Flickr
-
A not-so-serious MOC made as entry for a BeLUG (Belgium Lego User Group) contest: here is my TIE-Separator: TIE-Separator by Veynom, on Flickr Yes, we had to use any brick separator as part of our MOC. I used 32 of the current orange version. This MOC ended up second out of 26 entries, behind an elegant green grasshopper.
-

[MOC] Darth Maul's Scimitar (aka the Sith Infiltrator) Minifig scale with full interior
Evilkirk posted a topic in LEGO Star Wars
I'm absolutely delighted to present Darth Maul's Scimitar, or Sith Infiltrator - 100% minifig scale with a fully detailed interior! Build features: Semi-circular opening rear doors with a retractable boarding ramp lead into the lower floor of the main hull, where you'll find a fold-down bunk, a laser-gated holding cell and various storage compartments. A 'repulsor-lift elevator' takes you to the upper floor which is the flight deck, with passenger seating and Darth Maul's control console. From the lower floor a corridor narrows down into a maintenance crawl-space and leads through to various engineering access chambers - and eventually takes you out into the cargo hold, where the Bloodfin speeder and Dark Eye probe droids are stored. An access ramp lowers from the cargo hold (under the very front of the ship) + 2 panels under the ship's hull open for retractable landing gear with a fold-out landing pad under the main hull. The roof of the rear section is removable + the flight deck can also be lifted out to allow access to the lower floor + the whole roof of the front section is hinged to open fully, revealing some of the cloaking shield, hyperdrive and other engine components. I've designed a 306-piece tilted stand to display the ship in 'wings open' flight mode - the front of the display stand is fitted with a black 8 x 16 tile, for those who like to have custom UCS plaques on their ships. The display stand + Bloodfin Speeder + Dark Eye probe droids are all FREE downloads on my Rebrickable page :) During 18 months of it's building and design, I've spent hours studying source material for this ship, especially the floorplans - and I've put a lot of effort into keeping it as close to the original as possible without the whole ship becoming overly large. Having the correct proportions with its incredibly unbalanced front and rear sections + those large folding solar panels on the sides was very challenging - and keeping it all sturdy without any sag was quite a task, but it's turned out to be a solid build - you can swoosh this ship around until your arm hurts (I have!) and it'll be fine :) Specifications: This build uses 4244 pieces (not including the display stand, speeder or droids), is 63.4cm (25") long and 48cm (18.9") wide at the wing panels. Height is 18cm (7.1") standing on its landing gear + 42cm (16.6") high at the tip of the highest wing panel whilst in flight mode on the display stand. Weight is approximately 3.3kg (7.28 lb). TL,DR... I totally geeked out and went nuts on the details and here are a million pics of the results: -
Hello. I made a post a while ago where I showcased quite a few changes I made to the Brickvault Tie Fighter model. Now I'm back to showcase the same thing with additional Tie Fighter variants from their store, alongside a few I made using other models as a base. I'm not talking about one or two, I'm talking about 24 distinct models. Some ships are heavily altered, while others are unchanged minus one or two tweaks. On top of that, I've probed the depths of Canon and Legends lore for additional color schemes I could apply to some of the models. I've amassed enough pictures to drown a forum post in, so I'm going to do just that. *Because I went into much more detail in my previous topic, I won't talk much about the parts of ships that share the basic Tie Fighter's cockpit or wing designs. I recommend you check it out before continuing, but you don't have to. Tie Interceptor This ship was the obvious first choice for improvement following the Tie Fighter due to the two models sharing the same design for the central pod and wing pylons. As for improvements unique to the Interceptor, I slightly modified the wingtip cannons and added their power conduits using hose pieces. I changed the construction of the wide armor detailing where the wing pylon meets the wing hub for better screen accuracy. I also moved the ribbed detailing where the power conduits meet the wing hubs and rebuilt the sensors between the two wings for the same reason. Finally, I got rid of the grilled bricks on the rear solar panels and made the backside of the wing completely flat. This design also has the most additional color variants with the first being a version belonging to Inferno Squadron. The construction is taken from the Inferno Squadron Tie Fighter I modified in my first post. While not shown in-lore, its existence can be inferred; why would one of the best group of Tie aces still be flying regular Ties in a time when the Interceptor exists? While this isn't a color variant, it's minor enough to be counted alongside them. It's a version using the 6x6 Tie hatch piece that Lego used before downscaling to the newer 4x4. Even though it is less accurate, I prefer to keep the smaller piece because it's much more available and affordable. This is a version belonging to the 181st Fighter Wing, adorned with a brick-built red stripe on each wing. Some of the support for the stripes bleeds through to the other side of the wing, but I tried to keep it unobtrusive. This is a version modeled after Vult Skerris's ship from Star Wars: Rebels, with its sparse red highlights and hemispherical gray cockpit stripe. This is a primarily red version based off the Emperor's Guard paint job from Star Wars: Squadrons. Its construction is nearly identical to the base model, illustrating just how much difference some color blocking can make. Royal Guard Tie Interceptor Despite being listed as a unique model on Brickvault's website, the Royal Guard Interceptor is the same as the regular Tie Interceptor save for the four extra winglets. The biggest change I made is the addition of the mounting brackets for said winglets, something present in the ship's original appearance. Tie Bomber The main feature I wanted to change with this model is the construction of the missile-hole on the front of the ordinance pod. The original is sort of a vaguely defined square and is too large, mostly because of the unique construction of the face. I was able to modify the design to make a 2x2 hexagonal hole using slopes, but I had to use clear tiles to support the shutter arms. Other things I've modified for increased accuracy include remaking the front detailing between the pods, shrinking the thrusters, filling a gap in the bracers that run the length of the pods, and making the front and back of the wings one continuous surface. Here is another variant inspired by the Emperor's Guard paint job. Tie Advanced Another model that's mostly unchanged is the Tie Advanced. I adapted this design to utilize the newer 4x4 hatch piece for consistency with the rest of Brickvault's Tie lineup. I think it does the job well enough, but I don't think it could be any better without completely changing how the central pod is built. I also gave this Tie the updated “bowtie” details on the central pod and the blasters from the regular Tie Fighter. Finally, I beefed up the rear wing pylon construction and flipped the brackets covering some gaps on the rear of the ship to hide their studs. Tie Brute This is the first design I tweaked not made by @Jerac. Despite having its own style of wing construction, I replaced them with my modified version from the regular Tie Fighter because I think they look more accurate. I recessed the wing pylon details by one plate on the front and back of the model and created a gentler armor slope from the central pod using jumper plates and ingots for better screen accuracy. Next, I rounded out the central pod by making the top and bottom out of 6x6 hinged dome pieces. This means I got rid of the newer Tie hatch and replaced it with the old. The ratio of the larger hatch to the central pod is about the same as the smaller hatch to the normal Tie Fighter. I also gave the central pod upscaled “bowtie” detailing and remade the engines for screen accuracy. There's also the variant that uses 4x4 quarter dome pieces for the central pod. Tie Defender The Tie Defender's central pod now has the same updated features as the Tie Advanced. Additionally, the rest of the pod is rounder and free of inaccurate surface greebling. The triangular armor on the wing pylons is more substantial and the rest of the armor has been slimmed down. The biggest changes are the wings. The original ones are based off of older appearances, where the wings are smaller and shorter compared to the pod. I wanted to modify the ones that came with the model, but they're constrained by their use of ball joints for support. I didn't know how to make new ones until I saw a post by @Sylyphics showcasing his own Tie Defender MOC. I bought the instructions and started tweaking those wings too. The new wings have been majorly reworked for added length and build simplicity, while the wing hubs are unchanged. The result is more of an experiment representing my ideal Tie Defender model, uniting components from two great designs. This variant is based off the Elite Tie Defender from Rebels. It adds 6 missiles in between the wings and uses brackets that conceal highlight connections to get the little areas of color at the rear of the wings. This is based off Vult Skerris' personal Tie Defender Elite, basically the same as the above variant, but in yellow. This is another variant based off the Emperor's Guard paint job. Since the wing pylon rings run through the wedge plate detailing, I replicated the latter using jumper plates. Tie Striker This model also received the standard central pod enhancements, though the rear details required some interesting connections to get everything to line up correctly. The wings now come to more of a point and the laser cannons have their long, long power conduits running all the way to the cockpit. The biggest changes are to the top hatches; the 6x6 dome pieces have been replaced with an ovular, brick-built roof piece. It is removable for access to the interior, held in by a few studs while resting on smooth tiles. While not explicitly shown, this Emperor's Guard inspired variant follows the same design rules as the other ships with this coloration. First Order Tie Fighter Thanks to the Tie Series' inherent design similarities, improvements made to one model can be applied to many others. Case in point, the First Order's Tie fleet. This model is envisioned as a “V2” update to the First Order Tie Fighter, similar to the one its Imperial counterpart received. The new model is mostly built off of my tweaked Tie Fighter, but there are a few unique details that make it more a simple color swap; firstly, there are holes near the wing pylon armor, as there are on all First Order Ties. The thruster orientation rotated 90 degrees and there is an antenna on the right side of the central pod. The “headlight” details near the cannons are depicted with small segments of hose. The printed hatch piece has been replaced with a regular 4x4 dish for consistency with the other models. Finally, the interior wing hubs and bracing struts have their bulkier, armored appearance from the movies. This is a custom color variant that can be applied to all First Order Ties. Based on the appearance of the Final Order fleet's livery (and initially an excuse to see new Ties in the classic color scheme), this color scheme asks “What if all the forces of the galaxy-conquering First Order Navy didn't stop existing as soon as Kylo Ren found some shiny, new toys?”. First Order Special Forces Tie Fighter Despite its unique construction, the Special Forces Tie still benefits from some of the standard Tie upgrades, such as rounder pylons, more accurate pylon armor, updated wings, and a more circular central pod. The larger cannons are made using slightly altered construction from the regular Tie. The thrusters are now their correct size and shape, at least as close as it can be for the latter. Finally, the power cell banks on the wing pylons are fuller, more circular, and feature all of the segments in-line with each other This is as variant of the design that replaces the printed 6x6 dish on the rear of the central pod with a brick-built assembly. While it costs 2 dollars in comparison to the dish's 1 and eschews the detail of the printed element, it features a correctly colored rear window and can be built in whatever color pattern the design requires. Here is the requisite Final Order color variant of the Tie/sf. Thanks to the color change, it now features the 4x4 printed Tie hatch for added detail. This variant can only use the brick built rear windshield due to the new coloration. Tie Baron The changes here are mostly minor tweaks made to bring this model in line with the other edited Ties. The central pod received the standard Tie upgrades, including chin cannons, “bowtie” detailing, thicker pod dimensions, and an interior matching the standard First Order Tie Fighter. The wingtip cannons have been remade to fit their correct size and the power conduits have been simplified. The missile launchers have been edited so that the ordinance inside is visible. The wings are free of inaccurate detailing, the front wing pylon armor has been slightly modified, and the internal support “spine” behind the central pod has been made more sturdy. The Standard Tie Baron created by the designer features all the same improvements, but in black. The Special Forces variant now has the turret, chin cannons, and antennae of the Special Forces Tie Fighter. The Final Order variant swaps the gray and black from the Standard version. Modified Tie Whisper The central pod has been replaced with one based off the pod from the Special Forces Tie Fighter in order to correctly depict the two-seater cockpit. It uses some a unique connection to the handlebar element to both represent the red windshield ring and to support the windshield “spikes”. The red protrusions on the central pod have been rebuilt to be 1 stud wide and feature custom vent detailing stickers that can be applied for a more accurate look. The rear solar panels are made using a specific type of wedge plate because it is the exact shape they're supposed to be, though this leaves them covered in studs. The wingtip cannons have been redesigned and the indentations along the rearmost part of the wings has been made smaller. Here is the Final Order version. Those are all the official models I've modified, but I've also used those models as a base to create designs for ships that don't have as high-quality representation as Lego MOCs. Tie Experimental M1 “Bizarro” The first of the new models, and the first of the unmanned Tie Experimental series, is the Tie Bizarro. It was designed as an inverse to the standard Tie Fighter, with 2 pods straddling a single, central wing. Just as the model makers rearranged and recombined parts from a standard Tie to create this design, I've done the same with the Lego model of the Tie Fighter. The pods had to be modified to create a smooth outer curve thanks to their new positioning showcasing what once flowed into a wing pylon. The wing pylon itself is now a singular construction that runs from pod to pod. It's made using the longest 2-wide plates Lego produces for stability's sake. The pylon armor had to be modified as well to fit on the pylon, though this just means it is a plate thicker on each side compared to the standard Tie. The internal of the pod housing the turbolaser has been completely stripped and replaced with a scaffold to support the dish piece that replaces the windshield. This is a variant that more closely follows the “rules” of Tie design, with the vertical pylon armor next to the pods and the horizontal armor by the wing. It maintains the slimmer pylon armor of the Tie Fighter due to its unaltered construction. Tie Experimental M2 “Big Gun” This is a standard Tie Fighter with two large cannons attached to its outer wing hubs. I made the cannons 7x7 studs to depict their relative size to the central pod, but this led to some issues with how to mount them to the wings. I had to redesign the outer wing hubs with jumper plates to connect to the holes on the underside of the plates supporting the cannons. This accounted for the half stud offset required to center the cannons on the hub. Tie Experimental M3 “Warhead” This is a Tie Interceptor with missile pods mounted on the outside of its wings, so I took the modified Tie Interceptor model and did just that. The launch tube detailing on the front of the pods is too fine to be represented using Lego bricks, so I created custom stickers that could be applied over a flat, circular 4x4 area. Tie Experimental M4 “Bomb” This is a ship designed to act as a large missile. Fittingly, it is based off a Tie Bomber with a single pod and is fitted with a massive booster engine. The modification to the base Tie Bomber model was easy enough to make, as I just mirrored the construction already present for one side of the ship. The engine proved more challenging, thanks to its length. I made the smaller shaft out of cylinder pieces, while the larger part is a novel assembly made to display curved slopes on all 4 sides and to recess the exhaust. I've reinforced the engine and its connection to the main ship using Technic axles, but as I've only made a digital model, I can't tell if this engineering would be enough to support the engine in real life. Thusly, I created a stand to act as support for the engine. Tie Experimental M5 “Booster” This is a standard Tie Fighter with an engine based off the Tie Bomb's added to it. However, the Tie Booster's engine is even longer and larger than the one on the Tie Bomb, and is supported by a much smaller central pod. The construction of the engine is similar to the Tie Bomb, but magnified where necessary. The bracers running from the wings to the engine are attached to the rear solar panel strut by a clip-and-bar connection to achieve the correct angle. I also created a stand to support the engine regardless of the design strength, because it would definitely throw the model off balance in real life. Tie Droid This model is based off the droid-controlled fighters that were produced in swarms by the factories of the World Devastators. I based the model off the ship's appearance in the first Rogue Squadron game, because details like the wing size, wing detailing, and windshield color vary wildly across its initial appearance in comics and later illustrations. The central pod and wing pylons are almost entirely unchanged from the base Tie Fighter, save for the two protrusions a the top and bottom of the windshield. The opaque windshield is supposed to feature a horizontal line bisecting it, which would be represented with a thin, rectangular sticker, but the Stud.IO part designer program doesn't apply textures to domed surfaces too well. The standout feature of this design is the blocky wings. They're attached to the wing pylons by two clip-and-bar connections each, which should be enough to support the weight of the wings. The wings themselves are built around an oddly designed core, which supports the tiles of the large, smooth wing hubs. The solar panel detailing and outer edge leave the core mostly untouched, only connecting together in a few places for structural support. The outer edges themselves have been designed in a way to keep the two-plate thick sizing consistent across all sides of the wing. Tie/rc This obscure Tie variant was never given an actual name beyond its factory designation (the obvious Tie Reconnaissance Fighter referring to another ship entirely). It's little more than a standard Tie Fighter with a single cannon and some sensor greebling on the front of the ship, some of which is represented through custom stickers. I made it because it was an easy modification to do, though presumably somebody would be interested in displaying it. Tie Ground Targeting This unique model of Tie was designed to serve as he Empire's initial bomber for planetary bombardment. Given its in-universe existence before the dedicated Tie Bomber, it's built from a modified Tie Fighter frame. However, like a mullet, the front of the central pod is the same as a regular Tie (one cannon non-withstanding), but the rear is cylindrical like that of the Tie Bomber. This proved challenging to make because of its odd-numbered sizing, which needed to be mounted on, and centered to, an evenly-sized studded surface. The rear of the pod is made using a similar construction to the engines of the Tie Bomb and Tie Booster, and has a set of thrusters similar to that of the Tie Bomber. The top and bottom of the pod feature plates that are integrated with the top and bottom cockpit hatches, similarly to the design for my tweaked Tie Striker. The gaps from the regular Tie pod to the cylindrical back half are filled as best as possible, and are mostly hidden by the wings and hatch assemblies. Finally the triangular wing strut armor coming from the central pod has been redesigned to match the ship's reinforced appearance, complete with holes where they should be. Tie Fire Control This is the Tie/gt's other half, and another relatively easy build. This model of Tie was designed to house the sensors required for precise ground targeting, which was then relayed to the Tie/gt fighters it flew alongside. This ship shares its sticker detailing and single cannon with the Tie/rc. Its unique features are the chin mounted sensor arrays flanking the laser cannon. These boxy protuberances are meshed to the central pod as well as can be achieved without sacrificing the quarter dome pieces for something custom built to house the sensors. The sensors even extend into the area reserved for the bottom 4x4 dish, so a brick-built lookalike stands in for it. Tie Heavy Bomber This is a ship based on the Tie Bomber, but with two ordinance pods. I was inspired to recreate this design after I saw a Flickr post by Gingko19 Biloba showing a similar model. Unfortunately, he didn't alter the sides of the pods, which meant they clipped into the model in a manner impossible to build in reality. He told me he used a tile with a stud attached to a tile with a hole in the middle (a stud reversal method) to connect the pods to the central pylon. A plate ran from the core of one pod to the other for structural stability, covered by increasing the depth of the pylon by one plate. With that info, I set out to refine his model into something physically possible. The ordinance pods have been slightly altered in order to evenly meet up with the pylon. Additionally, I increased the height of the wings to extend past the bomb chute, a feature that is actually accurate to their portrayal. Emperor's Guard variant. Tie Interdictor / Punisher The next logical model to make after the Heavy Bomber. This ship basically mirrors the double-pod side for 4 ordinance pods. Emperor's Guard variant. First Order Tie Brute Seen exclusively in an immersive shooting gallery ride at Disney World, this Tie is largely the same as the Imperial Tie Brute. The First Order version has small, red headlights on its pylon armor, the requisite antenna array, and unique thrusters resembling those of the Millennium Falcon. I created the thrusters using custom stickers, including some applied to 1x2 grated slopes, meaning someone building this in real life would have to gently press the stickers on. Also available with small corners. And in the colors of the Final Order. First Order Tie Whisper To end this list of ships, we have the regular Tie Whisper. They are seen during the Lightspeed Skipping chase in TROS and have the wings of the standard First Order Tie Fighter. I reused the central pod and pylons from the Modified Tie Whisper and the wings from the Tie/fo. One detail unique to this ship is the curved, almost dented appearance of the wing hub's armor plating where it meets the wing pylon bracer. This altered construction means this ship can utilize the same wedge plate bracer design as most other Ties despite the extra plate's worth of armor usually blocking it. Final Order Version. Let me know what you think!
-
Hello. I've been lurking for a while and finally decided to make my first “real” post. I bought the instructions for @Jerac's Tie Fighter about a year ago, but before I bought the pieces, I wanted to try tweaking the design in Stud.IO to better match its on-screen appearance. I've continued modifying the design even after I built the physical model, with each extra tweak expanding the scope of the project. I currently have a Tie Fighter that, while still sharing the original model's bones, is nonetheless significantly altered. Given all the changes I've made, I decided to make a post about them to get some feedback. Wing Struts The armor panels have been remade for more visual cohesiveness and screen accuracy. The space constraints of the new construction necessitated a new approach to the sloped pieces that lie between the panels. The ones near the central pod are now made using 1x4 Slopes and are held in place with only a 1 stud connection. They maintain their stability by resting on top of the 1x2 30 Degree Slopes I incorporated into the struts to give them a rounder look. The lengths of the long slopes and the wedge plates near the wings were changed to better reflect their positioning and size relative to the other visual elements on the struts. While this decision leaves both elements slightly over and undersized, they come the closest that can be represented in Lego using a plate-based construction for the core of the struts. Wings I've redone the visual detailing for the wing hubs while leaving the support structure relatively unchanged. Jerac's construction method emphasized a balance between greebling and overall appearance, but this resulted in noticeable gaps in the hubs and a squished hexagonal shape. I modified the wing hubs to make a gap-less, regular hexagon that fits in an 8x8 space. The wing panels were slightly modified for more stability using groups of 1x1 Bricks w/ Holes connected by Technic pins. These preserve the vertical panel lining of the original while providing as much stability as longer horizontal bricks. Finally, I unified the construction of all the wing panel struts. They are all now 2 plates tall and capped with a curved slope leading into the wing's outermost border. I tried to go for a smoother appearance due to the fact that 1 plate thick wing struts are impossible to make while also serving as support for the wing panels. Central Pod - Front I covered up a small gap in the upper cockpit flap using 1x3 Jumper Tiles. The cannon assemblies use a modified version of the build method I recently saw on BrickVault's Tie X1, though the cannons themselves require the builder commit the ultimate sin of MOC design: part modification. They are made by cutting a length of flex tube to roughly twice the thickness of a horizontal clip piece. This kind of modification is something Lego has instructed the builder to do in some sets before, so I count it as a “legal” move, if not exactly smiled upon. This method results in the most accurate placement, size, and shape of any method I've seen for representing cannons recessed into a curved surface. Central Pod – Bottom A detail of the original model that irked me is that the top hatch sits flush with the top of the central pod and lines up with the slopes on either side of it, while the same area on the bottom of the ship was made with curved slopes. I was able to provide the half-plate recess necessary for a 4x4 Dish on the bottom to mirror the appearance of the top, though this one change required a substantial internal alteration. One of the two connections holding the central pod together stood in the way of creating the recess, but I figured out a compromise. By making the connecting plate 1 stud wide instead of two leaves space under the pilot's chair to run a sort of scaffolding to the 4x4 Dish's correct location. The scaffolding itself isn't very sturdy, but it only has to hold the dish in place; support is provided by all the pieces the dish now rests flush against. Aside from looking good, this construction method is strong enough to support the weight of the entire model resting on its stand. Additionally, the whole pod is now 2 plates thicker to give a more spherical appearance compared to the original model. It's a detail you can't unsee once you spot it, especially when the model is placed next to other BrickVault Ties. Central Pod – Back The original construction of the engines used hollow, round studs slid over the vertical arm of modified 1x2 plates to represent exhaust. While I like the effect, and tried to keep it in my revisions, this method of construction keeps the thrusters from being flush with the central pod's curved surface, as well as either too close or too far apart. I used a modified version of the “bow tie” detailing on the front of the pod to represent the thrusters, a trait shared with the on-screen Tie Fighter models. Regarding the rearmost portion of the ship, the original model uses 1x2 30m Degree Slopes to create the hexagonal rear window. However, the window is shown to be flush with the surface of the central pod in official depictions, meaning a redesign was needed. I wasn't satisfied with any solution I tried that used slope bricks to make the hexagonal window pattern. None of them were flat enough to match the source material, so I had to resort to the second greatest sin of MOC creation: a custom sticker. I think it turned out pretty well. Let me know what you all think!
-
Dear LEGO & Star Wars Fans, I am more than proud to announce that my long-term project, which I started in February 2019, is now complete: The Original Trilogy in LEGO. It took me a total of 5 years to complete this project. A long time that required a lot of perseverance and passion (especially from my wife ) A New Hope took 15 months, The Empire Strikes Back took 16 months, and Return of the Jedi took incredible 27 months. Throughout this lengthy period, I've been able to learn a great deal and I'm already looking forward to applying these new skills to future LEGO Star Wars projects. And now, without further ado, enjoy all the photos and MOCs 5 Years of hard work. My Journey of recreating the Original Star Wars Trilogy in LEGO. by Codyaner.bricks, on Flickr Link to the Album with all Original Trilogy Scenes: HERE Link to the Album with all A New Hope Scenes: HERE Link to the Album with all The Empire Strikes Back Scenes: HERE Link to the Album with all Return of the Jedi Scenes: HERE I hope you you all enjoyed the project and the journey Stay tuned, the next project will be announced very soon! Kind regards, Codyaner
-
Introducing you to my latest Midi-Scale spaceship, the timeless Y-Wing from Episode IV - A New Hope! At 546 pieces, this compact and intricate model is barely wider than your average smartphone's height, but keeps a dense, detailed look and accurate proportions. I initially made a first prototype more than a year ago but was unhappy with the half-baked, almost playset-ish scale. I took on the challenge again and recreated it entirely from scratch: it's now smaller, more accurate, and just better in every aspect. Despite the small size, I did my best to capture the essence of the original ILM prop: tilted cockpit section, engines off-center relative to the thin support struts, asymmetrical greebles from top to bottom, cockpit turret... Believe it or not, the deceptively simple shape of the body was not easy to capture at this scale: with such a tiny surface to work with, a subtle balance had to be struck between incorporating complex greebling and "drawing" an accurate body outline. The cockpit section was a whole other beast, but once I figured out how to create the tapering, things clicked pretty fast. I managed to reproduce the slight downwards tilt, the yellow stripes on the fuselage, and the more discreet gray stripes on each side as well. I believe it's about as small as you can go when creating a Y-Wing cockpit without sacrificing crucial features and proportions! This model comes with a removable stand. Although it being purely a display piece, its swooshability is very good. In addition to being cost-effective, I think it makes a nice desk model for anyone loving that ILM prop look, with a small space footprint. ► Instructions for the Y-Wing are available at BrickVault! More pictures on my Flickr page.
-
Started working on this a while back trying to find a style I like. I'm going for a hand-drawn style that I don't actually have to draw :) Does this look too much like what it is (image processed renders)? Feedback most welcome!
-
Today I started a new model. I'll build it mainly using light bluish grey Technic parts. Here's a first sketch to plan Bricklink order:
-
"Commander Cody, prepare the gunships for ground assault!" Let's give the Midi-Scale treatment to another timeless ship: the LAAT Gunship or Republic Gunship from The Clone Wars. Being a fan of the sleek and flush Clone Wars era design, I thought this variant deserved more attention, especially in Midi-Scale. This Midi LAAT/i consists of 1,015 pieces, measures only 22cm (without guns), and is accurately Microfig-scaled. It features a fully SNOT look, openable front doors, and a removable stand that can be tilted to taste. Design-wise, this ship was full of challenges, with lots of subtle angles and curved surfaces everywhere. Shaping the front section wasn't an easy task at this scale, as well as adding that crucial touch of lime green without any stickers. All of this resulted in a pretty intricate structure, especially for the front section. The angled rear section of the body features other details such as missile belts, exhaust slats and tail cannon. The underside of the ship is also fully SNOT-built. Initially, all four doors could be opened, but I chose to remove the less useful rear door mechanism for a smoother, easier building process. ► Instructions for the LAAT are available at BrickVault! More pictures on my Flickr page.
-
A small MOC scene to show off some custom minifig blasters... I got Commando Rex in there. hee hee... The bounty hunter is Ketsu Onyo from Star Wars Rebels. And, yes, I used an xacto to make her Westar-35.
-

[MOC] Technic Rebel Snowspeeder
drakmin posted a topic in LEGO Technic, Mindstorms, Model Team and Scale Modeling
---------------------------------------------------------------------------------------------------------------------------- 2014 UPDATE: ---------------------------------------------------------------------------------------------------------------------------- Hi! Instructions for my Snowspeeder model are now available at mocplans.com Instructions are made by Eric Albrecht (Blakbird) and have 125 pages. Model itself has 2191 parts. I'll update this post with rebrickable url later when it's online. ----------------------------------------------------------------------------------------------------------------------- earlier 2014 update ----------------------------------------------------------------------------------------------------------------------- Hi, I have updated this model: ---------------------------------------------------------------------------------------------------------------------------- 2014 UPDATE ends, original first post from now on -> ---------------------------------------------------------------------------------------------------------------------------- Hi. After my first Technic x-wing MOC I'm tryint to build the rebel snowspeeder. (T-47 airspeeder) Speeder will be roughly in the same scale with the x-wing: Here are first photos of the T-47. Feel free to point out anything that looks off. I need to get more light gray parts as I had to use dark grey in wrong places ;D My reference photos show that even the models used in movies have wings in different angles when looked from the rear. I guess I'll use wing angle that fits the best with my parts. My plan is to have two joystick in cockpit. Other one to control the "ailerons" on top of the engines and the other one to control rear "gun". Don't know yet if the cabin hatch should be motorized or not. -drakmin Drakmin's youtube -
So I thought this series was finished, but apparently not haha! This is a re-colour and Mod of https://www.bricklink.com/v2/catalog/catalogitem.page?S=76031-1#T=S&O={"iconly":0} I bought this set for my kids when it came out and I've always admired the way it captures the stance and feel of the Hulkbuster in such a simple and efficient manner. When the https://www.bricklink.com/v2/catalog/catalogitem.page?S=30611-1&name=R2-D2 - Mini polybag&category=[Star Wars][Mini][Star Wars Episode 4/5/6]#T=S&O={"iconly":0} came out I couldn't help but feel that this was a mash-up that needed to happen! He stands a touch over half the height of my other mechs but I think he fits right in with this motley crew haha! I tried to get this ready by the end of Mech-tober but ran out of time. "R2-D2, be reasonable about this!!!" by Greg Dalink, on Flickr R2-D2 Smasher Class Battle Mech by Greg Dalink, on Flickr R2-D2 Smasher Class Battle Mech by Greg Dalink, on Flickr I had a lot of fun building this guy and I hope you like it!
-
Biblo is a droid, living on the planet Tattooine. He drives a walking unit, built by himself using several parts of wrecked AT-walkers and pieces of other vehicles. Biblo travels trough Tattooine , searching for wrecked spaceships and vehicles to collect their parts and supply's. Maybe a defective Podracer would also have his interest.. ;) Biblo isn't allied with the Republic or the Rebellion . He provides everyone with supply's and parts who needs them. Biblo isn't a combatitive droid, but he has a harpoon gun for using when he's in trouble. 01_ Biblos_Supply_Walker by Mathijs Bongers, on Flickr 02_Biblos_Supply_Walker by Mathijs Bongers, on Flickr 03_Biblos_Supply_Walker by Mathijs Bongers, on Flickr Biblo's Supply Walker and Biblo are not an official Star Wars vethicle and character. It's designed by myself, inspired on the Star Wars stories. Pictures on Flickr: https://www.flickr.com/photos/mathijslegofan/albums/72177720311727990
-

[MOC]-BW3001 - Pre-Orders Open! UCS Kintan Strider Speeder Bike
coreyschaaf posted a topic in LEGO Star Wars
UCS Kintan Strider Speeder Bike As featured in the Book of Boba Fett • by Corey Schaaf | BrickWars.net It's been fun putting this build together. I've worked with so many different people on executing this project. From working with a manufacturer for a custom case, to my signature Printed UCS Plaques, the unique serialized tiles that's different for every build, to the UCS Stickers from a company in the UK - to the final print production of my Limited Edition UCS Instruction manual — I can just about call this one complete. Pieces: 2,285 + 2 Minifigs Weight: 71.5 oz | 4.7lbs Width: 57.6 cm | 22.7 in Length: 25.6 cm | 10.1 in Height: 24.8 cm | 9.7 in Estimated Part Costs: $375-$450 My manual is built in the same way my original UCS instruction manual for the Resistance Troop Transport ship was designed but in a much smaller print run. Only 150 copies of my manual will be available. Email subscribers will be notified when the pre-sale starts, so if you're interested, I would encourage you to visit https://BrickWars.net/moc-bw3001 and signup via the email link at the bottom of the page. You can find all the details and specifications on my website for this build at https://brickwars.net/moc-bw3001. If you have any questions, feel free to ask! You can also give me a follow me on https://www.instagram.com/brickwarsnet/ as well. New Video of MOC Just added -
The fastest hunk of junk in the galaxy just joined my Midi-Scale ship collection! Here comes the Millennium Falcon from Episode IV – A New Hope. Made of 2,178 pieces, measuring only 34cm and weighting almost 1kg, this compact yet dense Falcon was another unique challenge at this scale. After seeing some great-looking Figscale MOCs of this tricky ship, I couldn't resist making a Midi version. With this design, I took a different approach than most other Falcons out there, and wanted it to look as sleek and gapless as possible. This resulted in a pretty elaborate and unique mix of paneling techniques that involved a lot of SNOT building. One of my priorities was to faithfully reproduce the curved saucer shape on both sides of the ship, and not only on top. As a result, the build features all the details and shapes of the original 1977 studio model, from top to bottom. The overall thickness of the ship was another concern. I wanted it to be as thin as the original, while being able to sandwich some tasty greebles and even the hyperdrive engine bay inside the saucer. The Falcon has two display modes, "in-flight" with its canted stand, and "landed" with easy-to-install landing gear. It also includes a working ramp. ► Instructions for the Millennium Falcon are available at BrickVault. More pictures on my Flickr page.
-
Darth Maul's modified Razalon FC-20 "Bloodfin" Speeder! Stored in Lord Maul's Scimitar front cargo area and deployed via the bow access hatch. Seen briefly in The Phantom Menace when Darth Maul attempts to intercept Padme and Qui Gonn et all as they're leaving Tatooine - with a quick try at squishing young Anakin Skywalker by riding over him - because why not? :) In screenshots from the film, the Bloodfin appears to be very dark grey in colour or dark brown, or possibly a very dusty black. Toy manufacturers and graphic designers have portrayed it as being all different colours from beige and brown to grey and many 2-tone variants... so, I included a few colour ideas for you in the photos, although in the instructions I've stuck to Dark-Bluish Grey with Reddish Brown seats. I'll be happy to see other people's ideas! Free instructions on Rebrickable!
-
things changed: -lowered cockpit down roughly 1 brick, changed build around cockpit region to slope into wings, taper into body, round out the rear to more accurately reflect the shape of the model in canon -filled in gaps with 1 tile width across whole body; requires some gaps in wing construction -replaced guns for accuracy; subject to further change to reduce conspicuousness -cut up stickers to apply across model -cut cockpit -nexo tile at front to hammer in the point :) working on instructions if anyone's interested. if ur curious on scale it works like this
-

[Ep 2 - Cat. B - S10 - Merc] Layout of Ryek's Garage
Jody Meyer posted a topic in Mysteries: A Star Wars Role-Playing Game
*Your entry has earned 4 XP (S:1.5, T:1, A:1.5) Layout of Ryek's Garage -
Hello all, I am currently working on the Malevolence as seen in the clone wars, this is the first big build I am doing. Comments and criticism are welcome!
-
I have been lucky twice with lego : The first was when i was about 8 and i was walking with my dad past this charity shop by my house. When i look in i was astonnished to find a huge box with what i would later find out to be : 6376 breezway cafe 6666 ambulance (best ambulance ever) 6552 rocky river retreat 6398 central precinct HQ 6472 gas n' wash express (the one that the new garage comming out is based on) 6595 surf shack 6670 rescue rig 6593 blaze battler 6353 coastal cutter 6658 bulldozer and many more including some big truck with a space shuttle on it! and baseplates, cars, trees, and a load of figs! these sets created the best city ever made and all my friends were sooooo gelous! :-D and all for
-

Luminous Material Lighting Panels in Studio
mcphatty posted a topic in Digital LEGO: Tools, Techniques, and Projects
Hi everyone, I've been playing with luminous materials in Studio and have tried to replicate the kind of basic global illumination style HDRI lighting I used to aim for in Cinema 4D. Below is the result, the first render is my lighting with Intensity in Studio's Render menu set to zero and for comparison below that is the standard Mechanic lighting with Intensity 2. I think that by getting rid of the default illumination and effectively turning off the HDR sky in Studio the model looks less overexposed, especially the upward facing surfaces which instantly lose the bright, sterile white reflection. The darker model means the highlights stand out a lot more, and since studs and edges are reflective there are plenty of nice highlights to look at! I also added some illumination in the scene, the white parts around the edge of the landing pad and in the upright light are luminous soft white and there is a bit of glow coming from the engines. I rendered these with transparent background and added a coloured backdrop and some noise in Photoshop. It's not a realistic image by any means but I think it'd a decent improvement, it's certainly helped my renders blend in with my photos on Instagram profile. Here's the Studio file of the lighting arrangement (_HDRI Lights by Ron_McPhatty.io) if you'd like to to give it a try, remember to turn the "Illumination" option in the Render window down to "0" before clicking render. To achieve the lighting effect I arranged a heap of large plate pieces into rings, angled them at downwards to aim at the subject positioned in the centre and positioned a few luminous panel spotlights directly above to give extra shadows and highlights. Other lights can be toggled on and off by Hiding/Showing the parts groups, so it's possible to light objects slightly differently for example all light from one side to give the impression of a bright planet. Here's how it all looks in Studio... Here's a few more examples with different models. I hope the idea is useful, any suggestions to help me improve the set up would be great, and feel free to use and abuse the lighting set up if you like it and I'd love to see other models rendered in this style. -
Designed in Empire era, this mechsuit was built in few models and destinated to annihilate enemies on the battlefield. despite there are a few prototypes, this mechsuit gives to the trooper inside a great stength without losing agility, Mechsuit_Trooper by Rusty B., su Flickr The "Empire Trooper" mechsuit has a high powerful laser cannon mounted on one arm and the freedom to hold another weapon, or a tower shield, with the other hand. Mechsuit_Empire_Trooper by Rusty B., su Flickr the "Death Trooper" mechsuit has a high powerful laser cannon mounted on one arm and the freedom to hold another weapon, like a big trooper lightsaber, with the other hand. Also, this infiltration model is equipped with a Jetpack. Mechsuit_Death_Trooper by Rusty B., su Flickr The "Elite Trooper" mechsuit has a high powerful laser cannon mounted on one arm and the freedom to hold another weapon, like a electrostaff, with the other hand. Mechsuit_Elite_Trooper by Rusty B., su Flickr instructions of all models are avaiable here: Empire Trooper https://rebrickable.com/mocs/MOC-40148/Rustinidiel/mechsuit-empire-trooper/#details Death Trooper https://rebrickable.com/mocs/MOC-42530/Rustinidiel/mechsuit-death_trooper/#details Elite Trooper https://rebrickable.com/mocs/MOC-42536/Rustinidiel/mechsuit-elite-trooper/#details All pictures can be found on my Flickr. i hope you like this design, i really appreciate comments and criticism
.thumb.JPG.a6e449e5685f8b389fadcf907e1be99b.JPG)