Search the Community
Showing results for tags 'minifigure'.
Found 210 results
-
Hello Lotus, James Bond and Speed Champions fans, The Lotus Esprit S1 is a sports car built by Lotus Cars from 1976 to 1978 at their Hethel, England factory. It has a rear mid-engine, rear-wheel-drive layout and it was featured in the 1977 James Bond film The Spy Who Loved Me, where a car famously converted into a submarine after a road chase. The car used in the underwater scenes is nick-named "Wet Nellie". Building instructions are available on the following link: https://rebrickable.com/mocs/MOC-178962/_TLG_/lotus-esprit-s1-007-james-bond-submarine-conversion It is a studless build in the new, 8 studs wide Speed Champions style. I wanted to create a clean model which is as accurate as possible in this small scale. I prefer the brick built solutions to keep the flexibility of the used parts in further builds, and therefore only two vehicle registration plate stickers are used. My intent was to keep the width-length-height ratio of the real car and this size makes it possible. The model contains lots of details: for example the black stripes on the sides, door handles, detailed tail lights etc.. Maybe the most challenging one was the front and the front bumper with brick built headlights. I tried to fill every unnecessary gaps and therefore some tricky build techniques are used. The car can be converted to submarine. The model has space for two minifigures with helmets or small hairs. Thanks for visiting, _TLG_ Lotus Esprit S1 - James Bond - Instructions 01 by László Torma, on Flickr Lotus Esprit S1 - James Bond - Instructions 02 by László Torma, on Flickr Lotus Esprit S1 - James Bond - Instructions 03 by László Torma, on Flickr Lotus Esprit S1 - James Bond - Instructions 04 by László Torma, on Flickr Lotus Esprit S1 - James Bond - Instructions 05 by László Torma, on Flickr Lotus Esprit S1 - James Bond - Instructions 06 by László Torma, on Flickr Lotus Esprit S1 - James Bond - Instructions 07 by László Torma, on Flickr Lotus Esprit S1 - James Bond - Instructions 08 by László Torma, on Flickr Lotus Esprit S1 - James Bond - Instructions 09 by László Torma, on Flickr Lotus Esprit S1 - James Bond - Instructions 10 by László Torma, on Flickr Lotus Esprit S1 - James Bond - Instructions 11 by László Torma, on Flickr
-
Hello Speed Champions and City fans, It was my entry to Bricklink Designer Program Series 3 and 4. It has received many kind comments and support, but unfortunately it has not been selected, therefore I decided to make the instructions available here: https://rebrickable.com/mocs/MOC-177592/_TLG_/school-bus I always loved American style school buses, therefore I decided to design one to Bricklink Designer Program Series 3. It is not actually based on a real one, but it contains many typical details: the black bumper rails and STOP arms on the sides, the crossing arm, the side and rear doors, the rearview and crossover mirrors, the mudguards, the warning lights etc.. The roof assembly can be removed as one piece and in this case the internal details are visible: there is a driver seat with steering wheel, dashboard, gear shift, passenger seats and even a fire extinguisher. It is 8 studs wide, studless build in minifigure scale and fits perfectly to Speed Champions cars or to a LEGO City. There are many working details: the front and rear doors, the STOP arms, the crossing arm and windshield wipers. I wanted to create a clean build and tried to fill every unnecessary gaps and hide unnecessary studs, therefore some tricky, but legal build techniques are used. The set includes three minifigures: a driver, a school girl with a pen and backpack and a school boy with a brick built backpack. The model has space for 17 minifigures: one driver and 16 passengers. If the passengers are kids with short, rigid legs, then they can stand on the seats. The building instructions guidelines have been followed. It is built from the palette "BDP Series 3", so there are some color and part restrictions. The color "Bright Light Orange" would be a bit more authentic, but the available parts are restricted, therefore I decided to use "Yellow" and I am satisfied with the result. The STOP sign is very rare part and it is not available in this palette, therefore it is replaced by a simple, white, circular sign with a sticker. The door 43967 is also not available in yellow, therefore it is replaced by a brick built one, however, in this case I was able to add some extra details: a black door handle, bottom window and red lights. I hope you like my design, I appreciate any feedback. Thanks for visiting, _TLG_ School Bus - Bricklink Designer Program 3 - 01 by László Torma, on Flickr School Bus - Bricklink Designer Program 3 - 02 by László Torma, on Flickr School Bus - Bricklink Designer Program 3 - 03 by László Torma, on Flickr School Bus - Bricklink Designer Program 3 - 04 by László Torma, on Flickr School Bus - Bricklink Designer Program 3 - 05 by László Torma, on Flickr School Bus - Bricklink Designer Program 3 - 06 by László Torma, on Flickr School Bus - Bricklink Designer Program 3 - 07 by László Torma, on Flickr School Bus - Bricklink Designer Program 3 - 08 by László Torma, on Flickr School Bus - Bricklink Designer Program 3 - 09 by László Torma, on Flickr School Bus - Bricklink Designer Program 3 - 10 by László Torma, on Flickr
-
Hello Corvette and Speed Champions fans, The Chevrolet Corvette (C3) is the third generation of the Corvette sports car that was produced from 1967 until 1982 by Chevrolet for the 1968 to 1982 model years. Engines and chassis components were mostly carried over from the previous generation, but the body and interior were new. It set new sales records with 53,807 produced for the 1979 model year. Building instructions are available on the following link: https://rebrickable.com/mocs/MOC-176144/_TLG_/corvette-c3-stingray It is a studless build in the new, 8 studs wide Speed Champions style. I wanted to create a clean model which is as accurate as possible in this small scale. I prefer the brick built solutions to keep the flexibility of the used parts in further builds, and therefore only two vehicle registration plate stickers are used. My intent was to keep the width-length-height ratio of the real car and this size makes it possible. The model contains lots of details: for example the front bumper, the emblematic side grills, the side view mirrors, the embedded tail lights, the fuel cap etc... I tried to fill every unnecessary gaps and therefore some tricky build techniques are used. The instructions includes some modification ideas, for example front blinker and alternate side grill, see picture 6, and luggage rack, see picture 5. The model has space for two minifigures with helmets or small hairs. Thanks for visiting, _TLG_ Corvette C3 - instructions 01 by László Torma, on Flickr Corvette C3 - instructions 02 by László Torma, on Flickr Corvette C3 - instructions 03 by László Torma, on Flickr Corvette C3 - instructions 04 by László Torma, on Flickr Corvette C3 - instructions 05 by László Torma, on Flickr Corvette C3 - instructions 06 by László Torma, on Flickr Corvette C3 - instructions 07 by László Torma, on Flickr Corvette C3 - instructions 08 by László Torma, on Flickr Corvette C3 - instructions 09 by László Torma, on Flickr Corvette C3 - instructions 10 by László Torma, on Flickr Corvette C3 - instructions 11 by László Torma, on Flickr
-
The Micro Rocket Launchpad (40712) is a great set but because it's micro scale it's not easily integrated with the rest of Classic Space. So I decided to enlarge the builds in the set to fit minifigures. My plan wasn't to recreate the sets upon which Micro Rocket Launchpad is more-or-less inspired (483, 6950 and 6803). I have repurposed the microfigures as minifigure space kids, and made some cosmetic alterations: additions, substitutions and deletions (no stickers!).
-
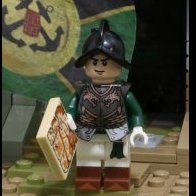
Retreat Back to Boston, April 19, 1775 Retreat Back to Boston, April 19, 1775 by Nicholas Goodman, on Flickr Retreat Back to Boston, April 19, 1775 by Nicholas Goodman, on Flickr Retreat Back to Boston, April 19, 1775 by Nicholas Goodman, on Flickr Retreat Back to Boston, April 19, 1775 by Nicholas Goodman, on Flickr Retreat Back to Boston, April 19, 1775 by Nicholas Goodman, on Flickr
-

[Mod] Collectible Minifigures Series 25 - fantasy mods
AmperZand posted a topic in LEGO Historic Themes
My mods of the Series 25 Collectible Minifigures as well as minifigures that have benefited from some of the series' new parts. Note: Three parts - one of the mushroom-man's rhizome stalks, the ipotane's shield and the harpy's wing-clips - are non-purist. Also, I removed the print from the mushroom-man's torso and arms. All other parts are purist. The goatherd, mushroom sprite and barbarian (Red Sonja) are as sold - no mods (unless you count the additional goat for the goatherd). Count Batlord is basically as sold. I just swapped the haft pieces around, putting the pointy one at the top and removing one of the axe heads. LEGO's choice of colours for the harpy was too busy in my view, so I muted them. I also changed the hair to one I like more. Sorry about Spider-man Noir in the shot. I didn't place the minifigure there. He must have snuck in while I was busy setting up the other minifigures. I would have included related minifigures from my display collection including a shepherd, the original Count Batlord and a couple of fright knights, three other barbarians, the forest elf (acorn boy), and a t-rex dino-man, but that would have been too many. You wouldn't have been able to see them all. I hope to be able to picture them as separate groups in due course. Comments? Questions? Myconic mysteries? -
Hello Lamborghini and Speed Champions fans, The Lamborghini Diablo is a high-performance mid-engine sports car built by Italian automobile manufacturer Lamborghini between 1990 and 2001. It is the first production Lamborghini capable of attaining a top speed in excess of 320 kilometres per hour (200 mph). Building instructions are available on the following links: It is a studless build in the new, 8 studs wide Speed Champions style. I wanted to create a clean model which is as accurate as possible in this small scale. I prefer the brick built solutions to keep the flexibility of the used parts in further builds, and therefore only one Lamborghini logo sticker and a standard vehicle registration plate sticker are used. My intent was to keep the width-length-height ratio of the real car and this size makes it possible. The model contains lots of details: for example the emblematic taillights, the side air intakes, the side view mirrors and rear details with the double exhausts etc... Maybe the most challenging one was the hood tilt and some half stud offsets in the inside structure. I tried to fill every unnecessary gaps and therefore some tricky build techniques are used. The model has space for two minifigures with helmets or small hairs. Thanks for visiting, _TLG_ Lamborghini Diablo - Instructions 1 by László Torma, on Flickr Lamborghini Diablo - Instructions 2 by László Torma, on Flickr Lamborghini Diablo - Instructions 3 by László Torma, on Flickr Lamborghini Diablo - Instructions 4 by László Torma, on Flickr Lamborghini Diablo - Instructions 5 by László Torma, on Flickr Lamborghini Diablo - Instructions 6 by László Torma, on Flickr Lamborghini Diablo - Instructions 7 by László Torma, on Flickr
-
Hi Everyone, I haven't seen any posts about displaying minifigures in picture frames recently, so I thought I share with you my version. I made these 5 display frames for my Lord of the Rings/Hobbit minifigure collection. It doesn't contain all the minifigs from the themes, I deninitely wanted to create a nice display instead. The 5 frames are: Elves, Orcs (including 1 goblin soldier), Wizards (=Istari, incl. 2 blue wizards from other themes), Dwarfs (+Bilbo) and the fellowship of the ring (incl. Gandalf the White, King Theoden, Elrond and Gollum). I can place some bigger minifigs (for ex. Goblin King) on the top of the frames. I've used IKEA Ribba frames (23x23 cm). I've edited special backrounds for the individual displays. The minifigs are standing on 2x4 bricks, which are glued to the background. These bricks allowed me to apply stickers to sign the minifigs and to add extra parts (for ex. the arkenstone for Thorin). Unfortunatey, I couldn't use the glass of the original frame, because there wasn't enough space due to the equipments of the minifigs. Thus, I can't prevent them from dust... Creation process: As you can see, the bricks aren't glued on the photo, they are connected directly to the board. The final result: Thanks for stopped by!
-
Hello! I really love minifigures and try to collect hem little by little. But the lonely figures don't look very good, so I try to add some environment to them. In this topic I will publish my ideas on this topic 1. Probably most of all I have minifigures in medical coats. The first thing that comes to mind where they can be combined - is a hospital. A large building requires a lot of parts and shelf space, so made an intensive care unit and a hospital ward.
-
Hello! I designed almost everything I wanted in a width of 5-6 stud. It's time to grow :) The new line of my models is approximately the same scale as the SpeedChampions series. I'll start with the Mack Defence. "offroad'' version 6x6 with short wheelbase civil version 8x6 with long wheelbase and photo nearby :) Thank you for watching! I will be glad to comments :)
-
Hello Lamborghini and Speed Champions fans, The Lamborghini Aventador LP700-4 is a mid-engine sportscar produced by the Italian automotive manufacturer Lamborghini. In keeping with Lamborghini tradition, the Aventador is named after a Spanish fighting bull that fought in Zaragoza, Aragón, in 1993. The Aventador is the successor for the Murciélago and was made by hand in Sant'Agata Bolognese, Italy. Building instructions are available on the following links: https://rebrickable.com/mocs/MOC-149528/_TLG_/lamborghini-aventador-lp700-4 It is a studless build in the new, 8 studs wide Speed Champions style. I wanted to create a clean model which is as accurate as possible in this small scale. I prefer the brick built solutions to keep the flexibility of the used parts in further builds, and therefore only two types of stickers are used: simple black ones to cover the visible parts of the headlights in the front air intakes, and the Lamborghini logo. My intent was to keep the width-length-height ratio of the real car and this size makes it possible. The model contains lots of details: for example the emblematic headlights, the front and side air intakes, the side view mirrors and rear details with the wide exhaust etc... Maybe the most challenging one was the hood tilt and some half stud offsets in the inside structure. I tried to fill every unnecessary gaps and therefore some tricky build techniques are used. The two trans-clear headlight parts "Slope, Inverted 45 2 x 1" (part 3665) are very rare, it never released in a set, but is available on Bricklink in some webshops. Of course they can be replaced for example by white, black, light bluish gray or dark bluish gray versions. The parts 86996 and 42446 are also rare, but the picture 7 shows an alternate side view mirror solution. It is a very low build, and can roll well only on flat surfaces. It is more of a display model then a toy for small children. The model has space for two minifigures: one with small hair or helmet in the driver's seat and one either without hair or withour leg. Thanks for visiting, _TLG_ Lamborghini Aventador - Instructions 1 by László Torma, on Flickr Lamborghini Aventador - Instructions 2 by László Torma, on Flickr Lamborghini Aventador - Instructions 3 by László Torma, on Flickr Lamborghini Aventador - Instructions 4 by László Torma, on Flickr Lamborghini Aventador - Instructions 5 by László Torma, on Flickr Lamborghini Aventador - Instructions 6 by László Torma, on Flickr Lamborghini Aventador - Instructions 7 by László Torma, on Flickr Lamborghini Aventador - Instructions 8 by László Torma, on Flickr Rear wing version added :), it is a free addition the original design: Lamborghini Aventador rear wing - Instructions 1 by László Torma, on Flickr Lamborghini Aventador rear wing - Instructions 2 by László Torma, on Flickr Lamborghini Aventador rear wing - Instructions 3 by László Torma, on Flickr
-
Hello Chevy and Speed Champions fans, The 1957 Chevrolet is a car that was introduced by Chevrolet in September 1956 for the 1957 model year. It was available in three series models: the upscale Bel Air, the mid-range Two-Ten, and the One-Fifty. It is a popular and sought after classic car. Its image has been frequently used in toys, graphics, music, movies, and television. The '57 Chevy, as it is often known, is an auto icon. This model is based on one of my favorite Matchbox as a child. Building instructions are available on the following links: https://rebrickable.com/mocs/MOC-87788/_TLG_/57-chevy-matchbox-version Kit is available here: https://buildamoc.com/products/57-chevy-matchbox-version It is a studless model in the new, 8 studs wide Speed Champions style. It can be built either with fixed doors, or with openable doors. I personally prefer the fixed door version (Speed Champions style) as it is more sturdy and there are no half plate thick gaps below the doors. I minimized the use of stickers to keep the flexibility of the used parts in further builds, therefore only two standard vehicle registration plate stickers are used. My intent was to keep the width-length-height ratio of the real car and this size makes it possible. I wanted to build the model as accurate as possible in this small scale, therefore it contains lots of details: for example the brick built flame decoration, the emblematic front bumper with the vehicle registration plate and front lights, the side view mirrors and the rearview mirror, the tiltable seats etc.. Maybe the most challenging one was the brick built number on the trunk. I tried to fill every unecessary gaps and therefore some tricky build techniques are used. The model has space for two minifigures on the front seats. There are some space before the rear seats too, but it is enough only for a minifigure without legs. Thanks for visiting, _TLG_ '57 Chevy - INSTRUCTIONS 1 by László Torma, on Flickr '57 Chevy - INSTRUCTIONS 2 by László Torma, on Flickr '57 Chevy - INSTRUCTIONS 3 by László Torma, on Flickr '57 Chevy - INSTRUCTIONS 4 by László Torma, on Flickr '57 Chevy - INSTRUCTIONS 5 by László Torma, on Flickr '57 Chevy - INSTRUCTIONS 6 by László Torma, on Flickr '57 Chevy - INSTRUCTIONS 7 by László Torma, on Flickr '57 Chevy - INSTRUCTIONS 8 by László Torma, on Flickr
-
Hello modular building and City fans, This modular Gothic Cathedral was my entry to Bricklink Designer Program Series 1. I have received many kind comments and support, but unfortunately it has not been selected, therefore I decided to make the instructions available here: https://rebrickable.com/mocs/MOC-148170/_TLG_/gothic-cathedral Kit is available here: https://buildamoc.com/products/gothic-cathedral It is not actually based on a real building, but it contains many typical details: lancet arches, double lancet arch windows, a ridge turret, flying buttresses, portals with series of receding planes, rose windows etc., and there is a matching street lamp too. The roof assembly can be removed as one piece and in this case the internal details are visible: there is an altar with a cross, a candle holder, a church tabernacle, a brick built bible, there are benches, an organ, a holy water stoup etc.. The middle door on the facade and the side doors open outward, and work perfectly, the side doors on the facade open inward and they can be opened if the door handle pieces (the taps) are removed, but it is not se easy to close them in this case. It is a studless build, the unnecessary studs are hidden by tiles. When I started the design, the first version included appr. 4600 parts, so I had to optimized and simplified it a bit, but I am still really satisfied with the result. For example it could be very nice if there was trans color plates in the holes of the window fences, but it would mean too much additional parts (and I am also not sure if it is a legal technique). The building instructions guidelines have been followed. It is built from the palette "BDP Series 1", so there are some color and part restrictions. The part 15744 could be awesome as rose window on the facade, but unfortunately it is not available in black or light bluish gray. However, the technic gear 40 tooth works too. The bells could be pearl gold or something similar, but the best available option is the black which is ok. I hope you like my design, I appreciate any feedback. Thanks for visiting, _TLG_ Gothic Cathedral 01 by László Torma, on Flickr Gothic Cathedral 02 by László Torma, on Flickr Gothic Cathedral 03 by László Torma, on Flickr Gothic Cathedral 04 by László Torma, on Flickr Gothic Cathedral 05 by László Torma, on Flickr Gothic Cathedral 06 by László Torma, on Flickr Gothic Cathedral 07 by László Torma, on Flickr Gothic Cathedral 08 by László Torma, on Flickr Gothic Cathedral 09 by László Torma, on Flickr
-
Hi everybody, Hopefully I'm in the right section. So, I don't own an Axl from Nexo Knights and after looking at the images online, it looks like his torso is made of two parts: one minifigure torso, and the top bit that attaches to it. Could anybody take a photo of the inside of the torso for me? I am very curious, I wonder if the two parts can be separated. If so, I hope the print on the bottom part covers the full torso, I'd like to use it to make a normal-sized Axl. Thanks! EDIT: Since I posted this, I have bought an Axl myself, and I can confirm that the piece does not attach through the arm holes. I believe it is glued at this point, but I am not interested in breaking it for confirmation. I can post specific photos if requested.
-
Hello Trabi and Speed Champions fans, Trabant 601 (or Trabant P601 series) is one of the most iconic Eastern Bloc cars of my childhood. It was a Trabant model produced by VEB Sachsenring in Zwickau, Saxony. It was the third generation of the model, built for the longest production time, from 1964 to 1990. As a result, it is the best-known Trabant model and often referred to simply as "the Trabant" or "the Trabi". During this long production run, 2,818,547 Trabant 601s were produced overall and it was the most common vehicle in former East Germany. Building instructions are available on the following links: https://rebrickable.com/mocs/MOC-137852/_TLG_/trabant-601 https://www.mocsmarket.com/lego-mocs/trabant-601/ It is a studless build in the original, 6 studs wide Speed Champions scale and fits perfectly to the new City style cars too. I have minimized the number of the stickers to keep the flexibility of the parts in further builds, therefore only two standard vehicle registration plate stickers and a Trabant logo sticker are used. I wanted to build the model as accurate as possible in this small scale, therefore it contains lots of details: for example the iconic head and rear ligths, the front grill, the side view mirror, the door handles etc... Maybe the most challenging one was the wheel and mudguard detail with a half stud offset. The model has space for one minifigure with small or middle sized hair. If you prefer the Universal version, then you need only 3 extra parts and it is an easy modification. Thanks for visiting, _TLG_ Trabant 601 - instructions 1 by László Torma, on Flickr Trabant 601 - instructions 2 by László Torma, on Flickr Trabant 601 - instructions 3 by László Torma, on Flickr Trabant 601 - instructions 4 by László Torma, on Flickr Trabant 601 - instructions 5 by László Torma, on Flickr Trabant 601 - instructions 6 by László Torma, on Flickr Trabant 601 - instructions 7 by László Torma, on Flickr
-
Hello Skoda and Speed Champions fans, Skoda 105 is one of the iconic Eastern Bloc cars of my childhood. It was a rear-engined, rear-wheel drive small family car that was produced by Czechoslovakian car manufacturer AZNP in Mladá Boleslav, Czechoslovakia between 1976 and 1990. Engine sizes were 1.05 and 1.2 liters respectively. The color scheme of this model is based on my father's first car. Building instructions are available on the following links: https://rebrickable.com/mocs/MOC-93968/_TLG_/skoda-105/#details https://www.mocsmarket.com/lego-mocs/skoda-105-building-instructions/ KIT is available on MOCHUB: https://www.mochub.com/moc/skoda-105 It is a studless build in the original, 6 studs wide Speed Champions scale and fits perfectly to the new City style cars too. I have minimized the number of the stickers to keep the flexibility of the parts in further builds, therefore only two standard vehicle registration plate stickers are used. I wanted to build the model as accurate as possible in this small scale, therefore it contains lots of details: for example the front ligths, the front grill with the narrow chrome line and Skoda logo, the side view mirrors and the rear view mirrors, the door handles, the black rubber stripe on the sides etc... Maybe the most challenging one was the C pillar solution. I tried to fill every unnecessary gaps and therefore some tricky build techniques are used. The model has space for two minifigures: one on the front seat with small or middle sized hair (the rear view mirror assembly has to be removed in this case) and one on the rear seat without any hair. I prefer the model as it is shown on the pictures, but there are some modification possibilties: a) a rear windscreen can be added (there is a more detailed explanation in the last step), b) many of Skoda 105 cars has side view mirrors only on one side, c) on the real cars the color of the door handles and side view mirrors are sometimes black on the other ones they are chrome. Thanks for visiting, _TLG_ Skoda 105 - Instructions 1 by László Torma, on Flickr Skoda 105 - Instructions 2 by László Torma, on Flickr Skoda 105 - Instructions 3 by László Torma, on Flickr Skoda 105 - Instructions 4 by László Torma, on Flickr Skoda 105 - Instructions 5 by László Torma, on Flickr
-
Hello, I have been designing some custom LEGO stickers lately and I'm really enjoying it, I have found this place near me that prints good quality vynil stickers. The problem is that these stickers are quite thick, so they won't work for example for the legs, cause they come off when the leg bends. Same for the heads when putting on hair. Is there thinner vynil sticker paper that would work for the legs? What's your experience? I'm also considering waterslide decals, I've read the tutorials here on the forums. I couldn't find any recent example of custom minifigures made using this technique, can anybody share some hi res photos? Also, is there any way to print light colors on dark pieces with waterslide paper? Thanks! ;)
-
Hello Ferrari and Speed Champions fans, The Ferrari Daytona SP3 is a limited production mid-engine sports car produced by Italian automobile manufacturer Ferrari, unveiled on 20 November 2021 for the 2023 model year. The design references to 1960s race cars, it is a modernization of the 330 P4, with the body work consisting distinguished low driver's seating position, raised front and rear wheel arches, and the Targa top design. Building instructions are available on the following links: https://rebrickable.com/mocs/MOC-131689/_TLG_/ferrari-daytona-sp3 https://www.mocsmarket.com/lego-mocs/ferrari-daytona-sp3/ It is a studless build in the new, 8 studs wide Speed Champions style. I wanted to create a sleek model which is as accurate as possible in this small scale. I prefer the brick built solutions to keep the flexibility of the used parts in further builds, and therefore only Ferrari logo and simple light gray head lights stickers are used. My intent was to keep the width-length-height ratio of the real car and this size makes it possible. The model contains lots of details: for example the emblematic front and hood grilles, the side and rear intakes, the side view mirrors etc... Maybe the most challenging one was the brick built narrow black and red lines on the front. I tried to fill every unnecessary gaps and therefore some tricky build techniques are used. On the pictures the red grills on the front are connected only by half studs. However, if you prefer more sturdy models, then full connection is usable too, it is a bit less accurate, but looks decent too. It is a very low build, an can roll well only on flat surfaces. The model has space for two minifigures. I suggest to use helmets, or small hairs, and the upper part of the seats have to be removed in this case. Thanks for visiting, _TLG_ Ferrari Daytona SP3 - instructions 1 by László Torma, on Flickr Ferrari Daytona SP3 - instructions 2 by László Torma, on Flickr Ferrari Daytona SP3 - instructions 3 by László Torma, on Flickr Ferrari Daytona SP3 - instructions 4 by László Torma, on Flickr Ferrari Daytona SP3 - instructions 5 by László Torma, on Flickr Ferrari Daytona SP3 - instructions 6 by László Torma, on Flickr Ferrari Daytona SP3 - instructions 7 by László Torma, on Flickr
-
Hello Speed Champions fans, Black Arrow is a ficticious hypercar which was designed for a "Hypercar building contest" hosted by sfh_bricks on Instagram. I tried to design something really cool inspired by the cyberpunk culture. Building instructions are available on the following links: https://rebrickable.com/mocs/MOC-119144/_TLG_/black-arrow-hypercar-concept It is a studless build in the new, 8 studs wide Speed Champions style. Some rules had to be followed: only certain types of car bases, wheels, fenders and windscreen are allowed, cockpit have to be closed, fixed dimensions (wheelbase, width, and maximum length), build must fit a full minifig with helmet. I prefer the brick built solutions to keep the flexibility of the used parts in further builds, and therefore stickers are not used. My intent was to keep the build smooth and to add lots of details: for example the air intakes, the rear wing, the side view mirrors etc. . Maybe the most challenging one was the double headlight. I tried to fill every unnecessary gaps and therefore some tricky build techniques are used. There are two versions of the front assembly : 1) the double headlight version which is a bit more extreme and 2) the simple headlight version which is more solid and sturdy. The model has space for one minifigure. I suggest to use a helmet or small hair. Thanks for visiting, _TLG_ Black Arrow 01 by László Torma, on Flickr Black Arrow 02 by László Torma, on Flickr Black Arrow 03 by László Torma, on Flickr Black Arrow 04 by László Torma, on Flickr Black Arrow 05 by László Torma, on Flickr Black Arrow 06 by László Torma, on Flickr Black Arrow 08 by László Torma, on Flickr Black Arrow 07 by László Torma, on Flickr
-
Hello, everyone. Recently, I've been trying to make use of all my spare minifigure pieces, especially older ones, to make Star Wars customs. I'm really proud of how some of them turned out. Of course, I found a bunch of yellow heads from back in the day, and put together a Jedi Master Tiplar minifigure. Everything was going well until I reached the Lekku-like part. I realized I had no yellow hairpiece, not a single one. Does anyone know what else I can do to complete the figure? It can be a brick-built design, a specific "common" piece, or in case of last resort, some kind of paper-made design. Thank you in advance! (Due to where I live, I'm unable to order anything online. So that won't be a working solution.)
-
My First Entry into the Purist Minifigure Contest. - This entry is titled "The Empire" Bio's below! I hope you like them! R5-J2 Repair Droid This sleek black and copper coloured repair droid was stationed on the second Death Star during the battle of Endor. Built slightly larger than the Imperial R2-Q5 unit. Snow Trooper Snowtroopers are stormtroopers trained for operations in artic conditions and equipped with specialized gear to protect the against cold.. Snowtroopers were deployed from AT-AT vehicles during the Battle of Hoth and proved ruthlessly effective in their attack on Echo Base. Darth Vader Seduced by the dark side of the force the young Jedi Master Anakin Skywalker become Darth Vader and turned against the Jedi Order. As Dark Lord of the Sith, a master of the dark side of the Force, and one of the Emperor's most trusted servants he became the scourge of the Jedi and drove the Jedi Purge.. Scout Trooper Scout troopers, also known as biker scouts were specially trained stormtroopers of the Imperial Army's Stormtrooper Corps. They were used by the Galactic Empire mainly for reconnaissance missions. They had lighter armor than standard stormtroopers, allowing greater range of movement and flexibility out in the field. Emperor’s Royal Guard The Emperor's Royal Guard, also known as the Crimson Guard, , and under the Galactic Republic as the Red Guard, was an elite unit whose members served as personal bodyguards to the Galactic Emperor, only the most skilled soldiers in the Imperial Military qualified for the extreme selection process to join the Royal Guard.
-
Hello! (This is a repost from a topic I made in Minifig Customization Workshop, which seemed to be unfitting since most people probably aren't knowledgable enough about Star Wars aside from here.) I'm currently going full Star Wars mode, so I am attempting to make use of all my spare minifigure parts to create characters. The picture shows some minifigs I own, feel free to point-out any character that could be made with any of these parts (added to other generic pieces from my collection), be it from Canon or EU/Legends. I'm really desperately looking for ideas. Anything from a head piece to a cape alone is fine!
-
Mariachi wagon and Mexican house One of the most vivid traditions of Mexico is surely the Mariachi culture. I’ve been always intrigued by Mariachi musicians and when LEGO released the Mariachi in Series 16 Collectible Minifigures I thought it was really cute and perfect for a Mexican themed MOC. My latest creation represents a classic Mexican scene: the Mariachi Wagon with the musicians on board ready to play the serenade to the beautiful girl on the terrace. On the right her father with his eyes well opened. The house boasts a multi-level terrace structure, a couple of arbors covered by flowers and a large patio. Cactus and plants of all kind are all around. In addition to the Mariachi, I also included in the diorama the Maraca Man (Series 2), Flamenco Dancer (Series 6), the Taco Tuesday Guy (the LEGO Movie) and the Cactus Girl (Series 18). Below few pictures: Hope you like it. More info and pictures on my Flickr. Thanks for stopping by!
-
Hello Porsche and Speed Champions fans, Porsche 906 aka Carrera 6 is a street-legal racing car from Porsche. It was announced in January 1966 and 50 examples were subsequently produced, thus meeting the homologation requirements of the FIA's new Group 4 Sports Car category to the number. The type would also compete in modified form in the Group 6 Sports Prototype class. For the year of the car's debut in 1966, it achieved numerous victories. The main inspiration came from a plastic toy car which I received as a child. Building instructions are available on the following links: https://rebrickable.com/mocs/MOC-106735/_TLG_/porsche-906 It is a studless build in the new, 8 studs wide Speed Champions style. I wanted to create a sleek model which is as accurate as possible in this small scale. I prefer the brick built solutions to keep the flexibility of the used parts in further builds, and therefore only a standard vehicle registration plate sticker is used. My intent was to keep the width-length-height ratio of the real car and this size makes it possible. The model contains lots of details: for example the emblematic front, the side view mirrors, the side air intakes etc. . Maybe the most challenging one was the iconic headlight, lots of solutions were tested before the final one. I tried to fill every unnecessary gaps and therefore some tricky build techniques are used. The model has space for one minifigure. I suggest to use a helmet or small hair. Thanks for visiting, _TLG_ Porsche 906 - Instructions 1 by László Torma, on Flickr Porsche 906 - Instructions 2 by László Torma, on Flickr Porsche 906 - Instructions 3 by László Torma, on Flickr Porsche 906 - Instructions 4 by László Torma, on Flickr Porsche 906 - Instructions 5 by László Torma, on Flickr Porsche 906 - Instructions 6 by László Torma, on Flickr Porsche 906 - Instructions 7 by László Torma, on Flickr Porsche 906 - Instructions 8 by László Torma, on Flickr
-
Hello Ferrari and Speed Champions fans, the Ferrari F40 (tipo F120) is a mid-engine, rear-wheel drive sports car engineered by Nicola Materazzi with styling by Pininfarina. It was built from 1987 to 1992, with the LM and GTE race car versions continuing production until 1994 and 1996 respectively. As the successor to the 288 GTO (also engineered by Materazzi), it was designed to celebrate Ferrari's 40th anniversary and was the last Ferrari automobile personally approved by Enzo Ferrari. At the time it was Ferrari's fastest, most powerful, and most expensive car for sale. Building instructions are available on the following links: https://rebrickable.com/mocs/MOC-99799/_TLG_/ferrari-f40 https://www.mocsmarket.com/lego-mocs/ferrari-f40-building-instructions/ It is a studless build in the new, 8 studs wide Speed Champions style. I wanted to create a sleek model which is as accurate as possible in this small scale. I prefer the brick built solutions to keep the flexibility of the used parts in further builds, and therefore only Ferrari logo stickers are used. (If you preferred a better shaping instead of a real rear side grill, then 2pcs of parts 61409 could replaced by 2pcs of tiles and some additional stickers, see the picture 3.) My intent was to keep the width-length-height ratio of the real car and this size makes it possible. The model contains lots of details: for example the emblematic front, hood , side and rear intakes, the narrow black line on the front and sides, the front turn signals, the side view mirrors etc... Maybe the most challenging one was the iconic rear side with the vehicle registration plate and the rear spoiler, here there is a half stud offset. I tried to fill every unnecessary gaps and therefore some tricky build techniques are used. The model has space for one minifigure. I suggest to use small or middle sized hair. Thanks for visiting, _TLG_ Ferrari F40 - instructions 1 by László Torma, on Flickr Ferrari F40 - instructions 2 by László Torma, on Flickr Ferrari F40 - instructions 3 by László Torma, on Flickr Ferrari F40 - instructions 4 by László Torma, on Flickr Ferrari F40 - instructions 5 by László Torma, on Flickr Ferrari F40 - instructions 6 by László Torma, on Flickr Ferrari F40 - instructions 7 by László Torma, on Flickr Ferrari F40 - instructions 8 by László Torma, on Flickr Ferrari F40 - instructions 9 by László Torma, on Flickr