Search the Community
Showing results for tags 'RC'.
Found 538 results
-
Lego Technic RC 3 Speed Manual Gearbox
TechnicBrickPower posted a topic in LEGO Technic, Mindstorms, Model Team and Scale Modeling
Here I've created my first attempt at a RC 3 speed gearbox allows you to change gears up and down using a power functions remote control. The gear changing mechanism is implemented using two parallel axles each with gears arranged in such a way that shifting one of the axles to one of three possible positions meshes the gears with 3 different gearing ratios. The gearing ratios implemented are 3:5, 1:1 and 5:3. The gear shifting axle is controlled by a lever mechanism driven by the 4 state stepper from the bugatti chiron set. This mechanism in turn is driven by a medium power functions motor activated by the remote control. Hope you like it. -

[MOC] RC/manual wrecker and car transport trailer
johnnym posted a topic in LEGO Technic, Mindstorms, Model Team and Scale Modeling
It's been some time since I provided an update on models from my Turbo Racers vs. Police Interceptors series here, most (22 cars + variations and a "dyno") are on Rebrickable now: https://rebrickable.com/mocs/?tag=10127&include_accessory=on&include_bmodel=on&include_subset=on Because the models I want to present today are not strictly racing, I thought about starting a new thread for them: TG Power wrecker This is a wrecker truck based on a modified body of the F A H R T-Laster with the following functionality: Selectable AWD/RWD (propelled by RC Buggy motor (Chinese replica installed ATM), steering by PF Servo motor, power and control by a BuWizz 2.0) manual front winch manual rear boom (closely based on the one from the 42079 B model but with manual double winch) rear PTO (motorized by PF M motor) rear towing hitch Colors are not final yet, e.g. the currently red boom mechanis will become LBG. This wrecker is pretty fast. I experimented with the new diffs to make it stronger instead, but I couldn't avoid gear slipping with a 12z bevel gear against the 28z bevel gear of the rear diff when driving it perpendicular. The propulsion motor then sat half a stud higher but was still only kept in place by pins and could be pushed up over time. Do others perhaps experience gear slipping with the new diff when driving it with a 12z bevel gear in perpendicular fashion? Can this work reliably at all? This video shows an application for the PTO, i.e. driving a small car lift: Car transport trailer This features: double winch at the front for pulling cars onto the platform (can be driven manually or from a PTO) tiltable platform (using two small LAs, manually driven) extendible ramps Except for the coloring I consider it pretty final. Hope you like it. -

Fastest Lego RC Ever?
1nxtmonster posted a topic in LEGO Technic, Mindstorms, Model Team and Scale Modeling
I put together a super-fast mini rc chassis. It has buggy motor geared up 20:16 for drive, and servo for steering. Lipo and v2 receiver provide power. It goes a measured 17.5 KPH (11 mph). So I was wondering if anyone built anything faster. Video: -
.thumb.gif.ad7c8d88b264ee812194946c07404504.gif)
[MOC] 2WD Drift Racer Chassis
mocbuild101 posted a topic in LEGO Technic, Mindstorms, Model Team and Scale Modeling
This was originally designed to be the smallest RC car to use a buggy motor, but it soon became an extremely powerful car capable of drifting. I refined the chassis design over 2 prototypes, and then tried multiple combinations of gear ratios and different sizes of wheels to achieve the best speed. The result: this MOC you are looking at right now! Driven by buggy motor, geared 1:1.25 Steered by PF servo Hidden power switch on underside LDcad/POV-Ray animation Video: http://bricksafe.com/files/mocbuild101/drift-racer-chassis/video.mpg Instructions: http://www.rebrickable.com/mocs/MOC-8835/mocbuild101/2wd-drift-racer-chassis 3D File http://www.bricksafe.com/files/mocbuild101/drift-racer-chassis/2WD Drift Racer 3D file.mpd -

[MOC] JCB 1CXT- Mini RC+Pneumatics Tracked Loader
CalimeroLego posted a topic in LEGO Technic, Mindstorms, Model Team and Scale Modeling
Hello everyone, Please let me introduce to you my first MOC on this website. I've been building for a while and finally I decided to share something; some of you that saw me in the Decreasing number of Mocs topic may be happy to see it. by Guilhem Martineau, on Flickr The 1CXT is a mini backhoe which particularity is to be driven by tracks and not wheels. As a mini backhoe it features a skid steer loader front and a rear mini excavator arm. The tracks allow for lower ground pressure, greater maneuverability and higher pushing or climbing power. Discover more about it here : JCB 1CXT This build has been almost 1.5 years in the making as i don't have much time in engineering school. I designed it using blueprints of the real machine and the scale of it is approximately 1:10. The model is 33 cm long without attachments and the rear arm folded, 78 cm long at maximum length with the fork, 22 cm high and 16 cm wide. by Guilhem Martineau, on Flickr This MOC is an hybrid of pneumatic and RC. I. RC : With the IR receiver you can control the drive with independent tracks control, and the movement of the front loader. The first receiver is for the tracks. They are driven by one L-Motor each. There is a 12:25 ratio so it's enough to move around. The tracks feature a tension system with one soft spring on each track. by Guilhem Martineau, on Flickr The second receiver is for the loader. One L-Motor controls the arm via a 20:12 ratio but I'm not happy with that, I can't figure how to fit a bigger ratio to gain some power. Because there are two big linear-actuators it's good enough. The attachment is tilted thanks to an M-Motor, directly hooked with two 12:12 90° transmission. then two mini linear actuators give the wanted movement. I am quite happy with the tilting range but not with the height, even tho I really can't do anything given the space that I have. by Guilhem Martineau, on Flickr II. Motorized : By turning the switch on the left side of the cab on, you start an XL-Motor and grant power to a second switch. The XL-Motor powers a pneumatic pump and a two way gearbox in the rear of the backhoe. With a red knob you can actuate the outriggers in either way without having to make the XL-motor run in the other direction. The two big outriggers are strong enough to lift the entire machine off the ground. The second switch is located in the roof of the cab. By turning the beacon left or right you rotate the excavator arm via an M-Motor and a worm gear setup. by Guilhem Martineau, on Flickr III. Pneumatics : The pump powered by the XL-Motor is hooked up to 4 switches that control the excavator arm. There are two of them in the cab and two sticking out of the roof. The one on the right hand side of the driver controls the first section of the arm and the one on the left the second section. The second section features an extension via a 1 stud thick cylinder controlled on the left when you are facing towards the arm. It takes the section from 15 to 20 cm to give the bucket, actuated by a 7 stud cylinder, a better reach. by Guilhem Martineau, on Flickr IV. Conclusion : Overall I am quite pleased with myself. The function setup might seem strange but there was no room for full RC and this was the best compromise I could find. The play-ability turned out to be great, my little brother loves it! You can find more pictures on my flickr account! Thank you for reading me and checking out my little loader! -
Hi everybody, I always wanted to make Madoca1977’s Baja Trophy Truck or something similar…. Well here’s my result. Now here you can see it in action…. I wanted to use buggy motors to drive the Baja buggy. (Unfortunately I only have 1 Lego Buggy motor, but for this model I bought 2 buggy motors from CADA). The front of the Baja Trophy Truck's chassis is the same as Madoca. The rear wheel drive is my own design. This also applies to the seats and cabin. The cabin is not as strong as Madoca's and also lacks the roll cage. I wanted to see if this model has a bit of speed and agility. As it turns out, I can barely drive the model because it is so fast. It drives on all kinds of terrain. The buggy drives fine with the normal 1.2 volt rechargeable batteries. But driving through the grass is a bit difficult. I once read a topic on this forum about lifepo4 batteries and thought let's give it a try. And to my surprise, it really drives everywhere like crazy. Topic "do-you-use-12v-or-15v-batteries" The buggy has : 1 Servo motor for steering 2 Buggy motors for driving (1 on each rear wheel) SBrick for control Battery box with 3x LiFePo4 and 3x dummy batteries (Work also fine with normal (reachable) batteries but has not much speed when driving through grass or very rough terrain) Building Instructions Nowadays I want to be able to rebuild my own models when I break them down, so I make a digital copy of the model. I always did this in LDD but since it is no longer updated I switched to Stud.io. It took some searching but now I am able to build the models and making the instructions is also easy. Here are some examples Since Madoca has provided his Baja Trophy Truck with free instructions, I want to share my Baja Buggy's instructions with everyone for free. Here you can find the Building Instructions and Studio file I'm not good at designing beautiful bodywork, but building this Baja Buggy has given me hours of building fun. Making the instruction toke me a lot of evening hours, but I like the result. Sorry for the experienced builders, the instructions are step by step as Lego does nowadays, this means that there are a total of 663 steps (about 500 pages). It is certainly not a professional design, there are some steps in the Studio file that do not fit completely, but it fits perfectly when building. Some work in progress Compare Here are some pictures showing the model compared to the famous 8466 4x4 Off-Roader and the 42110: Land Rover Defender. And a few renders of the Baja Buggy More pictures can be found here.
-
[WIP] 40+ km/h racer - need your help!
TechnicSummse posted a topic in LEGO Technic, Mindstorms, Model Team and Scale Modeling
[WIP] 40+ km/h lego car Since i like to see some ideas and open discussions, i decided to make this project public. So lets start with the current progress: A few pictures of the first tries, with the following specs: - 4 motors, gearing 24:8 from low-speed-otput - 1 PF-battery-box, attached to an old 9V switch, controlling 1 of the 4 buggy motors. Switch is controlled by a micromotor powered with the auxilary output of the rc unit. - 3 motors powered with the RC unit - total weight (without speed computer, to stay below the magic number :D) -> 991g (1012g with the computer) 4th motor is used as a booster, activated with the auxiliary padels, once the car reached like 15 km/h Fresh video, done 1 hour ago ;) (38,7 km/h) -> -

[MOC] Trophy Trial Truck
paave posted a topic in LEGO Technic, Mindstorms, Model Team and Scale Modeling
- 4x4 - Spring shocks suspension at the front - Leaf springs at the rear - Opening doors with locks, bonnet, tailgate - Removable body - 2L, Servo, IR, LiPo *** -

[MOC] KrAZ-255 (free building instructions added)
keymaker posted a topic in LEGO Technic, Mindstorms, Model Team and Scale Modeling
Hi, I would like to present you my last creation - ukrainian truck KrAZ-255. I was inspired by the model which is available in PC game: Spintires. The truck is built in scale 1:23. I tried to implement some key features of real truck, like suspension, drive train, details like engine and easy aplicable additions, which are present in the game. Enjoy :) Some details: - weight: 995g - dimensions LxWxH: 49x15x18 studs (without mirrors and additions) - live axle suspension - separate drive shaft for each axle - 6x6 drive, no diffs (L motor) - steering (M motor) - front and rear lights - working fake V8 engine - openable hood and doors - additions! Video: Instructions: https://rebrickable.com/mocs/MOC-55793/keymaker/kraz-255/#details There are some additions too! All of them are easy to connect or disconnect to swap to another. The first is simple crate: The second addition is prepared to wood transportation: The last one is the most advanced one - the crane. It is also partially remotely controlled. Functions: - rising/lowering two sections of the arm - crane rotation - gripper rotation - gripper closing/opening - extendable and lockable outriggers - openable maintenance section More photos: https://bricksafe.com/pages/keymaker/4.-kraz-255 I hope you like it :) -
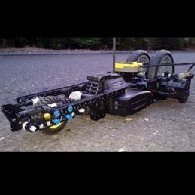
 Here's a wee little project I've spent the last 12 months on. Yes, it's a 3+ meters long LEGO ship that floats (without a drop of glue), moves and recovers sunken submarines, occasionally ripping them apart in the process. There's really too much to describe here so allow me to present you with a video covering all the details:
 -

[MOC] Ford F-150
mktechniccreations posted a topic in LEGO Technic, Mindstorms, Model Team and Scale Modeling
Hello everybody, my latest iteration is the pick up truck. The ford F-150. I am questioning a bit if its Creator or Technic, but chassis and power train is technic aspect and body is made of system bricks to deliver that specific look. It has 2 RC functions, drive and steering, steering is possible by virtual pivot point for narrow fenders look of system bricks, and only few manual options, as openable doors and rear cargo door. More photos are either on my FB page or Bricksafe page Bricksafe page Facebook Page most of all, from my MOC´s sales i am able to continue to build more creations, so it would be great if you support me this way if you like the model. Instructions are available here : Iinstructions Also can be fitted with Buwizz for more power : Buwizz -

[MOC] RC Floor Racer with video instructions
CF 28 posted a topic in LEGO Technic, Mindstorms, Model Team and Scale Modeling
Hello All. This is my newest little creation. Intended to rip it up indoors on flat floors, which it does. Powered by one (off-brand) buggy motor and a buwizz 2.0. Has 4wd with open differentials front and rear, and solid axles front and rear. The lack of suspension allows for a robust chassis which handles the power delivery with no drama. Front tie rods can disconnect if you run into something but is otherwise very reliable, and fun to drive. -

[MOC] Ford Mustang Hoonicorn
Anto posted a topic in LEGO Technic, Mindstorms, Model Team and Scale Modeling
Here's a MOC on which I'm working since the end of the previous summer! After I have done the video of my DS3, I had the idea to do a new chassis with 4 wheel drive. I thought it would not be possible, but the first prototype was better than my DS3! Actually the MOC is not finished. The stickers are missing, and I'm continuing to develop the chassis (I'm adding a 4th L motor) Actually there are 1 L for the front, and 2 L for the rear. The great advantage of the 4WD is that it can take a great angle while turning, but it's always controllable. But, that can have an inconvenient: the understeering. For that, I did the same thing on the real RC drift cars: I added a free wheel. So when I do not accelerate, the front wheels are not braked and the car does not understeer. You can see this video on this video, done for BuWizz with Charbel. But this is one. It's the same thing, but there is only my car. The final gymkhana will be for the next summer, because that requires a lot of time, and with the school, I have not enough time at another moment of the year. -
 EDIT 08/22 - CURRENT STATE : Here is a truck I just made (well, it actually took me several days) while being confined. I don't like to take apart my sets on display to MOC so I had to do with just a bunch of spare part I had, hence the strange color scheme and some questionable building technics and aesthetic choices (for example, I didn't had anything to make the front radiator grill so i had to improvise...) I wanted to make an American style Truck, inspired by the 5571, 5591, 8285 and more recently 42078, and remote controlled so I can have a little fun with it. Please don't be to harsh, this is my first Technic MOC that didn't end at the prototype status. The original goal was to test my new Buwizz but I finally used only original Lego PF element, because I rather use a physical remote than a smartphone. It is powered by a L motor (with the drivetrain as follow : Motor---16T / 16T---20T / differential / 20T--20T / differential) ) and steered with a servo, with a decent speed and a good steering lock. The IR receiver and standard AA battery box are housed in the back of the cab, and the latest can slide up for replacement by tilting the foldable spoiler forward. The spoiler can also be folded all the way down to make the cabin roof flat. The doors can be opened and the hood can be lifted, even though there is no fake engine underneath because that's where I furst intended to put the Buwizz. (Actually there is still enough room for it so I could convert the truck to a Buwizz model and remove all the biggest section of the cab for a more lightweight truck. :-) I could also run an axle under the cabin to the engine compartment and run a fake engine from the exposed 16T gear... A lot of work, thoughts, trial and errors went into the building of this truck, so I hope you will enjoy it as much as I do. There is still A LOT room for improvement, but unfortunately I was limited by the parts I had. Almost all of my grey and black liftarms and technic connectors whereused in the process ! I am not entirely satisfied by the roof of the cabin in the IR receiver area, which is a bit messy, and I really wish I had DBG curved panel for the sides instead of LBG ones. And of course, I wish I could replace the ugly black plate at the front with a proper truck grill. I also have to add a fifth wheel, as it is not able to pull anything in this configuration. It should be easy anyway, as I have a lot of mounting option at the rear (the black panel is only there for aesthetic purpose). I just have to figure out something with the parts i have left... In the end I like very much how it turned out though, and I may consider a bricklink order to fix the aforementioned issues once the lock-down is over. In the mean time, any comment and suggestion for improvement is welcome ! :-) EDIT : now with a running fake engine !
 -
Hi all. This is my RC Buggy, a C-Model build of the 4x4 Crawler set from several years ago now. After building the crawler most people want it to be faster, and with the original B-Model being the exact same drivetrain I thought I would build something to cruise around the house on flat floors. The buggy uses a much simpler drivetrain, rear drive with the two motors mounted transversely across the rear axle, with only one pair of gears each. One motor drives each wheel, eliminating the need for the differential. The motors face the same direction to avoid the use of a PF switch. Front suspension is independent a-arm type with decent travel. Rear is live axle swing arm. The buggy is much faster with the buwizz, of course, but I was pretty happy with the performance of the standard LEGO parts. https://rebrickable.com/mocs/MOC-47375/Cfachini/rc-buggy-9398-c/
-

Fast Black Buggy (FBB) With instructions.
Touc4nx posted a topic in LEGO Technic, Mindstorms, Model Team and Scale Modeling
It's time for a new MOC. This time it's a buggy. It is designed to be decently fast (considering it uses only two L motors) It features Full suspension. The rear axle is a live axle, and the front features double wishbone with caster angle. Sadly I don't have any Real life pictures... But I made a video. You can also buy the instructions on Rebrickable. I made them with stud.io. I added the cable in the instructions. https://rebrickable.com/mocs/MOC-50170/Toucanx/fbb-fast-black-buggy/#comments More pictures can be found on Bricksafe. -
[MOC] RC Karting (BuWizz)
Anto posted a topic in LEGO Technic, Mindstorms, Model Team and Scale Modeling
Hi! When I received my BuWizz, I wanted to make a fast RC model. It had to be very light, so a kart was good to make that. The mechanic is very simple. There are just some gears to turn the wheels at a high speed. As you can see, the driving is powered by two L motors and the steering by a servomotor. According to the tyres, this kart is very fast! -

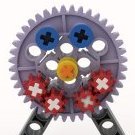
Help with Lego 5282 Controller
Ashfall posted a topic in LEGO Technic, Mindstorms, Model Team and Scale Modeling
A few months long ago, I bought the 5282 Rc Buggy controller to work with the battery box and the buggy motors. As of yesterday, I found out that my controller's left switch (The Very Important Drive Switch) had up and died, leaving the other 3 switches working fine. (2 toggle on the back, steering on the front) I have tested my two buggy battery boxes (6293c01 & 6272c01), cables, and buggy motors and they all work fine. I was wondering if anyone else has had this happen to them before, and whether you all think I should buy a new one or get it repaired. Picture of what the controller looks like: -
[MOC] RC Car Chassis - normal foward, 1/5 speed reverse
TechnicBrickPower posted a topic in LEGO Technic, Mindstorms, Model Team and Scale Modeling
Hi All, This is my first attempt at a car chassis. It is remote controlled with forward and reverse and remote controlled steering. What is different about this design is that it implements a special gearing mechanism that allows the car to drive forward at a normal speed, and 1/5 the speed in reverse. It uses a special configuration of differentials and a pair of ratchet gears to achieve this - however I did discover a flaw in the design after I built it. -
[MOC] Rock-Bouncer
mktechniccreations posted a topic in LEGO Technic, Mindstorms, Model Team and Scale Modeling
Hello my friend. This is my another asset to this forum in form of a off-roader/rock-crawler in this particular case its more like rock-bouncer, the reasons are follows. This MOC is powered by 3L Power function motors, which two of them are located in the rear axle, to help during uphill climb with more torque requested on the rear axle and overcome any obstacles Gear ratios are as followos, from motor to the axle its 3:1 to speed up the model, and afterwards it connected to new planetary hubs with theire respective ratios, steering is controlled by one servo and everything is controlled by one buwizz brick. Instructions are avaible at rebrickable: https://rebrickable.com/users/MK.Technic/mocs/ More photos on bricksafe page: https://bricksafe.com/pages/MK.Technic.Creations/rockcrawler-2l Video -

WIP Kraz 255B with Gearbox (For Fully RC TMM-3 Attachment)
The Vooduist posted a topic in LEGO Technic, Mindstorms, Model Team and Scale Modeling
Hey y'all, First time I'm gonna try to do a WIP page... Been fiddling around with this Kraz 255b MOC by the one and only Ingmar Spijkhoven and figured out what attachment I'll build finally. In short, it's a mini portable bridge (called a TMM-3 or a scissor bridge). Functions of this add on attachment consist of- Actuator for raising and lowering the bridge Winch for deploying and retracting the bridge 2 stabilizers at the end of the truck to... stabilize the truck Propulsion has been swapped from 2 L motors on the sides to 1 one buggy motor under the hood. Now the replica engine can be put on display. The gearbox I really wanted to try part 35188 to make all the functions AND propulsion run on the one motor. Where I guess we can call the "transfer case" is at is right behind the cab, so here's what the result is for now. It was tricky since the tandem axle left no room for fit it in between the chassis rails. The rear shaft will actually hit the bottom of this when compressed all the way. It's as compact as could get it with Studio (kinda a LDD fan). It'll probably need to be reinforced even more, but wanna see how it mates with the buggy motor first. Never built a gearbox before and destroyed many other MOC's with gearboxes so don't have high hopes. Note- all of the motorized attachments will be ran with worm gears, so not to concerned with the gear ratios... buggy motor just gonna make everything super fast anyways with a Buwizz. Where buggy motor is planning to be in the future a bit more securely. Just seeing how a gearbox could be placed and how high it'll be. Part 87408 is now mounted securely below the motor with two 24t gears feeding it above (will get a shot of it soon). Getting the motor to fit underneath the hood was very miserable. Couldn't use a servo anymore since the buggy motor is so low it'll interrupt the travel of the front axle. (yes the fenders are mounted backwards when rebuilt...) Ordered the parts for the gearbox and will update once they come in. Planned order of the build- Gearbox Wheels Test drive Stabilizers Building the frame/chassis of the TMM winch Scissor bridge Survive the misery -

MAZ 537 8X8 (WIP)
legotechnicus posted a topic in LEGO Technic, Mindstorms, Model Team and Scale Modeling
Hi guys, after a while of being not so active on the forum I decided to share a MOC (still wip) of a MAZ 537 8X8 truck. When I saw the 42099 I knew I needed some planetary hubs, so I got myself 8 of them :). Around this time I started playing with LEGO again, but kept it at american trucks (which i will post later). I started making a simple axle, because I really wanted the independent suspension on all axles like the real truck has. After this I build a test chassis and one thing led to another and now I have a rolling chassis for the truck. I came across these actions photo's of the truck and i'm planning to make some more and better pictures of the drivetrain and such. http://MAZ 537 WIP by J. van Veldhuizen, on Flickr http://MAZ 537 WIP by J. van Veldhuizen, on Flickr http://MAZ 537 WIP by J. van Veldhuizen, on Flickr Will keep posting updates! Have a nice evening, Legotechnicus -

Chassis for excavators
qwest70 posted a topic in LEGO Technic, Mindstorms, Model Team and Scale Modeling
Hello! Not so long ago, I became interested Lego technic and decided to assemble my own excavator based on 8043. I began to design a chassis on Lego Disigner. And now I present to your attention a new chassis. I made it completely independent on radio control with two M motors that can be changed to L motors, and a two-speed transmission, for better cross-country ability, which is switched manually. The gear ratio is 1 : 1 and 1.5 : 1. The chassis has become 3 cm longer - it is 20 studs and 20 cm, faster and more passable than 8043. I want to know your opinions, ideas and suggestions for improvement. https://photos.app.goo.gl/pLWJAhrkLgbQsicx9 https://photos.app.goo.gl/u9BBHzmuTSy9ownA7 https://photos.app.goo.gl/UtGjoYUEW6Aj4gzc6 https://photos.app.goo.gl/pD2fxTxMAZBFhk9b6 https://photos.app.goo.gl/vCrHdsWXX5dWx3pQ8 https://photos.app.goo.gl/xFhtM5JCXkzqVDfw7 https://photos.app.goo.gl/ViqR7qVG8FfWWggM6 https://photos.app.goo.gl/TVUwKgE8TWrpRN2R8 https://photos.app.goo.gl/JFmRJjed1vA3BnP4A https://photos.app.goo.gl/AXv7u1MQ4RnDmCDV9 https://photos.app.goo.gl/HVCucWCKUY3Gae8U8 -

[MOC] The Ultimate Pickup
Attika posted a topic in LEGO Technic, Mindstorms, Model Team and Scale Modeling
Hi there, I've developed a very annoying habit in the last few years. I randomly build pickups and other 4x4's. Even bought a real one. Anyway, the latest one is quite a biggy (sizewise) thanks to the planetary hubs. I've found a trick build them into solid axles with a practical ground clearance. This trick is going to be conroversial here. But start up with the video instead: All pics to be found here: https://bricksafe.com/pages/Attika77/ultimate-pickup In the comments under the video, noble members of our community noted, that there are parts which could solve the 1/4 stud misery. (if you don't know what is that, off you go, and whatch the video to the end! ) One of these is the 14t gear from the old diffs: I've made the attempt, but due to that collar on the bottom (top on the pic) it is too wide and puts srain on the drivline, making it hard to turn it by hand, so it is off the table unfortunatelly. So I speak for myself when I say, cuting those axles worth it. Not a rare piece, and costs 1 cent on bricklink, but only because there is no smaller value in the currency itself. In return the design prooved itself very reliable. Another "weakness" of the axle is the inperfect geometry. The wheelhubs aren't completelly vertical. There is about 1 degree tilting inside on the top. /---\ Before overdramatising this atribute, think, if you've noticed it in the video? Apart from the axles, the rest of the truck is the product of those years I've mentioned above. The essence of it is a simplest possible drivetrain: And a steering solution refined for non-rack steering: (The render is made of an older version, hence the different connector) If you don't belive your eyes, yes I choose to use 4x2 beams to form steering arms. It looks savage, but it is doing the job very well, brings ackerman geometry in the game. It does not hold the wheels rock solid of course, but in practicality it isn't noticable on the field. I've got a rack steering solution as well, but that brings the servo down A, onto the front axle (I don't do that. Ever ) B, into the mid chassis, where I don't have room for that. So we keep that for another build. Also has a working steering wheel using the rear output from the servo. ame old bevel system I've been using in most of my builds. Check the 1st episode of the pickup saga for more on that. Suspension Solid axles on a 3 link setup. It is kinda made up design, slightly inspired by the rear suspension of my Isuzu Trooper. Changing the shocks, or their hinge point on the top, gives 3 different ride height and suspension stiffness. The black, soft springs give a softer, relaxed, lower stance to it, while the dark grey shocks (known from the set 8880) are lifting the truck to a practical maximum, but still can reach full articulation. Not in all situations good to have your truck up in the sky. Like the climbing in the video. With low shock setting it made 52 degrees, but 47 "only" on big wheels and lifted shocks. The center of gravity moves with your ground clearance. That's about it, the rest is smoke-screen, like the body, and fancy doors. Oh, here is a fun fact: When it came to the seats, I realised I have 2 adjustable seats salvaged from a lorry build from about 5 years ago. Luckily they fit perfect so just made a rear bench in the same style. A non adjustable lazy style. Please feel free to ask about it, or just say something about cutting axles. I hope you find something useful here to take home with you. -

Tracked machine-gun Tank
Laurent14790 posted a topic in LEGO Technic, Mindstorms, Model Team and Scale Modeling
After reading several topics on Eurobricks, today, for the first time, I present an MOC on the forum. Do not hesitate to notify me if I made mistakes in my presentation. This MOC is a kind of tracked machine-gun Tank. It is powered by 2 BuWizz (one in the body, the other in the turret). Motorization: one RC per track with each a gearbox with 2 speeds. The two gearboxes are synchronized and controlled by a motor L. Orientation of the turret by motor M. Lifting of the "gun" by motor L. The firing mechanism uses 2 XL motors. Some pictures : Overview : Char Jaune Lego 001 by Laurent Lesellier, sur Flickr Char Jaune Lego 002 by Laurent Lesellier, sur Flickr Char Jaune Lego 001 by Laurent Lesellier, sur Flickr Char Jaune Lego 003 by Laurent Lesellier, sur Flickr The body : Char Jaune Lego 005 by Laurent Lesellier, sur Flickr Char Jaune Lego 006 by Laurent Lesellier, sur Flickr On-board ammunitions (105 rounds) At around 6 shots per second, the magazine empties in 17 seconds! it's very fast ! Char Jaune Lego 004 by Laurent Lesellier, sur Flickr Photo of a charger, there are 15 in the magazine: Char Jaune Lego 008 by Laurent Lesellier, sur Flickr For the video, you can watch the video on my wife's Facebook account. If you like it, you can like, comment and share! This will give me a few points for the contest organized by BuWizz. The subject of the competition is how to play with Lego during the lockdown due to the coronavirus! I propose an idea with playmobil! Do you like it? Thanks for reading. Do not hesitate to comment.