Search the Community
Showing results for tags 'diesel'.
Found 78 results
-

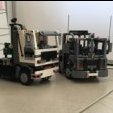
Sabine River and Northern 408 (NC class diesel switcher) real world MOC
Murdoch17 posted a topic in LEGO Train Tech
My LEGO model of Sabine River and Northern 408 is below the short handrail, just behind the access ladder. This MOC is based on a real loco, one of five NC class switchers built by Electro-Motive Corporation. (which later became EMD when it was bought by General Motors) Some of these five locomotives had General Electric electrical equipment, while others had Westinghouse, since EMC's own designs were not yet ready. Wikipedia doesn't have a lot to say on the NC class (it doesn't even have it own page!), but it does give us the history of this specific loco which is the last of it's class (as far as I know): 'EMC S/N 651 (built May 1937): Youngstown and Northern Railroad 202, to Elgin, Joliet and Eastern Railroad 408 in April 1946, to Marinette, Tomahawk & Western Railroad 408, then finally to the Sabine River and Northern Railroad as 408 before being preserved in the National Museum of Transportation in St. Louis, Missouri.' In addition, the engine's plaque at the museum says it cost $91,500 when new, and arrived at the museum in 1974. During the summer months, you can climb into the cab... although it is a very steep climb. The Lego model was heavily inspired by a SW1500 (which is a later cousin to the NC type) model I saw here. You can also read more about the Sabine River and Northern here on Wikipedia. I couldn't possibly get Sabine River and Northern to fit on the long hood, so just initials were placed instead. I also used a new printed 1x6 tile from set 60401 (Construction Steamroller) near the cab door. Thoughts? -
Portuguese Diesel Nez Cassé From the 80's 1:45 scale Circa 2000 parts Powered by 2 Powerfunctions train Motors and Buwizz Custom Lights Custom Magnet Couplers from HA Bricks 49cm long 1kg The CP1906(from the 1900 series) is a shorter cousin of the CC72000. Initially, they were exclusively used for cargo service by CP Comboios de Portugal. Nowadays, they also serve in Medway. Please do not mistake this for its older electric cousin, the CP2600 With his Yellow Medway Version
-
SOMAFEL is today a leading company in the construction of railway tracks and overhead lines in Portugal. This locomotive is used to maneuver some Rail work materials. It used to belong to CP Comboios de Portugal. It had several different liveries, this one is the current one. This was a commissioned job for a Somafel employee, unlike my other 1400 English Electric Series, this one is not motorized, It was requested as an exhibition model only, however, it is ready to be motorized, I did leave the room, for wires and battery.
-
I'm happy to present my most recent build, a midwestern grain train from the late 1970's in the US. I've been working on it for most of this year, though the inspiration and some parts purchases date back to 2006. Towards the end of last winter I had been train watching and after about a half dozen trains, each led by a couple of black locomotives pulling a mile long monochromatic string of cars, it got me thinking about an underappreciated heyday. Between 1960 and 1990 American freight cars were a burst of color, and even had a few hints of the old school railroad pride shining through, e.g., Milwaukee Road spending the extra dollar to weld a plate on the side of their covered hoppers declaring themselves "America's Resourceful Railroad." The freight cars were 100% utilitarian in design, but in the bright colors they went a little further and said, "look at me," with each car taking a different hue. Since then, freight cars have drifted back to browns and grays only flashing a random graffiti tag for flare after a night of hanging around with the wrong crowds. I wanted to capture that era in the days just after KarTrak Automatic Car Identification's failure showed how dirty railroading in America can be. But how and what? I've always had a soft spot for covered hopper cars, in particular those based on the Pullman Standard 3 bay design. I had a go at these cars in 2006 Shortly thereafter, I started collecting 1x2 door rail plates and double convex inverted slopes in yellow to build a Milwaukee Road version. Those parts sat in a box and I hadn't returned to that prototype until now. On the flip side, I had most of the parts in hand that I needed to start testing this build. Happy with the prototype, I expanded to 5 different liveries. These covered hoppers are 6 wide, featuring custom decals. With their weight they need roller bearing trucks, to ensure the trucks match the width of the car they use custom truck sides from TrainedBricks.com. At this scale it is impossible to get all of the details, so in this design I focused on capturing the essence, e.g., a continuous slope for the bins from the end of the car to the bottom of the chute, using thin vertical and horizontal members on the ends of the cars. Several of the cars have prototypical placards 1/2 plate out from the ribbing. A couple of the cars consumed almost all of the double convex inverted slopes available on bricklink in the given color. As with most of my designs, these cars are designed to negotiate R40 curves, and in turn, replicating the form of the prototype gave me a true appreciation of the design of the actual cars. Of course, once you start down the rabbit hole of looking at covered hopper cars, you wind up seeing lots of other cool cars... and the potential to build in colors that do not have door rails (dark green). Well, next thing I knew, I also had a design for the ACF center flow covered hopper cars. Once more the covered hoppers are 6 wide. These cars were designed as a complement to the Pullman Standard cars to fill out the fleet and bring in a few more colors/liveries. Why stop at 8 cars? Good question, of course you need a Canadian cylindrical covered hopper, who doesn't need a cylindrical hopper car? So I built one too. Now I know you've all been there, you build a MOC and then discover you need a second MOC to support the first MOC (or in this case, a 10th MOC to support the first 9). When I started out I did not worry too much about what would pull these cars. I have a few period appropriate 9v locomotives, most recent of which are from 2014, a pair of SW1200's. While there was one major solution (FX Track) two problems remained, (1) my old 9v locomotives were not powerful enough to pull the full train, and (2) it has been over a decade since I've run 9v trains in public. I originally thought that I would eventually address #2 at some later point in time, but #1 escalated the need. So off I went to build a period appropriate PF locomotive. I returned to MNS, the same road as the SW1200's. Minneapolis Northfield and Southern was a spunky shortline with a long history and a large fan club for a railroad with just over 80 miles of track. They had a history of unusual locomotives starting with their predecessor, the never electrified Dan Patch Electric Lines and the first successful gas-electric locomotive that was the predecessor to diesel electric locomotives, to a fleet of massive Baldwin center cab locomotives built in the late 40's (nicknamed the "blue dragons"), and their last purchased locomotives the SD39's in 1968. These were essentially SD40's with smaller prime movers (and thus, lower horsepower). They were painted in a distinct dark blue with a single white stripe running the length of the locomotive. The SD39's served until the MNS was purchased by Soo Line in 1982 and one has returned to the shortline (Progressive Rail) that now operates a portion of the old MNS route. My 6 wide SD39 has a lot packed inside, including 2 PF train motors, 1 rechargeable PF battery pack, an IR receiver, a pole reverser, and four weight bricks. Fitting it all in required some compromises, like filling the cab with the IR receiver, and my desire to make the white stripe brick built as much as possible made fitting the battery a lot more complicated. One obvious tradeoff is that the long hood is 5 studs wide to hide the battery, I would have preferred to keep it 4 studs wide. But also a little ingenuity to plow through some of the challenges. If you look closely at the side views, just above the fuel tank you can seek a small patch of dark gray from the battery. I used an old school 4.5v motor plate with 4x8 cutout to drop the battery down below the white stripe and snotted studs to hold the tiles on that cover the side of the battery. The build uses custom stickers, 3-axle motor covers and fan housings from trainedbricks.com, and custom railings to keep them closer to proportional than the brick built alternatives. But I did have to use the classic train wagon ends as a nod to the fact that this is a Lego train after all. Okay... just one more problem, I didn't have a respectable MNS caboose. So now I needed an 11th MOC to support the 10th. The MNS purchased 3 new bay window cabooses in 1972 and like the SD39's, these served until the MNS was purchased by Soo Line in 1982 and one has returned to the shortline (Progressive Rail) that now operates a portion of the old MNS route. The caboose is 6 wide (8 at the bays), featuring custom decals, roller bearing trucks to match the hopper cars. The net result is my all new MNS grain train, with 5 Pullman Standard 3 bay covered hopper cars, 3 ACF 3 bay covered hopper cars, 1 Canadian cylindrical covered hopper car, an MNS SD39 and MNS bay window caboose. All in liveries that would have been seen in the late 1970's or early 1980's. The total length is about 11 ft. All of the cars are 6 wide. Click here for a mediocre video of the train in action I hope you enjoy the train. Questions, comments and constructive suggestions are always welcome The full album is here
-
Hi this is the same model as CP1401 but with the classic blue color scheme It has 2 PF train motors Buwizz 2.0 Ludricous (But I don't use the Ludricous mode, this is not a High-speed train :P) DYI Lights It can run alone or synchronize with the CP1401. This is part of my Consist "CP Miradouro Phase 2" which has 2 Locomotives and 5 Coaches Now, some " CP Miradouro" consists The funny thing about the real-life train is the inconsistency of the rolling stock, it's almost impossible to see the same train twice, sometimes it's just two coaches, sometimes it has two locomotives, sometimes are fully colourful with several different coaches, sometimes are the same colors, etc Now the full train has 3,60meters long, but unfortunately I don't have enough room or backdrop to take a nice photo.
-
Hello, I would like to present to you my MOC of Santa's Sleigh. Initially it was supposed to by more typical endeavor but my local LUG (WAWLUG) held a small contest to build whatever using Stuntz motors. It only had to go half a meter, which gave birth to idea of a Diesel Sleigh :) The sleigh is pulled by three Stuntz motors and one regular and on very even surface can go up to about 1,5 meters. The biggest problem is the fact the sleigh have only one wheel that is used to "ring" two bells it has. Those will swing back and forth as the sleigh go. I hope you'll enjoy this little piece of X-mas, even though it is a bit late :)
-
NEZ Cassé LEGO Replica of the former CP1903, 1903 is the only Locomotive on the Medway fleet with this "Pikachu" color, that is what makes her unique. I called Her because it was baptized with the female name "Eva" The 1900 class locomotives were built by Sorefame in Portugal under license from the French company Alsthom and are visually similar to SNCF Class CC 72000 Motorized with Power functions and 3rd party Bluetooth Battery compatible with PF elements.
-
I present my 12v recreation of the Coras Iompar Eireann (old name for Irish Rail) E428 diesel shunter. The E class (also called 421 class) was built in the Inchicore Works in the early 1960s and were retired in the early 1980s. This particular engine is located at a station in private ownership not far from where I live. The model is 6 wide and I tried to keep it as true to the 12v era as possible, including the full size train doors, no snots and all parts available in the 1980s up to the very early 1990s. (The orange colour arrived in 1993. I did try red originally but it need the orange for the iconic CIE colour scheme.) here is the photo I took of the original the shunter ran in both directions I added some engine detail... the 1 weight brick included is behind the first door so the grey brick is hiding it and the technic brick is on top of it. That's a technic cylinder at the back. i added some cab detail (based on some pictures I found online that I don't have a link to any more It runs well on my 12v R40 curves and switches. (No video yet as I had to move my layout) The front wheel is fixed and the motor pivots the back section also pivots to help keep the carriages connect through the switches. The carriage was also built to complete the display as per the real thing. Green train windows don't exist so I just used regular 1 x 4 x 3 windows and kept it 28 studs long. Comments and suggestions welcome!
-
Earthmoving plant package
BIGRIG2005 posted a topic in LEGO Technic, Mindstorms, Model Team and Scale Modeling
My new MOC consists of a couple of items to form a big earthmoving plant package. 1. 42078 c model, Renault AE Magnum tipper and dual axle plant trailer. Truck -HOG steering -tilt cab -opening doors -working E9 V8 Mack Diesel engine -tipper with lockable tailgate -hitch at the back to couple to a wide range of different trailers. Trailer -floating pin hitch -folding legs -droppable rear ramps via small actuators -bed toolbox to store wheel chocks, chains etc. 2. 42053 c model, backhoe -4 wheel steering -quick hitch on the loader -tilting hitch on the loader -outriggers -sliding back actor with pin locks to hold actor in place. -quick hitch bucket on back actor -swinging actor with locks to hold in place for transport purposes -lift and extend functions for back actor -pneumatic functions for back actor and front loader tilt hitch -manual functions for back actor bucket angle and front loader lifting and lowering. 3. Mini excavator made from my spare parts box. -lifting and lowering as well as extension of excavator boom -front blade -swinging of main frame -tilting bucket Altogether this creates an ideal construction and earthmoving plant package. Hope you all like it. -
Hey Guys. I have been working on this project on and off since September of 2021. It is not my first MOC, but the first I care to show off here as I feel it is of a sufficient standard. Small Powered Up Shunter - Pybricks Control The brief was originally a clone of @BrickPirate's Small PF Shunter, and I was indeed using Power Functions parts in the beginning. As there were no instructions or files available, I reverse engineered what I could and went on from there. Then I decided I didn't want the smallest shunter ever, just the smallest on my layout. I also liked a more rounded styling and incorporated that into the design. The colour choice was pretty much determined by what I had to hand after designing a previous MOC (An Emerald Night clone in dark azure with a custom tender and 2L PF motors in the boiler). The white was to somewhat hide the Powered Up Hub in plain sight. The side covers are shamelessly ripped straight from the aforementioned MOC. I put a couple of round times with holes on the front long hood to allow the hub's light and power switches to be accessible. Previously I was removing tiles to access the power switch. Now I can use an axle or whatever I have to hand to power on and off. But there was a little unused space in the rear electrical box hood, so I made a little starting pin which can hide inside if I'm ever anywhere without a technic axle to hand! It just pops in the hole, then a couple of presses later the hub is powered on and the Pybricks program is started. The pin then gets stowed in the rear again until it is time to switch off. I originally had this on PF with a train motor in place, which I decided was just too fast and uncontrollable for slow shunting work. So I decided to put in a Powered Up linear motor. The medium was the only one which was able to fit. The square profile helps with fitment as it is only connected to the chassis physically by the axle to the drive gears. Otherwise it just sort of rests in there. The sided and rear short hood hold it in place against the back of the PU Hub. The wiring is a mess as it has nowhere to go but up in this configuration, but there's no room for a Minifig, so not too much of a sacrifice. The drive software is actually from another Train Tech thread. Control your trains without smart device - with Pybricks courtesy of @Lok24 With the custom profile they designed I can now move around the layout at reasonable speed pulling a consist, and then with a press of the centre button on the PU controller, I can switch into super low speed shunting mode. The benefits of the linear motor here are that the Hub will control voltage to keep the loco moving at the desired speed according to load. Plus the gear drive sounds a little bit like cooling fans spinning so I can pretend a little bit! Overall I'm quite happy with it for now, but I will probably end up changing out a few more things as time goes on. If I can get the motor mounted horizontally I may be able to get the drive line top a 4WD version, but I'm not holding out any hope. Poor little guy could really use 4WD! It can get stuck on points and does slip quite a bit if I load it up with too many pieces of rolling stock. I have custom traction bands on in place of the standard Lego ones for more grip but it does struggle for it sometimes. Thanks, hope you enjoy the pictures. I'll see if I can get a little running video together later on.
-
I have made this topic to share my train designs with the Eurobricks community. Here is a quick Moc I made this morning in Bricklink Studio before breakfast. It is a simple diesel shunter with no motor and old style wheels. I will be making a motorized version to and will put in in this topic once completed along with more train stuff. I also will try to make the studio files for most trains available. Here are some pictures; studio file HERE.
-
29.09.2023 - new locomotives Hello there and thank you for stopping by! Since posting last time i mocced up 3 more locomotives. They have been kept in the same "9V era plus style" i usually build in. The first new addition is a EMD GP "High Nose" Locomotive. It is based loosely on GP7 and GP9 Locomotives and is build in a CN Paint scheme to not look out of place when it runs together with the 10133 BNSF Loco. Speaking of 10133, the lower part and the longer hood-roof is heavily based on this set. EMD GP Highnose CN by Henrik S, auf Flickr EMD GP Highnose CN by Henrik S, auf Flickr EMD GP Highnose CN by Henrik S, auf Flickr EMD GP Highnose CN by Henrik S, auf Flickr Next we have a EMD Switcher Locomotive. Again, it resembles no particular prototype, it is basically an attempt to capture the general vibe of this type of locomotive in a 6 wide format. EMD SW Switcher Locomotive by Henrik S, auf Flickr EMD SW Switcher Locomotive by Henrik S, auf Flickr EMD SW Switcher Locomotive by Henrik S, auf Flickr EMD SW Switcher Locomotive by Henrik S, auf Flickr EMD SW Switcher Locomotive by Henrik S, auf Flickr The 3rd Locomotive is a european one, it is loosely based on the swiss Bernina Crocodile. Most of the parts used to build this locomotive come from set 10277 ( which was killed to create this 6 wide, 9V powered baby crocodile ). Bernina Krokodil (10277 Alternative) by Henrik S, auf Flickr Bernina Krokodil (10277 Alternative) by Henrik S, auf Flickr Bernina Krokodil (10277 Alternative) by Henrik S, auf Flickr Hope you enjoy, comments and constructive criticism are always welcome! _____________________________________________________________________________________________________________________________________________________________________________________________________________________________ It´s been a long time since i last posted in this thread . Some pictures on flickr were lost since then, some mocs got updated, some got dismembered to loot pieces for other projects. So i decided to revive this thread, and to show you some of my Mocs, mods and stuff i´ve been tinkering with since then. The Introduction of the 9V tracks from fxbricks in bigger radiuses triggered me to dust of my beloved 9v sets and to get into the rabbithole of lego trains again. I always had a soft spot for the 9V system, the sound of the metal rails.. It is a fondly remembered part of my childhood, many happy hours were spent playing with it . My models are obviously not exactly to scale. Some are not even prototypical. My goal has been to build something which resembles sets of the 9v era, including the wide range of new parts introduced since then. Another goal is playability. If possible I try to incorporate many play features (minifig seatings, working doors and mechanisms, cockpits and interiors, etc.). Locos: 4551 - crocodile I do not own this set, but i always liked the look of it. My adaptation of the crocodile has been color switched, from the ÖBB red to the german green color sheme. The „beaks“ of the original set were prone to derail. They have been changed to avoid this problem and have been shortened to look more prototypical. Other changes include the addition of 2 windows in the main section and a different roof. Lego 4551 Crocodile - modded by Henrik S, auf Flickr Lego 4551 Crocodile - modded by Henrik S, auf Flickr Lego 4551 Crocodile - modded by Henrik S, auf Flickr 4564 - 3 axle Shunting diesel Almost completly different from the original 4 axled locomotive found in Set 4564, i rebuild this loco to a 3 axle configuration. I always liked small shunting diesels like the german v60 or the vossloh G6, so the design of the superstructure resembles them. Lego 4564 - Modded by Henrik S, auf Flickr Lego 4564 - Modded by Henrik S, auf Flickr Lego 4564 - Modded by Henrik S, auf Flickr MOC – 4 axle modern diesel shunter A 4 axled diesel shunter with guardrails for operating safety. Loosely based on Vossloh and other very rectangular modern designs. Modern Diesel Shunter by Henrik S, auf Flickr Modern Diesel Shunter by Henrik S, auf Flickr Modern Diesel Shunter by Henrik S, auf Flickr Modern Diesel Shunter by Henrik S, auf Flickr DB BR 111 – electric locomotive An electric locomotive for passenger train services, heavily based on the german Baureihe 111. Build in the striking ocean blue – tan color sheme the DB used quite some time ago. BR 111 by Henrik S, auf Flickr BR 111 by Henrik S, auf Flickr BR 111 by Henrik S, auf Flickr Here it is with 4 passenger coaches. BR 111 with Passenger Train by Henrik S, auf Flickr The dining car, with pantograph to power the kitchen. Dining Car by Henrik S, auf Flickr Dining Car by Henrik S, auf Flickr 10183 - Modern electric locomotive This engine is loosely based on modern TRAXX locos. The base for this loco lies in a B Variant of set 10183 – Hobby train. After building the B model i kept tinkering with it, and over time it evolved into something resembling a modern TRAXX Locomotive. I actually have this loco 2-times: One in a red color sheme like DB uses, 10183 - Hobby Train Mod by Henrik S, auf Flickr and one in a black color sheme based on MRCE (leasing service for locomotives in Europe) Lego Hobby Train B Version (V2) by Henrik S, auf Flickr Lego Hobby Train B Version (V2) by Henrik S, auf Flickr Lego Hobby Train B Version (V2) by Henrik S, auf Flickr 7938 - Commuter train A lot has been changed. The middle waggon was removed and the remaining two parts are now connected with a jacobs boogie. The pantographs were removed, as the prototype for my version is powered by diesel. Another noteworthy change is the addition of implied doors. 7938 Mod by Henrik S, auf Flickr 7938 Mod by Henrik S, auf Flickr 7938 Mod - Cockpit by Henrik S, auf Flickr 7938 Mod - interior by Henrik S, auf Flickr Rolling stock: Container car; 2 and 4 axle versions It is build to carry the classic 4 wide containers common in the 9v era. The 4 wide containers look a bit small sizewise, but i like the versatility they offer. They can be transported by the classic 4 wide lego trucks, they can be grabbed by the Container Stacker. So in short, the playability outweighed the scale here. Container Cars by Henrik S, auf Flickr Container Car by Henrik S, auf Flickr Container Car by Henrik S, auf Flickr Container Car by Henrik S, auf Flickr Tank car A 4 axled tank car. The tank can be build in a variety of colors. The solution for the fairly round tank is not by me. I think i have seen the design somewhere here on eurobricks, but i don´t know by whom unfortunatly. So, if you read this and this is your design, please let me know and i will add your name for this technique! The original Design is by Phoxtane, check his tank car here: Tank Cars by Henrik S, auf Flickr Tank Car by Henrik S, auf Flickr 4537 – Twin Tank Car I fondly remember this waggon from my childhood. The original set rocked the classic white-green-red octan colors. On my quest to achieve a round and 6 wide design, this iconic color sheme unfortunatly had to go. Now it is dark bluish gray, which i think is a pretty common color for this type of freight car, so it is okay with me. Twin Tank Car by Henrik S, auf Flickr Twin Tank Car by Henrik S, auf Flickr EAOS - gondola car A car which can be seen countless times here in europe. There is not much to say about this car really, i tried to keep the weight down and the model features working doors. EAOS Gondola car by Henrik S, auf Flickr EAOS Gondola car by Henrik S, auf Flickr Small Box Car A classic of the 9V Waggons, in my oppinion it holds up nicely even today. The only change to it has been the addition of a curved roof, which in my oppinion looks pretty nice. Small Box Cars by Henrik S, auf Flickr Buildings and other stuff: 4554 – Trainstation Another classic 9V set (which i got for christmas in the 90s). I did not change much. Mainly the switch to a tan paint job and the interior of the station are different. The Rest is largely unchanged. 4554 Trainstation by Henrik S, auf Flickr 4554 Trainstation by Henrik S, auf Flickr 4554 Trainstation by Henrik S, auf Flickr 4554 Trainstation by Henrik S, auf Flickr 4554 Trainstation by Henrik S, auf Flickr 4554 Trainstation by Henrik S, auf Flickr 4555 – Cargo station Much like set 4554, not much was changed. I used the modern profile / masonry bricks to get a bit more detail into the building. The interior was tiled and the sparse furnishings were a bit extended. This set is part of the reason why i kept the 4 wide containers. I really like the old grippers in this set, which are also used on the container stacker set. 4555 Cargo Station by Henrik S, auf Flickr 4555 Cargo Station by Henrik S, auf Flickr 4555 Cargo Station by Henrik S, auf Flickr 4555 Cargo Station by Henrik S, auf Flickr Dockside crane Like the old harbour sets of the Lego town days, the base for my dockside is made of the elevated baseplates. The crane works and is able to unload the cargo from boat into freight cars (or into cargo trucks). Dockside Carne by Henrik S, auf Flickr Dockside Carne by Henrik S, auf Flickr So, thats all for now. I plan to update this thread kinda regularly, and to upload more content in the near future. Please let me know your opionions, critics and suggestions. I hope you have fun looking through these pictures!
-
*A Lego IDEAS submission* Frankie's Farm by Nick Jackson, on Flickr Welcome to the farm! This is a farm-themed freight train set that features the small diesel engine Shiro-chan. Shiro-chan v2 (front) by Nick Jackson, on Flickr There are three freight cars to transport cargo from the farm to your LEGO town. These are an all-purpose gondola, a tanker car, and a wood-paneled livestock car. Gondola (v2) by Nick Jackson, on Flickr Tank Car by Nick Jackson, on Flickr Stock Car (open) by Nick Jackson, on Flickr The farm consists of a barn with a loft, a mini tractor with a trailer, and a raised goods platform with a crane hoist. Barn Full by Nick Jackson, on Flickr Tractor (front) by Nick Jackson, on Flickr Farm Platform by Nick Jackson, on Flickr In the barn's loft there is a spot where a minifigure can take a quick nap next to the hay! Barn Loft by Nick Jackson, on Flickr Barn Open by Nick Jackson, on Flickr Drive the tractor and trailer to haul crates' worth of goods and supplies between the barn and the platform. The cargo platform has attachment points in the base which allow you to rearrange the ramps and staircase. The barn can also attach to the platform. For minifigures, there are two train operators, three farmhands, and an assortment of farm animals including cows, chickens, dogs and cats. Barn, Tractor, & Minifigs by Nick Jackson, on Flickr I built this digitally via Stud.io, but I have also built Shiro-chan (the engine) in real life. Depending on how the support campaign goes, I will attempt to construct the rest of the set. Not all of the parts exist (yet) in the colors depicted however. Thanks so much for taking some time to look at my project! **UPDATE** 6/28/22 So, I ordered some parts and set about building this in real bricks! I think the set turned out rather well! Can you spot the differences between the renders and the irl build…?
-
I haven't built a new diesel MOC in a little bit, so I decided to take a crack at a new challenge. This time, I decided to try and do a GE U36B. These were part of General Electric's 'Universal' Series, with 3600 HP and a B-B wheel arrangement, hence the name. 125 were produced between 1969 and 1974, with most of them going to Auto-Train and Seaboard Coast Line (Later CSX). As far as I can tell, most of these units were scrapped with only a few remaining examples today. And then here is my rendition of it. The livery is of my fictional railway company. I'm pretty proud of the building techniques that I used to get the front of the nose to offset like that, but it still needs a bit of work to be closer to the prototype, I think. I also tried using the regular steering wheel piece for the brake on the side of the nose, but I found it stuck out too far. Instead, I went with an old film reel piece, and I think it gets the idea across. Thankfully it came in white. Squeezing the PU hub into this locomotive was tough while keeping the entire back end as close to 4w as possible. I ended up using a technique I used previously to mount the hub inside the fuel tank. I then used sideways flags to try and hide the connections for the motors. I think it's decently well hidden, but I couldn't come up with another better solution. Also, since the Hub is so far down in the locomotive, a small section of roof lifts off and there is a technic axle you can push that hits the button on the Hub. Overall, I'm pretty happy with it. There's a few things I want to revisit and redo at some point, but for now, I'm calling it done. As always, if you would like to download the Stud.io file, here is the link to all of my MOCs I've posted on here. This one is under the file named "U36B". Legownz's Train Mocs - Bricksafe Thanks for looking!
-

[MOC] Lego DRG V3201 - Diesel/Pneumatic Locomotive - in 12v style
Paperinik77pk posted a topic in LEGO Train Tech
Hi all, always starting from this inspiring discussion... ... @Reker1000000 introduced me to a very particular locomotive: "DB V3201 seems like it would be an interesting starting point for a locomotive to model in 12v style with the red motor..." The locomotive we're speaking about is the DRG V3201, one of the first experiments to upgrade from steam to Diesel engines. In this case, Diesel motors were available , but problem was related to transmitting their power to the wheels. Gears were too weak, Hydraulic transimission was still in development...so the idea was to replace steam with compressed air, therefore maintaining the "old" transmission system (including distribution) used by steamers. In short, it worked this way: DIESEL ENGINE --> COMPRESSOR --> RESERVOIR -->CYLINDERS --> COUPLING RODS --> WHEELS More or less what is seen in some Pneumatic locomotives made in Lego (great stuff!) with electric motors. Well, seems great, but there were many problems related to the heating of compressed air, its cooling (!) and cylinders lubrication - all for maintaining its efficiency. Here's an interesting link! http://www.douglas-self.com/MUSEUM/LOCOLOCO/diesair/diesair.htm All in all - a very complex hybrid system, with many gaps to be solved with engineering "patches". But it's a cool locomotive and making it in 12v style could really be a challenging task. First of all, it's the most asymmetric thing I've ever seen , second - it's a very tormented design - which cannot be captured fully in 12v style, due to lack of parts at the time. It's however a very peculiar locomotive (depicted also in a postal stamp!!!) and it's worth to be tried. Here it is, just out of the shed , helped by a small V60. In reality, this event could not happen, since the V3201 was scrapped many years before the launch of the little shunter, but since we can do whatever we like with our fantasy, I was more optimistic and imagined a restored V3201 ready for some hystorical train! The V3201 is based on the chassis of a BR78, which - luckily - is one of the 12v locomotives I've already tried to create. Therefore, chassis was already prepared and only needed to be adapted to the longer body. This big beast has a quite boxy body, which seems to be made soldering together some parts of cabins, cut from steam locomotives. The central part of the body is sticking a bit out from the overall shape, and this is due to the big submarine diesel and air reservoirs. The main charachteristics are the two big gray radiators, the small windows on the corridor side, and those big stairs. Stairs were a nice thing to replicate, even if these are not the same as in the prototype. I did not use the big train doors, since these did not allow me to recreate the stairs and handrails. In the real thing, the stairs go over the cylinders, so using the 12v standard ones was quite a mess. I replicated them with normal parts. and this was not a problem. I had however to "cut" the stairs in half, the upper one being fixed to the body, while the lower one being part of the bogie (and turning accordingly). With the 12v motor, this design needed to be somehow adapted. On a real 12v motor, the central hole can accept an half Technic pin. Using a normal Techic brick some plates and tiles solved the problem. The ladder is kept in place by the pin and "slides" together with the motor. Between the radiator and the cabin there's a small, virtually transparent door since it's made of a panel full of small holes. The body in reality should be 4-wide in that point. I tried fences, door fences, everything did not fit and SNOTting was quite impossible (for me at least), given the limited parts available. Even Marklin's model is solid in that point, so I concentrated more on having at least a grille pattern. Using the ladder part was not so nice, it was just confusing. I therefore tried the just seen @zephyr1934 technique (thanks to you and Katy!), to have some visible horizontal lines. I used 3794b parts (jumper) . It works also with normal plates, but this is way better. Doors features a possible, even if not used at the time, SNOT for the door hadle, using headlamps bricks. Here's a shot from above, showing the 7-wide central part of the locomotive. As you can see I played a lot with the jumpers parts. And here's the "blind side" of the locomotive there's not so much to say ,being pretty smooth! Apart big red wheels and red motor, 2x1x2 and 1x1x2 black windows are there, just to remember there's some 7730s and 7750s blood inside the veins of this "thing". Here is visible the big radiator... ...and here is visible the smaller one. Looking better at the central headlight you can see some "white stuff" between the bricks - it's the classic 12v light brick with the addition of a small diode. This old trick allows the headlight to be lighten up according to locomotive's direction. Radiator is made by 1x1 plates, trying to replicate the "pattern" of the real thing. I put here red lights in 7777 style, even if these should be white, according to prototype. A brief mention to the Shed - it's an old MOD - I do not sincerely remember if I already presented it here in Eurobricks. It's a 7777 build, converted to a more shed-looking thing. Since I like to replicate dioramas in 12v style, this could be a nice addition to the overall scene. I hope you like it! Thanks again to @Reker1000000 for his inspirational idea! Ciao, Davide -
Interstellar Zephyr - streamlined diesel with passenger train for space layout
Murdoch17 posted a topic in LEGO Train Tech
The Interstellar Zephyr transports Nexus Force personnel as a very high-speed, high-security ground transport between the northern-most city of St. Nicklaus and north-pole-hugging outpost of Ice Station Odyssey, around 500 miles away. (this all takes places on the ice-bound planet of Beta Polaris, which orbits what we here call the North Star, far away from Earth.) Unlike the slower Earth trains, this Zephyr type of space-train is super-streamlined, and can go up to speeds of up to 110 MPH (135 is the loco's top possible speed) on it's special track, with super-elevated curves and long straight-a-way's over hundreds of miles, all while using Positive Train Control (PTC) on the the mostly double-track mainline, where all vehicle crossings are flyovers and switches virtually non-existent once out of St. Nicklaus city limits. This train runs along with nine other identical versions of this train (10 total trains in all) on the route with up to seven in running order on the route and at least two in the maintenance shed / in emergency backup storage at any one time. You may have noticed the train model is NOT in the original light gray "stainless steel" of the original Pioneer Zephyr on which is was (kind-of) based. The orange and white color scheme is because it's for my Nexus Force theme... to be honest, it's not even really a Zephyr that much anymore. It's more of a mix of the Pioneer Zephyr and several other concepts that began in the 1930's - '50's era, like the dome car. (To call it a hodgepodge would be accurate!) This model features three joined cars, with the power car up front, a coach, diner-dome in the middle, another coach, then the observation lounge at the rear. None of the car's roof sections come off, and their is no interior, to save on costs when this model is built in real life. The repurposed 2014 CITY Arctic logo slope on the rear of the lounge car is a missing print, as are the three dark bluish gray "donut" tiles on the loco unit. (these parts should have a engine fan / rotor print) The train uses only a few magnets to sperate the train in the middle, as having Jacobs bogies throughout with my current storage setup would have been unwise. This also leaves open the possibility for future expansion of a car or two... maybe a dome car could be in the cards somewhere down the line? (Yes, I know no shovel-nose Zephyr ever had domes... but this isn't a normal Zephyr, now is it?) You can see more details on the arctic / space base shown above in this thread in the Sci-Fi forum. Be warned, it needs to be updated with some newer pictures of stuff I designed! Thoughts on this model? EDIT 5/10/22: model completely revised and updated. EDIT #2 5/11/22 Three hundred parts found, 737 left to go on my space Zephyr. (the wrong colored window glass will be popped out an replaced when it's needed) The dome car, is not included in the totals either way as I'm still not sure it would work out to build it... even if I did make it work, I would be buying almost every single part on it. So, basically, it won't even be attempted for a while. Also, I got the shovel-nose built except for two orange slope parts. -
Hello, The DB class V60 was built more than 900 times in the 1950/60s and still can be seen on German rails.It's not the first LEGO model of this shunter, and I know many of them, so maybe some things look familiar. I wanted a smaller locomotive for the limited size of the average LEGO train layouts, and in Germany this engine is very popular so I decided to build my own. 3D printed coupling rod are from bricks-on-rails.de and there are some stickers - everything else is LEGO. It's powered by a "WeDo 2.0 Medium" (bricklink name) motor. It took me a while to work out the small offset for the "sliding hood" (?) - it coveres a PU hub, so there is not much space for snotting. Puling a small train:
-
So this is gonna be like my default thread for posting lego trains. Anyways, lemme start off by posting this double pacific Garratt, complete with railings, fully modeled valve gear, number plates, and full articulation Here's a side view with light effects
-
Maintenance Of Way (MOW) track construction train with steam and diesel locomotives - real world WIP
Murdoch17 posted a topic in LEGO Train Tech
Does you track need to be repaired after a major storm? Want to connect Point A to Point B with a brand new rail-line? Did the Flying Kipper have another accident on the main line? Or maybe you want to upgrade the signaling and double track the line at the same time? Call out the Maintenance Of Way (MOW) train to fix all these problems and more! This train consists of a late-1950's diesel locomotive, or a mid-1930's large eight-driving wheel steam engine and six specialty cars: - a (working!) crane car - depressed-center rail wagon - a (working!) ballast hopper - a tanker car - workman's tool car - caboose The 4-8-4 steam loco is new-to-me, and began life as a 2-8-4 Berkshire type built by Plastic_Goth and purchased from Rebrickable a seen here. To make this steamer, I upped the wheel count of @Plastic_Goth's locomotive by another leading axle, making it into a 4-8-4 Northern-type from the original 2-8-4 as built in the instructions. The new piston / wheel assembly is entirely my own work, as is the completely new 7-wide tender. The inside of the cab features two gauges and the firebox door. This model was originally a ALCO MRS-1 built by @SavaTheAggie, but has been so severely modified that it no longer looks like the prototype loco. So I went searching And found another ALCO locomotive, a RSD-12 that looks like my loco. Both my model and the prototype have the six wheels, and the same basic hood and cab design. The long hood of the loco has been designated the rear with a double red light. This car carries liquid weed killer for use after the track has been laid. This stream crane model was heavily inspired by Whoward69's instructions for a set of crane and match truck train cars. I modified the original model seen here. (sadly, it seems his Flickr profile and pictures has been deleted) I originally meant for the crane to have ropes to move the boom, but it got confusing on which rope went where so for now it's moved by the H.O.G. (Hand Of God) method. The crane can spin around in 360 degrees and lift anywhere up to 90 degrees straight up. (Their is a double set of pins keeping the boom from going too low, as well.) The heavy-duty depressed-center wagon has brick-built arms to secure the cargo of prefabricated railroad track in place. This model was inspired by a coal hopper on an older website called LGauge .com. I turned the old finger hinges into new pin-orientated ones and colored the car yellow to match the MOW paint scheme. The hopper's bottom doors open and can dump 1 x 1 round plates / bricks onto the tracks for ballast. This old passenger car carries the workmen and their tools. The caboose features two ladders (one per side) and more of those fancy printed 2 x 4 tiles. If you like what you see in this topic, check out the home base of the train and assorted other vehicles in this thread here! Thoughts? Comments, Suggestions, & Complaints always welcome! -
So, this mod started with me wanting to rebrick the 7760 Diesel Shunter. The plan was to replace the expensive parts with similar cheaper ones. After doing so i wasn´t really happy with the frankenstein-like 9V - 12V mix i had created, so I decided to redo it and mod the Engine with modern parts. This is the result: 7760 - Diesel Shunter 9V Mod by Henrik S, auf Flickr 7760 - Diesel Shunter 9V Mod by Henrik S, auf Flickr 7760 - Diesel Shunter 9V Mod by Henrik S, auf Flickr 7760 - Diesel Shunter 9V Mod by Henrik S, auf Flickr 7760 - Diesel Shunter 9V Mod by Henrik S, auf Flickr 7760 - Diesel Shunter 9V Mod by Henrik S, auf Flickr Feel free to comment and critize, i hope you enjoy the pictures
-
Here is my first go at building a 10 wide locomotive with full interior.
-
[MOC] Chilean "Gondola Carril T-1024" in 1:22.5 scale
Paperinik77pk posted a topic in LEGO Train Tech
Hi all, today I'd like to show you something I'm after since a few months. During the first days of lockdown I saw a documentary on Chile and its people, towns, traditions and lifestyle. One of the main points of the documentary was focusing on the railway running from Los Andes to Rio Blanco valley , a spectacular run between mountains, aside the Rio Blanco river. Originally it connected Chile to Argentina. And this "thing" was presented as the main attraction of the current line - its name is "Gondola Carril T-1024". I sincerely do not know why it is called "T-1024" . The "Gondola Carril" is a railmotor, based on an American built bus, the Yellow Coach Z-26. This time I understood that the letter Z is identifying the chassis type and 26 the number of passengers it could carry . The bus was normally used in Los Andes town, until it was converted into this very nice railcar. Originally used as a cheap inspection vehicle, It is now fully restored and used for touristic travels. And I can say it is an experience I would like to do once in my life. The "Ferrocarril Transandino de Chile" is a narrow gauge (metric) railway, therefore I based the whole project on 1:22.5 scale (good for running in the garden!). It is designed to run on G-Scale track (45mm), but with some modifications it could easily be converted to run also on standard Lego gauge (on large curves, since it is quite long). Since there are no specific technical specifications for the Gondola, I searched for the ones of the Z26 Bus - and tried to adapt the design according to the pictures and videos of the real railcar. The original motor used by Yellow Coaches Bus was replaced by a more modern Cummins Diesel, as nicely "declared" above the radiator. Despite the original railcar is based on a chassis, this one is basically a unibody build with some underside reinforcing (let's say - like the Jeep Cherokee XJ). It's quite light, so a medium motor is sufficient to move it. In the design, I used a PuP motor, placed in the front, under the hood. Then a pair of gears in cascade, cardanic joints and a transmission axle bring the power to the rear wheels. The "gears" I mentioned can be changed easily to have a lower or higher gear ratio, as needed. This railcar not meant to pull anything, so a lower gear ratio could save some batteries. Battery box is placed in the rear part, immediately beyond the rear axle. The small red axle you can see near the T-1024 sticker is used to turn the PuP battery/receiver on and off. The next picture shows the powertrain - it's taken from an alternative blue version of the railcar I prepared , with some freelance solutions which make it more "generic". I hope you like this one, and (more important) take a look to the original one, because it's really nice piece of history. https://www.ferrocarril-trasandino.com.ar/historia/ Ciao! Davide -
After getting my hands on a partial 3677, I decided to turn it into a color-swapped version of the original. I think both would look great together pulling a long freight train. Thoughts? 3677 Alternate Colors by Phil B, on Flickr
-
Welcome to the wonderous world of Yesteryears' view of the future! Where the moon is being colonized, robots are commonplace in our homes, atomic power is everywhere, and outer space is the new frontier! Here we see two Retro-futuristic trains together: the longest one is the "Nucleus Express" atomic-powered express passenger train, while the shortest one is the "Astrotrain" diesel passenger four-car train set, and the middle one is the "Moon Mover" diesel-powered freight service, with all three sporting streamlined Classic Space color schemes. ASTROTRAIN I already have a real-world Aerotrain LEGO model completed, and was fiddling around while bored when I came across this Classic Space version of the train from 2018. I had to take out the upside-down slanted coach windows because the parts don't exist in trans-yellow yet. I added different windows, red and green directional lights, and a bigger horn that looks like a thruster pod. I used black wheels instead of gray ones because they are cheaper and easier to find, but you'd never know that because I hid them behind SNOT'ed panels that look more like the prototype. Then, I deviated wildly from the GM Aerotrain and added a Baldwin Sharknose type-end to the front of the engine to make it even more unique. The classic space 4 x 2 slope from Benny's spaceship goes right below the headlight, of course. Also, as a side note, a 9V motor can be added to the engine for shows alongside my CS base / vehicles. (I don't own a 9V motor or track, but some GtwLUG members do and have offered to try out my locos wit h 9V power in the past.) The engine has been thoroughly made into a futuristic space locomotive... which wasn't too hard as it was already pretty forward-thinking designed originally. The roof is now removable, with seating for a driver and dual weight bricks for adding traction to the 9v motor. (when it has one for shows) As a concession to using trans-yellow as a window color, I had to remove the original slanted GM Fishbowl-bus style windows that were used on the original Aerotrain due to lack of parts in that color. The rear of the train has no coupler as it's "supposed" to be a part of one complete train-unit. Here we can se the original aerotrain working slightly at my dads. link to video showing Aerotrain in motion at Flickr Please excuse the pineapple couch, its my dads, as is the borrowed 9v equipment. The motor sadly only can pull three cars and at full speed only or not at all. But, it is a step towards having it run at train shows! (if anyone can help me figure out how to get the motor to move more than three cars, or add the video to my actual post, please respond below! Thanks to a suggestion by @XG BC, the locomotive now has weight bricks over the (potential) motor, so it should be ready for 9v power for shows next year. NUCLEUS EXPRESS PASSENGER TRAIN Heavily inspired by @Electricsteam's long-awaited Atomic Streamliner project, (as seen here ) I have designed my own Atomic-Age wonder for my "Moon Mover" fast freight service. It is, as is Electricsteams' engine, a fission powered turbine loco with 4-4-2 "Atlantic" wheel arrangement. This engine lacks the full streamlining of other locos, but it does have the nose streamlined. This allows for easier working on the nuclear powerplant that powers the engine's movement. Unlike the slower Earth trains, the Nucleus type of space-train is super-streamlined, and can go up to speeds of up to 180 MPH on it's special track, with super-elevated curves and a long straight-away over 101+ miles, all while using Positive Train Control (PTC) on the the mostly double-track mainline, where all vehicle crossings are flyovers and switches virtually non-existent once out of the city limits. Here are the three coaches for the Nucleus train. The inside of all the cars for this train look the same - three seats for each car. This dome car features spectacular views of Earth through it's car-width rooftop window. The rearmost-car features a large observation window. ASTRO-BASE COMMUTER RAILROAD STATION This commuter station will be the departure point for my two Classic Space trains. It features a very low floor with two accessibility ramps to get at the two train tracks - one run through and one stub end. There are two benches, two ticket machines, and a single double-sided analog clock. The manned ticket booth (for those uncomfortable or unfamiliar with the electronic machines) has a sign above it saying the train terminal's name, which is named Astro-Base. This is because it is located next to my Classic Space moon-base. Here we see the other side of the run-through track. OTHER STUFF The two identical doors of the space base has been re-designed to handle train tracks so the trains can enter and exit the walled-in base and the doors still open and shut. Atlantis City (located in Copernicus crater on Earth's moon, in XL shape and yellow on the map), the great domed wonder of the solar system, has a rail system to get people to work at it's outlying un-domed facilities. The interstellar transport hub of Reinhold is the next stop, and is the terminus for all the public passengers / galactic tourists. (The Reinhold crater is in green here) The following two branch lines are for specific crewmembers only: The Lansberg line is for power / shield generation over the city and surrounding land areas. It also was where the original city was located, before the original founders relocated to Copernicus Crater and founded the Great Glass City as we know it today. (Lansberg is in violet / purple crater) The Gambart line is for military personnel only, as it where the top brass pour over charts and make way for the latest improvements in "laser scanner" technology. (This one in the Blue with yellow rim crater) Potential new tracks could be laid to the planned 100,000 seat stadium in the older Stadius crater (barely visible near Copernicus crater) for Sportsball events. New tracks could also be laid past the space hippies encampment at Hortensius Crater (small yellow crater), but has been continually voted down by protesting neo-hippies, as it would bring bad vibes to their region by the loud construction vehicles just to get to the ice mines of the Mare Insularum. (No one has managed to get through to them that there is no sound in a vacuum!) (Photo from Google Earth, with railroad lines drawn and story by me. The colorful moon landscape background is from early 1960's NASA maps that I thought were really cool. More stuff will come as I think of it, so keep your eyes peeled for updates to this thread! UPDATED 7/11/21 This Zephyr-like loco is going to replace the engine at the head of my Astro-train. I decided to do this for one reason: motorization! I will soon be able to put a 9v motor at the head of the train, running it via electricity for shows with Gateway LUG. The inter-car connection is the same as before, and most of the needed parts for the engine (plus one more passenger car!) will come from the pervious loco. Thoughts?
-
Hello! Motorized with L Motor (PF)