Search the Community
Showing results for tags 'MOC'.
Found 5698 results
-
Hello fellow EB members. A small vignette showing a mid century streamline truck in an Octan livery. The driver stops for a well deserved break! You can view all my creations on my flickr account here if you so wish. Regards!
-

[MOC] Darth Maul's Scimitar (aka the Sith Infiltrator) Minifig scale with full interior
Evilkirk posted a topic in LEGO Star Wars
I'm absolutely delighted to present Darth Maul's Scimitar, or Sith Infiltrator - 100% minifig scale with a fully detailed interior! Build features: Semi-circular opening rear doors with a retractable boarding ramp lead into the lower floor of the main hull, where you'll find a fold-down bunk, a laser-gated holding cell and various storage compartments. A 'repulsor-lift elevator' takes you to the upper floor which is the flight deck, with passenger seating and Darth Maul's control console. From the lower floor a corridor narrows down into a maintenance crawl-space and leads through to various engineering access chambers - and eventually takes you out into the cargo hold, where the Bloodfin speeder and Dark Eye probe droids are stored. An access ramp lowers from the cargo hold (under the very front of the ship) + 2 panels under the ship's hull open for retractable landing gear with a fold-out landing pad under the main hull. The roof of the rear section is removable + the flight deck can also be lifted out to allow access to the lower floor + the whole roof of the front section is hinged to open fully, revealing some of the cloaking shield, hyperdrive and other engine components. I've designed a 306-piece tilted stand to display the ship in 'wings open' flight mode - the front of the display stand is fitted with a black 8 x 16 tile, for those who like to have custom UCS plaques on their ships. The display stand + Bloodfin Speeder + Dark Eye probe droids are all FREE downloads on my Rebrickable page :) During 18 months of it's building and design, I've spent hours studying source material for this ship, especially the floorplans - and I've put a lot of effort into keeping it as close to the original as possible without the whole ship becoming overly large. Having the correct proportions with its incredibly unbalanced front and rear sections + those large folding solar panels on the sides was very challenging - and keeping it all sturdy without any sag was quite a task, but it's turned out to be a solid build - you can swoosh this ship around until your arm hurts (I have!) and it'll be fine :) Specifications: This build uses 4244 pieces (not including the display stand, speeder or droids), is 63.4cm (25") long and 48cm (18.9") wide at the wing panels. Height is 18cm (7.1") standing on its landing gear + 42cm (16.6") high at the tip of the highest wing panel whilst in flight mode on the display stand. Weight is approximately 3.3kg (7.28 lb). TL,DR... I totally geeked out and went nuts on the details and here are a million pics of the results: -
If you have followed my WIP Post, you will already have the gist of it. I have finally managed to iron out any issues with my Stud.io design and create the instructions. Basically, I have tried to do the following things: Design a completely new tail section. Replace any offensive colours. Design new panels with less studs. Make the overall shape more like the movie Thopter. You can judge for yourself if I succeeded. Instructions and Part List are available here: https://reb.li/m/179131 Here are some more renderings: And some pictures of my prototype (there are some minor differences compared to the final design):
-
Here is a project that I have been maturing for 4 years and which finally takes shape from this year, inspired by a french comic strip from Arthur De Pins.. Throughout this topic, you can follow the progress of the project and the WIP. This first post will bring together only the completed games and winks to the universe. For those who do not know Zombillenium, visit Dupuis, the editor of Arthur de Pins (link in french): https://www.dupuis.com/seriebd/zombillenium/3204 Park map: 1. Gretchen and his Mini Cooper S : 2. Carousel with skulls : Great inspiration from those found in the comic strip park, but which I found a bit repetitive, especially this one. 3. "At work !" : Zombillenium - "At work !" by Stephle59, sur Flickr 4. "Cheeeeers..." Zombillenium - "Cheeers... Creepy family photo !" by Stephle59, sur Flickr The family photo, with from left to right: - Sirius Jefferson the skeleton - Aton Noudjemet the mummy - A demon worker like Aurelien Zahner - Francis Von Bloodt the vampire and director of the park - Blaise Canilhac the werewolf and director of human resources - Gretchen Webb the witch 5. Candy shop : Zombillénium - Main Street, Candy shop by Stephle59, sur Flickr To be continued...
-
Through the Jungles of Yucatan Through the Jungles of Yucatan, 1519 by Nicholas Goodman, on Flickr Through the Jungles of Yucatan, 1519 by Nicholas Goodman, on Flickr Through the Jungles of Yucatan, 1519 by Nicholas Goodman, on Flickr Through the Jungles of Yucatan, 1519 by Nicholas Goodman, on Flickr Through the Jungles of Yucatan, 1519 by Nicholas Goodman, on Flickr Through the Jungles of Yucatan, 1519 by Nicholas Goodman, on Flickr
-
Hi everyone! With this new year 2024 I want to start presenting you my latest work, the result of 3 months of work in autumn 2023. It represents a stone bridge with a stream, a dirt road, a couple of small waterfalls and a water mill. All set in medieval times. In 2018 I had built a Medieval Windmill and knew that one day I wanted to expand it. In 2023, however, I was inspired for a much larger and more ambitious project, namely creating a Medieval Village! The village has been divided into 6 modules (for the moment), the windmill therefore represents the first completed module, while today I present to you the second module. This latest moc is based on 4 32x32 baseplates and is made up of approximately 7500 pieces. The water mill also has movements operated by a lever or interchangeable with LEGO motors. The roof of the mill is divided into two opening sections which allow you to observe the internal details, such as the rotation mechanism of the blades and the grain mill. On the upper floor there is a fireplace with some chests and a sleeping room for the baker. On the dirt road I positioned a horse-drawn cart with two Black Falcon soldiers. The whole thing is completed by lush vegetation with a forestman on lookout on a large tree. I hope you enjoy my latest work and stay tuned soon for module #3! SDRnet Flickr Gallery: https://www.flickr.com/photos/sdrnet/albums/72177720314195257/
-

(WIP Thread) Manta's MOCs
Mantarri posted a topic in LEGO Technic, Mindstorms, Model Team and Scale Modeling
Thought I'd create a thread to just post WIPs of my MOCs, or neat mechanisms. Finished: Generic Muscle Car -
It was the year 1979 when LEGO launched one of the sets that became among the most iconic in the AFOL world: the 497 set or better known as 928. The set was proposed with two different codes: 497 with the title of "Galaxy Explorer" and 928 with the title of "Space Cruiser and Moonbase". The Classic Space theme was launched just a year earlier in 1978 and this set became a legend because it represented the most beautiful and largest spaceship in the entire fleet. It is incredible to think of the success that this set of only 338 pieces has had if we compare it to those on sale today, but in those days we were children who dreamed of having this box and our best memories are linked to it. In '79 I was just 5 years old and I have never been able to have this box, too expensive for my parents, but I have always dreamed of it looking at it in the catalogs. Finally as an adult I looked for it and managed to buy it! All this premise was used to introduce my new work: the Galaxy Explorer SDR-926! This year I am 10 years old as AFOL and I thought about making mocs that have a special meaning for me. The first of these was the desire to make a spaceship of some importance! SDR-926 wants to be a tribute to the 928 but with very different characteristics and numbers. Number 926 represents the birth of my daughter. The spaceship measures 85 x 75 x 21 cm and is made up of almost 4600 pieces! It took me 5 intense months to make it because it contains several features and functionalities in a single work. Main features and functions: 1) exploration ship removable from above with revolving lever 2) control room 3) removable panel to observe the central hall of the spaceship 4) three landing gears 5) foldable and removable wings 6) revolving laser cannons with levers 7) engines and hatch that can be opened 8 ) access ramp that can be opened with a lever 9) ground exploration vehicle with revolving radar 10) Excellent rigidity thanks to a basic structure composed of technic elements 11) disassembly of the spaceship in blocks 12) support for display with identification plate Main informations: Name: Galaxy Explorer SDR-926 Dimensions: 85 x 75 x 21 cm Parts number: 4200 pieces Number of parts with stand: 4580 pieces Minifigs: 8 Classic Space minifigs Main colors: Blue, Light Bluish Gray, Transparent Yellow Weight (spaceship only): 4370 gr Weight with stand: 4740 gr The spaceship is quite impressive if you compare it with the old LL 928, but it draws the same colors and a lot of playability, but with many more features. It is a spaceship built with care and attention to detail without forgetting an excellent sturdiness of the whole structure (made with technic blocks). For the first time I have also decided to try my hand at making the instructions that will be available in the future, as soon as I can complete the job! Visit my photo gallery on Flickr: https://www.flickr.com/photos/sdrnet/albums/72157719328861377
-
Hello. I have been working on a new gunship. I have finished V1, and before I go out and buy all the parts to build it, I wanted to come on here and share it to see if anyone has some feedback on the model. The model is a bit bigger than the minifig-scale, but I don't think it looks oversized. I am working on a few different versions of the gunship, the episode 2 gunship and the coruscant guard gunship, which you can see in the pictures below, but also the clone wars gunship, muunilinst 10 gunship, 104th battalion gunship, and the imperial gunship. All versions have opening doors, connection points for bubble turrets and floodlights, storage space for two speeder bikes and one AT-RT, a removable display stand, and a carrying handle. I want to make this model as accurate as possible, so if you know of any minute detail on the gunship that is not represented here, feel free to let me know. !Note! The bubble turret design on the first picture is heavily based on pre-existing designs from other MOC designers. Since I cannot improve upon the designs already made, I decided to adapt them to my model. I am unsure who created the original, as I have seen the same design on several other gunship MOCs in the past, so if anyone knows, please let me know so that I can properly credit them. Thank you for your time! And here is the AT-RT, and speeder bike builds to go along with the gunship
-
LEGO MOC - THX-1138 diorama. The scene after the trial when 3 Police Officers punish THX-1138 in a large white void. flickr
-

[MOC] 42167 skip loader truck
TechnicMOCer posted a topic in LEGO Technic, Mindstorms, Model Team and Scale Modeling
My alternative model of 42167 Mack LR set - skip loader truck. It features HOG steering and detachable container which can be loaded/unloaded. -
Next project (while I wait for my Cabover Truck Bricklink orders to come in) is a Unimog camper. I like to use the bigger doors for my truck creations and all online MOCs used the small door so this is a complete new build. Also I have lots of LEGO service packs with the blue train doors and windows so blue it is: Inside has toilet/shower, overhead cupboard, oven and hot plates, fridge and seat/table that converts to a bed. Still have to design fuel tank, batteries, jerry cans for underside. Here is the render so far.
-

1930's NYC passenger train with streamlined 4-6-4 Hudson steam loco - real world MOC
Murdoch17 posted a topic in LEGO Train Tech
Before we get to the real model pictures, first, let's set the scene: It's Friday, January 13th 1939: The Civil War in Spain is raging, Neville Chamberlain (British Prime Minster) has just started conferencing with Pope Pius XI after talking with Mussolini for the past few days, and the film 'Son of Frankenstein' is released into theaters. In a rural area west of New York on the NYC Railroad's four track water level route, a J-3 streamlined Hudson is pulling a passenger train through a picturesque snowy landscape of the early morning while heading for the Grand Central Terminal of the Big Apple. ...And now, onto the finished real-world MOC! The entire train in real bricks. This Dreyfuss-style streamlined 4-6-4 steam loco is numbered 5448 and is mostly modeled after a real, long-scrapped New York Central engine. The loco's tender really should say the railroad's full name of New York Central instead of its initials, but I don't want to shell out the money for all those 1 x 1 tiles, so I'm using fewer 2x2 tiles instead to spell out NYC, as it's much cheaper that way! the combine three coaches the observation car. I was originally going to use the new 3x3 macaroni bricks in trans-clear for the rear window, but I couldn't obtain them. Frustrated, I gave up and made my own version. Note: As some of you might be able to guess, this loco with matching coaches were inspired by pictures of Anthony Sava's original streamlined Tequila Sunrise train from 2007... however, no instructions were used to build the engine or cars. Oh, and all the historical things stated in the intro actually happened on the stated day in 1939 according to Wikipedia... and I'll bet the train bit happened too! Thoughts? -
Orders from the Governor, Santo Domingo 1674 Orders from the Governor, Santo Domingo 1674 by Nicholas Goodman, on Flickr Orders from the Governor, Santo Domingo 1674 by Nicholas Goodman, on Flickr Orders from the Governor, Santo Domingo 1674 by Nicholas Goodman, on Flickr Orders from the Governor, Santo Domingo 1674 by Nicholas Goodman, on Flickr Orders from the Governor, Santo Domingo 1674 by Nicholas Goodman, on Flickr
-
What started out as what to do with 2 chrome fuel tanks has morphed into a monster. Also wanted to design and build a cabover truck so this is what I ended up with. Already have 75% of cab and trailer parts at home. Will get the rest plus forklift parts from Bricklink. Forklift can slide fork hoist back and forward as per prototype. Turning the air cleaner also steers the back wheel.
-

[MOC] 1:64 scale Swiss trains - latest addition: Tm'' shunting tractor
TeddytheSpoon posted a topic in LEGO Train Tech
Hello Train Techies! A few weeks ago, I decided I'd like to make a model of a Swiss locomotive on LEGO's narrow-gauge track. So, I did... But not the one I intended! Initially I was going to make something at minifigure scale, and I probably stil will at some point. But during the planning I noticed that using the narrow-gauge track as scaled standard (1,435mm) gauge track gave a scale of almost exactly 1:64 (1:63.77, to be precise). So I decided to make something at that scale instead! You may be familiar with the locomotive - after all, there have been loads of great brick-built models of it already. This is the Re460, or Lok2000 on the other side of the Röstigraben. It's the main passenger workhorse of the SBB/CFF/FFS fleet, and one that I grew very familiar with growing up around Lake Geneva. Although I haven't seen many LEGO models at this scale, it's not an uncommon one in other areas of modelling. It's known as S gauge in train circles, but is more commonly used for miniatures and Hot Wheels/Matchbox cars, among other things. It makes this loco roughly 5.5 studs wide - this model is, nominally, 5.6 wide. So aside from the wheels being on the small side, proportionally I think it's alright! It can handle R84 TrixBrix track, but won't go much smaller than that without further modification. This is my first attempt at any sort of LEGO train, and although I'm pleased with the result I think there is still room for improvement. The fluted bricks mean I haven't got the CFF logo on the side; the area around the cab is a bit too angular for my liking; and that coupling probably won't haul much rolling stock as is. Nevertheless, I'm quite proud of the result. Speaking of rolling stock - I do have more planned at this scale, so watch this space! I hope you enjoy my model as much as I enjoyed making it. Stay tuned... -
Hello. I made a post a while ago where I showcased quite a few changes I made to the Brickvault Tie Fighter model. Now I'm back to showcase the same thing with additional Tie Fighter variants from their store, alongside a few I made using other models as a base. I'm not talking about one or two, I'm talking about 24 distinct models. Some ships are heavily altered, while others are unchanged minus one or two tweaks. On top of that, I've probed the depths of Canon and Legends lore for additional color schemes I could apply to some of the models. I've amassed enough pictures to drown a forum post in, so I'm going to do just that. *Because I went into much more detail in my previous topic, I won't talk much about the parts of ships that share the basic Tie Fighter's cockpit or wing designs. I recommend you check it out before continuing, but you don't have to. Tie Interceptor This ship was the obvious first choice for improvement following the Tie Fighter due to the two models sharing the same design for the central pod and wing pylons. As for improvements unique to the Interceptor, I slightly modified the wingtip cannons and added their power conduits using hose pieces. I changed the construction of the wide armor detailing where the wing pylon meets the wing hub for better screen accuracy. I also moved the ribbed detailing where the power conduits meet the wing hubs and rebuilt the sensors between the two wings for the same reason. Finally, I got rid of the grilled bricks on the rear solar panels and made the backside of the wing completely flat. This design also has the most additional color variants with the first being a version belonging to Inferno Squadron. The construction is taken from the Inferno Squadron Tie Fighter I modified in my first post. While not shown in-lore, its existence can be inferred; why would one of the best group of Tie aces still be flying regular Ties in a time when the Interceptor exists? While this isn't a color variant, it's minor enough to be counted alongside them. It's a version using the 6x6 Tie hatch piece that Lego used before downscaling to the newer 4x4. Even though it is less accurate, I prefer to keep the smaller piece because it's much more available and affordable. This is a version belonging to the 181st Fighter Wing, adorned with a brick-built red stripe on each wing. Some of the support for the stripes bleeds through to the other side of the wing, but I tried to keep it unobtrusive. This is a version modeled after Vult Skerris's ship from Star Wars: Rebels, with its sparse red highlights and hemispherical gray cockpit stripe. This is a primarily red version based off the Emperor's Guard paint job from Star Wars: Squadrons. Its construction is nearly identical to the base model, illustrating just how much difference some color blocking can make. Royal Guard Tie Interceptor Despite being listed as a unique model on Brickvault's website, the Royal Guard Interceptor is the same as the regular Tie Interceptor save for the four extra winglets. The biggest change I made is the addition of the mounting brackets for said winglets, something present in the ship's original appearance. Tie Bomber The main feature I wanted to change with this model is the construction of the missile-hole on the front of the ordinance pod. The original is sort of a vaguely defined square and is too large, mostly because of the unique construction of the face. I was able to modify the design to make a 2x2 hexagonal hole using slopes, but I had to use clear tiles to support the shutter arms. Other things I've modified for increased accuracy include remaking the front detailing between the pods, shrinking the thrusters, filling a gap in the bracers that run the length of the pods, and making the front and back of the wings one continuous surface. Here is another variant inspired by the Emperor's Guard paint job. Tie Advanced Another model that's mostly unchanged is the Tie Advanced. I adapted this design to utilize the newer 4x4 hatch piece for consistency with the rest of Brickvault's Tie lineup. I think it does the job well enough, but I don't think it could be any better without completely changing how the central pod is built. I also gave this Tie the updated “bowtie” details on the central pod and the blasters from the regular Tie Fighter. Finally, I beefed up the rear wing pylon construction and flipped the brackets covering some gaps on the rear of the ship to hide their studs. Tie Brute This is the first design I tweaked not made by @Jerac. Despite having its own style of wing construction, I replaced them with my modified version from the regular Tie Fighter because I think they look more accurate. I recessed the wing pylon details by one plate on the front and back of the model and created a gentler armor slope from the central pod using jumper plates and ingots for better screen accuracy. Next, I rounded out the central pod by making the top and bottom out of 6x6 hinged dome pieces. This means I got rid of the newer Tie hatch and replaced it with the old. The ratio of the larger hatch to the central pod is about the same as the smaller hatch to the normal Tie Fighter. I also gave the central pod upscaled “bowtie” detailing and remade the engines for screen accuracy. There's also the variant that uses 4x4 quarter dome pieces for the central pod. Tie Defender The Tie Defender's central pod now has the same updated features as the Tie Advanced. Additionally, the rest of the pod is rounder and free of inaccurate surface greebling. The triangular armor on the wing pylons is more substantial and the rest of the armor has been slimmed down. The biggest changes are the wings. The original ones are based off of older appearances, where the wings are smaller and shorter compared to the pod. I wanted to modify the ones that came with the model, but they're constrained by their use of ball joints for support. I didn't know how to make new ones until I saw a post by @Sylyphics showcasing his own Tie Defender MOC. I bought the instructions and started tweaking those wings too. The new wings have been majorly reworked for added length and build simplicity, while the wing hubs are unchanged. The result is more of an experiment representing my ideal Tie Defender model, uniting components from two great designs. This variant is based off the Elite Tie Defender from Rebels. It adds 6 missiles in between the wings and uses brackets that conceal highlight connections to get the little areas of color at the rear of the wings. This is based off Vult Skerris' personal Tie Defender Elite, basically the same as the above variant, but in yellow. This is another variant based off the Emperor's Guard paint job. Since the wing pylon rings run through the wedge plate detailing, I replicated the latter using jumper plates. Tie Striker This model also received the standard central pod enhancements, though the rear details required some interesting connections to get everything to line up correctly. The wings now come to more of a point and the laser cannons have their long, long power conduits running all the way to the cockpit. The biggest changes are to the top hatches; the 6x6 dome pieces have been replaced with an ovular, brick-built roof piece. It is removable for access to the interior, held in by a few studs while resting on smooth tiles. While not explicitly shown, this Emperor's Guard inspired variant follows the same design rules as the other ships with this coloration. First Order Tie Fighter Thanks to the Tie Series' inherent design similarities, improvements made to one model can be applied to many others. Case in point, the First Order's Tie fleet. This model is envisioned as a “V2” update to the First Order Tie Fighter, similar to the one its Imperial counterpart received. The new model is mostly built off of my tweaked Tie Fighter, but there are a few unique details that make it more a simple color swap; firstly, there are holes near the wing pylon armor, as there are on all First Order Ties. The thruster orientation rotated 90 degrees and there is an antenna on the right side of the central pod. The “headlight” details near the cannons are depicted with small segments of hose. The printed hatch piece has been replaced with a regular 4x4 dish for consistency with the other models. Finally, the interior wing hubs and bracing struts have their bulkier, armored appearance from the movies. This is a custom color variant that can be applied to all First Order Ties. Based on the appearance of the Final Order fleet's livery (and initially an excuse to see new Ties in the classic color scheme), this color scheme asks “What if all the forces of the galaxy-conquering First Order Navy didn't stop existing as soon as Kylo Ren found some shiny, new toys?”. First Order Special Forces Tie Fighter Despite its unique construction, the Special Forces Tie still benefits from some of the standard Tie upgrades, such as rounder pylons, more accurate pylon armor, updated wings, and a more circular central pod. The larger cannons are made using slightly altered construction from the regular Tie. The thrusters are now their correct size and shape, at least as close as it can be for the latter. Finally, the power cell banks on the wing pylons are fuller, more circular, and feature all of the segments in-line with each other This is as variant of the design that replaces the printed 6x6 dish on the rear of the central pod with a brick-built assembly. While it costs 2 dollars in comparison to the dish's 1 and eschews the detail of the printed element, it features a correctly colored rear window and can be built in whatever color pattern the design requires. Here is the requisite Final Order color variant of the Tie/sf. Thanks to the color change, it now features the 4x4 printed Tie hatch for added detail. This variant can only use the brick built rear windshield due to the new coloration. Tie Baron The changes here are mostly minor tweaks made to bring this model in line with the other edited Ties. The central pod received the standard Tie upgrades, including chin cannons, “bowtie” detailing, thicker pod dimensions, and an interior matching the standard First Order Tie Fighter. The wingtip cannons have been remade to fit their correct size and the power conduits have been simplified. The missile launchers have been edited so that the ordinance inside is visible. The wings are free of inaccurate detailing, the front wing pylon armor has been slightly modified, and the internal support “spine” behind the central pod has been made more sturdy. The Standard Tie Baron created by the designer features all the same improvements, but in black. The Special Forces variant now has the turret, chin cannons, and antennae of the Special Forces Tie Fighter. The Final Order variant swaps the gray and black from the Standard version. Modified Tie Whisper The central pod has been replaced with one based off the pod from the Special Forces Tie Fighter in order to correctly depict the two-seater cockpit. It uses some a unique connection to the handlebar element to both represent the red windshield ring and to support the windshield “spikes”. The red protrusions on the central pod have been rebuilt to be 1 stud wide and feature custom vent detailing stickers that can be applied for a more accurate look. The rear solar panels are made using a specific type of wedge plate because it is the exact shape they're supposed to be, though this leaves them covered in studs. The wingtip cannons have been redesigned and the indentations along the rearmost part of the wings has been made smaller. Here is the Final Order version. Those are all the official models I've modified, but I've also used those models as a base to create designs for ships that don't have as high-quality representation as Lego MOCs. Tie Experimental M1 “Bizarro” The first of the new models, and the first of the unmanned Tie Experimental series, is the Tie Bizarro. It was designed as an inverse to the standard Tie Fighter, with 2 pods straddling a single, central wing. Just as the model makers rearranged and recombined parts from a standard Tie to create this design, I've done the same with the Lego model of the Tie Fighter. The pods had to be modified to create a smooth outer curve thanks to their new positioning showcasing what once flowed into a wing pylon. The wing pylon itself is now a singular construction that runs from pod to pod. It's made using the longest 2-wide plates Lego produces for stability's sake. The pylon armor had to be modified as well to fit on the pylon, though this just means it is a plate thicker on each side compared to the standard Tie. The internal of the pod housing the turbolaser has been completely stripped and replaced with a scaffold to support the dish piece that replaces the windshield. This is a variant that more closely follows the “rules” of Tie design, with the vertical pylon armor next to the pods and the horizontal armor by the wing. It maintains the slimmer pylon armor of the Tie Fighter due to its unaltered construction. Tie Experimental M2 “Big Gun” This is a standard Tie Fighter with two large cannons attached to its outer wing hubs. I made the cannons 7x7 studs to depict their relative size to the central pod, but this led to some issues with how to mount them to the wings. I had to redesign the outer wing hubs with jumper plates to connect to the holes on the underside of the plates supporting the cannons. This accounted for the half stud offset required to center the cannons on the hub. Tie Experimental M3 “Warhead” This is a Tie Interceptor with missile pods mounted on the outside of its wings, so I took the modified Tie Interceptor model and did just that. The launch tube detailing on the front of the pods is too fine to be represented using Lego bricks, so I created custom stickers that could be applied over a flat, circular 4x4 area. Tie Experimental M4 “Bomb” This is a ship designed to act as a large missile. Fittingly, it is based off a Tie Bomber with a single pod and is fitted with a massive booster engine. The modification to the base Tie Bomber model was easy enough to make, as I just mirrored the construction already present for one side of the ship. The engine proved more challenging, thanks to its length. I made the smaller shaft out of cylinder pieces, while the larger part is a novel assembly made to display curved slopes on all 4 sides and to recess the exhaust. I've reinforced the engine and its connection to the main ship using Technic axles, but as I've only made a digital model, I can't tell if this engineering would be enough to support the engine in real life. Thusly, I created a stand to act as support for the engine. Tie Experimental M5 “Booster” This is a standard Tie Fighter with an engine based off the Tie Bomb's added to it. However, the Tie Booster's engine is even longer and larger than the one on the Tie Bomb, and is supported by a much smaller central pod. The construction of the engine is similar to the Tie Bomb, but magnified where necessary. The bracers running from the wings to the engine are attached to the rear solar panel strut by a clip-and-bar connection to achieve the correct angle. I also created a stand to support the engine regardless of the design strength, because it would definitely throw the model off balance in real life. Tie Droid This model is based off the droid-controlled fighters that were produced in swarms by the factories of the World Devastators. I based the model off the ship's appearance in the first Rogue Squadron game, because details like the wing size, wing detailing, and windshield color vary wildly across its initial appearance in comics and later illustrations. The central pod and wing pylons are almost entirely unchanged from the base Tie Fighter, save for the two protrusions a the top and bottom of the windshield. The opaque windshield is supposed to feature a horizontal line bisecting it, which would be represented with a thin, rectangular sticker, but the Stud.IO part designer program doesn't apply textures to domed surfaces too well. The standout feature of this design is the blocky wings. They're attached to the wing pylons by two clip-and-bar connections each, which should be enough to support the weight of the wings. The wings themselves are built around an oddly designed core, which supports the tiles of the large, smooth wing hubs. The solar panel detailing and outer edge leave the core mostly untouched, only connecting together in a few places for structural support. The outer edges themselves have been designed in a way to keep the two-plate thick sizing consistent across all sides of the wing. Tie/rc This obscure Tie variant was never given an actual name beyond its factory designation (the obvious Tie Reconnaissance Fighter referring to another ship entirely). It's little more than a standard Tie Fighter with a single cannon and some sensor greebling on the front of the ship, some of which is represented through custom stickers. I made it because it was an easy modification to do, though presumably somebody would be interested in displaying it. Tie Ground Targeting This unique model of Tie was designed to serve as he Empire's initial bomber for planetary bombardment. Given its in-universe existence before the dedicated Tie Bomber, it's built from a modified Tie Fighter frame. However, like a mullet, the front of the central pod is the same as a regular Tie (one cannon non-withstanding), but the rear is cylindrical like that of the Tie Bomber. This proved challenging to make because of its odd-numbered sizing, which needed to be mounted on, and centered to, an evenly-sized studded surface. The rear of the pod is made using a similar construction to the engines of the Tie Bomb and Tie Booster, and has a set of thrusters similar to that of the Tie Bomber. The top and bottom of the pod feature plates that are integrated with the top and bottom cockpit hatches, similarly to the design for my tweaked Tie Striker. The gaps from the regular Tie pod to the cylindrical back half are filled as best as possible, and are mostly hidden by the wings and hatch assemblies. Finally the triangular wing strut armor coming from the central pod has been redesigned to match the ship's reinforced appearance, complete with holes where they should be. Tie Fire Control This is the Tie/gt's other half, and another relatively easy build. This model of Tie was designed to house the sensors required for precise ground targeting, which was then relayed to the Tie/gt fighters it flew alongside. This ship shares its sticker detailing and single cannon with the Tie/rc. Its unique features are the chin mounted sensor arrays flanking the laser cannon. These boxy protuberances are meshed to the central pod as well as can be achieved without sacrificing the quarter dome pieces for something custom built to house the sensors. The sensors even extend into the area reserved for the bottom 4x4 dish, so a brick-built lookalike stands in for it. Tie Heavy Bomber This is a ship based on the Tie Bomber, but with two ordinance pods. I was inspired to recreate this design after I saw a Flickr post by Gingko19 Biloba showing a similar model. Unfortunately, he didn't alter the sides of the pods, which meant they clipped into the model in a manner impossible to build in reality. He told me he used a tile with a stud attached to a tile with a hole in the middle (a stud reversal method) to connect the pods to the central pylon. A plate ran from the core of one pod to the other for structural stability, covered by increasing the depth of the pylon by one plate. With that info, I set out to refine his model into something physically possible. The ordinance pods have been slightly altered in order to evenly meet up with the pylon. Additionally, I increased the height of the wings to extend past the bomb chute, a feature that is actually accurate to their portrayal. Emperor's Guard variant. Tie Interdictor / Punisher The next logical model to make after the Heavy Bomber. This ship basically mirrors the double-pod side for 4 ordinance pods. Emperor's Guard variant. First Order Tie Brute Seen exclusively in an immersive shooting gallery ride at Disney World, this Tie is largely the same as the Imperial Tie Brute. The First Order version has small, red headlights on its pylon armor, the requisite antenna array, and unique thrusters resembling those of the Millennium Falcon. I created the thrusters using custom stickers, including some applied to 1x2 grated slopes, meaning someone building this in real life would have to gently press the stickers on. Also available with small corners. And in the colors of the Final Order. First Order Tie Whisper To end this list of ships, we have the regular Tie Whisper. They are seen during the Lightspeed Skipping chase in TROS and have the wings of the standard First Order Tie Fighter. I reused the central pod and pylons from the Modified Tie Whisper and the wings from the Tie/fo. One detail unique to this ship is the curved, almost dented appearance of the wing hub's armor plating where it meets the wing pylon bracer. This altered construction means this ship can utilize the same wedge plate bracer design as most other Ties despite the extra plate's worth of armor usually blocking it. Final Order Version. Let me know what you think!
-
Hello Speed Champions and City fans, It was my entry to Bricklink Designer Program Series 3 and 4. It has received many kind comments and support, but unfortunately it has not been selected, therefore I decided to make the instructions available here: https://rebrickable.com/mocs/MOC-177592/_TLG_/school-bus I always loved American style school buses, therefore I decided to design one to Bricklink Designer Program Series 3. It is not actually based on a real one, but it contains many typical details: the black bumper rails and STOP arms on the sides, the crossing arm, the side and rear doors, the rearview and crossover mirrors, the mudguards, the warning lights etc.. The roof assembly can be removed as one piece and in this case the internal details are visible: there is a driver seat with steering wheel, dashboard, gear shift, passenger seats and even a fire extinguisher. It is 8 studs wide, studless build in minifigure scale and fits perfectly to Speed Champions cars or to a LEGO City. There are many working details: the front and rear doors, the STOP arms, the crossing arm and windshield wipers. I wanted to create a clean build and tried to fill every unnecessary gaps and hide unnecessary studs, therefore some tricky, but legal build techniques are used. The set includes three minifigures: a driver, a school girl with a pen and backpack and a school boy with a brick built backpack. The model has space for 17 minifigures: one driver and 16 passengers. If the passengers are kids with short, rigid legs, then they can stand on the seats. The building instructions guidelines have been followed. It is built from the palette "BDP Series 3", so there are some color and part restrictions. The color "Bright Light Orange" would be a bit more authentic, but the available parts are restricted, therefore I decided to use "Yellow" and I am satisfied with the result. The STOP sign is very rare part and it is not available in this palette, therefore it is replaced by a simple, white, circular sign with a sticker. The door 43967 is also not available in yellow, therefore it is replaced by a brick built one, however, in this case I was able to add some extra details: a black door handle, bottom window and red lights. I hope you like my design, I appreciate any feedback. Thanks for visiting, _TLG_ School Bus - Bricklink Designer Program 3 - 01 by László Torma, on Flickr School Bus - Bricklink Designer Program 3 - 02 by László Torma, on Flickr School Bus - Bricklink Designer Program 3 - 03 by László Torma, on Flickr School Bus - Bricklink Designer Program 3 - 04 by László Torma, on Flickr School Bus - Bricklink Designer Program 3 - 05 by László Torma, on Flickr School Bus - Bricklink Designer Program 3 - 06 by László Torma, on Flickr School Bus - Bricklink Designer Program 3 - 07 by László Torma, on Flickr School Bus - Bricklink Designer Program 3 - 08 by László Torma, on Flickr School Bus - Bricklink Designer Program 3 - 09 by László Torma, on Flickr School Bus - Bricklink Designer Program 3 - 10 by László Torma, on Flickr
-
First time I post here. I generally build trains moc, related buildings and accessories. Now I'm courious to know what do you think about this moc I made to complete the harbor area in our diorama city at Model Expo, our lug main event which was on March 17 / 18th. (you can see something else, a huge Dolomite mountain here in the Train Tech ) When we made the project, we had an harbor full of cranes, containers, hopper wagons, industrial plants and so on, but nothing for reproducing something like a little village of fishermen or something else to put near the new Lego set of fisherman house. While my daughetr and his boyfriend were building up that set and I had only to watch them (it was MY Christmas gift ), I thought to build a market of fish and vegetables to put beside. At least something to build on the topics with the instructions only on my mind! It was funny and unusual to me searching into BL for finding fishes, lobsters, cherries, carrots and other "strange" Lego pieces that I never considered before. I went to a fellow of my group for rummaging among the peces of her "Friends" collection . Found watermelons, juice packs, commercial insignias and other usefull pieces. I also found a very interesting box full of white old used Lego pieces ready for the trash. As I experienced yet, did a mix of new and used pieces for the buildings with good effect to my taste. Found even a shark head into an Harry Potter big mix: at first I thought it was a broken piece but at the end found a reusage. Unfortunately we had only a day for setting up the diorama of nearly 30 meters full of moc, trains, carousels and a reproduction of a Dolomite, so we couldn't finish well the pier to merge the old fishing store and the market as we lost the little bag with pieces. Two months for gathering into a large box the pieces I thought suitable then five evening sessions of building up. Thanks to my fellow Jader who supplied the minifigures, as I'm not so teached about. Of course lots of particular to improve and your comments to consider. Well here it is: the fish work and exposure area great catch and a very kich insignia the vegeables and fruits area The people The ice creams and sweets vendor machine An old warehouse needed a modern refrigerator to preserve the fresh fish. A quicly solution came out with a container from my trains collection, a bit inclined for liquids draining.
-
While I'm waiting for the parts to do my mod of the official Dune Ornithopter Set, I decided to play around a bit more and try to do the smaller thopter which Paul and Jessica used in the Dune Part 1 to escape the Sardaukar. This is of course still a very early stage. I started with the cockpit and then tried to design a downsized version of the flapping and folding mechanisms which I've basically taken from the official set. I will not include the the cool landing gear though. For one, it would take up too much space and secondly, the landing gear on this thopter works differently than on the one which was the template for the official Lego set. Maybe I can think of something really smart, but in the end, I'll probably just use ball joints, so that the landing gear will have to be put into place manually. Which means that from here on out, the main challenge will be to shape the exterior. One thing I have to admit to is that I have cheated with the colours. Unfortunately, these trans-yellow pieces don't exist. In the end, I'll have the choice between trans-clear and trans-brown. I think trans-brown will look nicer. Here's an interior shot of the cockpit with trans-clear windows.
-
I have just finished building my food truck empire. 8 USA based food trucks and 8 Italian based Piaggio Ape food/drink/toy selling trucks. Donut Food Truck: Piaggio Ape Wood Fired Pizza Truck: Has a LEGO light brick installed to simulate the pizza oven glow. Popcorn truck: The popcorn machine is from the polybag set so the corn can bounce by inserting finger thru rear door and tapping lever. Piaggio Ape Coffee Truck: Coffee machine this side. Coffee bean grinder and top opening milk fridge. With doors down.
-
Hi! After a long time, I'm back with my 4th project from the Minecraft world! The Mangrove Swamp I've been planning to build this biome for a long time, but I've been busy with Castle lately. I prepared the terrain design in the game and it was waiting for its time for several months, which has now come! :) This is my first Minecraft project this year, and there will be many more. I'm slowly building the next one, it will be something completely new The construction process is available in my video, link below. How do you like my Mangrove Swamp?
-
So I’ve always flip-flopped between sci-fi and fantasy themes. After spending several years firmly building spaceships I’ve decided to give a castle and medieval village build a go. My style is always with play in mind and some leeway towards historical accuracy. This is very much a work in progress. My aim is to make something sort of modular, not just to rearrange but to make it easier to move to allow my kids to play with it. I have another experimental build I tried, a half timbered house in the black and white style that I want to try and incorporate. Thoughts and comments very welcome! So you can see the overall plan, a quadrangular castle with a central keep, able to be closed up and opened. All off the corner towers and wall sections are connected with pins. Gate section. I intend to add a drawbridge style gate to the front. With chains if possible. Apart from some small variations in the colours, all four corners are the same. The two side walls again are quite similar. The SNOT bricks I plan to use for some kind of climbing foliage. I also plan on making small sub builds to connect to the inside of the walls; a forge and smithy, a pig pen, a small half timbered lodge, a storage pile etc. Something to give it some life. The longer of the two rear wall halves has the bridge to the keep. And the keep itself. I plan on another floor, which may have some half timbered extensions, and a roof top access. Interior-wise, the bottom floor has the dungeon and cellar. The middle will have a small hall and for the top I think a bed chamber makes sense. I want to add details to this section like torches on the walls, trophies, other decorations. I’ll add more pictures of the half timbered house I’ve started, as well as other sun builds and progress pictures as I go, as well as the figs I think will inhabit here. I welcome feedback and suggestions for other details and sub builds. Thank you for taking the time to go through this.
-

[MOC][VIDEO] Jurassic Park - 30th anniversary - animation 5 (of 5)
Kalais posted a topic in LEGO Licensed
This is the last animation in a series of five videos made to celebrate the 30th anniversary of Jurassic Park. In fact, the entire production started with this one and various solutions were tested here. It turned out to be the second most popular video of the five with almost 2 million views on the official LEGO YouTube channel. Read more » Full story on my LEGO blog: [VIDEO] Jurassic Park - 30th anniversary - animation 5 (of 5) -
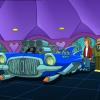
Captain Fishbone wept as he flew over the once prosperous Caribbean seas. His crew had abandoned him, leaving him with nothing but one ship, his modified flying tugboat called the Rustbucket. My entry to the Eurobricks Space Pirates Contest 'Rum for everybody!' category The Ship is based on Bdubs' fantastic flying tugboat Minecraft build in his Building with Bdoubleo series. https://flic.kr/p/2pB76a5


-min(2).thumb.jpg.89062c1a498f0e11e435e64ef3149476.jpg)