Search the Community
Showing results for tags 'UCS'.
Found 180 results
-
Hi, here's another one of my recent MOCs. It's a Liberator-class starfighter from Star Wars: The Old Republic in UCS size. The Galactic Republic used it against the Sith Empire, which also knew it as Talon Fighter. The wings can be folded to two positions (similar to the U-Wing from Rogue One). This design allows it to be used like an interceptor with the speed of an A-Wing or a starfighter with the firepower of an X-Wing. Hope you like it :) Liberator-class Starfighter UCS by Vaionaut, on Flickr
-
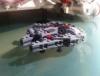
Aloha! If you're willing, I'm in need of some help. So I took notice on the UCS Star Destroyer of how the underside of the stern has a bend to its technic frame. Is there any way to fix this or did I miss a step in building? Heres the link to the image. https://www.flickr.com/photos/190338748@N06/51079892257/in/dateposted-public/
-
Hi everyone, today here I am to show you my version of the Batpod. When 5004590 was released, everyone was thrilled and tried to replicate one on their own with their parts. However, 5004590 looks just strange when you compare it to the real one. I bought the book The Dark Knight Manual to understand the design more, and research on the Internet for a month, and finally I built a version that I think is closer to the real Batpod. The original Batpod is an escape pod from Batman's Tumbler, and the mechanism is based on the S-shaped axis. Each of the two wheels are connected to the body by one-sided arm only. 5004590 set does not do this while mine follows that design. The shape of the Batpod is also in a reverse V-shaped manner, without any horizontal element. The LEGO set did not do that at all, and my version tries to follow that original profile, with rear part elongated as well to match the proportion. Front view, which shows the asymmetrical design of the wheel axis. The front view has mounted 3 pairs of weapons, with headlights on the sides too. Middle part, which retains some of the details of the original 5004590 set. I like this part the most, which keeps the original design of the Batpod: mudguard between the two pedals. I tried to add some wiring to mimic the original, but it looks too busy and so I ditch it in the end. The whole exercise was started as an MOD, but with my design goals to rebuild the form in the most realistic way, I redid the entire chassis in the end. Looks like an MOC at last! Anyway, there is one technical issue that prevents the front wheel guns from holding permanently, but as a display model, this is perfect already. Thanks for watching!
-
Hello! It's been awhile. But I am back at it again. This time going back to a previous build to build it in real bricks. I give you my SHIPtember(ish) progress (if years of no activity in a single build count LOL). So far I have 90% of the stbd side complete. It was more a matter of organizing all the 7000-something bricks I got for it. My last point working on it was making the Warrior drones and one engine back in 2019. Stopped as I got burnt out. But near the end of August I started building again after buying 3 hardware organizing boxes. Separated all I had into those and things sort of flowed together as I figured out how to use the instruction setting in Stud.io. Enjoy! EVE Online Lego UCS Reaper | Flickr This was the original post for it started in 2012 to 2019. [MOC] EVE Online UCS Reaper (update 2019) - LEGO Sci-Fi - Eurobricks Forums And the Cuusoo page with a better write-up on it all after being motivated from Csar's Rifter.. LEGO IDEAS - EVE Online Ships - UCS Reaper
-
After building my minifig scale T-70 i got the urge to go bigger and start an UCS version. So here she is besides her little sister, hope you enjoy the pics and build. Also a big shout out to usfighting and his amazing T-65 he made here... http://www.eurobrick...howtopic=104810, amazing model and big inspiration in making mine.
-
Nov. 2015 Initial Post: Hello Eurobrickers! I have a great announcement for you guys, especially those who are interested in Cavegod's UCS AT-AT. Over the past month or so, I have worked a countless number of hours in order to bring all of you guys something that this MOC deserved ever since its creation, a proper instruction manual. Yes, that's right, the famed issues of LDD will no longer be apart of this project thanks to this manual. Now I'm sure you're wondering, how big is a 6000+ piece manual? Well, to answer that question, the manual is a massive 1,089 pages. No that is not a typo, ONE THOUSAND AND EIGHTY NINE PAGES!!! A special thanks goes out to both Cavegod and drdavewatford. Cavegod designed a masterful MOC, one of the greatest ever, and drdavewatford was kind enough to allow me use of some of his photos throughout the manual. This could not be achieved without you guys! Enough of me talking, here are some images directly from the manual: (Initial images removed for clarity on update) Oct. 2020 Instructions Update: Almost five years after its initial release, I'm thrilled to announce that the remastered instructions for Cavegod's AT-AT are complete! The instructions feature updates that make this build SO much easier and affordable. The most important things that are included in the updated instructions are: Redesigned Legs. These new legs have a technic interior and erase any issues that occurred with the original leg stability Reinforced Body Frame. The handle is now incredibly sturdy and the technic structure that is housed within the body is significantly more sturdy Cheaper Pieces. After several years it was time to swap out the expensive parts. The parts and MOC are now much more affordable. Display Base. What MOC would be complete without a display base? I designed a large black display base that includes technic framing to snap in the feet, a much better alternative to the old method of tires within the feet. The base also features several snow-covered rocks to imitate a Hoth landscape The MOC now consists of 8,935 pieces and measures: 34" long 18" wide 30" tall The instructions are now reduced down to 550 pages. More information about getting the instructions and free access to the parts list can be found here Pete and I are super pumped to be sharing the update with you, and I cannot understate how much better they've made the build experience and final MOC. If you already own the instructions after getting them from me in the past, you should have received an email detailing how to obtain the updated instructions. If I missed you just shoot me a PM or contact me via email at alloutbrick@gmail.com and I'll get your upgrade over to you. Here's some photos of the update:
-
Was anyone else slightly disappointed with the UCS A-wing? Don't get me wrong it is a beautiful and striking looking model but (in my opinion) flawed with a few issues. In particular the loose/wobbly engines, large stickers and flimsy looking tail fins. I modified mine to fix these issues and I've published free instructions of these mods on Rebrickable: https://rebrickable.com/mocs/MOC-45277/Simon Lenz/ucs-a-wing-starfighter-modifications/?inventory=1#comments To see more photos of this model see my Flickr page: https://www.flickr.com/photos/160655025@N08/albums/72157714732198646 What do you think?
-

[MOC] [UCS] [Instructions] MC75 "Profundity" Star Cruiser
JorstadDesigns posted a topic in LEGO Star Wars
Hey everyone! Just posting an update on my MC75 Profundity. My original version used some technic liftarm supports at the front of the ship that obscured the lower command fin and wasn't as attractive. After trying a bunch of options, I've settled on this design as a balance of structural support and appearance. It's probably slightly less stable than the first version due to having one fewer support point over a smaller base surface area, but the ship isn't really designed for swooshing anyway, so I'm pretty satisfied! I additionally made some parts changes to reduce rare part usage; the new version also cut maybe 150 bricks overall. I hope you like the changes! Although there are a few different variants of the ship that showed up in Rise of Skywalker, this is the base design as seen on-screen in Rogue One, commanded by Admiral Raddus during the Battle of Scarif. Although Rogue One and some online images were used occasionally for scale/size reference, I mostly used the MC75 model from the board game Star Wars Armada for the design (a fantastic board game for anyone interested in strategy games). Part count: 3,294 LEGO bricks Dimensions: 32 in. L x 7 in. W x 15 in. H The original version took about six months of off-and-on design work to finish in LDD. I spent another four months testing the new stand for the update. Stud.Io was resisting while the PDF instructions manual was generating, but it got there eventually. The Profundity is designed to-scale with LEGO's new ISD (#75252) as well as most other JD MOCs, including the MC80a Home One, MC80b Liberty, and MC30c. The height of the ship was a bit of a challenge, but in the end the tall stand turned out to be an advantage for mounting other Rebel ships. Both the Tantive IV and the Ghost are designs by LEGO (the Tantive from the new ISD, and the Ghost from the Star Wars advent calendar) modded only for attaching to the model. The Tantive can be placed docked inside the hangar bay, escaping the Profundity, or on it's own independent stand. The MC75 star cruiser is a Mon Calamari city ship repurposed for combat with battleship-grade heavy armor and a large weapons collar encircling the main body of the ship. The most well-known MC75 was the Profundity, commanded by Admiral Raddus during the pivotal Battle of Scarif. Boasting twenty point-defense laser cannons, twelve broadside turbolasers, four heavy ion cannons, twelve proton torpedo launchers, and six tractor beam projectors, the MC75 was more versatile than the MC80 and easily adapted to varying engagement styles. The most notable feature of the MC75 is an armored outrigger fin extending the bridge command pod below the ship, a design choice intended to evoke the appearance of predatory fish feared among the Mon Calamari. A smaller fin above the ship housed the transmission array and primary sensor clusters. The large docking bay within the ship's nose was capable of docking ships up to the size of small corvettes (notably the Tantive IV). Although the MC75 lacked prominently displayed engine housings, twelve Kuat Drive Yards Gemon-15 sublight ion drives hidden beneath the rear armor plating allowed the MC75 to match the cruising speed of starfighter escorts. I tried to be as accurate as possible to the on-screen appearance of the MC75, but decided to sacrifice the grills in the sides of the forward weapons collar. Unfortunately the scale also prohibited adding the 8 smaller sublight engines in the rear of the ship. Clearly the model isn't a 'swoosher,' but overall it's remarkably sturdy! Honestly the test build went much smoother than expected, given the complex angles and the continued presence of gravity (haha). It took about twelve hours to assemble using Stud.Io and making corrections/fixing errors; should be significantly less using the manual. Thanks for looking - hope you like the design! -
UCS Jedi starfighter - Eta-2 Actis-class interceptor Dimensions: 42 x 38 x 28 studs Pieces: 1679 INSTRUCTIONS are available on rebrickable https://rebrickable.com/mocs/MOC-23806/thire5/ucs-eta-2-actis-class-interceptor/#details ------------------------------------------------------------------------------------------------------------- Original post --------------------------------------------------------------------------------------------------- Hello! I'm currently working on my new UCS model of Jedi Interceptor. Originally, I wanted to keep the same scale as my ARC-170 starfighter , but the sizes are quite different (18.95m vs. 4.3m) so the Jedi starfighter would be quite small. Right now I'm I have a little problem with R4 unit, it seems to be quite big compared to the rest of the ship. Not sure what to do, either create some smaller R4 unit (3x3 stud ?), or make the ship bigger what do you think ?
-
Hi, first post about doing a mod, but I felt pretty passionate about this one. Having grown up with the "original" Batman films, I loved the UCS Batmobile, and while I also love the lego Batwing, the elongated cockpit really struck me as a bit NQR. I tried various mods on mecabricks, and while the most accurate "shrinkage" (based on the original studio model) of the length of the cockpit would require the removable of (two) of the sections of 1/4 clear wall elements, this would require a full blown redesign of the seat and cockpit to fit it all in the remaining one. I also tried utilizing the new UCS A-wing canopy, but it's width isn't the 8 studs required (6 only), and again, a full redesign would be needed (which is a shame as it is a more accurate shape compared to this sets design) So finally, I settled on removing 2x BOW 1/4 4X4X1 which effectively shortened the length by about 2-3 studs (along with removal of other parts that were between the two cockpit sections). This allowed me to move the front of the canopy backwards 1 stud (more screen accurate) and also move the back "shell" (WALL ELEMENT CONE 3X6X6) forwards - again more screen accurate. To complete the look, I'm planning on printing some back vinyl to make the rear section of the canopy a sloping black area (rather than clear all the way back then a vertical black where the shell starts). The other major change I made was to remove some of the dark grey "detailing" to remain more screen accurate - especially the spoilers. I narrowed them by a stud to take advantage of the void below them created by removing the two LDG 2x6 bricks, which then allowed them to sit much more flush when down (with some detailing underneath 1 stud lower than the rest of the wing area) Instead of writing more, maybe I'll just show what I'm talking about, as it will hopefully make more sense that way. Happy with the overall result. Original model: Original studio model:
-
Hi! Here is my rendition of the Battlestar Galactica Colonial Viper MkII. The model is 55cm long, made of 2696 parts. The canopy can be sled open, and the landing gears are retractable, just like the real one! :) There is also a display stand: You can see high res pictures here: https://flic.kr/s/aHsm1djZ7U I propose the building instructions for 10EUR (268pages pdf files, including the ready-to-print sticker sheet, part list and detailed step-by-step building process). Drop me an email to get all the details! So Say We All! David
-

Bricklinking the Lambda-Class Imperial Shuttle 10212
Spud The Viking posted a topic in LEGO Star Wars
I have decided to build the, what is in my opinion, best ship in Star Wars: the classic and sleek imperial shuttle. From making a wanted list and ticking off what I actually have, is there any other advice you guys can pass on to me? It is a bit daunting but I have amassed about 25% of the total parts and just thinking of that beauty pushes me on. Thanks. -
I present to you the backbone of the Rebel Alliance – the GR-75 Rebel Transport: After having tweaked and tweaked my last MOC (Medical Frigate) and built a fleet of fighters and smaller ships for it, I wanted to build something bigger - but in the same scale. I chose the beautiful, organic looking 90-meters long, Rebel Transport. The Medical Frigate can be seen here: http://www.eurobrick...pic=129607&st=0 http://www.eurobrick...howtopic=131170 The Transport is the workhorse of the Rebel alliance, transporting equipment from base to base. The ship can house dozens of odd sized containers kept in place by strong magnetic locks. The Transport, like so many other Rebel ships, have a very organic and beat up look – getting this look right was the biggest challenge when designing the moc. The scale of the model is 1: 250 meaning it is built at 2 meters per stud. Thus the Transport is 45 studs long. Building the most detailed 45 stud version of the ship was my main goal. Based on pictures of the movie model I calculated the width and curvature of the ship – I fired up LDD and began building. What I ended up with was an 850+ brick model made up of 150+ brick types: The Transport takes flight! Front view. In this picture the curvature of the ship is very pronounced. To my luck the range of curved bricks fit perfectly with curvature of the ship. When placed along a central spine they further underline the lines the Transport has across the hull. Don’t mind the small hole in the front – one of the hinges is slightly too bent. Top view. I have mostly used white 1 x 4 curved slopes to get the proper shape. However, to get the dirty, rugged look of the ship, I have mixed in a number of different colors and other curved slopes. The Cargo. The GR-75 can carry a LOT of containers. Creating this part of the ship was kind of a chore but also very fun. At this scale I had just enough resolution to attempt recreating every single cargo container and detail from the studio model. I found a picture of the model showing the bottom up and began mapping every container pipe and greeble I could. I recreated it all with bricks of matching colors, pipes, taps and odd shaped pieces. The end result matches the haphazard stacking of the studio model – I’m glad I put the magnetic locks in place… :) Containers from the back. As with the Medical Frigate, one of the challenges was creating a sturdy non-interfering stand. With this ship one of the stands is placed in the middle of the containers. However I did not want to sacrifice even a single compartment so I found a workaround using transparent wall pieces. The slim piece is fitted snugly in between a number of containers and is just connected via two studs – but it seems to hold :) Container close up. They are all there :) Starboard profile view. This angle reveals the slight sloping of the hull towards the rear end of the ship. The curving effect was achieved by a number of plate hinges and four sections with slightly different angles. Port profile view. The profile views show the gap between the top and bottom hull plates. This gap has a jagged effect on the studio model – conveyed here by 1 x 1 and 1 x 2 plates. Side detail. Yes, there is actually detailing in the narrow gap between the hull plates. Again, the greebling is based on looking at the studio model – and on what was possible in such a small area :) Engine view. As always, one of my favorite parts of a ship. Getting all the engines to fit in there was a bit of a challenge. Rear view. As the Transport flies out of focus the uneven surface is again evident. The Transport has a very small command/deflector module - the little thing on top of the spine. To be in scale this module should actually be about half a stud smaller – even smaller than a B-wing cockpit section. However, the 2,5 stud test I did, did not look very good :) Lastly a scale comparison with the Medical Frigate – and the rest of the rebel fleet :) Thanks to all the supporters of the Medical Frigate project, you have helped make this model possible! Everyone can get the LDD for the Rebel Transport here: https://www.dropbox..../GR-75.lxf?dl=0 Enjoy and please comment!
-
There are many AT-AT mocs. Many with great interiors. Many with great exteriors. This is my attempt at integrating both into one model. The model is minifig scale, has at least 6000 thousand pieces and stands two feet tall. It is stable enough to be picked up and moved. Another rebuild(plus head redesign) in the books by Jhaelon Edwards, on Flickr Features -Articulated head area -Removable panels to reveal interior -Lights throughout inside -Motorized deployment cables -Speeder bike garage for 4 speeders -Two floors with seeting areas -Gun/backpack racks -Cockpit area with seating for two pilots -Sliding Side Doors Side View: The complete scene has been reconstructed. by Jhaelon Edwards, on Flickr Rear View: IMAG1033 by Jhaelon Edwards, on Flickr Head: IMAG1037 by Jhaelon Edwards, on Flickr Full Interior: IMAG1019 by Jhaelon Edwards, on Flickr Speeder Garage: IMAG1021 by Jhaelon Edwards, on Flickr Top Floor Seating Area: IMAG1023 by Jhaelon Edwards, on Flickr Bottom Floor Front Area: IMAG1026 by Jhaelon Edwards, on Flickr Bottom Floor Deployment Area: IMAG1028 by Jhaelon Edwards, on Flickr Top Floor Access Ladder: 2016-08-07_10-36-53 by Jhaelon Edwards, on Flickr Troop Deploying: 2016-08-07_10-27-42 by Jhaelon Edwards, on Flickr Cockpit Area IMAG1030 by Jhaelon Edwards, on Flickr Assault on Hoth!: Assault on Hoth by Jhaelon Edwards, on Flickr The AT-AT at Brickfiesta: Another brickfiesta in the books! by Jhaelon Edwards, on Flickr is a youtube video detailing all the features of the model, including the motorized deployment cable. Check my flickr for progress photos starting from the first LDD files. Special thanks to Cavegod and LILmeFromDaFuture. I got a lot of inspiration from their models/techniques. Let me know what you guys think. Sorry for the cell phone quality pictures. Would buy new camera but can't stop spending money on lego parts ;). I'm considering distributing/selling the LDD files for this model if there's interest. They do need some refinements, however.
-
Hello everyone! I've recently got back into LEGO as an adult after a 20 year hiatus. My last LEGO sets purchased were the initial 1999 wave of Star Wars sets and with the 20th Anniversary sets released last year I was pulled back in by nostalgia. Sets today are so much more complex and well thought out and the ideas and building techniques that the community come up with are really inspiring. I am an engineer by trade and work with 3D software frequently, I credit many of the skills I've developed over my life due to the foundation that LEGO provided during childhood. I really enjoy having to solve problems using the limited catalog of parts that LEGO currently provides, it really fosters creativity in an aging brain. I decided to jump headfirst into Mortesv's Nebulon-B MOC in February and I was hooked by the complex construction methods and thought I'd give it a try myself. Rogue One is my favorite Star Wars movie and when looking online, I hadn't seen too many Hammerhead Corvette MOC's at UCS "scale" and thought I would start there. Here is the 97% completed model, there a few pieces missing that I am still needing to source but its almost completely done. I tried to make it in the similar 1/250ish scale that the Nebulon-B is in, but it looks to be ever too slightly larger. Trying to find reference photos that show each angle were challenging and many photos show the ship with completely different features. I tried to match the movie model, but alas there are some creative liberties made. Without an exact 3D model, its hard to get every detail just right. The model is almost completely solid, save the front and rear which are shells. All of the engines and center section are modular and completely removable. The entire model is "swooshable" but at 9lbs its really heavy! I haven't worked with LDD or Stud.io, but I plan to make a digital version as well and possibly release instructions if there is enough interest. I welcome any and all feedback, that's how we improve and make things better! More photos on Imgur, I can only get one photo on here due to file size. https://imgur.com/gallery/iObPOEH
-

List fo best Lego Star Wars MOCs in UCS size with instruction
LateralusArt posted a topic in LEGO Star Wars
I would like to create in one place current list of best Lego Star Wars MOCs in UCS size with instruction available to purchase and build. For now i came up with such a list: Best UCS size: 1. Sandcrawler by Cavegod and Marshal Banana https://www.eurobricks.com/forum/index.php?/forums/topic/159511-moc-cavegods-ucs-sandcrawler/ 2. Imperial Star Destroyer by Raskolnikov https://www.eurobricks.com/forum/index.php?/forums/topic/152690-isd-aggressor-star-destroyer-moc-w-interior-and-instructions/ 3. AT-AT by Cavegod and Jhaelego and (AT-ACT) https://www.eurobricks.com/forum/index.php?/forums/topic/138552-moc-the-ultimate-at-at-walker/ https://www.eurobricks.com/forum/index.php?/forums/topic/117382-cavegod-ucs-at-at-instructions/ https://www.eurobricks.com/forum/index.php?/forums/topic/40849-ultimate-collectors-scale-all-terrain-armoured-transport/ https://www.eurobricks.com/forum/index.php?/forums/topic/154242-moc-minifigure-scale-ucs-at-act/ 4. Super Star Destroyer by Onecase https://www.eurobricks.com/forum/index.php?/forums/topic/160425-moc-executor-class-star-dreadnought/ https://www.eurobricks.com/forum/index.php?/forums/topic/163280-instructions-executor-class-star-dreadnought/ 5. Neblun-B by Mortsev and Dranac https://www.eurobricks.com/forum/index.php?/forums/topic/131170-moc-ucs-medical-frigate-further-improvements-and-instructions/ https://www.eurobricks.com/forum/index.php?/forums/topic/135698-mortesvs-ucs-nebulon-b-medical-frigate-instructions-available/ https://www.eurobricks.com/forum/index.php?/forums/topic/130986-moc-ucs-nebulon-b-frigate-by-dranac/ 6. A-Wing by Anio https://www.eurobricks.com/forum/index.php?/forums/topic/108296-moc-ucs-a-wing/ 7. U-Wing by Starbricks https://www.eurobricks.com/forum/index.php?/forums/topic/146899-moc-ut-60d-u-wing-sb00101-ucs/ 8. Tie Silencer by Starbricks https://www.eurobricks.com/forum/index.php?/forums/topic/158930-sb00201-ts-project-moc-tie-silencer-ucs/ 9. AT-M6 by Jhaelego https://www.eurobricks.com/forum/index.php?/forums/topic/159977-moc-minifig-scale-at-m6/ 10. Zeta Cargo Shuttle by Renegade Clone https://www.eurobricks.com/forum/index.php?/forums/topic/150375-moc-instructions-ucs-zeta-class-cargo-shuttle/ https://www.eurobricks.com/forum/index.php?/forums/topic/146805-moc-ucs-zeta-class-cargo-shuttle/ 11. Ghost by Brickvault https://www.eurobricks.com/forum/index.php?/forums/topic/157602-star-wars-rebels-ucs-ghost-minifig-scale/ 12. Venator by Anio/Polo https://www.eurobricks.com/forum/index.php?/forums/topic/37663-venator-class-republic-attack-cruiser/ 13. Imperial Star Destroyer by Onecase https://www.flickr.com/photos/138419110@N08/32429001358/in/dateposted/ 14. Corvus by RichboyJhaec https://www.youtube.com/watch?v=ghuL-7fUczs&t=937s 15. Zeta-Class Cargo Shuttle by Cavegod https://www.brickvault.toys/collections/all/products/zeta-class-shuttle-minifig-scale 16. Resistance Bomber by Star Bricks https://www.eurobricks.com/forum/index.php?/forums/topic/170102-sb00301-b-project-moc-resistance-bomber-ucs/ https://www.starbricks.net/b-project 17. Kylo Ren’s Command Shuttle by Cavegod https://www.eurobricks.com/forum/index.php?/forums/topic/170401-moc-cavegod’s-ucs-kylo-ren’s-command-shuttle/ 18. Tie Bomber by Yannik Brandt https://www.youtube.com/watch?v=uPGrWnjgpiw Other UCS size: 13. Desert Barge Sail by Baronsat https://www.baronsat.net/baronshop/INSTRUCTIONS-SW-JABBA-BARGE.htm 14. MOD Tie Interceptor by Jazbass https://imgur.com/gallery/SOaVL https://imgur.com/gallery/s70rCm0 15. ARC-170 by SarinoooO S https://www.youtube.com/watch?v=zVqh0saM264 16. First Order Special Forces Tie Fighter by Cavegod https://www.eurobricks.com/forum/index.php?/forums/topic/165197-moc-cavegods-first-order-special-forces-tie-fighter/ 17. TIE Reaper by Jhaelego https://www.eurobricks.com/forum/index.php?/forums/topic/152358-mocldd-instructions-tie-reaper/ https://www.youtube.com/watch?v=T4ulNn9lqZA&t=284s 18. Eclipse-Class Dreadnought by Jorstad-Designs https://www.jorstad-designs.com/product-page/instructions-eclipse-class-dreadnought 19. UCS Rey´s Speeder by Robert Lundmark https://www.flickr.com/photos/133266472@N05/25313457368/in/dateposted/ 20. Millennium Falcon by RichboyJhae https://www.youtube.com/watch?v=H5XcVgqoUbM&t=21s 21. AT-AT by Lego TK-1138 https://www.eurobricks.com/forum/index.php?/forums/topic/107648-ldd-at-at/ 22. Marshall Banana's Millennium Falcon by Brick Customs https://www.eurobricks.com/forum/index.php?/forums/topic/147385-i-made-a-replica-of-marshall-bananas-7500pc-lego-millennium-falcon-instructions/ 23. Jango Fett Slave 1 by RichboyJhae https://www.youtube.com/watch?v=V5Ij_J8VoV8 24. Jango Fett Slave 1 by Brick Customs https://www.eurobricks.com/forum/index.php?/forums/topic/152809-moc-ucs-jango-fetts-slave-1-instructions/&tab=comments#comment-2833300 https://www.youtube.com/watch?v=LDs3AEJgv5I&t=46s https://www.eurobricks.com/forum/index.php?/forums/topic/152809-moc-ucs-jango-fetts-slave-1-instructions/ 25. Jango Fett Slave 1 by Jorstad Design https://www.jorstad-designs.com/product-page/instructions-ucs-jango-s-slave-i 26. Venator-Class Star Destroyer by Elisss_2 https://www.eurobricks.com/forum/index.php?/forums/topic/160651-moc-ucs-venator-class-star-destroyer/ 27. Imperial Light Cruiser by insideLego https://www.eurobricks.com/forum/index.php?/forums/topic/152106-moc-imperial-light-cruiser/ 28. Imperial Interdictor Cruiser by insideLego https://www.eurobricks.com/forum/index.php?/forums/topic/151884-lego-star-wars-imperial-interdictor-cruiser-moc/ 29. Pelta-Class Frigate by insideLego https://www.eurobricks.com/forum/index.php?/forums/topic/152776-lego-star-wars-moc-pelta-class-frigate/ Speeder Bike by NNOPMOC https://www.eurobricks.com/forum/index.php?/forums/topic/109680-moc-speeder-bike/ Hyperdrive ring by syrhilla https://www.eurobricks.com/forum/index.php?/forums/topic/154004-moc-hyperdrive-ring-for-ucs-10215/&tab=comments#comment-2937498 Tie Defender by Cavegod https://www.eurobricks.com/forum/index.php?/forums/topic/145473-mocinstructions-cavegods-tie-defender/ Tie Defender by mcgrah https://www.eurobricks.com/forum/index.php?/forums/topic/147915-mocucs-tied-defender/ TIE Interceptor by ClassicLook https://www.eurobricks.com/forum/index.php?/forums/topic/152675-mod-7181-ucs-tie-interceptor/&tab=comments#comment-3023076 Snowspeeder by drakmin https://www.eurobricks.com/forum/index.php?/forums/topic/96421-moc-t-47-rebel-snowspeeder-instructions-available/ Zenith - Old Republic escort cruiser by Bob De Quatre https://www.eurobricks.com/forum/index.php?/forums/topic/86691-ldd-moczenith-old-republic-escort-cruiser/ X-Wing Red 5 by usfighting https://www.eurobricks.com/forum/index.php?/forums/topic/104810-moc-ucs-x-wing-red-5/&tab=comments#comment-2113271 Tie Bomber by spacepilot3000 https://www.eurobricks.com/forum/index.php?/forums/topic/46759-moc-ucs-tie-bomber/ B-Wing by Cavegod https://www.eurobricks.com/forum/index.php?/forums/topic/30184-moc-ucs-b-wing/&tab=comments#comment-936344 Lamba Shuttle Tydirium by Cavegod https://www.eurobricks.com/forum/index.php?/forums/topic/30185-moc-ucs-lamba-shuttle-tydirium/ Venator Star Destroyer by thire5 https://www.eurobricks.com/forum/index.php?/forums/topic/26049-moc-venator-star-destroyer/ Non UCS size: A-wing Starfighter by Jerac https://www.eurobricks.com/forum/index.php?/forums/topic/168637-a-wing-of-a-wings/ X-wing Starfighter by Jerac https://www.eurobricks.com/forum/index.php?/forums/topic/166523-moc-star-wars-the-x-wing-story/ TIE Defender by Jerac https://www.eurobricks.com/forum/index.php?/forums/topic/169059-the-defender-of-the-empire/ TIE Advanced by Jerac https://www.eurobricks.com/forum/index.php?/forums/topic/161063-sfs-tiex1-advanced/ TIE Interceptor by Jerac https://www.eurobricks.com/forum/index.php?/forums/topic/157444-tie-fighter-tie-interceptor/ TIE Bomber by Jerac https://www.eurobricks.com/forum/index.php?/forums/topic/160174-sfs-tiesa-bomber/ TIE Fighter by Jerac https://www.eurobricks.com/forum/index.php?/forums/topic/157444-tie-fighter-tie-interceptor/ B-wing Starfighter by Inthert N-1 Naboo Starfighter by Inthert https://www.eurobricks.com/forum/index.php?/forums/topic/154913-moc-naboo-n-1-starfighter-breakdown/ Y-Wing by Brickwright https://www.eurobricks.com/forum/index.php?/forums/topic/84780-minifigure-scale-y-wing-instructions/ Snowspeeder by Flying Waffle U-wing Starfighter by Caleb Ricks CR-90 Corellian Corvette - Blockade Runner (Tantive IV) by Mortsev https://www.eurobricks.com/forum/index.php?/forums/topic/155304-instructions-mortesvs-cr-90-corvette-blockade-runner-tantive-iv/ https://www.eurobricks.com/forum/index.php?/forums/topic/139982-moc-ucs-cr-90-corellian-corvette-–-blockade-runner-tantive-iv/ GR-75 by Mortsev https://www.eurobricks.com/forum/index.php?/forums/topic/137021-moc-1-250-mini-ucs-rebel-transport-gr-75-ldd-file/ AT-AT by Raskolnikov https://www.eurobricks.com/forum/index.php?/forums/topic/143010-build-your-own-plus-size-at-at/ https://www.eurobricks.com/forum/index.php?/forums/topic/142646-at-at-moc-plus-sized-but-not-super-big/ AT-ST by Gol https://www.eurobricks.com/forum/index.php?/forums/topic/120770-moc-another-at-st-version-2/ Constrictor II - Playable Interdictor Cruiser by Raskolnikov https://www.eurobricks.com/forum/index.php?/forums/topic/161369-constrictor-ii-imperial-interdictor-w-instructions/ https://www.eurobricks.com/forum/index.php?/forums/topic/137125-moc-imperial-interdictor-cruiser-the-iic-constrictor/ Hammerhead Corvette by Dmarkng https://www.eurobricks.com/forum/index.php?/forums/topic/149057-moc-instructions-dmarkngs-hammerhead-corvette/ AT-M6 by Edge of Bricks (Kozikyo86) https://www.eurobricks.com/forum/index.php?/forums/topic/155317-moc-ucs-first-order-heavy-assault-walker-at-m6/ First Order Xi-Class Light Shuttle by Edge of Bricks (Kozikyo86) https://www.eurobricks.com/forum/index.php?/forums/topic/164439-wip-moc-first-order-xi-class-light-shuttle/ First Order Upsilon-Class Command Shuttle by Edge of Bricks (Kozikyo86) https://www.eurobricks.com/forum/index.php?/forums/topic/168820-moc-mod-first-order-upsilon-class-command-shuttle/ First Order AT-ST Walker by Edge of Bricks (Kozikyo86) https://www.eurobricks.com/forum/index.php?/forums/topic/157323-moc-first-order-at-st-walker/ The Empire over Jedha City by Onecase https://www.eurobricks.com/forum/index.php?/forums/topic/164991-moc-the-empire-over-jedha-city/ https://www.eurobricks.com/forum/index.php?/forums/topic/168072-instructions-the-empire-over-jedha-city/ Mos Eisley Cantina by iScreamClone Mos Eisley Additional Buildings by iScreamClone Carbon Freeze Chamber by iScreamClone Speeder Bike by Anio https://www.eurobricks.com/forum/index.php?/forums/topic/86896-ucs-speeder-bike/ Super Star Destoryer by Anio https://www.eurobricks.com/forum/index.php?/forums/topic/45924-moc-executor-class-super-star-destroyer/ Slave I by Anio https://www.eurobricks.com/forum/index.php?/forums/topic/44221-moc-ucs-boba-fetts-slave-1/&page=3&tab=comments#comment-870935 Tie Fighter by Anio https://www.eurobricks.com/forum/index.php?/forums/topic/26055-moc-tie-fighter-ucs/ Invisible Hand by Anio https://www.eurobricks.com/forum/index.php?/forums/topic/90000-ucs-invisible-hand/ Royal Naboo Starship by Anio https://www.eurobricks.com/forum/index.php?/forums/topic/69102-fully-chromed-ucs-royal-naboo-starship/ Republic Cruiser by Anio https://www.eurobricks.com/forum/index.php?/forums/topic/63769-ucs-republic-cruiser/ Sebulba's Podracer by Anio https://www.eurobricks.com/forum/index.php?/forums/topic/58540-ucs-scale-sebulbas-podracer/ Juggernaut HAVw A6 by Anio https://www.eurobricks.com/forum/index.php?/forums/topic/54597-ucs-juggernaut-havw-a6/ Anakin Skywaker' Podracer by Anio https://www.eurobricks.com/forum/index.php?/forums/topic/32824-ucs-anakin-skywaker-podracer-with-video-and-building-instruction/ AT-TE by Anio https://www.eurobricks.com/forum/index.php?/forums/topic/26375-moc-at-te-ucs/ Super Star Destroyer Executor by Bob De Quatre https://www.eurobricks.com/forum/index.php?/forums/topic/71969-moc-yet-another-super-star-destroyer-executor/ Invisible Hand by L-DI-EGO https://www.eurobricks.com/forum/index.php?/forums/topic/63753-ldd-moc-invisible-hand/&tab=comments#comment-1706242 Star Destroyer by All in the Reflexes https://www.eurobricks.com/forum/index.php?/forums/topic/109505-ldd-mod-ucs-star-destroyer/ Interdictor Class Cruiser by Tommy Styrvoky https://www.eurobricks.com/forum/index.php?/forums/topic/149635-moc-ldd-star-wars-rebels-interdictor-class-cruiser/ Kylo Ren's Upsilon-class Shuttle by LegoStarWarsLDDShop https://www.eurobricks.com/forum/index.php?/forums/topic/121984-lddmod-kylo-rens-upsilon-class-shuttle/ Sith Infiltrator by Anio https://www.eurobricks.com/forum/index.php?/forums/topic/111294-moc-ucs-sith-infiltrator/ Jabba's Sail Barge by Anio https://www.eurobricks.com/forum/index.php?/forums/topic/93733-ucs-jabbas-sail-barge/ Tie Bomber by Volt_Bricks https://www.eurobricks.com/forum/index.php?/forums/topic/122597-tie-bomber-moc/ Tie Interceptor by dream-in-bricks https://www.eurobricks.com/forum/index.php?/forums/topic/142586-moc-tie-interceptor-proportions-study-11-months-later/ First Order Elite TIE Interceptor by Kozikyo86 https://www.eurobricks.com/forum/index.php?/forums/topic/161015-moc-first-order-elite-tie-interceptor/ Naboo N-1 by jameseilers https://www.eurobricks.com/forum/index.php?/forums/topic/137298-moc-ldd-naboo-n-1-starfighter/ Naboo N-1 by samppu https://www.eurobricks.com/forum/index.php?/forums/topic/143685-moc-naboo-n1-royal-starfighter-fully-functional/ Republic Gunship by JBB_777 https://www.eurobricks.com/forum/index.php?/forums/topic/151790-republic-gunship/ Phantom by ScottishDave https://www.eurobricks.com/forum/index.php?/forums/topic/132482-moc-lxf-minifig-scale-phantom-from-star-wars-rebels/ AT-AT by Anio https://www.eurobricks.com/forum/index.php?/forums/topic/148170-mod-anios-at-at/ https://www.eurobricks.com/forum/index.php?/forums/topic/68782-moc-ucs-at-at/ B-Wing by Renegade Clone https://www.eurobricks.com/forum/index.php?/forums/topic/120744-update-to-my-b-wing-design/ ATT by Anio https://www.eurobricks.com/forum/index.php?/forums/topic/92952-ucs-aat/ Tie Fighter by barneius https://www.eurobricks.com/forum/index.php?/forums/topic/168825-moc-mod-instructions-imperial-tie-fighter/ INCOM T-70 X-Wing Fighter by All in the Reflexes https://www.eurobricks.com/forum/index.php?/forums/topic/120731-moc-ldd-ucs-incom-t-70-x-wing-fighter/ Delta Class DX-9 Stormtrooper transport by michaelozzie https://www.eurobricks.com/forum/index.php?/forums/topic/138962-moc-delta-class-dx-9-stormtrooper-transport/&tab=comments#comment-2972462 Imperial Light Cruiser by insideLego https://www.eurobricks.com/forum/index.php?/forums/topic/152106-moc-imperial-light-cruiser/&tab=comments#comment-2905998 Y-Wing Clone Wars Era by IcarusBuilds https://www.eurobricks.com/forum/index.php?/forums/topic/150483-mocwipldd-minifig-scale-clone-wars-btl-b-y-wing-starfighter/&tab=comments#comment-2900145 X-Wing by cehnot https://www.eurobricks.com/forum/index.php?/forums/topic/144361-moc-the-x-wing-strikes-back/&tab=comments#comment-2708149 Imperial Shuttle by michaelozzie https://www.eurobricks.com/forum/index.php?/forums/topic/117375-wip-imperial-shuttle/&tab=comments#comment-2641053 Venator Class Star Destroyer by _Samibotss_ https://www.eurobricks.com/forum/index.php?/forums/topic/117625-ldd-moc-venator-class-star-destroyer/&tab=comments#comment-2438441 X-Wing by PoweredbyNorth https://www.eurobricks.com/forum/index.php?/forums/topic/71783-ucs-xwing-2nd-edition/ Nebulon B-2 by Walter Kovacs https://www.eurobricks.com/forum/index.php?/forums/topic/39040-ucs-scale-nebulon-b-2/ B-Wing by krispy https://www.eurobricks.com/forum/index.php?/forums/topic/78051-moc-minifig-scale-b-wing-with-instructions-and-ldd/&tab=comments#comment-1483742 Hammerhead Corvette by Jorstad Design https://www.jorstad-designs.com/product-page/ucs-hammerhead-corvette-rogue-one-1 Hammerhead Corvette (Rebels) by Jorstad Design https://www.jorstad-designs.com/product-page/ucs-hammerhead-corvette-star-wars-rebels Imperial Immobilizer 418 Star Destroyer by Jorstad Design https://www.jorstad-designs.com/product-page/ucs-imperial-immobilizer-418-star-destroyer Venator-Class Star Destroyer by Jorstad Design https://www.jorstad-designs.com/product-page/ucs-venator-class-star-destroyer Lucrehulk-Class Battleship by Jorstad Design https://www.jorstad-designs.com/product-page/instructions-lucrehulk-class-cargo-hauler UCS size MOCs which maybe will have instructions in the future: Imperial Star Destroyer by Onecase https://www.flickr.com/photos/138419110@N08/32429001358/in/dateposted/ Desert Skiff by Anio https://www.eurobricks.com/forum/index.php?/forums/topic/167855-ucs-desert-skiff/ http://www.brickshelf.com/cgi-bin/gallery.cgi?i=6575752 Imperial Landing Craft by Cavegod https://www.flickr.com/photos/42956921@N08/sets/72157625732347132 GR-75 by Cavegod https://www.flickr.com/photos/42956921@N08/sets/72157629813069766 UCS Tantive IV - CR-90 Corvette by Kit Bricksto https://www.eurobricks.com/forum/index.php?/forums/topic/154956-moc-ucs-tantive-iv-cr-90-corvette/ AT-AT by LiLimeFromDaFuture https://www.eurobricks.com/forum/index.php?/forums/topic/160363-new-ucs-at-at-teased/&tab=comments#comment-2948642 Marshal Bananas' Lambda Shuttle by Hamsha https://www.eurobricks.com/forum/index.php?/forums/topic/163286-moc-my-version-of-marshal-bananas-lambda-shuttle/ Corvus by RichboyJhaec https://www.youtube.com/watch?v=ghuL-7fUczs&t=937s Kylo Ren's Command Shuttle by Cavegod https://www.flickr.com/photos/42956921@N08/44571254002/in/dateposted/ Kylo Ren's Command Shuttle by leeCTA https://www.eurobricks.com/forum/index.php?/forums/topic/152498-moc-ucs-kylo-rens-command-shuttle/ Resurgent-Class Star Destroyer by Kommander https://www.eurobricks.com/forum/index.php?/forums/topic/157783-wip-ucs-resurgent-class-star-destroyer/ Zeta-Class Cargo Shuttle by Cavegod https://www.eurobricks.com/forum/index.php?/forums/topic/160397-ucs-zeta-class-cargo-shuttle/ https://www.flickr.com/photos/42956921@N08/sets/72157677086731271 Jedi Interceptor by Anio https://www.eurobricks.com/forum/index.php?/forums/topic/155066-ucs-jedi-interceptor/ Venator Class Star Destroyer by Ellisss_2 https://www.eurobricks.com/forum/index.php?/forums/topic/144269-ucs-wip-moc-venator-class-star-destroyer/ Y-Wing Clone Wars Era by Hold0511 https://www.eurobricks.com/forum/index.php?/forums/topic/140165-moc-ucs-y-wing-10134-clone-wars-era-wip/ UCS size MOCs without instructions Imperial Star Destroyer by Jerac https://www.flickr.com/photos/jerac/14160821890/in/dateposted/ https://www.eurobricks.com/forum/index.php?/forums/topic/96373-moc-isd-chimaera/ X34 Landspeeder https://www.eurobricks.com/forum/index.php?/forums/topic/104680-moc-ucs-x34-landspeeder/&page=3 https://www.flickr.com/photos/128945222@N04/16427154461/in/album-72157649885427838/ Jabba's Sail Barge by markus1984 https://www.eurobricks.com/forum/index.php?/forums/topic/93982-ucs-sail-barge-moc/ Jabba's Sail Barge by Chris Wight https://www.flickr.com/photos/60627060@N08/27505296025/in/dateposted/ UCS Tie Bomber by Cavegod https://www.eurobricks.com/forum/index.php?/forums/topic/57860-ucs-tie-bomber/&tab=comments#comment-1030745 AT-AT by Maciej Szymański https://www.flickr.com/photos/dmaclego/22732985008/ Lambda Shuttle by Marshal Banana https://www.eurobricks.com/forum/index.php?/forums/topic/151977-lambda-shuttle-and-star-destroyer-mocs/ Imperial Star Destroyer by Raskolnikov https://www.eurobricks.com/forum/index.php?/forums/topic/130922-moc-imperial-star-destroyer-tyrant/ https://www.eurobricks.com/forum/index.php?/forums/topic/146195-video-if-anyones-curious-how-the-isd-tyrant-opens-up/ Millennium Falcon by Marshal Banana https://www.eurobricks.com/forum/index.php?/forums/topic/118890-moc-millennium-falcon-still-the-coolest-spaceship/ Upsilon-class command shuttle by Renegade Clone https://www.eurobricks.com/forum/index.php?/forums/topic/119078-moc-upsilon-class-command-shuttle/ Star Destroyer Finalizer by AnkTales https://www.eurobricks.com/forum/index.php?/forums/topic/167737-moclego-star-destroyer-finalizer-moc-with-10000-bricks/ https://www.youtube.com/watch?v=VGKzLs1yfmc Venator-class Star Destroyer "Atelles" by Philipp Neumann https://www.flickr.com/photos/39520243@N03/sets/72157620671087561 https://www.eurobricks.com/forum/index.php?/forums/topic/135771-finished22-meters-long-venator-class-star-destroyer-atelles/&tab=comments#comment-2705649 Venator by Lego Customs 0401 https://www.eurobricks.com/forum/index.php?/forums/topic/138280-moc-wip-big-venator-project/ Venator-Class Star Destroyer by Alec Doede https://www.flickr.com/photos/17634665@N07/22228506166/in/dateposted/ Clone Turbotank by Rick Zonneveld https://www.flickr.com/photos/115031425@N04/sets/72157649468729312 https://www.eurobricks.com/forum/index.php?/forums/topic/102744-clone-turbo-tank/ Executor - Super Star Destroyer by Tigrouaugustin https://moc.bricklink.com/pages/moc/mocitem.page?idmocitem=5853 https://www.eurobricks.com/forum/index.php?/forums/topic/146361-moc-exécuteur-super-star-destroyer-185-m-73-pouces-61-pieds-in-progress/ Executor Super Star Destroyer by BerraBZ https://moc.bricklink.com/pages/moc/mocitem.page?idmocitem=3252 Mon calamari MC80 Home One by Baciccia_1978 https://moc.bricklink.com/pages/moc/mocitem.page?idmocitem=419 Mon Calamari MC80 Liberty by Baciccia_1978 https://moc.bricklink.com/pages/moc/mocitem.page?idmocitem=417 UCS Sith Fury-Class Sith Interceptor by markus19840420 https://www.flickr.com/photos/71475401@N07/29328813276/in/album-72157644753191459/ https://www.eurobricks.com/forum/index.php?/forums/topic/139693-sith-fury-class-interceptor-tor-idsmo-r4-final/ Vehicles from Original Trilogy which would be great to have instruction to UCS size MOC: -Jabba Sail Barge -Tie Bomber -Landspeeder X34 -Sentinel-class landing craft (maybe Cavegod will made instruction) -Desert Skiff (maybe Anio will made instruction) -Tantive IV Blocade Runner (maybe Kit Bricksto will made instruction) -Tie Interceptor (there were some mods to Lego UCS Tie Fighter?) -GR-75 (maybe Cavegod will made instruction) -Home One -Mon Calamari If You know about anything else worth adding to list please leave the comment i will update the list. -
I designed the UCS Clone Wars Y-wing Starfighter a couple of months ago, and I thought I'd share some images of it here. They are all over 1860 pieces, so pretty close to the Original Trilogy UCS Y-wing we got back in 2018. This starfighter has room for 2 pilots: One in the front, and another as a gunner in the bubble turrent. The windscreen piece behind the bubble turrent can also easily come off to reveal a small space that you can fit a crate in. And there is room for an astromech droid as well. All you have to do is remove the curved tiles which are attached in by one stud each. 39632 by ice chips, on Flickr 39632 3 by ice chips, on Flickr 39632 2 by ice chips, on Flickr 39632 4 by ice chips, on Flickr Heres some more close-up pictures. cover by ice chips, on Flickr Clone Wars Y-wing 1_5 by ice chips, on Flickr I also designed this model to be compatible with the 2018 UCS Y-wing stand. So it will fit perfectly on that stand. However, this model does need either 2 rubber bands or 2 thin threads. If you look at the 4 long panels on each of the engines, you will notice that there is a 1x1 studded area open. That is where you have to put a white or clear rubber band so that those 4 panels can stay together and not be flimsy. Alternatively, tying a thin thread around that 1x1 studded area and covering it up with some 1x1 tiles would work as well. I couldn't find any other way to connect those parts 'lego pieces wise'. I did make instructions as well at https://rebrickable.com/mocs/MOC-55730/starwarsfan66/y-wing-starfighter-yellow-gold-leader-variant/#details Let me know what you all think of this moc!
-
Hello all! This is my first attempt at a UCS style MOC. I've been wanting to redo all my playset Star Wars sets, so I decided to start with the TIE Fighter, and I am really happy with the results. If you want to get the instructions, I posted them on ReBrickable for download. Here is the model from the front and back: And here it is with my other UCS sets: For those who are interested, here is some of the earlier versions of the model. First, this is what I dubbed the fat TIE. Then, the wings got slimmed down. At this point they were still plates instead of bricks. This was the last iteration before I built the physical model. It looks a lot like the final version, but it could not support its own weight, so the cockpit and arms were completely changed.
-
Hi,As the author of the recently published "U2-CB Ultimate UCS Collector's Book" (u2-cb.com/en/), I would like to know if anyone has had a chance to read it and have their thoughts.Regards,Rafa
-
(image courtesy of quartertothree.com) In the Star Wars mythos, the Slave I was a heavily modified prototype Firespray-31-class patrol and attack craft (originally put to work to service the Republic Correctional Authority) repurposed by bounty hunters Jango Fett, and, more famously, his son, Boba Fett, to serve as the main craft for all their bounty hunting needs. In the real world, the legend goes this ship was modeled after a lamp post outside of the Industrial Light and Magic building, the folks responsible for the special effects in Star Wars. While that legend may not be entirely true (some claim the design was inspired by a radar dish), the odd and iconic shape has made the Slave I a popular ship to reproduce in LEGO. Since acquiring the license for Star Wars, LEGO had produced four minifigure scale Slave I versions (one for Jango Fett in 2002 and three for Boba Fett in 2000, 2006 and 2010) prior to the release of the UCS model in 2015. While the UCS version should be the obvious pinnacle of the Slave I mountain, I must admit the most recent version, set number 8097 released in 2010, was a great model and when the first images of the UCS ship began to pop-up I was disappointed in my own mind that the UCS version did not blow 8097 out of the water. At least part of my hesitation was due to the fact that the UCS version appeared to be designed to hold a minifigure, though I realize this is not the first time a UCS model has been minifigure scale. The UCS model should be much larger than the previous minifigure versions weighing in with a piece count that is over three times greater than the set released in 2010, set number 8097, but still my feeling of disappointment lingered. This feeling was a great surprise to me because I am a UCS fighter fan, having picked up all the previous UCS fighter sized ships (save for the Naboo Star Fighter), and a self-proclaimed Boba Fett and Slave I nut, picking up all the minifigure scale Slave I versions released by LEGO to date. As both a celebration of the release of the UCS Slave I and to review the evolution of the model through the LEGO timeline, I bring to you a comparison of the entire minifigure scale Slave I versions including the new UCS starship. One thing you're not going to find here is an in-depth review of the new UCS set, 75060. If you want a break down of the box design, instructions, parts selection, build process and set rating you won't find that here and you should really check-out Masked Builders excellent official EB review here! The Set-up I had both the 2006 and 2010 versions of the Slave I, set numbers 6209 and 8097, assembled and on display on my shelf at home. It is relatively rare for me to keep an ordinary (non-UCS or non-modular) model together as I am a MOCer by nature and usually buy sets primarily for their parts and minifigures. I had purchased the other two Slave I models, 7144 and 7153, when they were released, but I had disassembled them for MOCing purposes ages ago. Because I wanted to compare all the minifigure versions of the Slave I, I used Bricklink to print a list of all the parts required to build the models and then dug up all the pieces and reassembled 7144 and 7153 in their original color schemes. I was surprised by the rarity of some of the pieces (the brown slopes on 7144 for example were far less common than I would have imaged) but I managed to be missing only a few minor pieces on Jango’s ship (printed tiles and one trans-neon orange boat stud), but both models are otherwise complete. After assembling 7144 and 7153, I knew one tricky aspect of comparing these models would be that their odd shape would make them difficult to hold and position for photographing. While I had 6209 and 8097 on “display” at home, they really were just sitting in the “landed” position on my shelf… gathering dust. I decided the best route would be to build display stands to hold them upright. After thinking about a “cradle” display stand idea, I decided the most practical and best solution for photographing the models would be to build a stand that would simply attach to the model’s base on the back/engine side. I knew there would be some challenges with this plan because attaching the stand on the bottom would mean the moment of inertia of the models would be well over the front of the display stand if the model was set to be perfectly perpendicular to the photography surface. I wanted to ensure they could be held perpendicular for comparison type shots so I would need to make the stands long in the front to prevent the models from flipping over. I also wanted the stand to be able to tip the models back slightly in “flight pose” as that makes for better photographs (and just looks “cooler”), shifting the moment of inertia backwards slightly. The stands came out pretty well with just a little tinkering. Attaching to the under/engine side did mean I would have to remove a piece or two from the backs of 7153 and 6209 to attach the stands, but I do not think anything crucial was lost in the process. In order to see the evolution and features, I planned to photograph each model separately and in concert with the previous version(s) for comparison. To keep a consistent focus, after a brief introduction on each model, I decided to structure the review to always look at the same aspects of each model for comparison and discussion. Those aspects were the Fett minifigure, the shape and construction of the Slave I model, the coloration of the model and any play or special additional features. ================================================================= 7144 (image courtesy of Bricklink.com) Year Released: 2000 Piece Count: 165 Price: $19.99 USD Overview Beginning with the first Slave I, 7144, the very first thing to note is the low piece count and price. Weighing at a meager 165 pieces and sporting a low retail price of $20 USD, the first version of the Slave I was a disappointment on nearly every level when it was released. Some may believe this statement is revisionist history given the improvement of the Slave I over the years, to that I counter with a belief that nostalgia is getting the better of you. While the Slave I may have been novel at the time, the very first image left me very unsatisfied. While 2000 was only the second year for Star Wars models, we had already received a snowspeeder, AAT, Naboo Star Fighter, A-Wing, X-Wing, Y-Wing, and Vader's TIE Fighter with a far better sense of scale and level of detail than 7144. Smaller sets often defy the standard price to parts ratio greatly being on either side of the $.10 and this set was a bit on the high side with a price to parts ratio of $.1211. The Fett Minigure Its one redeeming grace was it was the first set to contain the famous bounty hunter himself. An immediate disappointment to me was how "blocky" the helmet piece looks. It is also disappointing that Boba's Mandalorian armored helmet and rocket backpack were one piece. It looks like Boba is a bit hobbled with a crack in his right leg (left side from behind). I did not bother to highlight Boba's weapon as LEGO was not producing "realistic" space age or modern weapons at the time. Boba carried a "loudhailer / SW Blaster" which definitely looked more like the "loudhailer" than Star Wars blaster. In order to reproduce the iconic “T-shaped” visor of the Mandalorian helmet, LEGO cut a slit in Boba’s helmet and then left his underlying head black to create the final look. The black minifigure head was common place with other Star Wars sets of the era where the face was inconsequential. Storm troopers, for instance, also sported a black, blank minifigure head. This set was also released before Attack of the Clones, so it would also be accurate to say LEGO would not have known what Boba (or a storm trooper if you believe they are all clones- and please, let’s not discuss that here) even looked like under their helmets anyway. Slave I Design The shape of the model was, in a word, uninspired. The base was too steep and not nearly rounded enough and the cockpit, its windscreen and fuselage (this is what I will call the portion of the ship elevated above the base) were all too angular. The windscreen was a disappointing length and shape, though it may have been the best option available at the time LEGO designed the ship. The whole model was completely undersized. I am sure this was largely due to the price point this set occupied. The model would have benefited greatly with another 40 or so pieces to really enhance the base and fuselage of the ship. If I were the designer, I would likely have enlarged the windscreen an additional extension piece and then resized the whole model to fit in line with the new windscreen. I was especially disappointed in the 2 x 4 dark gray (Blay did not yet exist!) plates on the front/top of the fuselage. I felt the design would have benefited greatly with tiles on this section to make it look a little less blocky and smooth. Another disappointment was the underside of the base where the engines are located. Five trans-neon orange radar dishes are the only detailing for the engines. The ramp to the cargo hold also extends beyond the 1 x 3 inverted slopes that connect the base and fuselage. An additional 1 x 3 slope on each side here really could have filled in this gap, though it may have made the cargo hatch too difficult to access. The rotating wing sections also completely lacked any detailing, save for three brown 1 x 2 grill plates per wing, though like the other Slave I versions, gravity rotated the wings when the ship took flight. The wing cowlings however are completely lacking in any design. The cockpit was built to allow Boba to sit at the helm, but it only looked "right" when the ship was in flight mode. When in landed mode, Boba was sitting parallel instead of perpendicular to the ground. I guess it is good Boba is wearing a jet pack when he tries to exit the ship. Coloration The coloration was also disappointing. While sand green was also introduced as a production color in 2000, dark green and dark red (Bricklink colors) were likely all off the table when 7144 was made making an accurate color scheme nearly impossible. A few other color choices, such as the black 6 x 6 plate with corner cut out up top and the white Technic bricks popping out the bottom are just silly and could have been avoided with a little more thought. I realize LEGO likes to use more colors to make the instructions easier to read and to add more variety to the collection of a set, but the appearance of these choices is jarring and makes the model look like a jumbled mess in some places. Those of the old school who rally against the new LEGO color scheme will appreciate the classic colors of brown, light gray and dark gray instead of the newer reddish brown and bluish tinted grays. Another color choice I found bizarre was the blue clips holding the front blasters in place. Gray or dark gray would have been much better and were readily available at the time. Additional Features In terms of play features, this set really had none save for an opening windscreen rotating wings and blasters. To be fair, play features were not as big a focus for LEGO in 2000. Spring loaded canons and flick and tension firing weapons had not yet become all the rage. Due to the very basic design of this ship, it was very stable and easy to pick-up and "swoosh". Later Slave I’s would ditch the opening windscreen which is actually a far more accurate representation of the ship. An additional play feature is the inclusion of Han in carbonite. The frozen Han was represented by a printed 1 x 2 x 5 black brick with silver Solo in the classic carbonite pose. It is, of course, a bit of a poor representation in terms of color and size. A minifigure is a bit wider than two studs, so unless carbonite also compresses a persons body, the slab is too narrow to be "realistic". Carbonite is also more of a silvery color and not black, but for a first attempt, it was passable. Han could be loaded into the cargo area for transport to Tatooine. The shot below shows how undersized this ship really was. The door Boba is loading Han into is supposed to be the main entrance for the ship and it is not even wide enough for a minifigure to slip by. ================================================================= 7153 (image courtesy of Bricklink.com) Year Released: 2002 Piece Count: 358 Price: $49.99 USD Overview 2002, alongside the release of Episode II: Attack of the Clones, brought Jango Fett’s version of the Slave I, set number 7153. Episode II was not a particularly good movie save for three things, Yoda’s lightsaber duel, Natalie Portman’s white outfit and the Slave I space battle. This larger version of the Slave I, weighing in at 358 parts, doubling the parts count from 7144, was a much better representation of the shape and look of the iconic ship. While some may argue the price was a little high ($.1396 per piece, a fair margin above the golden price to parts ratio of $.10), the new version corrected most of the shape issues plaguing 7144 and I was more than happy to plunk down my pennies to have the new, enhanced version. It also sported more play features and detailing and while it was still too small for “true” minifigure scale, it was certainly more in line with other LEGO “minifigure illusion” scale models, and certainly closer to scale than 7144. The Fett Minifigure Much like Boba in 7144, Jango Fett sported a one piece helmet and backpack combination, albeit in a different color. While this meant a black head like the figure in 7144 was still required, unlike that version of Boba, Jango, did have a yellow face printed on one side of his black minifigure head, so you could rotate his head and add hair when his helmet-backpack combo was removed to show his face. The purple color on the arms and torso seemed like pretty decent choices to me, though I have seen Jango represented with a lighter blue color as well. The main issue with either color choice is that Jango was largely covered in silver armor meaning a more muted or silvery color may have been a better choice, even if the true color of his undershirt was dark purple. With the exception of the color, helmet printing and a minor print change on the chest plate, the two Fetts are identical. You'll see my figure is also sporting a print alignment issue on the helmet where the double lines should meet. The next Slave I minifigure I received also had a print defect in the helmet. I guess I was on a Fett hot streak! Slave I Design While Jango was mostly just a recoloring of Boba from 7144, the real draw of this set was the much enhanced shape of the Slave I. Now featuring smoother curves and enough pieces to make the set feel substantial, the new ship was a must have when it was released. The new shape was a great improvement around the base, but the ship still felt too wide for its length. The profile shot of the ship, however, is quite attractive and really captures the feel of the Slave I. This ship was also the first to make me notice the gap in the base behind the wings. It is indeed movie accurate to have a space there, but it felt a little large compared to how I envisioned the ship. One area that did not improve much over 7144 was the rear of the ship. The engines are represented quite pathetically by trans-neon orange 2 x 2 rounded bottom “boat studs”. As noted above, one of the studs is trans-orange instead of trans-neon orange. Compared to 7144, 7153 was wider and longer, had a more curved base and a more rounded cockpit windscreen and fuselage. The shot below best demonstrates the extreme change in size between the two models. Other than the leap from 8097 to 75060 discussed further below, the evolution between 7144 and 7153 was the largest change in Slave I design. The windscreen and the curved base were in fact such great improvements that LEGO would continue to use a very similar base and windscreen for the next two minifigure versions of the Slave I. The base was a little too wide on the top of the ship compared to photos of the Slave I, but such an improvement over 7144 that it was hard to complain. While the shape of the fuselage was still a bit too angular for my tastes, the 2 x 4 plates ruining the fuselage of 7144 were partially replaced with tiling. The front blasters also received an upgrade moving from the tiny blasters and bars in 7144 to full sized cannons ready to shoot down the Slave I’s prey in 7153. Aside from looking far more intimidating, the new blasters were also attached with a ratcheting connection to make the guns "click" when rotated and stay in position once moved. I really liked the "click" turntable but as you'll discover below, but the part did not survive past this version of the Slave I. Despite the improvement over 7144, the blasters may actually be a bit too garish compared to the movie stills of the Slave I. The wings and their associated cowling and connectors also received a giant step up in detail with some nice greebles compared to the weak showing of 7144. The wing cowlings were still too angular as compared to the domed appearance on most pictures of the Slave I, but a good rounded part of the right size was not available. The cowlings are only attached with a single bracket on either side so they do tend to pop off the ship without much effort. There are a few other design quirks to mention. There is an odd gap between the cockpit and the windscreen. It was noticeable during construction, but it is not distracting while on display. There is also a large open space in the area between the base and fuselage where 7144 contained a ramp to hold in Han. Notice that the "doorway" however would not be large enough to a minifigure to conceivably pass through to enter the ship. While it was largely an ignored area of the ship, unlike 7144 the cockpit was designed to rotate with the wings. It was large enough to house both Jango and Boba, but it was not overly detailed. Note the lack of any gap between the sides of the ship and the cockpit platform. Though it was not a problem in my model, I could see the lack of a gap either scraping the bricks as the rubbed together or causing just enough of a snag for the wings and cockpit to get stuck and not rotate as the ship was transformed from landed to flight mode. Coloration The coloration of Jango’s Slave I, however, seemed a little haphazard to me. While I thought the dark blue in the base was a good choice and the black color on the cowlings to be decent enough, I found the mix of the rest of the colors displeasing. I thought the white color was overpowering and more gray shades mixed in would have been a welcome change. I also found the yellow accents to be distracting, and I didn’t love the sand green shade mixed with the dark blue. I also question the tan wing color. I thought gray or white may have fit the build better and may have helped reduce the cluttered feeling. This may mostly be an issue of personal taste and perhaps the ultimate issue is simply that I find the color scheme of Boba’s ship to be so much more appealing that Jango’s scheme felt mottled and disappointing. Additional Features One area that 7153 really shined, however, was the additional play features. Thanks to Episode II’s Slave I space battle scene, we finally got to see some of the tricks the Slave I had up its sleeve. I always envisioned the Slave I as looking like a fairly docile ship, luring in unsuspecting predators before popping the hatches and unleashing all the toys the bounty hunters were hiding. This version of the Slave I added the play features to show exactly what I had been imagining. Popping the hatches in the fuselage and base to unleashes space mines, rockets (and a hyper drive?) and giant laser cannons. Compared to 7144, the ship also added a feature to rotate the pilot (along with the wings) so Jango and Boba always appeared to be sitting upright whether the ship was landed or in flight mode. The package is rounded out with the addition of a little cargo box held in with a magnet. Upon reflection, this was almost a needed feature to compensate for the Han in carbonite play feature used in all the versions of Boba's Slave Is. Later models would use this same "wasted space" area of the ship to implement shooting play features. This set also had a young Boba Fett (not pictured since I was missing his exact head) included to ride in the cockpit with his father. This version of the Slave I was the last released before the fleshy licensed revolution of 2005 so Boba’s skin was classic yellow in color. He was the only figure released in a Slave I set to have the classic yellow head and hands. ================================================================= 6209 (image courtesy of Bricklink.com) Year Released: 2006 Piece Count: 537 Price: $49.99 USD Overview 2006 brought a new version of Boba’s Slave I, 6209, adding even more parts and details upgrading 7153. Tipping the scales at 537 parts, the price to parts ratio even dipped below the magical $.10 price to parts ratio at $.0931 and the shape and coloration were great improvements over Boba’s first version, 7144. Despite the improvements, much of the design was eerily similar to Jango’s version, 7153. The Fett Minifigure While this version of Boba is different than 7144 in that he is converted over from old gray to the new light bluish gray (dubbed “blay” or “bley” by LEGO enthusiasts) and the old brown to reddish brown(and in the print defect on the helmet on my particular figure) it was disappointing that Boba did not receive a face lift with a more accurately shaped helmet or a new torso print in the 6 years since his release. The "new" Boba is on the left while the old gray Boba is on the right. Slave I Design As unfortunate as the lack of a "real" new Boba was, Boba's Slave I received a massive upgrade over 7144 and while it is not immediately apparent, a significant upgrade in the ship over 7153 as well. The overall shape of the ship very much evokes the Slave I from the movie, though it may still be too wide for its length. The profile shot of the ship is very attractive though the cowlings are still too angular. You'll also notice there continues to be a gap where the body meets the windscreen, but the gap was not extreme and was even less noticeable on display. The rear of the ship received a major overhaul adding some detailing around the engines. A note about this design decision- the Slave I’s engines should actually be recessed into the base of the ship and not protruding as it does here. This would have been difficult to reproduce given the depth of the base, so the protruding shape, even if not accurate, was a nice improvement. The eagle-eyed among you may notice a discrepancy in the macaroni curves on the rear. It turns out a few were lost in transport and the replacements were a newer style... that story to be continued later... Adding 200+ pieces to 7153 allowed the designers to make massive strides in several areas that might not seem apparent when looking at the box art, but become more obvious when 7153 and 6209 are compared in person. First off the base is one or two studs longer and the fuselage is five studs longer. While five studs may seem insignificant, at this scale, it does give a much longer look to 7153. I edited the stands out of the picture below so the relative size difference could be viewed when the ships are placed back to back. The width of the ships remained the same making 7153 look a bit "chubby" as compared to 6209. The below shot also shows how this version fixes some of the "wing gap" issues I noticed on 7153, with this one feeling much more enclosed. The additional wingstrut also adds some nice detail and really makes the wings appear far less flimsy. The cockpit windscreen remained exactly the same. The fuselage also received more tiling and looked more rounded than 7153. I think this is mostly an optical illusion due to the increased length of 6209 in that exact area. LEGO also completely dropped the old “finger” style hinges present in 7153 and moved to the click hinges seen today. This did require some redesign of areas between the two ships including the top of the wing cowlings and the hatches hiding the Slave Is weapons. As mentioned above one major area of improvement was the engine section. As compared to 7153, the improvement was significant, even if not entirely movie accurate. I think the solid radar dish of 6209 is far more accurate, but overall, there is only so much that can be done with a base that is largely large solid plates. The wing cowlings also received a more secure connection using two brackets per cowling section to secure them. As mentioned above, the struts and connection points that connect the wings to the fuselage also received and upgrade in look. Though not functional, the second strut added a sturdier look and some additional greebling to the wings and connection point made the wings feel less like an afterthought. Despite the general improvements, there were some design quirks, such as the cargo door extending past the inverted slopes connecting the base to the fuselage, and a technic brick with pinning showing on the body of the ship on either side. The click hinges which open to expose some hidden weapons attach to the top of the fuselage which also detracts from the overall shape of the ship. In part due to the click hinges and in part due to some 45 degree slopes, this area of the ship also continued to look too angular for my tastes. The cockpit of 6209 remained fairly sparse though Boba did have a pilot's chair to rest his weary Mandalorian legs. I think the control panel here is really a pretty ugly choice. Perhaps it is the most accurate to the movie, I don't know, but it looks silly to me. Unlike 7153, this cockpit did not press directly against the sides of the ship alleviating any fears of wear or snaggery that may have existed. Coloration The coloration of the ship also took a great step forward from 7144. Besides the conversion to blay and reddish brown mentioned above, this ship also receives a nice dose of sand green. Some images of the Slave I would have me believe the green on the ship is actually much darker, but I personally like the sand green color and unlike the color mash-up on 7153, I did not mind its appearance as mixed with the blays and reddish brown. Speaking of the reddish brown, I did not find the color of the base to be distracting, though I always believed the color was closer to a deep red. The reddish accent added to the brown color since 7144 really was a nice enhancement and I thought it balanced well with the sand green even if it was not completely accurate. Even with the improvements, I would still classify this version of the Slave I as haphazardly colored, but I understand it helps convey a sense that it has been battle damaged, modified and cobble together over time giving the ship a rugged look. Additional Features 6209 also continued the play features of 7153 with compartments with hidden weapons (though the missiles hidden inside were not pointed towards their likely targets) and adding two levers, one to open and close the main cargo compartment door under the fuselage and another to fire a spring-loaded cannon housed in the fuselage just under the cockpit windscreen. The new Slave I may also have taken slight step back in an area besides the cockpit- the front blasters. While they are largely just a color change from 7153, they also ditched the "click" or ratcheting connection that I loved in 7153 and went with a smooth rotating blaster option. This did cause the blaster to flop up and down while I was positioning the ship for photography several times, and even cause me to have to retake a few shots here and there. LEGO also finally upped the minifigure assortment adding a Bespin Guard, IG-88, and Dengar. For those who are not in the know- LEGO was sued and had to battle over selling what were classified as "Star Wars figures" packs. Another company owns the rights to Star Wars figures and so LEGO was forced to step selling what essentially amounted to packs of a few named characters and instead began including more figures in their models. The Dengar figure was a little sad with the old ninja cowl covering his face (though you’d have to order the USC Super Star Destroyer or pay $20+ on Bricklink to get a better version), and IG-88, despite a general lack of detail, was a fun addition. The Bespin guard was also the only LEGO minifigure to ever feature the classic smiley in reddish brown- though if you examine my photo closely, you may notice mine has a bit more of a scowl than a smile- I could not find the right head anywhere so my guard is featuring a different face. This version of the Slave I also contained the same Han in Carbonite that 7144 had sported. Unlike 7144, however, you can see that Boba would be able to enter the Slave I through the 4 stud wide door under the ship. The door is, of course, set-up to hold Hand in place while the ship is being moved around. ================================================================= 8097 (image courtesy of Bricklink.com) Year Released: 2010 Piece Count: 593 Price: $79.99 USD Overview The next version of the Slave contained a minor jump in parts from 537 to 593, but a major step up in price from $49.99 to a wallet zapping $79.99. Clocking in with a price to parts ratio of $.1349, the value proposition offered by 6209 had been reversed. For such a large hop in price, I would have expected a great leap forward in design, but alas the changes were more cosmetic than structural. The Fett Minifigure What we lacked in major design improvements on the Slave I was more than made up for with a giant leap forward in one major area, the Boba Fett minifigure. Finally gone is the blocky, one-piece helmet backpack combo and in comes three new pieces to really jump up Boba’s look. A separate sand green rocket backpack, a new tatter cape/paldron in reddish brown and a fantastic new battle damaged, slit-less helmet with an enhanced shape and spots to add antenna accessories really took Boba up to a new level. Some may perceive the new rocket pack as a negative in that the missile on the back is way too short and the overall shape of the pack is inaccurate. I can get behind that. The rocket back portion of the old figure was actually far more accurate in share and missile size. Perhaps this is a final bastion of the Fett figure that can be conquered in the future. Boba also sported a new torso print adding (or at least enhancing) the Mandalorian Crest on his chest plate and adding a braid of Wookie hair, a trophy from a successful hunt. LEGO also changed the coloration slightly shifting from light blay legs and arms and reddish brown hips to sand blue legs and arms with dark red hips. To call the new Boba an improvement would be a giant understatement. Despite the great new features, I am not sure I am sold on the sand blue legs and arms. In some photos Boba's arms do appear to be a slightly different shade than the gray on his chest plate, but the difference is so nominal, I am not sure a color change was warranted. The dark red hips are also a bit bizzare. It seems to me dark green would have been more appropriate. I should also mention between 2010 and 2014 LEGO finally began producing more realistic looking Star Wars blasters. While I did not photograph the weapons (especially with how dull all the former versions were) it was the first time Boba seemed to be sporting a blaster pistol and not a megaphone. Lastly, with the slit in the prior version of the helmet gone, Boba also finally received a proper face under his helmet. I like the scared and battered face with some nice stubble to show how rough a bounty hunter's life could be. Slave I Design While Boba was the highlight of the package (the helmet and its tattered and battle damaged printing alone would almost be worth the price of admission) luckily for us, LEGO included a Slave I ship to boot. This version of the Slave I continued the evolution, if only incrementally. Perhaps following the theory of "it it ain't broke, why fix it", the this version of the Slave I kept many of the design elements of 6902. The rear of the ship remains well detailed and you can see here the engine "button" that is also used to fire the flickfire missiles mention in the additional features section below. The base of 8097 is nearly identical in shape to 6209. The cockpit windscreen, length of the fuselage, and wing shape also remained largely the same as the prior version. Not surprisingly, the 3/4 profile view of the ship is eerily similar to 6209, though a nice area of improvement over 6209 is the use of rounded slopes to finally make the extended portion of the fuselage more rounded in appearance. Overall the design in many places, including the rear engine section was not significantly different than 6209. The eagle-eyed may again notice a change to the macaroni curves in 6209. This time dug up the "right" macaroni curves to "correct" the look. 8097 did improve upon 6209 on the wing cowlings which ditched the angular style of the previous version over to a more rounded look thanks to a new element released by LEGO. An odd design quirk on the cowling, a small gap appears between the larger rounded pieces and the smaller dark green bit below. The quirk is not a major flaw but it is noticeable. Another design choice that I found questionable was the lack of a main cargo door leaving an open gap between the base and fuselage. The reason for the quirk will be identified in the play features outlined below and ultimately the trade off is probably worth it. The ship, however, did receive some strong details in this version including the first of the Slave I's to include stickers. Though I know many hate stickers, I actually don't mind them. I like that they are option so MOCers like myself can elect to use the part as a more generic item or place the sticker on a new part to create something totally new. I also imagine it helps control the price of LEGO models. I like this version of the Slave I so much that applied the stickers when I first built the model in 2010. I am all for them as they add some nice detail to a few areas of the ship as shown below. Not every change from 6209 was positive, however, as the cockpit actually took a step back in design and detail. Coloration While the design and shape improvements were more incremental, the ship did take a nice turn for the better in color. The base shifted from reddish brown over to the much more accurate dark red. The sand green color was also reduced and dark green entered the ship on the wing cowlings and parts of the fuselage. The windscreen also shifted in color from trans-black to trans-clear. Overall, the coloration looked a lot less haphazard and more movie-accurate. While I question what the true color of the wings are of Slave I, I actually prefer the ones on 8097 with far less tan and more light bluish gray. Additional Features Some new play features were implemented on 8097. The pop-out weapons were easier to point towards their targets and some kid somewhere must have lost an eye as the spring loaded cannon in 6209 because it vanished and was replaced in nearly the same location by a flickfire launcher activated by pressing a button/engine on the back of the ship. 8097 also addressed the bland, over-sized front blasters of the previous two versions with a smaller, more detailed set, though I do not believe they are any more, and may in someways be less, movie accurate than the prior two versions. This set of blasters also completely ditched the turntable connection electing to go with a technic pin/axel through a technic brick instead. The results is good enough, but I still miss the ratcheting turntables employed by 7153. The minifigure line-up also shifted giving us yet another bounty hunter this time, Bossk. The Bossk figure is a nice representation of the bounty hunter with a nice molded and printed head in sand green. Bossk wasn’t the only minifigure line-up shift as Han Solo also made his first minifigure appearance in a Slave I set. Han’s inclusion also heralded the other largest improvement over 6209 next to Boba himself, a new Han in carbonite piece which allowed the Han minifigure to be clipped into the casing. Compared to the old Han in carbonite, the new one was amazing. The new piece was too large to be stowed in the cargo bay as previous Han in carbonites had been, and thus it was stowed in the base of the Slave I instead. The hatch to cover Han did lead to an odd design quirk mentioned above where unlike previous versions of Boba’s Slave I, there was no cargo hatch concealing the underbelly of the ship, similar to the design of 7153. ================================================================= 75060 (image courtesy of Bricklink.com) Year Released: 2015 Piece Count: 1,996 Price: $199.99 USD Overview And so we have reached the top of the mountain. The UCS goliath Slave I. Coming in at 1,996 pieces and priced at $199.99 USD, the UCS versions clocks in with a price to piece ratio of .1002, about as close to the golden .10 mark as one can get! At times, UCS sets can really bend the price to parts ratio in either direction, so I am glad to see this set hits the mark almost perfectly. While it is, to some degree, no longer comparing apples to apples, the USC set is still minifigure scale, so let’s see how the USC monster compares to its predecessors, especially 8097, the best mini-figure illusion Slave I to date. The Fett Figure We’ll start where we should start, with the man himself, the newest version of Boba. While this version may seem similar in many ways to 8097, it is actually different in most areas. The arms, torso, legs, hips and face are all different than the prior version. The biggest and most immediate difference between this Boba and the previous versions is the arm printing. One of the awesome Boba Fett trademarks is the orange patch present on his left arm with the Mandalorian Mythosaur skull logo. This version of Boba also sports leg printing that was also present on the Desert Skift version of Boba, but not in the Slave I variants. Boba also has a new face, this time, clean shaven. The torso may look similar, but it is actually a new print with a more pronounced Wookie braid Boba and larger armor plates and belt. Another new addition is the printing present on the tattered pauldron around Boba’s neck, a big improvement over the reddish brown pauldron in 8097. While the improvements to the arm printing are nice, and this really is the ultimate Boba, it isn't as big a leap forward as was moving from 6209 to 8097 since the helmet and rocket pack remain the same. Now that we have reached the pinnacle of the Boba Fett tree, let's take a look from the top and compare 75060 with the whole line of Fett figures from past lines. While it is obvious Boba grew leeps and bounds from 6209 to 8097, 75060's version may, to some, be a bit cluttered. While I can appreciate the torso and arm printing, I may be inclined to agree that the leg printing does make the overall look a bit busy. To be fair, Boba's costume in Star Wars is indeed a bit busy, so perhaps that is less of a criticism than an observation. Slave I Design As expected, the UCS Slave I improves on some of the areas I've criticized on past models. First off the base of the ship is longer and doesn't feel as if it is too wide for the rest of the ship anymore. I am not the biggest fan of the way the base slopes look. It is a little broken-up and the overlaps here and there displease me a bit, and moving from the textured slopes to the gloss pieces does cause some glare from my studio lights, but achieving a round or domed shape in LEGO is one of the hardest looks to do properly so I will just have to live with this solution, even if it isn't perfect. I like the SNOT technique used at the lowest layer to get the overall shape as ovular as possible. By using plates in SNOT position attached to a technic frame, The UCS version also features a more tapered shape on the fuselage and unlike prior versions of the Slave I, the fuselage is even angled up slightly, a more realistic stance for the ship. It is a subtle improvement in the overall look, but represents the great attention to detail the UCS ship has. Because of this design decision, there are some quirks with the fit of the SNOT "skin" to the frame however. As you can see below, there are some gaps here and there when the ship is complete, though perhaps I missed a technical hole and with some work I could get the skin to be a little more taught. The new ship also features a bottom/rear section that is finally thick enough to recess the engines into the ship's base. I have seen various depictions of the rear of the Slave I and they all seem a little different, so while I am not sure how accurate it is, it does look interesting, and that is likely what really matters when the front of the ship is the star. While I like the greebling and design of the rear overall, it does look a little messy, I especially wish the tan had been removed in favor of shades of gray. LEGO also changed the engine "glow" from orange over to a blue. I am not sure whether orange or blue engine glow is more accurate, I've seen it depicted both ways, but I like the blue just fine. Compared to 8097, the UCS ship, 75060, is massive, but I can't help but look at 8097 and appreciate how it really just looks like a perfectly scaled down version of the UCS build from this angle. The colors and shape when viewed from a distance look to be very similar. The rears of the ship, however, show a different story. While I still appreciate the shape, the detail of 75060 really outshines 8097. Query how often you'll be viewing the rear of the ship, when it is on display, but overall I appreciate the work. For a little bit of humor, and too see how far the Slave I design has come, here is a comparison shot of 75060 with 7144. You've come a long way baby! And now the family photos. I edited the photos to realign the height of the Slaves, but they none were resized. This really is a great look at how the Slave 1 has evolved over the years! Are your eagle eyes peeled again for a change to one of the Slave's from before? A kudos (claimed by TWP) to whoever spots the difference first. And from the front. And the rear. Eagle eyes peeled again? Another kudos (claimed by Tereglith) for the first to notice the change from one of the prior Slave photos here as well! 75060 also stepped up the details in some other areas, a few which were never fully addressed by previous models. First the underside of the fuselage and cargo door have more detail than ever, finally no longer appearing to be an afterthought. Second, the wing cowlings are more detailed and rounded than before. The struts are bigger than all previous version, and unlike 8097, these wing struts connect to the ship for a more realistic look. Following in 8097's footsteps, 75060 continued to abandon the tan color on the wings, this time completely forgoing them in favor of light bluish gray and a splash of yellow. The yellow is a bit bright for my tastes, but I don't think it damages the overall feel of the model. Also following in 8097s footsteps, 75060 enhanced the ships rugged look by adding stickers to finish off the look. Again, while some rally against stickers, I do not mind them. I usually only apply them to models I intend to keep together and I like the option to leave them off. I also like the new front blaster. Not only do they up the detail on the blaster themselves, they also add a tubing detail that is pretty cool. I also like that the new blasters are held in place with some internal gearing. The gearing makes them less prone to flop up and down when the model is being moved, something I complained about on 6809 and 8907. The ship also features a new cockpit windscreen piece which is much smoother than that used in 6809 and 8907 and finally a new cockpit that finally adds some level of detail that was completely missing in all the prior models, and especially weak in 7144 and 8097. While I chalk this up largely to the space constraints of the prior versions, it is nice to see Boba is no longer piloting the ship using a single control panel by his feet. The cockpit on the new version, however, does not rotate via gravity like the prior three versions. It can be moved when the windscreen is taken off, but I think I would have preferred a solution that rotated as the model did. Coloration 75060's extra size and SNOT skin means it has the best canvas to color the Slave I appropriately. Sand green is the biggest add from 8097 mixing more sand green into the fuselage. For the first time I didn't feel the overall coloration could be described as "haphazard". Whole I like the coloration overall, as I mentioned previously the random tan bits on the underside are a bit puzzling to me. Additional Features Like prior versions of the Slave I, 75060 also has hatches that pop open to reveal a secret cache of weapons. Unlike some of the prior versions though, these weapons are amied more appropriately towards their targets instead of out to space. I am especially found of the rocket design on this version. The hatches do not pop up as smoothly as I would like, but it works well enough. The additional minifigure lineup, however, is weak. Included with 75060 is a Bespin guard, similar in many respects to 6809, but this time with fairer skin and a new hat, and a storm trooper. The storm trooper is baffling to me. I did not inspect the storm trooper closely enough to know how much different, if any, this stormie is than some of the prior stormie versions- Bricklink says this version has only appeared in one other set- and maybe the argument for including him is that it better recreates the Bespin scene than some random bounty hunter would- but this is UCS man! Give me a "cooler" bonus figure! How cool would a new IG-88 (that finally ditches the "regular" droid body) have been? Much like 8097, this version also contains Han who again can be placed in Carbonite. Han has two faces this time, and due to the duel face feature, a little bit of face can be seen underneath his hair on the back of the head. The two expressions seem to vary between concerned and frozen. While this Han is different from the one in the previous Slave I, it is pretty similar to the version appearing in the most recent version of Jabba's Palace, but the face print is slightly different. Concerned is a more realistic improvement over the cocky Han from 8097, but other than the face printing, the two Hans are identical. Speaking of identical, which carbonite packaging is from 75060 and which is from 8097? Don't answer that question because in the words of Admiral Akbar, "It's a trap!" The one of the right is actually from the most recent version of Jaba's palace, though both the ones you see below are identical to the one found in 8097. In keeping with tradition, we'll wrap 75060 with a shot of Boba loading Han into the cargo hold. Because of the wider ship base, the newer carbonite piece can now be loaded into the cargo bay of the ship. The piece clips into the door so as to not get lost. Final Thoughts The best version of Boba comes from 75060, the best overall shape of the ship comes from 75060, the closest color comes from 75060, it is indeed the ultimate Slave I. Yet through this process I found myself really appreciating 8097. I recall when 8097 was first announced, I thought the price was crazy and the design update of ship too low from 6209 to warrant attention. This retrospective, however, has convinced me otherwise. While I can endorse 75060 as a great pick-up, I feel sad for those who may have missed 8097. More than most minifigure illusion scale ships, 8097 really does just feel like a tiny version of UCS set! While I like the enhancements to Boba in 75060, the really truly iconic piece is the helmet which has remained the same since 8097. I really like that the 8097 helmet heralded a new Mandalorian LEGO era with some decent variation of Mandalorian colors and armors (you can check-out my custom Mandalorian squad here). I also think the work done on 8097 and now 75060 is so well executed, I doubt we'll see another official Slave I model for a while unless we get a remake of Jango's version with a better shape and colors... hint, hint LEGO! or a new piece is released that can finally achieve a more domed shaped for the base of the ship. If you're a Boba Fett or Star Wars fighter fan, get your grubby mitts on 75060, and if you can find the parts to build or re-build 8097, I'd put that set back together to go on display with your UCS Slave I. And again, don't forget to check out the Reviewers' Academy official review here! Lastly, I want to thank Masked Builder for allowing me to encroach on his review and Bonaparte for getting us the sets and green lighting the double feature!
-
as i made a lot of spaceships, here is a selection of my creations. Just for your eyes!! A small starfighter, made with boat parts Harpon: starfighter "Harpon" by Sebosaure Brite, sur Flickr Bomber: P1060900 by Sebosaure Brite, sur Flickr Y-E wing, neo-classic space style Y-E WING CS style by Sebosaure Brite, sur Flickr Kameleon class battlecruiser: Battlecruiser by Sebosaure Brite, sur Flickr other view: camouflage by Sebosaure Brite, sur Flickr small ship space rescue and patrol by Sebosaure Brite, sur Flickr micro fighter ( 10 parts ) P1060331 by Sebosaure Brite, sur Flickr speed figther recon-class fighter by Sebosaure Brite, sur Flickr Pacificator: pacificator nuanced shiptember 2018 moc by Sebosaure Brite, sur Flickr
-
Hello everybody!! I know than I di not post a lot of message in this site; but I would like you present one of my biggest project; an Armaments Rigged-up Moving Deck; Ii's from the Macross univers; for fans, not than it's just the arm of the SDF1; the number is the 03 because the two first models have been destroyed in the film; but the fleet build 10 other ARMD. Thoses whose not visible in the movies, but fansite expalin than significatives modifications was possibles in other ship. L=130 stud; 6.000 parts 10 kg P1070021 by Sebosaure Brite, sur Flickr with small fleet: P1070024 by Sebosaure Brite, sur Flickr P1070017 by Sebosaure Brite, sur Flickr P1070009 by Sebosaure Brite, sur Flickr
-
Work In Progress Ever since I bought the Sail Barge (75020) in 2013, I fell in love with the ship. It quickly became my favorite set. Sadly, recently, I've been taking apart most of my non-UCS sets to make room for the bigger models and to have more pieces to MOC with. I had refrained from wrecking the Barge and the MTT from 2007 because they were my two favorite sets. Eventually, when I got into making car MOCs (Chevrolet Bel Air and Rolls Royce Silver Cloud II), I took both sets apart to make a brown Plymouth Special Deluxe but, after seeing I didn't have enough brown bricks to go through with the project, all the pieces just laid there. Now, while waiting for the UCS Millenium Falcon to come back in stock, I've been having the minifigure-scale fever. I've built a couple of rebel ships (X-Wing (MOD), Y-Wing (WIP), A-Wing (Bought the latest one)) and now, after seeing all he brown pieces I had in stock and all the cool minifigures I wanted to use for some iconic scene, I've tackled Jabba's Sail Barge - The Khetanna. Here it is with my Desert Skiff and the brand new parts that have just arrived: There's a full interior for the barge. Kitchen, droid torture room, "lobby", driver's cabin and, of course, the party room at the back. I'll post pics of the interior as well as more of the outside once I make some progress with the new parts.
-
Hi guys, so what happened was that I accidentally build a BRAND NEW EF76 Nebulon B Medical Frigate! (It is ok if you skip past all the text and jump straight to the pictures below :) ) A rainy Saturday afternoon in December, I decided to put my old Nebulon model back together after it had been displayed at AFOLCon. Since I had to build the entire thing again, I thought it would be fun to see if I could improve it in some way and update the design. Thus I revisited the modelermagic.com site I had used the first time I designed the model. They have 200+ pictures of the model used in the movie. The model was one of the last finished models created for the Empire Strikes Back back in 1980. As with most ILM models it was made from a wonderful cocktail of kit-bashed and custom-made parts. If you look closely at the studio model, you can find old model kit parts – warship hulls, rockets, racecar fenders, engines of all sorts, and different kinds of weaponry. Even the frames used to hold the different kit parts have found their purpose. Back when I was building the old version of the ship I even found some guys trying to recreate the studio model – identifying the old model kits parts and all, a few years later the guy is still at it! But I digress… Looking at the pictures again I got a few ideas for modifications and extra details. But, more importantly, it somehow looked like the front half maybe needed to be… bigger?? I knew that the official 300m length and 72m width of the ship did NOT fit the proportions of the studio model. I had taken that into account when building the first version of the ship – where I repeatedly had to redesign the entire front again and again to hit the correct proportions. But looking at the pictures with fresh eyes it still looked “off” from certain angles. However, I couldn’t pinpoint how much exactly needed to be done… Until, I found the Empire Strikes Back BlueRay! On the BlueRay there were additional pictures AND a video of the movie model rotating. The goals were (as always) to get the proportions and details of the ship as accurate as possible. And, using the BlueRay material, I discovered that the entire front needed to be MUCH bigger than before to be accurate. Thus, a brand new design process began. During this process I built an entirely new front half of the ship with a ton of new features, which made the old model look, well, like a model. When that was done I began tweaking and rebuilding the rest of the ship; the neck, the back sections, the aft Deflector Control tower, the engine detailing, etc. etc.. Even the mini Falcon needed to be changed to another model entirely to fit with the larger construction. In the end I had built a brand new model! When designing the old model I had been pretty uncompromising when it came to angles of the ship. I wanted to get everything as close to the movie model as possible and not just having either straight or 45degree angles - this mantra has continued with the new model. This meant there were no easy solutions to make most of these angles. The “off” angles combined with all the specific detailing resulted in the original ship ending up using more than 450 types of bricks. This was also due to the discrete coloring found in the movie model, which I tried to replicate. Due to the much increased size of the new model it can afford much greater detailing – especially the front half, which was way too small before, is now infinitely more detailed compared. As I had originally done with the engine section, I could now begin to interpret every little piece of detailing on the front of the studio model. This also means that the brick type count with the new model has gone past 500 – and the ship is now several thousand bricks larger than before. Enjoy! This ship has a ton of detail and sections so I have tried sorting the pictures a bit – beginning with the front. The Front The Medical Frigate is a very “forward heavy” model. The entire front section takes up nearly half of the models total length (and much than half of the bricks). The front section has several defining features: The huge dark water tank, the antenna arrays and the dominating “stalactite” housing numerous smaller pods. The water tanks sports a lot of piping - but also a lonely canon (AKA a dbg 6246a screwdriver :) ). The Stalactite was one of my favorite areas designing the first model. However the increased size has allowed me to have details not possible before. Each section is like designing its own separate model. My way of working was to think of each "pod" as a separate, detailed smaller ship – which actually fits with the lore of these pods being interchangeable. I also like the haphazard cover plates encapsulating the pods. Some of the plating seems almost to float in space. This angle also reveals some of the several, otherwise hidden, viewports of the ship. Each part of the ship is designed as if it were a separate micro model. Just like trying to make the scale Falcon as precise as possible (Thanks Tim) each section is built for optimal detail. For comparison is a picture of the studio model in the same area below: Here the dirty, used look of the model along with the subtle splashes of color is evident. These are features I have tried to recreate in the design of the model. Before we move on here is a shot of the top of the front. The short-range communications array is in focus. I have always been curious as to what the purpose of the grilled area is? The Middle The area where the front section meets the neck is where we find the medical bay. Here is the iconic window where Leia and Luke watch the Falcon depart with Chewie and Lando in the search for Han. Getting the shape of the window correct was a challenge when using plates and tiles for the plating. I did a test using a “brick wall” approach, which made it easier to get the desired shape of the window, but forewent the nice texturing afforded by the lines between the tiles of different shapes and sizes. Just now writing this post I got an idea. Looking at the window in the picture above I decided I could clean it up a bit, but also set in the proper picture of Luke, Leia and the droids (the picture was found in the aforementioned post). This only goes to show that no Lego model is ever truly done :) (too bad I delivered back the good camera so this picture is taken with my phone ><). And now I got an idea for my next moc – I will build this medical-bay-window-scene in minifig scale, put in the minifigs, take a picture and place it in this window frame – it is the Lego way! :D The Falcon. In scale with the Medical Frigate, docked as seen in ESB. The excellent design is thanks to Tim Goddard. I have updated it a bit with a new cockpit section and a few other modifications. The Falcon is attached to the “Docking Neck” which is detailed below. The docking neck up close. Loads of piping, but also a few slopes thrown in to approximate the not quite round, but not quite square, shape of the studio model. The detailing continues all the way around – even under the neck. This was the only place I did not detail on the old model, but this time around it has gotten the proper treatment. Connecting front and back. Getting the Falcon to hang on properly and NOT fall down was "fun". Looking at the film shot it is actually docked in the exhaust vent right under the turret (which also makes little sense). Trying to getting it to hang in that area meant that it was too off the center of gravity and I would need a seperate stand for the Falcon. Or I could revert to the smaller, lighter version used in the old version. I am still considering a solution :) The Back The back section’s main features are the engines, the static discharge vanes and the Deflector Control tower. However, there are also plenty of more subtle features to pique the imagination. This angle shows off the details of the Deflector Control tower nicely, but it also reveals some detailing not seen from the angles shown on film. I have found no description on what the pipes are meant to be, but they look interesting and are part of the section of the model labeled Engineering. There is also a row of holes in the model here, which I suspect should be windows. However, on the studio model they are not covered with the kind of film the other windows are. Maybe it is an omission or maybe the holes serves a different purpose – in any case I have recreated them here. The static discharge vanes are also prominent in this picture. They must serve their purpose in atmosphere or perhaps more gaseous parts of space – perhaps inside a nebula eh? :P Here is the opposite side of the same area. Although the model is overall symmetrical, the different detailing techniques of the modelers working on different parts of the model is evident when looking at the studio model. I have tried to interpret the different styles using bricks :) Now to the juicy stuff – the engines. The engine section of the studio model sports an obscene amount of detail. Dozens and dozens of plates, placed in an intricate system. Looking at this section on the studio model from different angles continuously reveal new details. Just as you thought you had the look nailed, a new picture reveals plates jutting further out than expected or until then hidden nuances. This is why another picture of the exact same area, but from a slightly different angle, is needed. Looking at the engines from different perspectives also revealed that they are placed at slightly different “depths”. In general I had to revisit this area quite a few times because nothing lines up as neatly as initially expected. Even though it can look like it, the sides of the engine section does not slope at exactly 45 degrees – which makes recreating it that much more troublesome. Another perspective. The deflector control tower has a weird air intake looking thing at the top. The “Dark Side” The starboard side of the ship is not really shown up close in either ESB or RotJ. The main reason for this is that this is the side where the model was mounted to a large steel frame for shooting. The side sports a lot of unique detailing, as also seen on the back section. When looking at the starboard side of the stalactite, several unique features stands out compared to the port side. I have tried to recreate all these features, but I have also improvised a bit of additional detailing because this side was somewhat barer. Looking at the green command module there were no windows on this side and some weird plating. This lead me to believe that at some point the modelers had to prioritize their time to get the model done - and stuff that would not be seen in the movie suddenly became less important to flesh out. Thus I have taken a few liberties with this side. I recreated all the unique features, but I also added detail. For example the starboard windows to the command module – only having windows on one side struck me as weird. Since the other side of the same module had piping and cylinders I added a bit of those here as well – without mirroring anything, because no mirroring is to be found anywhere else on the model. I did more or less the same with the tan module adding some detail to compliment the opposite side. However, I have tried to make my own detailing subtle enough as to not take focus from the unique features found here. All in all, this side is a bit more of a playground compared to the rest of the model where every area is exquisitely detailed. The more modest texturing here begs for continued tinkering :) Heading into Hyperspace! The Nebulon B - ready to jump to lightspeed! Overview On the shelf. The model is done for now, but a model is always a work in progress. I am always tweaking here and there. I have already made a few modifications since these pictures were taken – I will keep you updated here :) I got a lot of builders asking to send them LDD of my old model. Well, I have good news. I will be making (not me personally) instructions for this if anyone is interested. When they are done the will be available alongside the LDD, Excel Sheet with the bricks needed and an XLM wanted list to upload to Bricklink :) And yes, it is swooshable! Please comment! Go here for updates to the design and instructions: http://www.eurobrick...howtopic=131170 UPDATE:
-

[MF-MOD] "I've added some special modifications myself"
DarthTwoShedsJackson posted a topic in LEGO Star Wars
Hello there! Some might remember me as the one who always was confident that we would eventually get a new UCS Millennium Falcon back in the days when there was speculation galore. I always wanted one, but I was not willing to pay 800 Euros for a set, even one as cool as the MF. Before christmas last year, however, I managed to get one for slightly over 600 Euros and finally pulled the trigger. Even before I received the enormous box I decided to not build the model according to the instructions from start to finish, but to built the majority of the outer shell and the details myself. First of all, I wanted to get cleaner lines and surfaces, especially on the circular hull plating and the mandibles, as well as creating movie-accurate detail. As for the detail, I aimed to build the clips to which the piping is attached into the plane of plates, so that all the pipes are resting flush on the hull plating. I also didn't want to bend soft or rigid hoses to create piping detail. As a general guideline, I always opt to achieve a 'clean', pleasing-looking finish, and I'm willing to approximate details in order to achieve that rather than trying to build them as closely to the reference material as possible, often ending up with something that looks super-accurate but clunky in Lego form. That's simply a matter of building style, not of 'right' or 'wrong'. Also, I avoid results that look cool but are wobbly. I start this thread because the model is finished for now, with all major problems on the outer shell solved and all outer details built and attached. As for the circular plating, I went with a 'pizza-slices'-approach, since that gave me clean edges and the right directions of the studs to achieve the piping like I described above and also get the right shapes and alignments for various coloured parts of the hull. I also moved the maintenance acces ports in the mandibles two studs to the front to create space for the circular plating and more accurate proportions in that whole area. In the coming months, I will most propably improve some things here and there, as is usually the case with such a huge model, and maybe tackle incorporating a full interior. We'll se about that. As for now, here are the first two photos of the heavily modified build, and I'll post more in the coming days. I hope you like it - in any case, tell me what you think!


.thumb.JPG.3c74c0d405dc1afb04b2fa216ebc79e6.JPG)