Search the Community
Showing results for tags '8110'.
Found 25 results
-
.thumb.jpg.2335d10c31c9ffa7029728589340e12f.jpg)
Third Party Tires for Lego Technic Rims
efferman posted a topic in LEGO Technic, Mindstorms, Model Team and Scale Modeling
you know that the lego tires are often too wide for their diameter or the pattern is only street legal and nothing for real offroad driving. now i have found some RC crawler tires which fits nearly perfect to the 8110 unimog rims. the tires came from the german manufacturer ansmann and have the number 211000224 the diameter is 108mm and the width is 40mm or 4,25"x1,45"- 1,9" they are ballon tires with a very soft rubber compound and with a foam inside here some pics if you know some other compatible third part tires, please tell it us.- 703 replies
-
- where can I buy these wheels
- Third Party
-
(and 3 more)
Tagged with:
-

[TC25] 8110 Mercedes Unimog U400
TechnicMOCer posted a topic in LEGO Technic, Mindstorms, Model Team and Scale Modeling
Had some issue with front axle after raising front suspension (because was too low) in Extreme Cruiser, and didn't have idea how to slove that, so I decided to make something more functional. This mini Unimog is 3x smaller than original one: So far it has HOG steering and pendular suspension on the front axle and mostly done cab. -

8110 - Unimog - MODs and Improvements
tripletschiee posted a topic in LEGO Technic, Mindstorms, Model Team and Scale Modeling
I think, it would make sense to open a new thread for the Unimog 8110 U-400, that includes all the MOCs, changes, improvements on the Unimog. It should also contain all the new attachments, equipments, that people build. It should show their ideas and what they are creating for this cool set. I am looking forward to see your creations! I'll start today. I implemented a pneumatic driven cargo bed. It is driven by the original motorized pump and works pretty well. The lifting angle could be better. So there is still room for inmprovments. For more pictures of this MOC plesae vistit my Flickr-page or (after publishing) my Brickshelf-folder. Regards, Gerhard -
[MOC] Scale Lowbed Trailer
Pat-Ard posted a topic in LEGO Technic, Mindstorms, Model Team and Scale Modeling
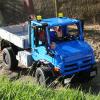
Hi folks, yes, I did it again. And no it ISN'T a Unimog :) But hey, it's trailer for it ;) Since all my models are in the same scale (nearly 1/12.5) the trailer has to be too... The model is a four axle lowbed...Overall length is 1100mm the bed is 115 studs long and 25 studs wide. Part count round about 2.500 parts. I got major help with the base and rear ramps by efferman - thanks again :) Enough words - pictures: LDD version: WIP pictures: And now the final model: Video will follow when the temperatures are lower... Have fun watching... Pat -

10.000 Subsribers special - Mashup
Zerobricks posted a topic in LEGO Technic, Mindstorms, Model Team and Scale Modeling
First if all I totally forgot to post this model here on the forum, guess better late than never Now to explain a bit about the motives behind this model before I go into specific details. Counter on my youtube channel was nearing 10.000 so I wanted to make something trully special. I was not sure what kind of a model I want to make, a sportscar, offroader, construction machine, so the decision came to MAKE ALL AT ONCE. The model would also incoporate ideas from the last decade of Lego technic product to go along with my 10 years on youtube. Starting with the design, the front end is heavily inspired by 42083 and 41999. Notice the front wheels are from 42056. The first motorized function is adjustable front suspension inspired by 8297: The front end can raise by 3 centiemetrs to allow the model to negotiate rough terrain. Continuing towards the cab, which was inspired by 41999, we can pop up the hood to find a green colored 10 cylinder engine inspred by 42030: Cab doors are inspired by the doors from 42069, which open at the angle. Opening the doors you can find a full interrior with two adjustable seats andworking steering wheel: In the center of the cab there is a gearbox which movel lineary to switch between 3+R gears using a special mechanism. This emchanisem translates the sliding action into usable inputs for the gearbox: Going further back, there is a section holding the battery box and, orange lever and utensils on the left side. I will explain the function of the orange lever later. On the opposite, right side there are 2 M motors powering all the motorized functions. Notice the mysterious red lever which is used for switching motorized functions. Notice the pump used to power the pneumatic functions. There are also two electric switches to reverse the two driving M motors. If we continue towards the back, we can see there is a pair of linear actuators used to manipulate the container. The red lever switches power from one of the M motor between the adjustable front suspension and linear actuators. But not only can the linear actuators tilt the container, but they can also pick up and load the entire thing. To switch between tilting or picking up, the orange lever is used to lock the individual segments of the lifting arm. This function is inspired by 8052. The arm can reach out and pick up the container with ease: If we continue and look at the photo of the back side you may notice a PTO output along with a strange mechanism with rubber bands: Same motor that powers adjustable front suspension, linear actuators also powers the PTO output via 24 tooth clutch gear. Notice that the PTO output uses a CV joint in order to slide the axles into it without friction. The rubber band mechanism is used to hold the rear attachment. This was inspired by 8110 and 42054. Here is a sum up the functions of the model so far: 1. Motorized functions Adjustable font suspension Tilting of the container Picking up and lifting of the container Pneumatic compressor and storage provided by two air tanks powered rear PTO 2. Manual functions: 10 cylinder engine powered via rear wheels through a 3+R gearbox 3+R gearbox Steering controlled by steering wheels inside the cab AND the light on the right side of the roof Openable doors Openable hood Adjutstable seats Independent front suspension Solid live axle assembly in the rear - inspired by 42043 Features: Both front axles are at a positive cats angle, allwing the fat Porsche wheels to self-center Due to the immense weight, each rear solid axle is supported by 4 yellow very hard springs The 3+R gearbox is derived from my diagonal gearbox featured in the Dominator TRS Due to its framed design the gearbox provides a very rigid backbone to the model A 5 tubed exhaust seemed appropriate for the 10 cylinder engine I hope this photo helps you understand all the functions and features a bit better. Each color of the model's chassis represents a different module. Next we will look at the rear attachment built for this model. The attachment is multifunctional, combining linear actuators, pneumatics and 4-way switchbox to actuate all the functions: In total the attachemnt features following functions powered by a PTO via 4-way switchbox: Extension of the control arms via small actuators and a lever mechanism Lowering of the control arms via large actuators - inspried by 42009 Rotation of the arm Spooling up a winch which allows the arm to be used as a crane arm - inspired by 8258 Additionally there are 4 pneumatic function powered by the compressor and air stored in the two pneumatic tanks on the truck itself: Raising of the primary arm joint Raising of the secondary arm joint Tilting of the showel - inspired by 8043 Closure of the blue pneumatic claws - inspired by 8110 Some intersting facts about this attachment module: All of the penumatic functions + rope of the winch pass through the turntable. Rotation of the turntable is limited to some 350 degrees to avoid all those tubes and rope tangling up The structure of the arm with diagonal arms is inspired by crane arms Frictionless 8 tooth gears allow the white 16L axles to slide with ease while powering the two large actuators used for support legs The 4-way switchbox is one of my most complex and sense assemblies and it took me 2 days to design with support of LDD. Winch uses a friction pin to keep the rope from unloading when the winch function is off. The blue claw uses rubber bricks for better grip Combining the main model with the atatchment resluts in a model which weighs around 5 kilograms and is over a meter long! Some facts about the design, and build of the model: The whole model took me over 2 months to design and built, biggest challenging being the gearbox, container arm and rear attachment switchbox. A lot of care was placed into keeping all the functions working reliably with a limited power source (M motor) and safely with no gears skipping or breaking. The model uses around 16 universal and 3 CV joints to transfer the power to the suspension lifting mechanism, PTO, both steering sytsems and drive axles. Each rear axle is capable of supporting the whole model's weight, the weak point are the Power Puller tyres which sag quite a lot, especially on the third axle. Thanks to it's stiff gearbox, this model has one of the stiffest central frames I ever built allowing the model to be easily picked up by diagonal front and rear wheel without excessive flex. Gas canisters and first aid from 42069 are featured on this model The hood ornament is a bunny from a Lego Friends set This is my first model to use the white pneumatic air tanks for it's intended purpose. The model is covered with glow in the dark parts close to its edges, so its visible at night - useful when you are wandering around your building area at night A photo of the mashup's total of 8 glow in the dark bionicle claw/eye pieces: You can see the model in action in the following feature video: Finally I would like to thank you for reading through this massive post and for helping me reach 10.000 subscribers. -
Could anyone kindly give me the height for the 8110 with the crane in a non-active position (like front of the box graphic) ? I get two dimensions: 31 cm from Lego and over 50 cm from other reviewers.. I want to know whether it fits my 38-cm high cabinet display. Thanks
-
Hi all, even if this probably doesn't draw anybody from the woodwork today in the age of the Arocs 42043 ;-), i have - inspired from the better performance of the Arocs crane - recompiled my full featured Unimog 8110 from 2014 (http://www.eurobrick...00#entry1964626 and some following posts) and eliminated some remaining weak points: - better bracing of the XL propulsion drive train (now 100% reliable without any crackling gears) - double airpump now mounted the two pumps with offset to each other so the compressor delivers continuously pressure within a turn - replacing the M motor with a L motor which fits perfectly into the same location - preserving tiltable cabin even with battery pack placed within the cabin... So i have decided to rebuild the Mog from the scratch and to document the needed modifying steps with detailled photos, s.b. link... some parts of the following text and pictures are just a replication of some other postings by me in the Unimog Modification Thread but because these posting have a somehow WIP character which makes hard to recognice the final solution i have decided to present the whole final stuff in an own new thread - so if someone searches for a full-featured Unimog-MOD it can be found at one location. @moderator: if you think that this doesn't deserve an own thread, please feel free to move/merge this to the Unimog modification thread - sry for inconvenience! So here is the writeup of all the new features and improvements integrated in the Unimog. Here is the complete overview of the new features / improvements: New features: openable doors and windscreen wipers working steering wheel 3-side tiltable bed with real loading gates with locking mechanism Remote control for driving and steering - and this feature preserves the working steering wheel as well as the 3-side tilting bed and also the fake engine below the cabin. Basic requirement is 100 reliable steering and driving - Motors and receiver are quite invisible from the outside and do not badly influence the appearance of the Mog. rear PTO pass through (with PTO driven trailer, sb) so rear PTO can used even when the crane and outtriggers are rear-mounted flashing beacons on the cabin roof - activated when driving Improvements: PF switch for for better operating of the functions-motor, so you have not to change direction with the battery switch (which is very annoying) Double airpump compressor incl. airtank for more lifting power and constantly high pressure during crane and attachment operation. Airtank gives you also more flexibility during crane operation because cause of the air reservoir you can simultaneously move the pneumatic stuff and turning the crane smoother steering by fixing some steering issues Better weight balance (the standard Unimog is not really well balanced cause of the heavy battery box on the left side) More motor power for the functions and the compressor by replacing the M-motor by a L motor --> really a big improvement, strongly recommended! Attachments: - some front attachments: 8848 style pneumatic scoop pneumatic front-loader, PTO driven mower, PTO driven street cleaner - 8063 inspired trailer with PTO driven bed and deployable stand Primary goal was adding all these features and improvements but not to change the overall appearance of the 8110 because IMO this is very very good. In addition all standard features like fake engine and tiltable cabin should be preserved. Also the basic design with the gearbox etc. should be preserved. So all new features should be integraded homegeneously and - in best case - invisible. At this final state of the Unimog MOD i'm quite pleased with the result because all goals have been reached - IMHO ;-) Important remark: Some of the integrated mods are not my own but have been basicly "developed and designed" by others people, mostly eurobricks members. See the credits at the end of the posting! Pneumatic driven bed which can be tilted to all 3 sides - including real loading gates with locking It is strongly inspired by the driven 3-side beds of eurobricks members barman and tripletschiee - many thanks to both of you for your very well done solutions! . There were no instructions available but there exist a bunch of photos of both solutions so i could reverse-engineer the tilting mechanisms. Most important concepts are a rotary cylinder base (based on barman's solution) a flexible connection to the bed ((completely "stolen" from tripletschiee, a very simple and intelligent solution ) and a "sub-bed" which allows to unlatch one of 3 possible tilting sides (rear, left and right): For easier rebuild i have documented the whole stuff with many detailled shots - see links section at the end. For the loading gates (see photo above) incl. a nifty locking mechanism i found a very good inspiration from EB member stefan_betula_pendula. - in this posting i have already described all deatails incl. many photos: http://www.eurobrick...00#entry1972050 Double offset airpump compressor with airtank A Double airpump compressor incl. airtank provides more lifting power and constantly high pressure during crane and attachment operation. The dual airpumps are mounted with offset to each other so the compressor delivers permanently pressure. Supported by the airtank the whole system now offers in each situation enough and high air power so the crane operation has now always enough lifting power and quite fast response time. This offset needs some more space so this improvement needs one quite deep modification of the chassis which can not be applied to an already build unimog: More motor power for the functions with a L motor The M motor can quite easily replaced by a L motor if the unimog is build from scratch for all this mods. This is really a big improvement and it is strongly recommended! Turning the crane or driving something with one of the PTOs has now much more power. For the new double pump compressor (s.a.) the additional power is also appreciated. But one Remark to the pictures above: better use a standard 24th gear instead of the shown clutch - the double pump compressor appreciates the full power (with a clutch something gets lost within the clutch when airtank is almost full and no pneumatic operation takes immediately place) - with i standard gear i never get a stalled motor but always full air power... RC for driving and steering incl. a working steering wheel Today all stuff has to be RC - and even i'm not really into it i saw the challenge to integrate RCing into the Unimog together with the tilting bed (s.a.) - this tilting bed prevents from using the typical solution be placing the XL motor for propulsion in the middle of the chassis - there is simply to room for it. After a lot of try&error solutions i finally managed an RC-solution which integrates very well and is quite invisible from outside (btw: thanks to EB member Pat Ard for his initial idea placing the XL into the original battery compartment --> battery has then moved into the cabin) drives without any crackling of gears steers as well and reliable as the direct-servo-solution-on-fron-axle (steers also very well when not driving!) - a return-to-center is really not necessary with such slow vehicles... preserves the full suspension travel of the front axle (with the servo mounted on the front axle the travel must be reduced by the height of a 1x2 plate to prevent the servo from colliding with the pistons of the fake engine (from below) has a working steering wheel has a quite invisible IR receiver Integration of the XL motor: Overall the steering-motor, the accu battery and the IR receiver can be integrated very well into the cabin - the cabin then simply has a typical center console (M motor), a build in refrigerator box (gear reduction for steering) and a tool cabinet (accu at the back of the cabin): One remark to the steering solution: Here the servo motor was not an option for me, despite the fact, that the steering performance of the servo is perfect when mounted direct on the front axle - as shown e.g. by EB member Pat Ard. But this solution allows no working steering wheel because it is simply impossible to connect a universal joint and the steering CV joint (cause of too steep angle and too short distance). Running the servo from within the cabin by driving the standard steering gear-train of the 8110 is also no solution because then the steering performance is somehow mediocre: the servo has enough power but IMO the steering gear train from motor to the rack is too long with too many gears involved so there is to much backlash - and because the servo can just spin a 1/4 for a full steering lock and because of very much friction caused by the big tires this 1/4 round of the servo is partly somewhere lost in the steering gear train... These problems can all be avoided with my final and very well working solution: Steering driven by M motor with a quite high gear reduction in the cabin performs excellent, but only with a double clutch gear (because only one is too weak for a powerful and fast enough response steering even during stop cause of the high resistance of the big tires): For the working steering wheel i have 99% applied the solution of tripletschiee, simply because it works like a charm and is very well integrated in the cabin Openable doors they were inspired by the solution of EB member Pat-Ard but slightly improved by adding a second hinge so now the doors are guided very well and stable... Using a PF switch switching direction via battery box is always a pain --> therefore i have added a PF switch - IMHO quite well integrated (and nowhere stolen ;-) Fixing steering issues There are two problems which needed being fixed: a) better steering lock/angle: This can be done by replacing the 4 3/4 pins (DBG) by 4 1/2 pins (LBG). Removing the pins completely is not the best solution because then the tires can rub on the chassis when suspension is compressed and you will steer... b) making the steering easier - out of the box it is way to hard - this is not only cause of the high friction of the tires but also cause of 4 red friction pins involved. In addition the whole front axle has a strong bump steer. well, i have tried several solutions: - Nicjasnos complete new front axle: this one has by far the best suspension and steering and reduces the bump steer a lot. BUT: it looks to bulky and therefore the look isn't realistic for a Unimog... therefore i have discarded it after building, installing and testing - applying the full fix of Junkstyle Gio (http://www.eurobrick...1) which replaces all 4 friction pins with frictionless-replacements: this makes the steering indeed very easy but on the other side now each grain of dust colliding with a front wheel can change the steering angle...it's too easy.. Therefore i have applied only the half of the fix of Junkstyle Gio so its a mixture of friction and frictionless pins --> IMHO is the best compromise of easyness and stability for the steering and the look of the front-axle: Adding a PTO pass trough for the crane - switchable between turning the crane and passing through the PTO This enhances the flexibility of the Unimog a lot beause now you can add any PTO powered trailer even with back-attached crane. There is a switch which allows to switch between spinning the crane and runing the PTO pass-through. PTO 1 has same speed as the PTO of the chassis, PTO 2 is slightly geared down (12:20) This mod is not from myself but it is from EB member dr_spock. A very well done solution, works like a charm and the full modularity of the crane and the outriggers are preserved. Highly recommened! Thank you, dr_spock, for providing me some detailshots. Trailer with dumping bed driven by the PTO pass-trough This trailer is inspired by the 8063 Trailer and by a trailer made by EB member dr_spock (which is also the designer of the pass through PTO as mentioned above). In fact: It is the 8063 trailer with slightly wider bed, bigger wheels and ability being connected to a mechanical PTO. In addition the tilting still can be manually operated. The clever coupling is from dr_spock. But the full power-gear train is completely my own MOD. The original 8063 trailer has a nice stand that can be deployed via a lever mechanism that keeps the trailer upright when it is not attached to the towing vehicle. I wanted this stand being preserved because it works well and it is simply necessary for a trailer with such an axle layout: Preserving this stand makes a it little bit tricky to integrate a well braced and geared down gear-train from the coupling to the LA-base but i succeded: Details can be found in this posting: http://www.eurobrick...00#entry1948575 Flashing beacons i ordered them by EB member Zmei_gorini4 (Kirill) - they work perfectly and look very good - IMHO they are worth the price...good job, Kirill! More details can be found here: http://www.eurobrick...25#entry1976100 Links to many many detail shots: Modded chassis: Building the modded chassis from scratch with all the following new features integrated: 3-side tilting bed, XL motor for propulsion (RC), L motor as replacement of the original M motor, double offset mounted air pump, preparation of airtank mounting plus hose guidings and covers for both motors (XL and L). Rear axle is 100% original and front axle has only applied the known steering fix for smoother steering movement and greater steering lock (s.a.). Of course in both axles you must switch the gear ratios vice verca in the portals (with 8:24 the Mog drives very well)! You can rebuild it with the photos found here http://bricksafe.com...ll-mods/chassis together with the original BI of the 8110. Modded Cabin: Detailed photos how to integrate RC steering: http://bricksafe.com...ontrol/Steering Detailed photos of the working steering wheel: http://bricksafe.com...l and PF switch Detailed photos of openable doors: http://bricksafe.com.../Openable doors Because these 3 mods have been done at different states of the Unimog modding there can be some inconsistences between some photos - build carefully together with the original 8110-BI because these 3 cabin mods slightly influence each other! Flasing beacons: http://bricksafe.com...lashing beacons Rear PTO pass-through: detailed photos can be found here: http://bricksafe.com...TO Pass through Trailer with tilting bed driven by the PTO: detailed photos can be found here: http://bricksafe.com...Unimog/Trailers - together with the original BI of the 8063 trailer you can easily rebuild it. Front loader attachment: detailed photos can be found here: http://bricksafe.com...ts/Front Loader 8848 style scoop: detailed photos can be found here: http://bricksafe.com...pneumatic-scoop PTO driven mower and street cleaner: Photo instructions can be found here: http://www.technic-d...odell=126&bid=c and http://www.technic-d...odell=126&bid=d) Inspirations and credits: New features: openable doors were inspired by the solution of Pat-Ard but slightly improved by adding a second hinge so now the doors are guided very well and stable... For working steerng wheel i have 99% applied the solution of EB-member tripletschiee, simply because it works like a charm and is very well integrated in the cabin - modified by me to work together with my RC steering solution The 3-side tilting bed It is strongly inspired by the driven 3-side beds of eurobricks members EB-members barman and tripletschiee - many thanks to both of you for your very well done solutions! RC is completely my own solution and design, for steering as well as for propulsion The rear PTO pass-through is from EB member dr_spock. A very well done solution, works like a charm and the full modularity of the crane and the outriggers are preserved Flasing beacons are bought from EB member Zmei_gorini4 - integration in the cabin by me Improvements: PF switch is completely my own design Double compressor with offset airpumps is completely my own design steering fix is inspired by the solution of EB member Junkstyle Gio but modified by me better weight balance by placing the battery box with in the cabin is completely my own design replacing the M motor by a L motor is completely my own design Attachments: The 8848 style pneumatic scoop is 100% the design of EB member thomol (http://www.eurobrick...75#entry1164528) The pneumatic front loader is build based on the design of EB member Tim S. PTO driven mower and PTO driven street cleaner i have found here: http://www.technic-d...odell=126&bid=c and http://www.technic-d...odell=126&bid=d) Trailer with PTO driven bed is inspired by the 8063 trailer and by a trailer of EB member dr_spock. The clever coupling is from dr_spock. But the full PTO-gear train is completely my own MOD
-

[MOC] historical logging trailer for Unimog U411
Pat-Ard posted a topic in LEGO Technic, Mindstorms, Model Team and Scale Modeling
Hi folks, something new - hm, no, historical ;) I made a histrical logging trailer, those were/are used here in southern germany. They are quite simple, but effective :) Oh, and here a small video which shows how the logs are loaded... Have fun... -

[MOC] Forestry wagon for Unimogs
Pat-Ard posted a topic in LEGO Technic, Mindstorms, Model Team and Scale Modeling
Hi folks, some days ago I finished a new MOC. It's a forestry wagon, those are/were often used by lumbermen here in southern Germany. The lumbermen took their breaks in... The wagon itself is mostly classic build but fits the Unimog quite well - I think ;) Some pictures: And a small video.... Hope you like it, have fun... -
[MOD][MOC] of Mr. Tekneex's 8110-C Model Jeep
JGW3000 posted a topic in LEGO Technic, Mindstorms, Model Team and Scale Modeling
After quite a long time of gathering parts, although I had about 80% of them required, building and rebuilding, and finally getting time to photograph the result, I present my interpretation of Mr. Tekneex's C-Model of the 8110, a Jeep - the original topic is here - http://www.eurobrick...&hl= 8110 jeep SInce I didn't have an 8110 to start with, I decided to use parts on hand, which then led down the slippery slope of changing colors, adding doors and a roof, adding a spare tire, different lights, etc... I also spent some time looking at similar vehicles on the road (about 11.6% of a passenger vehicles where I live are Jeeps, and about 20 % of those are some variation of this style). Lights, doors, roof-top light bar, spare tire, outside mirrors, and other added/modified features are all inspired from these observations. Features: - XL motor for drive - Servo for steering - RC for the XL and servo motor - M motor for front winch, raising/lowering hood - hand operated two-speed gear shift, mounted between seats - working doors - working engine - working steering wheel - four wheel drive with center differential and independent suspension Don't ask for a video, the final model was soooo heavy the poor XL motor could barely budge this thing to move much faster than a snail. Rather than rebuild with two motors for propulsion, I promptly disassembled the model for the next MOC. Without further ado, some images: -
[HELP] Unimog Chassis
Trango posted a topic in LEGO Technic, Mindstorms, Model Team and Scale Modeling
So I have this soft spot for Unimog (and G class) chassis and wanted to buy the 8110 set but it's obviously expensive since I'm late to the game. I was wondering whether the 8110 set has an accurate representation of the Unimog principle (portal axles & torque tube suspension & gear reduction & actual 4WD). I'm sure it won't have diff locks, right? Since I'm really just after a bare bone chassis as often observed in the Alps (and I don't care that much for pneumatics) I was thinking of just building the chassis per the Lego instructions... provided it's an actual good & accurate chassis. So my question is, does it make sense to try to rebuild the 8110 chassis (and maybe buy the parts for say booklet 1), or are there better MOCs out there, that I can base myself of? Like I said, I'm just a sucker for that simple yet ingenious engineering of the original Unimog chassis. Any help or pointers are most appreciated. -

[MOC] [WIP] Unimog U411
Pat-Ard posted a topic in LEGO Technic, Mindstorms, Model Team and Scale Modeling
Hi folks, yes, I did it again. Some might think it's boring. So, maybe, but not for me :) Today I preset you the actual beta of my U411. The Unimog has a wheelbase of 23 studs and is 17 studs over all wide. It's in the sam scale as all my other Unimogs 1/12,5. Since the beta is in black, the pictures aren't that good. In the next days I'll check which other color is possible... I use a L-Motor for driving an a S-Motor for steering. At the moment the accu is placed on the bed. Now pictures. First some pictures of the beta chassis: And now some pictures of the actual beta: There's still some detailing to do, but hey, that fun... Have fun watching the pictures. So far Pat -
Hello all, I want to get into the new Lego pneumatics and am deciding about the 8110 Unimog or the 42043 Arcos. The 42043 will cost about 180 and a new 8110 about 240 euro's. I like the 8110 visually a lot better than the 42043. But then again, the 42043 has 800 pieces more, but i don't like it's colors and looks. Which set has more (pneumatic) functions and what are your opinions about these sets? Hope to hear from your experiences!
-

[HELP] 8110 Front Suspension
flashtom posted a topic in LEGO Technic, Mindstorms, Model Team and Scale Modeling
hello everyone, i have a problem on 8110's front bridge. It seems a bit excursion, and i havn't found where i was wrong. i try to backout the black joint lever, it will be OK. help~~~ -

[MOC] [WIP] Uniknick
Pat-Ard posted a topic in LEGO Technic, Mindstorms, Model Team and Scale Modeling
Hi folks, the next Uni in the collection is about to get finished... And no, it's not an Unimog, not really ;) It's an UniKnick :) It's still WIP... Pictures: And moving pictures: Have fun... So far Pat -

8110 like you have never seen it before
nerdsforprez posted a topic in LEGO Technic, Mindstorms, Model Team and Scale Modeling
Hey everyone, I posted a version of my Unimog recently.. here are more pictures and another video. For full details of this project check out my mocpages http://mocpages.com/moc.php/407959 I am too lazy to put it all here I had lots of fun with this project, and I think it raises some "firsts" or at least breaks some ground in Technic building in new areas. First, I have no idea for certain, and will probably be proved wrong (which is fine by me) but this model may have the largest third party tires used for Technic models. They are nearly 6 inches tall! I have not seen any taller. Second, I haven't really seen any models being used for muddin'. We have truck trials and climbing competitions, but I have never really seen muddin competitions. This really is not possible with electrically powered models (b/c of the water), and that is why pneumatically powered models are so cool. They can open new doors to our hobby. I haven't seen a model go through more mud or water than this model (maybe I should post this to the records post ). The tires are nearly six inches tall, and with the water well surpassing the wheel wells in the video, this things can easily traverse through seven inches of water. Last.... which goes with the second... but I haven't really seen a lot of pneumatically powered MOCs used for trucks... period. Or climbers, etc. I have seen them used for cars, large cars, but not trucks. ALthough large LPE are not nearly as compact as motors, I think they open new doors as already discussed. Enjoy the pics and video... and remember to look at my page for further details.- 25 replies
-

[MOC] [WIP] Unimog U500 Doublecab
Pat-Ard posted a topic in LEGO Technic, Mindstorms, Model Team and Scale Modeling
Hi folks, and yes, I did it again... The next Unimog for my collection... It's a U500 doublecab. I used the standard chassis of 8110 and added 6 studs in the wheelbase. There are three M-motors, one XL and one servo used. The M's are used for the front an rear pto and one for the two pumps. The XL is for driving and the servo for steering... The front of the cab was inspired bei stefan_betula_pendula and his extrem nice U400 - thanks to Stefan for his help. And since I'm running out of required parts I have to wait until the next Bricklink deliveries... Have fun watching the first pictures and stay tuned... So far Pat -

[C-MODEL] 8110 Jeep
MrTekneex posted a topic in LEGO Technic, Mindstorms, Model Team and Scale Modeling
Hello guys! I wanted to introduce my latest creation. A MOC made exclusively with the pieces of the set 8110. It has various functions, such as motorized winch, motorized hood, fake 4 cylinder in-line engine, suspension, 4-wheel drive with center differential, gearbox with two-speed, steering wheel connected to the steering and opening doors. The model is ready to IR power function: using a remote control, receiver, XL-motor, M-motor and a switch you can drive it. Here some pics The lever near the left-seat change the speed from low to high. The lever near the right-seat change the functions between winch and hood. Under the hood Under the chassis View from the ground to the fake motor. Hope You like it! Here the video: Here the link where you can purchase the building instructions! http://mrtekneex.alt...g/building.html Diego -
Hi everybody, I started with the next project... It's not all of a MOC, but some pimping and new tops Here are some teasers... Any ideas what the result will be? So far Pat
-

Best fix for crappy steering of Unimog 8110?
Kumbbl posted a topic in LEGO Technic, Mindstorms, Model Team and Scale Modeling
Hi all unimog lovers, i'm aware that there is an official 8110 thread but i admit i'm lost in finding the answer to my question about a steering fix in this hundreds of postings about the mog - a steering fix which is - easy to implement - a real improvement I know the complete redesigned front axle of ninjasco which performs outstanding but now i'm searching a cheaper solution for a friend... so: any recommendation how to (quite) easily fix this really crappy steering implementation of the 8110? which solution has performed well for you? Thank you in advance -
Just noticed that the Unimog is on sale at the official LEGO shop (100$!) http://shop.lego.com...imog-U-400-8110 Pretty amazing deal! Update: Sold out.
-
Hi EB members, I'm LEGO fan since early 90s and have came back from my Dark age recently with 8297 set. I like it because of nice technical-mechanical base (independent suspension, fake motor connected to back wheels, differentials) this model has. I know this model is now old and most of you aren't interested in it but I'm actually it process of modification with more features (didn't see such mod before). I still have several Technic and Model Team sets from before the Dark age time, however these were before studless era came in, so 8297 was pretty new and fun to build. I've continued on my new collection with 9398 Crawler which has nice PF features and 8475 with Radio control and buggy motors Since I was a kid at the time I started my LEGO collection I couldn't afford any of big sets, especially Technic ones, so I hope I could get those 8880, 8466 and others later As you may see my recent sets having new features I didn't have before. One thing I believe I'm missing - pneumatics. This is very new and unknown to me and I'd like to explore this LEGO feature too. I wish you guys to suggest me the best set to get acquainted with pneumatics and enjoy it. There are two sets I found and interested: 8462 Tow Truck (1998 year set) 8110 Unimog - prices decreased so it is possible find a good deal on MISB set, not sure if it has cool pneumatic features. Any ideas are welcome.
-

Quick connect/disconnect of pneumatic hoses?
reibuehl posted a topic in LEGO Technic, Mindstorms, Model Team and Scale Modeling
Hi all, I have the 8110 Unimog U400 and noticed already during the building that the pneumatic hoses fix extremely tight onto the switches and connectors. I hardly could mount them. Is there a way to connect/diconnect them quick and easy e.g. for removing the crane? Maybe even a connector? Any ideas? Best regards, Reiner. -

Buying big set - need an advice!
peter_m posted a topic in LEGO Technic, Mindstorms, Model Team and Scale Modeling
I am about to buy a big set for myself - unless I win the lottery this might be the only one I get in next 2 years. So far I have only one set - 8258, which I simply love for its complexity and functions. I am in two minds whether to buy a Unimog 8110 while it is still available at reasonable price or wait for 42009 crane. The first one is tempting because of pneumatics and the other one because of its size, but I am not quite sure it will be as exciting as Unimog. What are your thoughts and assumptions regarding these two sets - based on experience (8110) and the bits of news (42009)? Any advice / answer / opinion will be much appreciated :) -

Another Timelapse - 8110 Unimog Disassembly
Phoxtane posted a topic in LEGO Technic, Mindstorms, Model Team and Scale Modeling
http://youtu.be/pqxIzsNPqmM I made another one, and I think I did a better job this time around. The camera is much more consistent, and there's even some music to listen this time around. Music used: Sunset Heroes, God Hand OST.

