

Veynom
-
Content Count
286 -
Joined
-
Last visited


-
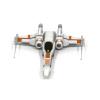
Instructions are now available on Rebrickable! https://rebrickable.com/mocs/MOC-186187/Veynom/tie-separator
-
I never made instructions for this one ... but I could, this is a good idea.
-
Multiple brick shows and conventions in Belgium this year. We will go abroad in 2025, probably France again, and Germany.
-
Adding also some pictures from last weekend: Upgraded base entrance by Veynom, on Flickr Upgraded base entrance by Veynom, on Flickr Upgraded base entrance by Veynom, on Flickr Upgraded base entrance by Veynom, on Flickr
-
That was a given for us. While I love the work done by some MOCers on ballast, for Star Wars, it had to be integrated. It can be a pain sometimes but it works fine and it is visually attractive. Thank you! We try and we still have many ideas. Only transportation and setup time become the main limiting factors.
-
Thanks! And I agree with you, it becomes easier but when you mix modularity and lights, it becomes a connecting challenge ... but the result is awesome. Thank you! The Star Wars train is our signature in Desert Wars since 2018. Personally, I've been using motorized Star Wars vehicles as train since 2016. And of course, I've many more videos. Here are some: Star Wars train in our Desert Wars 2021 layout by Veynom, on Flickr Desert Wars 2023 - Incoming train by Veynom, on Flickr And I really recommend you check this one: our train during a "by night" event .... (on Instagram): https://www.instagram.com/reel/CsCLM-cgFQg/
-
After upgrading my cliff section in 2023, I felt the need to update as well the entrance of my Imperial base on Desert Wars. Over time, I realise we need to constantly evolve to propose a better experience to the public during exhibitions. So far we change/update/upgrade/add more or less 15-20% of our layout every year. Unfortunately, we face more and more a particular limitation: transport. We already rent vans, but we are considering trucks now... but I digress and let's go back to the topic. So, before we start, what is that base entrance looking like? In the beginning, back in 2019, it was just the desert ending in the base. The base was rather an outpost to be honest. Desert Wars 2019 - Imperial Outpost by Veynom, on Flickr In 2021, a real entrance was built: Imperial base by Veynom, on Flickr Imperial base by Veynom, on Flickr I had recycled 2 watchtowers built for previous uses, added a kind of electric fence and that was it. It did the job. When our train was taking videos (with the embedded GoPro), it looked rather immersive. When we later expanded the layout depth from 4 baseplates to 5 baseplates, the update was rather easy. I recycled an old AT-ST turret on top of a basic tower. Desert Wars 2022 by Veynom, on Flickr Over time, I figured out that the parts used for the fence were far from ideal. They often looked sloppy, and the fence was fragile. The end result looked more and more like a rebel-scum hideout than a disciplined Imperial base to me. As I did not want to end up on Kessel, I had to do something to kill that "cheap" design from 2021, particularly as I had also increased the grey footprint of the base during 2023 while also adding some lights. Here, an picture showing the increased grey area with more and more zones being connected by the road. Desert Wars at night 2023 by Veynom, on Flickr So, what to do? Some ideas came to me while watching Rebels and the episodes with the TIE-Defender secret base. From there, I "only had to". Except there was an additional challenge: the lights. I wanted lights all along the wall and highlights some details but providing power when using the MILS system is not so easy, particularly as I don't want to spend additional setup time in connecting wires. But enough blabla, and let's see the new stuff. Here, you can see both the old and the upgrade, side by side. Upgraded Base Entrance by Veynom, on Flickr Upgraded Base Entrance by Veynom, on Flickr So, I start with a ion canon, thick reinforced walls with red LEDs and a new design for the watchtower. For these towers, I even replaced the rocky metaparts by some speederbike hangars, and a few lights. Speeder bike tiny hangar by Veynom, on Flickr The tower close to the public side is open on 2 sides, allowing to view and enjoy a small maintenance hangar. Note the speeder bikes are those from 1999 ... they also do the job. Imperial field maintenance bay by Veynom, on Flickr Imperial field maintenance bay by Veynom, on Flickr Imperial field maintenance bay by Veynom, on Flickr Both towers were completed and kept the same size at the bottom (16x16) and the same height (to fit in the transport crate). But otherwise, they are more detailed, fit better with the base and the Imperial style. Gone is the WW2 look and feel. Welcome the Empire. As a side story, during the BrickMania Antwerp event in 2023, a reseller offered us some freebies because he likes our layout. We received a handful of custom Gatling-like machine guns. To thank them, I made a mini kind of brickfilm. Hope you will like it. (It also contains another teaser ...). Just click on the black square. New Weapon for Desert Wars by Veynom, on Flickr And I got it ready for last weekend ... more pictures will come. But here is already a video of Desert Wars 2024. https://www.instagram.com/reel/C4kgTMBLwoh/?utm_source=ig_web_copy_link&igsh=MzRlODBiNWFlZA==
-
Thank you! Glad you enjoy it. You put your finger on the pain point! Just like a proton torpedo hitting some random exhaust port of a space station somewhere. This is indeed the section I am not too fond about. The problem is however not the length but the height. Looking more closely at pictures, I should probably do the following: Move the bottom turret back where the landing gear is located Remove the meta conic piece and make a flat bottom from the bottom turret Move the entire "head" section 1 brick higher for better alignment. It would allow to smoothen the slop ramp down from the top turret till the head. But where to put the forward landing gear then. in front ? it will also not be nice from a visual point of view. And references pictures are a bit contradictory. Thank you so much for the feedback!
-
Thank you! And you are absolutely 100% correct. Those printed panels comes from the old 7109 escape pod set. Under valued parts, so happy I purchased a stock 15 years ago.
-
Ten years after building a first version of an UCS-like Tantive IV, inspired by official sets 10019 and 10198, I have decided that it was about time to provide some lifting to my MOC. Believe me, coming back to an old MOC is a challenge. Over 10 years, many new parts have been released, many new build techniques were introduced and if means what can be seen as a simple re-lifting may become a total rebuild. Anyway, without additional blabla, here is the result: Tantive IV - 2023 Edition by Veynom, on Flickr And you may compare it with my previous edition from 2013: CR90 Corvette Tantive IV by Veynom, on Flickr Just as the previous version, it can be opened to reveal a detailed interior: Tantive IV - 2023 Edition by Veynom, on Flickr Instead of letting you spot the 7 differences (and there are more than 7), I will review the main changes brought to the model. The first one is about the color scheme. The old dark gray and red have been replaced by DBG and dark red everywhere. The model is also globally whiter than the 2013 version. The second global change is a massive move from studfull to almost studless, only keeping studs were it could provide greebling advantageously. And now, let's start to zoom on some sections, starting with the rear engine section. Tantive IV - 2023 Edition by Veynom, on Flickr It is 6-stud wider than the original, with extra space added between each engine pod in order to add some extra details. Just making it wider implied a full rebuild from scratch. Many, many details were added everywhere to closely match the original model. The engines are a bit longer and the exhaust part was revisited to provide a nicer visual effect. Just detailling the exhausts added more than 400 extra parts to te model. Tantive IV - 2023 Edition by Veynom, on Flickr With the radar section, I made structural strengthening, extra details on the lateral pods with smoother ending, detailed inside, brick-build white wings, and a brick-build radar. Tantive IV - 2023 Edition by Veynom, on Flickr The roof section was also rebuild from scratch. Details were added to all panels for visual improvement and also to ensure minimal holes between angled panels. Then we have the head... Tantive IV - 2023 Edition by Veynom, on Flickr I cut the head just after the central section and rebuilt it completely. As the original shape is somewhere halfway between a hammerhead and a double truncated cone, just reproducing it is already a challenge. If you further want it hollow in order to add a detailed cockpit then it becomes a very interesting challenge. The solution I used is maybe not the most esteatic one when looking at it closely but it does the job when moving a bit away from the ship and it allows to put 4 sitting minifigs and some walking ones in the central corridor. Tantive IV - 2023 Edition by Veynom, on Flickr It was really not easy to capture the curves, the outside details and still proposing an easy way to open it. Yet, the result is quite strong with enough details inside. Tantive IV - 2023 Edition by Veynom, on Flickr And there is a corridor allowing us to guess about some well know scenery from ANH. Tantive IV - 2023 Edition by Veynom, on Flickr And now the main room. Tantive IV - 2023 Edition by Veynom, on Flickr With Darth Vader, always elevating people around him with his typical sense of Imperial justice. Tantive IV - 2023 Edition by Veynom, on Flickr My lateral pods are still present, each with a small vignette inside and more details or better smoothing. Tantive IV - 2023 Edition by Veynom, on Flickr Tantive IV - 2023 Edition by Veynom, on Flickr A few more pictures from the build: Tantive IV uplifting WIP by Veynom, on Flickr Tantive IV uplifting WIP by Veynom, on Flickr TantiveIV uplifting WIP by Veynom, on Flickr A friend of mine told me the radar metabrick was not up to the level of the MOC. So I built a new one ... the result if indeed much more appealing and aligned with the original model. TantiveIV uplifting final WIP by Veynom, on Flickr A color swap which truely improve the visual impact: replacing the LBG engines (wheels) by dark pearl gray ones. Tantive IV uplifting Engine colors by Veynom, on Flickr Now, there is still a major disadvantage to this re-lifting. The beast weights now 25% more than before, increasing from 4.4 to 5.5 kg. Heavy MOC, I tell you. The length remained identically (that was a surprise to me). I've no clue if I will change it again in 10 years, maybe it will switch to a blue color-scheme...
-
Those sabers are nice and could complement a MOC or a collection. However, I would not buy these. When attending exhibitions, those are the kind of details that the public will not see. But kudos for your initiative of moving 1 step further. If you like your sabers, just keep on making them.
-
Hello there, I'm lucky enough to have a secondary flat at the seaside with a small stock of bricks. As I spent most of my summer holidays there this year, I used my time to build small MOCs, simple stuff, with no particular ambition. The exercice is often about how to use a particular part (NPU), how to make something with colors I use less, and still build mainly Star Wars creations with only what I have at hands (Creator, Friends, City bricks). Here are the various resulting MOCs: My Own Creations - Summer 2023 by Veynom, on Flickr I started with a small vignet, kind of a hangar where I used some clones from the 212th. 212th in action by Veynom, on Flickr If the base is 2-brick high, it is because the dark red ground part is mostly made from slopes (originally from a house roof). 212th in action by Veynom, on Flickr My daughter asked me then to build a kind of weapon shop for smugglers. I built this small bounty hunter outpost, ready to welcome scums and other vilains. I used almost all tan parts I had. Random outpost by Veynom, on Flickr Being close to the beach allowed me to make some cool pictures... Who just said "Tatooine"? Random outpost by Veynom, on Flickr Random outpost by Veynom, on Flickr Lack of tan parts forced me to be creative in many places. Random outpost by Veynom, on Flickr After the outpost, I built more speeders. Starting with this KH-26 Kaddyr, a kind of mini Opel Blitz, Star Wars way. KH-26 Kaddyr by Veynom, on Flickr It looks really rusty and cobbled together from whatever junk parts. Even its driver is a fishbag minifig. KH-26 Kaddyr by Veynom, on Flickr KH-26 Kaddyr by Veynom, on Flickr KH-26 Kaddyr by Veynom, on Flickr Then there was the KH-27 Pekz, to test color matching between lime and some custom clones purchased by my son. Lime does not work. KH-27 Pekz by Veynom, on Flickr But patrolling on the sea shore is a real pleasure. KH-27 Pekz by Veynom, on Flickr I must confess I would love driving a speeder on the sea side like that ... KH-27 Pekz by Veynom, on Flickr Free instructions for the Pekz are available on Rebrickable: https://rebrickable.com/mocs/MOC-156286/Veynom/kh-27-pekz-speederbike/#details Another speeder variant came next with the KH-28 Rhak-Skuri KH-28 Rhak-Skuri by Veynom, on Flickr I used blue and white for the colors and the engine exhaust is made from a Friend trophy cup! KH-28 Rhak-Skuri by Veynom, on Flickr KH-28 Rhak-Skuri by Veynom, on Flickr Then, with my son, we started a small contest. The goal was to create a small vignette to display his new custom clones. He started with this nice gate for a clone trooper from the 442nd Siege Battalion: Clone Wars - 442nd Siege Battalion by Veynom, on Flickr I really liked his gate. I retaliated with a stairs from Coruscant streets and Commander Fox: Clone Commander CC-1010 "Fox" by Veynom, on Flickr But finally I settled the score for all by merging both creations into a single one. His gate, my stairs. And the 442nd was back. Clone Wars - 442nd Siege Battalion by Veynom, on Flickr I found some discounted 501st battle packs. Figs are nice (ok compared to the custom ones, they are average) but the proposed canon is ... under average. I decided to use 2 of these sets to make 1 better canon. Mobile artillery platform by Veynom, on Flickr And more pictures at the sea side ... Mobile artillery platform by Veynom, on Flickr This is the new Atlantic Wall: Mobile artillery platform by Veynom, on Flickr Mobile artillery platform by Veynom, on Flickr Mobile artillery platform by Veynom, on Flickr I also made free instructions for that one on Rebrickable: https://rebrickable.com/mocs/MOC-155900/Veynom/mobile-artillery-platform-from-2x-set-75345/#details Most of these MOCs are already back to the bulk but the purpose is to build, not to keep. And when I build, it means I'm feeling good so I can conclude holidays were nice. Hope you enjoyed these, feel free to mention your preferred creations in the comments.
-

[MOC] TIE-Calliope, the poetic version of the TIE-Crawler
Veynom replied to Veynom's topic in LEGO Star Wars
Thank you! But believe me, this is not the craziest design I've produced .... did you ever see my TIE-Krykna? TIE-Krykna by Veynom, on Flickr -
[MOC] TIE-Calliope, the poetic version of the TIE-Crawler
Veynom replied to Veynom's topic in LEGO Star Wars
Thank you! And I believe bringing dynamism is essential when you include a MOC in a large layout. It makes the difference between static and eye-catching. -
The Sienar Technologies board of directors did not really appreciate that Rothana Heavy Engineering - one of their direct competitors - started selling the Katyoucha variant of their TX-225 tank to the Empire. (see the full article from 3 years ago here). Clearly, by proposing a relatively cheap rocket-launcher, Rothana would start grinding some of Sienar's market shares. But Sienar did not waste time before reacting and quickly started their own project of a rocket-launcher for the Imperial Army. In order to remain competitive from the pricing side, Sienar took two important decision. First, the new design should reuse as many existing components as possible. This first decision quickly make Sienar look toward their TIE families and existing designs. The second decision was to use the same model of rockets as Rothana. This would allow the Empire not to change their ammunition supply chain and permit in theory to quickly swap the Rothana TX-225 Katyoucha by the future design from Sienar. The project resulted in a fast prototype delivery and the TIE-Calliope was released. It was based on the existing TIE-Crawler which was already in use inside the Imperial Army but on tope of the existing Crawler a rocket launcher was mounted. But Sienar did not mount any small rocket launcher. They designed a rocket launcher that could carry no less than 50 rockets! And the TIE-Calliope could fire these one by one, in salvo, or even all of them within a handful of seconds. Useless to that the the impact of such firepower on any target was devastating. On top of that, the noise produced by the rockets during their flight generated a frightening feeling on the receiver's end. Thanks to this impressive solution, Sienar could even develop a great commercial argument: the ratio between the firepower and the deployed man on the field is way above whatever any competitor can offer (and almost 10x higher than the Katyoucha ratio). Indeed, the TIE-Calliope is equipped with 50 rockets, 2 blaster canons, and one turbolaser canon while only requiring a single pilot. On the other side, the TX-225 Katyoucha is only equipped with 16 rockets and 4 medium blaster canons and requires 3 crewmen to operate. Definitively, Sienar knows how to market their products. TIE-Calliope by Veynom, on Flickr But enough of the historical speech and let's discover the beast: TIE-Calliope by Veynom, on Flickr TIE-Calliope by Veynom, on Flickr TIE-Calliope by Veynom, on Flickr TIE-Calliope by Veynom, on Flickr Both of them together: TIE-Calliope & TX-225 Katyoucha by Veynom, on Flickr Naturally, before creating the Calliope variant, I had first to build a TIE-Crawler. Here it is, without its launcher. TIE-Crawler by Veynom, on Flickr You can see the 2x3 plates inside the track module panels. They were intended to receive the rocket launcher. In the final version, these plates were moved backwards. After all, when moc-ing, it is all about doing and undoing, isn't it? TIE-Crawler by Veynom, on Flickr TIE-Crawler by Veynom, on Flickr For those of you following our Desert Wars project, the TIE-Calliope will replace the Katyoucha as of June 24. Have a thought for the poor Katyoucha. Katyusha! by Veynom, on Flickr Please note that neither the TIE-Calliope, neither the TX-225 Katyoucha appear in any Star Wars material. They are both designs I created, aiming to propose ideas that could exist in the Star Wars universe. And while the old TX-225 Katyoucha was based on a soviet rocket launcher truck from WW2, the TIE-Calliope is based on a M4 Sherman tank variant. In the end, it is quite common to derive Star Wars designs from WW2 materials. Comments welcome, hope you liked it. PS: in the end, the Imperial Army selected the AT-AT from Kuat to mass equip their forces. Sienar and Rothana only received minor orders.