Search the Community
Showing results for tags 'WIp'.
Found 313 results
-
[MOC/WIP] Custom Interceptor/Bomber Spacecraft-Concept and Pics
Chrome Bricks posted a topic in LEGO Star Wars
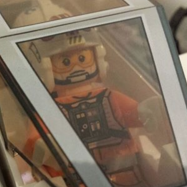
Hello Eurobricks Star Wars community! I'm ChromeBricks from Instagram, and this is my first post on this forum, although I've been following it for quite some time. I would like to present to you a quick model I came up with a few days ago, a hybrid between an interceptor and a bomber like craft, but this is not final, of course. Some could even consider it kinda crappy, I sorta do. This would be primarily used for massive ground devastation or capital ship disabling. The advantage in this case of hybrid ship would offer high maneuverability in flight to evade enemy fire (both ground and airborne) and protect the payload and high speeds to attack enemy fighters and achieve long range bombing runs when in formation. This ship is pretty similar in some aspects to the RZ-1 A-Wing starfighter used by the Rebel Alliance, as it is light, hyperspace-capable, and has high agility, maneuverability and speed. Minor note: the 1x6 DBG plate on each side of the craft are intended to represent blaster cannons. But I have to admit, they barely serve that purpose. The fighter also features an astromech droid socket to assist the pilot in navigation. Behind the socket, there is a hyperdrive unit that enables the craft to travel at FTL speed while in hyperspace. Here's a view with the canopy open. As you can see, no controls yet, but those eventually might be added. Here's the rear portion of the fighter, where the hyperdrive would be installed, although there's still no indication of it. The round 2x2 plates the engine's exhaust nozzles. The DBG 1x4 behind the pilot's head is used to store any pistols that he may use, as shown here. Here is the undercarriage of the fighter. The stacks of 2x2 round bricks and a nose cone is are the bombs themselves. The round 4x4 is intended to be some sort of docking port, and the 1x2 plate with clips is kinda intended to be a torpedo launcher, although that would be small for an actual one. The vehicle does still look respectable without the bombs on, even though they are large compared to the craft itself. Lastly, here's a (blurry) pic of the pilot (Ten Numb) and the astromech droid (R5-D4) next to the vehicle. To finish things off, here a list of what I intend to add to this (partially lacking) spacecraft: 1. More detail and a more defined color scheme 2. New cannons 3. Better bombs 4. Maybe retractable landing gear? 5. Better engines 6. More greebling, for sure. And more importantly: 7. A NAME FOR CRYING OUT LOUD Because no ship is a ship without a name, am I right? I'm open to suggestions for anything, since I'm new to this community. Thank you for your attention, and may the Force be with you. -

[MOC] Bottled City of Kandor (minifig-scale) and Fortress of Solitude
rob-ot5000 posted a topic in LEGO Licensed
Hello, and welcome to my minifig-scale bottled city of Kandor! This is the first MOC I've posted on EB, so be gentle. Or harsh. Or honest. EDIT: I may update this later, as I keep building, or take better photos This is part of a much larger Fortress of Solitude project I've been working on since forever (hence WIP, or work-in-progress). Please excuse the dust, dog hair, bad lighting, bad photos, etc, etc, ad infinitum. I'm only posting because someone asked how I did it, and because I really like some of the work I've done and am keen to share it, even if I'm not in a position to take decent photos. Or dust thoroughly beforehand. Seriously, my dog sheds a lot. It's a problem. On with the show. Here's some shots of the city, still bottled. Each shot is a 90 degree rotation clockwise from the previous shot. And here it is out of it's bottle. As you can see, the city is built on a 2x3 plate for a base, and fitted into a 4x4 (round) space, offset using two jumper plates. This is pretty tricky. The top of the cylinder, when assembled, only has a 2x4 opening, so you can't simply put the city inside the bottle. The opening at the bottom is the same 2x4, so you can't attach the 2x3 city then add the half-cylinders because the city overhangs on at least two sides. The easiest way to assemble it all is to add the two 1x2 jumpers to the bottom of the city's 2x3 base, then hold the cylinders around the city, so that the cylinders grip the jumper plates and form an even surface. Then attach the assembly to a 4x4 (round, or not), making sure to apply pressure to the half-cylinders AND the city itself. This can be frustrating, especially if the city isn't stable enough to withstand the pressure put on top. For mine, that longest spire is a perfect place to apply pressure and ensure solid clutch-power on the bottom. As for the city itself, well, you have tons of options. I went for the white color-scheme, to match the general aesthetic of the 70's movie version of Krypton, but plenty of depictions of Kandor/Krypton have color, so it all depends on what you want. For my project, I just started grabbing all of the tiny white pieces I could find in my collection and started throwing them together, finding pleasing arrangements, hoping to suggest micro-scale alien architecture. This is the fourth version or so that I came up with (though I think I liked the second version better, it is lost to me now). Here's some shots without the bottle, each one turned 90 degrees clockwise, as before. As you can see, there's all sorts of tiny bits in there, lightsaber hilts (attached vertically using a 1x1 round w/ pin), a lever-base, cheese slopes, a skeleton arm, some minifig hands, and lots of SNOT building on a 1x1 brick with studs on 4 sides. There are so many ways you can configure this stuff, it's nuts. I actually just acquired some white minifig skis that I'm hoping to incorporate soon. The only restrictions are to the inside of the cylinder, which leaves some room to build past the 2x3 plate-edge on the short sides, making the city more rounded in appearance. Spires also need to be position to fit through the centered 2x4 gap at the top. That's it, really. If anyone has any questions, please let me know! Now that that's out of the way, here's some shots of the Fortress itself (very much a WIP), and a couple of other goodies. A wide shot of the base and half of the outer Fortress, with Kandor sitting in front for size-reference: Pictured are four spires, individual constructed and attached at the base. The spires are built using a core of standard bricks and technic bricks, strategically placed so that the outside can be plated and tiled in various places, adding to the crystalline look I'm going for. Here's where the spires attach, using some technic pieces, so that the spires are able to swing open, allowing access to the interior (which is fairly non-existent at this point ) The spires are built with some overlap, so that, if you raise the first one, it catches the second, and so on. When closing it up, the last one catches the next-to-last, and so on. Aaaand, this is the point at which I stalled out on the project. I want to incorporate some gears so that the entire structure can be opened and closed using one crank/gear. But I'm not a Technic guy. I came up with a simple enough lift system, but the spires are too heavy for it to work smoothly, or well, or at all really. I thought about redesigning the spires to be more hollow, thus lighter, and I thought about changing the way in which the spires interlock, and I thought about changing.....etc. So yeah. That's why there's a year's worth of dust on this monster. I should get back to work soon. Again, criticism, thoughts, and ideas are all welcome. Here's a case of kryptonite that would go somewhere inside, though I'm not entirely happy with it, simply because glass isn't enough to save Superman. It'll have to go behind lead, but then we couldn't see inside, so I'll probably add a vault for it to go in. Eventually. And last but not least, my Phantom Zone projector. I styled it largely based on the Superman: The Animated Series version. It is able to tilt up and down on the stand, or detach completely so that Superman can fly around with it and zap anyway who annoys him. Like Jimmy Olsen. Damn that Turtle Boy! A picture here would be good. #FAIL Phew, I'm tired of writing this post, so I guess that's it. Thanks for checking it out! -

[WIP] Koenigsegg Regera EV3
TheMindGarage posted a topic in LEGO Technic, Mindstorms, Model Team and Scale Modeling
At the moment, this is just an idea - since I have two cars currently half-build, I will finish them before doing this. Expect this sometime in October (knowing me, near the end of it ). This will be about 1:10 scale with 68.8x36ZR tyres. As with all my cars, this won't be a strict scale model - I just want the car to be recognisable, functional and fast. These are my plans: Power will come from my entire EV3 arsenal - 3 EV3 Large motors and one EV3 Medium motor. These will be connected in a very strange way. The Large motor and Medium motor (geared down 5:3) are combined with an adder. This output will go into a second differential with one Large motor on each side. Each side will then be geared up (hopefully 1:9) before going to the wheels. I haven't tested this setup - I really hope the diffs are strong enough . I might need to gear up the motors 1:3 before the diff and 1:3 after the diff, but I'd rather avoid this if I can since it would mean more sets of gears. When turning, the Large/Medium combo (representing the ICE) will have to slow down a little bit, as will the Large motor on the inside of the turn. Steering will not be motorised - my plan is for the front wheels to be able to steer freely (maybe with a rubber band to provide a little self-centering) but have a high castor angle. When the motors on each side of the diff turn at different speeds, the front wheels will steer automatically. Essentially the fastest castorbot ever! Suspension is still undecided. Depending on the layout of the drivetrain and my chosen width (the math says 26 studs - I have a choice of 25 or 27), the rear suspension may either be independent or an independent trailing-arm type. Whatever I go for, I would like something that replicates the triplex suspension in the real car. Front will be regular independent, with the wheels free to pivot. Making the ride height adjustable would be a bonus. I'm also hoping to make proper Koenigsegg doors and have some space for a cabin. -
Here is my current project. The Windhoff MPV or miulti purpose vehicle. It has had several incarnations in its short life, firstly as the cargo sprinter now in the market of maintence of way. The english "great western electrication project" will use several of these to electrify the remaining 179 miles of rail from outer London to Cardiff. Derek Wilson in the UK has taken some great reference pics: http://derekwilson-r...-HOPS/i-wzWKvHs Amey the prime contractor had these: http://www.infrarail...-2014-Amey-.pdf & http://nearyou.imech...um-15-04-13.pdf This will be a pure moc for me, no cheating by recreating others work. Prelim stats: it will be an eight wide train at an overall scale of 1:38.1 or 1 stud = 1 foot, overall length will be about 1.3m or 166 studs or 5.2 std baseplates There will be 2x mpv's along with the supply trailer. The MPV's will be 54 studs long plus buffers & the supply wagon will be 52 studs long. Being modular I will make several of the modules to provide different setup displays from foundations to mast installation to the wire work. Windhoff wip by coghilla, on Flickr
-
This text is mostly credit, previous ideas and rambling, you may just look through the links and at the pictures. Recently I've been thinking about how one could build a ship with smoother lines than usual - CGHs building technique might be great, but there are always some steps in between the different modules. Then there is Sebeus I's prefab technique, which requires one to basically build one broadside of a ship and clip it onto it. This might be smoother, but still - it misses some of the curves most of the ships in the Age of Sail had. Part I: In a Lego store I stumbled over a bunch of Harry Potter Wands in black; I picked up a few hundred of them, hoping to do something with them. So, there we have the very first part of my journey - a mini-scale first rate, that I still consider a WIP, even though it is currently disassembled: Now, this technique may work for that specific situation, but I just couldn't see how to apply the technique I used for that one for a minifigure-scale (or illusion scale as it is often called) ship. So put it aside. A few weeks later, Kurigan reminded me of the organic ship from Sebeus (I'm totally stealing that name for this, sorry;)), which brought my interest in this back, but I didn't really want to use that technique - while it might be a great technique, I just can't see it being stable enough, nor cheap. Part II: A few weeks ago a small conversation about a different interior than exterior colour on ships happened - this somehow ended with me going through the ship index (the one for BOBS) and finding the Matterhorn by Mr Townsend - coincidentally build with tiles on the outside and the option to have differently coloured plates on the inside. It still has the steps on the outside - I want to go without that. Part III: Sunday, last week. I had an idea which involved bending a snotted broadside (the idea about bending a broadside I also heard from Kabel), which I quickly turned into a mockup build - and I think this is the idea I'll continue with. So, here is the mockup: Excuse the mess. Part IV: Heard from kurigan about another ship built using a very similar technique, the Revenge by MayDayArtist; the technique behind it seems to be way more advanced, and "more of a one time thing" (not so accurate quote from kurigan). ________________ So, that's basically the story behind this concept. To show it versatility a bit more, I've quickly done a mockup for the tumblehome of a first Rate, and, for comparision, a small, 14 gun, brig: The first rate I'm not going to do more with - it was just to show that you can build basically any ships center hull using this technique. The brig - I'm not sure, I think I'll first build the project I'm starting now, and then maybe look at that brig again. So, let's get started on the WIP, which will be a 42 gun fifth rate frigate - 2x14 guns on the gundeck + 14 guns on the upper deck. The upper decks armament may still change. The stern will be on the right of these pictures, just for perspective. I started by building the length of the central hull; I did this in 3 parts, as I want to keep a ship this size somewhat modular and the broadside can't be easily split using this technique. You can see the tan tiles showing the future positions of the gunports. How it looks connected - there are only 5 technic pins connecting these parts, to allow disassembly later on. Next, I'm using a bunch of 1x4 tiles and 1x6 plates to build another simulated broadside - this is just a part to help me "draw" the lines of the ship. Using some more plates of different length I mount these - note that the last and first gunport still line up; this means that the long line gets streched a little bit, which may not be great, but so far I haven't seen any damage done to the bricks. I think here it makes some sense to show the parts I'm using - some technic pins, technic bricks, old style (!) hinges and some inverted 2x2 brackets. I use these to follow the technic bricks to remake the curve (very roughly) I laid out earlier. I place the brackets with the hinges in positions where the hinges won't obstruct a gunport (I leave 1 stud on either side of the hinges up the gunports). Next, I place these broadside mounts instead of the temporary plates and tiles; I made sure to place them in a way that allows the entire thing to stay modular. Now, I reinforce the lower parts using a bunch of plates (you won't see these later, I just had a bunch of dkb gray around) Here I prepare a bunch of black tiles for simulating the lower part of the hull. Sadly I own very few 1x6 tiles in black, so I had to use 1x8 and 1x4 tiles - 1x6 tiles would be just perfect. These stripes are the full length of the broadside - 6 studs longer than the outer hinges are apart. I'm placing them a little offset from eachother to simulate planking. if one would want to make this even more realistic he could try to angle this part a bit downward too - that was a bit to much for my first model using this technique. Quick view from ontop to show the current state - I think I may have to make this ship a little bit thinner, maybe 2 or 4 bricks? I would be glad about some feedback about that. In the last part for today I'm preparing the lowest part of the angled tumblehome - a long line of 1x6 tiles supported by 1x4 plates. I'll need a lot of these! For now these are just mounted on the further outwards hinges using some plates behind some tiles. All my black 1x6 tiles are currently in the 1st rate broadside that I need to tear down. _________________ So, that is what I have so far. Now I need some feedback and some help - should I make the entire thing a little bit thinner (note that bow and stern are still missing), or maybe change the curve a little bit? So, now to the part where I need help. I'm not quite sure how I'll build the bow, I have a few ideas using hinges and / or flex tubes, but thats all I have. I would be very glad if some of you would try to give me some ideas for that part or just follow along the build. I would also be honored to see someone building along with me - this would also help develop this technique. Thanks for reading! ;) Edit: List of ships/building techniques mentioned in this topic: CGH's technique Sebeus I technique (example) Organic ship by Sebeus I Matterhorn by Mr Townsend Broadside bending by Kabel (visible towards the stern) Revenge by MayDayArtist Bumblebee by Kurigan El Gran Grin's by CGH Dunkleosteus technique
-

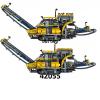
[MOC] [WIP] Man GTS 6x6
KikoTube posted a topic in LEGO Technic, Mindstorms, Model Team and Scale Modeling
Hello Guys :) Being working on a MAN GTS 6x6 Truck. Here´s the LDD Im having a few Problems with the last axle tho. It is powered through the 2nd axle. I think it will be very weak. Do you guys have some Solutions how the last axle can be as powerful as the 2nd? Without doing big Upgrades on that what i have done till now? -
I will be revisiting my LEGO Store Modular Building. I feel I still haven seen a definitive LEGO Store besides L@go's LEGO Store on Flickr: Hopefully one day LEGO does release a LEGO Brand Store Modular Building. But for now you can enjoy mine. Here is my previous LEGO Store Modular Building: https://www.flickr.c...tream/lightbox/ Minifigure Scale LEGO Sets: LEGO Minifigure Scale LEGO Set - Tower of Orthanc (10243) by Adeel Zubair, on Flickr LEGO Minifigure Scale LEGO Set - Volkswagen T1 Camper Van (10220) by Adeel Zubair, on Flickr LEGO Minifigure Scale LEGO Set - Sydney Opera House (10234) by Adeel Zubair, on Flickr LEGO Minifigure Scale LEGO Set - Arkham Asylum Breakout (10937) by Adeel Zubair, on Flickr If you want to see more click here: https://www.flickr.c...7646319243991/# LEGO Modular Building - LEGO Brand Store - The Gallery by Adeel Zubair, on Flickr In this picture I have shown how the minifigure scale models would look in the LEGO Store ‘the gallery.’ I have chosen to display several different sized models to show the different sized display stands: MetalBeard's Sea Cow (70810), Volkswagen T1 Camper Van (10220) and Sopwith Camel (10226) LEGO Modular Building - LEGO Brand Store - Building Station by Adeel Zubair, on Flickr Those Green and Medium Stone Grey 2x2 plates represent 32x32 baseplates. The assembly in between is what the LEGO elements sit in. Those studs represent LEGO elements that would be available for the customers to build with. LEGO Modular Building - LEGO Brand Store - Mini Master Builder Bar by Adeel Zubair, on Flickr Not only can you try the LEGO online games at the Mini Master Builder Bar, but you can also check out the latest LEGO news on LEGO.com and find detailed information on LEGO sets on shop.LEGO.com I could only fit two computer monitors on the ‘4x4 Round W. Snap’ I have added two additional chairs for parents who want to rest. As you can see as I didn’t have space for a third monitor I also couldn’t space for smaller building stations on the tables, plus it would just be the same thing all over again. The final LEGO Brand Store Modular Building will have ‘Brick Ø16 W. Cross’ instead of the two ‘Round 2x2 Plate’ and ‘Flat Tile 2x2 Round’ for the minifigures to be able to sit on the chairs. LEGO Modular Building - LEGO Brand Store - Counter by Adeel Zubair, on Flickr This is were you buy those amazing sets. Due to the lack of space in a modular building, I need to make the store counter smaller so I based this on the counter in the Rockefeller Center. However I did make small changes to the counter comparing with other counters in LEGO Stores. worldwide. LEGO Mini Wooden Duck Toy by Adeel Zubair, on Flickr This model was inspired by Garett Yoshimura's LEGO Wooden Turtle: https://flic.kr/p/osFWLj This is Mini model of LEGO Duck (2011) set. I will be placing this mini model in the LEGO Brand Store Modular Building. LEGO Mini Ole Kirk's House by Adeel Zubair, on Flickr This is Mini model of Ole Kirk's House (4000007) set. I will be placing this mini model in the LEGO Brand Store Modular Building. Any updates on this MOC will be posted on this thread or on Flickr: https://www.flickr.c...7646319243991/# Please leave your thoughts, opinions and suggestions down below.
-
[WIP] Liebherr HS855HD MOC
Cumulonimbus posted a topic in LEGO Technic, Mindstorms, Model Team and Scale Modeling
For a while now, I'm working on a crawler crane. As discussed elsewhere, progress has stopped and this topic is an attempt to jump start the build again and finish it so it can join my collection. So here it goes: The project started with the launch of the 42042 Crawler crane and was a simple MOD at first, but quickly evolved into two MOCs. It didn't like the proportions of the body and cab of the 42042 and wanted to add some features like expandable or removable tracks. The first LDD sketches looked something like this: As some will probably notice, at this point I was still considering to make its larger brother the Liebherr LR1250 as well as a HS855HD. The LR1200 plan has been dropped, because it was simply a bigger version of the 8288 and brought nothing new. During my research, I found the HS855HD was more interesting, because it's a so-called duty cycle crane, a very versatile machine designed to do repetitive tasks efficiently, for example dragline work, soil compacting, (un)loading bulk materials etc. One of the consequences is the fact it has a free fall function on some of its winches, making it possible to drop the bucket or tool to either save time or to provide impact force (you can see this feature in and ). This seemed a nice function to try to implement in my MOC.After a few trial and errors, I came up with this internal mechanism: (The newest clutch parts are not used yet in this image) The controls are very similar as in the 42042: each winch has one switch with two positions: one for winding up the winch, one for winding it down. It is powered with the L motor of the 42042. My addition is the clutch system (in yellow) for the green and blue winch. Push the lever and the winches are simultaneously disconnected form the rest of the system and will unwind under the weight of the tool attached. Releasing the lever will allow the spring to re-engage the yellow clutches, linking them again to the drive. Meanwhile, I also wanted to capture the looks of this machine. It has linked manual expandable tracks, a tiltable cabine, and a inspection hatch. This is the current state of the tracks and body: At the moment, the bottleneck is the fact that the clutch system has too much back-lash or too much play to fully disconnect. I need to move the spring closer to the lever I think, which is rather challenging due to the compact build. Another issue to be solved is the expandable tracks which seem to snag on the chassis when under load. I would like to make my MOC as versatile as the real machine and design the parts to convert it in a dragline, double hook, clamshell bucket or foundation excavator configuration. To be continued ... -
[HELP] Eternal WIPs
Cumulonimbus posted a topic in LEGO Technic, Mindstorms, Model Team and Scale Modeling
I finally have some time on my hands to continue my WIPs but I am confronted with a huge amount of unfinished work. My MOC list contains dozens of Technic projects, ranging from nearly finished to just an idea. I heard the saying here that MOC is never truly finished, but I have some difficulty in reaching a satisfactory result in my projects: I typically grind to a halt when bumping into a problem I can’t immediately solve. I put the project aside at this point in search for inspiration, but this small delay often turns into weeks and months (in some case even years). In other words, I’m a great starter of Technic projects, not so great at actually completing them. When this happens in my professional life, there is always external pressure in the form of a project leader or deadline to push me over the bump. In MOCing however, it is just me. This leads me to my questions to you, fellow MOCers: Do you recognize the lack of motivation/energy to finish a MOC? If so, do you have tricks, methods, deadlines, etc to continue and actually finish? (related to B) Do you find that the community helps you in continuing your build process, for example with a WIP thread on a forum? Very curious about your experiences and tips. -
The Imperial Speeder Transport (not sure if it really has a name but this sounded good) from the Heir to the Empire comic book has always been one of my favorite speeder designs. Here is my take on it. Next step is to work on the underside and then flesh out the interior and controls. The front wind vanes are the one part I am not happy with so far. looking into other designs. imperial-speeder-front-quarter by James Eilers, on Flickr imperial-speeder-profile by James Eilers, on Flickr imperial-speeder-rear-quarter by James Eilers, on Flickr And the reference images from the comic
-
[WIP] Small 4x4 Vehicle
JJ2 posted a topic in LEGO Technic, Mindstorms, Model Team and Scale Modeling
Hello all: For this project I want make a car-truck that has good off road capability but is at a very small scale. Enough "talking" here are the pictures. I have the basic chassis done as of yet, and I plan to use a L-Motor for drive, a M-motor for steering, and a old 9v BB for power. Yes I know that PF parts dont work with 9v parts but I plan to use this method where you bridge the two metal parts with tiny pieces of aluminum foil. I am not happy with the front suspension because I needed to use some gears to center the drive chain The suspension is going to be live axle and probably only have one spring each. I do not know what bodywork I am going to put on it but ALL suggestions are appreciated. Expect more updates soon! -
[PORSCHE] [WIP] 914.5 SpyTarg
TheMindGarage posted a topic in LEGO Technic, Mindstorms, Model Team and Scale Modeling
About 5 years ago, rumours were around hinting at a new supercar positioned between the 911 and 918 Spyder. Some dubbed it the "914.5", coming from the mean of the two model numbers. Unfortunately, such a car hasn't yet arrived, and I plan to solve that problem. This will be the true "Dream Porsche", taking features from both the 918 Spyder and the 911 Targa. It will combine the hybrid all-wheel drive and 4-wheel steering of the 918 with the iconic rear-mounted flat-6 engine and roof of the Targa. Here are my definite features: Flat-6 engine mounted in rear 8-speed paddle-shifting manual gearbox (connected to piston engine, driving rear) Fake electric motors "driving" the front and rear (as in the 918) Full independent suspension with camber angle, castor angle and adjustable ride-height (independent adjustment for each wheel). Not sure where the ride-height controls will be - probably under the front hood. 4-wheel steering (as in the 918) operated by the steering wheel. Opening hood and locking doors. 2 seats inside. Folding roof modelling the 911 Targa's mechanism. Here are features that I might add if I have enough space and parts: Brakes - not sure how these would be operated if they get added. A PF Large motor and battery box to drive the front axle. Like the 918, the front is single-speed. Unfortunately, the only RC stuff I have is MINDSTORMS, which would be too bulky for this. Opening rear revealing the engine. The car will be 1:10 scale - considerably smaller than the 911 GT3 RS from LEGO. I haven't started building yet - I still need to add a couple of finishing touches on my current build. However, most of the "technologies" (such as an 8-speed gearbox and adjustable suspension) already exist in my current build, so this will likely be finished by mid-July. UPDATE 1 (03/07/2016): Paddle-shifting mechanism and steering wheel mount Having dismantled my previous build, I have built this compact steering wheel mount with an integrated paddle shifter. The two levers on either side of the steering wheela are paddle-shifters. They shift when pushed inwards. Here is a side view: Each paddle makes a lever move downwards and hit the cross-shaped element. I initially used a knob wheel, but it was too small for the lever to make it advance far enough. When the lever extends, the cross rotates about 75 degrees before the lever blocks it from going any further. When the paddle is released, the lever retracts and allows the cross to rotate the final 15 degrees. The paddles have rubber bands to make them return to their original position when released. The part with the wedge-belt wheels can slide a short distance. It too has rubber bands - this makes the cross "snap" to the nearest 90 degrees and provides the turning force for the final 15 degrees of rotation. There is also a universal joint - this is connected to the steering wheel. -

[LDD Idea] Spinning Gyroscope
sheo posted a topic in LEGO Technic, Mindstorms, Model Team and Scale Modeling
This contraption imitates a spinning gyroscope-like structure. The left axle is driven and the right axle is attached to the frame. When the left axle rotates the outer ring, the right axle transfers rotation in opposite direction through the series of gears to the middle ring. The same principle is used to transfer rotation to the inner ring. What do you think about this idea? Will it work? Unfortunately I don't have so many connectors #3 right now, so I can't reproduce it in reality. However, I tested this idea with only one ring, and it worked. The idea described above resulted in a project of a large Technic spaceship which is currently in a WIP state. Updates: -
I'm currently working on a Modular Hospital MOC in LDD. These are the results so far (rendered using BlueRender): Birds perspective: Front view: Inside view: About the model: The lower right wing will be a garage for an ambulance (hence the barrier on the sidewalk). On the opposite side, lower left, there is a gift shop with flowers, balloons and a teddy bear. Across the gift shop will be room for an elevator. At the main entrance (those are sliding doors) there is a reception/desk. The second floor contains a room with two hospital beds (one currently containing a patient). In the other wing an operation room is situated along with minifigs of a surgeon and a patient. The rest of the second floor I don't have planned yet! I'd like to hear your thoughts and comments Also, first post here! YAY!
-
This summer the Tall Ships Races (races for sail training sailing ships) comes to my hometown Fredrikstad in Norway. One of the participating ships is Christian Radich, a norwegian ship with Oslo as it's homeport. I have used the winter to digitally build this ship in 1:60 scale, and I'm now in the final stages of completing it in real bricks. Hopefully I will be done before the ship arrives in Fredrikstad 12th of July. The model will then be displayed in one of the exhibition halls close to where Christian Radich is located during the event. Here is a photo of the real ship, and below it is pictures from the building progress. I will continue to update this topic as I'm building.
-
I was fiddling about a week or so ago and decided to build a mini Imperial Class Star Destroyer and Victory Class Star Destroyer. They both feature in my exciting Shadow of Nal Eurbrikka introductory build that you can check out here if you so wish: Sacking of Clak'dor VII Back to the starships. I had a lot of difficult getting the triangular section beneath the engines without breaking the perpendicular line between both upper and bottom hulls. I decided the upper back triangle and engines were more important. If anyone had any suggestions please I would love them. I plan on also building an interdictor class and tartan patrol vessel to scale with these two. As usual all comments, critiques, and suggestions are welcome. If you wish to see more MOCS somewhat like these feel free to visit my Flickr Photostream Thanks for viewing
-

Saberwing40k's WIP and Ideas thread.
Saberwing40k posted a topic in LEGO Technic, Mindstorms, Model Team and Scale Modeling
Well, I've got a bunch of ideas and other random things, as I am building more often, so rather than make a dedicated thread for every off the cuff thing or proof of concept I turn out, I'm just going to compile it here. The first item is a proof of concept chassis for a Gottwald crane, which I meant to be an AK-912, but there are many different models that have a similar chassis, including the AMK-1000, and the AK-680. It's a WIP, but I have other projects I want to finish first, so I made this, and am currently working on an LDD file. Once that file is finished, this thing will be taken apart, so I can use the pieces for other projects, and once I am ready to give this my all, I will use the LDD file to rebuild it. Gottwald AK-912 chassis. by Saberwing007, on Flickr The model is meant to be like an official set, like 42043, meaning one motor, and no RC. The chassi has a V-12 engine, like the real thing, and 8 wheel drive, with a single middle differential. I found that given how far apart the axles are, a differential is required between the 2 sets of driven axles. The different angle between the steering axles is achieved by a diagonal beam, which is very effective. There is almost no backlash, and the axles are in sync automatically. Also, due to how it works, the axles are set to the correct angle relative to each other automatically, due to how it is built, without any calculations. Another picture of the front unit: Gottwald AK-912 chassis. by Saberwing007, on Flickr In addition, the chassis can be separated into three parts, like the real thing. Seperate by Saberwing007, on Flickr Although the steering on the front and rear units works well, it's connecting the two that has proven problematic. I blame lack of stiffness in the middle reversing linkage, and using friction pins for every steering connection. But, for now, this is finished. I will get back to it later, I don't know how much later, though. -
Hey Guys,i need some Advice on this one. I`m planning this futuristic Garbage Truck for my imaginative Lego City-Future Theme. The Bodywork is pretty much done and i think it is recognizeale as a Garbage Truck.The two large orange Pieces are already in my Parts Bin and all the little Bits might be in there too.Maybe some Bricks need to be bricklinked or i need to buy them in the little Lego Shop in my Hometown. I`m still not sure how to make this Big Boy hover above the Ground.I would love to use something that fits in the Wheel Wells and only sticks out a little bit, you know,classic sci fi Hovercar Stuff. Maybe some shiftable Dishes or Pods. Feel free to share any Ideas.I also added the lxf File so you can poke around a little bit.Maybe you might have some Ideas to improve the whole Thing.I like it very much,but i still think something is missing.Something catchy....like a Push Bar or Guard Rails.... Any Idea would be much apprechiated. The rounded Rearend calls for a Nickname...Hunchback maybe?Still not happy with the lower rear End (behind the rear Fenders) Scifi-Garbage Hauler.lxf
-
[WIP] M8 Greyhound 6x6 Armored car (RC)
Tommy Styrvoky posted a topic in LEGO Technic, Mindstorms, Model Team and Scale Modeling
I have always wanted to build a 8x8 or 6x6, I recently acquired 10 62.4x20 tires, so now I can get to building a multi-axle vehicle. I also purchased a Sbrick, this will allow me to control my models at a greater distance outside. So I wanted my first model with a Sbrick to be special. The M8 Greyhound is a light armored car, that is mainly for scouting roles and mounts a 37 mm gun for supporting fire. When designing the drivetrain, I wanted a functional suspension system, and differentials. I attempted to replicate the real setup with staggered differentials, but this failed as there wasn't enough space, so I was forced to use a similar axle setup of the Arocs, as this is rather compact, but because of the height of lego springs, this made it very difficult to mound more than one L motor. I initially wanted this to be powered by two L motors, with a 1:1 ratio between the driveshaft and the differentials. Because of the height of the suspension, the roof of the engine deck will be very close to the top of where the shock absorbers are mounted. This has created a very interesting challenge, The low profile of the vehicle severely limits the area where I can mount power function elements. My progress over my short easter break is shown in the images below, I won't be able to continue progress on this model until the end of April, as that is when college is finished. Real vehicle Lego M8 Greyhound 6x6 Armored car WIP (RC) by Tommy Styrvoky, on Flickr Lego M8 Greyhound 6x6 Armored car WIP (RC) by Tommy Styrvoky, on Flickr Lego M8 Greyhound 6x6 Armored car WIP (RC) by Tommy Styrvoky, on Flickr Lego M8 Greyhound 6x6 Armored car WIP (RC) by Tommy Styrvoky, on Flickr Lego M8 Greyhound 6x6 Armored car WIP (RC) by Tommy Styrvoky, on Flickr Lego M8 Greyhound 6x6 Armored car WIP (RC) by Tommy Styrvoky, on Flickr Lego M8 Greyhound 6x6 Armored car WIP (RC) by Tommy Styrvoky, on Flickr -
Here I present to you my Grand Hotel Ocean View - work in progress. That is the outside facade is ready, but I still need to add the interior and the roof garden. Inspiration to this came from last years summer holiday. And then the friends hotel came, and I bought it and used many of its elements. But alas, to build a hotel is such an undertaking... The project plan got delayed. It is still WIP and the interior needs to be added. And now if I'm not careful these agents start sending the tourists already. I know some of you have been awaiting this, so here you go. Tipps for interior appreciated. The forefront can be nicely integrated into a Grand Esplanade. The palm shaded garden side invites to have breakfast outside. I'm not yet decided what shades to use for the rooftop. And of course the gardeners have lots to do still. The belle etage has lofty rooms with a balcony each and ocean view. Rooms are flooded with beautiful sun light. The impressive carpet for the Great Hall has been delivered, but the clerks are missing their desks. Of course the MOC is modular and can be integrated with other Lego City buildings. C&C welcome. Some more pictures and sizes can be found on Flickr.
-
EDIT: It's done (for now)!! Still waiting on a few more bricklink orders and several more hours bangin my head against my desk finishing decals in photoshop, but as my first MOC post & first post-darkage creation I was a little excited to show her to the world. Not 100% if I'll stick with #6936 because it's still running in UP's heritage fleet, or #6913 because its in Texas. As you can see the yellow is still off in the decals plus I have a few hundred more to apply but these are just the first ones I printed to fine tune the colors on my printer. I'll have HQ pictures on brickshelf in a few days once my camera comes back from repairs.
-
Im hate mixing those anime eyes with normal lego eyes and I know others do, Ahsoka Tano Hondo Ohnaka Aayla Secura Ki-Adi-Mundi Shaak-Ti more to come
-

HD's WIPyard, scrapyard
HorcikDesigns posted a topic in LEGO Technic, Mindstorms, Model Team and Scale Modeling
Hi all. I am starting this thread in order to have all never finished MOCs, or of lower quality creations that are not that what they were planned to be, cars without bodies, trucks without arms, weird things without more weird things, etc., and my other Technic-themed activity in one topic. In the initial post I'll add a link to my Flickr Photostream - there are all my creations and Lego themed photos - finished or unfinished MOCs, technic, space, and some drawings of non-lego cars (for more drawings from me plase visit this link (dA)) _________________________________________________ _________________________________________________. The first image section is my second attempt (my firs one: https://flic.kr/s/aHsk5RN6rp) in creating 3axle truck with red panels. Direct inspiration to build this one is the 42043 MB Arocs. This truck is the similar scale as the TLG's attempt, it uses nearly the same rear axle, very similar steering rod, and the same cabin-tilting geometry. What's more, it's engine is also I6. On the other hand, my 3RedAxles 2 is 6×6 (unfortunatelly, not enough reliable), and all functions are controlled manualy from separate knobwheels - wait, this is more con than pro... Next that could have been better is the crane arm - it is horrible here, but it works - and I wanted just to try to build something that could be folded like the real thing - to test the geometry. Well, the only thing I am satisfied with, are the headlights, and look of the cabin (that is very inspired by 8258 Cranetruck. More photos: https://flic.kr/s/aHskmtVNb2 Hope you like it ;) -
MOC Mercedes Dump Truck
roppie11 posted a topic in LEGO Technic, Mindstorms, Model Team and Scale Modeling
[MOC] [WIP] Mercedes-Benz dump truck. Hello, I decided to go make a moc. I bought the arocs last november and i was like:"hmm, i have enough stuff to build a good moc." so i started to make a plan. A simple painting in word 2013 and i made some challenges and requirements for myself. Here is a list: RC functions: Driving Steering Outtrigger Sideway Tipping(which side is not decided yet.) Manual functions: Openable doors Switch rc/handdrive HoG steering Other specs: Suspended, driven tracks Suspended steering frontwheels Outrigger will have 2 stages, driven by one motor with the use of a differential. There will only be one outrigger on one side, depends on what side the truck is gonna dump. 19 studs wide (made the tracks and they turned out te be 19 studs wide) PF stuff 1x XL motor for driving 2x L- motor for outtriggers and tipping 1x M- motor for steering Will probably use the cabin of the arocs (42043) 2 receivers batterybox Challenges: Driven tracks(first time i work with tracks) 2 staged outriggers will be difficult. Unusual way to dump. Find a way to switch from handdrive/steer to RC. Advanced gearbox to make all this possible here is a rough sketch i made in word. i know this is gonna be a weird non-existing truck. but my goal is to make a really advanced truck and to learn things from it. i'm sure i'll do. 1. i only play with lego on sundays so don't expect to see updates midweek. 2. i also have no idea how it's gonna go and i don't know if I'm able to do all this. this is my first moc and this not a technical easy one. 3. another thing i wanna tell you is that i don't have receivers now. I had 2 from 8043 but the are both broken. 4. i ordered 2 by the customerservice broken bricks, but they were not available so i don't know when the moc will be finished. i also made no deadline for myself. the tracks now about the tracks, it was pretty difficult for me to build proper tracks, since i have never build one. the first problem i ran into was the good length. i built a track, all pretty well, but when i put on the actual trackpieces, it turned out that they were a half track too long. it just didn't fit. i also could not remove a piece because otherwise it would be too short. i experimented a bit with it but i wasn't able to get it right. Then i got the idea to look in the building instructions. so i did and i had a nice fitting track. i have to say, it is still a little bit loose, but that's probably supossed to. but then another problem came along. on a 5*7 bracket i put a small turntable to have a sort of suspension. but when i made my fitting track and put it on, the thing was waay to wide. (note: the photo's are taken with my smartphone. I don't have a normal camera so quality is pretty bad. sorry for that.) that's the reason i had to make a whole gear system in the tracks. you can see them on the picture above. the gears are coming out of the turntable right in the middle of the track. it took quite a while to lead the axle to the actual wheel. but that's done and i am satisfied wih the result. the black line shows how the axles and gears are going here are some more pictures. on the picture above you see how you can detach a track. it's pretty simple. i put 4 of these pieces(I don't know how to describe them) on the turntable with 3l pins. i now have 4 cross hole to attach to another piece. i just put 2 4l axles with stop in it as you can see. the axles go through 5*7 bracket and i put a half yellow bush on the underside. as written earlier the total width is 19 studs. the tracks are 5studs and i have 2 of them. i have a 5*7 bracket. with two beams and the 2 small turntables which are 1 stud. the tracks are each 37 pieces long which brings it in total to 74 pieces. I was happy to find out that it was as wide as the arocs because i'm going to use the cabin. Here is a picture. this is the result. ------------------------------------------------------------------------------------------------------------- the outrigger I just finished the outtrigger. I wanted an outrigger with 2 stages like 42009 which could be expanded with one motor. i used a differential for that this is the first stage. you see that i used 2 bevel gears to drive 2 gearracks to expand outwards. then i used a u-bracket to transfer it down. the outtrigger is laying upside down, so the axle is going down, not up. this is the whole thing(not finished) you see that i used a small LA to do the downward movement. this means it can go down 4 studs. the LA is sticking out but i don't care about that since 42043 has that as well and that's a official lego set. here is the finished one: as you can see, it can expand 7 studs sideways and 4 studs downwards. if it is retracted, the thing is 22 studs wide which is a little bit wider than the tracks. it is 8 studs hight and 9 studs wide. 22*8*9. i used 26 gears in total. it took me a day to build and i'm pretty ok with it. below is a picture from the outrigger as seen from the bottom. you see the differential.you turn the differential with the big black bevel gear, the right side goes to the ----------------------------------------------------------------------- front wheels today i moved on the front suspension. i disassembled the 42043 B-model and i only left the cabin+grille. when nothing was left but the pieces, i began building. i had a great idea(i thought) my idea was this: i attached those black pieces and a ball joint. then i use some liftarms and attached it to a frame. it worked pretty well and i was happy, yeah this is going so well!! look under here, full independent, it can steer, no problem. yeah!!! then i saw something horrible, it was a 'little bit' too wide. i experimented a bit but i found out, that those wheelhubs combined with liftarms are too wide. look at the second picture: luckily, i remebered a topic about suspended axles, so i looked throug my history and fount this topic. i looked for a while and build this axle: (finally good quality ) i used the road wheels, not the balloon ones. the building instructions on LDD are 'great'. #not. but i managed to build it. i ran into a few problems. 1. i don't have a powerjoint. so i had to use a normal 5x7 bracket for the differential. a 2. another problem. if i don't use the powerjoint, how am i gonna attach the axle to the chassis. i used a sort of life axle idea. or is it a real life axle? 3. to drive the differential,i had to use a half thick 20z bevel gear. i first did that but it was not sturdy enough. the gear slipped out several times. after messing with it for a while, i came up with the idea to just turn the axle around and use a double bevel gear. 4. the steering didn't work at first because, it could not move forward to the axle, if you know what i mean. if you steer a wheel, the gear racks moves a bit forward, but the bracket was in it's way so that didn't work. i put the gear rack on the upside and it had space to move, but the gears slipped. i placed just two blue 5x3 L-beams to fix that. all in all, i changed quite a bit of the axle and only 50% of so is from the original building instructions. check it out below. it can steer very well and has a bit ackerman geometry. it works fine though. i attached the spring to the liftarm so i don't have to make a whole structure to attach it to the truck. it has a travel of 2 studs. that is not much but it works, and i'm fine. it was not my goal to have as much travel as possible. i'm pretty satisfied with it, it works fine. the next step is attaching the arocs grille and cabin. i think, i'm gonna use the 6l fake motor as well. the axle is 19 studs wide, just like the tracks and the cabin summary: i am building a non existing truck with driven and suspende. tracks and steered, driven, suspended frontwheels. it will have a sideway dumping and an outtrigger to that side with two stages like 42009. it will be rc and have a switch so you can drive manually. i'm gonna use the arocs cabin because it's a wonderful piece of lego. this is my fist moc so i don't know how it will turn out. for details and building process, check out the whole first post. if have now build: - tracks - front wheels - cabin and grille - outrigger i have to build: - nice frame to put on the cabin and grille. - gearbox for all functions and motors and a switch : manual-->rc. - a mechanism to dump sideways. - a bed, you know, where you put in the stuff to dump. -
Green Schooner WIP Redux I am editing over the old post as I found it wanting. I suppose I could start a new post but that just seems wasteful. I also don’t want to discredit the support which has already been shown. Below is my attempt at a better, more informative, if verbose, WIP topic. If you’re taking an interest, you’ll likely have lots of questions as to how or why I made a lot of the choices I have. For those of you, here it all is. For those less inclined, enjoy the pictures. If anything is still unclear, you have a truly helpful suggestion, or just want to show your support, please feel free to comment. Thanks for your interest in advance, and trust me it’s worth getting all the way though. When I started this project, about a year ago now, I set forth with a few goals in mind. For one I wanted to frame the entire project within the idea of making an all-out pirate ship based on Skull’s Eye Schooner of Classic Pirates fame. Hither too I had always favored good-guy/hero types with my creations and figured it was about time I provide my mini-verse with some bad-guys to keep ‘em busy. When I was a kid, playing with my Lego ships it always bothered me that SES wasn’t anything like a schooner. I suppose even at that age I already preferred that the intersection where fiction converged with history be more in the neighborhood of realism over fantasy. I used this as inspiration and resolved that whatever came of it, I’d make this next MOC in the style of SES but as an actual schooner. My other goals involved further refining the “Bent Brick” method I had adopted and adapted (credit to Henrik Hoexbroe). My previous MOC, Ramcat, was rather experimental and in parts suffers from a lack of pre-planning. Though the basic elements are all there and the goal of an all-working-parts-model can be said to have been achieved, much was omitted for space while some things remain historically dubious. Knowing better the demands of this style of building I would be more well prepared with each step to make a more complete and inclusive model this time. Many of the things, like fife rails, left out or left peculiar to that previous venture would be rectified in this construction. Also important to me was to include elements from other builders which could enhance my own effort as well as incorporate other elements from real world examples I had previously shied away from. The final element I’d insist on incorporating would be homage paid to the American privateers of the early 18th century. In my youth I had considered such vessels to have occurred far too late in history to be truly relevant to my own interests or Pirate lore in general. As I matured, learned and branched out I came to appreciate these historic vessels, and the contemporary replicas thereof, a great deal more. Now, aside from perhaps Frigates and their daring crews of the same era, these are perhaps my favorite over all. For reference I’d look to Lynx and Pride of Baltimore II. The initial renditions of the project were less than stellar. It seemed that marrying my concept to the parameters of SES likeness was going to be a handicap. For one I didn’t want to destroy any previous builds to reuse parts and change the color scheme but at the same time did not want to go forth and acquire new or more bricks either. On the one hand I felt it a violation of my principal of “use what you have” vs. “order, just, what you’ll need”. On the other it would take some creative budgeting to afford the colors I’d need to do it right. Before I was done, however, I’d commit to both. After trying several different configurations of color, I decided that green should be the predominant color on the hull accented by gray, rather than the other way around as of SES originally. As for the red elements, I just couldn’t seem to rectify them on my version and abandoned them entirely. The shade of green was the deciding factor in my decision to order parts. The standard Lego green, that bright green of prefab foliage, was just too vibrant for my taste and didn’t give the feeling of pirate ship at all. Instead I had to go with a darker, drabber green which I could afford, but had to be ordered in sets and cannibalized. The gray elements would have to be dark gray and/or blay to compliment the darker green as well, but that I had in stock, abundantly enough. The rest of the ship would wind up black instead of wood colors. While “blacking” was a common practice for practical vessels of this era I also figure it would lend the schooner a more sinister look. This time around I built the ships sides in a “ribbon” like fashion, flat on the deck then tested it again and again around an armature. After a lot of trial and error of both elements, the ribbon and armature, I came up with a hull shape I found pleasing and accurate (enough). Astern I expounded on a concept I added to Ramcat as more of an afterthought which made attaching the ribbon to the armature particularly difficult. Though I am a little ashamed to admit I do not know the name of, nor can I find any reference to it; I found the lack of curve on the underside of the hull near the stern disenchanting. Even heavily laden ships have a small portion of their hull’s underside above the water line as it narrows to the stern post. On this model I wanted to make this effect more pronounced and better well incorporated in to the transom. Though not entirely successful, I think the scale to small to really work well, I find her stern profile passable. Since the dynamic shape I had envisioned escaped me I took advantage of the increased space and added elements for a working rudder. Only the rudder head and till actually exist as the rest would be below the water line, but all the same, working elements were established early on as a primary goal. Up forward another working element was integrated when inspiration struck. I always considered the idea of a functional windlass/capstan fundamental. Any round part on an axle will coil a cable. Going years back to Snake, though, I wanted to make something of a more practical model than just round bricks on pins. While looking over pictures of schooners for inspiration I took a closer look at the more advanced, metal, windlasses of 19th century vessels as such. I saw a lot of similar shapes in common with technic parts and started building. Digging though my bag of gears and such, I found a lot of useful parts and cobbled together some designs that would very much look the part but still not quite work. What I was missing was a ratcheting action. To function it would need cat’s paws but on that scale, how? I found a gear which worked well with a cheese wedge to lock in place but needed a spring. (Purists prepare to cringe) In one rendition I actually tried to use the spring from a retracting ball point pen but it was impossible to keep in place. The smooth surface of Lego bricks failed to create enough friction. After that I tried pieces of flexible material, like card stock and balsa wood, but none of it had the necessary tension. Then out of the blue I thought of closed cell foam. Over the years I had saved plenty of the stuff from the likes of video game console packaging for myriad uses. I even had black which would blend well into the schooner’s décor. With a cheese wedge attached to a clip to make a hinge and pressed up against a wall, the foam acted like a spring and the ratchet worked. I now had a truly functional and practical windlass for my schooner. If I could bring mini-figures to life, they could use the windlass just like the real thing! See Video Amid ships there was much more work to be done. Mounting masts was nothing new, the same methods from Ramcat would be used over but the railings and deck were going to be a challenge. The belaying pin system I developed for Ramcat would work well, but I would need a lot more pins this time and the same standard would be needed on the new fife rails as well. In this system a clip holds a pin firm in place, rather than loose through a board like the real thing. This is so that a rope to be belayed in place need be only wrapped around the pin once to hold its place while reaching through the web of lines on the model. Then the clip and pin can be removed as one, the line still held in place, and belayed properly; free of the ships rigging where the modeler can work more easily. Once properly tied off the assembly can be replaced on the rack to resume proper tension, taking full advantage of the Lego system. Then next thing to be incorporated were deck housings. In my previous works I shied away from such construction for lack of deck space. Instead I had tried to compensate for the small scale by leaving hatch ways and gratings flat or even flush. For a basic interpretation this works well enough but is a characteristic more appropriate for much larger vessels. On schooners of this type, raised deck housings helped compensate for a distinct lack of space below deck and are a key characteristic of those ships. The first rendition of these was rudimentary by comparison, but served to develop the hatch ways I kept on the later version. Though they do not open and close freely, these covers and doors can be configured to remain either open or closed. Since the type of model (waterline), scale and construction technique make a below decks space impossible, I figured this is a nice way to allude to one for certain scenes. I also wanted to take this model to the next level with a planked deck, never much enjoying the studded decks of my previous efforts. A tiled deck may have seemed easier at first but it would have made for a lot more spacing conflicts with the armature and the tiles as planks would be just too wide. Instead I tried out something I had seen here on Classic Pirates. I assembled gray plates on their sides and staggered them to resemble the planks. I feel it worked out rather well. I picked gray over beige or brown, not only because I have no abundance of those other colors but because I wanted to serve that sinister look. Wooden decks not regularly sanded and scrubbed, nor sealed and coated will turn gray when exposed to the weather. Unfortunately I didn’t have enough of any one gray to do all of the deck, so I took a queue from castle builders and started throwing in other grays randomly. My hope was that the different colors would resemble damaged, well worn and/or repaired sections. I think the overall effect worked, but worry that some particular sections may still be distracting. Still to be worked on: The wheel, I copied Ram cat’s design but, this time with the intention of actually attaching the line to the till to work the rudder. I had planned on using relieving tackles below deck to give the wheel a more realistic feel. After completing the deck from what was on hand, plates of every dimension from 1 to 4 studs wide, I’m not sure I still have the space. I may have to settle for a direct connection. The gun flaps are currently held in place with strips of tape. I tried many different configurations of bricks to make a hinge but found none that worked ad still fit the size/scale of the ship. I came up with this idea while pondering how the actual hinges were attached. Purists may cringe, again, but after seeing how well these work and look my intention is to print stickers to replace the taps and look like iron hinges. I actually don’t feel that this is too much of a purism violation, not that I am very much concerned. After all though not for articulation, even Lego uses stickers to decorate their creations at time. Mine will just be a custom sticker. Belaying pins have been something of a struggle on this build. On Ramcat I simply turned dowel against a file in my hands and that worked well enough. The shape was simple but served the purpose. Purest may again take umbrage but there simply are no parts in the Lego catalog that will work just right. This schooner has so many more pins than Ramcat (26 vs. 44), that I decided that old method would be remarkably impractical. I attempted to makeshift a lathe with my Dremel tool. It worked well enough but I found it difficult to produce consistent shapes. Perhaps with practice or a proper tool, I could do better but that would simply be far more of an investment than I’d like. Instead I tried to design 3D belaying pins to print with Shapeways. My efforts there have hit a hurdle in the form of my lacking experience as well. There are problems with my mesh which will take an investment in self education all its own to correct. On this front, any assistance the community can offer would be appreciated. There are still scale miles of rigging to be rove, though the masts and spars as complete and ready. Sails will be their own adventure as I moved on from Ramcat before ever making her suit. Though it will require some experimentation, both vessels will likely get their suits at the same time. I figure at this point that my end goal for this project cannot be reached in the remaining time. I had resolved to complete the project by October 31st in order to utilize it in a Halloween appropriate scene. After that I had hoped to use her in conjunction with Ramcat and some of my other MOCs in a number of vignettes and perhaps even on display at convention(s). Between changing jobs and getting married, though, I simply haven’t been able to keep up. At this point I fear the project never being completed let alone dragging on any longer. Though I still hold out hope for a finished Ramcat, it was much the same situation and still she collects dust. I may very well be able to broker some free time in the near future I can use towards this cause though. I still don’t’ find the end of the month realistic but I don’t believe any of the local (Philadelphia area) conventions occur till the New Year. If you made it this far, thanks for your investment and interest. I do appreciate the encouragement I’ve received (most of the time) from this community over the years and that’s probably why I keep coming back. Please leave your comments, but in mind of her incomplete status.