Search the Community
Showing results for tags 'darth vader'.
Found 64 results
-
[MOC] Darth Vader's TIE Advanced x1, Alternate Build for 75347 TIE Bomber
Wurger49 posted a topic in LEGO Star Wars
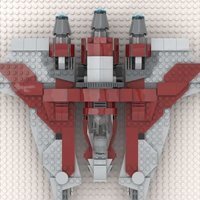
2023 is the year of LEGO Star Wars TIEs, TIE bomber has returned after 20 years, and the TIE Interceptor has returned after 17 years, both great models worthy of picking up. The last minifigure scale TIE Advanced x1 was from 2017 which I don’t have, I was itching for an TIE Advanced to go with my 2018 Solo Tie Fighter. For 75347, there is a Darth Vader figure included in the TIE bomber set, very strange choice to be honest but that’s the impetus for me, its bent wings and double fuselage gives me more pieces to work with. Recently, Amazon was doing a sale at $71.20 AUD, I decided to buy two sets. I built the bomber first to learn the techniques before disassembling to rebuild. Tie Advanced X1 v1.2_3 by Richard Yao, on Flickr The solar arrays are the easiest to modify, moved the black tiles one stud from the edge so the whole support frame is one stud from the solar panels. Ideally, I would like to have 8 additional 1x2 black tiles to go in below the triangular tiles. The solar power converter has been thinned to 2 studs wide like the main support strut, the wedge plates are needed elsewhere. I thought about reducing the height of the bent panels, but decided against it as the original TIE Advanced has wide panels. Tie Advanced X1 v1.2_7 by Richard Yao, on Flickr The wing spars are made longer by 2 studs, using the mainly sloped pieces to create the bulky angular shape. I used two 1x2 slopes to have the opening to show the deflector shield generators on the front. The smaller 4x4 cockpit dish has no bar handle, and I really wanted to make sure Vader can get inside the cockpit, so the official LEGO designed opening is kept. I turned the horizontal laid hinge piece to the vertical plane to keep the cockpit as round as possible. IMG_3663 by Richard Yao, on Flickr As I was designing the hatch of the eyeball cockpit, the first few attempts were the same tubular design of the official set, definitely not what I wanted. I then tried out the round corner bricks, they looked great from all views, and I flipped the 1x2 slopes so the wider side is facing the round bricks, reducing gaps between the pieces. The newly printed 6x6 inverted radar with two Ingot bars acting as upper viewports formed the access hatch. IMG_3666 by Richard Yao, on Flickr Now I moved to the back where the hyperdrive is located, supported by the disc like structure which houses the power cells and the stabilizing field projector bars. I used two 6x6 round plates as the basis for the shape. After trying out many different methods of connecting them to the cockpit and wing spars; my design used two 1x10 tan plates and two 1x6 black plates to sandwich the two 6x6 round plates, all four plates connect back to the cockpit and supported the entire back section with no wobble. I designed this section without wings, after I put on the wings, I realized the disc structure was too narrow, and had to widen it by two studs on both sides. I had to use white and dark bluish grey plates to support the pieces, leaving a messy looking underside. For the round edge of the disc, I tried multiple combinations of four wedge pieces and two curved slope pieces, decided to separate the wedges pieces as side by side they form a straight edge, I prefer to show the round shape of the 6x6 plate from the top view. Tie Advanced X1 v1.3_4 by Richard Yao, on Flickr The two pairs of red ion engine exhausts are attached by 1x2 brackets, I managed to put them on the same location above and below the back disc. There are not many parts for greebling on the Hyperdriver, two grille pieces for the thermal radiator ports and two roller stakes to fill in space. Tie Advanced X1 v1.2_4 by Richard Yao, on Flickr On the earlier versions of this ship, I left the two laser cannons on the side of the cockpit as the official set, after which I have mostly finished up, I wanted to see if I can move them below the viewport. After placing the two 1x1 light attachment plates on the bottom of the cockpit, the 1x1 round pin tiles don’t fit as their placement is too close to the inverted slope. I had to use long technic pins from the actual drop bombs, push them though the ring attachment. The inverted curved slope means the cannon attachment is one stud back from the edge, so Vader lost his lightsaber hilts to trade for long Ion cannon barrels. I know the cannons meant to be embedded inside the cockpit module, I haven’t figured it out with the pieces available from 75347, though my end product does look like aircraft gun pods. Tie Advanced X1 v1.2_9 by Richard Yao, on Flickr I am pretty happy with the end product, it’s a very solid swooshable model that uses 453 pieces. Please let me know your thoughts on the comments below. Instructions are available on rebrickable.com. https://rebrickable.com/mocs/MOC-146501/wurger49/tiead-advanced-x1-vaders-fighter-alternate-75347/#details- 4 replies
-
- darth vader
- tie advanced
-
(and 1 more)
Tagged with:
-
As an absolute fan of the original trilogy, I had to build more Empire ships in Midi-Scale. I decided to start with my favorite TIE model, the TIE Advanced. This 496-piece TIE Advanced features a fully SNOT and detailed surface. It also includes rear engine thrusters at the back of the cockpit dome. Most importantly, being able to design smooth but razor thin wings was the key to making this build look proportionate and realistic. The same applies for the rear section of the fuselage which, being only 1 tile-high, ended up looking just a thin as the original prop model. Logically, the ship scales well to my previous TIE Reaper - I'll keep exploring more of these in the same scale, and maybe one day have a whole fleet of Midi TIE ships! ► Instructions will be available at Rebrickable soon. More pictures on my Flickr page. ♥ Patreon ♦ Instagram ♦ Rebrickable ♦ Eurobricks ♦ Reddit
- 3 replies
-
- episode iv
- lego
- (and 14 more)
-
My First Entry into the Purist Minifigure Contest. - This entry is titled "The Empire" Bio's below! I hope you like them! R5-J2 Repair Droid This sleek black and copper coloured repair droid was stationed on the second Death Star during the battle of Endor. Built slightly larger than the Imperial R2-Q5 unit. Snow Trooper Snowtroopers are stormtroopers trained for operations in artic conditions and equipped with specialized gear to protect the against cold.. Snowtroopers were deployed from AT-AT vehicles during the Battle of Hoth and proved ruthlessly effective in their attack on Echo Base. Darth Vader Seduced by the dark side of the force the young Jedi Master Anakin Skywalker become Darth Vader and turned against the Jedi Order. As Dark Lord of the Sith, a master of the dark side of the Force, and one of the Emperor's most trusted servants he became the scourge of the Jedi and drove the Jedi Purge.. Scout Trooper Scout troopers, also known as biker scouts were specially trained stormtroopers of the Imperial Army's Stormtrooper Corps. They were used by the Galactic Empire mainly for reconnaissance missions. They had lighter armor than standard stormtroopers, allowing greater range of movement and flexibility out in the field. Emperor’s Royal Guard The Emperor's Royal Guard, also known as the Crimson Guard, , and under the Galactic Republic as the Red Guard, was an elite unit whose members served as personal bodyguards to the Galactic Emperor, only the most skilled soldiers in the Imperial Military qualified for the extreme selection process to join the Royal Guard.
- 2 replies
-
- maythefourth
- minfigures
-
(and 6 more)
Tagged with:
-
Here is my review on 75296 Darth Vader Meditation Chamber: THE GOOD: Great display piece. Love the design of the open/closing experience. Interesting building experience. Great details in building the stairs. Love the stand. Great minifigures. THE NOT SO GOOD: none (really can't find anything negative about this) I like this set very much. I had a great experience with this and I do think this is an excellent set. Really like some of the design and building experience in this. On top of that, it's a great display piece on any desks or shelves. It's always nice to see Lego releases Star Wars sets not based on vehicles. I wish LEGO releases more sets like this. Anyway, totally will recommend this to everyone.
-

[MOC][Instructions] Micro Scale Blockade Runners: The Liberator and Tantive IV
mcphatty posted a topic in LEGO Star Wars
Hi everyone! I have been building up to tackling a 'Blockade Runner' CR90 Corvette for over a year, MOCs this size are definitely not my strong point so my thanks go to community members Bruxxy and MasterBrickSeparator for their help. First things first, here's a render of both the Tantive IV and Liberator colour schemes, there are more on my Flickr page and should any of you be interested the instructions for both colour schemes are available on Rebrickable. I can hear a lot of you screaming at your screens "Its not micro!" and I admit you're probably right, the build is 59cm long and weighs 1.6kg which is similar to the Tantive IV set 75244 from 2019. It is however the same scale (1:250) as the rest of my little fleet of ships so I feel like I couldn't not slip micro into the title. I've tried my best to make the exterior as accurate as possible, I began by dividing and measuring the obvious sections and designing them seperately in Studio, then connecting them to a Technic frame. I started with the cockpit and worked backwards, although I nearly gave up there as getting the shape right whilst leaving space for an bridge was a nightmare, the modular nature of the ship made building the rest much easier though. The central fins also proved difficult, they are the most fragile part of the ship and can be easily knocked out of position, but very luckily they fit around the cylindrical core well enough to look pretty accurate. The fins also make the ship harder to pick up, two hands are required to lift the ship off a surface until you can hold the stand in one hand. I'll keep working on his aspect in case a stronger solution is possible, I would really love it if I could make the ship one-handedly swooshable. Fininishing with the engines I came across a new challenge, how to build the 11 thrusters with enough detail but not so much that they would cost a fortune in small pieces. The structural frame is very strong, its probably overengineered but I'm pleased with how solid the build feels as the strength was a complete unknown to me whilst designing in Studio. Best of all the frame allows for a tiny interior, sadly its not 1:250 scale (Lego pieces only go so small!) but it does give the MOC some extra playability and character. The roof can be removed in two sections to expose the cockpit, the upper deck and top gunner position, a central corridor running the length of the ship and the docking areas near the rear side pods. The upper deck can also be removed to reveal the main deck's conference room, side engineering corridors and micro escape pods, which are also all removable. At the end of the project I especially enjoyed adding a little 4-stud tall crew, each little stack of round plates is probably unreconisable individually but I think that when they're seen together with the ship they really come to life! Whilst putting together the instructions for both colours I decided that I wanted to build the Liberator from Star Wars Rebels. I've been rewatching the show and I have to admit that after seeing the ship in action repeatedly in season 2 I feel that its far more exciting than the Tantive IV! I'd love to take more photos of the Liberator with my other micro ships but at the moment I don't have the equipment, skill or enough micro A-Wings to do a decent job, but I'm working on it. Here's a few photos showing the Liberator along with my micro Ghost and X-Wing, plus the interior. You can see more in my Flickr album. I've tried to balance detail and cost, so apart from a few rare colours for the Rebels crew the 1900ish parts are all common and each of the ship colour schemes will cost roughly £/€/$150 to build. I know that the Blockade Runner has been recreated in Lego many times, both by Lego themselves and the community, but I've tried to make something with a few unique features that is hopefully a worthwhile addition to the roster. Thanks for taking the time to look :)- 9 replies
-
- phoenix squadron
- corvette
- (and 18 more)
-
Hello erveryone, After 13 Months of building I finally finished my A New Hope in Lego Series. I recreated more than 50 Scenes of our so beloved Star Wars movie from 1977. I hope you all enjoy my little photo series and I am happy to receive some feedback from you guys Next Project: "The Empire Strikes Back" in Lego. Follow me on Instagram to always see the latest parts of my upcoming series: https://www.instagram.com/codyaner_bricks/?hl=de A New Hope (1/6) by Codyaner_bricks, on Flickr A New Hope (2/6) by Codyaner_bricks, on Flickr A New Hope (3/6) by Codyaner_bricks, on Flickr A New Hope (4/6) by Codyaner_bricks, on Flickr A New Hope (5/6) by Codyaner_bricks, on Flickr A New Hope (6/6) by Codyaner_bricks, on Flickr Kind regards Codyaner
- 14 replies
-
- star wars
- a new hope
- (and 9 more)
-
Here is a small reversible vignette made for a contest on BrickPirate. The concept is simple: DO a vignette and make its mirrored counterpart (a bit like Stranger Things). I have selected Anakin Skywalker becoming Darth Vader in a very classical way. Light side, dark side by Veynom, on Flickr Dark side, light side by Veynom, on Flickr A few highlights: Anakin becomes Darth Vader, that's the obvious central point; Clones become Stormtroopers, still a natural evolution. Trade Federation droids become rebels ... this is a daring evolution. Blue lasers become red, and vice-versa The light side is chasing droids in an evil environment but the dark side is hunting down rebels in a bright and white environment. In the end, which side will you go for ?
-
MOC: Darth Bender I've been working on this for a couple of days and went through eight different variations for the 'eye-box' - ranging from designs including wheel arches, cheese slopes, SNOT- and not SNOT, six wide and five wide. In the end I went back to version 5. Comments and ridicule most welcome and there's more stuff and nonsense on Flickr https://www.flickr.com/photos/eurotrash48903/
-
.thumb.png.d1506c976462e0f6ae4ace82212c85b3.png)
[MOC] [Render] Death Star Battle: Ben Kenobi vs. Darth Vader
Mon3yMon3y2020 posted a topic in LEGO Star Wars
For May the Fourth I made a small Ben Kenobi vs. Darth Vader moc. Death Star Battle: Ben Kenobi vs. Darth Vader by Money Money 2020, on Flickr -
Hi there guys, I havent posted in a while but thats not because I haven't been building, I have just been away with work! I have a couple of builds to share with you starting with this... It is my recreation of the final scenes from Revenge of the Sith. As with all my MOCs I have kept this on a 16x16 base. Here it is in comparison to the actual scene from the film... Quite a fun build this, especially making the Death Star look like it is in the early stages of construction. And I loved the fact I could use the new style Vader and Tarkin (From A-Wing vs Tie Advanced set) as I think they are two really good looking mini figs. I took the figures off for these shots to show the detail on the panelling. Finally, It is impossible to resist a selfie! As always I hope you enjoy and any feedback would be greatly appreciated! More builds on the way!
- 24 replies
-
- revenge of sith
- rouge one
-
(and 5 more)
Tagged with:
-
What if you put a mini figure inside a Brickheadz? Brickheadz Inzide Darth Vader by Henrik Jansson, on Flickr
-
Hello everyone! First post on Eurobricks, though a longtime lurker. I created a Mustafar "Skyline" in Studio in the style of the Architecture skyline series. The skyline features the Klegger Corp Mining Facility, Darth Vader's castle (with a couple Easter eggs in the back), and an active volcano. My instagram page: @benbuildslego Lego Star Wars - Mustafar Skyline MOC by Jamin Ross, on Flickr Lego Star Wars - Mustafar Skyline MOC (Back) by Jamin Ross, on Flickr Lego Star Wars - Mustafar Skyline MOC (Top View) by Jamin Ross, on Flickr
- 3 replies
-
- darth vader
- studio
-
(and 5 more)
Tagged with:
-
Hi everybody! Together with my son we built our version of Vader's castle on Mustafar from R1. We tried to make it UCS style complete with a micro build, UCS style sticker and a booklet. The base (the lava field) is 96x96 studs; the total height is approx 125cm. It includes six minifigs: two imperial guards, Vaane - Vader's servant, Krennic, and two versions of Vader - one in armor, and one in the bacta tank. For the bacta tank version we used the torso from the collectible minifig gargoyle. We built it last autumn, but worked on it since; and now got around to take some decentish photos. Hope you'll like it. Here's the link to the flickr album https://www.flickr.com/photos/152265303@N06/albums/72157700068239294
- 5 replies
-
- darth vader
- vader
- (and 7 more)
-
So I've been going through old minifigures from the Star Wars theme and found miifigs like Kit Fisto and Plo Koon. The paint on them isn't there anymore. Any ideas on what to do?
-
- star wars
- phantom menace
- (and 10 more)
-
Hello everyone! It is a Lightsaber contest on Russian Fan Forum of LEGO. While my house is in grand repair and all my bricks and parts are beyond my reach. Suddenly my eyes fell on Darth Vader (75111) standing on my table. I took it in hand, twisted and then it hit me: I can make a great Lightsaber from it! I took it, dismantled, laid parts on the table and was "thought to think"... In General, in a couple hours everything was ready. I twisted-twirled a nameless Lightsaber in my hands. It was excellent. And then I remembered one famous meme! Now I'll show it to You! Oscar! I'll call a Lightsaber Oscar! And then there's the parts left for the stand. Like This. Look! From different angles and sides: Form is very unusual: Top "flat right-left". And on the contrary the bottom "back and forth" The entire body is decorated with intricate "imitation of rough metal": On the back side of Oscar is specific asymmetric control unit: I put it on the stand. He looks like "stepped one leg front": And so is like a rocket at the start: Let's take a closer look: "Oscar's face"! The power button is located in the recess above the thumb. On the reverse side is the wheel controller for the power of the beam. Oscar looks "in hand". And so is on the reverse side: The emitter (which is similar to the famous head statues): The battery part is located in the base of the lower part. By the way, after Assembly there are very few "unused" parts. Let the Pikachu Force be with You! Thank You All, Your Pikachu.
-
- 75111
- darth vader
-
(and 2 more)
Tagged with:
-
- 2 replies
-
- star wars
- darth vader
- (and 5 more)
-
Hi everyone, I started this week building small vignettes for the Star Wars promotional minifigs. The first is the Shadow ARF Trooper. The Shadow ARF Trooper is infiltrating an industrial building on Separatist territory. TC-14 has delivered the drinks, but the Jedi have fled after TC-14 heard the word: Dioxis! Darth Vader at the Death Star. A Mouse Droid is passing by while Vader is looking at Obi Wan Kenobi. In a parallel universe is Boba Fett dressed in white. He has his own place with trophies he collected over the years. Darth Revan has entered the Technical Service Room of a building in the Republic. He is ready to strike. Darth Maul at the duel of fates. He has taken off the upper side of his robe to make his opponent tremble. Admiral Yularen is present in a control room to inspect the data on an Imperial Star Destroyer. The lieutenant is walking through the hallway. The alarm went off and he hurries to the dropship. If you want to see other sized pictures, you can visit my Flickr album. Star Wars Vignettes Comments and feedback are welcome. Sander
- 5 replies
-
- darth vader
- boba fett
-
(and 4 more)
Tagged with:
-
The Cloud City playset from Star Wars, The Empire Strikes Backs…https://ideas.lego.com/projects/163944 I wanted to design a fun and playable set which would include the ionic scenes from the Empire Strikes Back film. The aim was to create a set that resembles the shape of the cloud city and offers a playable platform like the Death Star play set. I’m a keen Star Wars fan and as Cloud City hasn’t seen a new set since 2003 I thought I would have a go. I hope you enjoy and welcome your creative input into my project. Thanks for your vote…
- 22 replies
-
- star wars
- cloud city
- (and 16 more)
-
1st release of Darth Vader in LEGO form: Darth Vader's TIE Fighter in action, from Lego set 7150 Vader's Tie Fighter and Y-Wing.
- 1 reply
-
- star wars
- darth vader
-
(and 3 more)
Tagged with:
-
[MOC] Evolution Of Apenakin Skywalker On The Planet Of The Apes.
Vincent Q posted a topic in LEGO Star Wars
Long time ago in the galaxy far far away, there is a jedi who meant to be a master that will bring the balance to the force, but he turn to the dark... https://flic.kr/s/aHskVjGeXf -
These two preceding photos are to show off my latest MOC (or rather, re-doing of an existing Lego product), what I am calling Darth Vader's Transformation Remix. It's my attempt to somehow improve on the original set that was released way back in 2005. Now, the original set (# 7251) included a few key features: Darth Vader/Anakin Skywalker, a brick-built FX-9 Surgical Assistant Droid and the operation table. But, seeing as quite a few people out there have recreated this particular scene with much more detail than was included with the set (i.e., background walls, redone operating table, etc), it seemed a bit lacking. So, I made an attempt to expand on the set by adding a few background wall panels, along with various other bricks that serve as "readouts" outlining Vader's condition. Also, while the colors of the bricks used for the original 7251 were already subdued and grave, I wanted to give the remixed version a more doleful and foreboding color scheme. Hence the use of silver & titanium metallics, med. stone grays and blacks, with some other color bricks thrown in to balance out the darker colors. Another thing is that there are only two wire and cable-like structures near the top of the second panel from the left; this I did in an attempt to make it seem as if the "room" was hastily put together, and the builders placed all of the wires and power cables in safe enough areas except for those two. As a matter of fact, the entire top half of panel two is supposed to represent a shoddily built part of the medical apparatus. Overall, this build is inspired by the Yoda Chronicles Holocron Chamber promotional set. LXF file
- 3 replies
-
- darth vader
- transformation
-
(and 2 more)
Tagged with:
-
I am currently working on a Ghost MOC from Star Wars Rebels. I'm basing the design of DarthTwoShedsJackson's Ghost. I really dislike the original Lego set because its too small and has no interior. I'm making it UCS scaled and it would really help if anyone could give me some advice.
-
I am currently working on a Ghost MOC from Star Wars Rebels. I'm basing the design of DarthTwoShedsJackson's Ghost. I really dislike the original Lego set because its too small and has no interior. I'm making it UCS scaled and it would really help if anyone could give me some advice.
-
- darth vader
- lego
- (and 22 more)

