Search the Community
Showing results for tags 'SBrick'.
Found 171 results
-
[MOC] The Ultimate Pickup
Attika posted a topic in LEGO Technic, Mindstorms, Model Team and Scale Modeling
Hi there, I've developed a very annoying habit in the last few years. I randomly build pickups and other 4x4's. Even bought a real one. Anyway, the latest one is quite a biggy (sizewise) thanks to the planetary hubs. I've found a trick build them into solid axles with a practical ground clearance. This trick is going to be conroversial here. But start up with the video instead: All pics to be found here: https://bricksafe.com/pages/Attika77/ultimate-pickup In the comments under the video, noble members of our community noted, that there are parts which could solve the 1/4 stud misery. (if you don't know what is that, off you go, and whatch the video to the end! ) One of these is the 14t gear from the old diffs: I've made the attempt, but due to that collar on the bottom (top on the pic) it is too wide and puts srain on the drivline, making it hard to turn it by hand, so it is off the table unfortunatelly. So I speak for myself when I say, cuting those axles worth it. Not a rare piece, and costs 1 cent on bricklink, but only because there is no smaller value in the currency itself. In return the design prooved itself very reliable. Another "weakness" of the axle is the inperfect geometry. The wheelhubs aren't completelly vertical. There is about 1 degree tilting inside on the top. /---\ Before overdramatising this atribute, think, if you've noticed it in the video? Apart from the axles, the rest of the truck is the product of those years I've mentioned above. The essence of it is a simplest possible drivetrain: And a steering solution refined for non-rack steering: (The render is made of an older version, hence the different connector) If you don't belive your eyes, yes I choose to use 4x2 beams to form steering arms. It looks savage, but it is doing the job very well, brings ackerman geometry in the game. It does not hold the wheels rock solid of course, but in practicality it isn't noticable on the field. I've got a rack steering solution as well, but that brings the servo down A, onto the front axle (I don't do that. Ever ) B, into the mid chassis, where I don't have room for that. So we keep that for another build. Also has a working steering wheel using the rear output from the servo. ame old bevel system I've been using in most of my builds. Check the 1st episode of the pickup saga for more on that. Suspension Solid axles on a 3 link setup. It is kinda made up design, slightly inspired by the rear suspension of my Isuzu Trooper. Changing the shocks, or their hinge point on the top, gives 3 different ride height and suspension stiffness. The black, soft springs give a softer, relaxed, lower stance to it, while the dark grey shocks (known from the set 8880) are lifting the truck to a practical maximum, but still can reach full articulation. Not in all situations good to have your truck up in the sky. Like the climbing in the video. With low shock setting it made 52 degrees, but 47 "only" on big wheels and lifted shocks. The center of gravity moves with your ground clearance. That's about it, the rest is smoke-screen, like the body, and fancy doors. Oh, here is a fun fact: When it came to the seats, I realised I have 2 adjustable seats salvaged from a lorry build from about 5 years ago. Luckily they fit perfect so just made a rear bench in the same style. A non adjustable lazy style. Please feel free to ask about it, or just say something about cutting axles. I hope you find something useful here to take home with you. -
RC Car Toy Story
Leviathan posted a topic in LEGO Technic, Mindstorms, Model Team and Scale Modeling
Hi everyone, Here is my last original creation : The RC Car from Toy story movie ! I would like to make a RC car controlled by smartphone and easily recognizable by young people (and older one too...) Features : RWD by 2 L motors Steering by 1 Servo motor Controlled by 1 Sbrick (or 1 Buwizz without bbox) Independent suspensions External switch for power supply Some nice colors I used 2 pythagoriciens triplets to improve chasis stiffness. The car is divided in 3 modules : front, motors and rear In the picture below you can see red bush on 4l axle with stop. It's the switch to power up or down the battery box. I used Anto's buggy motorisation : http:// http://www.techlug.fr/Forum/viewtopic.php?f=5&t=11544 but il replaced 8t by 24t. HD photos gallery : https://www.flickr.com/photos/147164115@N07/albums/72157713497548457 Building instructions are available : https://rebrickable.com/mocs/MOC-39835 I added 3x3 lime dish for the eyes on 3D model : I hope you'll like it, See you soon ! -

[MOC] Datsun 240Z
legomarat posted a topic in LEGO Technic, Mindstorms, Model Team and Scale Modeling
My latest MOC. Wangan Midnight Devil Z. Power: 2 RC motors and 2 88000 battery boxes. PF servo for steering and Sbrick for control. Full Independent suspension. Link to video -

SBrick General Discussion
functionalTechnic replied to Nofer89's topic in LEGO Technic, Mindstorms, Model Team and Scale Modeling
Hi everybody I had the opportunity to test the beta version of the new Sbrick app, which will be released in one or two months. The new app is convincing. It is perfect for MOCs with special demands. However, to set up a program is more complicated as with the present Sbrick Profile Designer. Nevertheless, there are now a lot more options to create custom functions for your models. Some of the new features of the app: It is possible to create loops Queries from the Sbrick can be made Sounds from the mobile device can be connected to slider positions It should also be possible to control functions with a gamepad (I haven’t tested it until now) mathematical operations can be used in the app I tested the app with my MACK Anthem MOD. With the new app it is possible to automate several functions of the model: [media] Cheers Simon -

Scania bulk hauler (PF, scale 1:17)
Dennis Bosman posted a topic in LEGO Technic, Mindstorms, Model Team and Scale Modeling
This year I spent less time online due to several reasons (like my career) but I haven’t been hanging around when it comes to LEGO. Next to co-organize LW I built a couple of models and one of them is this Scania T143 bulk hauler. I originally started with mk1 in 2016 but gave it an overhaul in 2017. For sure it is based on Ingmar Spijkhoven’s model but actually I wanted to give it a personnal touch. Is has another chassis and drive train which is more based on Jaaptechnic’s Actros. The cab is different from Ingmar’s. I chose for the original side panels with the typical 2-series and 3-series shapes. The rear panel got the same treatment. The truck is powered by a singe XL motor with is strong enough to pull a drawbar trailer. Both bodyworks can tip with a XL motor and it has lights on front and rear. It is supplied with an SBrick. Special thanks to Dirk Klijn and Jaaptechnic for the high quality decals. For more pictures please have a look in my album: https://flic.kr/s/aHskrBEUtv -

[MOC] Vintage Monster Truck - instruction available
Madoca 1977 posted a topic in LEGO Technic, Mindstorms, Model Team and Scale Modeling
Hello everyone. As a monster truck MOC was one of my earliest creations, the time has come to remake it! Weight: 2030g - Powered by 2 SBricks - 4 XL motors for propulsion - 2 Servo motor for steering - M motor for switching steering mode (normal/crab) - M motor for raising front hood and rear bed - LED lights for headlights - Openable doors and tailgate Those old-school power functions components still work sufficiently in this MOC. The body was inspired by 80's monster trucks made from lifted and modified Ford pickup trucks. The under structure was designed for robustness. Eventually it looks more like modern tubular chassis. There could be multiple options for the sets of dual shocks. (Hard/Soft, Hard only, H/H, S/S) Vertically placed M motor moves Polarity Switch connected to rear Servo motor. Horizontally placed M motor is for two functions. Front hood opens via worm and 24T gear. On the other hand rear bed is raised via small actuator. That requires two driven axles of different torque and rotational speed for each side. Center differential enables single motor to transmit the power to both sides. One of the benefits of portal hub is easy to change gear ratio. Body parts could be replaced with different color scheme, though they are not fully modular. On November 2nd and 3rd, Monster Jam live was held in Japan for the second time. I did go to the event and took photos of amazing real monster trucks and drivers. Thank you, Bari Musawwir and Neil Elliott! Building instructions available at Rebrickable. -
[MOC] Dacoma 4x4 Redux
Madoca 1977 posted a topic in LEGO Technic, Mindstorms, Model Team and Scale Modeling
Hello everyone! Thanks to the purple Titanian, it took 18 months for coming back from yet another dark age in my life. Now I am here with yet another pickup truck. Design was inspired by Ford Raptor, Dodge Ram and GMC Sierra. Dacoma 4x4 Redux Weight: 1360g -Powered by Sbrick -2 L motors for propulsion -Servo motor for steering -M motor for two speed gearbox, (sort of) limited-slip center differential and lockable rear differential -LED for headlights -Openable hood,doors and tailgate Video: https://www.youtube.com/watch?v=qMUH1YmF1F4&t=1s This is an improved version of my Dacoma pickup truck and TLC 80. I could not finish building instructions for them because they had fatal drawbacks on their drivetrain. In low gear, bevel gears in center differential often skip and pop out by the torque of propulsion motors. To make it reliable, it was necessary to reduce the stress on center diff while handling higher torque in low gear. The gearbox works sequentially. (1 - 2 - 3 - 2 - 1) 1: High - 2: Low - 3: Low with rear diff lock In low gear, center diff works like limited-slip diff. In high gear, two L motors are coupled and rotate center differential together. Front and rear axles are driven via open center diff. In low gear, only one L motor rotates center diff. Another motor is connected only to rear axle. (In other words, it just supports rear half of drivetrain.) Which means rear half of axle in center diff is (nearly) locked. That means front half of axle in center diff is locked as well. Maximum suspension travel is not as long as older Dacoma truck. But new one articulates better thanks to softer front suspension. Years ago I happened to get some rare blue parts from old sets. So I could build it in blue. With a few tweaks, it can be built in white, orange or black. Building instructions: https://rebrickable.com/mocs/MOC-25520/Madoca1977/dacoma-4x4-redux/#comments I hope you will like it. And I will work hard not to take a long time for sharing next model. -

[MOC] 1:16 Volvo FMX with Palfinger PK78002 SH
dikkie klijn posted a topic in LEGO Technic, Mindstorms, Model Team and Scale Modeling
The Volvo FMX is an oddly styled truck, its bulldog nose like design stood out to me instantly. Having an inherent weakness for the odd I decided to build one all the way back in 2015. Four years later I proudly present my latest model :). Developing the Palfinger crane took the better half of the development time for this model. In order to house all the electronics necessary a flatbed truck design was chosen with 4 axles, 2 under the bed and 2 to support the crane and cabin. The crane is operated by 3 servo-controlled pneumatic switches, the newer style switch allowed me to build this more compact than we ever could! The Pneumatic cylinders for the extension sections have been modified to allow for a more realistic reach. Two original cylinders were cut and acetone welded together for each one of them. The compressor is powered by an L motor and assisted by a rubber band to reach the pressures necessary to operate the crane. The crane is able to reach the back of the bed, as was my goal, but isn't able to lift much anymore then, the limit of pneumatic control is really stretched when a single-cylinder needs to push an arm of 30+cm on a point 5 studs away from the pivot point. With all this functionality, details are fun but also frustrating to add. Two tiny tool compartments have been fitted on the rear of the truck stowing away lifting equipment. The engine is only built for the upper 2/3 to accommodate for the suspended axles and steering mechanisms. The model is also fitted with a full custom led kit. A custom electronics board with an Arduino pro mini takes the signals from the Sbricks and converts them into turn signals, driving lights, hazard lights and much much more. More can be seen on the Flickr album and in the Youtube video! -
[MOD] Formula Off-Roader 42037 RC with SBrick
RabbiT_CZ posted a topic in LEGO Technic, Mindstorms, Model Team and Scale Modeling
Hi all, Recently I wanted to try to modify the 42037 Formula Off-Roader with the SBrick remote control and Power Functions. It is done with two L-motors for rear-wheel drive and the servo for steering. It is little bit larger modification but the shape is still close to original. Only the back of the buggy is bigger to accommodate the large battery box. It is capable of riding in a short grass and even climbing to a moderate hill. The final gear ratio is 1:2.334 but can be easily changed for higher speed on a smooth surface. If you are interested, here is the LDraw file: 42037_-_formula_off_roader_sbrick.mpd (original by Philo). PS: On the photo are different front springs as the front is very light and I wanted softer suspension. -
We’ve been working on redesigning and improving our web interface to control multiple trains using one tablet / phone. Besides the trains, you can of course also control all the other devices in your layout: switches, lights, boom barriers, etc. We added the following features: Support for SBrick We have added support for SBrick controllers, so now you can control LEGO PU hubs, SBrick and our 4DBrix WiFi controllers with our system. Just like for PU hubs, controller SBrick requires a BLE112 dongle and an software license. Touch Controls You can now control the speed of the train by sweeping the power control, see video below. It’s a very intuitive and effective way to control the trains, especially to position them. Skins We have redesigned the multi-train interface. It now uses skins so you can customize the look of the app in function of the train you’re controlling. We’ve tried to give it a LEGO feel. At the moment you can use a number of pre-defined skins. The goal is to support custom skins in the future. Emergency button We also added an emergency button so you can immediately stop all trains in case that’s needed. You can see it at the bottom of the screen capture of the control app. Let us know what you think and don’t hesitate to get in touch with us if you’re interested in controlling your LEGO train layout this way. ---- P.S. the initial post had an incorrect link to the YouTube video, this has been fixed now.
-
SBrick Plus Video for Beginners
shugo posted a topic in LEGO Technic, Mindstorms, Model Team and Scale Modeling
How to create your own controller for SBrick (Profile Designer) First Run of your new SBrick -

Experiment: Using Raspberry PI and SBricks for automatic train control
Asper posted a topic in LEGO Train Tech
"proof of concept" using one raspberry pi to control two LEGO trains: The trains are detected by reed switches. The Raspberry PI sends commands over bluetooth to the SBricks mounted on each train. The code on the raspberry PI is based on this code: https://github.com/J...ick-Stress-Test by GitHub user JorgePe. He also has details on the implementation in the SBrick wiki: https://social.sbric...client-scripts. The only cable-connections are from the raspberry PI to the USB power supply (white box) and to the reed switches. Even at this early stage, this can be helpful on small train layout at exhibitions by adding some random elements in the timing. -

[WIP] 42043S (RC Arocs 3245 with SBrick)
Sphexish posted a topic in LEGO Technic, Mindstorms, Model Team and Scale Modeling
Greetings! After coming out of my Dark Ages and tackling both the excellent Ultimate 8043 & 42009 (see below) designed by Jurgen Krooshoop, I was hungry for another Lego Technic challenge. But I felt rather lost at this point: without a large collection of loose Technic pieces at my beck and call, motorized MOCs which weren't heavily based on existing Lego sets would require some hefty Bricklink investments from my part. Fortunately, a fifteen-percent-off-everything anniversary sale at a local toy store with an expansive Lego section made the choice for my next project a lot simpler: they had the 42043 Arocs set that had already been calling out to my wallet since way back in oh-fifteen. They also had a certain little gizmo called an SBrick in stock, which I had heard quite a few things about. My previous builds had involved standard PF receivers and remotes, so it seemed like an interesting new challenge to incorporate this new-fangled blue-toothed thing-a-ma-jig into my already-slightly-more-challenging attempt at "RC-afying" the Mercedes. I'm already a little way into the project, but I've already made a few false starts and moronic missteps, so I figured it might be educational for others to document my frantic flailing about experiences, so that they might avoid my (myriad) mistakes. The first thing I did, of course, was to order the necessary PF components: a Servo Motor, an L-Motor, an 20cm extension cable, and a couple of PF lights. In hindsight, this already turned out to be my first mistake: I hadn't done my research properly and hadn't realized that the SBrick requires an extension cable to be hooked up to a battery box. This meant I was probably going to be one cable short, since I didn't think the cable for the L-motor used for drive would reach. While I waited for these crucial parts to be delivered, I began preliminary work on the Arocs proper. After completing most of bags 1 to 3, I had three loosely connected main sections of the truck - the cabin housing the 6-cilinder engine and the L-motor that came with the set, the gearbox with the outriggers, and the rear section with the dumping bed and the differentials. In my mind, I could already see a problem arising: there was a drivetrain going from the rear wheels all the way to the engine in the front of the truck, which would obviously make the pistons move as you move the truck along. I already guessed I would be severing this connection by remove the driveshaft with the CV joint and attaching an L-motor in the center somewhere. Which would render the engine, the drivetrain, etc. utterly useless. This was not acceptable - not in the last place because my kids had unanimously decided that seeing the pistons in my 42009 mobile crane move was officially The Coolest Thing Ever™. So I fiddled about a bit before connection these three main sections, and eventually came up with this: Might be a bit hard to see, but... Basically, I placed an additional small gear directly in-between the L-motor and the gearbox, which allows it to power the axles and gears connected to the piston engine when in use. So, it wouldn't be connected to the drive anymore, but at least there could be some motorized eye-candy when one swung back the cabin and fired up the main engine. It wasn't long before my motors and such arrived, so the first I tried to accomplish was to connect the L-motor for the drive somewhere. One nifty solution I'd found involved replacing the engine in the front and using the long drive-train to power the rear wheels -- a technique I thoroughly rejected for several reasons: It seemed inefficient, and COOLEST. THING. EVER. So I figured I'd just bolt the bloody thing directly to the rear diff, as I'd also seen in this fascinating and classically scored tutorial vid by RC-master PPUNG daddy: It didn't sit right with me to just attach the motor with two pins like that though, so I have attempted to support it a little bit better without messing up the way the rear suspension works too much. Right now, it looks something like this: Not exactly perfect, but it seems to work well enough, even when I give the suspension a bit of a work-out. Next came the steering. My first attempt was based on this extremely helpful Youtube video by yu shine: Basically, this involved just connecting the Servo directly to the standard HOG steering mechanism for the Arocs, just below the two orange lights-slash-knobs at the top which you're supposed to turn. It seemed the most simple and elegant and -- being but a simple soul -- this naturally appealed to me greatly. It also didn't require the purchase of any additional parts, and left the mechanically unique way the steering on the Arocs model works intact. At this point I was able to put together a sort of prototype for the RC driving, by dangling the SBrick from the battery box and just hooking everything up in a makeshift manner. After installing the app, setting up the official 42043S profile, and playing around with my handiwork for a bit, I discovered the following issues: The L-motor was supplying quite a bit of power, making the truck actually pretty hard to control. Of course, there was a lot of weight left to be added at this point, so I was willing to reserve judgement for the time being, but given that my kids no doubt want to play around with this thing as well it'd be nice if I could prevent them from semi-accidentally ramming a massive Lego vehicle into, well, practically everything. Not sure how I could address though, other than from the software side. Placing the Servo motor where it was, behind the battery box, didn't actually fit all that well. The battery box itself actually pushed up against the servo when inserted, bending it back by at least a stud, which also frustrated my attempts to secure it in place a bit further. The steering was a bit... inadequate. The problems regarding the steering I recalled Sariel already mentioning in were only exacerbated here. It felt imprecise and rather unresponsive, and it didn't help that there was quite a bit of play in the wheels even with the Servo hooked up, meaning they weren't necessarily centered even when it was. So in the end, I stripped the away the steering mechanism and the wheels up front until I was left with this: After that, I decided to pony up and order the parts which -- after careful visual inspection of PPung's tutorial -- I figured I'd still need to mount the servo at the bottom, between the two sets of front wheels. So, mostly a set of gear racks and gears, in addition to some beams and various connectors used for bracing. This also gave me the chance to simultaneously order an extra extension cable from the same supplier, since it was pretty clear I was going to be needing it if I wanted to have any hope of hooking up the drive motor to the SBrick up front. And now, we wait... Although, to pass the time, I busied myself with rebuilding the back of the cabin, which I had previously taken apart to place the servo motor. I didn't need all the gears used for the steering mechanism, of course, and I figured I'd be better off trying to mount the SBrick in this space instead. For the moment, I came up with the following: I did notice the two black Technic pins still sticking out back there, and peeking ahead in the manual revealed that these will be used to help brace the pneumatic crane, once the time comes to attach that beast. As far as I can tell, that should still be possible even with the SBrick where it is, but no doubt I'll have screwed up somehow. We'll find out in the next update, hopefully! (Assuming, quite optimistically, that there is actual interest in such a thing. ) -

Lego Rocket Crawler with SBrick and BuWizz
PunkTacoNYC posted a topic in LEGO Technic, Mindstorms, Model Team and Scale Modeling
Hey Eurobricks, PunktacoNYC back again with another rock crawler! This time it's called the Rocket Crawler and it is my largest, fastest crawler yet. Youtube video: Features: - 4 L-Motors for drive (one per wheel) - Ackerman steering with custom virtual pivot system to maximize steering angle - Rigid, triangulated 4-link suspension with 100% Lego-legal original, extra large links - Very minimal, light bodywork, and a cute rocket atop the cab - BuWizz for extra power and SBrick for a great custom control scheme - RC4WD 2.2” Bully Competition Tires The initial inspiration for this crawler was twofold; I wanted to build a RC competition super-class-like crawler, what with giant relative wheel size, slim body, and high articulation. I also really wanted to make use of RC4WD's quite large Bully competition tires. This project has been in development for over a year thanks primarily to issues with the front axle. The problem with the front axle was that Lego universal joints simply could not handle the high torque required to spin such large tires. I tried using custom Lego universal joints custom dremeled brass remote-controlled boat u-joints, and even knob gears at the pivot point - nothing worked. So, I mounted the motors directly to the wheels, all within a virtual system to move the steering pivot closer to the center of the wheel for a better turning radius. There is approximately 90° of articulation between the front and rear axles: Easily adjustable suspension height: (high) (medium) (low) The chassis: Wheel comparison: Concept 1: Concept 2 (later): This has been my favorite project. Let me know what you think. P.s. I got a snupps page (nice idea, Sariel): https://www.snupps.com/punktaconyc -

Sandvik Toro 60
Superkoala posted a topic in LEGO Technic, Mindstorms, Model Team and Scale Modeling
Hello Eurobrick, It’s been a long time I haven’t posted here, for many reason. Now I’m back to Lego, let me present you my latest MOC, a Sandvik underground mining truck. (Please note this review is also posted on my own website Superk-technic.com) The Toro 60 is a 60t truck buit by Toro/Sandvik. It is a new approach of the underground mining application, by using a rigid frame truck instead of an articulated one. This allows to have a larger payload for a similar size truck. The Toro 60 is 6×4 truck, with a steering rear axle allowing to take sharp turn in gallery. Here is a presentation video of the truck. The MOC: This MOC is a simple reproduction of the main function of the real truck, as well as a cosmetic challenge to reproduce its unsual aspect. It is not mounted on suspension because I’m lazy because the rear steering-driven axle was a huge mess to create. And also because I’m lazy. It is powered by a Lego rechargeable battery and a SBrick bluetooth controller. All images are available on FLickR Propulsion. Axle 2 and 3 are powered through a PF-L motor. It was the best compromize between compacity and power. It fits well in the chassis between the two axle, but unfortunately there is a little lack of power for the outside run. A PF-XL motor would have been a better choice, but harder to integrate int he structure. Steering. The front axle is a classic Ackerman steering, and the rear axle is rigid and mounted on a turntable, like the real truck. Both axle are powered by a single PF-Servomotor. If you already played with a large turntable you should have noticed that if you gear directly a PF-SM on it your turntable isn’t straight, it has a slight angle. To compensate that, I geared the control axle with a 16t/16t: there is no onger an angle but it reates some slack in the direction. Tipper operation. On the real truck the tipper is actuated by to large and very (very)(very) long hydraulic jack on the forward part of the tipper. This kind of part doesn’t exist in Lego so I used classical large Linear Actuator. It works well when the tipper is empty; It’s a lot more difficult to raise it when fully loaded. Some Details. The front part of the MOC has been worked (more than usual) to represent as accurately as possible the original Toro 60. There is some asccess point and handrail on both side of the face. The massive front radiator shows the big fan, and the cabin is simple but includes a seat and a (on-functionnal) steering wheel. Footnote: The “official” color of Sanvik truck is red, but some parts are not available in red, in particular the panels. This is what the truck could have look like (visual made with Bricklink Stud.io): Thank you for reading ! -

[MOD] Tracked Racer 42065 B Model, Off Road Truck
tamahandy posted a topic in LEGO Technic, Mindstorms, Model Team and Scale Modeling
Hi Newbie around here, used to play with lego back in the days and somehow got back into it but this time as grown up and and adjusted gaming budget ended up buying some Lego Technics models along the way (mainly stuff with tracks :) ). So got my hands on the 42065 Tracked Racer, really liked it but fell in love with the B-Model/Off Road Truck and started putting my two RC 5292 motors into it. Here is a short video about the evolution to my so far "final" v5.3 Mod: Short recap about the progress: replacing the two PF motors with the RCs, and going for an SBrick increasing the wheel base and changing to 3:1 gearing, then getting to know about the fuse inside the battery box, adding suspension, moving the battery up increasing the wheelbase again to get two battery boxes inside and double the SBricks, and change to 1,667:1 gearing Putting the RCs horizontal with a 2.5:1 gearing Currently working on: Getting a GoPro attached Getting it a bit water/splash proof to be able to go through some puddles (so far cling foil wrapping battery cases) ToDo: Get some filminig done of the v5.3 with the 2.5:1 gearing Getting the PS3 controller working on the Nexus 5 together with the SBrick Future ideas Improving suspension, weight is currently heavy on the rear Getting a winch into it on the rear or front Automatic two gear box to get faster on plain surface and getting more torque when going through terrain, looking at sariels automatic two gear box so far, but it probadly wont fit p.s. These are my first attempts at shooting videos as well, so bear with me ;-) . Most of them are handheld from my Google Pixel while driving with my other hand on my old Nexus 5 -

[MOC] Truck with inner loader
MikeTwo9398 posted a topic in LEGO Technic, Mindstorms, Model Team and Scale Modeling
Hi everyone, This is a new project I am/was working on. I build an trailer capable to load high objects. For now it’s finished but I am not that pleased with the looks. In Dutch it’s called a “Binnenlader” as far as I know in English it “Innerloader”. It’s used to transport high objects like prefabbed walls. Some transporters use this kind of trailer to have 2 loading floors (Double Deck Trailers). The bottom of the trailer is very low to the ground. The trailer can be loaded by crane but it is also possible to load a carrier that can be load- and unloaded by the trailer. The carrier can be separated from the trailer. This is done by lowering the trailer, open the tailgate, and drive forward leaving the carrier standing. by My model automatically opens and closes the back door when the trailer is moving down or upwards. Don’t think is done with a real trailer but I wanted to make it remote controlled with as less motors possible. I was able to only use 1 motor. Have a look at the video and photo's:. http://youtu.be/D-oJ6EqskxQ -

[MOC] Mini-Skidder: Woody and the woodpicker
Leonard Goldstein posted a topic in LEGO Technic, Mindstorms, Model Team and Scale Modeling
Hi, another Mini-MOC for you: here comes the Mini-Skidder This little thing is very powerful as it uses 2 L-Motors for drive and a third L-Motor for steering. Watch the video: On my brick safe page you can find the pics in higher resolution and of course an LDD-File: https://bricksafe.com/files/Leonard_Goldstein/woody_and_the_woodpicker/Woody-Woodpicker_V02.lxf Let me know what you think Regards Leonard Goldstein -

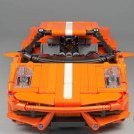
[MOC] “Challenger” The Supercar
KevinMoo posted a topic in LEGO Technic, Mindstorms, Model Team and Scale Modeling
EDIT: Improved Interior -------- I’m a big fan of medium-size models. Ever since the first appearance of the curved panel (part 18944), I’ve been planning to make something out of it. And it couldn’t be more suitable than putting it on a supercar. Finally, presenting my first ever supercar - the Challenger. This MOC is equipped with 56 x 28 tires, making it a roughly 1:11.5 scale model. It’s really challenging to design a bodywork with complex curves for a supercar at this scale, hence the name Challenger. BODYWORK Normally wheel arch made of liftarms has flexible axles inside, but I choose to use rigid hose because it’s slightly better than soft axle in terms of keeping shape when the desired curve is short and subtle. Together with the curved panel, they create a beautiful silhouette. Even though this MOC looks like a Porsche, and indeed it is mainly based on Porsche design, but it is not a Porsche. Especially when you look at the rear end, it’s definitely not a typical Porsche style. Actually the whole bodywork referenced several car brands, it’s more of a combination of all my favorite parts from different design styles along with some of my own thoughts. DRIVETRAIN & SUSPENSIONS It is powered by 2 L motors, and steered by servo motor. Front suspension is a conventional independent suspension; rear suspension is a multi-link suspension which incorporates what is called a Watt’s link. It works just like a Panhard rod, but slightly different from Panhard rod. PERFORMANCE COMPROMISES & IMPERFECTIONS Due to limitation of the size, I really couldn’t put everything I want into this MOC. One big problem is the seat. Since the motors take too much interior space, the seats have to sit high on the motors, while in a real car they are much closer to the floor. And they don’t look like racing seats. Secondly the rear suspension is really stiff and suspension travel is short, so it couldn’t take full advantage of the Watt’s link. Also the absence of working headlights and taillights and the noncontinuous curve of this liftarm-made wheel arch are the compromises I have to make. Anyway, I’m basically satisfied with this MOC, it’s a good start of creating motorized medium-size supercar for me. Hope you guys like it And happy Chinese New Year! -
 Today I like to show you my latest MOC: The Mercedes Zetros 1833 Expedition Truck 4×4. It's my second LEGO Technic Zetros in an approximate scale of 1:13.5. The construction time was actually only three weeks. Then the truck was finished by and large. The extensions and improvements took another 11 months. For the impatient among you, here's the video first: This MOC was originally designed for lightweight construction, best off-road capabilities and adequate speed. Therefore I completely redesigned the chassis and the axles. And because it has to work in forest, desert, arctic and jungle, I designed the chassis and drive as simple as possible. Each wheel of the 4×4 truck is driven by an XL engine. Via a 90° deflection via knob wheels, the drive goes to planetary gear. Thus the highest possible torque is available at the wheel. The steering is done by a servo motor. Two SBrick are used to control the truck. In addition, a Power Functions infrared receiver is installed. The Zetros draws its energy from two large PF battery boxes. The lightweight construction was not quite successful. The Zetros weighs 5.7 kg including batteries. Therefore I had to reinforce the springs several times. Now the long red springs are in front ( a bit softer ). In the back there are four yellow, hard springs as well as two spring-loaded shock absorbers. The shock absorbers were necessary because the body quickly built up during off-road driving. So the truck is very stable and easy to drive. About the functions: At the front of the Zetros there is a cable winch with pulley and hook. The winch is operated via one of the SBricks. In the rear of the fully equipped superstructure there is a garage for an ATV. I control its winch via the PF IR. The ATV is quasi a “MOC in the MOC” and of course fully functional. It has a fake V2 engine and rear axle suspension. For a long time I worked on the retractable awning. This stretches itself. The motor, which is hidden in one of the built-in cabinets, only rolls in and out the fabric. The awning is also controlled via the PF IR. A real highlight is the lighting of the truck. Functioning front and rear lights go without saying. The indicators also work on the left and right as well as on the “warning lights”. There is a floodlight bar on the roof. And because it is equipped with an odd number of single LEDs, there was one left. Well, now the truck even has cabin lighting. For interior design. There is a passage between the driver’s cab and the superstructure, as in the original, which is covered at the top and sides with a flexible rubber bead. In the living area there is a loft bed (above the ATV garage), a small bathroom with a suggested toilet, a suggested kitchen block (which hides the winch for the ATV), a closet (which hides the mechanics for the awning), a table and two storage compartments (one is empty, the other contains the awning shaft). On the roof of the driver’s cabin is a luggage rack with two expedition boxes (what’s inside, I reveal in the Behind-the-MOC video) and three canisters of water and diesel (what else). I hope I haven’t forgotten anything. More photos of the finished Mercedes Zetros 1833 and the Work in Progress of the Zetros can be found on my Flickr channel.
 -
Hello all, im not a very experienced train builder, but since i saw the movie "Unstoppable", i got inspiration to build trains, so, i made my own version of the 777 train of the movie in LDD, which if im not wrong its a BNSF GE C44-9W, so here it goes: Im not very talented for the aesthetics, thats why it is a bit ugly, it was supposed to have a yellow stripe on the sides, but i think it would look much better with stickers, however, i will see if i can make of bricks. I decided to make it 8 wide, to have more space for details and to make it more scale-realistic. The propulsion system its done by one battery box, one sbrick and 2 XL motors for each locomotive: And this is how it steers (it still can steer to take the normal curves) I hope you like it, i will try to post more pics of the working parts. Thanks.
-

Double Trouble Trophy Truck
rm8 posted a topic in LEGO Technic, Mindstorms, Model Team and Scale Modeling
Dear moderators, please rename this topic to [MOC] Trophy Truck "Double Trouble" Hi everybody! Video is available, enjoy and comment! Here comes double trouble. Twin powered double trouble True liftarm energy! This is my new Moc. And it is ready: I am working on photo/video. UPDATE Here is some photos and info while you wait for video. Specs: Soft long travel suspension. Front independent with postive caster Rear live axle with built in Buggy motors. Rear wheel drive Self made stickers Tires RC4WD Dirt Grabber 1.55 (74 мм) - thats a copy of real BF Goodrich AT tires Spare tire RC4WD Mickey Tompson Baja MTZ 1.55 (83 мм) Weight is 1100 gr Electrics: Steering SERVO, Flying Propulsion 2x Buggy motors Fueled by 2xLiPo 3xLED lights Controlling thru 2xSBrick Internal space is filled with electronics. Unfortunately there is no free space for cockpit. Love this suspension, its articulation is great for me. I am happy seeing how it works) Suspension travel is about 4L. I will drop down and show it on video later. You know, LEGO suspension is always jerky, so you cant make big mocs drive straight, especially when it is fast and big. Positive caster helps to return wheels in center postition and fights with steering system backlash. It also makes shock absorbers work smoother and softer, IMHO. I dont like demonic "Monster" theme that is everywhere now...but this is good) Very good and realistic tires. Sad that there is no similar proportions tires in LEGO assortment. These are 75 mm with wide almost equal to medium 43 mm racing wheel. Spare tire is another type, cause I dont have 5-th Dirt Grabber. These 83 mm tire also fit in the arches, but they are bigger and harder for LiPos to rotate without stress... Model is driving fast enough for its weight and even drift donuts indoor, but outdoor shows the the weakest part - LiPo. I should try to lock differential thermistor for insane driving. After "baja" outdoor drive I replaced all damaged wheel axles and going to film its indoor's donuts and at asphalt outdoor to reach maximum speed. I hope it can reach at least 10 km/h. So "why double trouble"? - it is hard to fuel buggy motors. And here we have double of them. Here is full photo album http://www.bricksafe...rm8/BajaTruckDT -
Hello, Almost all of us use Sbricks as just "long range remote control with smooth speed control", right? It take time to know more about Sbrick functions that can be programmed using Profile designer. New possibilities, opened with Sequence and Circuit, was not presented and described well in guides (SBRICK Team should do a detailed guide and how-to manual). So I have to learn them by myslef. Car is just a mule for all functions we planned. So no need to describe design. We did it with my son for robotics contest in his School in January. Functions Independent suspension openable doors, including motorized rear door Rear wheel drive and steering Auto turn lights (+ manual buttons) Auto emergency lights (+ manual button) Auto backward drive light (+ manual button) Daylight and rear lights powered with solar panels All electronics 2x L motor for propulsion Servo motor for steering 2x LED for turn and emergency signals 2x LED for front and rear daylights 1x LED for backward drive signal M motor for trunk door opening WEDO tilt sensor for safe/dangerous drive control 1x LiPo batery 2x Solar panels 1x Smart Brick 1x Smart Brick PLUS Control profile is a mess of buttons. I think I need a real designer to design something nice in designer profile Small buttons are circuits, that are ON on the start, and no need to press them. So that's why I make them small (May be, hiding them is the better design decision) For example, circuits was used to make aut turn light: left or right turn LEDs are on depending on SERVO motor rotation direction. Circuits are like "IF" functions, that can be linked any port of Sbrick, but it is not described in Manual, so I have to expore it by myself. Round sequence buttons work like ON buttons but with programmed timings and power. So I can do blinking lights with described intervals of LED on and pauses between. The same I can do with motors. When driving, you can see that some sequence buttons on the iPad turns ON automatically (I don't press emergency, backward or turn rights at all) Another experiment: solar panels. They work well with LEDs. They even make work Sbrick. But too weak for motors. I saw some moving cars on YT with one solar panel and one motor under bright sun, but I can't name that "CARS" - just some liftarms and wheels with solar panel and M motor. My car is too heavy. Almost all functions can be done only by Sbrick. Sbrick PLUS is only used for connecting WEDO Tilt sensor. Tilt sensor detects "agressive driving": fast acceleration or brakes, crashes, shaking and roll over of course. Then circuit sends command to emergency lights. Another function I planned, but failed: automatic rear door opening detecting hand or leg under the rear bumper (like modern cars do). Unfortunately, I can't set up WEDO distance sensor. It should detect leg and open door only at small range. But everytime it detects surface under the car - it opens the door I also have to do some tricks, for example "all off" circuit, to prevent manual turn off emergency and rear drive light after every auto turning on... I think, this can function can be useful for big supercar scaled models or truck, especially for events. But Sbrick team shoud do a user friendly predesigne profiles for that and do a detailed manual for every function in profile designer. And I am also waiting for iOS support drivers You can turn on english subtitiles in the video. Describing how to programm all that buttons in Designer Profile need a separate video. Thanks.
-
Сокол-80M crawler crane.
Superkoala posted a topic in LEGO Technic, Mindstorms, Model Team and Scale Modeling
Some month ago, I discovered the Сокол -80M (Сокол = Falcon), a heavy Russian crane with a lifting capacity of 80t on a two stages telescopic boom, thanks to another couple of hour spent on Youtube instead of working. See the video here (starting at 1:38) After some difficult search, I found that two variant exists, the first one is Falcon 80.01 and is mounted on a wagon for railway crash salvage and recovery, the second one is Falcon 80M which is mounted on a self-propelled tracked vehicle equipped with outriggers, able so to be also used in hard off-road environment . It is this version that kept my attention. The Lego Version This MOC is ‘inspired’ by the Сокол-80M more than a real scale reproduction. All the pictures are availavle on FlickR The transporter part is mounted on two track and equipped with deploying outriggers adapted from the 42009 Mark II Mobile crane. I had to modify them in order to avoid clash with the tracks There is 4 functions integrated in the transporter: Left track + Right track with a PF-L motor each Deployment of the outriggers through PF-M Extension of the stabilizers through PF-M These functions are controlled by a SBrick and powered by a single rechargeable battery installed in the cabin. The superstructure supports the main mast which is erected using two linear actuator. Due to the gear reduction (PF-L > short worm gear > 20T > LA) it moves very slowly but it works. I would really love to see one day Linear actuator twice the length of the current ones. Superstructure is installed on a 60t turntable and integrates all the functions required to operate the crane: Rotation of the superstructure through a PF-M Erection of the mast through PF-L Deployment of the telescopic part through PF-M Cable operation through PF-M These 4 functions are also operated through a dedicated SBrick powered by the battery. The only cable passing through the turntable is for the electrical alimentation The transporter and the superstructure are independent and can be separated. The assembly is done by simply clipping the turntable onto the transporter. A video : Good and to improve: Good : It’s like a mobile crane but more badass. Each transporter and superstructure can be controlled independently from the other Could have been done better : The visual aspect of the transporter and the crane cabin are not really perfect. I won’t lie, reproduce real machine at a mid scale is still not my cup of tea. What could be done better: Upscale it. Bigger, more space, more possibility. Thank you for reading -

[MOD] 42065 RC Tracked Racer
Lasse D posted a topic in LEGO Technic, Mindstorms, Model Team and Scale Modeling
The 42065 RC Tracked Racer is a nice canvas for modding. I was a bit disappointed when I found that it didn't have any technic gears apart from what you find when you disassemble the motors. Technic has always been used to teach mechanics to kids, and I personally find differential drive to be a super interesting alternative to the direct drive approach. It didn't take more than a couple of hours to stuff in a couple of differentials, so I made a little video of this mod in action: Another obvious "MOD" is to SBrick the model. This is a ridiculously simple MOD, so I decided to document the whole process of unpacking, updating, and programming a remote using the SBrick: I also had super high hopes for the L-motors. Perhaps this would be more interesting with a 2:1 gearing for double speed. This is how the standard direct-drive model performs with L-motors: Next up will be a GBC-module built mostly from parts of the model. To make a plain belt drive module is not really interesting anymore, so I'm currently trying to figure out if it can be made more interesting.