Search the Community
Showing results for tags 'MOD'.
Found 466 results
-

Eurobricker’s Share your Trailers!!!
CrazyKreations posted a topic in LEGO Technic, Mindstorms, Model Team and Scale Modeling
Hey everyone, you must check out the share your trucks forum for many talented eurobricker’s inspirational truck designs! But this topic is for those who have made their own custom trailers and mods that they are proud of! I will start first Here is my trailer for my custom Semitruck. I am currently designing a nice off-road capable caravan which I hope some of you would like to see, I am almost finished and I will post it here when I am done. -
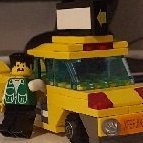
A while ago i bought the Whomping Willow set as an effort to complete my Hogwarts Collection. A lot can be done better and more detailed on this set, but for now i decided to just give the car a little rework. I know the car was designed by Lego for durability and playability but i really didn´t like that odd roof. So i decided to take matters (and bricks) into my own hands and redesign the car: 20210228_172918 20210228_172819 20210228_172853 As you can see, i incorporated a lot of slightly mismatching colors into the car since the one in the movie isn´t exactly brand new...to describe it politely. The car has dings, dents, and spotty paint. I also tried to detail the interior a bit. It still might not fit 4 minifigs, but at least 2 can be seated and some luggage can be put behind the seats...and yes, the back rests can be adjusted. 20210228_163455 As you know, the car gets quite a beating from the Whomping Willow after it crashes into the tree, so i decided to "demolish" it. 20210228_163132 20210228_163005 20210228_162937 I hope you guys like my version. Comments are apprechiated.
-
Hi, first post about doing a mod, but I felt pretty passionate about this one. Having grown up with the "original" Batman films, I loved the UCS Batmobile, and while I also love the lego Batwing, the elongated cockpit really struck me as a bit NQR. I tried various mods on mecabricks, and while the most accurate "shrinkage" (based on the original studio model) of the length of the cockpit would require the removable of (two) of the sections of 1/4 clear wall elements, this would require a full blown redesign of the seat and cockpit to fit it all in the remaining one. I also tried utilizing the new UCS A-wing canopy, but it's width isn't the 8 studs required (6 only), and again, a full redesign would be needed (which is a shame as it is a more accurate shape compared to this sets design) So finally, I settled on removing 2x BOW 1/4 4X4X1 which effectively shortened the length by about 2-3 studs (along with removal of other parts that were between the two cockpit sections). This allowed me to move the front of the canopy backwards 1 stud (more screen accurate) and also move the back "shell" (WALL ELEMENT CONE 3X6X6) forwards - again more screen accurate. To complete the look, I'm planning on printing some back vinyl to make the rear section of the canopy a sloping black area (rather than clear all the way back then a vertical black where the shell starts). The other major change I made was to remove some of the dark grey "detailing" to remain more screen accurate - especially the spoilers. I narrowed them by a stud to take advantage of the void below them created by removing the two LDG 2x6 bricks, which then allowed them to sit much more flush when down (with some detailing underneath 1 stud lower than the rest of the wing area) Instead of writing more, maybe I'll just show what I'm talking about, as it will hopefully make more sense that way. Happy with the overall result. Original model: Original studio model:
-
I've made a lot of special modifications myself. Hi, this is my first real post here. Let me know what I'm doing wrong! I built @Jerac's TIE Fighter a couple years ago, and I've been tinkering with it off and on ever since. This was the first MOC I bought and built, and I remain very impressed by the strength, elegance, and ingenuity of the design. I've seen a lot of TIE MOCs since, and Jerac's is probably still my favourite. I wanted to say that clearly at the start, before getting into the nit-picking! Here's what I changed: Wing Gaps I always found the holes in the wings very distracting. They're easy enough to fill with 1x4 tiles, if you remove a plate from the base of the horizontal spokes. The result not only looks better, but holds the spokes in place more securely. I added 1x1 plates to the top and bottom corners to fill another gap. Canopy/Gun Mount I was also dissatisfied with the canopy/guns/controls assembly, which is a precarious stack of rods and clips. It's fiddly and fragile, and leaves extraneous T-pieces sticking out the front. Why did Jerac build it this way? I think because the cockpit's top, front and bottom dishes wrap around the quarter domes and they need to fit snugly to approximate a sphere, so the space available to mount the canopy and guns is incredibly tight. My solution was to mount the canopy on old robot arms. They're the right length, and they have a squared off neck where I've attached the gun mounts, which helps hold the guns in position (at least on 1 axis). Top Hatch Mount The top hatch in Jerac's model sits noticeably to the rear of centre. It's a bit tricky to fix because the hatch mount connects to the top of the central hexagon, which also needs to be positioned precisely. I had to rework my initial solution when I redid the rear - more on that below. Wing Construction I love Jerac's smooth stacked-brick wings, but they give the impression of subtle stripes running parallel to the wings edges, like concentric hexagons, whereas the real TIEs have prominent ridges perpendicular to the edges. It occurred to me that I could suggest these by using tall 1x1 bricks instead of long bricks. Stacked 1x1s do not make a strong wall, but because the hub/spokes/rim design is so secure, the finished wings are plenty solid. The main drawback of this design is that light can shine through the tall seams when you look straight on, lessening the sense of solidity. But I find the overall effect delightful. I used 1x8 tiles for all the spokes, to clear some extraneous studs off the wings. Interior I spent a lot of time trying to mimic the cockpit's triangular panels in some way, but couldn't find a solution at this scale. So I went for a looser interpretation, inspired by the beautiful Inthert version and Jerac's TIE Defender. The interior space in this model is very limited (even the Defender has an extra stud of depth) but I was able to include a lot of detail. I also made space for the newer, oversized TIE pilot helmets. I borrowed the control design from the Bricks Feeder/Inthert interior. I'm disappointed that LEGO has never printed the TIE Fighter targeting display. I may print my own sticker for that. The top hatch isn't functional, but it does need to swing up for cockpit access, so I added some simple details underneath. The scale is way off, but I like the way the 1x2 grills evoke the skylight pattern on the hatch. Cockpit Side Greebling I wanted to include the little dark grey bow ties on either side of the canopy. This was challenging for a few reasons: They should be centred, which means holding a small piece in the middle of a 2-stud space and minimizing the gaps around it. Everything should be curved to match the quarter domes. I also wanted to accommodate interior detailing in this space. Finally, there's an identical pattern in the rear, around the engines. These areas should look similar in front and back (see below). I'm quite satisfied with this solution: Wing Spars The arms (technically "spars") attaching the cockpit to the wings are full of Lego-unfriendly details: cylinders, thin rings and fins, and the notched plates next to the cockpit that slope in like 4 directions at once. Their diameter is small and they need to be strong. I did my best to imitate the details while sticking with Jerac's sturdy plate-based design. I swapped the 1x4 brackets for 1x2s to clear a couple studs off the front. There are more brackets inside to add strength and attach interior details. I tried a lot of different pieces for the bent T detail next to the wings. Pneumatic t-pieces seemed to best capture the shape. I'm dissatisfied with basically every part of these arms, but I haven't seen other versions at this scale that I prefer. Most of the key details are at least present, although crudely represented. Rear The central rear ring is the last piece of the original that I altered (so far). I'd done earlier revisions of the engines and hatch mount that retained the quarter ring tiles. I appreciate their smoothness even though they're too flat, and sink the central hexagon behind a circular cutout. I finally noticed that the outer diameter of this ring should match the top hatch and front canopy – it should be 5 studs (scaled to the overall model) or 6 (matching the canopy and hatch). That pushed me to build a custom ring with the key features of: 6 stud diameter Outer cone shape Inner inverted cone, and Prominent central hexagon with slightly recessed black interior. Drawbacks: I couldn't find a way to keep the red engine centers with this design I also couldn't include the bump on the top of the cone. The top hatch sits ~1mm too far forward (but closer to centre than the original) The outer diameter is 6 studs, but only at the points where the handlebars attach The handlebars aren't angled quite right, so the clips that form the ring are a bit skewed The inner inverted cone is too deep And of course this segmented design is not as smooth as the rest of the model. In spite of all that, I think the shapes are quite accurate for this scale, and I'm satisfied with the result. A Note on Scale The cockpit is about 9 studs tall, including the top hatch and bottom dish. At that scale the front canopy, top hatch and rear cone should all be 5 studs in diameter. It would be interesting to see a TIE MOC scaled up to fit the 6x6 dish – a cockpit diameter of ~11 studs. Conclusion I've changed most of the pieces and the details in this model, without changing much about the structure or general appearance. I'm still tinkering with it. I've got some ideas to rework the wings and spars, but that's quite a big project. Some of these modifications are a matter of taste, but I'm quite pleased with the results. I'm interested to hear others' opinions. Credits In addition to Jerac, I appreciated and drew inspiration from: Inthert and Bricks Feeder: Beautiful interiors Koen Zwanenburg: Clever cockpit side details, more accurate shape of the wing hubs (although I stuck with Jerac's for now) Fuku Saku: Nice front and back cockpit details. The rear cone piece is clean and accurate, but loses the center details. Force of Bricks: Interesting arm details and rear shape. If I do a more thorough redesign I'll likely borrow a lot from this model. Pasq67: Impressive details at a smaller scale. Cereal Eating Builder: Incredible accuracy at a much larger scale. Reference Photos The EFX prop replica seems to be the most accurate model available. This gallery is my main resource. For proportions I referred to this blueprint from the Tie Fighter Owners' Workshop Manual Some pictures of original props here A discussion of TIE Fighter scale
-
 What do you do when you love the look of a set (80024), but don't want to start a new theme? Sell the figs and re-theme it! Here are Neo-Classic Adventurers Johnny Thunder, Pippin Reed, and Professor Kilroy rafting and flying in on their new Aero-Nomad balloon. The expedition is to explore the Legendary Flower Fruit Forest, but they're unaware it's the stronghold of the fearsome guardian Tygurah, and his minions. While most are just very minor MODs and minifigure swaps to 80024, there is also MOC remake of the Aero-Nomad (7415) Set. More LEGO - Neo-Classic Adventurers photos, on Flickr
 -
This is a mod of the Marvel 76173 Spider-man and Ghost Rider vs Carnage set, but since it is Marvel no more - it parks with other Speed Champions cars I have - I placed it in Town sub-forum like other SC style car MOCcers do. The mod includes styling changes that made the car resemble a full-blown (pun intended) 1968 Charger with some extra semi-realistic goodies while maintaining the Speed Champions vibe. Mod includes: adding 1968 tail-lights + front blinkers moving fuel cap to a proper spot and removing the other one adding side exhausts + stereo antenna + side-view mirror on driver's side creating a sleeker, "shotgun" style scoop (still using the stud shooters) and a filled hood adding a suggestion of rear suspension springs + extended and reinforced fuel tank creating a suggestion of an interior with a gear shifter and two gauges + moving the seat and steering wheel one plate higher + moving the rear window one stud back The mod required use of some extra parts, of course. Being a fan of a '68 and knowing that a vast majority of Mopar fans prefer 1969 and 1970 Chargers and that the 1968's representation is way smaller among toys - did you know that Hot Wheels still haven't made a '68 Charger model? it's an outrage! - I knew I was gonna built my own 1968 one day. The marvel set, of course, did a lot of work for me, but still I'm really happy with this mod. I have bought the Marvel 76173 set purely for this purpose; not only was it cheaper than 75983 2018 Dodge Challenger SRT Demon and 1970 Dodge Charger R/T , but it also felt way more versatile platform for mods.
-
So, this is my mod based on the pictures from @Kozikyo86 I have to say that the mods to this set were easy to make and as always the only difficulty was parts. I had to take apart a good number of sets, mainly for smooth tiles. However, In my opinion it was totally worth it. First off, the head, Here i just added some parts to smooth out the jaw and the front end. I also replaced the black window with red, I am not sure why Lego went with black, red looks much more menacing for a robot dog. I also changed the canopy and increased the size as per the mod. Next, the legs, again this follows the moc, this was just a case of adding smooth tile pieces and added a few extra parts to the top of the leg to create a more bulky outline. In addition i added a few plates on the inside of the legs, to bring the depth closer to the technic beams. I tried to bring these totally level but it looked too bulky. I also tried making using 2 stud wide smooth tiles to totally cover the legs, again, this looked too bulky. Next up, the sides of the AT AT. This was an area where plates were in short supply so I had to use what I could find. I followed as closely as I could and made sure that any studs showing looked like they were purposfully placed. I still think the panel over the front leg needs adjusting slightly. I also added some small pieces on the leg joints. These look great from a distance and are easy to remove, i think they add a little extra interest. Bottoms of the legs, I added some smooth quarter pieces on top of the round circles. I also increased the height of these by one extra plate. On the (real) thing these parts are really high. I also echoed some of the detail on the outide of the legs onto the inside sections. All in all, I am very happy with the final result and I think it looks great on display with my other star wars stuff.
-

[MOC][MOD] Unimog U 4023/U 5023
gvo25 posted a topic in LEGO Technic, Mindstorms, Model Team and Scale Modeling
Hello all, With the possible release of lego technic mercedes Zetros, I decided to rebuild my Technic unimog U400 into an unimog U4023. I could do this thanks to the recently aquired Claas Tractor Tyres and the abundant parts of the Liebherr - I find the Liebherr a fantastic set for parts - I modified the cab and I will integrate 2 control+ L motors and 1 XL control+ motor for drive. First I started with the cab, the chassis I'll do next The cab is build on the same base of the U400 cab The cab is not 100% true to the original, lack of various grilles, the front wheel arches are not integrated in the cabin, the air intake etc, but I find it a great start if i can say so myself. The cab features lockable doors Here is a foto of the cab on the original U400 unimog chassis with Claas Tyres. So the next project is to rebuild the chassis with the control+ motors and I also plan to rebuild the front bumper to match the U4023 bumper. Hope you liked it so far -

[MOC] Jose's Inn at Skull Rock (31109 B-model enclosed tavern building MOD) now finished in real life!
Murdoch17 posted a topic in Pirate MOCs
Ahoy there, and welcome to Jose's Inn, located on the scenic Skull Rock boardwalk just a stone throws away from the pirate port itself! This Inn has all amenities of (both ship-or-land-based) home, such as five cozy beds and a large wine cellar stocked with all best ale's, beers, wines and spirits. The food served is guaranteed by our cook Dan "Dysentery" McGee to be the best served in all the world's navies, with no-maggots* crackers a staple of the pre-dinner meal! We are also proud to feature twice-a-week amusements by "Davy Jones and the Cursed Immortals" as our house band on Monday and Friday nights. Come around for such hearty songs such as "Point of Know Return", "Wooden Ships", "Octopus's Garden", with "Hotel in Tortuga" as their usual closer. The rear of the tavern, with the crow's nest-like lookout on top. Inside and upstairs are the (cost is per night) beds. Downstairs is the tavern area. So come on down to Jose's Inn, where our famous waitstaff (Manfred the waiter on left, Rosemary the barkeep on right) will treat you like old friends! (*Crackers may or may not contain maggots. Resulting disease may vary; Check with your local barber for more details on whether the crackers may be safe for you!) Davy Jones and the Undead Immortals Band are, from left to right: - Cpt. Vanderdecken, on drums (cursed God on a trip round the horn of Africa, so God cursed him) - Corporal Punishment, on guitar (from a Spanish expedition to El Dorado) - Major Paine, on bass guitar (officer from the English Civil War) - Davy Jones, on vocals (made a deal with goddess Calypso to ferry souls to underworld) NOTE: Their instruments are made from ectoplasm and not visible to living beings, thus they are not visible here. MODEL NOTES: This tavern idea came to me in early February, and was built in late May, and is based off set 31109's B-model with the printed sign from set Pirates of Barracuda Bay (from the Ideas set 21332 number . I thought I should build accommodations for my pirate crews upon arriving at Skull Rock, and it will hook into the boardwalk via clips on both sides of the model's dock easily. The song list is the one I thought long and hard about... thinking of REAL songs with pirate or ship themes, however slight, was hard! However, the easiest one to add was because of @Professor Thaum and his awesome pirate-y rendition of Hotel California, as seen in the post linked to above in the actual song list and again here, because I love it so much. Comments, questions, suggestions, and complaints welcome! -
Hello everyone, 40448 is a pretty nice set, but I don't like it doesn't have functional doors. So I modified it to have a functional hood, doors, and trunk. Now the minifigures can get back the surfing board to surfing. The instruction is listed in my video. Welcome to take a look :)
-
 As a bike lover, I'm so glad that LEGO had released such a beauty beast - Ducati Panigale V4 R. But there are a lot of missing parts, so I'd added the following improvements:- brake levers- front fender/mudguard, but the movement of the forks will be limited- brake calipers- front turn signal lights- solid fuel tank- remove the 2 rubber bands, without loosing their functions- retractable kickstand- move the rear fender closer to the wheel The MOD is posted on rebrickable at https://rebrickable.com/mocs/MOC-62667/ Thanks for watching.
 -
Hi all. Until recently I resided only at the EB Technic subforum. For several reasons (which I won’t elaborate here) I’m taking a break from Technic. Instead I found joy in building City vehicles in LDD and improving them as I like. My main motivation is the nostalgia for the times I had a Lego city and some of the vehicle I had a fascination for as a kid. Small disclaimer: This all just for fun, I have no plans for building any of the following vehicles with real bricks. I would like to kick things of with the first series of vehicles: some utility trucks inspired by the cherry picker in the upcoming 60306 Shopping Street set. l liked the proportions, colors and general look of the original, but missed some play value. So I tweaked the nose, modified the cherry picker for bigger range, added outriggers and some tool storage. This is the result, next to its source of inspiration: The ball got rolling and I built two version of this vehicle, a contractor truck towing an air compressor and one featuring a snowplow. When the cherry picker and the contractor are at work it looks something like this: I hope you like them, I'm currently working on another series of vehicles
-

Lego 42123 McLaren Senna GTR™ MODs and improvements
Zerobricks posted a topic in LEGO Technic, Mindstorms, Model Team and Scale Modeling
I got my 42123 a month or so ago and while it's a very awesome set out of the boy I knew I had to give it a proper differential. Here's how I did it in LDD: In order to preserve the original engine position the differential is moved back one stud: A pair of 8 tooth gears transfer the power from wheels to the differential: And while I was at it, I also made the steering work using 8 and 24 tooth gears: I plan to make a detailed HOW:TO video tomorrow, so stay tuned. Meanwhile you can download the LDD here: https://bricksafe.com/files/Zblj/42123-differential-and-working-steering-wheel-mod/42123 Differential and Working Steering Wheel MOD.lxf -
Hello! Here I want to present you my MOD from the Lego 75318 The Child set. More photos on Flickr album
-
Decided to finally post all my Jedi Interceptor ETA-2 mods. All were made from either Set 75135, but most were made from set 75281. All the stickers you see were created by me using photoshop.
-
Lego WV Funicular 01 by Loslyn Loslyn, on Flickr Lego WV Funicular 02 by Loslyn Loslyn, on Flickr Lego WV Funicular 03 by Loslyn Loslyn, on Flickr Lego WV Funicular 04 by Loslyn Loslyn, on Flickr Seasons Greetings! Here is my Wintry Funicular Railway. I have re-purposed the Winter Village Train Station as an upper and lower station. The winch and winch housing 'level' of my modular mountain is built mainly from the Friends ski lift. I would most welcome advice on how to improve the funicular carriage, which uses some of the school bus pieces. I have not built a vehicle before, and found the different level axles very challenging, it works ok but is not robust or elegant! Lego WV Funicular 05 by Loslyn Loslyn, on Flickr I am pleased with the open platform in the lower station. The east face of my mountain is a WIP and will include ski runs. Obviously the mountain is vertically challenged! I have rebricked the fire station to make it shorter, and converted Santa's Workshop into a train station.
-
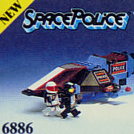
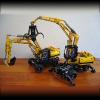
[NCS] 886 - Space Buggy, Remastered It is my chassis from [NCS] 6802 - Space Probe by changing the rear of the vehicle. Rear with articulated arm, 2 fire extinguishers, ore box, articulated arm control panel, 1 spaceman's hand tools, one antenna, 1 airtank. Front of the buggy with camera, sensors, binoculars, 2 walkie-talkies, a mini-satellite-antenna and control panel. [NCS] 886 - Space Buggy, Remastered by Horlack, sur Flickr [NCS] 6928 - Uranium Search Vehicle, Remastered [NCS] 6928 - Uranium Search Vehicle, Remastered by Horlack, sur Flickr [NCS] 6928 - Uranium Search Vehiclen, Remastered by Horlack, sur Flickr [NCS] 6842 - Shuttle Craft, Remastered A small remastered 6842-Shuttle Craft. Walkie-talkie, camera/weapon (depending on). On the Shuttle : reactors, engines, jet turbine, cannons, 4 front sensors, radiators, small antenna, 2 horizontal ailerons, 2 vertical ailerons, lifters, steering nozzle, rear computer control panel. Basically, I took a bit of inspiration from the Speeders of the Meta-Universe from Starwars. search keywords for all see : "type = speeders" https://www.starwars-universe.com/encyclopedie/vaisseaux_vehicules.php [NCS] 6842 - Shuttle Craft, Remastered by Horlack, sur Flickr [NCS] 462-897- Mobile Rocket Launcher, Remastered The Mythic 462-897 Mobile Rocket Launcher set was too small, so ... I remastered it in 2020 version. I had some difficulty with the Rocket, because I didn't want to use round bricks. I wanted something more elegant with cool building techniques. So I remade the rocket entirely in brickbuild. Ditto for the radar. In short, a little technical originality. I didn't want to be conventional. I used the elements of my old constructions to keep it homogeneous. The radar cockpit rotates 360°, and the radar itself also rotates, 360°. The radar cockpit is quite worked with control screens everywhere, as well as small joysticks. A walkie-talkie, a hammer and an adjustable wrench hang on it. I retake : - The chassis of my [NCS] 6802-Space Probe Remastered - The radar of my [NCS] 452-894-Mobile Tracking Station, Remastered [NCS] 462-897- Mobile Rocket Launcher, Remastered by Horlack, sur Flickr [NCS] 462-897- Mobile Rocket Launcher, Remastered by Horlack, sur Flickr The goal is to remain homogeneous in the architecture. Which is sometimes not an easy task. All the blocks are interchangeable, between all my creations. It's Modular, on a vehicle scale. Details of the rocket. Use of modified brick, by turning them 45 ° in the central body of the rocket, in order to build it "in hexagon" [NCS] 6901 - Mobile Lab, Remastered Always in the spirit of keeping modules of old constructions to reuse them. Just to swap modules, to make another MOC. Maximum standardization. The forward cockpit contains 2 repair utensils. It opens through doors on the side or through the central canopy. It is a resumption of the cockpit of the "1580 Lunar Scout, Remastered", by adding 2 ladders, and by rotating the roof sensors 180 °. The aft cockpit opens by rotating the canopy, or through the roof by eclipsing the radar. It contains 2 levers and 3 control panels which are in height. The chassis is also a recovery. An excavator entirely made in brickbuild. I did not find any existing parts, adapted to the scale of the vehicle, so a brickbuild is needed :) [NCS] 6901 - Mobile Lab, Remastered by Horlack, sur Flickr [NCS] 6901 - Mobile Lab, Remastered by Horlack, sur Flickr Well, I'm pretty happy with the look. I was worried that with my history of taking modules from other builds, it would result in a lousy mobile lab. Overall, "no". I had to be inventive on the rear 4x6 module block part. Once the seat and the astronaut were installed, I found myself stuck putting screens on him! And worse, not being able to get it out of the cockpit, lol Yeah, that's bad! Even blowing up the radar which is made up of 2 modular blocks, there was really little room. in fact, I had it kinda on my own, absolutely wanting a seat, which made it worse in a minimalist space. My neurons have overheated! Hence the idea of putting a canopy at an angle, from the top, to gain length space to take out the spaceman, but also to put control panels on the ceiling. And in fact, without wanting to, I took again in a different form, the horizontal rear opening of the 2 doors of the original 6901, but in a single vertical one at the rear. [MOC] [NCS] 6802 Space Probe, Remastered Bigger on a Buggy chassis with double probes. The robot deserved a 2020 update. :) - Head 3626bpb0034 : Minifigure, Head Alien with Copper Skin and Silver Eyepiece Pattern - torso 973pb1061 : Torso Robot with Silver Rivets - Arm 62691 : Arm Mechanical [NCS] 6802 - Space Probe Remastered by Horlack, sur Flickr [NCS] 6802 - Space Probe Remastered by Horlack, sur Flickr [NCS] 1580 Lunar Scout Remastered I kept the structures of my old creations, to remain homogeneous, and above all to make it "modular". The goal is to make all of my vehicles modular, and interchange the components between vehicles, to rebuild them as they see fit. Structure of the articulated Mini-arm found in, my [NCS] 6841 - Heavy Mineral Detector, Remastered Structure of the bumpers, which can be found [NCS] 452-894 - Mobile Tracking Station, Remastered I put a mini articulated arm at the back, in addition to the 2 mineral containers. The canopy is not green, because I will take over the cockpit structure for another construction. I couldn't put the chassis as low as the original, but overall I stayed in the "spirit" of the little scout utility vehicle. [NCS] 1580 Lunar Scout Remastered by Horlack, sur Flickr [NCS] 1580 Lunar Scout Remastered by Horlack, sur Flickr [NCS] 6841 - Heavy Mineral Detector Remastered I continue my series. I feel hot and boiling there! ☢️ A little Classic-space 6841 Mineral Detector Remastered, only bigger. I have tried to stay true to the functionality and structure of the original. Then added in all directions: Mini-articulated arm at the back, box to store minerals, box to crush minerals and analyze them, communication antenna, walkie-talkies, various small radars / cameras / front detectors at the front of the vehicle, small rock hammer, hand detector (which can be hung on the mini articulated arm) and various control panels. [NCS] 6841 - Heavy Mineral Detector Remastered by Horlack, sur Flickr [NCS] 6841 - Heavy Mineral Detector Remasterised by Horlack, sur Flickr [NCS] 452-894 - Mobile Tracking Station, Remastered Functional quality, of course :). Radar in tow that turns in all directions. The 2 small folding jacks when the trailer is unhooked. (A radar not horizontal, when the trailer tilts, it works much less well!) Radar on the roof of the vehicle which rotates 360 °. I really thoroughly styled this 2nd radar with sensors everywhere and tried to keep "the best spirit" with the 2 round transparent things. [NCS] 452-894 - Mobile Tracking Station by Horlack, sur Flickr [NCS] 452-894 - Mobile Tracking Station by Horlack, sur Flickr
-

[MOD] 31109s 3rd alternative: Skull Island additional Ship
Stoertebricker posted a topic in Pirate MOCs
Hi everyone! At last I got my own 31109 which I started building the smalles build first, the 3rd model: Skull Island. I have seen several nice MOCs and MODs around this set so far so I wanted to add one myself. I saw all those left over pieces and so started to build a small pirate ship only by using the left-over pieces. Here is what I came up with: Hope you like it. If someone has a good idea for improvement, then you have to be fast or build your own addition to the island! I want to tear everything down soon to build the 2nd model and then the ship -

[MOD/MOC] Lego City Mars Exploration - Heavy Mobile Lab
Horlack Bricks posted a topic in LEGO Sci-Fi
[MOD/MOC] Lego City Mars Exploration - Heavy Mobile Lab Built based on 2x 60225 Rover Testing Drive, 2x 60227 Lunar Space Station, 60229 Rocket Assembly & Transport on theme : Lego City Mars Exploration - Rover - Drone - 2 articulated arms: grippers and drill - Radar antenna - Various tools - Spacesuits / airtanks - Scientific analysis equipment - Microscope - 2 retractable berths - Cockpits NCS - Heavy Mobile Lab by Horlack, on Flickr NCS - Heavy Mobile Lab by Horlack, on Flickr NCS - Heavy Mobile Lab by Horlack, on Flickr ============================================ -

[REBRICK][MOD] Star Wars Z-95 Headhunter | conversion for display stand and landing skids
NerdYoda posted a topic in LEGO Star Wars
Hello everyone, some weeks ago I bought and downloaded the manual of the classic - and for me best - Z-95 Headhunter of the Designer Moppo (MOC-30461) from Rebrickable (link to the MOC: https://rebrickable.com/mocs/MOC-30461/Moppo/z95-headhunter/#parts). After I had all the parts together and could start building, I soon realized that the MOC was not suitable to be placed next to all the others in my showcase on an acrylic display stand, as the photo of the bottom side shows. In order to present it next to my other models and MOCs, I ordered a suitable Medium Angled Acrylic Display Stand with a 4x4 Top Plate from Wicked Bricks (https://www.wickedbrick.com/collections/vario-display-stands-1/products/small-angled-multi-use-display-stand-for-lego-vehicles), so that I could consider and implement the necessary modification of the original model after receiving it. The idea was to construct an additional carrier and to modify the bottom side of the Z-95 Headhunter accordingly, so that it will fit the model and the display stand at the end. To do this, a sketch had to be made to determine the parts to be ordered. Modification of the Z-95 Headhunter (bottom side). For the necessary modification you need the following parts: (Structure: Designation | part number | quantity | comment) Plate 1x4 2 Knobs | 4599498 | 2 Flat Tile 1x3 | 4558169 | 2 Flat Tile 1x2 | 4211414 | 1 Flat Tile 2x2 | 4211413 | 1 Once you have all the parts together, start by removing the three flat tiles 1x4 from the bottom of the Z-95. The same applies to the Flat Tiles 2x4. At the gained space you attach the above parts from the parts list in the arrangement shown on the photo. This way we realize a mounting possibility for the carrier, which will be built in the next step and serves as a bridge between Display Stand and Z-95 Headhunter. We need the dismantled Flat Tile 1x4 for the carrier, which we will focus on in the next step. The carrier. The carrier consists of two parts. We need the following parts for the carrier Plate 1x4 | 4211445 | 3 Flat Tile 1x4 | - | 1 | From the dismantled parts from above. Half Bow 1x2x2 Inv. | 6144138 | 2 | Half Bow 1x2x2 | 6028813 | 2 | Technic Brick 1x1 | 4211535 | 4 | Plate 1x2 | 4211398 | 2 Profiles Brick 1x2 | 4211383 | 2 | The construction is very simple and can be seen in the following picture. The result. The result is that the carrier sits very firmly on the display stand and the Z-95 Headhunter is also solidly attached to the carrier, so that nothing stands in the way of presenting the model on a shelf or in a showcase. The modification of the underside has been designed so that the hunter does not gain excess weight in one direction or the other to prevent accidental falling. So everyone can decide for himself whether the hunter tilts into a curve, rises steeply or descends. Besides the possibility to show the hunter on a display stand, I also implemented a modification for the attachment of landing supports. The realization is also very easy and fast with a little disassembly and assembly. Here you need - besides the above mentioned modification of the underside - the following components: Technic Lever 3M | 6331723 | 2 2M Cross Axle w. groove | 4142865 | 2 Fric/Stump with cross hole | 4158848 | 1 Fric/Forc with cross hole | 4210695 | 2 Plate 1x3 w/Stub/Along/U.P. | 4210882 | 1 Roof Brick 1x2/45° | 4211614 | 4 Flat Tile 1x2 | 4211414 | 2 Landing skid front. The assembly of the front landing skid is shown on the following photo. In addition, the two Technic Lever 2M, which were originally mounted, must be replaced by the Technic Lever 3M in order to attach the landing skid to the fighter. Landing struts underside. The landing skids of the underside are realized by two Roof Bricks each, which are connected by a 1x2 Flat Tile. Both are then attached to the 1x4 Plate with 2 Knobs on the underside (see above). Just align everything nicely and the Z-95 Headhunter is ready for presentation inside a hangar MOC, since it is now standing on its own landing struts: -
Dear All, after so many modding activities regarding the Crocodile it is hard to believe to be able to add something new to it. Don’t know whether this is any “new” – if not, moderators please remove this thread. (Also, please excuse my crappy photography - I am not good at this nor I believe is that tiny camera I have. Also, the LDView screenshots were made without much passion ...) Here it is though: I don’t like blind drivers. (I know that in many cases they are simply mandatory – steamers with more than four driving wheels attached via connecting rods and there we are, particularly on TLG's original curved track. I know only one exception from that: Ben Beneke’s BR23 LEGO replica: This one features 6 driving wheels; they are all flanged and each pair of three wheels is connected using LEGO Flex system parts. In addition, a split center axis is used so that the corresponding center driver is moving inward when going through curves – it is a brilliant solution) With the Crocodile though, the “noses” feature only two drivers connecting via one rod that in addition allows some articulation at the wheel - rod joint. So all-flanged drivers could have worked – unfortunately though, the pivot point of the bogie is not in the center but far out between cab and nose. Blind drivers are thus used accordingly for the pair of drivers closer to the pivot point. And I don’t like them. Particularly because my LEGO layout is rather crowded. So I decided to put some track up the sloped wall – with some curves to see the crocodile meander about – I mean this is what crocodiles do when preying … and then you just see it all the time: The blind drivers are “leaving” the track. Solution: Moving axles, as has been demonstrated in countless contributions here on EB and elsewhere. I decided to articulate the axle close to the cab, which requires narrowing the 4 wide frame – I used a two wide base (three would work as well, but I simply could not figure it out). (Note the red drivers on the side facing away from my chair - will try to get the black ones some other time - do they exist as separate part at all? Need to check) Here are some LDraw screenshots: Also, as friction leading to upward pointing forces goes up quite a bit, I made some room for some "weights", which are required to counter these additional forces. So there are 10 x 1 Euro cent and 4 x 50 cent Euro pieces in each nose, considerably increasing the value of my croc. Without the extra money, each nose weighs about 145 g (not including the pony truck) – with modifications plus the money 210 g. The values of my crocodile is thus retails price + 4 Euros and 20 cents. (Well, I had only 7 50 cent coins that day - the one in the photo is a Swiss coin of almost the same size ...) Further modifications: I simply did not like the coupling offset between noses and cab, tilting the nose downward to the front. This maybe intentionally. But when you look directly at the Crocodile's noses in front of your own nose all day – I had serious sleeping problems. Solution: Not using the 4x4 Technic brick + pin (popping off all the time drove me crazy as well …), but 1x2 plates with tow ball, which conveniently came with the extra 40411 set. That required some modding of the cab frame as well – in addition to the flanges of the new drives close to the cab needing more space for pivoting. So the slopes had to be changed. The color of the axle pins (whatever that color is - sand something) of the pony truck wheels also got me mad. They are partly hidden by the bley 1x2 plates with ladder, but again my eyes are level with the Crocodile … plus I also noticed that on most pictures I found on the web of the II version the “ladder” is missing at all. So I redesigned the truck as well, now featuring a 6L black axle and no ladder. And in addition many of the implementation of previously reported mods: @Sérgio's greebling (soo nice!!!) very slightly modified, and @Sérgio's solution for closing the gap between cab and nose (plus some very minor additions, see pictures above and LDraw files, link below). Want to add the wheel guards as well, as @Sérgio and @Duq have demonstrated. What is that "plate"/slope called, you are using? What else? Ahh – changed the frames to black, as suggested by others. Not entirely because the contrast between the black wheels and greebling is then gone. So I left a few parts in dark bley – simply to show (and: because I did not have them in black). And: I removed all but 2 rubber bands on the cab. None on the wheel of the noses. So here she is: That was it. As usual, I really learned a lot from you guys. Thank you all very much for letting me again dive into the LEGO world of bricks! Forgot: Yes, it negotiates curves (S type) very well. No idea about switches, but my crocodile will only drive back and forth "on the wall", disappearing behind books and magically reappearing … that needs some BLE programming – we will see. In that regard, a lot is going on in the Mindstorms Forum! (Here are the links to the LDraw files (really very rudimentary, just for my documentation. Deep linked - as the folder is not moderated yet http://www.brickshelf.com/gallery/ThorstenB/9VTrain/Crocodile/LDraw/nose_bogie.ldr http://www.brickshelf.com/gallery/ThorstenB/9VTrain/Crocodile/LDraw/ponytruck.ldr) All the best Thorsten
-
[MOD] Martian Colonization Base, 4x 60227 I transformed the lunar space station into a Martian land base for colonization The blocks / modules are perfect. I also made a small NPU with train part number 55768. It makes excellent glass roof/skylight :) Picture on high quality 4096x3072 on my flickr [MOD] Martian Colonization Base, 4x60227 by Horlack, sur Flickr
-
I always like to mess around with existing LEGO sets, especially with set 3177 (a.k.a small car). So I discovered a BMW M4 with a trailer made from another BMW M4 cut in half. I used that idea to make this thing:
-
For over a year I’ve been modifying set 75930: Indoraptor Rampage at Lockwood Estate, and I’ve finally finished it up. I started by completely removing all of the lab parts in the set. I wanted the place to be more accurate to the movie and feel way more like a mansion. Maisie in front of the Agujaceratops skull. The exterior with masonry bricks, a few new windows, a new doorway, and slopes on the roof. While the movie has lion statues, classic baby T. Rex statues take their place here. “Ms. Dearing, you’re early!” Interior overview Lego’s goblets of plants by the entrance were accurately gold, but unfortunately the real pot piece isn’t available in gold as of now. The right and left sides now connect to other rooms on the bottom floor. Sir Benjamin and the Dimetrodon When the chameleon was made in teal was when I barely realized the piece could be used for a Dimetrodon. I wondered if the rubber mohawk piece could be bent into shape and placed on it without glue or such, but in the end I had to cheat by cutting off a bit of it and using some blu-tack to keep the two attached. Iris and the Velociraptor This diorama came first and is what pushed me to get a Dimetrodon for the other diorama somehow. For both it took some effort to use a stick to move and click them in place between the wall and glass panels. Different angles Lounge area, at least one person who lives here has to like tea. Maisie’s room and the Library I debated turning that whole third floor into either Maisie’s room or Mills’ office, but her room had the door and there were enough unique decor ideas that ended up being the telescope, a nightlight, and a green classic T. Rex as a toy. I’m pretty proud of how the center of the middle floor turned out. I used the brown and black furniture to try to cover up as much of the tan wall as possible. The glass vases of plants worked out great. There’s no other piece like that landscape tile so I was very happy that it exists, and it ended up being an unintentionally accurate decoration upon looking at set pictures from the movie’s production designer Andy Nicholson. The ship in a bottle isn't present in the movie but it’s a reference to how there are docks close to the estate. That table is supposed to be the one found in Mill’s office that electronically displayed Isla Nublar and profiles of different dinosaur species. I didn’t think there was any way to represent that, but some friends gave me the idea to use a sticker from the Dilophosaurus outpost set, so that will be something to use eventually. The Indoraptor may be too big, but Blue can somewhat fit through that door and look like she opened it. Mills’ Office Retained that idea of a table and umbrella holder and gave his space a computer with a sticker from 75917: Raptor Rampage. I'll probably replace that map with the one of Isla Nublar printed on it eventually. I used the portraits of Thomas and Martha Wayne from the 1960s Batman set for both hallways. It would’ve been great if they officially had one for John Hammond. The new transparent piece from the DC collectible minifigure series allowed for that ammonite fossil to be displayed accurately. A simple bust build and a drawer with explorer items on top. Just a look at how the hallways now connect the entire bottom floor together. Eli Mills, Sir Benjamin Lockwood, Iris Carroll, and Claire Dearing. Thanks for looking!
-
Hi Folks, some weeks ago I presented my Millennium Falcon Moc here on this page. ...but after a while I wasn't completely satisfied with the endresult, so I broke it down (which wasn't easy) and began a rebuild. The new version is larger and I tried to get the outer proportions more like the original Falcon, same with the the interior layout. Length: 58 cm (75257: 44) Width: 40 cm (32) Hight: 14 (14) Weight: 4,1 kg. First some exterior images: