Search the Community
Showing results for tags 'INSTRUCTIONS'.
Found 251 results
-
This is my version of the iconic RV from the hit television series Breaking Bad. The Fleetwood Bounder, better known as the RV, was a motorhome that served as a mobile laboratory in which Walter White and Jesse Pinkman cooked methamphetamine. Jesse nicknamed the RV "The Krystal Ship." The model includes detailed interior, and has an opening side door. I created the model in Stud.io and then ordered the pieces to build it in real life :) Hope you like it, contact me if you are interested in gettin' the stud.io file and offer me a beer *minifigs are custom
-
This is the final version of my Imperial TIE Fighter based on original LEGO sets. I've made PDF step-by-step instructions as well. If anyone would like to build this one, instructions are available at rebrickable.com for 6,99 Euro here: https://rebrickable.com/mocs/MOC-19900/barneius/imperial-twin-ion-engine-fighter/#comments Imperial TIE Fighter Lego MOC / MOD by barneius, on Flickr Imperial TIE Fighter Lego MOC / MOD by barneius, on Flickr Imperial TIE Fighter Lego MOC / MOD by barneius, on Flickr Imperial TIE Fighter Lego MOC / MOD by barneius, on Flickr Imperial TIE Fighter Lego MOC / MOD by barneius, on Flickr Imperial TIE Fighter Lego MOC / MOD by barneius, on Flickr Imperial TIE Fighter Lego MOC / MOD by barneius, on Flickr Imperial TIE Fighter Lego MOC / MOD by barneius, on Flickr Imperial TIE Fighter Lego MOC / MOD by barneius, on Flickr Imperial TIE Fighter Lego MOC / MOD by barneius, on Flickr Imperial TIE Fighter Lego MOC / MOD by barneius, on Flickr Imperial TIE Fighter Lego MOC / MOD by barneius, on Flickr
-

Instructions from the Getting Started With LEGO Trains book
JECook1997 posted a topic in LEGO Train Tech
Hello everybody Does anyone here have the book 'Getting Started with LEGO Trains' by Jacob Mckee from 2003? If so, Would they be able to post a PDF of the instructions and parts list for the reefer boxcar? I've seen pictures of it and would love to build one myself but paying $60 for the book is a no go. Also, if the other instructions were posted this thread could be a good reference for anyone else who would like to build the other models from the book. Thanks in advance -
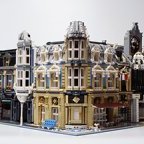
Instructions available here. I'm sure I'm not the only who on one hand appreciated the different direction Lego took with the DD design, but on the other hand found it hard to incorporate seemlessly into an existing town layout, since the architectural style is so distinct. So I set out to rebuild the set in a style more resembling the other modulars. And the result is the Internet Café Corner Modular. I almost gave up halfway through when I realized there wasn't enough bricks to build all the side walls I wanted, but in the end I managed to scrape together enough pieces to build everything I set out to. The first floor contains a couple computers to use for internet access and a small café with free Wi-Fi. The second floor has some living space and the rooftop a small garden.
-
[REVIEW] 8450 The Mission
Lost_In_Noise posted a topic in LEGO Technic, Mindstorms, Model Team and Scale Modeling
8450 The mission was released in 1999, and contains 643 pieces. Although it was originally intended as an expansion set for the cybermaster series, it is mostly listed as a Technic set. Being part of the cybermaster, it is also the biggest set by far in the Competition subtheme. It was 60$ on release, and I ended up paying $300 for mine MISB. I have no idea what it's worth, because it's been such a long time since I saw any for sale. The box The box is of a theme similar to the 8448 and 8458 sets, with silver/grey and yellow colors. The front shows the main model, and the flip-top lid unveils the disc needed to see the instructions, as well as the features of the plane. The weird-looking guy in the upper picture is commander Jack. The boss tells him to get ready for his new, dangerous mission. I'm scared already. It takes me a while to dare to open the box. Once opened, the box has a plastic inlay which holds the disc with instructions. Here you can see all the brochures and various papers included. Maybe this was the reason for the lack of paper instructions. There is a value coupon, a 1999 service catalog with part numbers, a mindstorms booklet which presents all the sets of the year, and TWO sticker sheets. The instructions Well, what can I say. The main reason why I got into Technic was to get away from the computer. Then this happens. Not only are the instructions supplied on a compact disc which can only be run on a win98 machine, they are also with tiny, tiny steps just to make you watch the animated menu. 376(!) steps for the main model, and 195 for the alternate. I figured some people may get frustrated(like me) over this, so I've uploaded the whole instruction set to my Brickshelf folder. Additionally, when I was building this set I found a lot of errors in the instructions, misaligned pieces, wrongly oriented connectors and so forth. Even wrong pieces were rendered. Therefore I had to pay extra attention when building this set. Still, there is a small booklet included which contains axle measures and an introduction to the software. The parts The parts come in nicely numbered bags from 0-10. Once opened, these parts stand out from the rest of the friction pins, beams, axles and bricks: There is a dampened spring included. This is a 1 x 11 link in black. Only seen in this set, it fetches 2$. A lot of Dark Turqoise parts are seen here, and most of them are also featured in the other CyberMaster and ROBOLAB sets. This is a Technic Ball Joint 2 x 7 with 2 Ball Joints, which only comes in this Technic set. It is mostly seen in the Competition range. Tubes and flex axles helps forming the lines of the plane, and the 19L axles seen at the far right are unique to this set. If you're looking to buy some, they come at 15$ a piece. Probably one of the rarest parts availible. Okay, that's it for the parts. Moving on to the build, starting with... A model: The Mission The main model has four sub-assemblies which are combined into a big plane. The build starts with the front canopy, which is not a particularly interesting build. The yellow double pins in the back is for connecting it to the rest of the aircraft later. The Technic slope/wing is stickered with some handrests with controls. The canopy is made with axles and connectors. It has some stickered instrument panel in the roof. Two big panels are used to close up the sides. Now for the main part of the fuselage. The links are used to synchronize the landing gear. The landing gear is powered by a damped spring. Next is the mount for the canopy. You can see where the yellow double pins will fit. A set of 4 16T gears transfers the drive from the spring driven axle and forwards. The yellow thin liftarm with the axle and bush pushes the damped spring so that it expands and turns the two 16T gears.Here is the completed landing gear assembly. The wheels turn against eachother into the hull. The damped spring is nearly invisible when the landing gear is retracted. Some aesthetic details on the main bodyusing flex axles and ribbed hoses improves the models look. The rear wing is made of axle connectors and regular axles. Another part finished. The only thing remaining are the wings. The engine rotates freely in a rack which also supports the wing. The engine is hidden away behind a panel with a sticker showing the fuel intake and other features. The left wing is made the same way. This plane has several attachments; a winch, a drill, a bomb dropper and a claw. The bomb release mechanism works by turning the lever, which returns to its original position with aid of the rubber band. Next is the grab arm, drill and winch. The arm makes extensive use of the bionicle pieces to achieve full freedom of movement in all directions. The claw closes by use of 2 rubber bands. The drill is a worm gear on an axle driven by a knob. The winch is operated by cranking the yellow axle and pin connector, and the rubber band provides stopping power. The last thing to be done is combining all the different chassis parts into the finished plane. The finished model is a beauty! Features Opening canopy, which fits a technic figure. The wings are synchronized with the landing gear. This plane lands like a harrier. The different attachments can be mounted on the front of the plane: Winch Dropping bombs Drill and claw The claw is capable of lifting the 8209 Future F1, weighing 72 grams. Comparison 9394 Jet Plane: 8855 Prop Plane: 8480 Space Shuttle: B model: Chopper The chopper in this set consists of two smaller builds, which are combined near the end similar to the main model. We start with the bottom. An axle with two 3L axle and pin connectors runs through the centre. The landing wheels are placed, and a rubber band provides suspension. The canopy is made of axles and connectors like the main model. Sadly, it does not open. First part of the assembly is complete. The yellow Double pin allows it to be attached to the body later. The rear base starts with the input axle for the main prop. It has a 12T bevel gear on it. Next is the retractable landing gear, driven by a dampened spring. A set of cams pushes the spring so that it expands. Here is a pic of the function. As the axle with the cams pushes the spring away, it expands, turning the 4 16T gears. This assembly extends the prop driveshaft, and adds another connecting point for the canopy. The propeller itself is made of axle connectors and flex axles. Now that the rear part of the model is completed, we can join the two pieces. This is a very odd looking chopper. It has wheels in the front, but the claw in the back prohibits it from rolling. Features Turning either of the yellow knobs rotates the main propeller. Pushing the dampened spring activates the grabbing arm. The arm is very strong, and was able to lift this 8294 Excavator. It weighs about 1 kg. It is minifig compatible, and seats one in the cocpit. When he's tired of flying, he can disconnect the cabin, and drive around the area. The buggy has suspension, but no steering. Comparison 8068 Rescue Helicopter: 8412 Nighthawk: Conclusion As strange as it may look and function, this is my new favourite plane. It's swooshable, even by a kid's standards, and the various attachments makes for a nice selection of playing scenarios. A big bonus is that the landing gear works by a push of a button. The ability to seat a Technic minifig is always nice to see, and the attachments are a nice touch. I know this is suppose to fit in with the Cybermaster sets, but since I don't have any I'll just have to compare this to the other planes I have. I'm a bit puzzled by the bomb dropping feature, since Lego toys are almost never violent, except when it fits the certain theme. From a innovating perspective, the building is also an interesting one, making separate assemblies and combining them in the end. This is fairly common nowadays, but when this set came out, it wasn't. Too bad I can't say the same about the instructions. For the alternate model, it could have been its own set. Diving in and grabbing something with the claw is great fun, especially since it is able to lift something big. Comparing the looks to other Technic planes, this is definately one of the better looking of the bunch. Overall, it stands nicely out in my collection with the black/green/yellow color scheme. The functions aren't all that special, but the tilting rotors are better executed than the 8434 Aircraft. Overall you can say that these two sets are pretty much alike, but this one is better. Get it if you can. You wont regret it. Hope you enjoyed the read. As always, source pics are here. The instructions can also be found there. Look in the "misc" folder, you will find the pics and a PDF for the booklet and one for the instructions. -
Hi everybody! I've decided to start sharing a few ideas and tips for building some of my own creations - starting with this minifig-scale drinking fountain. Why not have a go?! Uses less than 30 pcs.... https://flic.kr/s/aHsmqDoDnP (click this link, not the pic, for full instruction pics)
-
I've modified the motorcycle (part 52035), used since 2005, in three different ways - basic, long axle, and reverse trike. Expect an instruction video for the reverse trike to follow.
-
Finally finished this after 18 months of tweaks and fussing around. Due to requests, you can get the building guide/instructions here: http://www.brickmonster.toys
-
 Backstory: Ever since I emerged from my dark age I was mesmerized by Designer Han’s models – especially dragline excavator. I like all kind of excavators so I was slowly gathering pieces for it to buy instructions and build it. I have realized over the time that building from instructions is not entertaining for me and that I can build almost anything if I have the drive (and parts). I still admire Han’s models, but I know that I would be disappointed because of his design choices. Don’t get me wrong – I still like his work, but I don’t want to build it anymore. Long story short – I wanted my own dragline excavator with truck transport. Preparations: First of all I had to pick a reference machine, in this case Sennebogen HD 670 tracked crane. Why this one? Sennebogen because it is not very known and because of this fantastic die cast model: http://www.cranesetc.co.uk/library/rosreviews/203/203review.htm . Such models are very good because you can see the machine from a lot of angles and you can replicate small details from them more easily. The model is however 690HD and I have picked smaller 70 ton 670HD. This is because of whole concept with transport truck. The scale is dictated by wheels, in this case by wheels on truck and wheels on excavator as well. Since TLG is making only two wheels for tracked vehicles it is simple choice. With bigger tracked wheels the scale is 21,5:1, meaning that 49,5mm tires for truck are perfect fit. 690HD with the same wheels would be closer to 23:1 and we do not have truck wheels for this scale. Features: Undercarriage Real crawlers have either retractable tracks or dismount them completely when transported. In order to achieve that I had to place all motors to superstructure and use single battery box. As you can see from datasheet, the tracks can be retracted so they are not wider than body. To replicate it I have built it in such way that both tracks are very easily detachable from central piece that can be swapped for narrow one. Replacing this central piece doesn’t take more than few minutes, it is only necessary to take apart two liftarms on each side as seen in the picture. Another stud or two narrower tracks would be probably better, but I would certainly lose the ability to swap it easily. All four wheels are driven by two shafts from superstructure connected to M motors; final ratio is 9,265:1. Wide track Narrow track IMGP5236 Superstructure The superstructure holds six motors (4x M-motor and 2x L-motor) – two M motors are for tracks, 1x M motor is for slewing via worm gear on turntable (56:1) and rest are for winches. Slewing gave me quite a headache because of the desired gear ratio. The real machine can rotate up to 4 revolutions per minute so I wanted to replicate that. In the end the only viable solution was to use older turntable driven by worn gear without further gear reductions. I use train PF remote to start and stop smoothly. The usage of older turntable meant I had to shorten boom because of its less stability as it bends significantly more than new type. The A frame is fixed – the boom is raised by pulling floating pulleys with attached ropes. Bigger machines uses movable A frame where the angle between A frame and boom is fixed. The A frame can be folded down when the crawler is transported. A frame is Pythagorean triplet with beams length 29-21-20. There are 3 winches for boom raising, bucket lifting and bucket drag. All three are equally geared 5:1. Counterweight is detachable as on real machine, it of course holds standard Technic battery box. Cabin features opening doors and foldable walkway. IMGP5220 IMGP5222 Ready for work side by side Boom Booms on real machines are made out of several truss elements bolted together. There is usually lower boom section that stays on crawler when transported, then are intermediate sections in various lengths (2,9m, 5,7, and 11,2m) and then headpiece section. I wanted to replicate this kind of boom so I focused on correct shape of each section and size as well. This mean that the lower boom section is pyramid-shape: 5x1 studs wide at crawler side and 9x9 studs at opposite end. I guess not all connections on it are TLG legal, but everything fits nicely without any stress and thanks to it truss-like constructions it is very sturdy. The same principle follows at intermediate section, in my case the shortest one (2920 mm => 17 studs). Boom ends with headpiece that is quite similar to lower section but ends with two pulleys. They are of course not real pulleys as TLG doesn’t make anything free-spinning in that size but size was more important to me. The drawback of such modular boom is its weight; it is almost double the weight of boom that would be built in one piece so I had to stay low with total length. There are also two pulleys serving as fairlead so the rope dragging the bucket goes to winch from top, the fairlead pulleys are mounted on lever so they stay in same position regardless of boom angle. Headpiece side comparsion boom Bucket It is brick-build and its size is only guessed from pictures and its volume, I was unable to find any datasheets with buckets. Bucket Greebling, look and difficulties As usually I pay a lot of attention to greebling like railings, mirrors, cabin shape, lights and other small details. I really had fun with this model as it is quite packed with it. The biggest obstacle during the build was constant lack of parts. Together with truck and low-loader it is reaching 4000 pieces and I was even running low on both 2l and 3l pins once. I had selected yellow color at the start, green would be certainly better for Sennebogen, but I already had some yellow parts and green technic is very expensive. Beside that I have seen pictures of Sennebogen machines in various colors like yellow, red and blue, so I think it is fine. The whole internal build is very symmetric; the only asymmetric is gearing on left side for slewing and gearing on right for drag winch. IMGP5223 Playability Honestly, playability sucks. There is one important feature of real dragline omitted – free fall winches. Without it you can place bucket too close and drag it only few centimeters. Grabbing anything with the bucket is also very difficult. Drive and slew works very well though. Truck The truck is very loosely based on this real counterpart: http://www.ditzj.de/html/en/trucks/scania/wiesbr500.html i.e. 8x4 tractor with short wheelbase, 2 steered axles, high cabin and tower behind it. It is driven by L-motor and servo is used for steering. Both steerable axles use the same configuration like in my previous truck – 5l steering arms and hubs with 3 ball joints. There is of course Ackermann steering and different angle on both axles. Rear axles are connected to fake V6 engine. Cabin features two seats, IR receiver between them and steering wheel. Whole cabin can tilt to reveal engine. Gear ratio from L motor is 7:1 because it is meant to haul quite a lot of weight. The truck can be easily modified to low cabin version as the high roof is only held by four pins. The tower is too high then so it is replaced with bare battery box. The whole truck is quite heavy on front and it have sometimes trouble with driving when it is without load so it is possible to add ballast box on its fifth wheel. There is also coupling for draw ball trailer, but it is not meant for pulling. I think the most difficult part of design was not to copy my previous truck. The cabin is still quite similar, I’m aware of that, but in the end I’m happy with other small details that makes it different – flags on front, mud flaps, detachable roof, etc. IMGP5248 IMGP5249 Working fake engine Low cabin Ballast box Low-loader Low loader with detachable gooseneck is based on Motomat’s trailer because in the end you realize there is only one viable way how to build it – two technic beams with plates between. A little challenge was how to mount wheels without using single axle for both sides. The frame between wheels can be only 4 studs wide meaning the axle can be supported by 2 studs. I have used 8L axle with stop supported by thin liftarms. In the end the wheels are supported enough, they can rotate freely and you can take them apart without axle. IMGP5260 Lowloader with detachable gooseneck Instructions I have made instructions for dragline and truck as well. Lowloader will follow soon. Both will appear on Rebrickable soon, I will add link here later. Due to amount of work it took I will sell instructions for dragline for 10€ and truck for 5€. Lowloader will be free as it is not something trully mine. Both instructions are as usually PDF generated by LPub3D. Especially the dragline is compressed into as few steps as possible, with only 115 pages (~2400 parts), so if you don't like TLG instructions for beeing too easy this might be something for you. Dragline rebrickable link: https://rebrickable.com/mocs/MOC-17193/Ivan_M/dragline-excavator/#parts Video & gallery Whole gallery is here: https://flic.kr/s/aHskDJiTT8 And one crappy video for end:
 -
[MOC] Classic Jaguar Roadster (with instructions)
martijnnab posted a topic in LEGO Technic, Mindstorms, Model Team and Scale Modeling
All, After more then 2 year without working on a new Technic MOC I am now ready to present my new project: A classic roadster based on a Jaguar XK120. I managed to built it in white and separate the frame and the bodywork completety. Due to this there is also a frame version with full RC. It can be build in red and black as well without major adaptations. More pictures, video and instructions to follow.... Rebrickable instructions: https://www.rebrickable.com/mocs/MOC-10690/martijnnab/classic-jaguar-roadster/#comments Blog from The Lego Car Blog: https://thelegocarblog.com/2017/11/02/it-doesnt-matter-if-youre-black-or-white-2/ Blog from The Brothers-brick: https://www.brothers-brick.com/2017/11/09/jaguar-roadsters-technical-challenge/ -
So far, only ONE AFOL has given me the right answer :-) Hi everybody, This one is a real challenge! After the quiz N2 that we had as warm-up, here we are with a harder quiz. I am really curious to know if anybody knows or can find the answer of this one. I would consider a prize for the winner(s). If you are sure you know the answer, please "DO NOT SPOIL", but only pm me. But if you have any guess together with some reasons for your guess, you are very welcome to comment under this post so that we can discuss about it and who knows, maybe we get multiple responses. Here is the question: WHICH INSTRUCTIONS have MORE THAN ONE VERSION? The sets in question are 7710, 7715, 7720, 7722, 7725, 7727, 7730, 7735, 7740, 7745, 7750, 7755, 7760. I believe you cannot find the answer by googling (I couldn't). Good luck :-)
-
I have seen two variations of instructions 7860: 1) For the second release 1982-87, the code of instruction is 113483 ©1981. In the instructions, we can see this variation of "Straight Conducting Rail with Rail Interruption" 3242apb01: https://www.bricklink.com/v2/catalog/catalogitem.page?P=3242apb01&idColor=9#T=S&C=9&O={"color":9,"iconly":0} 2) For the third release 1988-94, it is 120622 ©1981 in which we can see this variation of "Straight Conducting Rail with Rail Interruption" 3242bpb01: https://www.bricklink.com/v2/catalog/catalogitem.page?P=3242bpb01#T=S&C=9&O={"color":9,"iconly":0} 3) What about the first release 1980-81? Is there any instructions for it (do you have it?) in which we can see "Straight Conducting Rail with Rail Interruption" 3242a: https://www.bricklink.com/v2/catalog/catalogitem.page?P=3242a&idColor=9
-
I made Instructions for my MOC: 10211 Grand Emporium Alternative buildwith the theme of "Wedding Hall"You can make this Alternative build only using parts of 10211 lego set, without any extra bricks.Model design, Instructions by Inyong Lee Store pages: https://www.ebay.com/itm/Lego-10211-alternative-build-instructions/132595113153?hash=item1edf48dcc1:g:Vs4AAOSwdMBa3hef https://rebrickable.com/mocs/MOC-14248/InyongBricks/10211-alternative-build/
-
Lego MacPherson Strut Instructions
Legotyres posted a topic in LEGO Technic, Mindstorms, Model Team and Scale Modeling
It's only photos, but it is a design I've been working on for quite a while now. It will work with the standard 7 long steering beam and Track Rod 6mm, it even gives you Ackerman Steering. 17.5mm, 34mm diamiter rims. So that should cover all 1:10 scale models. You can swap the large spring for a smaller and uses these parts at the top one with parts x1 "Tube with double Ø4.85", x1 "Cross Block/form 2 x 2 x 2", x1 "3 with arch with Knob & Shaft Ø3.2", x2 "Technic Lever 2m" and x2 "Axle 3mm with Stoppers". I have only shown instructions for one side, it should be self explanatory on how to make the opposite side Please find photos Here! Lego McPherson Suspension Enjoy. -
Hey all, With the release of Go Brick Me, I’m looking to use the bases of the two figures you get plus extra parts in my collection to closely approximate the Comic Con Brickheadz to complete my collection. I was searching for the instructions for any of the convention exclusive Brickheadz online and could only find a Reddit post for 41498 Boba Fett and Han Solo in Carbonite. It looks like the inventories of a few of them (namely the early DC ones) are on BrickLink but I can’t seem to find any instructions besides one YouTube video showing how two of them are made. Thus, does anyone with the sets listed below happen to have the instructions they could share by any chance? Much appreciated! 41490 41491 41492 41493 41496 41497
-
Hello good people and welcome to my MOC Instructions Shop! First of all, a brief introduction: My name is Art, I am a LEGO enthusiast from Russia, known across the interwebs as TheMugbearer, TheDudeWithACup and CrashSanders. I do digital LEGO MOCs for several years now, a it has become a little bit more than a hobby since then. Several years ago I made a LEGO CUUSOO project about the FTL: Faster Than Light, an award-winning rogue-like videogame. While the project itself didn't get approved, it gained enough attention so that there was a demand for the instructions of the models that were proposed in the project. For this purpose I have recently joined forces with a skilled PDF maker to bring forth the long-awaited instructions booklets. Most of the MOCs that have been committed to PDF instructions are microscale spaceships, mostly because of the FTL project. So here's what I am offering at the moment: (disclaimer: the offered goods are PDF instructions, the preview images on Cubebrush serve only as a demonstration) FTL Bundle MEGA This is the "ultimate" bundle containing instructions for all of the micro-ships from "FTL: Faster Than Light". Cubebrush link: http://cbr.sh/9hgp8h Price: $25 Contents: PDF Instructions and Bricklink Wishlist XMLs of the following models: LEGO FTL #001 "The Kestrel" (Kestrel Cruiser, treated as a free bonus) LEGO FTL #002 "The Gila Monster" (Mantis Cruiser) LEGO FTL #003 "The Osprey" (Federation Cruiser) LEGO FTL #004 "The Nesasio" (Stealth Cruiser) LEGO FTL #005 "The Torus" (Engi Cruiser) LEGO FTL #006 "The Adjudicator" (Zoltan Cruiser) LEGO FTL #007 "The Bulwark" (Rock Cruiser) LEGO FTL #008 "The Man Of War" (Slug Cruiser) LEGO FTL #009 "The Kruos" (Lanius Cruiser) FTL Bundle #1 This smaller bundle offers three out of eight micro-ships from "FTL: Faster Than Light" Cubebrush link: http://cbr.sh/gc7uq3 Price: $9 Contents: PDF Instructions and Bricklink Wishlist XMLs of the following models: LEGO FTL #001 "The Kestrel" (Kestrel Cruiser, treated as a free bonus) LEGO FTL #003 "The Osprey" (Federation Cruiser) LEGO FTL #004 "The Nesasio" (Stealth Cruiser) LEGO FTL #008 "The Man Of War" (Slug Cruiser) FTL Bundle #2 This smaller bundle offers three out of eight micro-ships from "FTL: Faster Than Light" Cubebrush link: http://cbr.sh/30jvhv Price: $9 Contents: PDF Instructions and Bricklink Wishlist XMLs of the following models: LEGO FTL #001 "The Kestrel" (Kestrel Cruiser, treated as a free bonus) LEGO FTL #005 "The Torus" (Engi Cruiser) LEGO FTL #007 "The Bulwark" (Rock Cruiser) LEGO FTL #009 "The Kruos" (Lanius Cruiser) FTL Bundle #3 This smaller bundle offers two out of eight micro-ships from "FTL: Faster Than Light" Cubebrush link: http://cbr.sh/wwl1f2 Price: $9 Contents: PDF Instructions and Bricklink Wishlist XMLs of the following models: LEGO FTL #001 "The Kestrel" (Kestrel Cruiser, treated as a free bonus) LEGO FTL #005 "The Torus" (Engi Cruiser) LEGO FTL #007 "The Bulwark" (Rock Cruiser) LEGO FTL #009 "The Kruos" (Lanius Cruiser) Additionally, every FTL ship PDF is available separately for $5 each (except for The Kestrel). See my Cubebrush store for more: https://cubebrush.co/themugbearer Police VTOL This PDF booklet is the result of a selection made by one of my Flickr followers. The original digital MOC can be found here: https://flic.kr/p/fwwV4D Cubebrush link: http://cbr.sh/uko63k Price: $15 Contents: PDF Instructions and Bricklink Wishlist XML of the Police VTOL model. Light Tank Bundle This bundle of instructions was an experiment proposed by my partner: two models inspired by a timeless RTS classic "Total Annihilation" bundled together in a "battle pack". Cubebrush link: http://cbr.sh/n7o6is Price: $10 Contents: PDF Instructions and Bricklink Wishlist XMLs for the following models: Blue Light Tank (inspired by ARM Flash) Red Light Tank (inspired by CORE Instigator) If you want to keep up with the updates to my products, please consider following me on Cubebrush! Feel free to ask any questions about my store or my products here or via PM. Thank you and have a nice day!
-
Evening everyone, New member and first time poster here so apologies if this is in the wrong section. Im currently building a producing instructions for a model and have use a buffer exchange command to show the placement of a tile in the main build. Now Ive followed the information from Holly-wood.it and the working with pub google site but I still have an issue. The 'hovering' part appears with the arrow in the correct location but on the next step it recounts the piece in the PLI so you end up with a extra piece. Is it something simple that I've missed or arranged incorrectly ? The code looks correct but Im not sure. Here is the code: 1 0 420 -8 -460 0 0 1 0 1 0 -1 0 0 3068b.dat 1 0 460 -8 -460 0 0 1 0 1 0 -1 0 0 3068b.dat 0 STEP 1 0 -20 -8 -430 -1 0 0 0 1 0 0 0 -1 3069b.dat 1 0 60 -8 -390 -1 0 0 0 1 0 0 0 -1 3069b.dat 1 0 180 -8 -370 -1 0 0 0 1 0 0 0 -1 3069b.dat 1 0 -100 -8 -370 -1 0 0 0 1 0 0 0 -1 3069b.dat 1 0 380 -8 -380 0 0 1 0 1 0 -1 0 0 3068b.dat 1 0 420 -8 -380 0 0 1 0 1 0 -1 0 0 3068b.dat 0 BUFEXCHG A STORE 0 GHOST 1 0 -270 -64 -470 0 0 1 0 1 0 -1 0 0 3069b.dat 0 MLCAD ARROW 0 -250 -18 -470 0 1 0 -1 0 0 0 0 1 10 4 12 40 3 30 1 2 4 4 0 MLCAD SKIP_BEGIN 3 4 -250 -6 -470 -255 -21 -470 -250 -16 -470 3 4 -250 -6 -470 -245 -21 -470 -250 -16 -470 3 4 -250 -16 -470 -252 -18 -470 -248 -18 -470 4 4 -252 -18 -470 -252 -58 -470 -248 -58 -470 -248 -18 -470 0 MLCAD SKIP_END 0 STEP 0 BUFEXCHG A RETRIEVE 1 0 -250 -8 -460 0 0 1 0 1 0 -1 0 0 3069b.dat 1 0 460 -8 -370 -1 0 0 0 1 0 0 0 -1 3069b.dat 1 0 260 -8 -430 -1 0 0 0 1 0 0 0 -1 3069b.dat 1 0 340 -8 -390 -1 0 0 0 1 0 0 0 -1 3069b.dat 0 STEP 1 15 -120 -8 -430 1 0 0 0 1 0 0 0 1 4162.dat 1 15 -80 -8 -410 1 0 0 0 1 0 0 0 1 4162.dat Thanks in advance
-
Hello again, I am looking for instructions of 753, 754 and 755. Didn't find them online. Do you know from where I can download them or do you have them?
-
Hello Guys ! I show you my MOC of the TIE Fighter with the STARWARS REBELS Design. I'm inspired by the awesome "TIE Fighters short film" on YouTube too. I'm trying to be the more "accurate" I can! I'm proud of my cockpit design which has a very good shape! :) I regret just a small space between the canopy and the rest of the cockpit. Moreover, the panels ("wings") are relatively heavy for the structure. The consequence is this creation is NOT for playing! Because the structure is a little bit too fragile for that! If you are interested, I sell the building instructions (PDF + Partlist.xls) 5 euros. I have to finish these instructions. My instructions are not free to help me a little to continue to build other things and to "protect" my work... I hope you understand. My website : https://bricksfeeder.wixsite.com/bricksfeeder On Rebrickable : https://rebrickable.com/mocs/MOC-10510/BricksFeeder/tie-fighter-starwars-rebels-design/#comments UPDATE (30/10/2017) : With RUSTINIDIEL, we found a way to improve the strength of the structure. Now, You can grab the TIE By the cockpit (not by just one wing) and put in on the air and different positions. BUT be careful ! You still have to take it not as a brute or too quickly. This TIE is still made for dioramas, or collection (static positions) An updated building instructions was made. For the person who already bought my instructions, I will send the updated version for free. :) My YouTube Video : See you soon! :) You can see my other topics : ITT : [MOC] ITT (Imperial Troop Transport) from SW Rebels TIE Advanced Prototype : [MOC] TIE Advanced Prototype (aka Inquisitor's TIE) from SW Rebels A-Wing (McQuarrie / SW Rebels Design) : [MOC] A-Wing (McQuarrie / SW Rebels Design) Batman's Batmech : [MOC] Batman's Batmech Speeder Bike 614-AVA : [MOC] Speeder bike 614-AvA
-
Note: this is a copy of a thread in the Technic section - it was originally started there, but it was suggested to me that folks at SW section might be interested as well. The original thread is here: So, I want to share with you complete and free instructions for modding the UCS BB-8 set to be fully RC. And by fully RC I mean: it can drive, steer, it has rotating side panels (so it appears to be rolling when viewed from side) and retains the wobbly head. Ths instructions are available at http://sariel.pl/downloads/ and while they're completely free, you may want to consider a small donation if you feel it is earned at https://www.paypal.me/sarielpl Here's the video followed by a link to photos and description: More: http://sariel.pl/2017/12/75187-bb-8-ucs-rc-mod/
-
In the interest of trying to compile one location, (and also a place for people to ask for new ideas) I figured this post could serve as the one stop shop for people looking to purchase instructions for non-official Lego Modular instructions. [For the record, this isn't a For Sale topic, but a place for people to most places for instructions to be purchased.] So with that being said, what are the places for people to purchase Modular Instructions? ______________________________________ www.brickcitydepot.com www.brickbuilderspro.com
-
Hey guys, I’m searching MOC instructions and LXF files for my near-future huge Lego city. I plan of course doing some MOC modulars but there are some very nice MOCs created by other people! I made a list of all the designers I found, I hope that list helps some other people who search modular instructions! Here are the must-have instruction designers and instructions I listed (with no particular order): -Brick Ative (by @lookl and @Pakita) -SteBrick (by @stef2280) -Andrew Tate (instructions on sale by @2013-lego) (by @snaillad) -Sheo (by @sheo) -Ryan Taggart (by @ryantaggart) (instructions on www.snakebyte.dk) -Train Station (by @LegoWolf) (link to download the LXF file on his Flickr: ge.tt/498NPKi2 ) ____________________ Here are the almost-must-have instructions designers and instructions (with no particular order): -bricksandtiles (by @Giacinto Consiglio) -peedeejay (by @peedeejay) -brickcitydepot (by @brickcitydepot), the latest instructions (CB023, CB026, CB027, CB028, CB029 and CB030) -Villa Maison (by @marcosbessa) (found the LXF file on LDD gallery as it’s no longer available in his own website) _________________ Between two categories ones (starting from those who have EB accounts) : -Kristel (by @Kristel) -BrickToyCo (by @Tobysan) -hermez (by @hermez) -2013-lego (by @2013-lego) (his own designed modulars) -Dunkaadkin0 (by @Dakar A) -A *Deal* 4 U (by @waltzking) -andrepsramos -custombricks.de -TheUniqueBrick -Bjor Schoute -sabriyo -The Royal Church (by ateameric) _______________ Here are some other ones (those I don’t really like but may be of interest to others) (the ones with an EB account are on the top of the list): -SkywardBrick (by @SkywardBrick) -mestari (by @Mestari) -brickcitydepot (by @brickcitydepot) (other ones) -brickbuilderspro -Bricker & Co -Berth -Soar Brick -jval (Need for Brick) -Fully Brick Models -Brick Vice So that’s all I found. Maybe you ask yourself “why he’s asking for new instructions, he already found enough!” I ask it because I’m just purchasing/will just purchase the instructions in the categories “must-have” and “almost-must-have”. In LDD gallery, there are some interesting MOCs, you can download them too. I hope that list helps some people and some people helps me by recommending/finding more modular instructions/LXF files. Cheers!
-
Hi guys, been working with LPUB here the past few days and I am having a few issues that I can't seem to find solutions to. Props to anyone who creates instructions with this program, it is very finicky. My issues: I can't figure out how to remove the complete sub-models from the parts list. I've been able to remove the parts list from the callout but the assembled sub-models still show up in the parts list with all of the required parts. Also, I can not figure out how to move a callout to another page (if this is even possible). This callout is somewhat large and I am having issues sizing it correctly for the page. That brings up another issue, whenever I try to change the margins of an individual callout, nothing changes. This program is highly frustrating to say the least. I've attached a screenshot of the specific step that is causing me so much issues. part_list_issue by Jeffinslaw, on Flickr As you can see, I've crossed out the parts in the part list that I want to remove. I also want the first smaller callout to be displayed underneath step 1 and 2 such that the whole callout will fit within the page. Hopefully you guys are able to help! -Jeffinslaw
-

75187 BB-8 UCS full RC mod with free instructions
Sariel posted a topic in LEGO Technic, Mindstorms, Model Team and Scale Modeling
I'm not 100% sure if this belongs here, seeing as it's a Technic mod of a Star Wars set, but let the moderators decide. So, I want to share with you complete and free instructions for modding the UCS BB-8 set to be fully RC. And by fully RC I mean: it can drive, steer, it has rotating side panels (so it appears to be rolling when viewed from side) and retains the wobbly head. Ths instructions are available at http://sariel.pl/downloads/ and while they're completely free, you may want to consider a small donation if you feel it is earned at https://www.paypal.me/sarielpl Here's the video followed by a link to photos and description: More: http://sariel.pl/2017/12/75187-bb-8-ucs-rc-mod/ -
Hi guys! Until I receive the missing pieces for my TIE Interceptor and my TAS Batmobile... (Follow me on Instagram, Flick or Facebook ;) ), I quickly made a try for the Peugeot Spinner from Blade Runner 2049 (French power! ;) ) with pieces I have in my room. I tried to be closed to the minifig's scale. It's not very nice... I prefer my other MOCs I find better than this... I like the inside and the rear of the vehicle but not the rest... The small drone! And a full inside ! If you want to build it I made a fast tutorial! Maybe too fast... Send me an e-mail if you have problem for the building process! (The stickers come from the First order snow speeder and the Rogue One AT-ST but I'm not sure) Link for the parts list on Rebrickable : https://rebrickable.com/mocs/MOC-1090... Let me know what do you think about this MOC? :) If you have build my MOCs, could you send me a picture? I will be very happy to see if my work is around the world! :D Keep on building in a free world! You can see my other topics : TIE Fighter (SW Rebels Design) : https://www.eurobricks.com/forum/index.php?/forums/topic/155546-moc-tie-fighter-starwars-rebels-design/&tab=comments#comment-2873629 ITT : [MOC] ITT (Imperial Troop Transport) from SW Rebels TIE Advanced Prototype : [MOC] TIE Advanced Prototype (aka Inquisitor's TIE) from SW Rebels A-Wing (McQuarrie / SW Rebels Design) : [MOC] A-Wing (McQuarrie / SW Rebels Design) Batman's Batmech : [MOC] Batman's Batmech Speeder Bike 614-AVA : [MOC] Speeder bike 614-AvA