Search the Community
Showing results for tags 'flex axle'.
Found 1 result
-
[REVIEW] 8450 The Mission
Lost_In_Noise posted a topic in LEGO Technic, Mindstorms, Model Team and Scale Modeling
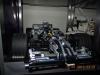
8450 The mission was released in 1999, and contains 643 pieces. Although it was originally intended as an expansion set for the cybermaster series, it is mostly listed as a Technic set. Being part of the cybermaster, it is also the biggest set by far in the Competition subtheme. It was 60$ on release, and I ended up paying $300 for mine MISB. I have no idea what it's worth, because it's been such a long time since I saw any for sale. The box The box is of a theme similar to the 8448 and 8458 sets, with silver/grey and yellow colors. The front shows the main model, and the flip-top lid unveils the disc needed to see the instructions, as well as the features of the plane. The weird-looking guy in the upper picture is commander Jack. The boss tells him to get ready for his new, dangerous mission. I'm scared already. It takes me a while to dare to open the box. Once opened, the box has a plastic inlay which holds the disc with instructions. Here you can see all the brochures and various papers included. Maybe this was the reason for the lack of paper instructions. There is a value coupon, a 1999 service catalog with part numbers, a mindstorms booklet which presents all the sets of the year, and TWO sticker sheets. The instructions Well, what can I say. The main reason why I got into Technic was to get away from the computer. Then this happens. Not only are the instructions supplied on a compact disc which can only be run on a win98 machine, they are also with tiny, tiny steps just to make you watch the animated menu. 376(!) steps for the main model, and 195 for the alternate. I figured some people may get frustrated(like me) over this, so I've uploaded the whole instruction set to my Brickshelf folder. Additionally, when I was building this set I found a lot of errors in the instructions, misaligned pieces, wrongly oriented connectors and so forth. Even wrong pieces were rendered. Therefore I had to pay extra attention when building this set. Still, there is a small booklet included which contains axle measures and an introduction to the software. The parts The parts come in nicely numbered bags from 0-10. Once opened, these parts stand out from the rest of the friction pins, beams, axles and bricks: There is a dampened spring included. This is a 1 x 11 link in black. Only seen in this set, it fetches 2$. A lot of Dark Turqoise parts are seen here, and most of them are also featured in the other CyberMaster and ROBOLAB sets. This is a Technic Ball Joint 2 x 7 with 2 Ball Joints, which only comes in this Technic set. It is mostly seen in the Competition range. Tubes and flex axles helps forming the lines of the plane, and the 19L axles seen at the far right are unique to this set. If you're looking to buy some, they come at 15$ a piece. Probably one of the rarest parts availible. Okay, that's it for the parts. Moving on to the build, starting with... A model: The Mission The main model has four sub-assemblies which are combined into a big plane. The build starts with the front canopy, which is not a particularly interesting build. The yellow double pins in the back is for connecting it to the rest of the aircraft later. The Technic slope/wing is stickered with some handrests with controls. The canopy is made with axles and connectors. It has some stickered instrument panel in the roof. Two big panels are used to close up the sides. Now for the main part of the fuselage. The links are used to synchronize the landing gear. The landing gear is powered by a damped spring. Next is the mount for the canopy. You can see where the yellow double pins will fit. A set of 4 16T gears transfers the drive from the spring driven axle and forwards. The yellow thin liftarm with the axle and bush pushes the damped spring so that it expands and turns the two 16T gears.Here is the completed landing gear assembly. The wheels turn against eachother into the hull. The damped spring is nearly invisible when the landing gear is retracted. Some aesthetic details on the main bodyusing flex axles and ribbed hoses improves the models look. The rear wing is made of axle connectors and regular axles. Another part finished. The only thing remaining are the wings. The engine rotates freely in a rack which also supports the wing. The engine is hidden away behind a panel with a sticker showing the fuel intake and other features. The left wing is made the same way. This plane has several attachments; a winch, a drill, a bomb dropper and a claw. The bomb release mechanism works by turning the lever, which returns to its original position with aid of the rubber band. Next is the grab arm, drill and winch. The arm makes extensive use of the bionicle pieces to achieve full freedom of movement in all directions. The claw closes by use of 2 rubber bands. The drill is a worm gear on an axle driven by a knob. The winch is operated by cranking the yellow axle and pin connector, and the rubber band provides stopping power. The last thing to be done is combining all the different chassis parts into the finished plane. The finished model is a beauty! Features Opening canopy, which fits a technic figure. The wings are synchronized with the landing gear. This plane lands like a harrier. The different attachments can be mounted on the front of the plane: Winch Dropping bombs Drill and claw The claw is capable of lifting the 8209 Future F1, weighing 72 grams. Comparison 9394 Jet Plane: 8855 Prop Plane: 8480 Space Shuttle: B model: Chopper The chopper in this set consists of two smaller builds, which are combined near the end similar to the main model. We start with the bottom. An axle with two 3L axle and pin connectors runs through the centre. The landing wheels are placed, and a rubber band provides suspension. The canopy is made of axles and connectors like the main model. Sadly, it does not open. First part of the assembly is complete. The yellow Double pin allows it to be attached to the body later. The rear base starts with the input axle for the main prop. It has a 12T bevel gear on it. Next is the retractable landing gear, driven by a dampened spring. A set of cams pushes the spring so that it expands. Here is a pic of the function. As the axle with the cams pushes the spring away, it expands, turning the 4 16T gears. This assembly extends the prop driveshaft, and adds another connecting point for the canopy. The propeller itself is made of axle connectors and flex axles. Now that the rear part of the model is completed, we can join the two pieces. This is a very odd looking chopper. It has wheels in the front, but the claw in the back prohibits it from rolling. Features Turning either of the yellow knobs rotates the main propeller. Pushing the dampened spring activates the grabbing arm. The arm is very strong, and was able to lift this 8294 Excavator. It weighs about 1 kg. It is minifig compatible, and seats one in the cocpit. When he's tired of flying, he can disconnect the cabin, and drive around the area. The buggy has suspension, but no steering. Comparison 8068 Rescue Helicopter: 8412 Nighthawk: Conclusion As strange as it may look and function, this is my new favourite plane. It's swooshable, even by a kid's standards, and the various attachments makes for a nice selection of playing scenarios. A big bonus is that the landing gear works by a push of a button. The ability to seat a Technic minifig is always nice to see, and the attachments are a nice touch. I know this is suppose to fit in with the Cybermaster sets, but since I don't have any I'll just have to compare this to the other planes I have. I'm a bit puzzled by the bomb dropping feature, since Lego toys are almost never violent, except when it fits the certain theme. From a innovating perspective, the building is also an interesting one, making separate assemblies and combining them in the end. This is fairly common nowadays, but when this set came out, it wasn't. Too bad I can't say the same about the instructions. For the alternate model, it could have been its own set. Diving in and grabbing something with the claw is great fun, especially since it is able to lift something big. Comparing the looks to other Technic planes, this is definately one of the better looking of the bunch. Overall, it stands nicely out in my collection with the black/green/yellow color scheme. The functions aren't all that special, but the tilting rotors are better executed than the 8434 Aircraft. Overall you can say that these two sets are pretty much alike, but this one is better. Get it if you can. You wont regret it. Hope you enjoyed the read. As always, source pics are here. The instructions can also be found there. Look in the "misc" folder, you will find the pics and a PDF for the booklet and one for the instructions.