Search the Community
Showing results for tags 'MINI'.
Found 223 results
-

Lego Mini Pinzgauer 710 1/14
dpi2000 posted a topic in LEGO Technic, Mindstorms, Model Team and Scale Modeling
Mini Truck Model 7, Pinzgauer 710. 1/14.I’m used to calling it,‘little Tatar’.full suspension Tatra-type,Truck Trial Model. L motor x2 +new wheel hubs, Servo motor x1.Infomation: W16 x L32 x H17 cm. Simple and good playability, I hope you'll like it. Instructions for free https://rebrickable.com/mocs/MOC-59691/dpi2000/lego-mini-truck-pinzgauer-710-114-moc/#details -
[MOC] Cherry Picker Truck
paave posted a topic in LEGO Technic, Mindstorms, Model Team and Scale Modeling
My new creation Cherry Picker Truck - HOG-steering - 4L-engine - Opening doors - Outriggers control - 360° superstructure rotation - Telescopic and lifting boom - Adjustable basket angle Video: Building instruction: https://rebrickable.com/mocs/MOC-51575/paave/cherry-picker-truck -
Always loved the unique design of the Arwings from Starfox. Many cool Arwing MOCs already out there but with this I especially aimed for the classic blocky design from the original game (which is the best, imo) and I tried to keep it as small and simple but also as recognizable and playable as possible. Now that Lego has partnered with Nintendo a Lego Starfox franchise might be a thing?!?
-
Hello everybody! This is the first MOC I present on Eurobricks. My most popular MOC yet is the 3 speed auto gearbox (https://rebrickable.com/mocs/MOC-33711/lbrix/3-speed-auto-gearbox-overworked-version/?inventory=1#comments). But now to this gearbox: At first ask yourself this question: Which sense has a normal D-N-R gearbox in a manual technic car? It has no sense. It makes no difference if you are in the forward gear or in te reserve. But with this D-N-R gearbox it makes a difference, because if you are in the forward gear, you can not push the car backward and if you switch in the reserve gear, you can not push the car forward. If you want to build this gearbox into a technic car, you have to connect the grey connectors to the wheels and one of the black ones to the fake engine. For more information check out this MOC on rebrickable (maybe it is not approved yet): https://rebrickable.com/mocs/MOC-47985/lbrix/alternative-d-n-r-gearbox/?inventory=1#comments No I wanted to ask you, what you think about this D-N-R gearbox? Here is an video of my gearbox:
-
[MOC] Concorde (Air France/British Airways)
DoubleBU posted a topic in LEGO Technic, Mindstorms, Model Team and Scale Modeling
I was looking for LEGO Concorde designs but not very much came up in such a small scale so I thought I might as well give it a try. It comes complete with bendable nose cone, retractable landing gears (front and back), moveable back wing flaps (thanks again, mini fig pants...!) and the optional flame FX for... historical accuracy... . . .!? And as always you can find more pics here and if interested in a cutesy little Concorde to swoosh around the full set & instructions are available here. I hope you like my small sized interpretation of one of aviation history's most iconic aircraft. Thanks & have fun! (And many thanks to ukbajadave for explaining to a noob how to implement more pics here!) -
This is a mini version of Captain Future's Comet/Meteor spacecraft from the famous 80s cartoon. Despite its size the construction is actually reasonably stable and the design also allows the wings to rotate freely from the rest of the spacecraft.
-
Mini Race Truck (42041/8041)
offroadcreations posted a topic in LEGO Technic, Mindstorms, Model Team and Scale Modeling
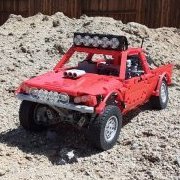
Hello All, Today I present my newest MOC, the Mini Race Truck (42041/8041). I originally was inspired to make this for the TC18 competition, but after seeing that trucks weren't allowed, I saved this model for later. It has all the features of the full-size model and more. Features: Mini V8 engine Opening doors Tilting Cab 2 Hog steering inputs More pictures: Includes step-by-step PDF instructions and a Stud.io file for your building pleasure. https://bricksafe.com/files/Offroadcreations/mini-race-truck-420418041/mini 42041.pdf https://bricksafe.com/files/Offroadcreations/mini-race-truck-420418041/Mini 42041.io Throw it a "like" on Rebrickable! https://rebrickable.com/mocs/MOC-47434/offroadcreations/mini-race-truck-420218041/#comments Enjoy! All comments are appreciated. -
REVIEW - 10242 - MINI COOPER Mk VII INTRODUCTION After the 10187 - Volkswagen Beetle in 2008 and the 10220 - Volkswagen T1 Camper Van in 2011 LEGO has released another brick built version of an iconic car. Now it's MINI's turn to be immortalized in the form of a LEGO Creator set. The model has been designed by British senior designer Andy Hugh Seenan, who allegedly can't work without coffee. He has been designing toys for LEGO since 2007 and joined the LEGO Creator department in 2011. He also designed the 31010 - LEGO Creator Tree House and 10525 - DUPLO Big Farm, which is his favorite self-designed model. We can judge by the Tree House that Andy is very creative in both implementing various features and maintaining aesthetics. Let's see if his creativity has founds it's way to the MINI. Review images can be clicked for hi-res versions. FROM LEGO PRESS RELEASE Take this MINI Cooper for a nostalgic drive down memory lane! Experience the iconic MINI Cooper first hand, with its classic lines, detailed interior and fun picnic theme. Take the iconic MINI Cooper for a drive! This beautifully crafted LEGO brick replica of the classic MINI Cooper Mk VII is full of authentic details, from the classic green and white color scheme with white wing mirrors and racing stripes, to the opening doors, hood and trunk, sporty fog lights, detailed engine and separate spare tire compartment. You can even remove the roof to access a tan colored interior with patterned seats, veneer-style dashboard, turning steering wheel, and moving gearshift and handbrake. And of course, no MINI Cooper would be complete without a picnic basket and blanket, the perfect accessories for a cozy day in the countryside! Features opening doors, bonnet and boot, spare wheel in separate compartment, detailed engine and 2 fog lights. Accessories include a picnic basket, bottle and blanket for nostalgic picnic theme. Authentic replica of the MINI Cooper Mk VII. Classic green and white color theme with white wing mirrors and racing stripes. Lift the bonnet to reveal the detailed engine. Remove the roof and access the detailed interior. Go on a countryside picnic with this iconic classic! MINI Cooper measures over 4” (11cm) high, 9” (25cm) long and 5” (14cm) wide. Available for VIPs from July 18th. SET INFORMATION Number: 10242 Title: Mini Cooper Theme: Creator (Expert) Released: July/August 2014 Part Count: 1.077 Box Weight: 1330 gr Box Dimensions: 37,2 x 35,0 x 8,9 cm (WxHxD) Set Price (MSRP): US $99.99 / CA $119.99 / AU $149.99 / DE 89.99€ / UK £74.99 / DK 799.00 DKK Price per Part: US $0.093 / CA $0.111 / AU $0.139 / DE 0.084€ / UK £0.070 / DK 0.742 DKK THE BOX The almost square box measures 37,2 x 35,0 x 8,9 cm and feels like it is filled with lots of parts. Holding the box and looking at the images, I immediately got the feeling that this will make a great present for young and old. The box is slightly smaller than the box of the VW Van which does have more parts. FRONT SIDE The front of the box shows the model in a countryside picknick scene. The age recommendation is 16+ which is a bit high in my opinion. The upper right corner shows the detachable roof. The box also states this model belongs to the Creator theme, Expert series. BACK SIDE The back side shows a variety of different smaller pictures, explaining most of the neat features. By the number of pictures we can see that there's a lot going on in this set. SIDES One of the sides shows a comparison between the model and it's real life counterpart. Most noticeable is the difference in the number of fog lights. And the rear of the real MINI is more curved than the LEGO version. The next side shows the front, side and back of the model. The front view is my favorite view. The combination of the grill, head lights and fog lights is well executed. The third side shows the part list, which is common for LEGO creator sets. What I like about the part list on the box is that you can see the variety of parts included in the box. Like most Creator sets, this set has a vast array of different colored bricks, which are very appealing to potential buyers. I would recommend including such an image on every larger box. CONTENTS OF THE BOX Since the box is not overly big, it feels like it's filled to the brim. It contains: 8 Numbered Bags (1, 2 and 3) 2 Booklets 2 Sticker Sheets 1 Brick Separator BAGS The set includes 8 numbered (1, 2 and 3) bags in varying sizes. The larger bags contain some smaller bag with smaller parts. The set also contains a brick separator. BOOKLETS The set contains two booklets with 64 and 51 pages for instructions, adding up to 76 steps. The booklets are almost identical. The only difference is the sequence number. STICKER SHEETS Not one, but two sticker sheets are included in this set. Two sticker sheets while there are a lot of printed parts?! One of the sheets has four stickers with metallic look. The other sticker sheet contains five different types of license plates to choose from. HIGHLIGHTED PARTS There are a lot of dark green parts in this set and some of them hadn't been released in this color before. Especially the first two common parts are very welcome in dark green! 1 x 1 PLATE Believe it or not, but this plate wasn't available in dark green before. 1 x 1 MODIFIED BRICK WITH STUD ON ONE SIDE Also a new part in dark green and a very useful one. 2 x 2 ROUND TILE & 3 x 2 PLATE WITH HOLE The round tile is new in dark green and the plate with hole hasn't been used since 2005. 3 x 4 x 2/3 PLATE WITH BOW WITH NOPS Not a very commonly used part, but from now on, it's available in dark green. 3 x 6 x 1 CURVED WINDSCREEN Like the previous one this part has a very specific use and is available in dark green for the first time. 1 x 4 x 1 1/3 MODIFIED BRICK WITH CURVED TOP This part is also new in dark green. It comes in two variants, one with and one without striped pattern. The stripes are printed on the part, so no hassle with applying stickers. 2 x 1 CURVED SLOPE A new flat silver curved slope. Introduced this year (2014) but not unique to this set. It has been used in several other sets. MINIFIGURE SKATE As we can see in the image below, the minifigure skate is a very versatile part! PART LIST Here's the complete list for all 1077 parts. BUILDING EXPERIENCE The set contains bags numbered 1, 2 and 3, which means the build consists of 3 stages. Each stage requires opening the corresponding bags. So let's start with the first stage! STAGE #1: CHASSIS The first stage requires opening the two bags numbered #1 which results in using the following parts. The chassis pretty symmetrical when it comes to the wheel base. Being a Creator set some oddly colored parts are used, like the blue Technic bricks. At the rear we can see the single fog light mounted on the right side of the fender. Here we can see the Neck Bracket with Technic Pin cleverly used as the exhaust pipe. The middle bottom section of the vehicle is where the front seats and rear couch will be mounted. The mounting points are already visible. The side skirts make sure the MINI gets it's sporty Cooper look. The shift stick is very simple and very well-thought-out at the same time. The base consists of a Modified 2 x 3 Tile with 2 Clips and a Technic Axle Towball, which results in a freely moveable stick. The floor of the trunk can be lifted to reveal the spare tire. Using the 1 x 6 x 5 Panel results in having room for the tire AND the entire picknick basket, which is quite an accomplishment for a model this size. At the end of stage #1 the chassis is complete. It already has the shift stick and trunk with spare tire. It's about 30 studs long and measures around 25 cm. STAGE #2: INTERIOR AND REAR BODYWORK During the next stage you will add the following parts to the model. A Curved 3 x 6 x 1 Windscreen is used as exterior wheel hump. The checkered upholstery looks fantastic and it's not even finished. The handbrake is one of the many great details! At the rear you see one of the stickers (MINI badge) you need to apply. funny enough, you need to apply this sticker to a part which has printed stripes on it. It's for the first time LEGO has printed a curved part like this. The dainty picknick basket is so cute! The details are remarkable. It even has two different types of cheese! Probably Gouda cheese The blanket is an actual piece of cloth, not plastic. The bottle and baguette are the icing on the cake. Being a right driven model, I have chosen the British registration. The MINI has an R registration, which means the year of registration is 1997/1998. Could this possibly be Andy's old registration number?! The boot is very efficient. It holds the spare tire and entire picknick set! STAGE #3: ENGINE BAY, FRONT BODYWORK AND ROOF During the final stage you will finish the front of the car and the roof. Lots of dark green parts will be added to the car. Under the hood the twin-carburetor 1,275 cc engine is mounted. I love the use of the Small Barb (Helmet Horn) as spark plug cables (or high tension leads). The dashboard is pretty detailed, with a glove compartment and several printed gauges. The steering wheel is a bit big, but the old MINI's did have a big steering wheel. Although the Cooper has a smaller sports steering wheel, I still think this one suits best. The seats and neck rests can be adjusted to a certain degree. The checkered upholstery looks amazing, much like the rest of the car. The door handles are actually Minifigure Iceskates. FINISHED MODEL It took me approximately 3 hours to build this model, one hour per stage. FRONT VIEW After finishing the model I really felt a WOW! Just WOW! Granted, the rear section should be a little more curved to resemble the real MINI better. In my opinion this is just a minor detail, since the model captures the overall look of it's real life counterpart very well! The front of the car with the grill, fog lights and bonnet, screams MINI Cooper! The white striping, mirrors and roof give this model it's iconic Cooper look. The sloping bonnet is very well designed. REAR VIEW The trunk lid with embedded license plate is another nice detail which adds to the recognizable MINI design. The tank filler cap is on the left side. Small details like this make the MINI an outstanding model. BOTTOM VIEW The bottom view shows the chassis of the car and in the front you can see the towball construction used for the shift stick. PARTS LEFT Most of the smaller parts have a spare one in every stage, so you end up with quite a few extra 1 x 1 plates and tiles. FEATURES This model some dainty details and exquisite features: Opening hood Opening bonnet Opening doors Detachable roof Storable spare tire Filled picknick basket with bottle Cooper-ish wheel covers Moveable steer Moveable shift stick Adjustable seats Should LEGO have gone the extra mile and include parts to turn this MINI into a convertible, like Dirk1313 did over here?! There's probably a good reason LEGO didn't, but it would have been a nice addition. On the other hand; you can easily do this yourself. SUMMARY Since the MINI has quite a few great details, building it is never boring. After every step it's getting better and better. When you have finished the model, you really get that WOW! feeling. Choosing dark green for the bodywork gives this model the characteristic British Racing Green look. Although it could have been blue or red, I think LEGO made the right choice with dark green. The model lacks a bit of playability when it comes to driving. Without actual steering it's hard to turn the car. Driving back and forth gets a little boring after a while. But then again; this model is probably not meant to play with. Maybe that's one of the reasons it has 16+ as an age recommendation. As a display model, this is one of the best cars LEGO has created...ever! Quite a few people will be having a hard time believing that this actually is a LEGO model. Andy has a great job capturing the essence of the real MINI in this LEGO Creator set. PROS Astonishing model Lots of dainty details Lots of features Lots of (new) parts in dark green Some silver/chrome parts Most of the decals are printed CONS Lack of steering Rear is a bit too square SCORE Design 9: The model screams MINI Cooper. Build 8: Fun build, never a dull moment. Features 9: Lots of nice features. Playability 8: Lack of steering diminishes playability. Parts 9: Great parts pack, if you like dark green. Value for Money 9: Iconic MINI Cooper for a reasonable price. 8,7 Instant classic! MEDIA I have included some extra content for your viewing pleasure! DESIGNER VIDEO PREVIEW VIDEOS Hope you enjoyed it! Thanks for reading and please rate this set at the top of this topic!
-
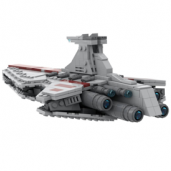
I was never a huge fan of this ship... but once I started modeling, I couldn't stop. It's a unique ship in terms of shape, and, at only 39 studs, it's at a very manageable scale. Same scale as @Kristof's Venator.This is one that I plan to build, and I'm confident in its rigidity, despite the skeletal structure. Admittedly, the gray 3x3x2 dome top (pn 88293) is too tall for the rear armor plating, but I didn't like the blocky aesthetic of the alternatives. A 3x3x1 dome top would be ideal, or even a wedge 3x3 variant of pn 43708, but, alas, we can't have everything in life. Renders UPDATE: Here's a shot of the build next to Kristof's Venator. More images of the Munificent build can be found in the replies.
-

Lego Mini Truck model 4
dpi2000 posted a topic in LEGO Technic, Mindstorms, Model Team and Scale Modeling
Hi,there, mini truck,again;) New body work, off-road truck race,vintage style,such as ZIL Dodge Wagon and KpA3. L motor for propulsion,Servo motor for steering ,9v Lipo battery.Worm gear for power transmission,Similar to the chassis of RC car, lowers the center of gravity, bottom of the frame is smoother. But,you know,lego 8 teeth gear is too soft. Dimensions W/36,L/20,H/22studs More: https://rebrickable.com/users/dpi2000/mocs/ Thanks for watching ;) -

WIP Mini Ferrari Portofino
Matty04 posted a topic in LEGO Technic, Mindstorms, Model Team and Scale Modeling
I wanted to include full independent suspension, with positive caster and MacPherson strut in the front and rear trailing arms, a working front-mid placed 90° v8 engine, working steering wheel + HoG, convertible top, openable hood, doors and trunk. From now on I plan to do the convertible top mechanism and I consider it quite a challenge as I would like it to operate as close to the real thing (google it) and I'll keep you updated as the build progresses. I have worked on the chassis for a while now and this is what I came up with: And yes, I plan to change that background, coloured cardboard doesn't really do the trick, I promise this is the last time you'll see it.- 2 replies
-
- mini
- convertible
-
(and 2 more)
Tagged with:
-
Hi all I thought I would take a break from Resistance models and publish something more interesting/popular. This has actually, for the most part, been built for a while but I was just waiting for those black pointed 2 x 4 wedge plates from Bricklink from the official Sith Fighter set. The TIE/dg starfighter, also known as the TIE dagger, or the Sith TIE fighter, was a type of Sith affiliated TIE line starship that was forged in secret by forces under the command of the reborn Emperor Palpatine and seen in Ep. IX during the Battle of Exogol. The new pointed wedge plates are perfect this little ship. They also come in dark red and I was toying with adding some of these to the model to add the red edges to the panels but to hide them to show the right amount of red would have made the panels 3 studs thick and too wide so i ditched that idea. I have managed to add the little gap between the panels and the light grey part at the back from the original design of the ship. I have done this using clip plates and the 1 x1 round plate with bar. Apart from that it is a simple build and once again it is on display with a minifig - the Sith Trooper. Hope you like it. Jon
- 4 replies
-
- tie dagger
- mini
-
(and 1 more)
Tagged with:
-

[ MOC ] 42082 Rough Terrain Crane Mini-Replica (Control-)
cyberdyne systems posted a topic in LEGO Technic, Mindstorms, Model Team and Scale Modeling
Hello, everyone! I've mentioned that a lot of you liked my 42100 mini-replica so the time has come to release another Micro-model in the "Control -" line up :) This time I chose 42082 to be downsized. This crane and mini-Liebherr, both are in almost the same scale. The crane has all the same functions as it's "big brother": -AWD with fake engine -All-wheels steering -Deployable outriggers -Turning the tower -Lifting and elongating the boom -Winch All functions can be controlled via knobs on the sides and on the back of the tower. As bonus thing it also has a compartment for outriggers' plates. Here is the video which shows how all this machinery works. Thanks for watching. Merry Christmas and a happy New Year! -
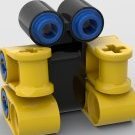
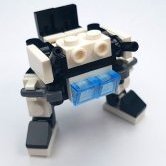
It is a transformer robot which can turns into scorpion-shaped robot mode.
-
This transformer robot's name is White Astronaut. Because the robot mode looks like astronaut. :) This mini robot is a triple changer transformer. It could change into a fighter jet and a monster.
- 2 replies
-
- transformer
- robot
-
(and 4 more)
Tagged with:
-

[MOC] Micro Kinetic scenes for the original trilogy.
Sandlot_Creations posted a topic in LEGO Star Wars
These are original trilogy themed scenes for my Kinetic Balancing desk toy with Interchangeable scenes. Here is a video of it in action and photos/more info below : LEGO Kinetic Balancing Desk Toy by Sandlot Creations, on Flickr Lego balancing Desk Toy - Star Wars themed scenes by Sandlot Creations, on Flickr Lego balancing Desk Toy - Star Wars themed scenes by Sandlot Creations, on Flickr If you would like to make the Balancing Desk Toy concept into an official Lego product please consider voting for it on Lego Ideas here: https://ideas.lego.com/projects/235a536e-c6cc-4b0e-889f-1daf1403da88 Every vote counts! You can also see the other scenes I've created for this on the Lego Ideas Page! Also, Let me know any scenes you would like to see created for this project! Thanks for watching! -

[IDEA] Micro Working Fake Engine
syclone posted a topic in LEGO Technic, Mindstorms, Model Team and Scale Modeling
Hello there! Even though TLC finally stepped out of using big blocky engines, the newest rendition of fake engines isn't very good. Mostly due to the ugly long brown axles and big "crankshaft". Now, it is possible to use the ovaloid-shaped liftarms as the crankshaft with 2l axles and half-bushes, but the entire assembly still occupies a lot of vertical space, specially the Ø3L crankshaft. Now, making something smaller with Technic pieces wasn't possible, so I resorted to System parts. 1x1 plates with 1x1 round plates were the solution looked for. Even though the "pistons" don't have much vertical movement, the engine still sounds great and both inline and v-shape setups can be made, theorically with infinite cylinders as the crankshaft isn't limited by maximum Technic axle length but by how many 1x1 plates can be stacked together. Advantages: Small volume - 3 studs vertical by 2 studs width Little extra space required - approximately quarter of a stud around the crankshaft (Technic axles can be placed alongside it) Produces sound as well as other fake engines V-shape or Inline engines possible Disadvantages: small vertical piston travel Crankshaft doesn't use Technic pieces so can be difficult to correctly space (stacked plates height vs Technic stud width) and might break if too long or abused too much Here's a video showing both setups and sound (e-motor is very quiet so the engine can be heard) -

[MOC] Mini RC Nitro Menace (8649)
syclone posted a topic in LEGO Technic, Mindstorms, Model Team and Scale Modeling
Having finally set free the buggy motors from TC16, it was time for something speedy again. Having seen the new 2019 transporter, that scale got me again, so making a car "compatible" with that set was very interesting. And having 8649 box on display made it clear which one I wanted 2 make. After a day of non-stop building this abomination somewhat resembling the original was born: The build was based off this year's Corvette wheelbase - 20x15 studs. 8649 has oversized wheels, giving it a cartoony apperance, but that wouldn't work for this one as space in the rear was required for a double buggy motor setup. Low profile tires in combination with old rims were a perfect tuner combo and gave resemblance to the 68.8 six spoke wheels. This also allowed to place the rear wheels much closer to the buggy motors using a non-standard 36z - 16z gears combo (1:2.25) with half-stud on-axis offset [see picture below] powered through the slower, outermost motor output to an approximate 2000rpm to the rear wheels. This gear combination resulted quite reliable when braced properly and withstanded all crashes, slides and racing that was thrown at it. In contrast, the front axle is a real mess. Having to place the m-motor right after the BuWizz made it really weak, and the flex axles make it hinge forwards. It does stay in place though due to all the bracing, so good enough? Also low-pros are amazing for drifting, which makes this vehicle very enjoyable to play with . Bodywork-wise it is NOT a "modern beauty" but carries the approximate lines of the original model. All the interior details are present - double NOS bottles in the rear, Red bucket seats and a tuner steering wheel (RHD version for some JDM powah ). Supercharger was a no for me - it looked terrible on the original. Big a$$ exhausts were kept to annoy the neighbours In the end it is not fully compatible as it probably wouldn't be able to drive up the ramps, but does drive cool. Welp, here's the video and LDD file https://rebrickable.com/mocs/MOC-26855/syclone/mini-rc-nitro-menace-8649/ Best Regards, Dan. Cya later!!! -
So I was messing around with 70503 The Golden Dragon (the old/first set). And I notice the arm joints at the shoulders were stiff on Lloyd (The Golden Ninja). As I was trying to loosen the joints I thought just taken arms out would help. That is when I broke the arms off. Now I am wondering has this happen to anyone else? Is the plastic just poor in the first place? Then after messing with the torso A little more I was able to get the "rest of the arms" out. And now I am wondering if putting in some "green arms" in the torso would look alright.
-
Hello again everyone Following on from my Snowspeeder post a few weeks back I realised I had neglected to build the Rebel Transport from Empire Strikes Back. So I decided to rectify that. There are no really tricky elements to this build. It does switch from 2 to 3 studs at the bottom using the new 2x3 jumper plates. This then allows the 5-stud wide main body to get the shape at the front. It is not as round at the front as it should be but you can’t always do everything in this scale and you have to approximate. It also uses the old finger hinge plates to attach the side “panels”. It would have needed a 1 plate high gap between the clip/hinge and the main body to use clips or the clicky hinges so sometimes old is better! Hope you like it Jon
- 2 replies
-
- original trilogy
- mini
-
(and 4 more)
Tagged with:
-
Hello again everyone This time I present my last (I can’t think of anything else to build?) model from Solo – Han’s Landspeeder. Han Solo acquired his overpowered Mobquet M-68 Landspeeder under circumstances he doesn’t care to explain. ? The M-68 is a favorite of Corellian speeder enthusiasts, as its repulsorlift generator is easily modified and overcharged. This was quite a tricky little build to keep the overall shape and sleekness in this scale. It is supposed to resemble a sports car after all. The first problem I came across was the windshield. 1x1 clear cheese slopes looked too small and the 1x2 panel was just too upright and looked terrible. In the end I managed to use some slopes which have been turned on their ends. They are attached using bricks with a stud on the side and a tile on the studs of the slopes. Luckily it fits perfectly in the space for them. Another part was the “spoiler” at the back. Luckily those new 1x1 brackets came in dark blue! Then the engines. I went through a few different versions before finally using this: https://www.bricklink.com/v2/catalog/catalogitem.page?P=11458&C=63#T=C&C=63 These pieces are then attached using 2 headlight bricks in the main body of the model and then attaching another 2 to these to be able to attach the above piece. Anyway, I think this model looks pretty good if I do say so myself, nice and sleek! Hope you like it. Jon
-
Hi again everyone This time I present one more model from Rogue One – the Eta-Class Supply Barge. This “super tanker” can be seen entering Scarif through the shield gate. It is the big brother/sister of the Zeta-Class Cargo shuttle: I also cannot recall seeing any other MOC’s of this monster. This was quite a simple build – it is mostly a flat-bed after all – but the pieces that inspired me was the new 1x2 wedges for the prongs at the front. The only other “tricky” part was making the 8 wings so that they were sloped but not too sloped. I eventually settled on door rail plates at the bottom of each wing to give an illusion of a slope. It is a bit bigger than I would normally like to build but with the front having to be 4 studs wide (difficult to make it 3) it dictated the overall length of the model. My photography is not very good but the orange containers contrasted against the dark-bluish gray is quite striking. Let me know what you think and there will be more MINI madness soon Jon
-
Hi again everyone The Imperial Arrestor Cruiser first appeared in the Star Wars canon in the 2018 film Solo: A Star Wars Story, barely visible in an Imperial recruitment film. However, in the script for Solo, the Millennium Falcon was at one point to be captured by a tractor beam ship, which was developed into the Arrestor Cruiser. However, this full appearance in the film was eventually cut but can be seen in a deleted scene where Han crashes his Tie Fighter. A scene I wish they had kept in. Colin Cantwell originally pitched the design of what would become the Imperial Arrestor Cruiser directly to George Lucas, for use in the 1977 movie Star Wars: Episode IV A New Hope, although it was ultimately discarded in favor of the Star Destroyer. I built this model fairly quickly, again in between finishing other models. It is a fairly simple design with the only complicated part the “nose”. It needed to be slightly tapered and bricks would just not cut it. I have attached this using clip tiles and handle plates to attach the side tiles. I have also then used door rail plates to close the gap at the front. Anyway, here is the model. Jon
-
Hello again everyone This time I present a MOD rather than a full MOC – a mod of the 30498 AT-Hauler polybag which I tinkered with over the Christmas break. I quite liked the overall design and construction of this but there were a few things that I felt needed changing: · Changed it from white to grey. Think grey is better fitting for a cargo vessel and for most vessels in Star Wars. · Added the gantry underneath. A simple addition with 4 extra parts which I am surprised were not included in the original. · Beefed up the lifting arms as they looked too thin. · The big one – the cockpit. This is what made me want to MOD the polybag in the first place. The use of the slope in the polybag is a bit lazy so I have built this using bricks with studs on the side and wedge plates. · And like all my other models a display stand with Rio Durant minifig. More new and original stuff soon. Jon

