Search the Community
Showing results for tags 'Plane'.
Found 107 results
-
Mission: Scout Lorstan II for water. Tags. Plane, Kawashita, Lorstan II, Pilot They sent me to Lorstan II to scout for a water source, pretty sure it won't be hard to find.. Mantis is on the offensive now, won't be long until we are competing with them on planets on a regular basis. Hopefully I'll have time to finish the big ship.
-

Antonov AN-140
Carsten Svendsen posted a topic in LEGO Technic, Mindstorms, Model Team and Scale Modeling
Hello everyone. This is my first post and this is a projekt I've been working a lot on the paste yea or so. I have only posted on the danish lug Byggepladen.dk, and I wanted to show the building progress to every other AFOL around the world instead of just danish members of Byggepladen. All of these next posts are copied directly into google translate so bear with me if there are some mistakes some places. I don't have the energy to translate walls of text just for this purpose. You can find my image gallery here You can find my youtube account with my airplane process - I plan on adding another video very soon, the plane is nearly done :DSo here goes.... (I realised just now that I cannot create a reply to my self but only edit. Be patient please. There are lots of stuff to come.) (My englih skills are also awesome if I have to say so my self, bear in mind that I'm still using google translate and fixing the most inconsistent words for better understanding) -
Hi. I've been working on it for a year or bit more. I think I'm on the finish line now as most problems I could think of are more or less solved. It started in that way - one of a rainy weekend we played with my son with some Lego and it turned to be a half-done airplane of mixed color. A few days after my son came up with 'Dad, will it fly?'. I answered "No, of course. It's too heavy and too weak for flying", but this idea literally stuck in my mind so I started to think about it from time to time. I started to evaluate things from different points of view. It was obvious that I should give up using Lego powertrain, there were no match for 0.8 - 1.2 KW required power. Other two main problems were weight and strength. Problem of weight could be moved away with enough power and enough speed. To cope with strength issue I decided to move on with glue. There was also no chance of controlling such a thing with IR stuff, so controls also should be implemented using standard RC 2.4 GHz equipment. This left me with only the airframe made of Lego, but nevertheless I'm pretty happy with it (Purists may stop reading here :))). However, the model could stand on a shelf (and this shelf have to be rather big :) without any glue, operate landing gear and may be even control surfaces using only Lego parts. This means there are no cheats like 'just glue this piece to that'. All connections are at first usual Lego connections, glue just added for stiffness. But to flying. First, I had to implement airfoil using Lego pieces. I did not choose Carsten Swendsen's way of making only wireframe with Technic axles and using some kind of monokote to cover it and instead decided to use System parts to make the wings and fuse. I managed to implement Kline-Fogelman airfoil using 93606 and some plates with stud inversion. May be this is not the best airfoil, but I think it weighs less than, for instance, flat bottom airfoil with some curved slopes on the trailing edge. Wings implemented that way have many space inside and could accomodate LiPos and motor controller. My first version of wing have following layout: Speed controller on the root part of wing, then nacelle with landing gear, doors and retraction mechanism, then batteries in configuration of 2 cells one above another and one another cell next to them. My chosen configuration was 2700 KV 590W motor and 3x2200 mAh batteries in each wing. (With covering removed) (Speed controller inside wing root) Landing gear was implemented using single 9.5L shock absorber with double springs and spacer made from modified 4624 wheel hub. Single 9.5L shock with extra hard spring compresses fully at 1.2kg and I had no chances making the plane lighter then 4 - 4.5 kg and any design with some kind of levers would weigh more and take more space. (And a bit boring video:) My evaluations showed that take-off speed with flaps deployed will be about 40 kph, so landing gear must be able to sustain this speed for at least 30 seconds. There were some doubts how much load could be handled by Technic axle rotating in shock socket at speed of 7000 RPM. I did some experiments with it. Now I know that axle will be damaged if used without grease handling load of 1 kg at ~ 5000 RPM, but could live with this load for 30-35 seconds if greased. This made me move away from that simple landing gear design, it was also rather weak and any non-ideal (or may be even ideal?) landing could break the strut or move it away from extended position - the locking was not good. (I'll post pictures of damaged axle and video of experiment a bit later) At the same time I was thinking of other ways to reduce weight and came up with idea to reduce weight by cutting flight time. I was targeting for 10 minutes before, but now I think that even 3-4 minutes will be enough to prove the idea of flying Lego airframe :) I found another motor/prop/battery configuration and combined it with new landing gear with 4 wheels per strut and more reliable locking. New layout is using 4x950 mAh batteries, 1200 KV 530 W motor and smaller speed controller and potentially could fit in root part of the wing at whole. However, root part have to be lengthened. This is going to enlarge wing area (which is good) but also probably will load root spars more (which is not so good). On the other hand, heavy batteries are moved from outer wing section into root section (and their weight is reduced; with lighter ESC saving is 90 g per wing) First version of wing also featured front spar for almost all wing length. In second version I decided to end front spar soon after engine nacelle. After gluing wing v1 it was obvious, that front spar of that length is not needed - wing is rigid enough. Also, when making wing v1 I had some mess with covering root section - it was 10st length and there is no 10x8 tile to cover it. Wing v2 have root part of 18st and could be covered easier. (Unfinished nacelle v2) To make control surfaces I used micro-motor directly connected to axle, holding the surface (except of flaps - flaps are connected by worm gear. On ailerons other side of surface is attached to potentiometer, connected to PCB of standard RC servo. Micro-motor is connected to PCB via H-bridge. RC servo operates at 5 V and this is very low voltage for Lego motor. With help of H-bridge, micro-motor is being fed by full battery voltage (11.1V or 14.4V) and moves with reasonable speed. For rudder, elevator and flaps I will have to add some gears to connect potentiometer. I hope the play in gears could be compared to play in servo-to-surface linkage of traditional RC setup. I started some mock-ups of fuselage about the same time as wing v1. Seems like I can fit all the required equipment (air compressor, front landing gear, flap mechanism, pneumo-switches) under the floor (slightly raised in nose section) and some other things (RC receiver, air tank) in aft section. This makes realistic look for cabin, it can be fitted with seats, crew and passengers :) Fuselage, however, is a quite ugly being made from System pieces. With one wing attached: Some amusing details :) Now I'm waiting for new powertrain and some missing pieces for nacelles. After that, if this layout proves doable and reasonable, I'm going to glue both wings, finish fuselage and rear control surfaces and attach wings so CG is in the right place. I think I'll be almost done at that point. However, there are some minor unsolved problems. Design of front landing gear and bay doors make it impossible to close doors when landing gear is down like in main struts. On the other hand, doors must open before extending gear and close after. And there is no place for third pneumo-switch. My idea is to make some kind of throttle to create delay in pneumo-cylinder operation. Also, there is no place for mechanical sequencer, so I'm going to make some simple microcontroller stuff for sequencing door-gear operations. I don't see anything hard here. And yes, there is still a bigger problem - will the whole thing work as expected? :) Well, at least it will be fun to watch how it crash. Sure I should have started with some simpler design - no retractable landing gears, some simple fuselage, something like WWI era airplanes, but my current design is so much fun to build, so I probably revert to simpler construction only after I done with current one. Hope you enjoyed this crazy thing.
-
After making the asymmetrical Blohm&Voss BV 141 aircraft from the set 60064 Arctic Supply Plane, I wanted to make some more of its kind. Once somebody tries to find a present day asymmetrical plane, surely finds the "Boomerang", which was designed by Burt Rutan. It is a one of a kind double engine airplane, and has a very stable flight even with one motor off. In case you have never seen it, you can find a pic HERE. As this one has a very curvy shape, it was totally impossible to "copy" it from the set 60064, but I still wanted to build something similar. Burt Rutan Boomerang (60064 alternate) by Plastic.Ati, on Flickr As normally, I wanted to catch some important point from the design. The nose of the main body was very hard to plan as the cockpits themselves were too big and ugly for a "base". Fortunately I found a way to fix the window of the flat cockpit only, which gave me a chance to build a better form. Burt Rutan Boomerang (60064 alternate) by Plastic.Ati, on Flickr As you can see, I could make the thing in minifig scale, which was "necessary" for me. Burt Rutan Boomerang (60064 alternate) by Plastic.Ati, on Flickr The wings are bent forward (see the name: boomerang) and upwards too. I wanted to make it so much that I spent quite a time with just the wings, building and dismantling the connection to the body infinite times. Burt Rutan Boomerang (60064 alternate) by Plastic.Ati, on Flickr I haven't found a way to make wheels for a landed version, and I even run out of elements for making the middle piece of the wings correctly, and it was problematic from an other point of view too. I wanted to make it more or less similar to the original, and even stable enough for making the model swooshable. I spent 2 more hours on the stabilisation, and finally I could make the connection between the bodies hard enough, so now the model won't break apart when somebody plays with it. Burt Rutan Boomerang (60064 alternate) by Plastic.Ati, on Flickr I know, the middle wing is ugly, but now I have no better idea. In case I find a nicer way to build it, I will update the post. C&C are welcome. The instructions will be ready on the next week, and whenever it is accessable on Rebrickable, I will put the link here. If you missed my earlier alternates for this set, you can find them below:
-
Hi Everyone! This is the beginning of a new year so I finally gained some time to make my first posts. As I like making alternate builds for nearly every set I open, the "hard-to-find" piece of the Arctic series from year 2014 was no exception. I liked the big twin-boom airplane a lot so I wanted to make some more of this kind. I wanted to build an easy one first, so I have chosen the Fokker F.25 Promotor, because of its pusher configuration. It's minifig compatible, quite swooshable, but the propeller needs some attention as the one-stud connection is less stable. Fokker F.25 Promotor (60064 alternate) by Plastic.Ati, on Flickr I've tried to make a wheeled version too, but without a useable wheel it wasn't too easy... Fokker F.25 Promotor (60064 alternate) by Plastic.Ati, on Flickr Fokker F.25 Promotor (60064 alternate) by Plastic.Ati, on Flickr For those who want more: go to my Rebrickable page (links to more pics, and instuctions) For those who want to check the original: click HERE Hope you will have a very nice and prosperous year in 2015! Below you can check my other alternates for this set:
-
When Tony Stark decides to leave the arm-dealing field, he sets up Stark Resilient, which aims to put his technology to the city to benefit the needed people. This time, he puts his arc reactor on the medical ship, and that helps reduce the transport time for patients to the hospitals and makes in-the-air surgery possible. The arc reactor engines are small and powerful, so that the ship can have more space for other uses. Tony meets the team of medical staff at the launch of new medical ship. Overview of the ship, which is quite bulky. Probably that gives people a more "caring and steady" feel for transporting the injured. Side view, and front view below. The cockpit has two seats, and the higher back one can be closed sideways so as to give access to the front seat. And yes, it is a little futuristic era to see the blue transparent panel. Maybe the front should have the same, now I realize! The top is the core of the energy source. The new repulsor engine in action. Normal; flipping out shields and turning backwards for rear thrust.... The back, which has two doors to ensure that the inside is sealed off from the outside, since this ship allows in-the-air surgery. The inside is a well equipped surgery room, with all the necessary medical supplies and tools. "Relax, and we will soon arrive at the hospital for a more thorough check." Thanks for checking!
-

[TC5] VTOL Search & Rescue Heli-plane
Dohed44 posted a topic in LEGO Technic, Mindstorms, Model Team and Scale Modeling
My build for the contest uses sets #8068 and #42020, which have 408 and 145 pieces respectively, for a total of 553 pieces. I used 490 on the ship and 14 on the stand. Leaving 34 and 29 pieces unused. The Leftovers by CleverNiftyDude, on Flickr Major pin and axle shortage with these two sets. VTOL Heli-plane by CleverNiftyDude, on Flickr The stand,...barely stands, but I was able to get some cool banking shots,... as it slowly fell over. VTOL with Pilot by CleverNiftyDude, on Flickr Just happen to have a matching Technic Fig for scale,..Nice! Unfortunately my entry post will be pilot-less, as he is not part of either set. VTOL Cockpit by CleverNiftyDude, on Flickr A close-up of the pit, with assorted NF controls and interface. VTOL Top view by CleverNiftyDude, on Flickr Functions incude: Manual 90 deg. swivel of wings/props/landing wheels Manual tail fin rotation HOG prop spin. HOG Ratcheted rescue basket I think I'm going to try to get a few more photos before I enter it. Cheers. -
Harry Cane has a new plane to test and fly. The Goodbury group's newest offering: The Goshawk. The Goodbury Factors build all kinds of vehicles. I patterned this after the early fighter planes, both in style and colourscheme. It wasn't based on any specific old set this time, simply a new plane for my refreshed figure to pilot. The new Harry Cane has a cleaner cut than the old figure, mainly because I think he looks a lot smarter with a tidy beard than with a whole lot of stubble. My personal story for him was RAF officer, so he had to look a little neater! The Naboo Pilot torso has been a favourite of mine, both 'recent' designs look great. Though their source look was taken from the eras of history that had such style! There are only a few Adventurer of my refreshed characters who I have used a whole new face for. There are 'story' reasons, there are quality issues with the old heads or I didn't have the figure in the first place. Other times it is simply the fact I like the 'new' white pupils printed in. All of these factors meant Harry Cane got a new head!
-
My new expanded city (still in the planning stages) will have an airport so I decided to make some planes which did not end uptaking too much space. The first is a compact jet plane that will be part of the aerobatic display team (catchy name to follow). I would also like to add a passenger plane with a limited wingspan though still working on that. I wanted it to have retractable wheels but I did not have any in my parts.
-
A great deal of experimental aircraft were developed by the ƧCǣ airfactors in attempts to break Trans-Atlantic and time airborn records. The Lightning Volt was on such jet. While it got to a certain point in deveolpment a more promising design prototype shelved the L-V project. Mothballed for a long time it was built to flight standard by an eccentric pilot. Sooo... I was building Adventurer planes but these sky-fi ones keep escaping instead. It is technically created for Adventurer's to use but it of course fits here better than Action and Adventure. I was trying for some bare-bones look in areas as if the jet is experimental and I love using the spinner crowns in planes and the cable/wires at the front are actually reigns from Friends and the Star Wars Bantha.
-
Hi everyone, I am new to this place and great to meet all of you. I am showing this latest creation of mine here, the Bat. Many fans already did their Lego version of the Bat, but I still think it is best to follow what the movie has made. So I bought the book and started to understand what the Bat is really about. It was indeed a very great book! Inside, I got the blueprint of the wonderfully designed plane! It took me nearly two months to start building the form and the put the pieces I wanted onto the structure. This is the first draft I made, though it didn't look too good to me. The right is of course the Tumbler. But I was happy to see the back design, which followed nearly all the parts from the blueprint. It did look like the real thing. Another overview... But I was not happy about it, and it took me another month to modify it. I actually dismantled the whole thing and rebuilt the structure, which I strived hard to follow the curve of the real plane in the movie. Here is the final version, and the side elevation to see the curve body (like a lobster!) It was a little bigger than the previous version, but I think it is still acceptable. The "hands" are also the difficult part, not to say two support rod things behind it which attach to the head of the plane. I keep most of the original design for the back, but add some details. Each part can be slightly adjusted to suit the flying mode. The topmost parts can be dropped and lay flat in the "parking mode". The rear flaps are not too real enough compared to the movie, but since they are used for landing, they have to be rigid. So I decide to use the one piece brick for it, the top fin brick. This another elevation allows you to see the bottom side, which has a series of blades and a pair of propellers (or should I called choppers?) The two windows can be opened, with top one upwards and the front one pulling outwards to the front. (just like in the movie) Two people can be seated inside too. One set complete! Ready to go to fight crime! Done! Thanks for reading! :D I hope you enjoy this! *** Edited on 2012-12-22 some more photos, which show the size of the plane compared to the tumbler in a better angle... ***
-
Hi, Just finished building this and taking photos Full Album here: https://www.flickr.c...57646957186579/
-
This is my entry for the mini contest. The main function of this model is given by the two manual operated helices. It has an openable cabin too. I have modeled it on LDD and it uses 200 pieces that mostly came from a 9394 set with a few from 42006, 42022 and 42020. This is a LDD screenshot so you can see how it looks And this is the LDD file https://dl.dropboxus...chnic/Plane.lxf Following these links you will find some more photos of the real thing (sorry for the quality of them): https://dl.dropboxus...26-42_photo.jpg (lateral image) https://dl.dropboxus...-27-35_deco.jpg (above image) https://dl.dropboxus...-28-15_deco.jpg (front image) https://dl.dropboxus...-28-53_deco.jpg (bottom image) I hope you like it PD: I know it has some oddities like the steering wheel (the sports one should look _much_ better ) or the colors of some pieces but, unfortunately, this is the model I'm able to construct
-

Flight using Lego
anton1678 posted a topic in LEGO Technic, Mindstorms, Model Team and Scale Modeling
I've seen a lot of dead topics about LEGO flight recently, but no-one has anything electrical that actually flies. I did some research, and some math. We need to strip down our 'planes' , take off the plastic motor casing and battery box casing, maybe even just homebrew a battery box. Tethered flight is possible, according to zblj''s principles, but we need to start looking at the untethered side. Maybe this is going to look like a lego-frame quadcopter, but at least we will be using a lego motor, the buggy motor. Overvolting will also be needed, and maybe a gear-down. -
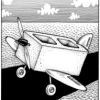
Solo Trainer Set #: 6673 Year Released: 1990 Piece Count: 65 Minifigs: 1 RRP: unknown (Edit- probably around 4.99GBP). Searching the review index I spotted that no one had yet given attention to another of the sets I wished for but never had back when I was a kid. So after a little e-baying I give you my take on 1990's Solo Trainer. But... before we start I will raise my one issue with the set: it's name. Apparently the lego town flying school teaches their students by sending them up alone in a twin engined aircraft....though, maybe this is one of the reasons lego town's and city's have such well funded fire departments! Anyway, onward with the review! The Box Unfortunately I don't have a box for this one, however as with all kits of this era, the front print on the instructions matches the front box art, showing the aircraft from perhaps its best aspect (more on that later) against a washed out representation of a runway and airport control tower set against a cloudless blue sky - the weather was always good in 1990's town! Also on the cover in soft focus we see the ground equipment that comes with this set. The Minifig Yep, just the one, well he is training solo. No printing to be found, just a plain blue torso with white sleeves plus red pants and baseball cap. He's not exactly up to the standard of the smug pilot of today's sets: The Parts Here are the bits that go together to make your plane, nothing of particular note, but you do get some nice blue wedges in there which are good for 90's era boat/plane (or dare I say classic space?) MOCs. You also get 4 trans-blue 1x2x1 panels: The Instructions Standard double sided fold out affair split into a very short (2 step) ground equipment build followed by 15 steps of aircraft. Despite the change in background colours from sky to grass, there are no issues with contrast and they are relatively easy to follow with a few mini-build call outs. Our intrepid student might be worried though as he was hoping for some instruction on how to fly the plane, not just build it! The Build and Model The build starts with the ground equipment which includes a simple shell liver fuel drum and hose and a big spanner which our student will need to build his aircraft. Luckily for him there's no particularly novel techniques involved. Here is a shot about a third of the way through: Fuselage is done, onto the wings, which are a separate call-out build: As you see in this next shot the wings and roof are a single assembly which hinges forward to let the pilot in through the roof. The gaps at the back of the cockpit really irk me, particularly as this ugly feature is hidden from view on the box art. Why they did not use plates and tiles, or 1x1x1 cornet panels to fill the gaps I do not know? Im also unsure about the open sides here, it 1x2x2 panels or airplane windows might look better. It is a bit of a struggle for our student to get in! Having finished the plane, it's time for a pre flight walk around. From the side the plane is noticably short and stubby, but does look quite smart if you ignore the cockpit issues. The engines are simple 2x2 with pin pieces and again could perhaps use a little detail: From the front, no complaints: Fueling Up: Our smug modern pilot instructor gives some final words of wisdom: "so there I was, in a 2g inverted dive..." Oh dear, first flight hasn't gone too well! The IP decides its time to make himself scarce: The Verdict Build& Model: Average, nothing novel, but the resulting model is well shaped and reasonably robust for the part count. Just a shame about the 'missing' parts around the cockpit: 7 Parts: Some useful bits in here, nothing unique though: 7 Figure: Pretty plain, and there's only one, this set could use a maintenance guy, or instructor with a walkie talkie to add a bit more appeal: 5 Playability: Its a plane, you can 'swoosh' it! The ground equipment adds a little extra too: 8 Overall: A fairly solid all round set given the part count. Looks good from most angles though some modding of the cockpit and engines would likely improve things. If you want a small civilian aircraft for cheap, then you could do worse than start here: 7
-
Hello friends! I have been entertaining myself recently with LDD. I have always loved aviation and especially military planes. I have seen some beautiful large-scale builds of the famous SR-71 Blackbird but they are always so huge, and I had some ideas to make a smaller, more practical model, perhaps sacrificing detail for the sake of practicality. Anyway, I would love all your comments, criticisms, and suggestions. Don't be afraid to be harsh- I really want to know how I am doing. Thanks in advance! http://imgur.com/a/Cuyy9
-
Steven: Lets hope that cargo we sabotaged the plane for is still intact. Ian: Don't you worry about that....
-

[JFAIR] Biplane (WIP)
unimog123 posted a topic in LEGO Technic, Mindstorms, Model Team and Scale Modeling
This is what I'm making for the January-February Air theme. It is essentially a biplane, but I might add or take away certain things to make it unique. Here is what I have so far. I have come across a bit of a problem with the landing gear. I did not realize that the setup I was going to use with two mini linear actuators(front/back) doesn't work. They end up going in opposite directions. I may try changing the direction of the gears or using a worm gear solution. Also the gearbox in the cockpit will control the landing gear and hopefully the rudder. I would appreciate any suggestions. -
Many people looked forward to the new Superman movie <Man of Steel>, but were much disappointed when the movie was not something that they expected. However, I think the first part of the movie about Krypton, the home world of Superman, is quite awesome. The organic high-tech kind of design looks very interesting without being too overwhelming or too different from human's world. Too bad that Lego's Man of Steel series only have the dropship and escape pod, and I think the awesome attack ship by General Zod should also be included. This time, like I did The Bat last time, I bought the movie book to study what this plane really is before starting the brick building. I couldn't believe that it only had one page about this ship, with only this blurry image: This type of ship only appears once in the movie, in which General Zod came to Jor-el's place to stop him from sending Superman to Earth. I have trimmed that little bit of the movie, and see if it helps you recall what I am going to show you. After nearly 2 months I finally completed the model, and it was featured too in the recent Hong Kong Lego exhibition "Bricks Adventure 2013". Now, here is the overall view of what the Man of Steel series should be! Close-up of the cockpit. There is no glass, and with the Krypton technology, why do you need to see the outside? Haha! Also, check the guns at the front, which can be adjusted for different angles. They are the weapons blowing off Jor-el's place... Inside the cockpit, one Kryptonian can be fitted in. The attack ship is basically a bigger dropship, transferring warriors to the battlefield. The center part is empty, and you can fit around 8 soldiers here... The most complicated and difficult part is the wings, which is also the prominent feature of this ship. I guess they take the idea from insects. Each side of the wings have 3 members, each can then be rotated to adjust flight position. I fixed the innermost two parts, leaving only 4 of them being adjustable. Also, the 3 members can be opened outwards or packed together. The concept for all these rotated blades of engines is for the control of flight direction. If the plane is moving forward, the engines along the blades (green parts) will face backwards. If it needs to slow down, the wings will flip to the front, like this: (you can see that in the clip above too) If it needs to stay in the air, the engines (green parts) will face downwards. This is a shot of the back, which features a pair of engine too. Different rows of engines will be turned on depending on the moving direction of the plane (as you can see in the clip) Okay now you know how the wings work. Time to land and find Superman! There are quite some design considerations during the development. I decided to keep the same kind of color and form that the original Lego series had set up, but at the same time I had to follow what the movie had designed (the dropship was not completely like the original!). It is quite a struggle. In the movie, there is no green color, but I prefer what Lego did with the green color, since it is what Kryptonite is like in the comics. Also, I keep the details from the dropship: tan base plates, shooting missiles...etc. The hardest part is the pair of wings. I have redesigned it four times, trying to keep the same design and form but making it lighter so that the hinges can withstand the long blades. Now it is slightly supported too by the top part of the plane, which is okay for now. I may improve it by using some Technic pieces later. Now everything is set, the Kryptonian war begins!
-
REVIEW: 60015 - Coast Guard Plane In the summer wave of 2013 Lego has release a number of sets related to the coast guard. The last time Lego used this theme was in 2008, which was when I was still in the dark ages so for me, someone who loves the sea and boats, this was quite an exciting announcement. As soon as the sets hit the stores, I bought them, and build them, and boy did they deliver. It's been quite a while since my last review in this series, but I've finale gotten my hands on the LEGO store exclusive Coast Guard Plane. Now let's see if that exclusiveness made the set more awesome or not. Coast guard review index: 60011 - Surfer Rescue 60012 - 4x4 & Diving Boat 60013 - Coast Guard Helicopter 60014 - Coast Guard Patrol 60015 - Coast Guard Plane 60015 - Coast Guard Plane Set Nr: 60015 Theme: City Year released: 2013 Nr of parts: 279 Minifigs: 3 Price: US$44.99 / €44.99 / £34.99 The box On the front of the box we get a scene that reeks of danger, as the fishing boat is making a lot of water and the coast guard plane comes in way to low and will probably ram the boat. Yep, those fishermen are in a heap of trouble! In the bottom right corner we are reminded that the fishing boat really floats, which I, once again, don't recommend trying after applying the stickers to the sides of the craft. On the side of the box we see that the fishermen have made it to shore safely and continue their craft from a pier, while the pilot of the plane walk up to them, presumably to apologize for his reckless flying earlier on. On the back of the box we are reminded of the modular building method and the other sets in the coast guard series. on the right hand side we get some images to steer kids in the right direction, giving them a LEGO approved scenario to play out with the set. The instructions The set comes with two booklets. the first one detailing how to build the boat, and the second one for the plane. The building instructions are very clear, with a nice watery background that in no way interferes with the build. I think by now we all know what's on the back of these booklets (and are desperately trying to forget that same information), so I'll refrain from putting those here. If, for whatever reason, you are still curious about the backs, just look at any of my other coastguard reviews, since it's basically the same. The contents Appart from the booklets, you will be getting 4 bags with the stuff it's all about: LEGO's. You will also find a couple of stickers... ...and a ship's hull and "Orange Aircraft Fuselage Curved Aft Section 6 x 10 Bottom" which didn't fit into the bags. The build In the first bag we find the parts for the ship, which are predominantly blacks and grays, with some green thrown in for good measure. Also in the bag are two cartons with string. The first order of business is assembling the two fishermen. They both have nice looking front print, but no back printing. The guy on the left has a pair of scissors and a pencil in his front pocket, which I doubt have a great usability while fishing (okay, maybe the scissors can be useful). The fig on the right has a very basic look to him. To be honest, they don't really look at home on a fishing boat, I would've liked the figs to have some more appropriate clothing. Let the building start! To start off we assemble the back part of the boat. After which the powerful looking engine is added. We then build up the sides and front of the ship and put a base in the center for the cabin. The cabin is added, with a great use of the lances as antennas (antennae?). And then we add some more details and the boat is done!. I like the aesthetic of this small fishing boat. The only thing I'n not so sure about is the 2 water spouts signifying leakage, but I guess they can be removed easily enough. In the second bag we find the parts to build the base of the plane. We get a wide variety of colors, with the orange, blue and yellow parts, as well as the usual blacks, grays and whites. The console is a printed part. Here we have the pilot of the plane, wearing the same safety harness as most of his colleagues from the other sets, as well as some bitchin' sunglasses. We start by building the base of the plane. which, I must say, at this point looked quite unimpressive to me. The center of the plane is build up, and that's it for the second bag. Nice detail: In the cockpit are a wrench and fire extinguisher. In the third bad we find a lot of white and grays, with a bit of blue and yellow sprinkled in for good measure. The wings are added and we finally get a better feel for the size of this thing. It may not be so bad after all. The top is added, making it look like some weir cocoon with wings attached to it. Next up is the tail section. Now it's starting to look like a plane! A few details are added to the top of the plane, and the props are attached. Damn, those look like some powerful engines. In the fourth bag we get a lot of duplicate parts, which is to be expected when building two identical pontoons. The pontoons are build simple but effective. The have a nice sleek look to them. And when we add them to the plane we are... ...Done! Despite some doubts in the start this turned out to be a very nice looking plane. One complaint however is the internal space. There is enough space for the pilot in the cabin, but there is no way he can rescue those fishermen with that plane, unless they have to sit on the pontoons and hold on for dear life. The plane has a very good look about it, both from the front and from the back. Conclusions (Disclaimer: I don't believe in giving numerical scores. It is up to the reader to decide what they think of any given model, and I believe mandatory scores detract from this notion.) minifigs: The fishermen don't really look the part, but I guess they are sufficient. build/design: The plane would've been nicer with some more internal space, but the overall designs of both the plane and the boat are great. Playability: You get people to be rescued, and someone to rescue them. What more could you want? Overall I think this is a nice set, but maybe a little bit overpriced. Nevertheless I'm glad to add it to my collection. Now, since there isn't enough space for them to fit in the plane, the fishermen better start scooping the water out using their tiny bucket!
-
Greetings! Thought of sharing my latest MOC. Some people might already know about this, as it's on CUUSOO and also on my Flickr page. A Douglas DC-3 airplane in Buffalo Airways colors: Some of you might remember my first DC-3 MOC, also on CUUSOO: http://lego.cuusoo.c...deas/view/17534 Well it happened that Mikey McBryan (https://twitter.com/mikeymcbryan) of the Buffalo Airways, a company operating an entire fleet of real DC-3s and other classic planes, found that project and then contacted me with his idea that we could make a Buffalo Airways DC-3 project on CUUSOO, me taking care of the model and he focusing on the promotion business. The Buffalo aviation family and their planes star in this TV show Ice Pilots NWT as well. I confess, I have never watched it myself - I don't watch anything on TV, since I don't have a TV. This DC-3 design is smaller than my first one, that is, more affordable and easier to handle, in order to have better chances in the CUUSOO Review - if this project gets that far. Maybe FOLs here on Eurobricks like to help? We've seen how IP-connected licence-requiring ideas tend to succeed at getting 10k supports on CUUSOO far more easily than all-original ideas. So I was thinking, if they gotta be licenced stuff, at least be something that makes sense as a Lego set idea, and can appeal to others too (regular kids & dedicated FOLs) and not just the particular special interest group. So I'm thinking, a cool airplane with both display & play value, can't go wrong, right? A few more pics: Some pieces are not yet available in colors used (especially green) so I had to PAINT them! Like my bigger DC-3, this too has retractable landing gears, operated from the knob: And of course some essentials for playability, like the luxury of interior accessible via detachable top sections (a pilot can sit in the cockpit, passengers and/or cargo space in the back): If you liked this project to have its chance in the final CUUSOO Review, please support - or just check out for more information like piece count and measures: http://lego.cuusoo.c...deas/view/51472 Anyway, my MOC ain't mine no more. As a part of our deal, Mikey paid for the model and I shipped it to Canada. Bye bye baby! But I'm sure she'll be loved there at her new home. And just a little note if there are some new folks here who don't know about my other projects on CUUSOO and might be interested. http://lego.cuusoo.c.../Ssorg#projects
-

Crimson Skies Brigand
Omikron posted a topic in LEGO Technic, Mindstorms, Model Team and Scale Modeling
Hello everyone, here is my recent creation of Crimson Skies Brigand. (For those who doesn't know what "crimson skies" is - it is a great flying simulator for PC and first generation of xbox console) Here are some teasing photos (I'll upload more after proper resizing) Hosting problems... Captains control set Opened cockpit Closed Rear turret Elevator and rudders Black aileron Guns, joysticks and pedals Turret aiming at higher target Turret aiming at lower target Turret aiming at left target Turret aiming at right target Docking hook is hidden Docking hook opened Propeller pitch 1 Propeller pitch 2 Beautiful engine Propeller blade Blades must be like this, but I had no money to buy a set of parts =( Ask questions, I'd be glad to answer! -
1930, Friday 13rd June : 6am Henri Guillaumet say goodbye to his friend Antoine de Saint Exupéry before taking off for its 92rd flight over the Andes. Story of the Aeropostale by 74louloute, on Flickr Story of the Aeropostale by 74louloute, on Flickr He didn't know, but in a few hours, he crashed his Potez 25 at Laguna del Diamante in Mendoza, Argentina, because of bad weather. He walked for a week over three mountain passes. Though tempted to give up, he persisted while thinking of his wife, Noëlle, until June 19 at dawn when he was rescued by a 14-year-old boy named Juan García. He reached a village whose inhabitants could not believe his story. This exploit made him stand out among the 'stars' of Aéropostale. To his friend Antoine de Saint-Exupéry, who had come to find him, he said, "Ce que j'ai fait, je te le jure, aucune bête ne l'aurait fait." (What I have done, I swear to you, no other animal would have done.) More pics of the plane : ----- This is my first try at a forced perspective, I hope you guys will like it ! Critics and comments are welcome.
-
Hello everyone! My newest MOC is a minifig scaleg airport control tower! I enjoyed buildig it, hope you like it, too! The tower has 3 floors and detailed interior. On the first floor there is a kitchen with a fridge, a coffee maker, a sink, food and a frying pan in it.On the second floor we can find a fire extinguisher, a washbasin and a clean toilet with toilet paper. And on the top of the tower there is the control room! There are 7 chairs and tables in this room for the employees, 6 tables for the operators with tehephones, computers, radios, radar screens and red and yellow mugs, and 1 for the boss with a computer and drawers. There are two binoculars and a fire-extinguisher here, too. This octagon is not exact. First time it moved easily, so I used gray L elements on two side (up and down), and dark grey tiles on the other two sides (left and right) to make it stable. The angles are a little bit more or less, than 45 degrees. This floor is kept by 8 blue technic pins in position. There are the roof's parts and its construction on next pictures. It was difficult, bacause the distance of the octagon's sides is longer than X studs, but shorter, than X+1 studs. Bars can slide in the holes of the small white round plates, and that dark gray L elements helps, too. This pictures show the ladders between the floors. This pictures show, how it is possible to remove the control room. You have to remove firs the window of the toilet, then push the room. Please support the bus on Cuusoo, which transports the tourists to the airport: http://lego.cuusoo.c...deas/view/32505 Thanks for watching!