Search the Community
Showing results for tags 'helicopter'.
Found 114 results
-
For more photos and a 360 degree video, please check out my Flickr: https://www.flickr.com/photos/legoadam/
-
Hi fellow builders My third MOC here on Eurobricks is a minifig scaled model of the brand new SAR helicopter in Norway. The Leonardo AW 101 is a magnificent machine! I start off with some important information. I built this MOC based on a model i found on Lego Ideas. The creator SimonSchepp published six pictures of his grey army version of this helicopter, and I used these with the intention of making a similar model. The result is a helicopter that looks similar, but is probably built very differently. With only six pictures available It was really difficult to figure out how to build this thing. But I think it turnes out nice, and I learned a lot along the way. Hope you like it. Minifigs deserve only the best, and the AW 101 is state of the art. You can hoist the patients in to the helicopter. The crew has lots of medical equipment available for treating patients. The helicopter flies fast and safe in all kinds of weather conditions. Fully decorated cabin, similar to the layout in the real helicopter. Size does matter, and this thing is big. Fully decorated cockpit, with collective and cyclic. I know there should to room for 2 pilots. But to maintain playability, I could only fit in one seat. The godfather of helicopters, Igor Sikorsky, deserves som credit. Any comment or questions is much appreciated. Thank you for your time. Keep building :-)
-

[MOC] CityAirbus Air Taxi
Brickthus posted a topic in LEGO Technic, Mindstorms, Model Team and Scale Modeling
Following my disappointment that the Osprey 42113 did not follow the normal pattern of availability and cost, I decided to build a civil aircraft MOC of a similar price point. I chose the CityAirbus because it has an interesting configuration, not seen before in LEGO Technic. The real one is all-electric, improving on the usual gas-guzzling Technic prototypes. There was also room to innovate in the model. A lot of prototype aircraft inherit a shell from an existing one and fit new equipment, which doesn't make for such an interesting model. With Technic we want to see the new mechanisms, so I left the underside open to view the gearbox. There are three motorised functions: rotor spin, a "hovering" mechanism and a movement mechanism. A single L-motor powers the 8 rotors and a selection gearbox for the other 2 functions. The right lever does the hovering mechanism, which lowers a pair of linear actuators that move clear beams to raise the aircraft off the ground. The left lever does the movement mechanism that powers a sliding axle arrangement that drives clear wheels on the feet of the scissor jack. The two manual "mechanisms" are removal of panels on each side and the ability to rolls sideways when landed, using small wheels on the skids. The red lever sows the centre of the function selection gearbox. It works like the one on the back of Claas tractor 42054. The rotor drive comes from the centre of the gearbox, using the reversing bevels, and goes up, then diagonally to reach the front rotors. The rear rotor drive goes along the top. My first prototype test model allowed the rotors to tilt in sided pairs but they do not do so in the real CityAirbus. The motor is above and to the rear of the function gearbox. The hovering mechanism is geared down by worm but has a small gear-up before the worm. A clutch protects the motor. You can see the final drive from the end of a row of 16-tooth cogs to the LA (mirrored the other side). The movement mechanism has an axle sliding in a red 8-tooth cog in between the LAs, with bevel drives to the wheels. The battery unit (any 4x8x3 one will do) is housed at the rear. The 12-tooth cog shows the control to a PF LiPo for this prototype but the PU 2-port hub could be used. The maximum hovering height is about 7cm but the movement function works as soon as the skids have left the ground. Further flight uses the traditional "swooshing" method. Walking pace would meet the real 75mph design speed at 1:20 scale! My hope is that this will help to ensure that we have LEGO Technic civil aircraft of a decent size in the range of sets, seeing as the Osprey would have been around for at least next year, had it not tripped over the "non-military" policy. As a set, the final CityAirbus model would need to be sponsored by Airbus Helicopters, who own the IP to the real CityAirbus. They would specify decals to put the livery patterns and brand names on it. The design and build time was 125 hours over about 5 weeks in August and September, quite a few hours after midnight! More pictures in my Brickshelf folder Video on YouTube Project on LEGO Ideas Please let me know what you think, and do support and share! Thanks, Mark -
 FREEDOM GUNDAM Allow me to introduce my alternate model of the LEGO Technic 42145 Airbus H175 Helicopter. It uses only the parts included in the set. It is based on the ZGMF-X10A Freedom Gundam with slightly changed colour combo due to the donor set. The robot measures: 47 cm in height 61 cm in wingspan The model features 4 motorized functions operated by a gearbox: Wing movement Torso rotation Arm movement Head rotation Other features include: Poseable shoulders, elbows and thumbs Poseable hip, shoulder and knee guards Accessories include: Beam Rifle Shield Sword The battery box is attached to a brace that helps to stabilize the figure but it stands perfectly on an even surface. Hi-Res photos available here: https://bricksafe.com/pages/grohl/42145-freedom-gundam#
 -

[MOC] Just a Generic Helicopter.
weavil posted a topic in LEGO Technic, Mindstorms, Model Team and Scale Modeling
I bring to you the Generic Helicopter. It was made with no brand or style in mind. I started it because the hype around the release of the 42145 at the time. I also had the blades sitting around and finally felt it was time to try to make a helicopter. I wanted to make one that was full function and as compact as possible. Which was a little challenging, but not impossible. I wanted it it be manual to allow for more room to work with, however after I was done I realized I could fit a medium PF motor on top to power the rotor. The Work In Progress thread: The functions (not to short I hope): Collective Cyclic Pedals Spinning Rotors And Sliding Doors! Swashplate with finger slicers: Check out my good side: Look door! *Swoosh sound effect* Tail spinning thingy: The big one is for finger operation or you can spin the rotor its self: The Inputs: The bare bits: More pictures here! The video of plane Jane working the functions: Thank you for your time. -
[WIP] Generic Helicopter
weavil posted a topic in LEGO Technic, Mindstorms, Model Team and Scale Modeling
I figured It was time to make a helicopter and with the hype about the 42145 currently. (Like efferman's custom parts.) Plus I had the blades sitting here for almost two years. This is not any special make or model. It so far has I have a rotor top, cyclic, collective, and rudder peddles. I used, for now, a modified setup that efferman made; But so far I feel good about the progress. https://www.bricksafe.com/pages/weavil/2022/helicopter-wip -
 I showed this MOC the past weekend in the Lego Fan Weekend in Skaerbaek. After many cars and other land vehicles, now its time to build something different. This creation is based in the Russian helicopter Kamov KA-32. This helicopter has the peculiarity that it has two coaxial rotors turning in opposite directions, instead of the traditional main rotor with a small tail rotor. A real Kamov KA-32 used in Spain for firefighting. I have used the same color scheme. This MOC has been build in scale 1:16. The rotors has a diameter of 127 studs(102 cm or 40 in.) The fuselage size is 98x15x23 studs (78x12x18 cm or 30.7x4.7x7.1 in.) Both rotors are powered by only one PF XL motor and a PF Rechargeable battery. Complete rotors control using two swashplates directly from the cabin. Just like the real KA-32. Collective lever control: fly up-down Cyclic stick control(both sticks works): fly front-back-right-left(not turn) Upper rotor pitch pedals: turn right-left The controls only control de lower swashplate, and this one control the upper swashplate using the there grey links . The front wheels have free steering. And the rear ones have suspension, and a side sliding door. Very quick fuselage disassemble. I know that all this technical features and strange functions are difficult to understand. So here you have a video showing the helicopter working. As always more info and pictures in my website: sheepo.es
 -

[MOC] AW 169 helicopter [US Navy edition]
steph77 posted a topic in LEGO Technic, Mindstorms, Model Team and Scale Modeling
Hi everyone, This is my next project. Its a replica of the brand new Agusta-Westland - AW196 Air ambulance. This model is a lightweight transport helicopter designed to be able to achieve missions in about every possible environment. This is also one LEGO project, and I have tried to take lessons from my previous helicopter MOCs. At this point I have achieved the most difficult part of the MOC. The complete control center of the rotor's head is done and perfectly functional. But before, have a look at the global model in it's WIP state: The global shape is coming out of the bricks actually :) On this picture you can see one joystick standing lateraly in behind the pilot seats: And you have the same on the other side of the aircraft. Other point of view: So, what's the goal? I already build previously helicopters with onboard command, even realistic commands. It was pleasant but not always really practical. So this time I decided to make use of a pair of joysticks, one on every lateral side. The left joystick controls the cyclic movement of the rotor. When pushing it to the front/back the swashplate incline to the front and back (forwards and backwards translation of the aircraft). Pushing the joystick up and down makes the swashplate incline left or right (lateral movement of the aircraft) The right joystick controls: the collective mouvement of the rotor when pushing it up and down The pitch of the tail rotor (command is operational, tail rotor still to build) Actually, the main rotor is perfectly functional with large amplitude movement of the blade. This amplitude was a real goal of this MOC, because I found lots of beautiful build on the net, but not really one with real large movements of the blades. Other view of the rotor head, i'll explain you all of this later ;) On the other function point of view, the BB already is placed in front of the rotor in order to assure a good wheight repartition on the 3 points landing gear. I will place now a gear box with to reversible commands on it : one for the landing gear in/out command and one other for the winch, that actually does not exist. There will also be one main clutch gearbox for the rotors, in order to be able to use of the other function without rotor rotation. So, that's it for now guys, this is the first take of it. Building time: about 20 hours actually. Any comment or idea will be appreciate. -
The Battle of Hue, 1968 (Tet Offensive) Battle of Hue, February 1968 by Nicholas Goodman, on Flickr Battle of Hue, February 1968 by Nicholas Goodman, on Flickr Battle of Hue, February 1968 by Nicholas Goodman, on Flickr
-
Hi all, I would like to present my new MOC Airwolf, there are two types: one is normal mode, the other is weapon mode with chainguns and missiles, I also create a display stand for it. Hope you enjoy the build!
-

[MOC] Bell 206 Helicopter
paave posted a topic in LEGO Technic, Mindstorms, Model Team and Scale Modeling
There are no many creations with the blades, so here's mine: Bell 206 Helicopter Features: - Main rotor collective pitch control - Rear rotor pitch control - Opening doors - Rotating propellers - PF: M-Motor, LiPo battery. Video: More photos: Building instruction: https://rebrickable.com/mocs/MOC-98383/paave/bell-206-helicopter/#details -

Model of a local Bell 407 Medevac Helicopter
droomangroup posted a topic in LEGO Technic, Mindstorms, Model Team and Scale Modeling
Hey all, I live in Moab UT which has more than its share of back country accidents and injuries and we have one of the busiest SAR teams in the country. I wanted to make a replica of our local helicopter but was a bit dismayed at first when i saw it's very elaborate paint job. At first i was going to do the graphics with decals, but i'm happy that i tried it with bricks as i think it came out great and provided some fun challenges to figure out. The windscreen is a old helicopter windscreen from like the 90's that's a bit taller than the similar one that's more recent. it's a shame it only came in trans clear though as a tinted one would have looked better. You can see i added some yellow stripes to it in order to break it up into the front split window and the side windows. All other decals are made by me on a vinyl cutter. This is one of the first really complex builds i've made in Studio (after finally ditching LLD) and I'm really happy with the result. there was only a few things studio tricked me into thinking would work, but actually didn't. thankfully i figured out some workarounds. record player for scale :) nose detail a view of the interior and some inner workings of the tail boom, i used 6L bar running thru 1x1 4 sided snot bricks to give it some stiffness here's two little tricks i did, first i used some round plates through an axle so i could position the 1x2 modified plate with the bars on each side to just the right position to allow some clips on the side walls to clip into it. then my favorite little trick was making a way to mount the 1x1x2 snot brick in the center rear to hold up the tail detail at the bottom of the boom. i used a 3L bar thru some 1x1 round plates with holes and the 2x2 modified plates with roundy bits on the end to flip the stud direction and give me a way to mount that brick right where i needed it. the connection is very strong and works great! here's a view of the base layer of snot bricks that allows me to get a nice curved bottom, i wasn't sure how this was gonna work out, but it worked great. finally here's a picture of the real thing... -
 REVIEW - 42052 - HEAVY LIFT HELICOPTER INTRODUCTION Helicopters, planes...basically everything airborne is +1 for me. The 9396 - Helicopter is one of my favorite models. I own three copies, which says it all. the news about a new helicopter made me very excited. The news about twin rotors made me even more excited. Although I must admit I was hoping for a Chinook style tandem rotor, instead of a double rotor where one is positioned on top of the other. This set does come with a Chinook style B-model, so maybe that will be worth building. One thing I immediately like better than the 9396 is the color scheme. I love the bright orange-white combination. This set seems to have a huge number of panels, which is not to everyone's liking. Let's find out what's going on underneath that smooth surface! Note: All images can be clicked for hi-res versions. SET INFORMATION Number: 42052 Title: Heavy Lift Helicopter Theme: Technic Released: 2016 Part Count: 1042 Box Weight: 1831 gr Box Dimensions: 57,0 cm x 37,3 cm x 8,0 cm Set Price (MSRP): € 119,99 Price per Part: € 0,115 Links: Brickset, Bricklink THE BOX The box is fairly big, which indicates a pretty big model. Unfortunately the box was damaged. Some cracks and dents, but luckily it wasn't ripped apart, like my Mercedes box. I'm not sure if TLG sends out the sets the same way when they sell via S&H, because I would be slightly disappointed to receive my sets like this. Update: I've seen more complaints about wrecked and/or damaged boxes, so there's room for improvement in the shipping department. The front of the box shows the helicopter lifting it's load. The model is 60 cm long and 53 cm wide. It also shows the contra-rotating rotors. As you can see an M-motor and battery box are included, so there are some powered functions. BACK The back of the box shows which functions are powered. We will deal with the functions later. It also shows the Chinook style B-model, which has motorised functions too. Looking at the front of the B-model I am not very tempted to build it. It looks like a flying guinea-pig CONTENT OF THE BOX The box contains: Sealed instruction booklet with stickers 6 Helicopter Blades 1 Sealed M-Motor 1 Battery Box 2 Soft Axles 10 Unnumbered Bags SEALED INSTRUCTIONS WITH STICKERS The stickers are sealed with the instruction booklet, like we are getting used to with bigger sets. I've said it before, but TLG deserves a big thumbs-up for this! The sticker sheet is still in perfect shape! HELICOPTER BLADES This set contains six of the Large Technic Rotor Blades, first released in the 9396 - Helicopter in 2012. PF BATTERY BOX AND M-MOTOR SOFT AXLES Two Soft Axles, or Flex Axles, are delivered unbagged. 19L? Who knows! More on these later BAGS Ten bags containing the rest of the, mostly white, parts. HIGHLIGHTED PARTS This chapter describes new and interesting parts. Not sure if it's a trend, but like the 24 Hours Race Car this set also has an abundance of panels. I've counted 51 of 'em (not counting the engine covers). It does have two new panels, introduced in most of the 1H 2016 sets. As from today this set officially contains the most Technic Panels. One more than the 42025 - Cargo Plane. 42052 - 51 panels 42025 - 50 panels 42039 - 47 panels BLUE 5x3 BENT PANELS These new Bent Panels seem to be very suited to make fenders/wheel arches and seats. AXLE AND PIN HOLE The axle counterpart of the Pin and Pin Hole. YELLOW 5L AXLE From what I can tell at the moment, the yellow 6L Axle is unique to this set. I made a mistake here. It's actually a yellow 5L axle instead of 6L. RED 6L AXLE Like the yellow 6L axle, the red 5L Axle seems to be unique to this set. This will obviously change over the course of time, but for now it's the only set containing them. I made a mistake here. It's actually a red 6L axle instead of 5L. 19L SOFT AXLES Finally, the black 19L Soft Axles! A lot of people will be glad to see these being used again. Only released in the 8450 - The Mission in 1999, this part has become very rare. DRUM TIPPER Of course these are no Cement Mixer Drum Tippers (60018 - Cement Mixer, 7990 - Cement Mixer). These are Helicopter Engine Covers, and quite good looking ones. They seem to be more versatile then you'd imagine, since they already appeared in 4 other sets. GREEN 3x11 PANEL Two green 3x11 Panels, not to be confused with bright green, used in the 42039. This is the same green as the 42008 - Service Truck from 2013. ORANGE PANELS A collection of 13 orange panels. WHITE PANELS A collection of 34 white panels. WHITE 5x11 TAPERED PANEL PLATE Introduced last year in the Fire Plane, this is a relatively new panel. 2x4 PERPENDICULAR BENT PIN CONNECTOR This 2x4 Perpendicular Bent Pin Connector was introduced in 2013 and it's one of those parts flying under the radar. You won't be needing this every day, but who knows when it might come in handy. PART LIST The set consists of 1042, shown below. THE BUILD Upon opening the booklet with building instructions, I noticed the color of the pages has slightly changed. The pages are lighter blue than we're used to. Probably to increase the contrast and make the difference between the darker colors better visible. This new color is used in every booklet of the new sets. The build setup is a bit different than we're used to. Usually you start by building one side, followed by adding things inside and finished by closing up the model. This time you start by building the fuselage, after which you continue with the gear box and rotors. ROTORS The image below shows the mechanism for the contra-rotating rotors. Actually I made a mistake here. I switched the two turntables. Luckily it didn't take me long to find out. At the top you can see an Axle Connector with Axle Hole which is connected to an axle going through the turntables. This axle is only connected to one of the turntables (obviously). The first set of rotors is connected to one of the turntables, while the other is connected to the axle going through the turntable. This is demonstrated in the video below. GEARBOX Here you can see the setup of the gearbox. A basic setup with a single layer of gears (more or less). You can see the 3L Driving Ring on both sides of the model, used to switch between the different functions. CARGO BAY DOORS I found the mechanism to open the bottom cargo bay doors to be very intriguing. Here you can see three stages of moving the H-Frame down. The video below demonstrates the gearbox and the mechanism for the cargo bay doors. This video shows the gearbox mounted on the fuselage, and the contra-rotating rotors. CARGO CONTAINER The cargo container wraps up the build. FINISHED MODEL Leaving the other building steps for you to discover, we skip right to the finished model. There's always a lot of debate about panels and closing a Technic model with them. I personally love a finished look with panels. Looking at the image below, I can only compliment the designer with his accomplishment. The helicopter looks fantastic! The design itself is fantastic and the color scheme is really spot on. This helicopter looks even better than the 9396 - Helicopter, which I will compare later in this review. The Drum Tipper parts used as engine covers is very well done. You would almost think they are designed to be used in this helicopter. SIDE REAR VIEW In this picture you can clearly see the rear cargo bay door/ramp and the landing gear. The tail rudders are operated manually, which is slightly disappointing. The solution in the 42025 - Cargo Plane was much better. The landing gear is pretty clever though. Very simple, but it works like a charm, using nothing more than gravity. SIDE VIEW The side view shows how well the helicopter has been designed. The panels align very well and the model is almost entirely closed. This is a matter of personal preference, but I absolutely love it. BOTTOM VIEW Yup, there it is...the battery box. You can also see the mechanism to operate the tail wing. I find this to be a weak spot of the model. The lever is positioned very close to the wing itself, which feels a bit useless. It would have been great to operate the wing with the orange Bionicle Tooth located near the tail gate. You can clearly see which panels are used for cargo bay doors. Two 3x11 panels are used as bottom cargo bay doors, and a 5x11 is used as the back cargo bay door (ramp). Both are operated by the Power Functions motor (see features and functions). FRONT VIEW REAR VIEW ADDITIONAL IMAGES Here are two additional images from different angles. PARTS LEFT It's interesting too see TLG provided an extra 19L Soft Axle. It appears to be used in the B-model, but it somehow feels like an added bonus, since this part is wanted by a lot of builders. The 6L"]http://alpha.brickli..."color":11}"]6L Rigid Hose[/url], which is also used in the B-model, is extra too. Since the instruction booklet tells us we are only supposed to get a single 19L Soft Axle, I am not sure whether it's used in the B-model (it looks that way though). FEATURES AND FUNCTIONS This set has the following features: Contra-rotating rotors (Power Functions) Opening bottom cargo bay doors (Power Functions) Opening rear cargo bay door/ramp (Power Functions) Operating the winch Operating tail wing (Manual) Operating tail rudders (Manual) Landing gear Castering nose wheel The following video demonstrated all of the functions/features. I have added an IR receiver and I am using a PF remote to operate the powered functions. As you can see all the functions work very smooth. The powered functions work pretty fast, so there's no waiting for ages before the cargo doors open up. The winch is the slowest of them all, but that makes sense. As you could read in the review, I don't really like the manual tail wind and rudder functions. I know a designer needs to make concessions, but wasn't it possible to operate the tail wing with the orange bionicle tooth. The castering nose wheel does work properly, and so does the landing gear. Both very simple, but they do their job. SUMMARY Like I said at the beginning of my review, I am fan of flying machines. And to be honest, I am an even bigger fan of helicopters than planes or jets. This might influence my judgement. I am also a big fan of white, orange and grey, so that's another plus. And I happen to like models finished with panels. Do you see where this is going?! I absolutely love this model. The 9396 - Helicopter was one of my favorite models, but I like this one even better. The closed design is something I like a lot, as long as the model is packing some functions too. Panels alone don't cut it. Well, this set has some cool features under those panels. The mechanism for the contra-rotating rotors is pretty nifty. So are the bottom cargo bay doors. The things I like the least is are the tail wing and tail rudders. The tail wing is operated manually, but it's a simple lever positioned very closely to the actual wing. And the rudders are operated by simply moving the rudders themselves. As with the Mercedes I am not a big fan of operating a model by using the switch on the battery box. It confuses me, and you can't easily reach it. I understand TLG can't throw in a remote and IR receiver each time they supply a PF motor, but it's probably one of the modifications most AFOLs will immediately apply. That being said, I absolutely recommend getting this fantastic model! SCORE Okay, so how do I grade this set? 9 DESIGN Absolutely magnificent. 8 BUILDING EXPERIENCE Great build with some clever techniques. 8 FEATURES Great functions, but rudder and tail controls need improvement. 8 PLAYABILITY Lots of things to operate, but would work better with a remote control. 9 PARTS Contains lots of new parts and loads of white panels. 9 VALUE FOR MONEY Worth every penny. Will buy another one. 8,5 ABSOLUTE EYECATCHER BONUS COMPARISON I will end this review with a comparison between the "new" and "old" helicopter. As you can see my 9396 has a yellow and black color scheme, instead of the original yellow and red, but it will give you a clear picture on how these two compare. More pictures can be found on my Flickr page. Thanks for reading and I hope you enjoyed it.
 -

[C-model] 42106 - Pullback Vehicles
Tomik posted a topic in LEGO Technic, Mindstorms, Model Team and Scale Modeling
Few months have gone since I built my last alternative model from set 42106 and I got desire to build another one. The first model was Pullback Racer that I built for TC18 contest - more about it is here. Then I built Pullback Plane - more about it is here. And finally now I've built Pullback Helicopter. I planned to build it even before plane but I rejected it because I didn't see the way how to connect both rotor blades with pullback motor and landing gear. Set 42106 contains only 5 bevel gears and I usually use 6 for helicopter (three pairs). Later I find solution for problem with missing gear - I saved one bevel gear by connecting axle for tail rotor blade to another pair of bevel gears that transmit motion from horizontal axle to vertical. The only con of this solution is low possition of axle for tail rotor - see picture of mechanism. The last issue, I had to solve, was possition of center of gravity - it was too close to tail so helicopter made wheelies. I prevent them by adding structure under tail rotor blade. Do you think it was all for now? No, it wasn't. I've got one more idea, much crazier idea - I wanna build Pullback Steam Engine! I focused more to functionality than its look so proportions are not correct but it really works. Pullback motor is connected to rear axle and it drives also middle axle thanks to piston-rods. Front axle with small wheels works just like stabilizer (I had to move driven axles too far to rear behind center of gravity and whole vehicle would fall on its front without small wheels). Finally I added optional flame on chimney (smoke would be better but I didn't find any in donor set). I plan to make video of steam engine in action but it will not be anytime soon. Any comments and criticism are welcomed. -
I would like to present you my latest model. It's HH-3E combat search and rescue helicopter, known as 'Jolly Green Giant'. It's a derivative of the Sea King helicopter, with longer and more spacious fuselage with rear loading ramp. It served in US military from early 60s to operatrion Desert Storm days. My model, 1:40 of scale, was initially uploaded to my Flickr acount during Christmas 2016. But then, it has black notions, not as fancy as dark green-olive green-tan camo I proudly present now. Some minor updates also have been applied. You can see more shots on my instagram: www.instagram.com/p/CODE53hpyEg/ www.instagram.com/p/COBhR93piyE/ I'm new on insta, so it would be a huge thing to me to receive some follows, likes and shares. Thank you and enjoy!
-
I would like to present you my latest helicopter - Sikorsky UH-34D Seahorse from late 60s. It's also known as S-58, HSS-1 Seabat, H-34 Choctaw etc. It took my 3 months to design it and collect all needed orange pieces. Enjoy! https://www.instagram.com/p/CNfwuNZJROX/?utm_source=ig_web_copy_link https://www.instagram.com/p/CNiDk00pWbn/?utm_source=ig_web_copy_link
-
 Toy Helicopter - Lego Mini CLAAS XERION 42102 Alternative Build Free Building Instructions: https://rebrickable.com/mocs/MOC-71747/makushima/toy-helicopter-42102 Lego Mini CLAAS XERION 42102 Alternative Build - MOC - Toy Helicopter (Free Building Instructions) by makushima Three-wheel Extended Version Lego Mini CLAAS XERION 42102 Alternative Build - MOC - Toy Helicopter (Free Building Instructions) by makushima
 -
[42125 Alternate] Helicopter
paave posted a topic in LEGO Technic, Mindstorms, Model Team and Scale Modeling
Since the 42125 Ferrari set has blades... The features are: - Rotating propellers - Collective pitch control - Folding blades Video: More photos: Rebrickable page: https://rebrickable.com/mocs/MOC-68779/paave/helicopter/#details -

[MOC] PERSEVERANCE Mars 2020 Rover + INGENUITY Helicopter
cyberdyne systems posted a topic in LEGO Technic, Mindstorms, Model Team and Scale Modeling
Good time, everyone. It is actually a really good time to Iive in. With all this historical events like yesterday's landing happening around us. To celebrate the successful landing of Perseverance, I've created this Lego technic model of Marsian rover. I've tried to recreate as much detail as possible. because one of the goals was not just to make Lego rover, but a good educational model, which can be used to show people how the real one works, what instruments it has on board and which experiments they will help to conduct. So,the video serves the same purpose - to be entertaining and a bit informational. I hope, you'll like it. And if you liked this video, please share it with others, because science popularization is a good thing to do! Also, tell if you want, do you have such ticket to mars, like in the video? See you on the Red Planet! P.S. Music in the video is by soviet group called Zodiac. -

42113 Bell Boeing V-22 Osprey
Ngoc Nguyen posted a topic in LEGO Technic, Mindstorms, Model Team and Scale Modeling
DBG and Orange. 129.99 EUR. The four functions are switched manually. Special features and new parts: - New rotor blades - New panels 3x13 left and right that suit perfectly Panel Curved 3x13 (18944) - Control+ battery box - 1 motor Functions - Driven rotors - Tlting the rotors - Retractable undercarriage - Open and close chopping flap Go nuts -
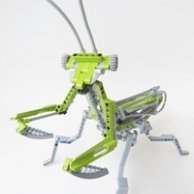
[MOC] Technic Attack Helicopter (Building Instructions)
makushima posted a topic in LEGO Technic, Mindstorms, Model Team and Scale Modeling
Lego Technic MOC - Attack Helicopter Building Instructions: https://play.google.com/store/apps/details?id=max.moc.technic.instructions.prime Lego Technic MOC - Attack Helicopter Lego Technic MOC - Attack Helicopter -

[MOC] Autogyro - Lego Technic 42117 C model
Silvavasil posted a topic in LEGO Technic, Mindstorms, Model Team and Scale Modeling
Hi everybody! This is alternate model of the official Lego Technic set 42117The main feature of this model that it can drive around 2 meters. Realistic sound, both propellers rotate. YouTube When you push the model, the drive axle make the propeller works which produces the centrifugal force that force the drive works more longer. Follow my instagram: https://www.instagram.com/silvavasil_lego/ -

30465 Polybag Helicopter [VIDEO REVIEW]
Sariel posted a topic in LEGO Technic, Mindstorms, Model Team and Scale Modeling
Here's a brief review of the set no one saw coming, including parts list and building instructions :) -

[MOC] Airbus Eurocopter EC135 (Police helicopter)
T Lego posted a topic in LEGO Technic, Mindstorms, Model Team and Scale Modeling
Hi everyone, I would like to present my latest creation to you: A lego technic helicopter inspired by the Eurocopter EC135, in particular the police version. The eurocopter is an iconic helicopter which is widely used by police, fire and ambulance services and for executive transport worldwide. In fact I see these fly over my city almost every day The model presented here is not a very identical copy of the real machine, because I always like to be a bit free with the styling. As a matter of fact this model is in the end more of a display model than something to play with. When I started this project I aimed for a relatively small and compact package with some PF comonents inside and A goodlooking bodywork. I think I found the right ballance between panels flex axles and connectors. - Dimensions: 47x13x22 Studs -Weight: 750 g -Rotor span: 47 studs -White and Dark Azure collor scheme -easy accessible PF AAA battery box -Motorized main rotor and tail rotor powered by a PF M motor -Clutch gears for safety -Tiltable rotor blades powered by a PF M motor -Controlled using a standard PF remote controller Designing the tail (rotor) was probaly the biggest nightmare of this model. All the curved shapes and angles made it very hard to put it together. On top of that, a driven axle had to be placed inside as well. The solotion regarding the tail rotor I came up with was to use a rubber band. I tried using gears as well but it turned out too bulky and very ugly. Another challenge was the Dark Azure collor scheme. Not many parts are available in this collor so that was a huge limitation as well, but in the end it looks much better then most other collors would on this model. And at last a shot together with my Audi RS1 which, despite being built in different scales, look very nice on the shelf next to each other. Also special thanks to everyone here on the forum who helped me with the design on my WIP topic. I won't make instructions for this model, but for my current WIP I will. Comments, feedback and questions are as usual highly appreciated! -

LEGO 8640 Update
Thirdwigg posted a topic in LEGO Technic, Mindstorms, Model Team and Scale Modeling
Ever since TC15, and @Lipko who (I think) came up with and @Rudivdk who used a great little variable pitch propellor system using the three-pin technic hub, I knew I had to use it for a little helicopter. I used it in a failed design, and a little executive helicopter that was not great. I wanted to try it again. After playing with some panels, I decided to try my hand at one of my favorite little sets, 8640 from 1986. It is mostly the same size, but seats two technic figs and their skis and poles. Both main and tail rotors spin, and the collective for the main rotor is controlled by the pilot. Ski and pole storage I hope you enjoy. I'll take it apart soon, and I'll make some photo instructions then.