Search the Community
Showing results for tags 'Train'.
Found 774 results
-
Hi everyone! Well, it's time to share a new MOC with you. The Monorail Emergency Train. The idea of such kind of equipment resulted from a derailing incidient on Brixe's monorail diorama during the last Fanwelt in Cologne, where the Farnheim Fire Department was called for technical assistance. So I started to create a special Monorail-based emergency and rescue vehicle. With that train the Farnheim Fire Department should now be well equipped for such future incidents. The train features an emergency module where evacuated injured passengers get first medical aid. The second supply module is equipped with lots of stuff for technical assistances and a huge watertank with a separated smaller foam tank. On the roof a big water cannon and a high reach extendable Turret (HRET) for structure fires nearby the railroad system are also installed. The electric drive has the advantage to evacuate passengers in heavily smoked tunnel systems. The train is sited in a special building near downtown Farnheim. Hope you like it. Thanks for watching. Critics and comments are very welcome as usual. Best regards, Farnheim
-
Hello! I would like to introduce my town and show you some photos... I have just decided on the name Brixton for the town and have made a few updates today, altho this is the first time i have posted it on the EB Forum. Previous updates can be found on my youtube channel here: http://www.youtube.c...iew=0&flow=grid and also on my flickr photostream (photos below are links). Anyway, without further ado, a couple of snaps! So there's a few pics, but there are more on my flikr stream so please check it out. Future updates will arrive, and i have a few MOCs/MODs in the pipeline as well as plan to have a railway all the way around the city, and tiling the road plates. Unfortunately Brixton Town Council is a little short on funds atm, so it may take some time. Comments and suggestions welcome :D Cheers, TimmyC
-
One of the most enduring stories of the Civil War is the 1862 Andrews Raid... or better known as the Great Locomotive Chase. The namesake at the center of this drama is the locomotive "The General": http://flic.kr/s/aHsjEtRoBg . The paint scheme shown here is not how she appeared in 1862... however it is the one popularized in the mid-20th century and what most people remember. This static display model was a commission. It leverages many techniques from my Wild Wild West locomotive "Inyo" but with a more traditional brick frame. It also sports a set of Zephyr1934's (Ben C's) custom drive rods ( http://www.bricklink...re.asp?p=zephyr ). My only regret is that I ran short of large BBB drivers so had to include standard Lego drivers :-( - Brian Williams
-
This MOC is a blast from the past:http://www.flickr.com/photos/brian_williams/sets/72157633093116564/ . The year was 1999 when I joined GMLTC to exhibit at the NMRA National Train Show in Minneapolis, Minnesota. To my knowledge this was the first time a Lego layout exhibited with the NMRA National Train Show - and it was a HUGE hit. My contribution to honor the occasion was to build the William Crooks: the first locomotive to operate in Minnesota and two prototypical cars of the Saint Paul and Pacific Railroad. Now remember this model is a tad old... and it hasn't been upgraded through the years. It retains a basic slope boiler and studs on the roofs. However, the custom stickers still hold-up with the best today as they were made on an Alps. The technique to allow the cylinders to clear the pony truck is still quite unusual. And of course there is the pure nostalgia factor ! - Brian Williams
-
I've recently started photographing a long backlog of MOCs. Here is the finished Wild Wild West train which took Best Train at Brickworld 2012: http://flic.kr/s/aHsjvZkYzK . The prototype can be seen here: http://wanderer.jame.../MAIN_PAGE.html The train is notable as it is built to scale using 1 stud = 1 foot taking advantage of figures with the long Toy Story arms and legs. It also features several excellent applications of structural stickers around the cylinders, domes, and on the coach roofs. - Brian Williams
-
As I mentioned in my post about the GN S2 MOC, I have slipped one step further down the Lego purity slope and made my own ladders. (click on the image or here to see the full gallery) You can see examples of the short ladders clipped on at the front of the tender and the long ladders clipped on at the back of the tender. If you look closely at the ladders on the front of the tender, you will see that the surface is matte (they will not be mistaken for shiny bricks), but some of the lego bars have a similar matte surface. The spacing between rungs is similar to the lego bars, but I've made the holes square instead of rectangular. Probably not something a minifig would want to put their foot in. I think the dimensions look a lot better for my rolling stock and it is definitely a heck of a lot easier than trying to do a brick built version. This past week I've retrofitted one of my earliest MOCs with the new ladder- original in back and new in front. Click on the image to see more, including the smaller ladder on the other end of the car. I like the proportions a lot better. After doing this change, I see a lot of other tweaks that I will do to the boxcar, e.g., using grilled cheese bricks for the running boards leading to the ladder, removing the buffers You can see photos of all four sizes that I've fabricated so far here. And for those of you who want to be tempted down the purity slope, you can do so here. Enjoy!
-
Brickworld 2012 FPS: A View From the Front of the Train (and sde)
CarrollFilms posted a topic in LEGO Train Tech
WARNING: THIS IS A 15 MINUTE LONG VIDEO. Just a heads up. Skip the first minute to get to the trains part, each train runs for about a minute or two then it switches to a different one. http://www.youtube.com/watch?v=IriDOWKT7N8 I filmed this last summer and thought I might as well share the adventures of my camera. Hopefully I will have photos showing the cradle that was used for filming this rather soon. -
full gallery I am pleased to present my rendition of the preserved GN S2 class 4-8-4 northern, #2584. This locomotive has been on my to do list for quite some time. I was waiting for the cheese slopes to come out in sand green and then it was only a matter of time. I first saw this engine many years ago while taking Amtrak through Havre, Montana where she is on static display. How bold to paint a steam engine such a bright green. Sure, she was an oil burner, but still, imagine the work to keep that boiler looking clean. The US railroads loved to do this sort of thing and fought to keep their equipment clean (remember, these trains were the equivalent of today's business class on transcontinental flights, heck, the NYC's 20th Century limited is where the phrase "roll out the red carpet" originated, but I digress). Delivered in 1930, the engine arrived in the Glacier Park paint scheme and the fleet of S1 and S2's were used to pull the finest passenger trains on the Great Northern. By early 1950's they were reassigned to freight and repainted black. The 2584 was retired Dec 1957 and stored. GN decided to preserve this locomotive and after restoring it, put it on display in 1964 (more details can be found here). When I saw it, it still had "no trepassing, BN Ry" signs on the fence. So presumably it has been under railroad ownership throughout. When I started building the custom valve gear parts, I knew it was time to build this engine. It took a few months, but here's my model. I must say, building in rare color like sand green is extra fun. Let's take a tour from the front to the back. On the nose I had to have the air compressors, and here was the first collision with the limited parts availability in sand green. I almost gave an arm and a leg to solve it but in the end I managed to keep the arm. Getting all of the snot for the smoke box working was an exercise in multi-dimensional optimization. On the side the stairs up to the running boards turned out well (I'm not sure if I came up with that solution on my own or if I first saw it on another model). Also note the hand rails, a refined design from my earlier northern's. Within the boiler, the framework is largely unchanged from my J, and later used on two other northern's. The design is solid for operating at shows with uneven tracks- the drivers are pulled from the pilot truck and the boiler itself rides on just two trucks. This has the added feature of keeping the swing within reason on curves. Allowing me to put the tender foot plate at the cab foot plate (with the aid of a few wedge plates). I must say, when building a locomotive for tight curves, you come to understand why the rear corners of the cab roofs and top corners of the tenders were cut off. The frame is also strong enough that you can put two or three of the northerns on the point of a heavy train and pull through the front couplers. While viewing the second image above, note the sloped front to the cab borrowed from my NP northern, the mud ring on the bottom of the firebox borrowed from my Milw northern, the cab roof details borrowed from my SP pacific. I think the vent hatches look particularly good in dark red. You will also see one of the design elements that I'm quite pleased with, the sand green ladder above the running board. I'm getting ahead of myself on this tour. Jumping back to the drivers for a moment, I used my custom rods and valve gear bars for the drivers, including modeling the Walschaerts valve gear. Meanwhile, up top, I managed to sneak in a 1/2 plate offset for the green boiler jacket (visible in the very first photo in this post, where the gray smokebox transitions to the green boiler). Now moving to the rear, this oil burner had a Vanderbilt tender. I knew that wouldn't be much of a problem since I had already built one packed with PF equipment for my SP pacific. I had to build the complete engine first, so that I could figure out the clearance for the tender. This time it wound up being almost entirely snotted. Since I did not have to worry about putting anything in the tender, I could get the proportions better than the SP tender. I even included a rounded bottom (though no good photos yet exist). I've got to say that Vanderbilt tenders are hard to photograph and I'm not completely satisfied with the quality of the photos of the tender, but this one should give you an idea, If you look closely, you will also see my Indiana Jones moment. I was faced with figuring out how to get the ladder on the front of the tender. On curves, the couplers swing out to 6 wide. So there wasn't enough room to get any design I liked in there. Seeing the man waving a pair of machetes at me, I dropped my whip and picked up my six shooter. Voila, as I slip another rung down the lego purity slope, the custom ladder was born. They looked so good, I decided to hang another pair off the back of the tender (I'll post more about the ladders soon). Now returning to the prototype for a moment. The Havre locomotive looks striking in its green paint, but while I was digging up reference material for this model, I quickly learned that it was the wrong color. From everything I've read, the Glacier Park paint scheme was commonly used on passenger locomotives, but it was never an official scheme. For the curious, click the small image below for the best color example of the scheme that I'm aware of. Also note the herald on the engineer's side, the goat is facing to the right. The closest lego color to the original green would probably be dark green. Still, I like sand green as the prototype is currently and I didn't want this to look like a Emerald Night MOD. Still, it has gotten me wondering why the prototype is the wrong color. GN preserved this engine and then BN, so it is not like some misguided town repainted it in the faded color after years of neglect. full gallery
-
Hi everyone, We just posted the third instalment in our lego town construction video series. This one focuses on showing the lego roads we constructed. We chose a snot road construction technique rather than road plates. as we had more flexibility in fitting streets of different widths into our layout. Hope you like the video. Thank you for the comments and subscribes. my daughter loves hearing from people and seeing the viewer stats from around the world. This video also shows the Trains touring the town. Next video should include the new Cinema. Cheers
-

MOC: Metro Station with NXT controlled sliding platform doors
Esben Kolind posted a topic in LEGO Train Tech
Hi, At the recent Lego World 2013 in Copenhagen I displayed my model of Islands Brygge Metro Station including NXT controlled sliding platform doors. This model is the fourth in a line of trains with automatic sliding doors, that I have built over the last years (version 1, version 2, version 3). I have compiled a short video to show all the functionality including some "behind the scenes" footage: The NXT controls the following: Output 1: Running the train on the inner loop (9V) Output 2: Running the opening mechanism for the three sets of platform doors and three stes of train doors Output 3: Running the elevator Light sensor: Stopping the train at the platform (accuracy: 1 stud) Distance sensor: Detecting the lower position of the elevator (dynamically calibrating the elevator cycle) Touch sensor: Detecting the outer position of the opening mechanism (dynamically calibrating the cycle) In addition, there is a 9V metro train running on the outer loop and PF lights on the platform wall and over the platform door. Some images of the station, which was part of a bigger display of Islands Brygge, a central neighborhood in Copenhagen: After moderation, more pictures can be found here. The station is modelled very closely after my local metro station, though I have reduced the number of opening doors to three sets. Here are some reference pictures: I am looking forward to your comments. Esben -

GFLUG at Plant City Train Show near Tampa, FL, USA
brickbuilder711 posted a topic in LEGO Train Tech
On February 9, the Greater Florida LEGO Users Group put on a magnificent display with city and town dioramas and trains running around their newer Dueling Yards concept. A couple of my MOCs were a part of the show, one being a train depot built after the one in the Plant City, FL, where the show was at. Here is a little feed from it: -
Got my Town out of the loft the other day, thought some of the pictures might bring back fond memories of the way Town used to be All the pics are on http://www.flickr.co...157632814264062 and a description (plus all the pictures) can be found on MOCpages here http://www.mocpages.com/moc.php/354405
-
This little engine was inspired by the little shunting engine from LEGO's own City set, 4204 'The Mine' which it is pictured with below. This little engine is just 5 studs wide, and can run on rails at just 4-studs wide. The LEGO historians amongst you may recognise the character on which it's name is based. The engine is based on the iconic miniature engine 'Talyllyn', from the Talyllyn Railway, the worlds first preserved railway in Wales, United Kingdom. The aim was to not to create an exact replica of the engine, but rather it was a self discipline exercise to produce a set that would fit in nicely along side the rest of the LEGO City range. As well as to represent a steam engine at this small scale. Heres an image of it next the magnificent Emerald Night to appreciate the scale of the model. The entire 3-piece train is a tad longer than just the Emerald Night's Engine section! Had all the pieces been available in their respective colours I would have made a physical version of the model, but alas they don't, so instead this model was created using Bricksmith and rendered in POV-Ray (Thanks to C3POwen's awesome tutorial). I've decided to upload it to LEGO Cuusoo, so if you like please SUPPORT it there. It would be great to have an actual LEGO Train set that was more affordable to those with a smaller pocket, as the smaller sets in the Trains range always seem to be random rolling stock, railway furniture (lights, station accessories, etc) or track packs, not much with the 'swoosh/chuff' factor. There are more pictures as well as a second engine and some other rolling stock in the works which I'll post up here, and in its Flickr Album when they arrive..
-

General Motors Aerotrain - 1950's prototype diesel passenger train
Murdoch17 posted a topic in LEGO Train Tech
Historical background: The experimental Aerotrain was built by General Motors using hard riding Bus Bodies for coaches, a new untested (and quite complicated) air cushion suspension system, and an under-powered motor originally made for switching locomotives. Two of these trains were built in the 1950's as a way to entice passengers back onto the railroads and out of their automobiles. The hard-coupled unit had one engine and 10 cars attached, including the observation car. These low-slung units toured the United States as a test of it's abilities. Needless to say, it was a tremendous failure. It toured on four roads including the Atchison Topeka & Santa Fe, New York Central, Pennsylvania Railroad, & Union Pacific before eventually being sold to the Rock Island for Chicago Commuter Service. In 1966, after less than a decade of service, one locomotive & two cars were sold to the National Railroad Museum in Green Bay, Wisconsin, while the other locomotive and two cars were sold to The Museum of Transportation in St. Louis, Missouri. The train can come apart (unlike the prototype Aerotrain) into 6 sections: 1 engine, 4 coaches, 1 observation coach. Model Notes: The original train had ten cars, which would be hard to do in Lego (and it's kinda pointless as 9 of then are identical) I have five cars on my train, four identical coaches and one observation coach on the end. My Inspiration for this model came from this Brickshelf account here: http://www.brickshel...ry.cgi?f=497396 and i give 99% of the credit for the model to Brickshelf user enquete-art. The other 1% comes from me, such as the reworked front bogie, front and back windshields, window work and using this numbered tile in red: http://www.bricklink...sp?P=3070bpb063 I used a lot of SNOT to hold the diagonal windows & front engine slopes in place. other than that, it's pretty straight-forward building. I found this picture on Google. It comes from a 1950's General Motors ad for the Aerotrain. It has been used by several different blogs and groups according to my search, so it should be okay to post here. Comments, questions and complaints welcome! -
I started new MOC series nowadays. Theme is Korean diesel trains of 1980'~1990'. Painting reminds me of my childhood. ^^ It was 'leisure and travel' in my childhood, the train. Now it means memories of childhood. I wish you also like my train MOCs. This series on going. ^^ Plz visit my blog for latest update and other files. ( http://legodaystar.blogspot.kr )
-
I was inspired by DaveBey Buildable in the following colours. (BL Name) Black Blue Brown Dark Bluish Gray Dark Gray Dark Orange Dark Purple Dark Red Dark Tan Green Light Bluish Gray Light Gray Lime Maersk Blue Medium Blue Orange Pink Reddish Brown Sand Blue Sand Green Tan Trans-Clear White Yellow dowload This is the Lime version.
-
Well, I've been lurking on these forums for a while. Time for me to contribute. Since a few weeks, my daughter and me have had a (modest) train layout with a cargo train, a passenger train, three sets of switching tracks and a decent amount of track. Having been an avid lego builder in my younger years, I really love sharing this with her. Anyway, because we were both eager to add some excitement to the setup, I decided to sacrifice two straight pieces of PF track and make a track crossing (whoa, accidents!). How I did it: The first of the two straights was cut in three pieces by cutting out a track section one stud wide on the 6th position, on both sides. Next, the center piece of this chopped up straight was disposed of its side studs. The second straight was also butchered by removing its central 2x2 and both of its central 2x1 side studs. Four more studs were removed on its sides as can be seen on the image. In addition to that, four grooves were carved out of this second straight. Tools used: a sharp knife, a miniature circular saw blade (on a Dremel clone) and a miniature grinder on the same Dremel. No glue whatsoever. It took a while to do this (+- 1 hour). To help making the cuts on the right place, I sacrificed two of my old lego 8x1 flats: it is quite convenient to click one of these on the piece of track right where it needs to be cut. The sawblade can then glide along them. (Honestly, the sacrificed pieces already suffered a dog attack in the early nineties. So it's not really a big loss ) The result: Everything fitted together: And by means of some 2x2 plates (I should probably get some bluish grey ones ), all the parts are connected: The result was added it to our layout and I must say that this piece makes the track a whole lot more interesting when trying to drive two PF trains around. With all the crashes we have had so far, I must say it's a good thing we still have my old faithful eighties firefighter helicopter around. Note: I did not consider buying a 4519 since I can't really justify its ~25€ price tag (used) for my PF setup. And of course it was just a nice silly project I enjoyed doing .
-
This is a large and hard to photograph creation showing the epic Pre-title sequence of the latest James Bond film, Skyfall; where in Istanbul, 007 chases after the hitman Patrice whose stolen valuable information, leading to them landing on a moving train—with MI6 agent Eve in hot pursuit. Classic Bond...James Bond ~Nemo
-
Well I thought I would post the results of my efforts today, nothing special but my son decided to get the monster fighters ghost train set with some of his Christmas money, and after he finished building it this morning he instantly said to me "can we add power functions daddy?" So here is the result, the other side isn't complete yet as I didn't have enough parts, I also had to raise the front by one flat so that the flangeless driving wheel didn't derail the train on the exit from bends, can't find a better solution for that yet! Let me know what you think! Cheers, Dave
-
Please see this topic This is a new sustainable monorail system using basic parts for infinite tracks and Power Functions for power and control. Mark
-
My first contest! I wanted to enter into last year's Winter Village contest, but didn't have any ideas at the time. Shortly after this year's contest was announced, I had a flash of inspiration and decided to enter. So, I present to you, the Winter Village Train Depot! Here's the whole layout. This would be the biggest Winter Village set yet were it to be produced, with a large platform and a couple of pieces of railroad track to go along with the main building, the outlying lamp and picnic table, and the hand cart. There are also nine minifigures: The conductor, maintenance man, ticketing rep, and six travelers waiting for the next train. The icicles were something I had not seen before, and worked out better than I had initially envisioned. An alternate shot of the main structure from the other side. I used the masonry bricks for the foundation, and was partly inspired by a few real life buildings in this regard. As with the existing Winter Village sets, I incorporated a light brick. This one is a bit different in that it projects outdoors, illuminating the lamp above the front door. A shot of the interior, where the ticketing rep is hiding. I built the fireplace and other interior details to be as consistent as I could with the previous sets in this line. A closer view of the interior to show off a couple of the simple details I'm proudest of in this build: The bow around the support pole, the SNOT-built bubblegum machine. and the cozy corner with a different type of brick built tree. The chairs behind the counter are brick-built and the hearth of the fireplace faces the front door, but they were difficult to photograph. There are more pics, including a building from which I drew inspiration, in my Brickshelf folder: http://www.brickshel...ry.cgi?f=518699
-
Hi All, I've got a 100% complete Sante Fe Super Chief Train Engine (1 replacement piece) that I'm looking to sell. I built it last night, so I can confirm that it is 100% complete, disregarding the one small replacement piece. Conditions: Bricks and minifigures are in excellent condition Box: No Box: Instructions: No instructions, easy to find at LEGO.com for free. That is how I built the set. The replacement piece is the following: Missing (Dark grey 1x4 tile): http://www.bricklink.com/PL/2431.jpg?1 Replaced with(Stone Dark Grey 1x4 tile): http://www.bricklink.com/PL/2431.jpg?1 As you can see, there is hardly a difference. Please PM me if you are interested. I don't really have a price in mind right now because I have almost zero experience with the LEGO train line. I'm willing to ship anywhere in the continental US for free, and will consider shipping overseas for a price. PM me with your email if you would like pictures. They are apparently to large for eurobricks uploader. Thanks, Sam
-
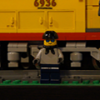
EDIT: It's done (for now)!! Still waiting on a few more bricklink orders and several more hours bangin my head against my desk finishing decals in photoshop, but as my first MOC post & first post-darkage creation I was a little excited to show her to the world. Not 100% if I'll stick with #6936 because it's still running in UP's heritage fleet, or #6913 because its in Texas. As you can see the yellow is still off in the decals plus I have a few hundred more to apply but these are just the first ones I printed to fine tune the colors on my printer. I'll have HQ pictures on brickshelf in a few days once my camera comes back from repairs.
-
Indexed by Moderator Lego 10233 Horizon Express Lego's newest adult fan-oriented train is the Horizon Express. Based off the French TGV (most notably the 1980s orange livery), it's a high-speed passenger train. The TGV has a distinctive sloped nose and end-to-end symmetry, so Lego designed this set for AFOLs to buy a pair and put them back to back. The set comes as a stand alone train, but includes instructions for motorization and works fine on all Lego tracks. Even if you only plan to display it, I'd recommend getting some straight track lengths to put it on. When this set was announced online, the train fans immediately began poring over the images, looking for any details of interest. A few things quickly became topics of discussion: The SNOT arrows on the sides of the locomotive (ok, so technically they call it a "power car," but I'm sticking with locomotive throughout this review since that's what most people would call it), the windows, some new parts like the pneumatic connector being used in the pantographs, new colors - lots of orange - and the few stickers and printed parts. Lego generously provided this prerelease set to Eurobricks for reviewing, and EB generously provided it to me for this writeup. Enjoy! Name: Horizon Express Set Number: 10233 Pieces: 1351 Price: US $129.99 CA $149.99 DE 99.99€ UK 79.99 £ DK 899.00 DKK Minifigs: 6 Theme: Expert Creator Year of Release: 2013 Links: Bricklink Peeron Brickset The Box... The Box by mostlytechnic, on Flickr I came home from work to find this - a white box all the way from Denmark. With a Lego address label... Opening the Box Inside the Box by mostlytechnic, on Flickr Inside, some genuine European bubble wrap. I wonder if it's different than American bubble wrap. Metric dimensions? Different smelling air? Do the bubbles sound different when you pop them, sorta like how European police sirens are different than our American ones? Oh, wait. No one cares about the bubble wrap. There's also a Lego Horizon Express set in there. Better get that out fast and get reviewing! The Box, Front The Box, Front by mostlytechnic, on Flickr The front of the box has a nice action shot of the train. Note that there's not really track its running on - don't want to possibly confuse people into thinking track is included. Being a European box, it's a bit plainer than our American versions, but it's got nice insets of the dimensions and minifigs. It's also marked "Expert" - apparently Lego is now highlighting the larger, AFOL-oriented sets this way within the Creator line. The Box, Top The Box, Top by mostlytechnic, on Flickr Like other Creator sets, an inventory of parts is on top of the box. Unlike most, it's crammed full of tiny parts since there's so many in this large set. I love that the 1:1 size indicator is the SNOT built arrow graphic from the side of the locomotive - it's a part the fans have been discussing since the set was first revealed, so Lego is obviously thinking about the target market clearly with this set. This one's for the fans. The Box, Back The Box, Back by mostlytechnic, on Flickr Unlike the front, the back of the box is crowded and busy. Lots of action shots dominate - opening up to show the interiors down the left, the big station shot at the bottom, and details of the car furnishings at the top. The middle has plugs for the expandability of the set. Two can be run back to back to make a longer, more accurate looking train, and you can pick up PowerFunctions parts to electrify the set. The Box, Bottom The Box, Bottom by mostlytechnic, on Flickr On the bottom are the mandatory production location listing (Denmark, Hungary, Mexico, Germany, China, and Czech Republic in this case) and choking warnings. There's also though a neat shot of the train with the roof off, so buyers can see inside. Nice way to fill the space with a new image. The Contents The Contents by mostlytechnic, on Flickr Lots of bags here - numbered 1 through 3 (since there's 3 cars, I bet I know how they're divided...), the three train baseplates, a bag with the magnetic couplings and tubing, and the manuals and sticker sheet, nicely protected with cardboard so they are pristine. Much appreciated, Lego! The Stickers The Stickers by mostlytechnic, on Flickr Like the Emerald Night, the set includes extra stickers. The manual only has you apply the two decorative stickers, the #14 stickers to the locomotive, and the #1 and #2 stickers to the cars. If you got a second set, you could make that have locomotive #10 and number additional cars all the way through 9. That'd be a long train, but I'm sure it won't be long before a LUG somewhere is showing one off. The Manuals The Manuals, Backs by mostlytechnic, on Flickr There are three manuals, one for each car. The fronts are all the same image from the front of the box. The backs have some new (at least I don't recall seeing them before) images - no more "WIN!" kid! The Manuals, Page 1 The Manuals, Page 1 by mostlytechnic, on Flickr The first manual starts with more new graphics - instead of the old pictographs telling you not to work on carpet and not to dump them all together, now we get a minifig kid building one group at a time. There's also a very nice set of photos on how to use the brick separator - I'm sure lots of people didn't realize how useful and flexible it is, so this is a great educational tool. There's also a text and QR code reference to lego.com/brickseparator for more information. The Manuals The Manuals by mostlytechnic, on Flickr The instructions themselves are plain but clear. There's no extraneous graphics, just clear instructions. I had no trouble at any point in the build knowing what to add - helped of course by the rarity of grey parts, but still, it's a nicely made manual. With all the black in the set, the new outlines on black parts help a lot as well. The Special Parts The Special Parts by mostlytechnic, on Flickr Lucy the engineer here will show us some of the special parts in the set. There's the brick separator - despite the image in the manual, it's NOT ORANGE! That's nice, since practically the entire rest of the set IS. There's some train slope parts in orange and black, the decorative train wheel sides, a printed windshield (new print, as far as I can tell), the pneumatic connector in dark bluish grey (new color), a couple printed tiles (unique to this set) and a few of the new and rare 2x2 inverted tiles. Building the Locomotive, 1 Building the Locomotive, 1 by mostlytechnic, on Flickr Time to start building. The locomotive begins with a train base and a rim of bricks. There are the mandatory parts that make no sense yet (the blue handles) and some grills and jumper plates at the front that will come in useful later. Building the Locomotive, 2 Building the Locomotive, 2 by mostlytechnic, on Flickr At the rear of the locomotive is this interesting part. I assume it's supposed to be some electrical equipment (it's right below where the pantographs will eventually be), but you can see how the bars on it are used to hold the end of the snot arrows. Building the Locomotive, 3 Building the Locomotive, 3 by mostlytechnic, on Flickr Here's details of how those arrows are made. It's just cheese slopes on 1x1 plates with clips, and then all attached to the bars. It's simple and ingenious, and it's a technique that many people will never have seen before. Building the Locomotive, 4 Building the Locomotive, 4 by mostlytechnic, on Flickr The nose of the locomotive is built separately. There's a number of different snot attachments used, clear headlight bricks that are *actually used as headlights!!!*, and a seat and control panel for the engineer. There's also the usual interesting part usage, such as the black grills that will never be seen and could easily have been any other 1x2 part. Building the Locomotive, 5 Building the Locomotive, 5 by mostlytechnic, on Flickr The nose is coming together now - two of the orange wedge pieces stack up, and orange and while tiles and curves are added to the snot connections to make the lower sides. Building the Locomotive, 6 Building the Locomotive, 6 by mostlytechnic, on Flickr The nose attaches to the body of the locomotive by the grey plate under the driver's seat. Other parts of the body have been added as well - lots of grill bricks, some recessed handles (using those jumper plates in the beginning), and the printed tiles via more SNOT work. The tiles do make a nice transition between the orange and black, but the printing could be better. The white and orange ink aren't opaque enough, so they show the black through. It would have been better to use a white tile and print the orange and black on it, or use heavier printing of the white and orange on the black tile. Plus, this is such a specific part. The train would look strange without it since it's designed for it, but I can't see using it anywhere else. Building the Locomotive, 7 Building the Locomotive, 7 by mostlytechnic, on Flickr A row of orange adds another stripe to the sides, and you can see here all the interior space left available for eventual motorization of the set. Building the Locomotive, 8 Building the Locomotive, 8 by mostlytechnic, on Flickr Ok, what on earth is this? Random parts joined together, with pins holding the brown bottom and the grey/orange top together... this is one of those moments where you are following directions without having a clue what it'll turn out being. I love those parts of building... Building the Locomotive, 9 Building the Locomotive, 9 by mostlytechnic, on Flickr It's a transformer! Well, sorta. Twist the orange parts around, thanks to the pin connections, and now you have some unique angles that will look great under the locomotive. Building the Locomotive, 10 Building the Locomotive, 10 by mostlytechnic, on Flickr Bogey time. Anyone who's built other Lego trains will find these pretty normal. I love though how they build two with very different methods yet they look so similar. The left bogey uses the special train wheel holders, metal axles, and wheels, and then adds some black minifig heads and other parts as decoration. The right bogey uses technic beams as a frame, wheels on technic axles, and then the decorative side pieces. Building the Locomotive, 11 Building the Locomotive, 11 by mostlytechnic, on Flickr If you're familiar with the TGV or other high speed trains, you know they have interesting air splitters under the front end for aerodynamics. So let's make that here - note the dark tan rails inside the orange wedge. Those will be useful in a second. Building the Locomotive, 12 Building the Locomotive, 12 by mostlytechnic, on Flickr With the loco upside down, we can add the splitter. The orange wedge slides into the bricks with grooves, making a nice upside down slope. Building the Locomotive, 13 Building the Locomotive, 13 by mostlytechnic, on Flickr The grey portion attaches to the few stud holes left visible in the previous photo, and a couple orange tiles brace it all together. Building the Locomotive, 14 Building the Locomotive, 14 by mostlytechnic, on Flickr Since the set doesn't include electronics, Lego fills in the interior with some decorations, much like they did with the Maersk train. There's a block of random pieces that looks strangely similar to the PF receiver, a unit that I suppose is supposed to be some electrical or motor equipment, and of course, the very nice pantographs using the pneumatic connectors as joints. They work great here. Building the Locomotive, Finished Building the Locomotive, Finished by mostlytechnic, on Flickr The complete locomotive. You can clearly see here how the printed tile doesn't quite match in color, but also how nice the rest of the unit is. There's a TON of black cheese graters on the roof. The stripes just look great, and the snot arrows nicely break up the large black expanse. Building the Locomotive, A Flaw Building the Locomotive, a flaw by mostlytechnic, on Flickr This, however, bugs me. There's no roof under the pantograph, so you can see all the way to the floor under it. Building the First Car, 1 Building the First Car, 1 by mostlytechnic, on Flickr The first car begins with a baseplate and assorted parts down one side. Some things are pretty obvious if you've build Lego trains before - the long grey plate will have some chairs on it later I'm sure, but other parts I don't yet know about - like the weird snot section at the left, or the grey neck bracket. Building the First Car, 2 Building the First Car, 2 by mostlytechnic, on Flickr Now it's coming together. Chairs and racks for luggage are filling in the space, there's a computer screen, and there's long black tiles down both sides. Building the First Car, 3 Building the First Car, 3 by mostlytechnic, on Flickr Time for the windows. The fans immediately jumped all over the window design as soon as photos got on the internet. These are tall windows laid on their side, so there's some fiddly snot work to make it happen. This section of the build uses a lot of small parts - headlight bricks, 1x1 plates, 1x1 tiles, etc - to hold it together. Building the First Car, 4 Building the First Car, 4 by mostlytechnic, on Flickr A row of windows goes down each side of the car and white and orange stripes are added. It's still very flimsy at this point though - only a few studs hold each side together. There's also nice brick-built doors at the end where you can add the number stickers to the window. Building the First Car, 5 Building the First Car, 5 by mostlytechnic, on Flickr This unit will go under the car to fill in between the wheels. Like on the locomotive, pins are used to make otherwise-impossible angles, and there's a pair of 2x2 orange tiles that will fill in the holes in the train baseplate from underneath. I found it interesting though that Lego used the silver 1x1 round plates. You can't see them and they're not used anywhere else in the build. Why not save a few pennies and use 1x1 square plates or even round ones in another color? Heck, I'll probably replace them on mine and have some flat silver 1x1s to use in something else. Building the First Car, 6 Building the First Car, 6 by mostlytechnic, on Flickr Two more bogeys. The left is a very common Lego design, used on lots of other trains over the years. The right one is different. It's a Jacobs bogey and goes between two cars so they share it, hence the pins on the ends rather than one in the middle. Building the First Car, 7 Building the First Car, 7 by mostlytechnic, on Flickr The roof. Lots of black. I actually like the couple spots where cheese wedge and a tile break up the smooth curve. There's also some tubing running the length of the roof to mimic the power cable on the roof of the real TGV. Building the First Car, 8 Building the First Car, 8 by mostlytechnic, on Flickr A look inside the car. That strange bunch of snot work at the very beginning turned out to be a bathroom, complete with sliding door. However, as a train car, it's pretty cramped. You can't actually get a fig past the bathroom and there's studs sticking into the aisle (some snot plates were used just to stick up and keep the long window section from being pushed inside the car when you handle it). But just stick the roof on and car 1 is done. Building the Second Car, 1 Building the Second Car, 1 by mostlytechnic, on Flickr Car 2 starts similar to number 1, but obviously the interior will be different. Big thumbs up to Lego for having the cars be unique. My wife saw this and immediately guessed the white overhangs will be tables (she's right). Building the Second Car, 2 Building the Second Car, 2 by mostlytechnic, on Flickr This is obviously the eating car. Seats with tables, the coffee maker, and a bar at the end. Yep, a bar. But it's Lego, so I assume they're serving fancy bottled water and maybe some sparkling juice. The rest of this car is built like the first - windows, then roof - so now we'll jump ahead. The Finished Train The Finished Train by mostlytechnic, on Flickr I love how the train flows. The stripes run the length just like they should, making it look like a complete train rather than a random assortment of cars like freight trains do. To nitpick though, I don't like how the hump at the start of the first car sticks up higher than the locomotive. I think that should be flush, but they had to cheat a little on the back of the locomotive to make the pantograph the way they wanted to. [edit: comments have pointed out that the real TGV is like this - Lego modeled it accurately. It's just not how I would have done it.] Also, the windows are too low - if you have figs seated inside, the windows are below their heads. They'd have to crawl to see outside. They look good from the outside though; it's just Lego proportions being off a bit. The limitations of Lego also mean there's more gap between the cars than there should be and the whole thing is too short, but it's still nice. I've seen some interesting work happening in the EB Train forum though on spring-loaded bogeys to fix this passenger train issue (basically, the cars can be closer together while in straight track, but then spread apart a little to negotiate curves) and I'd love to see Lego do something like that. I think it takes up space inside the car though, and they want the playability more. The length would definitely be helped by adding a second set to extend it. Sadly, there's not parts provided to make the Jacobs bogey in the middle. The official pic on the back of the box shows the double train using two bogeys in the middle. I'm sure anyone buying two sets to make a longer train will modify the middle to have the Jacobs bogey again there. Opening the Finished Train Opening the Finished Train by mostlytechnic, on Flickr The Horizon Express opens nicely for play. I especially like that the top of the walls on the passenger cars come off with the roof, making the interior easier to access. The Minifigs The Minifigs by mostlytechnic, on Flickr Here's the six figs that come with the train. It's a nice assortment: and engineer (female), a steward (male) and four passengers. I'm not a minifig expert, so I'm not sure what's new and old about these figs, but they're all nice. The Minifigs The Minifigs by mostlytechnic, on Flickr Most have back printing, but there's no second face on any of them. I appreciate though having 6 different hairpieces though. Power Functions, 1 Power Functions, 1 by mostlytechnic, on Flickr The third book of the instructions includes step-by-step instructions for powering the train, assuming you have all the needed electical parts. First, a bunch of the loco comes apart. Power Functions, 2 Power Functions, 2 by mostlytechnic, on Flickr Here's what you need to power it - a speed remote control, an IR receiver, a battery box (I'm using the 6 AAA battery box, but Lego recommends the rechargeable battery box and transformer), PF lights (if you want headlights), and a train motor. Pricey if you don't already have them, although using the AAA battery box over the rechargeable one saves $50 or so. Power Functions, 3 Power Functions, 3 by mostlytechnic, on Flickr First the decorative sides are put onto the train motor. Power Functions, 4 Power Functions, 4 by mostlytechnic, on Flickr The PF lights stick into the trans clear headlight bricks and the wires run on each side of the engineer. Finally the reason for those blue handles in the very beginning is revealed - they make it MUCH easier to mount the center brick of the lights to the base of the train without disassembling more of the walls. Power Functions, 5 Power Functions, 5 by mostlytechnic, on Flickr The IR receiver and battery box mount in the space freed up by removing the other parts. This is a perfect snug fit. According to the manual, you're supposed to put the lights and motor on separate channels of the receiver so you can control them independently. Since I have multiple trains, I didn't want to use up two channels like that, so I stacked them on the receiver. At first I had the lights as the top plug, and then the battery box wouldn't fit. It's so precise in there that raising the light plug 2 plates made the cord block the battery box. I reversed the plugs (since there's plenty of extra wire coming from the motor) and it worked fine. For people who want to run dual motors, it might be tricky. You need a switch to reverse the second motor, and there's not much room for that. I don't know if a switch would fit behind the driver. Stacking a third plug on the receiver also might hit the pantograph. The Trio The Trio by mostlytechnic, on Flickr The three recent AFOL trains - Emerald Night, Maersk, and Horizon Express. Steam, diesel freight, and electric passenger. Very different in every way, but all well-recreated in Lego. Comparison to the Real Thing Wow, Lego nailed it. They replaced the TGV logo at the back with their arrows since this isn't officially a TGV. Otherwise, look how much it matches. The sticker on the nose. The grey chin. Even the little windows on the side of the driver, that they used the backs of headlight bricks to make. The cheese graters on the roof, the grills on the side, the size of the stripes. About the only way to get closer in appearance would be to have a custom nose part molded (like some of the old trains did) but that wouldn't be nearly as cool as the brick-built version. The Video (click through to YouTube to see in 1080p) In the video you can see how nicely the train runs. I never got it up to full speed, since my straights aren't long enough to do it without crashing. I have no doubt the LUGs will soon have long versions of this train running on their high-speed layouts. You can also see how well it handles curves and switches, both in forward and reverse. The nose does overhang though, so make sure to leave room around your track. The Conclusion If you're a train fan and like passenger trains, get this set. It's a great design and better than the 7938 Passenger Train. It's got the playability of the 7938, but looks better for the adult fan. The color scheme stands out and it'll look good either on a layout or as a static display model. The Ratings Value: 9/10 - It's more than the EN or Maersk cost, but there's also more parts. It has a lot of a less-common color, but not as fantastically usable as the EN's dark green or Maersk blue. Still, it's at the 10 cents a part sweet spot, has 6 figs, and all the train-specific parts, so the value is solid. Design: 8/10 - The look is good, but personally, not as good as EN and Maersk. I think the HE suffers more from the shorter design, and there's some minor flaws IMHO (under the pantograph, the printed tiles, etc). It feels less detailed than the other two, but the real train is much sleeker and less "greebled" than a steam or diesel loco as well. Playability: 8/10 - It's got nice playability, but I can't go higher since other train sets (3677, 7938, 7939) come completely with the Power Functions and track and accessories, the Maersk had containers and a truck, etc. However, this is targeted at a fan base that likely already has track and motors and stations, so I understand not including that. Parts: 9/10 - A number of new or rare parts, LOTS of orange. Can't help but wonder what it'd have looked like in dark blue or dark red though... or the modern blue and silver livery. Can you imagine tons of flat silver bricks and parts :) Overall: 8/10 - Part of this is simply bias - I'm not a big passenger train fan. Here in the US they're rare. Trains here are cargo and that's just visually more interesting I think. I appreciate what Lego did here, making a very different train from EN and Maersk, it's just not my cup of tea like those were (for the record, I own two of each of those - along with 7939 and 3677 cargo trains). For what it is, it's well done, attractive, and ripe for modding. I can already picture people making longer versions of this (longer individual cars that is) and running them on some of those high-speed layouts they have in European LUGs. It will look fantastic there. On my layout, not as much. Additionally, when I look at EN or Maersk, those are nearly flawless. The railings on Maersk annoy me since they get out of shape so easily, and EN has a cord from the tender to the locomotive if you power it, but those are minor. The printed tile and hole under the pantograph here bug me more. Still, it's a solid train and I have no doubt it'll appeal to tons of fans. Just be ready to buy 2 of them, because you know you'll want a second.