Search the Community
Showing results for tags 'RC'.
Found 537 results
-
My entry for TC22: Wille Loader Based on Wille Machines 35L x 13W x 17H = 7735, stud^3 Features: - Drive (L-motor) - Articulated steering (M-motor + 2x linear actuator) - Bucket lift (L-motor) - Bucket tilt (L-motor) - Front and rear lights (2x LED) - LiPo-battery - 2x IR-receiver Video: More photos: Rebrickable page: https://rebrickable.com/mocs/MOC-113292/paave/wille-loader/ Sorry for being late, got really lost in time. Thanks the admins for letting me join anyway
-
(1).thumb.png.b4d6c907fe73903aec1adfd3cd481a19.png)
Tank base with 3DOF crane arm on top is done
glowytheglowbug posted a topic in LEGO Technic, Mindstorms, Model Team and Scale Modeling
im finally done with my tank moc! i hope you like it if possible like and share it on insta & facebook (links below) it comes with a detachable trailer and a 3DOF arm thanks @thealvacado for the arm I've improved the bracing of the 8 tooth to the 40 tooth gears as they were constantly popping out also changed positioning of some things there is a 4 pin connector on the end so that its much easier to change the attachment on the end I hope you like it :) spent quite a while making this https://www.instagram.com/p/CdnoQmspEut/?utm_source=ig_web_button_share_sheet https://www.facebook.com/544771685/posts/pfbid032Jr1QQfEXsTZbEqxBUDAR7LWMGfGzE9wpor93kkCivLbZfqt3ujtvHVqyUvEDkpzl/?d=n https://youtu.be/5j2kXYvjlAM https://youtube.com/shorts/PzlFRePGSP4?feature=share https://youtu.be/X7KmZLrbvlw https://flic.kr/s/aHBqjzQeX3 -

[8081 MOD/MOC] MM //COMMANDO// - Winch is ready!
johnnym posted a topic in LEGO Technic, Mindstorms, Model Team and Scale Modeling
Some might still remember this offroader I started sometime ago in 2019 and showed earlier versions in the 8081 mods thread a while ago. Well, I finally "finished" it now and created digital models for it. I call it the COMMANDO and it is "sold" by MM (Mars Motors). People that follow my Turbo Racers series and my series of 42093 scale cars with swappable engines should already know MM. To show its capabilities I made a trip to a special location and examined what it can do there. Have a look into the video to see what it possible: The configuration in this video has all axles locked and uses the drivetrain variation #2 (see below). The COMMANDO started as the glorious 8081 A model and went through lots of modifications - especially to the front and rear axles and also to the outer hull - on the way to the final result. I created three versions so far: with 1 x PF AA battery box with 2 x PF AAA battery boxes with BuWizz 2.0 ...from which the BuWizz one was used during the video and also most of the time I drove it so far. Here are a few more detailed pictures showing it in that terrain: Here are two pictures showing the chassis construction (click to magnify): ...and here are the three drivetrain variations that can be used (click to magnify) More variations are possible and the gearing can be changed with relative ease, as the motors are not an integral part of the construction: #1 is used for the PF versions and #2 is used for the BuWizz version. #3 can be used to examine the effects of open differentials in offroad situations. The COMMANDO can use various tyres and clearance should be good enough for all of them: 45982 81.6 x 38 R Balloon tyres 18450 81.6 x 44 R (Tumbler) tyres 69912 81 x 35 Tractor (Zetros) tyres I have also already designed a few addons that will be released at a later time - need to create the digital models first - and I have even more ideas for it. So far I have available: front winch rear PTO exploration gear tracks So stay tuned for additions. I hope you like the COMMANDO and I hope it is a worthy successor to the 8081 A model. If you're interested, the - free of charge - digital models (Studio files with detailed steps and submodels) and more pictures are available on Rebrickable: https://rebrickable.com/mocs/MOC-111591/johnnym/mm-commando/ -
[MOC] Blue Mamba fast off-roader
Daniel-99 posted a topic in LEGO Technic, Mindstorms, Model Team and Scale Modeling
Hey, Eurobricks! In this post I want to tell you about one of my latest MOCs, called Blue Mamba. It was made for outdoor King of the Hammers competition. Unlikely I was not able to participate in the competition this year, but I am not disappointed because it is very fun to drive this car. Main features 4-wheel drive In-axe motors (one PF L-motor for each wheel) 2 x Buwizz 3.0 units for power RC tires 97 mm Bodywork The race vehicles used at the King of the Hammers are known as Ultra 4 vehicles. This Ultra4 class is unlimited 4400, and every vehicle is custom fabricated by each team. Most of the vehicle made with metal tubular frame and plastic body panels. I tried to replicate the bodywork to match the real prototypes. Black pieces imitate a tubular frame of the car. Side panels and the hood are the structural elements of the chassis. The total weight of the car is about 1,280 grams. Half of the weight (4x PF L-motors) is located in axes, this is not good for the dynamics of the car at big speeds, but helps a lot in trial. Steering motor and Buwizz units are located in the cockpit. It is possible to lower them, so there is a reason to revisit the chassis once again. Suspension The rial race combines desert racing and rock crawling. So the Lego version of the race combines high-speed and trial sections. For good performance in trial Blue Mamba has a free articulation of a rear axe. The string are placed on the middle link, so rear axe can suspend jumps. Front axe has a limited articulation for a good control at high speed. Drivetrian Ultra4 vehicles has both powerful engine and the gearbox which allows to drive fast on straight lines and slow on rock-crawling segments. But Lego gearboxes has a significant disadvantage - a huge loss of torque. So I decide to place the motors in axes. This gives nearly zero losses, but has it`s own disadvantage: an extremal load on the CV joints which connects front motors to the wheel hubs. There is no way to deal with in without widening the wheel base and adding the portal reduction.. I hope some day Lego will make a new hubs that connects to new CV joints (without planetary reduction). In-axe motor placement provides some restrictions to the size of axes. I tried to maximize the ground clearance. Big wheels partially solve the problem. The resulting ground clearance in not big as one the cars with portal hubs has, but it is comparable to the ground clearance of cars with front independent suspension (there were several competitors with such configuration). Also it is worth noting that front and rear axes does not stick out from the side profile of the wheels, so Blue Mamba has great approach and decent angles. Control and Power The car is powered by two Buwizz 3.0 units. Powerful lego cars usually have a big problem. They can not go on a full speed for a continuous time since the driving motors consume a lot of power. I build many cars powered Buwizz 3.0 units. And I noticed that 2 Buwizz motors or 4 PF L-motors consume more power then the battery can give (in continuous drive). A good example of a car with 4 L-motors and 1 Buwizz unit is my Jeep Wrangler. To deal this problem, I places two units in the Blue Mamba. This doubles the travel range of the car and allows to drive Blue Mamba on full speed during the race. But multiple tests show that 1 Buwizz unit is enough for this car, since there are no losses in the transmission (in the first video car is powered by a single Buwizz unit). For steering a C+ L-motor is used. It is placed in a cockpit in between Buwizz units. Small scrab-radius, positive caster angle and proportional steering provide a good control of a car. Summary The competition has passed, and I there is a video on youtube: This allows me to compare my car with the other competitor cars. I would not win the race but perform good. I will look for the next King of the Hammers competition and prepare Blue Mamba to it. The following changes will be made: Buwizz units will be replaced with RC electrics The cockpit will be lowered for few studs The wheel base will be lengthened for 4-6 studs (to prevent the car from flips at high stairs in trial) I made a 3D model of Blue Mamba, but I have no motivation for making PDF instructions since Rebrickable does not work for me nowadays... Hope everything will be changed soon! Now we can only wait and play Lego! -

[TC22] Mini RC Tracked Loader
SaperPL posted a topic in LEGO Technic, Mindstorms, Model Team and Scale Modeling
So I've been contemplating what to build for the contest as the volume restrictions is something that should fall exactly in my area of expertise, but with RC allowed, it got a bit complex. To fully handle a crane or excavator you need 5 or 6 motors, so either two hubs or something like buwizz 3.0 which supports 6 motors, and I'm not really sure if I'll be able to fit all that perfectly within the specified volume while not making it a messy build. So I decided to stick to stuff that I can power with a single hub, and I love the ease of use of physical remote from CADA so I ended up deciding to go with a tracked vehicle + two mechanical functions, so after looking at multiple options I decided to pick a tracked skid-steer loader - a bobcat: I like this one because it has an interesting geometry of the arms, which I expect to be there in order to prevent the bucket getting closer to the cab while the arms are getting raised. I yet have to test this theory. Here's a concept / design so far: I tested the geometry of the arm against keeping the bucket at same angle while the arm is changing its angle, assuming the lever holding liftarm over the arm has fixed angle, and it works more or less. I don't have a bucket yet, and I've got to figure out the driving connection for it that has a significant gear reduction as well as it should have some safety like clutch gear, but I'm not sure if it is a good idea considering weight of the bucket. I'm not 100% sure that I'll be able to go with the design of the arm that is supported by that liftarm to move forward/keep horizontal position of the bucket, especially because of the requirements for the bucket tilt lever connection to the motor. Additional note here is that the tracks are shaped in a way that rear gears one exactly above each other because I couldn't achieve optimal track tension in other configurations and also I would have to make more space for the attachment of linear actuators behind the tracks and it would complicate the base structure. Finally I might end up with arms hitting the cab, so maybe I'll have to move them by 1 stud to the sides, which would made the proportions weird, but I don't think I'll be able to shrink the cab without showing a mess of cables. -
.thumb.jpg.3f4deb19d1e4f36dfb3084a150286f74.jpg)
[TC22] Mining Truck
Jayden posted a topic in LEGO Technic, Mindstorms, Model Team and Scale Modeling
I want to build something inspired by this beast, although my yellow panel collection is rather light on, so it will be in black/LBG. Here is my progress so far: and under side shot: There is currently: 1 PU L motor for drive. 1 PU L motor for steering. And 1 PF M motor for tilting the bed using these pieces https://rebrickable.com/parts/32039/technic-axle-connector-with-axle-hole/71/ I am planning for it to powered by buwizz 3.0 -
[MOC] Dragonfly dune buggy
Daniel-99 posted a topic in LEGO Technic, Mindstorms, Model Team and Scale Modeling
DRAGONFLY Dune Buggy Hello everyone! For a very long time I had a dream to build a dune buggy, and finally, my dream come true! The main goal was to use a C+ electrics instead of Buwizz unit. Of course, I am not the first who attempted to build a buggy. I take an inspiration in Madoca`s Blue Lightning buggy. Technical specifications: - Light and ridged tubular bodywork - electrics form 42099 set (controlled with C+ app for 42099) - Long-travel independent suspension - positive caster angle on the front wheels - Long wheel for stability on the straigt lines - Double steering rack and steering arms reduce wobbling of the steering system - understeering feature (rear wheels get more grip) - RC tires 90 mm Buggy performed well, comparing to the 42124 set. It appears to be a car that is very comfortable to play with. The speed of the buggy allows you to walk with your normal speed in the park driving it at the same time! Here is a small video of my first tests: As I said, the main goal of this project was to use C+ electrics. But after that I decided to boost it with buggy motors! The overview of the car does not change much. Rear wheels get a positive caster angle, and wheel size was reduced from 90 mm to 85 mm (for reducing speed and increasing torque). Here is a short video with Buwizz-powered Dragonfly. I will definitely make another video about this car then the summer comes. -

[MOC] RC Snowmobile "Trident" - Control+ / testing in snow
cyberdyne systems posted a topic in LEGO Technic, Mindstorms, Model Team and Scale Modeling
Good day, everyone! Each winter I hope to build some offroader to drive in snow, and each winter something goes off. Finally in 2022 I,ve finally built what I wanted - big orange snowmobile with control+ electrics and sprockets from Liebherr/ SNOWMOBILE "TRIDENT" Two main parts are the chassis and the body. Let's start with former. Front side - as it is snowmobile it is fitted with two steerable skis. Suspension consists of parallel levers with two big yellow shock absobers and two hard small shock absorbers between the levers. Suspension is strong enough to bear the weigh of control+ smart hub with 6 battries, body parts and optionally Darth Vader as the driver. Skis are 5M wide and each one has two small rubber wheels inside to add traction on smooth surfaces (with them you can steer even on smooth floor - without only on snow) front suspension has positive castor angle. Which looks cool, but required some tricky techniques to implement steering - for example - for steering I used Large Angular Motor (or simply LAM) it is in parallel with suspension levers, but connected to chassis and smarthub with angle. Next - rear part - all driving motors (2 XL) are inside the tracks. Reduction gear is 28:36 (or 1:1,29) - keeping motors inside the tracks reduces the weigh of body which is good for suspension travel. Long shock absorbers work for vertical movement of only rear part of vehicle, whereas short sh.a. are used for vertical movemnet of whole body (long sh.a. act as parallel levers) And finally - the bodywork. I think this is for now the best bodywork I've ever made for MOC - it is orange, it looks good and its reliable and rigid enough so you can grab this Snowmobile by most of it's orange sections and nothing will fall away. Furthermore, all panel are locked in places and don't wiggle at all. I've even used aquaman's trident from brickhead as mascot when I figured out that Snowmobile looks a lot like trident from above. For everything else that you need to know i invite you to watch the video: P.S. I wanted this snowmobile to look loke a fish. But it turned out to be closer to shrimp or prawn :) -
I build a new rc car for having fun. 😊 The body of the car is by @filsawgood, but with my own chassis. propulsion: monster motor steering: servo controller and battery by mould king lights and brake light by bricktec-lights wheels: 3d printed custom wheels from shapeways here are some pictures: And of course a short video: here are the links: https://rebrickable.com/mocs/MOC-92747/filsawgood/wrx/#details https://bricktec-lights.de Here you can see the working brake lights: IMG_0160 by Friedl St, auf Flickr
-
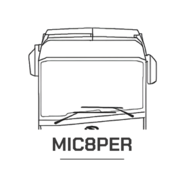
[MOC] App-controlled bus
mic8per_ posted a topic in LEGO Technic, Mindstorms, Model Team and Scale Modeling
After a half year of work I present you this bus.The goal was to make as functional bus as possible with least amount of motors.The result is fully RC bus with openable doors, propulsions and steering using only 3 motors. The steering angle is really good. Steered by Large angular motorPropulsion uses XL-motorDoors work smoothly & flawlessly. They are powered by L-motorPowered by C+ hub.Lots of interion & exerior details. Building and programming instructions for $9.99: https://rebrickable.com/mocs/MOC-100999 Video: -

Help needed with simple rc program for 51515
whitepen posted a topic in LEGO Technic, Mindstorms, Model Team and Scale Modeling
So I was working on a simple rc program on my computer today with my new 51515 set and was trying to make it rc using the keyboard (up arrow=forward down arrow=reverse left arrow=left right arrow=right) But it is hard because there is no "when no key pressed" block to my knowledge. The robot I am using is THIS. Any help would be greatly appreciated. -
[MOC] Santa`s ultimate vechile
Daniel-99 posted a topic in LEGO Technic, Mindstorms, Model Team and Scale Modeling
Hello everyone! I know, that Christmas has passed, but i think it is not the reason to wait for the next one to show my new car. It is build on the same Chassis as my Jeep Wrangler [trial mod] Features: 4 wheel drive with locked differentials live axles suspension with 9.5 L shocks 4-wheel steering 120 mm RC tires with high grip 4x PF L-motors for propulsion PU L-motor for steering Buwizz 3.0 for power light tubular bodywork 1.15 kg of total mass (wheels are heavy!) 7 studs of ground clearance I would like to note, that this car is not a proper rock crawler due to the limited suspension travel. All this modifications took about 2-hours of build, but the car give a lot of satisfaction driving in the snow. It is capable for driving in the deep snow and climbing steep icy hills! I conclude, that this project is 100% successful! Hope you like it! -
Drift chassis by Adrià Blancafort
FriedlS posted a topic in LEGO Technic, Mindstorms, Model Team and Scale Modeling
A new rebuild oft the drift chassis by https://rebrickable.com/mocs/MOC-97061/Adrià Blancafort/rc-awd-mazda-rx7-drift/#details i changed the gearing: front: 16/28 open diff rear: 20/28 locked diff working steering wheel fake V10 engine lockable center diff here some pics: https://flic.kr/p/2mXc4As -
[MOC] Morooka Tracked Dumper
Arie posted a topic in LEGO Technic, Mindstorms, Model Team and Scale Modeling
I have finally found the time to finish this MOC of a Morooka tracked dumper. It is loosely based on the Morooka MST 2200VD. The model is controlled using an S-brick and powered by the regular lego technic power functions battery box. Each track is driven by an PF L motor with a 1:1 ratio, giving the model plenty of speed and enough torque to drive over obstacles etc. Dumping is also motorized using a PF L motor driving a linear actuator. The battery box is hidden under the openable hood, and can be easily accessed and removed (although a lot easier if the dumpbed is up :)) Other functions include an openable door and a lock for the gate on the dumpbed, that opens if you dump. I tried to make a video but you guys will have to wait a bit longer because my baby is making a lot of noise in the background so I have to make a new one sometime when he is asleep :) Edit: made a new video - the period in the beginning when nothing happens is when the buwizz in the tractor fails to connect Some more pictures: https://bricksafe.com/pages/Arie/tracked-dumper Let me know what you think! -

[MOD] 10269 Harley Davidson Fatboy Remote Controlled
Cyrix78 posted a topic in LEGO Technic, Mindstorms, Model Team and Scale Modeling
Full RC Conversion of 10269 Harley Davidson Fatboy After many hours of trial and error, broken bits and gray hair I have finally a working Remote Controlled Harley. And it actually works wery well and are not more fragile than the orginal set. My goal was to create a slower motorbike that you can play with in your living room, so self balancing was not an option as this requires high speed to work. My bike runs on "training wheels" all the time that leans at the same time as the handlebar stears. Have tried my best to hide the electronics an keep it as close looking as possible to the orginal set. Motorized wtih Buwizz/CaDa battery to save space and Power Functions motors. Youtube Video Instructions available at Rebrickable -

[MOC] Armored Trophy Truck [free building instructions]
keymaker posted a topic in LEGO Technic, Mindstorms, Model Team and Scale Modeling
Hi, It lasted a bit, but I managed to finish this project and here I am. I would like to share with you my latest MOC - Armored Trophy Truck. It was designed mostly to test new Buwizz 3.0 unit and Buwizz motors. I also wanted to increase my own experience in building fast MOCs this time. As there are many trophy trucks out there created by many great builders I tried to take some different approach. So to protect cabin and motors, I put armor on my creation :) Thanks to panels both motors and cabin are protected from dirt, dust and stones. I also added roll cage to protect the driver. More details and presentation how fast this truck is you can check on the video below. Instructions are free of charge, I hope many of you will be able to build it and have fun playing with it outdoors as I did. Link: https://rebrickable.com/mocs/MOC-94026/keymaker/armored-trophy-truck-rc/#details Details and main functions: • dimensions LxWxH: 36x16x14.5 cm • weight: 1.22 kg • RWD drive (2xBuwizz motors) • steering (C+ L motor) with positive caster • double wishbone suspension at front • live axle suspension at rear • additional suppressors in rear suspension to protect frame during high jumps • high ground clearance • front, rear and whole truck chassis are protected against dirt, dust and stones • roll cage • rear wheels are connected via portal hubs - gear ratio can be adjusted More photos: https://bricksafe.com/pages/keymaker/9.-armored-trophy-truck -
[MOC] Jeep Wrangler
Daniel-99 posted a topic in LEGO Technic, Mindstorms, Model Team and Scale Modeling
Hello everyone! Im glad to introduce a new RC MOC that I build! It is not a 100 replica of Jeep Wrangler, but I was inspired by it while building the bodywork. The instruction could be found here: https://rebrickable.com/mocs/MOC-93754/danil.nig/jeep-wrangler-rc/#details Features: - Universal chassis - Live axle 4-link suspension - 4 wheel drive - 4x PF L-motors for propulsion (2 for each axle) - PF Servo motor (or PU L-motor) for steering - Ackerman steering geometry (not that essential for off-roader ) - Buwizz 2.0 (Buwizz 3.0) for power - 1.5 kg of total mass, well-balanced - admit a trial mod with planetary hubs and 4-wheel steering! - >90% of parts are taken from 42110 set (except motors, new joints and few more pieces...) I have to mention, that the front of the car was taken from gyenesvi`s MOC. But I made it 2 studs wider and use my own mounting system to connect it to the custom chassis. https://rebrickable.com/mocs/MOC-81354/gyenesvi/42110-c-model-jeep-wrangler-bruiser-conversion/ Here is the chassis of my car After taking the previous photo, I made a new body for it! Here is an official video! Hope you like it! -

[MOC] RC Jeep Wrangler - 42129 alternate
gyenesvi posted a topic in LEGO Technic, Mindstorms, Model Team and Scale Modeling
Hey Guys, I'm back with my second alternate model of the Zetros set (42129). As you might remember from the presentation of my Unimog alternate, I was originally entertaining the thought of rebuilding the Zetros into a Jeep, but I passed since Tim has already built one. However, as I kept thinking of how I would do it, it became clear that I had quite different ideas in mind, and it was just too tempting to do it, so I gave it a go. Here I will write down the design process as that seemed to be something interesting for you guys in case of the Unimog as well, and I also prefer such presentations. Features - 3-link floating axle suspension with Panhard rod at the front - simplified rear floating axle suspension with 2 links of limited degrees of freedom and a Panhard rod - 2-speed gearbox with coupled RWD/AWD selector (hi gear is RWD, lo gear is AWD) - smooth and highly colour consistent bodywork - openable doors, bonnet and trunk - detachable hardtop - detailed interior with green accents, built seats - detailed engine, snorkel, minor extras (roof rack, jerry can, fire extinguishers) Here's a real 2-door model in dark grey color which I used as a visual reference: I also used a blue print to roughly set the proportions in a 1:10 scale. Bodywork Interestingly, this model started out from the bodywork, which I don't do often. As a fan of Jeeps, I have long been wondering what the best ways are for replicating its characteristic details, such as the hood and the grill with Lego parts. My Willys Jeep (alternate of the Defender) uses system parts for the (flat) hood and a simple vertical grill, but I wanted to build one with technic panels as well, replicating the slanted surfaces. I have seen two major techniques, one with the long wing-shaped panels (such as the models of @Madoca 1977 and @rm8), and the other with the long curved panel, mainly the classic model of @Sheepo. Since this set has those curved panels in DBG, and the wheels are about the same size as on Sheepo's model, I was wondering if a similar front could be built from the set, especially the angled placement of the curved part, along with the downward slanting of the whole hood, which also needed to be openable. It turned out that with quite a few alterations here and there, the hood could be built, and even better, they could be built using a few large panels only, which makes it look more clean and uniform.. Some arches needed to be redesigned, and the whole became 2 studs narrower, but the proportions worked fine. Then I moved on to the front and the grill, where much more redesign was needed due to different parts available, but after a few iterations with increasing the width and height of the vertical 'bars', I found the one that fit nicely with the smaller lights in the set and the newer curved small panel extenders (and as far as I can tell, newer Jeeps has such bigger grill, so it seemed fine). From there, I moved on to the sides. I knew it was critical to use the BDG panels carefully, because otherwise there would not be enough DBG beams to build the whole body, and I wanted a clean and colour consistent body. I quickly concluded that the doors can easily be built with the large panels, and the windows can also be built with the DBG connectors. The next critical point was to use the thinner long DBG panels in the rear part above the fenders. The difficulty was that they only left one possibility to mount the pieces of the fenders, so I had to use all those black angled beams there, and I had to build the fenders a bit wider so that I can actually connect the two ends to make it a stable piece. Fortunately, the wider fenders also made it possible to build the front ones from black beams at the same angle, even without more available angled beams using triangulation. The last critical piece was to use the small BDG panels in front of the doors, which just fit there tight. If I had to build that section from beams (as I started out), it would have cost too many beams and connecting them to the chassis would have been difficult as well, but the panel solved both problems (unfortunately, it has a drawback as well, which I will cover later). The remaining DBG panels were used in the back, also allowing for an opening trunk. The last tricky part was the rear corners with the lights. I wanted to make them more rounded with the curved panel extenders, but they would have screwed up the proportions, so I just used a slightly curved system brick to give it some curvature. Also I managed to use the black arched beams to replicate the characteristic rear roll bars, and the black tubular parts to build the roll cage, along with the 15L flip-flop beams, which proved to be critical for mounting the roof. The many flat black panels of the set were enough to build the whole roof, along with the side windows in a way that the whole hardtop is detachable from the roll cage as a single piece. Later, when it was more clear what parts remain, I also added the two bumpers, and even a nice snorkel and minimalistic roof racks were doable to give it more interesting details. Gearbox After being satisfied with the rough bodywork, I started designing the functional parts, which I also wanted to put emphasis on, since that's what technic is all about. However, since my Unimog alternate was about the suspension, this time I wanted to focus more on the RC gearbox and build a less articulated suspension which takes less space. I have been tinkering with the idea of a coupled 2-speed gearbox and a central diff-lock for a while (and @Pattspatt also teased me about it), but I never managed to design a compact one, where the drive motors are also placed conveniently. When I looked up a Jeep Wrangler drivetrain, I found this image, which was particularly interesting for me because of the front wheel drive that can be decoupled. Being offset to the side, I thought this could actually be nicely reproduced with lego clutch gears (something similar I already did with my Willys Jeep alternate, not knowing that it's done similarly in real life). After a lot of juggling with the placement of the motors and the gearbox components, I came up with this quite compact drivetrain setup with the gearbox inside the 11x7 frames, which not only includes the drive motors, but the steering motor too (later on that as well). The key ideas regarding the overall chassis structure are the following. First, I use a simplified (limited degrees of freedom) rear suspension, which requires only one CV joint, which makes the rear part of the drivetrain shorter, making more space for the gearbox, which is placed a bit to the back. Second, I placed the motors to the front of the middle section, and use the back of the motors as the mounting point for the front lower suspension links. Thus, the motors play a major structural role in the chassis. Here is the central part: And here is the whole drivetrain without the motors and the frames: As you can see, the rear part is short, and the front is offset to the side, and can just be routed between the drive motors, under the steering motor. Another interesting thing about it, is that it actually has two shafts (yellow axles at the front) coming from the two drive motors (but they are coupled by the red gear in the middle), and one of the shafts powers the 2-speed gearbox, that then goes to the rear axle, and the other shaft powers the the front axle, so the front axle drive does not pass through the gearbox, as it's only active in low gear. The orange selector switches both the gearbox and the RWD/AWD switch at the same time, activating the front of the drive train when low gear is selected. As with my Unimog, the placement of the gearbox motor was again difficult, as a lot of additional elements (end stoppers, clutch gear protection, down-gearing) need to be placed, so the gearbox motor had to be routed out to the trunk. Suspension As I outlined above, the rear suspension is a somewhat simplified live axle. I saw this trick first in @nico71's Ford F150 alternate, but builds of @rm8 use it as well. It is like a ball-joint based suspension, but without the ball-joint as support that prevents the axle from rotating forward/backward. In case of non-motorized models or smaller RC ones with less powerful motors, the joint itself is enough to keep the axle from rotating, but it was not enough in this case (the coupled motors could just rip apart the driveshaft), so I had to fix it explicitly. I opted for a suspension link that does not let the axle rotate forward on the far end, only tilt sideways (not using towball pins, just regular axles). This setup provides strong enough support to prevent the torque from ripping the driveshaft apart. A Panhard rod further stabilizes the axle to prevent sideways movement. Unfortunately, it's still not as solid as a ball-joint would be, and does not relieve all friction from the driveshaft. On the front, I used a similar 3-link suspension as the Unimog, but I had to move the Panhard rod behind the axle as the space was even less in the front, and managed to move the springs further in, giving it a softer and longer travel. It actually came out too articulated and had to be limited, as the wheels hit the fenders. Also, I used a better steering geometry than the Unimog (no anti-Ackermann geometry), and the max steering angle became very good, too good actually, as the wheels hit the bodywork at max angle, and can get stuck in it, so I limited the angle a bit, but is still better than the Zetros (the limiters are just half pins, which can be taken out to get a lot of steering angle, at the cost of risking the front wheel getting stuck in the body at max angle and max articulation, but work pretty good on flat surface). So the suspension is not bad actually, limited a bit by the bodywork, but the model still drives around quite okay on real terrain. Also, I wanted to experiment with a different steering setup, not placing the steering motor onto the axle. As said above, I found it a nice place between the drive motors, and using the CV joints there was just enough space to route it to the axle. It works okay, however, the two joints already introduce some lag in the steering, which is most noticeable when trying to automatically return to center, it does not center totally. But it's still okay and can be controlled with fine adjustments. Interior As the seats in the Zetros set were too small for this scale I needed to build bigger ones. Since I did not want to use the green beams on the outside, I used them as accents on the inside, they were enough to build seats and to be used in the middle console. I entertained the idea of making the steering wheel functional, since the steering motor is not on the axle, but there was not enough space to route it to the steering wheel, and furthermore, the curved panels used as a dashboard just block the way, and otherwise they are important structural elements that hold the front and the sides, so I did not want to alter them. The battery is placed between the B columns, as there was no other convenient place, and there it's easily accessible. The seats can be folded forward, to give room for replacing the batteries. The engine details are just some imaginary ones built from the remaining parts (nothing working). But the snorkel tubing continues on the inside :) Here is the whole chassis with the interior: And here are a few more renders and photos of the complete model, but much more is available on Bricksafe. Building instructions are available on Rebrickable. Let me know how you like it! Cheers, Viktor -
Daniel`s technic creations
Daniel-99 posted a topic in LEGO Technic, Mindstorms, Model Team and Scale Modeling
Hello everyone, Im a new Eurobricks member and have only a few posts, some of them present my own technic creations. I noticed, that there is no possibility to see all posts of any member even in it`s personal page (correct me if I`m wrong). So, taking an example from Nico71 i decided to make a dedicated topic for myself, there i will share my lated technic creations. Main goals for this topic: Make a list of my Lego technic creations Make a brief preview of each car Give a link to a full story of development... Please, put all the suggestions and discussions into dedicated topics if possible ;-) Chevrolet Corvette [RC MOD] Features: RWD, driven by two PF L-motors PF Servo for steering Buwizz 2.0 for power some bodywork modifications ;-) Full story of the build could be found in the following topic: Fitst PF car Well, everyone knows, that to get skill you have to practice a lot... and first results differ a lot from the later one... Here is one of my first PF cars. Features: modular build (3 sections) PF L-motor for propulsion PF Servo-motor for steering Full story of the build could be found in the following topic: -
[WIP] RC Heavy Buggy
Daniel-99 posted a topic in LEGO Technic, Mindstorms, Model Team and Scale Modeling
Hello everyone! Lately, I made several posts of my finished models, some of which was build many year ago, so i cant make more photos of them and add your suggestions to the build. Today i would like to share with you my recent project. Im building (developing) an RC Buggy in big scale. Im not trying to make a version of a real one, but the general principles i follow are the same with real buggies. General principles: - independent suspension with a big travel - Rear wheel drive - big positive caster on from wheels - 2x Buggy motors for power (1 per each wheel) - lack of the body - only the structural elements... - double steering arms (for stability and stiffness) I have begun this project a month ago, but then got interrupted with some 4x4 cars (i will make posts on them later). The first prototype This car is actually closer to trophy trucks than to buggies, but nether mind... Features: - Rear drive with live axle. Long travel, soft suspension. - Dual driveshaft: Buggy motors are connected to the rear wheel independently. - McPherson front suspension, positive caster, extra steering arm for stiffness (like in 42099) - anti-row bar at the front The main goal of the first prototype was to test the McPherson setup and the gear-ratio (find a good balance between speed and torque). I made a several tests, and was very pleased with them (see videos below) but many observations has been made for the future development. Main benefit of the McPherson setup is it`s compactness, since there is only one wishbone. But it also became the problem for the car, since additional wishbone gives more ridged structure. Also all axes in transmission has a lot of plastic dust in them - Buggy motors have made their job too well! Summing up, Im very pleased with the first prototype, but the general scheme should be changed! So the development continues... Im waiting for your comments and suggestions... It is not that easy to build a thing from lego that can drive "properly". THIS SECTION WILL BE CONTINUED! ;-) -
[WIP] Red Coupe RC
Daniel-99 posted a topic in LEGO Technic, Mindstorms, Model Team and Scale Modeling
Hello everyone, today I`m going to reveal to all of you my Red coupe MOC that I placed on my avatar ;-) A long long story begins There is a long story of development of this car. It starts with my childhood dream and the First Lego technic PF car (see https://www.eurobricks.com/forum/index.php?/forums/topic/188301-fitst-pf-technic-car-moc/&tab=comments#comment-3468455 ) (that I built in 2012). After I left my hobby for about 4-5 years. And then I returned with RC MOD of Chevrolet Corvette set (see https://www.eurobricks.com/forum/index.php?/forums/topic/188300-chevrolet-corvette-42093-rc-mod/&tab=comments#comment-3468619 ). After that I tried to deal with a big scale (1:10) by building an RC MOC of Porsche 911 RSR (see https://www.eurobricks.com/forum/index.php?/forums/topic/188322-porsche-911-rsr-rc-moc/&tab=comments#comment-3469094 ) - that was a big challenge for me and required a significant upgrade of my lego workshop... At the very end of my story with Porsche, I get some ideas for a new car... but to build a car from that ideas took me 2 more months. The cassis and first ideas of the body I was developing a new RC chassis for my Porsche 911, it is a long process, you know... Finally, the chassis has been developed. It was built out of ideas and I was very pleased with it! I needed to add several mounting points to it in order to swap the body. The chassis was waiting for me on the next desk where I used to play lego and I was doing my everyday job on computer. Then suddenly, I looked up onto a shelf and noticed, that fenders from Land Rover set 42110 has a nice shape as a front grill! I checked my idea, and it worked! At that moment I realized that the story of a new car begins!... To build the back lights of the new car I use the old Bionicle heads! And made first lines of the roof and A-pillars After that the process stopped... New fenders from Ferrari set Process stopped... I was struggling a low with making the wheel arched for front wheels... the bonnet I made required me to make a very sport-like very slime and curved wheel arches. At the same time they needed to be sturdy enough for outdoor driving and also provide some space for the suspension travel... After a month of unsuccessful attempts I was ready to give up! But likely for me, the new Lego set Ferrari 42125 has arrived! I waited for another month for a "good" price since it was totally overpriced form the very beginning. The Ferrari fenders bring the new power to me. Also they provided the color for the car. To finish the bodywork in red I bought two Ducati sets their parts help me a lot! On the photo you can see the gorgeous moment of attachment of the side-panels to the car. After I solved the problem with fenders, the car was assembled piece by piece in such a way, that all my ideas nearly "provide" the form of the car and the part use. As you can see, the first prototype of a bonnet was lifted up to be a roof ;-). Some underlying ideas for bodywork: - Short front and back bumpers (comparing to the Porsche set) - Front grill with a fender from the Land Rover set - Narrowing door panels The car has no interior and no doors, since I was building an RC car. I was saving the weight. Final car with batteries (Buwizz) has a total weight of 1,5 kg. Photos of a finished car Hope you like it! After finishing the first version, I made a significant update of it. Now it is equipped with 2 powerful Buwizz motors and powered by 2 Buwizz 3.0 bricks. The total weight is 1,63 kg and the mass of the car is moved closer to the rear wheels for a better grip. All electronics is located in the lowest 5 studs of a car so it is very stable and quite fast (about 12 km/h) it is really fun to play. But you heed a flat areas since the ground clearance is about 2 studs (all in all it is a sport car). The suspension is independent and very responsive. I have no video to share for now and the winter has already come, so I will wait until spring! Now im 100% involved in 4x4 technic RC off-roaders.... P.S. I will try to make a OPDF instruction for my MOC, but it will take a lot of times. And if you have any questions, no not hesitate to ask me - the car was not disassembled and it is waiting for the warn and sunny days on a shelf ;-) -
Porsche 911 RSR [RC MOC]
Daniel-99 posted a topic in LEGO Technic, Mindstorms, Model Team and Scale Modeling
Hello everyone! Im very glad to show my RC Porsche 911 RSR. As always, story begins far far in the past... My childhood dream was to get an RC car... Some time ago I shared with you a Corvette RC mod, and that was the "first step" in my dream coming true! In that project I understood, that a lego car can go a decent speed especially with the Buwizz 2.0. BUT... But the speed uncovered a another problem, that is the lack of control! Lego bricks have too much wobbling... Searching for the solution of this problem in the internet I found several buggy projects with technic bricks that has a positive caster... Ant I instantly understood that the positive caster is the thing I need in my car. Also, I was struggling a lot with gigantic scrab-radius. But in that time all rims produced by lego was symmetric. Finally, the Land-rover set has arrived... And the new rims give me some hope... Now I was going to build a 1:10 scale car. But the Land-rover set itself was a bad candidate for motorization due to it`s mass and a wobbly chassis. Due to the lack of skills in bodywork I decided to modify the lego set. I choose a Porsche 911 RSR set for my needs. One would ask me: why you call this RC mod a MOC? Well, the cassis of lego sets are totally inappropriate for making RC cars - most of them are too wobbly and weak. Moreover I wanted to build a positive caster. So I decided to build a custom RC chassis that will for to the bodywork of the initial lego set. Here is a front suspension. Yeah, that is my first "finished" chassis with suspension. Do you see some unusual ideas? I managed to build a double steering arms in order to make the steering system stronger. Moreover, I made a double steering rack steered with a single gear... On the back I decoded to build a live axle with motors connected directly to wheels: no friction on gears, no weak universal joins... I used the original instructions to check the dimensions! Here you can see the finished chassis - nothing special! I placed several smaller wheels for comparison. I would like to mention, that my first RC car was build with the smallest wheels (the very right wheel on the photo). The main reason why I build a car with small wheels was the lack of power the lego motors have (as I thought back then I was at the very beginning of my lego technic build experience). The main question for now: will the motors have enough power to move this big chassis? I made the first drive, and the car really goes well! Unfortunately I did not make a video, but it was going about 7-8 km/h - that was not a bad speed comparing to the 9398. After finishing the chassis I started the bodywork. Then I build front and back parts of the body (with a lot of changes from the original) I decided that it would be great to have a single body-unit that sits on the chassis on several attachment points. And this is the result: The main reason why I build a detachable body is because I was going to make modifications of chassis! Hope you like my post and the car ;-) Feel free to comment on technical aspects. P.S. one fan fact about this car: this RC car has only one gear! - sounds crazy, isn`t it, -
Fitst PF technic car [MOC]
Daniel-99 posted a topic in LEGO Technic, Mindstorms, Model Team and Scale Modeling
Hello everyone, today I will tell you a sad story about my first attempts in lego technic RC. Lego technic set 9398 was my dream since I like really like both RC cars and lego. And then I get one I was totally disappointed! 9398 set was a slow turtle that stops in front of any "decent" obstacle. At first, I tried to deal this problem by changing gears and it gives a result, but the car became a super-slow turtle... After that I decided to motorize a 42029 Pick up set with motors from 9398 set, but the car had not enough power as well... The wheel were too big and heavy for two motors... (at least I thought that in my early days). Finally I understood that the smaller wheels car has, the easier it will be for motors to move the car... And I decided to build a car with the smallest wheels possible! The car is assembled form the 3 sections: front wheels with steering rack, rear axle and the middle part with all the motors emplaced. Technical specs: 1 steering with servo-motor 2 propulsion with L-motor 3 PF battery box and receiver Here you likes it... This is my first "finished" motorized technic MOC ! -
Chevrolet Corvette 42093 [RC MOD]
Daniel-99 posted a topic in LEGO Technic, Mindstorms, Model Team and Scale Modeling
Hello everyone, in this post I want to tell you about my motorization project I completed about 2 years ago. The set 42093 brings the wheels to the technic community. I always wanted to build an RC car with lego bricks but I had no experience neither in bodywork nor in building RC chassis, so this project was my second "successful" attempt. Technical specs: 1 steering with Servo-motor 2 propulsion with 2 L-motors 3 powered by Buwizz 2.0 I also made some improvements in bodywork. Enjoy the build! As you can see, I improved the roof by making a higher A-pillars and adding grey arches on the sides. A full gallery is available by the link: https://bricksafe.com/pages/danil.nig/motorized-chevrolet-corvette-42093 -

[MOC] Ferrari F40 1:10 RC
paave posted a topic in LEGO Technic, Mindstorms, Model Team and Scale Modeling
Here's my latest creation: Ferrari F40 Model Info: Scale: 1:10 Size: L45, W21, H12, cm Weight: 1476g Parts: 1589 Features: - Remote control - Working V8 engine - Independent suspension - Opening doors, bonnet, trunk - Pop-up headlights - Modular construction - PF: 2L, Servo, IR, LiPo Video: Pictures: More images: https://bricksafe.com/pages/paave/ferrari-f40-110-rc Building instruction made in Bricklink Studio coming with 564 steps on 442 pages: https://rebrickable.com/mocs/MOC-92704/paave/ferrari-f40-110-rc/#details