Search the Community
Showing results for tags 'help'.
Found 285 results
-
OK, so recently the 5 millionth topic was opened about storage. Let's keep it all to one sub-forum and one topic. How do you sort your LEGO? How do you store your LEGO? Discuss...
-
Hi guys. As you can tell from the title I need to repair a technic figure. I have this guy: And most unfortunately someone small used him a little like a doll and his left arm snapped off at the shoulder joint. Now, what happened is the pin/peg snapped clean at the point it met the arm, so the entirety of it is inside the torso with a tiny dimple left on the arm itself. I noticed the peg was hollow and the arm did have a dimple, so running a small risk of limited movement I attempted my own repair. Using a carefully trimmed piece of the sprue two minifig keys come on I dipped the one end of this little pin/rod into Revell Model Glue and popped it into the hole of the pin left in the shoulder. So far, so good. The glue cured and the new repair pin remained in place with normal handling. Then I trimmed it to the best length to attach the arm using the remains of the original peg. Dabbed glue into the dimple of the broken peg on the arm, placed it onto the pin and with a little masking tape to hold it in place, left the glue to cure. First try, the arm came away with the tape. Second try, the arm fell off once the tape was gone. It is leaving a nice mass of glue on the tip of the pin (formed to the shape of the dimple on the arm...) I am guessing it is either not the best adhesive to use in this situation, the plastics won't bond or that there just isn't enough of the original peg left on the arm to join it right. What would you suggest? I could get a different glue (I am on the hunt for some as a few action figures got mashed too. Poor Sam Flynn is now headless and my Big Duo is Last Appearance accurate!) or is it better to get the leftover peg out of the torso and put a new arm in?
-

School project survey - LEGO shelves - Please help me out!
AD_Bricks posted a topic in General LEGO Discussion
Hey there! I'm in the middle of working on a large project for school - one where we're almost completely free to do whatever we want for it. I've chosen to develop an all-encompassing and ideal design for animal-, UV- and dust-protected customisable and situation-adjustable LEGO collection shelves for optimal displaying of sets and models in an aesthetically pleasing and space-efficient way. I'd certainly appreciate it if you took the time to fill it out for me, as I'll need data from the target audience in order to make and refine the best possible design for everybody. https://forms.office.com/r/Lur7XaqnhE (If some of the wording doesn't seem right in this, please note that this is just a copy-pasted message that hasn't been context-adjusted.) (Side note: the project is merely to develop the design, and no shelves are actually being sold here.) -
Hello LEGO Action Figures community! I build 1/12 scale fully posable figures (like GoodSmile Figma or Kotobukiya figures) of anime characters and I was reevaluating my arm design. Here's how the arm design I've been using currently looks like, the one on the left I use for short-heighted characters and the one on the right I use for characters who are average-heighted: This design has been reliable for my first few figure creations, but I am facing two problems. One is that the short arm (left) is very crude and looks ugly. I think I made the arm too short, but there are of course, many characters that call for short arm length. I try my best to make my figures' arms as articulated as possible, but I would like to find a way to make arms, short and long, with the exact amount of articulation, but that are more realistic to actual human arms, which is really difficult to achieve in 1/12 scale. The second problem is that both arms do not have the articulation needed to spread their arms out like this: So I tried putting a clip on the end of the larger arm's elbow, connecting the rest of the arm but able to achieve the articulation I wanted, but now the upper arm above the elbow is fragile with the removal of a 1x2 plate to make room for the 1x1 bracket, and the elbow clip is only hanging on by a stud. Not exactly the solution I was hoping to achieve. Below is what the leg design looks like on my figures too. Only showing this because I was curious if the hip design (just a brick with the legs connected to it attached to the bottom of the body) could be improved to look less weird, unless you think it's not weird and fine the way it is. Is it possible for anyone to help me find the best design for 1/12 scale action figure arms (a 6-stud long design for short figures and a 7-stud long design for average-heighted figures) that look realistic and less blocky than my designs, but are also fully articulated like on a traditional 1/12 scale fully posable action figure? Like these arms, (figure by Moc_Lobster on Rebrickable) but without the use of ugly gray ball joint pieces and preferably more realistic.
- 3 replies
-
- help
- action figure
-
(and 3 more)
Tagged with:
-
Friends, over the past couple of months I have been working to improve the photography of my models. Particularly, I hope to develop a consistent and excellent setup that can be used indoors to photograph my MOC at anytime of the day (or night). I am interested in any suggestions others use for their current photography needs. I suspect my needs at this time revolve around lighting. My current setup uses: Canon Rebel XT DSLR Camera A large posterboard Two midsize photography lamps (120V, 240W, 6400 lumen bulbs) Here is a shot with the current setup: Here is the lighting (and whiteness) I hope to achieve, albeit in an indoor setting. Any suggestions would be appreciated.
-

[HELP] Which Technic Set Should I Buy?
Siegfried posted a topic in LEGO Technic, Mindstorms, Model Team and Scale Modeling
There seems to be a flood of "What should I buy" type topics lately. The problem with these topics is that if everyone made one over ever purchase the forum would become unreadable. Thus to solve this problem this topic has been created to be the new home for all such questions. Do note though that there there's a topic about this already but since a lot of you Technic guys seem to not want to hang out with the System guys I'll make a similar topic here, but please do realise that EB is one site, not a collection of many small ones. I'm making an exception here, not a rule... Ask away! -

A Quick Start Guide to Brethren of the Brick Seas (BoBS)
Bregir posted a topic in Brethren of the Brick Seas
So you think you'd like to dive into the world of the Brick Seas, however there is so much to read and so many rules that you are not even sure where to start! Fear not, it's actually quite easy to get started and the community here is really friendly and will help you along each step of the way! Never be afraid to ask questions in the introduction thread or any of the faction threads (linked below). For now let's look at exactly what you need to do to sign up and get started in one post! Step One: Choosing a Faction The first step is also one of the most important - choosing the faction that your character will pledge allegiance to. While you are never limited to only building scenes within your faction's territory (in fact many challenges may require you to build in other factions), faction choice will impact your role in BoBS. There are many things to consider, what style suits your current Lego collection, what interests you, which part of the game you wish to focus on etc. etc. Even the number of currently active players in each faction may influence your choice. The most important thing however, is to choose a faction that you are going to enjoy and be motivated to build for! There are four playable factions in the game, let's have a brief look at each one to assist in your choice. Corrington Primary Lego Influence: Imperial Guard (Red Coats) Primary real world influences: Great Britain, Renaissance Sweden and enlightenment era Denmark-Norway The Basics: Science and the enlightenment are main national characteristics for Corrington, and their main source of income is from their strong merchant fleet. A strong navy is required to protect their maritime mercantile interests and this tends to be their military focus. Corlander's strive to bring order and structure to the world. Typical Quote: "That flower is beautiful. We must conserve it and bring it to the national museum." If you see your sigfig crawling through the jungle to find a beautiful flower - join Corrington. Read more: Corrington thread Eslandola Primary Lego Influence: Imperial Armada Primary real world influences: Spain, Portugal and the Netherlands. Also some of the merchant republics such as Venice, Milan and Lübeck. The Basics: Trade and profit are the main national characteristics for Eslandola. Although nominally ruled by a King, a trio of very powerful trade companies are the power brokers and have recently established a republic in the colonies. Their main source of income is through vast property holdings and they have developed a strong army and navy to protect and aggressively expand their interests. Typical Quote: "Enough profit for the day? Don't make me laugh!" If you see your sigfig crawling through the jungle to find a shiny city of gold - join Eslandola. Read more: Eslandola thread Oleon Primary Lego Influence: Imperial Soldiers (Bluecoats) Primary real world influences: Pre-revolutionary France and Imperial Austria The Basics: The main national characteristics of Oleon are deeply rooted in their strict adherence to the religion known as 'The Faith' which together with the strong aristocracy form strong bases of political power. A great love for art and culture as well as ancient artefacts is also a national characteristic together with their famous wine making skills. Like Corrington they have developed a strong merchant fleet and navy. Although historically Oleon and Corrington have been bitter rivals, relations have been improving of late. Typical Quote: "May Zeus and Poseidon guide your journey." If you see your sigfig crawling through the jungle to find a mystical artefact - join Oleon. Read more: Oleon thread Sea Rats Primary Lego Influence: Pirates Primary real world influences: Real world Pirates and free settlements such as Nassau. The Basics: The Sea Rats are basically anyone in the new world who owe no allegiance to any of the old world empires. These men and women go their own way. Some are fierce pirate lords, making a living terrorising the Brick Seas, others are peaceful merchants who refuse to bend the knee to any King, and some settle down at a romantic place in the colonies. The Sea Rats are a loose confederation with no central authority, whose binding characteristic would probably be the fierce defence of their freedom to live life completely on their own terms. Typical Quote: "What? You've never heard the tales of the reckless Benjamin Morgan? Benjamin, brave and bold? Dread Pirate Captain Morgan, on his legendary ship, the Queen Annetta's Revenge? Morgan the Moray?" If you see your sigfig crawling through the jungle... because it has an utter disregard for the rules - join the Sea Rats. Read more: Sea Rats thread Once you have chosen a faction, you are ready to move to step 2 and start building! (Next post)- 32 replies
-
- new
- walkthrough
- (and 4 more)
-
I'm making a 10 studs wide Peterbilt Dump Truck for my Uncle and wanted the bonnet to open. However, I haven't been able to come up with a solution for how to make the hood open. This is where I want the bonnet when it is open... ...and here is where I want it to be when closed. Any building advice? Note that I want to be able to fit a detailed Cummins X15 engine under the hood so I don't want the bits and hinges that make the hood open to take up that much space. I can upload a Studio file of the entire truck's front end if you'd like. Thank you.
-
Is it okay if I create a fresh new ReBrickable account from scratch, especially with a different email address?I tried to log in as a guest using my current email address but I got that message; 'An account already exists with that email, please login to proceed'. MOCPlans merged with ReBrickable back in 2017 and I can't remember what my username or password was now.
-
- rebrickable
- (and 4 more)
-

Can't launch PartDesigner! Can anyone help!
BrickWild posted a topic in Digital LEGO: Tools, Techniques, and Projects
Hi there, I tried to open PartDesigner but I get this error stating 'Failed to initialize PartEditor. Please report to studio@bricklink.com'. I also uninstalled it and then reinstalled but the same thing happens no matter what. Anyone else having that same problem? Have I done something wrong?- 1 reply
-
- parteditor
- partdesigner
-
(and 5 more)
Tagged with:
-
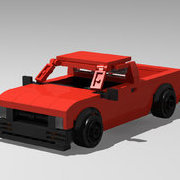
Hey peeps, I got the urge to improve my 8-wide vehicle builds again and was wondering if maybe I've been doing things the hard way all this time. How do you start your Speed Champions MOCs? Have you developed your own go-to techniques? Usually I don't use pre-built bases, I usually start with the tire/wheel assembly attached to some Technic bricks, then figure out the wheelbase (distance between the front and rear axles) and build around that. For this build though, I wanted to try using the traditional Speed Champions base. For example, I'm working on an modern Acura NSX, I know the life-size Countach has a 96 inch wheel base, and the NSX has about 103 inches, so I added a stud of length to the LEGO Countach's wheelbase. Once I work on the body I'll be able to tell if I need to adjust it to keep things in correct proportions. We've all seen how the official designers work miracles with this base, so I'm hoping I stumble onto one of my own lol Edit: After some tinkering, I def had to extend the wheelbase another stud.
-
I have never built an action figure with Lego before, but after tons of trial and error I'm happy how the legs came out so far. My only problem is I need to find a solution to keep the articulation the legs already have while adding the ability for the legs to rotate for even more dynamic poses. Photos from Studio are below, any advice would be very appreciated, I look forward to making many more figures in the future and I want the articulation to be accurate.
-
Hello guys , I desperately need a stud.io expert's help : I am doing builds for Star Wars factions using LDD and stud.io and I've stumbled upon some roadblocks in my use of Stud.io. Namely : 1) I cannot find any way to make parts that are supposed to be dual-molded be two different colors. For example I want a minifig's legs to be tan in their upper area , with dark bluish grey as the "boots"/lower part. Another example is a doctor who sonic screwdriver - I want the "body" to be pearl grey but the "light bulb" on top to be a trans green or trans blue . Is there any way , direct or indirect , to achieve that ? 2) What I also looked for , but could not find , was a way to use my own custom decals on , say a minifig torso . Is there any way of accessing the decoration/decal database of the programm and adding my own / replacing an existing one with my own ? If this has been answered / covered elsewhere , feel free to lock / delete the topic and point me to the right direction. Thanks in advance to anyone kind enough to help.
-
(1).thumb.png.b4d6c907fe73903aec1adfd3cd481a19.png)
i need some help with my ev3 classroom app
glowytheglowbug posted a topic in LEGO Technic, Mindstorms, Model Team and Scale Modeling
i think i found a bug when i scroll flashes of random colors go around the screen stuff gets misaligned etc as I scroll through the thing it moves around https://flic.kr/s/aHBqjzQLHH -

PoweredUP/Control+/Mindstorms Help
The_Tinkerer posted a topic in LEGO Technic, Mindstorms, Model Team and Scale Modeling
I have several questions regarding PoweredUP/Control+ and Mindstorms, and as the Mindstorms help topic went down with the ship, I think I'll start a new one. Do all PoweredUP and Control+ motors work with the Mindstorms hubs, and vice versa? Further, do people use the 51515/45678 Mindstorms hub instead of the PoweredUP/Control+ hubs for the size and additional outputs? I realize the Mindstorms hubs are more expensive but they're still comparable to a Buwizz with additional ports and programmability. -
Flickr seems to change so often that it's hard to keep up with all of its functions. There have been a number of questions about deeplinking from Flickr recently, so I hope people find this short tutorial helpful. I have included TWO ways of sharing pictures from Flickr in this tutorial; using the "Share" button and through the "Download" button. Embedding pictures using the "Share button. Embedding pictures using the "Download" button. Feel free to post questions about Flickr here and anyone can answer them. For any other questions, ie anything not relating to flickr, please check the FAQ tab in the upper right of the forum, or post in the HELP! ! ! topic here in Forum Information and Help.
-
Good afternoon all. Just a quick question; has anyone bought LEGO or similar from a site called StockX before? Are they reliable? I’m asking because they claim to be listing the Ninjago City Gardens at only $390 AUD (for non-Australians RRP is $499 here) with $27 extra for delivery - a good price, and not so good as to be suspicious. I’m not familiar with the site, though, and if it turns out to be a scam or similar this could turn into a very expensive mistake. It claims 165 people have bought Ninjago City Gardens on that site, but there’s no option for ratings or reviews there, which is also a red flag. Can anyone confirm whether it’s a legitimate site or a scam? Link is below. https://stockx.com/lego-ninjago-city-gardens-set-71741?country=AU¤cyCode=AUD
-
- stockx
- reliability
-
(and 2 more)
Tagged with:
-
Hi all, i have a few photos to upload, where is the best place to do that brickshelf? then link t to the post? Lukemax
-
Help needed with simple rc program for 51515
whitepen posted a topic in LEGO Technic, Mindstorms, Model Team and Scale Modeling
So I was working on a simple rc program on my computer today with my new 51515 set and was trying to make it rc using the keyboard (up arrow=forward down arrow=reverse left arrow=left right arrow=right) But it is hard because there is no "when no key pressed" block to my knowledge. The robot I am using is THIS. Any help would be greatly appreciated.-
- mindstorms
- programming
-
(and 7 more)
Tagged with:
-

Strange Power Functions Issue
jshuiting posted a topic in LEGO Technic, Mindstorms, Model Team and Scale Modeling
I bought a set from bricklink a while ago and tested out the electronics, only to find that they were acting really strange. I'll try to explain it is as clear as possible but i may mess up a bit. So the set came with 4 motors, one of each kind, XL, L, M and Servo, and these all work perfectly fine on my own battery packs and recievers. But now i hook them up to the included recievers, so XL on red, L on blue, but then only the XL motor works. Now i'll switch them arround, but yet again it's only the XL motor that works, but now on the red channel. The L motor does function correctly when hooked up to a different reciever or straight to a battery pack. Further testing shows the XL motor works on all my recievers, both red and blue channels. The L motor works on 2 out of 4 recievers but only on either red or blu side, not both sides on the same reciever The Servo motor worked on none. And the M motor worked on 3 out of 4, also on just one side per reciever, either red or blue. And again all the motors work directly on the battery pack, or when hooked up to known good reciever. So what's going on here? How does one motor work on a reciever, but another does not? Can i throw away the motors or are the recievers at fault here? It's really frustrating because i am in the midst of making a deal with the seller aswell, but i can't without knowing exactly what's broken. It's like the recievers are picky in which motors they want to actuate and which ones not, but how's that even possible?- 5 replies
-
- power functions
- electrics
-
(and 5 more)
Tagged with:
-
Hi everyone, I've finished trying to RC my 42043 and it seems that the PF L motor has issues providing sufficient power to drive the set? I obtained instructions from the creator of this video (https://www.youtube.com/watch?v=BpP_05uxKqs&t=22s&ab_channel=PawełWojnarowski) and also checked PPUNG DADDY's 42043 RC video (https://www.youtube.com/watch?v=O8easq7ueIo&ab_channel=PPUNGDADDY(뿡대디)-LEGOTECHNICRC), both used an L motor with no problems. Here's a video of the issue: https://youtu.be/J8P13WLPzN8. As you can see in the video, the motor loses power after driving for some time, eventually being unable to drive at all. The problem is worsened when I try to drive and steer at the same time, it's almost impossible to drive and turn. I have tried swapping the tyres around, changing batteries, trying a V1 and V2 IR receiver, switching positions of the motor and servo cables, and using a new L motor. But the problem still persists. Here's a photo of the L motor: Could it be because of excess friction introduced in the rear axles during construction? Because I noticed when I lifted up the rear axles, the motor spins the wheels at its standard rpm, BUT only 1 wheel on each axle spins, the other is stationary. Then when the wheels contact the floor, the motor suddenly seems to struggle with driving the thing. Hence I was thinking could it be that I built the differential too "tightly"? Appreciate any help from the technic experts in this forum, thanks in advance!
-
Hello People :) Currently i am building 10278. So far I really like this set and I am already preparing some bricklink list for some small upgrades. However I do have no idea for making some kind of curtains for the 1st floor, right here. Do you have any idea which pieces would do the job? I was thinking on something green, triangle plate with small tiles on it from both sides, but to be honest - I have no pieces to even test it and do not have the feeling on what could be a good idea. I will be glad for any ideas. Thank you in advance and have a great weekend :)
-

multi link suspension help
platinum831 posted a topic in LEGO Technic, Mindstorms, Model Team and Scale Modeling
hello i am working on a moc with multi link suspension it will have pneumatic cylinders as the shocks to act as air ride the steering of the suspension is a little funky and I don't know where i should mount the cylinders too in order to get full suspension travel with them installed any help is greatly appreciated- 8 replies
-
- suspension
- multi link
-
(and 2 more)
Tagged with:
-
Hello, FIRST post here so I hope my question is OK for the forum. I purchased the 75252 ISD for my son to build (yes, I'm helping). We have gotten to Bag #7, and have built the (see picture) the 2 sort of big triangular pieces that go BEHIND the engines and block people from seeing inside the ship. I've drawn a red line indicating the cross beam that extends and helps to connect the 2 pieces to the build. We installed the lower, or bottom triangle with very little issue, BUT we noticed the "cross beam support" is flexed a bit (we figured it was part of the build. BUT when we try to put the top shield (honestly I don't know what to call it, but these shields create the back panel of the ship when installed)....the top shield/panel has an issue(s) when we try to connect it. The 'flex' in the cross beam support seems to be just a small fraction off. Last night, after fiddling with it, I was able to get it connected but felt it wasn't exactly right. When we got up this morning, 2 of the 4 black connectors had come apart. I hope I am making sense here. BTW, if you watch this video from the Lego builder and scrub to approximately 3:30 you see him connect the 2 pieces I'm talking about (but you can't see the cross beam because of the angle). ALSO, he connects it all as 1 piece...not 2, which is DIFFERENT from the instructions. SO...I am very sorry for the long post, but: 1) have you built this?? 2) IF SO, did you run into the same issue?? 3) Any solution if you did?? THANKS SO MUCH in advance!! I have a VERY worried 14-year-old....HECK, I'm worried that I won't know how to fix it for him!! AGAIN, thanks. Kevin
- 9 replies
-
- help
- build help
-
(and 3 more)
Tagged with:
-

[HELP] Buggy Motor Stalling
jg711 posted a topic in LEGO Technic, Mindstorms, Model Team and Scale Modeling
Hello guys, Im new on the forum. I have a problem wich is very annoing, it is my recently purchased buggy motor. I have built a rally car and when i bought the motor, i only needed to click it in to place. Now, the problem is that if i drive (drift actually) the overload protection comes in and brakes the party. Wat i am using is this: 1. 8878 Li-Po Battery box 2. V2 Receiver 3. On the blue one, M Motor for steering, just like rm8's Black Mamba GT 4. On the red one, 8886 extension wire 5. From the extension wire to the Buggy Motor 5292 I have trouble uploading pics but i will try to figure out.- 17 replies
-
- RC
- Buggy motor
-
(and 4 more)
Tagged with:


