Search the Community
Showing results for tags '2015'.
Found 114 results
-
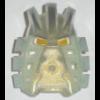
Hello again everyone! Continuing to review the sets I bought during the May the Fourth sale. So here is my second review : 75088 Senate Commando Troopers Name: Senate Commando Troopers Theme: Star Wars / The Clone Wars Year: 2015 Pieces: 106 Minifigures: 4 Price: USA 12.99$, ENG 11.99£, CAN 15.99$, EUR 16.99€ Resource: Brickset Lego store description The front of the box with the new 2015 art: A stormtrooper helmet tagged with a rebel alliance crest. Same as the other sets of the winter wave. On the back, we see the troopers in action, the number of spare studs included and the play features of the canon. In the box, the pieces come in 2 bags and there is also the instruction booklet. The instruction booklet has the same image as the box on the cover. The back with the win minifigure. Spare parts. Mainly spare studs for the guns as you can expect from a battlepack. The completed model. The canon is equiped with the new stud "gatlin" gun. Side view 1 Side view 2 Back view Top view The legs can be adjusted Legs down Legs up The canon can be aimed up and down. This is the lowest angle it can be placed in. We now move to the minifigures: the highlight and purpose of the battlepack. We get 4 of them. Three senate commando troopers and one senate commando captain. The captain as a different face from the 3 other troopers. The 3 troopers have the clone face from other clone battlepacks. The captain as some white painting on his helmet, torso and leg. The back printing is similar. Rating ------ These three points are not included in final score. Price: 6/10 – 106 pieces for 12.99$ is above the 10 cents per piece ration. Also 20 of those piece are studs for the guns and the canon. Still we get 4 great minifigures that were really expensive on the aftermarket because they were released in only 2 sets years ago. Plus the canon is a nice little build. We are use by now to this kind of pricing for battlepacks. Parts: 7/10 – 20 of the pieces are studs but we get 7 pieces in republic red and only 2-3 technic pieces. The "gatlin" canon is a really nice piece. Build 7/10 – Nothing fancy here. The building process will take you no longer then 10 minutes. No special technic are involved in the build. ------ Design 7.5/10 – Since the canon is not based on any source material it's difficult to compare it. Still, with the colors and style we have no problems imagining this canon as an anti aircraft gun that would be around the senate protecting it from attacks. The canon looks great overall, but the side of the barrel (Image: side view 1) could have been better. Also, some might find it too "bulky". It looks more like a mortar then a canon. Minifigures: 9/10 – The 4 minifigures are amazing. Printed legs and printed back torso. The fact that we get a captain and 3 troopers is great. Its nice to have a captain. It adds diversity to the battleback but they still look good displayed together. Only complaint: we should have goten 4 different faces since the senate commando troopers are not clones. Playability: 7.5/10 – Like other one faction only battlepacks, it complement other sets really well. By itself you can shoots the canon and play with the troopers but you will defenetly need bad guy to shoot at. The shooter on the canon rotates on the sides and up and down. It works really well and shoots far. Kids should have a blast using it. OVERALL 8/10 – A nice little battlepack. The minifigures are great and so is the canon. Its not everyday we get a senate related sets and non clones troopers of the prequel era. In fact this is the first prequel battlepack wich does not contain any clones. They look great standing next to Palpatine in his office and you can make an Emperor arrival moc PT style. This is an above average set that you should pick up if you would like to add to your republic force with non clone elements and a neat canon. Thoughts and critiques welcomes! Also if there is any grammar mistake burning your eyes, please PM me and I will edit. Thanks for reading!
-
Old Bionicle parts you'd want to see brought back for Gen 2?
Takanuinuva posted a topic in LEGO Action Figures
Seeing as the Guurahk staff was used again for Pohatu and Kopaka. It had me thinking what other old Bionicle parts would still work for Gen 2 I personally want to see the Bohrok tooth make a comeback. http://www.bricklink.com/catalogItem.asp?P=42074 There using Bohrok eyes in summer sets. Skull Scorpion and Skull Grinder. So why not this part as well. Another part I'd like to see is the Vahki waist piece. http://www.bricklink.com/catalogItem.asp?P=47330 It small and is good for making custom torso's so there's potential for it in CCBS I'd also like to see this piece remolded into the new ball style. http://www.bricklink.com/catalogItem.asp?P=x1192px1 Its unique and would help with more custom CCBS limb designs. What pieces would you like to see come back for Bionicle Gen 2? -
Charpai, Toraros, and Polarus: Masters of Magnetism
Dr_Chronos posted a topic in LEGO Action Figures
(Ok first off I'm terrible with naming characters, these guys sound like pokemon! ) Anyway this is a project I've wanted to do for a while, but because of exams I couldn't even start on it until yesterday! Essentially I wanted to make a toa of magnetism, but then one of my friends suggested I make 2 of them to account for the opposite poles. And so Charpai and Toraros were born! Charpai controls the attraction forces of magnetism and Toraros controls the repulsion. But then I had the idea of taking these guys a step further by giving them a new form... Polarus! A shot showing the two components, and how they are connected Tahu for size... Thanks for looking . Does Polarus stack up? Comments and Criticisms welcome! -
Hello Eurobricks members and web crawlers alike. Let's review a set that I feel isn't getting near enough love this wave: the Imperial Troop Transport 75078. USD $12.99 CAN $15.99 UK $11.99 GER €16.99 FRA €14.99 Product Description: Track down the rebels on planet Lothal with the armored LEGO Star Wars Imperial Troop Transport battle pack. Issue your Stormtroopers with stud shooters, load them up and get ready to deploy. If they come under attack, jump onto the roof and fire the dual flick missiles from the turret to send the rebels running for cover! Includes 4 Stormtrooper minifigures with assorted weapons. Includes 4 Stormtrooper minifigures with assorted weapons Imperial Troop Transport features a dual flick missile turret and space for 4 Stormtroopers and their weapons Also includes extra ammunition Weapons include 4 stud shooters Load up the troops and track down some rebels Man the turret and fire the flick missiles Store the extra ammunition in the storage box with handles Expand your LEGO® Star Wars collection with this great battle pack As featured in the Star Wars: Rebelsanimated TV series Imperial Troop Transport measures over 3” (8cm) high, 2” (6cm) long and 3” (9cm) wide I wanted to do a review of this set because I think it's an all-around keeper - a well rounded battlepack with some great value. It's also going somewhat unnoticed in a wave with more exciting designs and figures. It's true this kit is only 4 of the same figure, but in my opinion it's a solid figure to have four of. If any moderator wants to add a poll, be my guest. Otherwise, feel free to reply with your impression of the set. Here's the front of the box, standard 2014-2015 wave "Rebels" grey/orange. And the back. Love the four-shot at the top right. The contents: Here are the stars of the show - the Star Wars: Rebels-era Stormtroopers. From what I've read the printing/grill on the front of the trooper mask is a cause of some protest for Lego Star Wars fans - some say it's too grinnish, distorted and unfamiliar. We'll get to that later. All four troopers are identical, except two of them have a different facial expression. Here's the troopers' backs. And with the stud shooters, which although I agree are somewhat not-so-great for minifigs, have had success recently integrating them onto ships and vehicles. Here are some steps throughout the build, which is surprisingly more time consuming than it looks. And that's the whole Imperial Troop Transport. Does it look like the real one? Sorta. With that economy of pieces? Certainly. But... it's small. It's actually around the right height... about as high as a person standing, a bit taller. On the show, there are three placements on both sides for troopers to ride in (or prisoners to be transported in) and this model only has two per side. Big drawback: there's no interior. But I guess the general shape is represented with pretty small pieces and simple slopes. If you can squeeze those 4 studs into the crate, great. Slide the cargo crate in the middle (always nice to have more of those) and the troopers pit more or less easily into their placements. If they are holding guns, particularly stud shooters, it is cumbersome to align them in properly. Very few spare pieces left over, but I do like me some extra x1 white round studs. You can turn them into jogan fruit. :D All together, here's the side view... ... and the front. Neither side is a beauty, these ITT blobs look best at an angle. It's a surprisingly sturdy build though, all together. Here's a look at the underside. This kit comes with enough 1x2 trans clear bricks to make some people happy... about 6 or so in total I think. Here are a couple of my improvements: First of all, give these troopers some proper blasters. Second, that turret on top doesn't look right. Not a fan of the flick fires on something so small. So with two black lightsaber hilts, I switched around the turret a bit in the hopes that it looks a *tiny* bit more screen-accurate. Ratings: Personally, I love this kit because the price is great for the number of troopers you get... and I don't mind the Rebels-era stormtrooper helmet variant. Some people do, though. They don't like the shape of the mouth and I can understand that. I'd also read that some don't like how pronounced the blue grill details are on the sides of the mask. Well here's a bit of a perspective: I have a number of "vintage" stormtroopers from various sets all the way back to 1999 and the printing on stormtroopers then was terrible. Here's a comparison: Yes, there's a huge gap in printing between the "teeth" of about a dozen of my Millennium-era troopers (above, right) and it looks sad. I have all of them assigned to the bowels of the Death Star and on board the ISD so that most people don't see them. Compared to these old dudes... four troopers for fifteen bucks, IMO this kit is a no-brainer. Snap these up on sale! I plan to get at least two more next sale and then I'll store some away for future gifts. I can only hope that the episode 7 kits coming out are this generous in an offering - 4 troopers for $15 is a great deal. You can never have too many troopers. ;) Can you? Parts: 9/10 Decent! These are useful slopes and bricks in grey, a few clear pieces and grey plates. You could probably do a lot with this pile of pieces. Price 10/10 Absolutely stellar. Bring a shopping cart when these are on sale... unless you only can stand pure original trilogy stormtroopers. Build 8/10 It's okay... I built two of these and got lost briefly both times because the pieces looked so similar. Again, the flick fires make me crazy and I had to tweak it right away. Design 7/10 Scale wise: the size of the transport compared with the AT-DP is pretty close to what we have in the show. There is criticism to be leveled here, though. Looking at the wide berth of the transport in the show I think better pieces could have been chosen to create the round front. And I know it needed to be a certain price point but... I dunno. Take out the stud shooters and make it a full stud wider? I would have enjoyed an ITT at a $25 or $30 price point but I'm expecting some clever MOC'ers here to come up with something. Minifigures - 10/10 Awesome. The reason I am doing this review is to give this sweet, misunderstood set for what it is - a battlepack for Imperial Troopers that hasn't been matched since 7667 Imperial Drop Ship back in good old 2007 (OMG it was USD $9.99). I won't ding points for the helmet because it is meant to be a representation of troopers from Star Wars Rebels... and that's how they look. And sometimes It's great to get four-of something in a battlepack instead of two you want... and two you don't. Playability- 9/10 This is a pretty solid set, it looks okay without troopers, great with them loaded and there's a Lothal vibe where they're parked. It's solid and is easy to handle and manipulate. Overall 9/10 My final thought... run and don't walk the next day these babies are on sale. As a Canadian AFL, there aren't that many sets that I feel are of such good value even at regular retail price. If you like the Rebels Troopers, now's your chance to really expand your imperial army. Feel free to add your comments, ratings and why. You can, of course, re-enact some rad battle scenes on top of these transports: "Your master has deceived you into thinking you can become a Jedi..." Rebels Season two can't come soon enough!
-
Hello everyone! I was browsing the forum for some reviews of the sets I bought during the May the Fourth sale and I noticed many were missing. So I thought I would make a review to fill that gap and contribute to the LSW community. So here is my first review : 75085 Hailfire Droid Name: Hailfire Droid Theme: Star Wars / Episode II Year: 2015 Pieces: 163 Minifigures: 3 Price: USA 19.99$ (Target exclusive), ENG 19.99£, CAN 24.99$, EUR 26.99€ Ressources: Brickset Lego store description The box The front of the box with the new 2015 art: A stormtrooper helmet tagged with a rebel alliance crest. On the back, we can see the play features and images of the lone clone trooper fighting. Inside the box there is 3 numbered bags, the 2 loose printed wheels and the instruction booklet. There is only one instruction booklet with the same image as the box on the cover The back Spare parts The build The build after bag one. The middle piece of the model. The build after bag 2. The inside part of the wheel holders The build after bag 3. The outside part of the wheel holders. The model is now complete. The completed model (back view) The completed model (side view 1) The completed model (side view 2) The completed model (top view) The wheels in straight mode. The model is not stable and will roll back and forth if you surface is not 100% flat. The wheels can be folded down 90 degrees but more than this and the wheels don't touch the ground and the model doesn't roll anymore. The minifigures Now on to the minifigures. We get 3 of them. One clone trooper Lieutenant and 2 Super Battle Droid. The Super Battle Droid. The same as the one release with other episode 2 sets. The 'incomplete' back The clone Lieutenant compared to the polybag version we got in october 2013 Note: The sets comes with only one clone trooper. The one on the left is from the polybag. The one on the right is from this set. As you can see they are both exactly te same except the newer version as leg printing. ( I just noticed the printing on my new lieutenant's helmet is a bit off. Maybe I should call and request a new helmet.) The back is exactly the same Rating --------- These two point are not included in final score.I will still rate them as they are important for some people. Let me explain: Price: Too much dependent on where you live and your Lego budget. Also, Lego is kid oriented even with the big AFOL community. Most Lego sets are gift to childrens so the price will not affect the overall feeling of a kid toward is play set since they don't pay for it and generally they won't know the price. Parts: only affect the overall score for MOCCERS who need pieces for their mocs. This should not affect the rating of people who display their model and/or play with it and don't dismantles them for parts. Price: 5/10 – 163 pieces for 20$ is under the 10 cents per piece ratio. Still if you are interested in the clone Lieutenant, 20$ is the price you would have payed on the aftermarket for one. I feel another clone trooper should have been included at this price. Parts: 6/10 – The printed wheels are exclusive to this set. They are the highlights in term of parts, depending if you like them or not. We also gets some pieces in 2 different shades of brown. But most pieces are small grey and black bricks that don't seem that interesting. We also get a lot of technic pieces. --------- Build 6/10 – Except for the middle section, its a pretty repetitive build. It should take around 15-20 minutes to build this set. It's an easy build. Design 6/10 – I think this all comes down to if you like the printed wheels or not. It does look somewhat like the source material but it should have bigger wheels and more rocket launchers. Also you cannot leave the spring loaded missiles in the launchers because they will damage the spring if you leave them in too long. It won't damage the spring but I don't leave my spring launcher loaded because I don't like having "loaded" shooters on display. Thus it diminishes the value of this set as a display piece. Minifigures: 5/10 – The Clone Lieutenant is a great minifigure and the highlight of this sets. This is a good way of getting the Lieutenant for those who missed the polybag and don't want to pay the ridiculous aftermarket prices. The two droids are a bad selection for this set. We should have gotten 2 brown battle droids instead of 2 SBD. In the worst case t least 1 brown battle droid and 1 SBD. Also a fourth minifig should have been included. Playability: 6/10 – You get 4 spring loaded missiles shooters and wheels to roll around. So this is pretty swooshable. But by itself there is not much to do because you get 2 SBD and only 1 clone trooper. This set is clearly meant to complement other Geonosis sets from the 2013 wave. OVERALL 5.75/10 – Definitively not one of the best set of the winter wave. I would not recommend this set alone but it's decent complement to your Geonosis collection. Also even if the minifigure selection is not the best, this set is worth getting for those who missed the clone Lieutenant polybag. I am pretty sure we won't get a third chance to get a blue phase one clone trooper. Here is a little bonus for those who got through the review Thoughts and critiques welcomes! I tried my best for the lighting while I took the pictures. I tried pretty much all the lamps in my house and this is the best result I got. Are they too dark? Also if there is any grammar mistake burning your eyes, please PM me and I will edit. Thanks for reading! PS: Could a moderator please PM me. I would like to add polls.
-
(All pics link to Flickr) Function Video (5 seconds) I was realizing the day before yesterday that the 2015 Toa have one strategic advantage over the 2015 BIONICLE villains: none of the villains appear to be able to fly. So I thought I'd even the odds. Obviously, I had to use a few placeholder parts, but I still think it conveys the general idea I was going for. Skull Ripper includes 87 pieces total, and so I imagine she would hit about the same $15 price point as the other skull villains. Skull Ripper's torso features the same Technic function as Skull Basher's, but here it serves two very different purposes. From a standing position, it allows Skull Ripper to stab an opponent with her talons. In flight, it allows her to flap her wings. Ideally, I'd prefer Skull Ripper to use Tr. Blue instead of Tr. Light Blue, but from a practical standpoint I found that I had a more useful range of pieces in Tr. Light Blue. Thoughts, comments, criticism? Please share! This is my first MOC I've completed to my satisfaction in a few months, so I'm very proud of it, but I'm sure there's room for improvement!
-
Hello all, I made a custom Mixel today. Furnax is an Infernite; I experimented with his back three times and decided to use a bunch of slopes. Yes!
-

[VIDEO] BIONICLE: Mask of Light Trailer (G2)
The Phantom Terror posted a topic in LEGO Action Figures
Hey guys. I've been working on something over the weekend and I'd like to keep it to myself and bask in its awesomeness share it with you. So here we go. Embedding isn't working. So here's the -
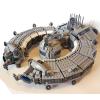
A last minute entry for the High Council in warzone 5. Into The Desert... by BrickCurve, on Flickr As the leader of the convoy reached the first few metres of desert sand his thoughts returned to all those who had been lost over the years. From the unlucky traveller who had almost reached civilization in days before regular patrols around the edge of the great sands, and then there were those that just wandered in, never to be seen again. Still it could happen for there little party, a sandstorm to get them lost in the middle of the desert was all that was needed. For in a desert with no permanent landmarks getting lost and running out of water would spell death to all but the luckiest of adventurers. Still the supplies they were carrying were needed by High Council troops in this great civil war. Into The Desert... by BrickCurve, on Flickr He looked back for the last time at the honour guard that the patrol behind them had formed. He wondered to himself whether he had tempted his fate in the desert too many times to get away with it again, wondering whether he would see any of the patrol, or any other soldiers of the high council again or would he and the convoy behing him become nothing more than another pile of bleached bones soon to be hidden by the great shifting sands that formed this great desert. On another note, I cant seem to get the deeplinking working between here and flickr, I've seen similar images missing around the forum so is deeplinking no longer possible here? <edit> Fixed, it was a problem Google chrome.
-
Here is a quick mod to the Lord of Skull Spiders. I completely rebuilt the torso and took out the grabbing gimmick to install a stud six shooter in his mouth. Cause of this I gave him articulated legs and a small abdomen. Front http://www.brickshel...2015/loss01.jpg Side http://www.brickshel...2015/loss02.jpg Back http://www.brickshel...2015/loss03.jpg Top http://www.brickshel...2015/loss04.jpg Bottom http://www.brickshel...2015/loss05.jpg Mouth open with web shot loaded http://www.brickshel...2015/loss06.jpg Picture will all 12 Skull Spiders & Gold Skull Spider Mask (Lens gave a bit of glare to the eyes but I think it makes him look more evil this way) http://www.brickshel...2015/loss07.jpg .LXF file http://www.brickshelf.com/gallery/takanuinuva/Bionicle2015/thumb/moloss.lxf_thumb.jpg Comments and criticism appreciated
-
Thanks to some Bricklink orders that arrived today I can now show off my mods for the 2015 Toa One thing to mention with all of them except Onua. I built a custom torso since I didn't like the exposed ball joints on Tahu, Pohatu, Gali and Lewa. I didn't with Onua cause of his large chest piece. I won't show how its built until LDD updates. Till then feel free to guess how I built it. Also they all have silver armor save for Tahu and Kopaka's chest plates. I hope in later waves we get Silver Red or White printed chests for Tahu and Kopaka. Gallery when public http://www.brickshel...ry.cgi?f=554632 Tahu I shortened his legs and change his feet from silver to red. Swapped out chest armor for Breakout version. I might change his eyes to orange once I get the summer sets. Front http://www.brickshel...015/tahu001.jpg Side http://www.brickshel...015/tahu002.jpg Back http://www.brickshel...015/tahu003.jpg Weapons stored on back http://www.brickshel...015/tahu004.jpg Secondary Weapon Function http://www.brickshel...015/tahu005.jpg With Gold Mask of Fire http://www.brickshel...015/tahu006.jpg Kopaka I removed the trans blue, Swapped his silver chest for a white Breakout version. Better shield design (Credit to TheDesuComplex) Switched his spear for a custom built sword, Shortened his legs. Shoulder armor is now more like his prototype version Front http://www.brickshel...5/kopaka001.jpg Side http://www.brickshel...5/kopaka002.jpg Back http://www.brickshel...5/kopaka003.jpg Weapons stored on back http://www.brickshel...5/kopaka004.jpg Secondary Weapon Function http://www.brickshel...5/kopaka005.jpg With Gold Mask of Ice http://www.brickshel...5/kopaka006.jpg Onua I changed his torso armor to be bulkier, Swapped his feet for the standard ones. Changed the build to his shoulder armor. Hammer is changed slightly to have a sort of shovel esc handle at the bottom Front http://www.brickshel...015/onua001.jpg Side http://www.brickshel...015/onua002.jpg Back http://www.brickshel...015/onua003.jpg Weapons stored on back http://www.brickshel...015/onua004.jpg Secondary Weapon Function http://www.brickshel...015/onua005.jpg With Gold Mask of Earth http://www.brickshel...015/onua006.jpg Lewa I swapped out his leg armor for larger ones and made his feet green. Changed the build of his axes. Replaced shoulder spikes with the Savage planet Claw/Wing piece. Swapped his torso for the Breakout version. Shortened his arms by one bone length Front http://www.brickshel...015/lewa001.jpg Side http://www.brickshel...015/lewa002.jpg Back http://www.brickshel...015/lewa003.jpg Weapons stored on back http://www.brickshel...015/lewa004.jpg Secondary Weapon Function http://www.brickshel...015/lewa005.jpg With Gold Mask of Jungle http://www.brickshel...015/lewa006.jpg Pohatu I removed the asymmetry. Added wrist mounted daggers. Added spikes from Pewku to the torso. Front http://www.brickshel...5/pohatu001.jpg Side http://www.brickshel...5/pohatu002.jpg Back http://www.brickshel...5/pohatu003.jpg Weapons stored on back http://www.brickshel...5/pohatu004.jpg Secondary Weapon Function http://www.brickshel...5/pohatu005.jpg With Gold Mask of Stone http://www.brickshel...5/pohatu006.jpg Gali Swapped all yellow parts for black. Simplified the trident and added the Gurahkk staff pieces from Kopaka and Pohatu. Made her left handed and changed her green eyes to blue (Though I may change them back). Gali also has shorter hips on her custom torso. Front http://www.brickshel...015/gali001.jpg Side http://www.brickshel...015/gali002.jpg Back http://www.brickshel...015/gali003.jpg Weapon stored on back http://www.brickshel...015/gali004.jpg Secondary Weapon Function http://www.brickshel...015/gali005.jpg With Gold Mask of Water http://www.brickshel...015/gali006.jpg Lastly here is a real life version of my Kanohi Suva http://www.brickshel...suvareal001.jpg http://www.brickshel...suvareal002.jpg Bottom http://www.brickshel...suvareal003.jpg With standard colored masks http://www.brickshel...suvareal004.jpg http://www.brickshel...suvareal005.jpg With Golden Masks (Also the Gold Skull Spider Mask) http://www.brickshel...suvareal006.jpg http://www.brickshel...suvareal007.jpg Comments and criticism appreciated
-
Hello! As usual in this thread I'll put all the updates of my town, Brickville (a pretty common name, huh? ) Due to the space limit of the table I've reached the highest number of buildings possible, so if I want to build more, I'm forced to replace an existing building with another. I found a way to add the new modulars to the existing city, so here's an overview of the whole city: and, as usual, some everyday's scenes of ordinary city life A 50's car in a 50's service station How to save a cat Classic cars show I guess superheroes are arrived in town Uh, and the new billboard Hope you like, check my Flickr gallery, it's updated more often.
-
Name: Painting Easter Eggs Theme: LEGO Year: 2015 Pieces: 153 Pieces Minifigs: 2 minifigures Price: USD $9.99 First the box, these holiday sets are theme-less but honestly it would fit well into Creator. The back shows the vignette's scenario in detail with the kid dropping the egg because he's busy thinking of chickens... The one picture is a bit odd to me, it shows the egg falling AND one already broken on the floor. A chicken for scale, cute. Three bags, two loose plates, and the instructions were well preserved and not excessively bent. No numbers on the bags for the small build. The instructions have a plain baby blue backgrounds that provides great contrast compared to some of the overly busy backgrounds these days. Some of the great parts in this set. 7 dark red masonry bricks are the big standout. These currently sell for upwards of $0.75 so half the price of this set can be represented just in these bricks. The round plate with jumper is a fairly recent and very useful piece. The orange 1x1 round tile may not seem too special but it has only appeared in 6 sets previously. Of course the chicken, classic space themed torso, and painting supplies are all great pieces as well. The first stage of the build is the chicken in the wild with its egg. Simple but a nice way to get the chicken into the set. Here is the base with tiled floor and beginnings of the back wall, the alternating tiles and plates provides a nice flexible base for positioning the figures. Note the cookies in the oven, I also like the simplicity of the "fume hood" represented by a 1x2 cheese slope. The completed back wall, of course it must have a coffee maker. Simple but very evocative of a kitchen scene. The completed vignette! The brown flowers make good egg holds but I kinda wish they'd used the normal 1x1 round with hole as those are more versatile than the flower shape. The leftovers, the brush is the main standout. Playability: 7/10 You can splat the egg, get the cookies out, but in general this is meant for display. Thats not a bad thing in this case. Design: 9/10 Very evocative of a home kitchen with nice parts use throughout. Price: 10/10 Good price per piece though many small pieces, however the unusual parts like red masonry bricks elevate this. Minifigures: 8/10 Good prints, the kids shirt especially. Perfect figs for the scene. Parts: 10/10 Great selection of rare parts for such a small set. Total: 44/50 Colorful and creative build with great parts. Thanks for reading!
-
Name: City 30313 Garbage Truck Theme: LEGO System / City Year: 2015 Pieces: 48 Minifigs: 1 minifigure Price: USD $3.49 I picked up this new polybag in the Easter section at Target. The parts. Front end could use a bit more detail, but a nice little utility vehicle vehicle. The extras, not much but the black arm is a nice piece. Playability: 7/10 For a $3.49 set its not bad with the trash and shovel and cans to put them in. Design: 8/10 Its a polybag, but the little mechanism for the cans is nice. Could use some sort of front fairing. In general this stood out to me more than some of the recent City polybags. Reminds me of a John Deere Gator type vehicle. Price: 7/10 Average price per piece, nice printing on minifig but nothing new. Minifigure: 6/10 Pretty typical blue collar worker type figure. Seems like a lot of these guys have facial hair in the LEGO world. Parts: 7/10 The trash cans are moderately valuable, the arms with hooks are always useful, and the oldschool car base is not found in too many sets these days. Total: 35/50 A pretty average set but would make a nice addition to a park scene. Will be watching to get a couple more cheap if they make it to 50% off the day after Easter.
-
Hello gents, in this topic we would discuss modding options to redesign the avengers age of Ultron Hulkbuster, i would advise all those who have the model and have already modded it to thoroughly describe the process. We advide to only use pieces from the set, but if you do have to use another piece, please do specify the piece number and colour so the rest of us can then purchase it if we wish to follow your steps. Furthermore i advise please not to be greedy, this topic is about sharing, so we can all have a good definitive hulkbuster. So please if you have a good design then don't hog the design.
-
Here a video of my modified modulars, all together in one layout.
-
''Help a baby tiger in trouble at the LEGO® Friends Jungle Falls Rescue with Olivia mini-doll figure, cliff hut, dam function and caves.'' But... ...did the TLG get the right story? If you're interested, scroll down (and read the review) to find out. Basic info of the set Set no.: 41033 Name: Jungle Falls Rescue Theme: Friends Subtheme: Jungle Year: 2014 Pieces: 183 Minifigs: 1 (plus a tiger and a chameleon) Age group: 6 - 12 Price: £ 17.99 / US$ 19.99 / EUR 19.99 Price per part: 9.831p / 10.923 c / 10.923 c Links: Brickset, Bricklink, LEGO S@H The box The front of the box is (as always) in bright Friendly colours, with the main five characters on the top right corner as opposed to the main set's character, in this case Olivia, in the bottom right corner. The sides of the box are typically curved, as seen in larger sets from the Friends series. The landscaping on the box art is tropical and acts as a nice background for the set. Interestingly, there are many features that set the box(es) in the Jungle subtheme appart from the classic ''Town'' Friends. The five characters are dressed in tops seen in the Jungle subtheme, the box art is framed with bamboo and tropical flowers. I also noticed that the set as shown on the front of the box differs slightly from the set as seen in the instruction booklet. Can you spot the differences? The back of the box reveals other aspects of the set, most importantly the playability of the set. The Friends theme is aimed at female population, young and less young girls like me, and playability is an important factor. Individual play set-ups are framed with a bamboo pattern. There's a mechanism that allows sliding the waterfall panel to the side, Olivia saving the baby tiger, exploring the cave in the rocks and giving him a treat. In addition, Olivia can enjoy a meal with her chameleon. Same as seen at the front of the box, the most obvious box art are the bamboo and tropical flowers, clearly distinguishing the Jungle subtheme. The same jungle box art is seen on the sides of the box and it looks really nice. Of course, the mandatory hearts, butterflies and dog paws are seen in subtle print. The top of the box has a bamboo framed picture of Olivia as a measure of scale. The tropical flower pattern nicely rounds up the top of the box. I'm only missing the butterflies here. The booklet The front art design is repeated on the front page of the booklet instruction. It's slightly bend on the left side as a result of bags of bricks being pushed against it. Luckily, the instructions were not damaged. I know it's just a small set, but having more protection for the instruction booklets would be nice. On the inside, the booklet is as neat as ever. The background is in lavender, again a typical Friends colour. Building steps are simple, with not many bricks to add in each step. What I liked specifically, in some steps, such as step 18, there are red arrows emphasizing the right placement of some bricks, where it's a bit hard to see. This is a nice addition, not so much for the experienced builders, but for the beginners. The odd pages differ from the even pages in that they have a small heart and butterfly design in bottom right corner. Again, this kind of watermarks is typical for Friends. Although, it's not a necessary one, it became a traditional, and the page would look a bit empty without it. A positive surprise in the instruction booklet was the promotional page for the Jungle subtheme sets. Apart from the pictures of all 4 sets, there's a lovely presentation on how to combine those sets into one larger setup. Although it's more of a MOD, I see this feature as a promotion for MOCing. It also shows nicely how the TLG planned the individual sets to allow for combining them together. The pieces Inside the box, there are two numbered bags of similar size, a 16x16 plate in medium azure, a sticker sheet and two lime plant vines with leaves. Medium azure plate of this size is available in only 4 sets of the Friends and Disney Princess themes. Since the standard base plates in blue are not available any more, this medium azure plate can be considered as its substitute to create water. The lime plant vines are the highlight of this set - they're a new mold and one of them is an extra part! They're flexible, and can be placed in different positions. Sticker sheet is included, but again it could easily be avoided. While it does make some of the rocks slightly more interesting with the printed flowers, the set would be just as nice without it. I have two copies of this set, and chose to use the stickers only in this one for the presentation purpose. In general, I like the flower designs, but I'd rather see more plants and flowers included. The build starts with the bag no. 1. The parts found in this bag form the base of the rocks and the waterfall. Here, the torso and legs for Olivia are found, but I forgot to include them on these photos (they're discussed in more detail later on). The parts to point out include the dark bluish grey rock panels and the trans-light blue waterfall panel. The latter is actually quite rare, it's included in 3 sets only. These are my first parts of the kind, and although I'd prefer smaller parts for the rocks, in the end, these do their job just fine. Most parts are in light and dark bluish grey, and from the colours seen on the picture I'd never guess this is a Friends set (where's the pink?). Inside the bag no. 1, there's a smaller bag with the smaller parts. These parts are more colourful, and surprisingly there's only 3 parts in pink - again, is this a set aimed at girls? Yes, it is! My favourite parts here are the trans-light blue ones, they complement the waterfall nicely, and I only wish that more of them were included in the set. The 1x1 bricks were re-introduced in 2014 after a 12-year gap. The other interesting parts are the 1x1 round bricks in dark orange, appearing in 5 sets, but only 2 of these sets are currently available at the stores. Bag no. 2 contains slightly more colourful parts, but again, there's not as much pink as I'd expect from my experience with the Friends series, which is not necessarily a bad thing. The dark pink plate is the only part in a girly colour. The interesting parts here are the lime palm trees which were introduced in many sets in the last two years, two inverted tan tiles and the chameleon in bright green with medium lavender pattern. Inside the bag no. 2, there's another polybag with smaller parts. There were only a few. The most interesting (and anticipated in my collection) were the 1x1 round bricks in dark orange (there's a total of 6 in the set). Other parts are not that excited, apart from the round tiles - they are the new types with a bottom stud holder. The best parts in this set are the the panels for the rocks and waterfall. I might be too excited over those, but these are the first ones in my collection, and I'm looking forward using them in future MOCs. Also, the trans-light blue bricks and tiles are interesting and useful parts to build various water features. In addition, there are the newer molds, the 1x1x3 brick, the round tile with bottom stud holder and one with a hole in the middle. The dark orange 1x1 round bricks are welcomed too, as they allow for more variations of bark colour when making trees, and the highlight for me is the new plant vine. Did I mention you get two and one of them is an extra? Chameleon with the lavender pattern is also a new (recoloured) LEGO species. The extra parts are the usual small bricks that could get easily lost. As mentioned before, there's an extra plant vine. I won't complain about that one. I was positively surprised to see one, but I wonder why it was included as an extra part. Is it possible it breaks more easily when under stress? Never the less, it's a great part to have as extra! The minifig Olivia is the main and only character in this set. Her outfit is a uniform of the Red Cross Friends Jungle team. The dark pink printed scarf is a lovely addition to add more feminine touch to the uniform. Her hair has holes for hair assessories, but there are none included in the set. If I could choose, I'd go for some type of large pinkish tropical flower as seen on the box art. Well, I guess Olivia knows better than to pick wild jungle flowers just to put them in her hair. I didn't include the parts of Oliva in the parts section, so here they are. We all know the Friends anatomy, so there's nothing new here. Everyone would look so thin with an empty stomach, right? In addition to Olivia, two animals are included in this set. The baby tiger is the first one presented in the set. It's the same type as in the Friends Animals series 4, Tiger's Beautiful Temple. It has a nice back printing. I only wish the dark brown pattern would be printed also on the sides of the torso. It has cute written all over him/her. Beware if you have a soft spot for blue eyed kitties! The tiger has the main role in this set, as Olivia seems to be rescueing him/her from the waters in the waterfall lagune. The tiger is placed on this simple raft, that could be easily thought of as a drift wood. What I like about it, is that the underside of the 2x4 plate has inverted tiles attached to it. This way, the raft moves more rapidly over the studded water surface. The other animal in this set is the chameleon. It's a new LEGO species that was introduced in the 2014. One of them is Pascal, the chameleon from the Rapunzel's Creativity Tower. Chameleon in this set differs from Pascal in two ways, both obvious. He/she doesn't have a name, and he/she has a more realistic chameleon-like pattern. It comes in bright green with a medium lavender pattern. Since I own two copies of this set, I thought to compare the lavender pattern, and it's actually different. For me, this is really great, as it's easier to distinguish between them in case you name them. The build The set is targeted at girls from 6-12 years old, and it's basically an intermediate build. There are some more complex aspects of the set, where you need to be careful when placing parts in the correct positions. Contrary to some other Friends sets, where smaller subsets are included, the Jungle Falls Rescue is a one build set. The building process is divided into two parts as already indicated by the two numbered bags. It's starts with forming a base for the rocky landscape or the cliff, as TLG described it. The tiles seen here are where the waterfall slides into the cave, and the black jumper tile is where the crystal stone can be found. What I found interesting at this step, is that the stickers were applied to parts which are not visible from the front. This is why I think the sticker sheet could be easily omitted from the set. However, in a way it feels nice to have some details included also at the back side. At the end of the day, each builder gets to decide for him/herself whether to apply the stickers. As for me, I applied them in one set only. Few steps on, part of the mechanism for sliding the waterfall is built using Technic gears. Also, the first rock panel part is included and it's decorated with a stickered butterfly. My least favourite parts, the 1 x something x 5 bricks are included here, and although I'd prefer smaller bricks, I have to admit these parts are efficient when trying to gain some height. So far, all the building was on the baseplate. The next step is building the highly anticipated waterfall. While having a completely brick built waterfall would be amazing, I'm liking this panel-built version just as much, although it's more simple and less realistic. The trans-light blue colour of the panel with a rocky pattern works great as a water feature. Different views of this minibuild show part of the sliding mechanism. Another panel is included here, and I can not blame the TLG for using a panel instead of bricks. This is a part that's not visible in the completely build set. The LBG gear rack connects to the gear and allows movement. The waterfall is then placed on the tiles, and its only connection to the rest of the structure is by gears. The only thing I'd change here is the base of the waterfall. Instead of white plates, I'd go for blue or even trans-blue plates, and then use white, trans-clear and trans-blue 1x1 round plates for the splashing water at the bottom of the waterfall. . A view from the back shows how the gear rack connects to the gear. It looks simple, but I have to admit, I wouldn't think of such mechanism. Well, I'm one of those AFOLs who think Technic bricks are too complicated to use correctly. Here you can see that a medium azure tile was used as the top of the waterfall and it looks much better than the white plates at the bottom. My favourite choice here would be a trans-light blue tile, but you can't have it all. The right part of the sliding waterfall is nicely hidden by a LURP with addition of some slopes and dark orange bricks. Considering the size of the build, this large element fits just fine. To me, it even seems as if the set planning was based on this part, and then build around it. The only thing missing here is some more greenery. More details were added to the water. The LBG tiles look great as stones, and the trans-light blue tile at the bottom of the waterfall creates an effect of splashing water. I would add more of them, though. When opening bag no. 2, another interesting minibuild pops up. It's the handle for the sliding mechanism and is camouflaged as a dam. It has a gear rack on the later hidden side, and dark orange and reddish brown bricks and plates on the visible side. The handle is very colourful, and I really wonder why TLG uses these colourful parts in hidden places. In the end, only the parts above the 1x8 reddish brown plate are visible, so the use of yellow and blue bricks is not a big problem. With the above handle in place, the waterfall can already slide to the right. Here's a view from the back side, showing an ''open'' waterfall. At this point the mechanism doesn't run very smoothly, but this gets better after addition of extra bricks, that help keep the handle in place. Ok, I admit I had to try sliding the waterfall as soon as the handle was added, and I had much fun doing that. It's a great feature, and adds so much to the playability of the set. A view of the sliding mechanism from the top. The yellow handle is used to slide the gear rack to the waterfall slide, and by moving the gear in the middle, it moves also the waterfall part, thus opening the entrance to the caves bellow. I like that the TLG camouflaged this sliding mechanism as a dam, but I'd prefer to have the yellow handle in brown or at least green. It wouldn't stick out so much. Also visible from the point of view is the crystal rock hidden in the cave behind the waterfall. A few steps on, little chairs are added to the top of the rocks to form the platform for Olivia's observation point. At this point, more greenery is included, and the rocks look much better already. The new plant type extends from the top of the rocks to the bottom right. It's attached with clips, and its flexibility allows for different positions. Considering there's an extra plant vine in the set, it could well enough be used in the building of the set. There's no such thing as too much plants, right? The little table at Olivia's observation top is built very simply. It's a combination of lime and reddish brown parts which gives it a more natural look. Colour-wise it fits nicely in the little hut at the top of the rocks. The most interesting part here is the stickered 2x2 tan round tile. My first though was that it's a pizza, but I'm not sure who would order a tropical pizza with kiwi fruits, so I'm guessing it's a fruit pie. As for the yellow spots and pink sauce, I have no idea what could it be. Maybe some sliced bananas and berries. The table is then placed at the platform at the top of the rocks, under the shadow of the palm tree roof. From this front view, it's not so obvious, but the table is not completely covered by the roof. I'm guessing it doesn't rain in the jungle or Olivia is not watching out for little tigers when it does rain. The building of the set is finished here. The size of the build surprised me nicely, as I didn't expect it to be this big. After all, there's only 179 parts in the set. This number would be higher, though, if bricks and slopes would be used instead of the large panels. To increase the parts number, more plants could be included. Bamboo leaves would fill the gaps bellow the tan plate really nicely. The finished product After 42 building steps, the set is finished. The finished cliff looks great from three angles, that is the front and both sides. From the left, the rock panel is nicely decorated with the butterfly sticker. It makes it more interesting, but I'd prefer to see more plants instead of stickers. Also, the yellow handle is well hidden from this side, and the transparent waterfall panel creates a nice effect. As it is not as clear to see through as from the front view, it looks more realistic to me. From the right side, the cliff is partially opened to allow easy access. The stickered flowers add more detail here as well, but as I said before, I'd prefer real flowers. My first thought would be to add a couple of those bionicle spines hanging from the top, and it would make the set even cooler. Also, more plants could be used to camouflage the rocks and the steps to the top of the cliff. A view from the back reveals a cave behind the waterfall and the hidden crystal rock. The cave is a nice feature in this set. At first it may look that it's just an empty space beneath the cliff, but it's much more. The hidden crystal is there waiting to be found, and in addition, the (stickered) flowers are a proof of life in the cave, so there's obviously lots to explore. The access to the cave from the back is relatively easy also for the adult fingers. Another interesting feature is that the access to the cave is revealed by stopping the water flow. The dam function stops the water, and as the waterfall dries out, Olivia can set to explore the cave beneath the cliff. I really like that on one side you can have a tea party at the hut, chat with your girlfriends, and on the other, you can have an adventurous afternoon by exploring the cave beneath the cliff. Olivia climbed down from her retreat, and is debatting whether to call for help or go in the water with the life preserver to save the baby tiger. The tiger is floating on a drift wood in the middle of the lagune under the waterfall. The inverted tiles on the bottom side of the brown plate really allow for smooth surfing. When the baby tiger is safely out from the water, Olivia can return back to her hut on the rocks, and enjoy the kiwi pie. As seen on the box art, the chameleon can join her at the table, but I'm not sure if he can use the cups. Maybe the baby tiger can use them. Anyway, it's nice to have an extra cup included, so Olivia doesn't fell all alone in the jungle. Additional play features were explained in the text above, here I just want to emphasize them again. Apart from the surfing tiger, Olivia climbing up and down the rocks, the dam can stop the water and reveals the entrance to the underground world with hidden treasures, so Olivia can explore the cave. Considering the size and the price of the set, there really is a lot to offer. The Final Verdict Design: 9/10 The overall design is great, but there is still room for improvement. Considering the target population of 6-12 year olds, the build is simple and well done. I'm only missing more plants here. Considering that trees in official sets often have just a couple of leaves, I know I shouldn't complain here. After all, there's an extra plant included. There some rare and interesting parts included in the set, adding more value. I was surprised with the colour scheme, as there's hardly any pink. While being a small set, with not a large number of parts included, it offers a lot. Parts: 10/10 The parts in the set are a nice selection of various bits and pieces in interesting and very usefull colours. There are some new and rare parts included, and that makes the set also nice as a parts pack. The interesting parts are the new lime plant vines (there's 2! ), the panels for the rocks and the trans-light blue parts for the waterfall. The parts selection is very useful for various MOCs, and for me that was the reason to get an extra copy of the set. Build: 8/10 It's a simple and straight forward build approriate for beginners, but also with some elements for the more advanced builders. I was excited to see the dam mechanism. It's a lovely play feature. I missed some extra plants here, but that can be easily added, as probably everyone has some extra greenery. Considered it's targeted at girls, there's a lot of building, and not many mini builds, as in some other Friends sets. It also has a potential to modify it and make it larger. Playability: 10/10 Playability is the most important feature of this set. There's enough action for everyone, boys and girls, and adults. There are moveable features, such as the dam and the surfing tiger, the hut to enjoy a meal, a cave to explore and baby tiger to take care of. Minifigs: 8/10 Olivia wears a Jungle uniform. Her top is a new design, while the skirt isn't. This is probably one of the few minidols without hair accessories, and she looks good that way. Well, I wouldn't mind some tropical flower pinned in her hair. Price: 9/10 It's a small set, but it offers enough interesting bricks for the price. The price per part is a bit high in this price range, as there's sligthly less parts included due to some of the panels. I mentioned there are some rare and new parts included, and these justify the price per part. I was nicely surprised with the selection of very useful bricks, and I have to admit I got two copies of the set for both the parts and playability, and considering the price, it was a great deal. Overall: 55/60 (90%) The overall score implies, this is a set worth having. It's an interesting design, appropriate for the beginners, it has a great selection of parts to attract AFOL, and it offers a lot of playability. Considering its price, this is a set that should attract different demographic groups of LEGO users, and still meet their various needs. So, did the TLG get the right story? I think the baby tiger was after an adrenaline-pumping ride at the waterfalls, and Olivia missinterpreted his intentions. But that's just my story, you can make your own....
-
Confirmed on the same day as the S.H.I.E.L.D. Helicarrier reveal! http://www.businesswire.com/news/home/20150129005263/en/Warner-Bros.-Interactive-Entertainment-TT-Games-LEGO#.VMpD7N08KrU
-
I plan to display some creations at Brick 2015 in the UK. This will probably be the first display at a LEGO convention as well as purchasing specific parts for MOC's. I normally build on LEGO Digital Designer and occasionally build with actual bricks, examples can be seen here: Now for your help! I need to know what is the best way to purchase parts for LEGO MOC's, I plan to display some of my best creations that you guys have already seen as well as some new secret projects. What is the best option or cheapest way to build LEGO MOC's? Pick-A-Brick, buying multiple sets, Bricklink/Brickowl etc. One big problem I've come across is budget. I have acsses to just over £1100 from now until October. Should I spend all of it on creating MOC's for Brick2015 or should I mix it up and buy a few sets? Is it worth taking apart sets for specific parts, I own many LEGO Super Heroes sets as well as LEGO Ideas and D2C sets? I've been to Brick last year and saw many large layouts. What is the best size to build at? I would like to build some of my best MOC's I have already shown on Flickr. Any tips for smaller builds in similar sizes to official LEGO sets? I'm currently thinking of doing a large layout as the center piece to attract attention and have smaller builds on the side. What do you think? How do you guys plan in advance? Any other tips and ideas you guys have to help me with your past experiences of LEGO conventions and building MOC's? Any feedback and suggestions are welcome. Thanks, Adeel
-
My first attempt at a waterfall. Far in the outer reaches of Kaliphlin...
-
Hello again! From the beginning of December 2014 LEGO gave me an opportunity to play with new Bionicle 2015 pieces. 50 Kilos. In return I had to build some MOCs and sent them my photos. LEGO gave me 2 weeks of pleasure. After that time I had to sent them back all Bionicle 2015 pieces and all MOCs I created with them. They said they would like to use them for Public Relations purposes. But they also said I can use photos in my gallery/forum etc. If you're interested in more details, you can see my little propaganda video: ... don't forget to turn captions on! Ok, I think I made my point and it is good time to show my MOCs. I decided to post here only some basic pictures and links - that's because I don't want to make topic too huge. More infos about heroes and others in my flickr/DA descriptions: FlickR (all project Bionicle 2015 photos) DeviantArt (all project Bionicle 2015 photos, additional gallery) FlickR (my second account) (photos of 50 kilos, new Bionicle parts etc.) I also give some links related to topic on my blog. I'm sorry I didn't translate it into English but I think it my be more practical to show MOCs' photos in that way. I don't think that the text is interesting - on flickR/DA should be all of my story in English. 1. Dark Lord BRICKSHELF A topic on my blog (some extra photos). The Bush of Power: 2. Hero of Fire BRICKSHELF A topic on my blog (some extra photos). 3. Hero fo Stone BRICKSHELF A topic on my blog (some extra photos). 4. Hero of Water BRICKSHELF A topic on my blog (some extra photos). 5. Hero of Air BRICKSHELF A topic on my blog (some extra photos). 6. Hero of Ice BRICKSHELF A topic on my blog (some extra photos). 7. The Huntress BRICKSHELF A topic on my blog (some extra photos). 8. The Hunting Huntress BRICKSHELF - Rahi Emu BRICKSHELF - plant A topic on my blog (some extra photos). Some additional photos: 9. Beasts BRICKSHELF - Dark Lord's scout BRICKSHELF - Turtle A topic on my blog. 10. Zar’ratux the Dragon BRICKSHELF A topic on my blog (some extra photos). Additional photo: Best regards, ~ QQS
-
Goodevening all, Me and my brother bought the new bionicle sets over a week ago (in the UK) and we have been really enjoying them, however we have been discussing the supposed 'combiners' that lego are currently using with the toa + protectors weapons. We decided to have a go at building them both and some kaita of the protectors. Akamai Wairuha Protector Akamai Protector Wairuha Battle! I hope you like them, more images can be found on brickshelf as soon as its public. - Mightyslickpancake
-
Building number four way underway.....only a little bit to go now and then I can start on the grain silos......keep watching !
-
An updated version of my original model ready for Brickvention. I would like to claim the UoP credit for Hydrology: Flowing Water.
-
Building number three of New Mannum's rebuild....recreate......reimagine....etc.,. It still has the same interior as the Railway Hotel from 2014........keep watching ! Edit - links to post office MOC......http://www.eurobricks.com/forum/index.php?showtopic=104272 and the IGA True Value Store MOC.......http://www.eurobricks.com/forum/index.php?showtopic=104079&st=25#entry2098098