Search the Community
Showing results for tags 'INSTRUCTIONS'.
Found 251 results
-
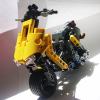
I'm wondering, does anyone have the instructions for the various RoboRider combo models? As in the ones that use three or more? I've spent quite a while looking for them, but they aren't really available anywhere. Does anybody have them, and if so, could you post a link? These are very rare, so you'd be doing every Lego constraction and Technic fan a favor.
-

Forest Tractor (with instructions)
M_longer posted a topic in LEGO Technic, Mindstorms, Model Team and Scale Modeling
Another day, another idea for contest. There's a toy: And real one work like this: And I decided to use it as a model for LUGPol contest (total amount of 1000 parts). Tractor has 4 pneumatic functions, which are: claw, crane arm rising, crane arm extending, and rear blade lowering. And three manual functions: winch, rotating the crane and front wheel steering + working fake R4 engine: The trailer is rather, simple, becuase most of the parts were used for the tractor, but it has pendualar suspenion: Everything works like this: I have made instructions for it, separate files for tractor and trailer: - Tractor - - Trailer - Parts list on Rebrickable (for both models): http://rebrickable.c...or-with-trailer Sugestions about instructions are welcome. -
This is a MOC that was created to go with big fantasy diorama "Studogrod", that was displayed in Warsaw on Polish LUG LugPOL exhibition. I wanted to create some ruins that has been taken over by a tree as time went by. I spent some time creating some instructions for it as well - you can find them on Rebrickable under this link. All photos of this MOC can be found here. If you happen to build this MOC, please let me know your thought about the building process and your general impressions in the comments section. And here goes the MOC - a brave knight explores the forgotten ruins when suddenly he encounters an unexpected being... :)
-
Here is my most recent project I'm building. I've built the chassis of this Buggy from instructions made by Madoca 1977. The difference here is that I built this to use the AA battery box instead of the Lipo battery. In the future I plan to add one or two of my upgraded XL motor in here but right now the L motors are looking and handling great. More is to come feel free to comment...
-
Hello everyone. Here we go, last hours to the end of voting for "Eurobricks' Dress my Exo Suit mini challenge". I really enjoyed this challenge and I'm happy to share the LDD file of my entry: The Exo-Homer! If you don't know what was the challenge already, check Dress my Exo Suit! There is last chance to vote in the VOTING THREAD where you can check for all cool entries! For those who are interrested in .LXF file for my Exo-Homer, please follow this link to my MOCpages and you find the link in the description of regarding MOC :) Happy building! Kris
-

[HELP] Select Model to Improve LDD Skills
jorgeopesi posted a topic in LEGO Technic, Mindstorms, Model Team and Scale Modeling
I need your help again. I want to improve my LDD and I like to know which of my previous MOCs you like to see on LDD. This time no more cars please, next time maybe... There are a lot of choices, you can take a look at my brickshelf page and choose, thank you. -
Here is the original topic for the Ferris Wheel. Edit: Instructions are no longer available.
-
BATMAN Happy Day to all, a gift Tumbler instructions Cammo, Homegrown, you enjoy it. Happy BATMAN day por AL13N163NA, en Flickr instructions: https://drive.google...dit?usp=sharing (sorry for the picture quality, but I'm in the office and my smartphone for 3 years, if not give more XD) See You ¡¡¡¡¡¡¡
-

[WIP] Supercar with automatic transmission
MSc Shobaki posted a topic in LEGO Technic, Mindstorms, Model Team and Scale Modeling
Hello you guys! My name is Ahmed El Shobaki, 25 years old, originally from Palestine, born and raised in Stockholm, Sweden. I've been reading through the topics for a while now in the Technic Mindstorms etc. section which led me to start a project of my own. After being inspired by very famous technic builders, namely Paul Boratko aka Crowkillers, Nathanael aka NK as well as Sheepo, I felt interested in building something extraordinary. Currently, I'm studying to become a MSc. Engineer in Advanced machine design at RIT, Stockholm where I only have some courses left before I get my degree. Enough said about me for now My project is about designing a smooth, great looking car as the fellow builders which previously were mentioned build, but I want it to be multifunctional. So I stated some criterias for the car to feature: Realistic suspension and steering (camber, caster, ackermann, multilink etc.) Front wheel driven by PF PF operated steering of wheels and steering wheel Remote controlled Fully mechanical automatic transmission. Pneumatic controlled doors with onbord compressor and remote controlled valve (open/close) PF Lights Two-seater Last but not least, easy access to batterybox as well as other functions like e.g. openable boot and hood. Three days ago, I learned how to use SR3D and now I'm almost halfway through with my model. I haven't built the model IRL, so the project can be either a real success when I finally build it or a complete failure hahahaha This is due to my regular work in the university where I'm an experienced CAD-designer and design stuff first in CAD before I manufacture something. I will post images of the building process and I hope that you'll like what you'll see. - MSc Shobaki Some WIP images: https://www.dropbox.com/sh/zkvp9a2tj3447os/AACc-ffpXP16P-lY06Y450Hea?m= -
Edit: Instructions are no longer available.
-

Instructions for Skid Steer Loader (Bobcat)
Jennifer Clark posted a topic in LEGO Technic, Mindstorms, Model Team and Scale Modeling
After much preparation I am proud to present the instructions for my Skid Steer Loader, based on the New Holland LS160; It's driven by two electric motors, steers differentially, and the boom and bucket are pneumatic. Check it out moving about on .Control is by a tethered hand controller with built in automatic pneumatic pump - instructions are included for this. There's also a chapter describing the building techniques I used, loads of photos of the model and real machine, and instructions for an optional pneumatic grab attachment. You can buy the instructions from my website and MOCplans for a small charge of $12 - these are rendered by Eric Albrecht, so you know you are buying quality. I've listed the model on Rebrickable, so it should be easy to figure out if you have the parts you need to build it! Enjoy, and please let me know what you think :-) Jennifer -
Instructions for my Excavator
Jennifer Clark posted a topic in LEGO Technic, Mindstorms, Model Team and Scale Modeling
Hi Folks, Many, many years ago I started the process of creating instructions for one of my models, the JCB JS220 excavator. Unfortunately I was unable to convert the complex CAD files to instructions due to technical problems, but Eric Albrecht (Blakbird) has stepped in and made it work. So after an incredible amount of work from Eric and myself, it is with great pleasure I finally announce they are ready, and can now be downloaded. Eric has done an amazing job on the rendering, and the instructions are of the highest quality. They can be downloaded from Crowkiller's website for a small charge at the following link; http://www.crowkille...F-JCB-excavator Enjoy! Jennifer -

Building instructions available of LEGO GBC 6
PV-Productions posted a topic in LEGO Technic, Mindstorms, Model Team and Scale Modeling
I'm proud to present that the LEGO GBC Shooter module from GBC 5 has been digitized and ready for download. I also made the building instructions available in PDF format. Here is the file if you want it: http://pv-productions.com/lego-gbc-5/ -
Building instructions LEGO GBC Pick & Place Robot module available
PV-Productions posted a topic in LEGO Technic, Mindstorms, Model Team and Scale Modeling
I'm proud to present that the LEGO GBC Pick & Place Robot module from GBC 6 has been digitized and ready for download. Also the NXT program is available on the website. Click here to download the building instructions and the NXT program. Skip to 1:33 to see the Pick and Place Robot working. Click here to support LEGO GBC 6 on LEGO Cuusoo. -
I'm in need of advice (hopefully this is in the right place). My wife and I are starting our own modular city -- right now it's a little more than a colony, with four lego figures and a covered wagon (you get the idea) -- and have been looking at purchasing a few instructions. I bought the Video Game Shop instructions from Brick Builders Pro (http://www.brickbuilderspro.com/video-game-shop-pdf-instructions/), and my better half has been crawling Amazon looking for others. She found a few by the same guy, and has her heart set on this one: http://www.amazon.com/Build-Cute-Cream-Shop-ebook/dp/B007C4WJOM/ I checked the guy's website, and he doesn't sell this through there anymore (or any of the other 6 he has listed on Amazon -- Mellow Yellow Jazz Club, Fresh Flower Shop, Kelly Green Deli, The Brick Town House, and the Seafood Cafe). Amazon sells these as Kindle books, which I could check out using their Lending Library.. If I owned a Kindle. :P Has anyone checked any of these instructions out? Are they pretty much the same as his Game Shop? It's frustrating not being able to see them before I buy them, as Amazon has the first six pages as a preview, as opposed to the center of the instructions where you get a good bead on what's going on. Any and all input welcome. Should I just buy these and hope for the best? Or is there somewhere else I should be looking to purchase similar instructions?
-
With the exception of the 16x32 base plate this model is built using only the parts available in the 10211 Grand Emporium kit. When I set out to build this the only thing I was trying to do is avoid having the facade look like the donor kit. It came out much better than I expected given I only had so many pieces to work with. More pictures of better quality at http://www.mocpages.com/moc.php/377737 and information about instructions at http://www.AlteredBricks.com Thanks for looking.
-

30 projects in 30 days - Lego Architecture Studio 30-day challenge
henrysunset posted a topic in Special LEGO Themes
I wanted to share a project that I'm doing which I think will be interesting to the members of this community. I've recently purchased the Lego Architecture Studio set, and I created a personal challenge to build 30 models with the bricks from this set in 30 days. Each day, I create a new building challenge to try and build, and I've already completed 9 models so I'm almost 1/3 of the way done! I hope that others will take the challenge, either by doing the same 30 challenges I've done, or expanding the idea with new challenges to try. Learn more about the project: http://tomalphin.com...-challenge.html Please take a look and let me know what you think! I'm especially interested to hear if others have taken on similar personal challenges, or if you have idea of other challenges I should try... Sincerely, ---tom Gallery of a few of the projects I've built so far: Lego Challenge #8: Make a model of a piece of furniture Lego Challenge #5: Build a model based on an architectural style Lego Challenge #2: Build a microscale home, then a bigger model with more details. Lego Challenge #9: Fire Lookout Tower -
Polaris 800 4x4 Instructions WIP
piterx posted a topic in LEGO Technic, Mindstorms, Model Team and Scale Modeling
Hi guys! as i promised to you some time ago, i'm making the instructions for the polaris i've done in july :) i got the Ldraw file for this and it's also subdivided more or less logically in groups.... as i'd also like to make proper instructions i will share the ldraw file now for those who don't want to wait :P and in the next days i will update this topic with an idea that i have in mind wich could simplify the boring process of making step by step instructions :) i hope you'll enjoy building my 4x4 how do i add a spoiler to put the Ldraw text file inside :P? ps: it's free but not at all !!! if you download and build it, you have the moral duty to post your version here Here's the link where you'll be able to download the file and the pieces paper :) https://dl.dropboxusercontent.com/s/iwxp0zxmiukccnm/Lego%20Polaris%204x4%20by%20piterx.rar?token_hash=AAHVgvqSzDd6KQlpD7COYeyw0E92j_3p8Ei5XCPHfK3MNA&dl=1 -
Hello, I couldn't seem to find anything in the forum regarding the terrible scans that TLG puts on their websites for the A Models of their Technic sets (only sets I checked, haven't look at others). This is very apparent when looking at the Black colored beams in these sets, it's near impossible to make out where the holes are. They have the original digital files for these instructions, why do they give us such crappy quality PDFs. Does anyone know of a website that contains both the Official Lego Instructions as well as clean scans of these poorly done ones? I know when I started downloading all the PDF instructions for my own sets, I went ahead and sliced up a few of my physical books and scanned them since the official ones were so bad. Thank goodness for the sheet fed double sided scanner I recently purchased. Example: Lego 42000 - Grand Prix Racer
-
 Hi! During the easter, I have been trying to get into MLcad and Ldraw, because I wanted to make some instructions for my latest MOC, the small tracked loader I showed off last week. Anyways, seeing as this is my first, I would ask the helping hand of a couple of you more experienced builders out there, to download the instructions, build the model, and then give me some feedback as to what could have been done differently/better. I will probably finish the instructions later today, or early tomorrow. If this sounds like something you might be interested in, please contact me via PM, and I will send you a link to download the instructions from my dropbox once they are done. These are of course copyrighted, and should not be distributed freely amongst others. In the meantime, I have compiled a parts list from the LDD model that you can download here , but there are two or three minor differences from that list and the model in the actual instructions. and here is a small sample of the instructions: Thank you in advance!
 -
Hey everyone Sever comin at ya with a request if you can fill it. Im looking for some cusotm instructions (PDF.Files preferred cant use LDD) For a MOC Im building a minifig scale model of gotham city from Under the red hood now i already have a layout but i need some help my strong point in lego building is customization but im going to try my hand in something big like this. So what im asking you guys is to help me maybe drop a line for some small things you know like cars or stuff like that. If anyone has any ideas on how to build that warehouse like in the beginning i would very much aprrecitate it (sorry im typing really fast dont have time to spell right) when it's done im going to create a stop motion video of the movie. So i would be very much thankful for the help. Thanks! P.S If im putting this in wrong place or something please alert me i dont favor breaking rules)
-

42004 B model Mods
Saberwing40k posted a topic in LEGO Technic, Mindstorms, Model Team and Scale Modeling
So I finally opened my 42004 set, and built the B model, so that I would have the mini turntable. Something immediately jumped out at me, and that was the fact that there was no mechanism to control the bucket tilt, aside from moving the thing yourself. I looked at the sizeable pile of spare parts, and thought, why couldn't I modify it to include that mechanism? This mod is incredibly easy, and as mentioned before, only uses the parts left over from building the B model. I'm actually kind of shocked that Lego did not do this originally, as it's very simple, and would not have required any additional parts. Well, enough of my blabbering, let's get to building! Start with the B model: Then, remove the following parts: the bevel gear from the steering control, the 2 L liftarm from one of the steering arms, and the bush above it, and remove the side of the bucket linkage with the axle joiner, as shown. Then, pull the following parts out of the pile of extras: A 9L beam, and a 7L axle. everything else should be easily recognizable. Now, assemble as shown in the pictures: Now, knock out the 4L axle holding the arm to the chassis: And remove the piece from between the arms. (It's a liftarm with both an axle and a pinhole.) Put that piece on the empty steering arm. Put the arm back together, and thread the 7L axle through as shown. Now attach the arm piece, which you built a couple of steps ago. ( I actually made a mistake with this, the liftarm holding the two pieces together should be facing the other way.) Now add the control knob, which should be fairly easy to make. Now put the bucket linkage back together. And you are done! So, do you like this? Edit: Booyah! 300th post! -
 On his "Sheepo's Garage" website, Sheepo posted Building Instructions for his Lego Technic Remote Controllers. The Power Functions controllers are comfortable to hold, and are versatile. He's counting the number of downloads, so go there for the PDF file! Thanks for sharing, Sheepo! The instructions were made by him and Jurgen Krooshoop.
 -
madoca1977 posted video Building Instructions for his small Lego Technic Supercar which uses two Power Functions M-motors. It's his "first MOC". : :
-
Hi guys, I have a question about a building step in Emerald Night instructions. At page 6, it's clearly shown to put a tan brick 1x1 with hole with a pearl round 1x1 attached below in the "gear box", blocked by the black axle. This is what I did, as you can see in the following image. At page 50, when you need to put the engine upside down to build the bogies, that brick with attached round is not shown. Is correct what I did? Why is the brick free to move on the axle? My guess is that the brick is used to block the gears in their place, but if so, what's the benefit of that round attached below the brick? Thank you in advance for your help.