Search the Community
Showing results for tags '42054'.
Found 24 results
-

[MOD] 42054 steering fix: reducing backlash and resistance on steering system
BrickbyBrickTechnic posted a topic in LEGO Technic, Mindstorms, Model Team and Scale Modeling
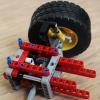
Hello everyone, I have recently picked up a 42054. Immediately I noticed the insane amount of backlash and resistance in the steering system. Here's how I fixed it: 1: Finding the problem: The problem was one of these: It was adding lots of friction which caused the grand majority of the backlash. It is added in this step (step 57 substep 2): 2. Replacing the piece. This was relatively simple, I replaced it with one of these: I had to hold the other piece in before placing it into the assembly, but it was totally worth it. There is little to no backlash and resistance. So, that's it! Thanks for reading! BrickbyBrickTechnic -
[MOC] Class Xerion small - lxf and io added
Jurss posted a topic in LEGO Technic, Mindstorms, Model Team and Scale Modeling
TC19 entry not finished, but I got those small tractor tyres, anf of course, I need to build that Class Xerion This is the size It is pretty small. 4x4 seems impossible. Maybe some 2 steering modes, but not shure. This is how it scales. It is already littlebit wider, but there is still almost no space for something. Finish in page two with more pics 29.01.2022. Added digital files. Engine is littlebit different, than in real model. IO file https://bricksafe.com/files/Jurss/classxerion_small/xerion_small.io but with baloon tires, as stud.io doesn't has small tractor tires LDD file https://bricksafe.com/files/Jurss/classxerion_small/xerion_small.lxf for lxf parts pack from [KEY TOPIC] LDD New Parts - LEGO Digital Designer and other digital tools - Eurobricks Forums could be needed -
 Using 3385 parts only from 42082 set (83.3%) Tractor is alternate of 42054 Claas Xerion 5000 TRAC VC Color design - red hood and roof, dark bluish gray cabin, black outside surfaces, different color for important details All functions from 42054 remains: Motorized functions: * cabin rotation and elevation * schaft driving Power Take Offs (front + rear) Manual functions: * Hand of God with 3 steering modes: * 4 wheel steering * front axle steering * crab steering * PTOs elevation New functions + details: * front exhaust * reinforced front and back axle * improoved front axle steering by adding second liftarm * front engine trunk is operated via linear actuator 8 attachments: (all can be built at the same time) Manual: * snow plough (front/rear) * dead weight * water tank for animals * herse Motorized: * dual lawn mower (front/rear) * reel and hook - both direction operations + neutral for freely unload cable * windmill (ECO) Building of a crane was not possible due to missing second large turntable, on the other hand remaining pieces gave me plenty of options Why windmill? I came with the question, if there is any tractor, that is strictly battery powered - everyone is thinking ECO these days. Right now it doesn't exist, but there are some studies of how it should work. My idea came like this: windmill has integrated battery storage and acumulates energy thorough the day. For every night tractor connects to it to recharge. There is also aditional diesel motor. Windmill is realeased as separate freemium model All attachments are compatible with original 42054! 392 pages of generated instructions for experienced builder (A4 landscape orientation) - sample on bricksafe Instructions created by KAMEIV Sorry for the long video, I wanted to show all functions, and there is plenty of playability with this moc! I always liked 42054, but it was released in my dark days, when I wasn't interested in lego. This model is so good, that's almost impossible to get it 3 years after it's release date, and noone is selling it in second-hand market. So I decided to build it from newer set. Funny think though, once finished this moc and prepared for shooting video I found it for good price on aftermarket, so now I have original and alternate ;) It took me about 2.5 months to finish this creation.
 -

Muffinbrick's Technic Corner
muffinbrick posted a topic in LEGO Technic, Mindstorms, Model Team and Scale Modeling
It's about a time, since I've been ended my dark ages and now it looks like my way will be rather smaller attempts and "projects", then bigger and more sophisticated ones. My older builds had their own topics here and here, but I don't think that all of my next builds will be suitable for separate topics, so I decided to make this one, where I have intention to add all of my publishable builds. And for the beginning, here is my wip small manual buggy. Buggies are favourite Technic builds, there are many of them in all sizes, shapes and qualities. This one is intended to be small and simple, all manualy working. Now it has front and rear suspesion, openable cabin, steering and rear wheels conected to fake engine. I'd like to improve rear axle suspension, add HOG and steering wheel and some details here and there. And finaly adjust color scheme, although I'm not very disturbed with this clor vomit in this type of vehicle. -
 Hi! After a long break without Lego's I come back with new model: Trailed Potato Harvester for 42054 Claas Xerion 5000 Potato / beet harvesters are divided into 2 categories: self propelled (often with haulm topper, up to 4 rows at once) and trailed (smaller with less functions, maximum 2 rows). In this nomenclature my harvester is single row trailed potato harvester with bunker (collection container). There are many brands that make this kind of harvesters. Most known are Grimme, DeWulf, AVR or ROPA. Construction visually is based on Grimme products but it’s not an exact copy of any particular model. My goal was to design a harvester that will suit Claas in shape and also looking like official set (for example ¾ pins on conveyor belts are in tan colour, main propulsion shafts are yellow, there are no illegal connections etc.). But to make it more real I’ve added couple stickers (some of them are original like side warning flags or computer controls - rest I’ve made myself). And so Grimme logo transformed into Harvester logo intentionally maintaining its original shape, other stickers stayed unchanged (like yellow warning signs). I didn’t want to use any additional engines inside harvester. Instead this I used tractor PTO for delivering power to all conveyor belts. And it works. But to achieve overall sufficient performance of harvester I had to make 2 changes in Claas. Firstly I’ve added one more clutch onto PTO shaft to increase force needed to make them slip, secondly M engine is replaced by L (with no additional bricks used). Another problem was how to transfer motion from tractor providing full freedom of movement. I decided to go with BALL JOINT which is mostly used in suspensions. To provide a fast and easy connection I’ve also built a special mount for Claas. It’s compact, versatile and lets you connect any type of attachments which use ball joint connection. Overall dimensions of harvester are: 450mm length, 323mm width, 214mm height. It weights almost 2kg. Estimated part count: 2300. From Claas PTO power goes to gearbox which splits movement into 2 directions – for moving main and sorting conveyor belt (simultaneously), and unloading belt. For main belt overall gear ratio is 1:4,68, sorting 1:14,1 and unloading 1:18,75. To control which conveyor belts should be moving there is a lever on the right side of harvester. Turning it left engages main and sorting belts, turning right – unloading belt. Additionally right lever puts main belt into transport mode. Every moving part is secured by clutches inside tractor. The most challenging part was finding a “sweet spot” for main conveyor belt and brushes to make “potatoes” collecting possible. Lowest point (tiles) is around 1mm above the ground which means that harvesting is possible only on flat, smooth surfaces like table or floor. Maybe 1x1 round bricks would look better as potatoes instead 2x2 but in this configuration they are too small for this. After passing brushes main conveyor belt transports bricks to the top where originally is stone and earth separator. As it is only a Lego model and it uses single motor I didn’t want to decrease power by adding more brushes or moving parts so I’ve simplified this a little bit. Next stop is sorting belt. Now it’s a time for human workers. Even there is a separator it may happen that bigger stone (simulated by gray bricks) came through. Their task is to take it and put into ejector that is located at the end of harvester. After that clean and inspected “potatoes” land into collecting container called bunker. When work is done it’s time to unload yields. To do that simply switch lever to right and potatoes will unload itself. On this occasion I’ve made a “slightly” modified trailer from 8063 set which I’ll describe later in separate topic. When there is a need to transport harvester, main conveyor belt can be raised and lock about 5mm above ground by switching second lever. In addition I made here a blockade. When main conveyor belt is in transport mode it’s impossible to turn it on. Only unloading belt can be engaged. It works in both ways so when main belt is moving it can be raised but can’t be locked. More additional photos: Okay, more or less I’ve described how it works and why it looks like this. Of course best experience beside looking at pictures (especially for Technic MOCs) is to watch a video. Inside it basically there is everything which I described above so if you didn’t read it all is not lost :) Feel free to comment and ask questions. Thanks!
 -

[MOC] Claas Xerion 5000 with realistic functions and attachments
Severin Brunold posted a topic in LEGO Technic, Mindstorms, Model Team and Scale Modeling
Hi With my first post on eurobrickst I’d like to show my Claas Xerion 5000 track VC MOC (although it is more than one year old). Some Ideas are taken from the original Claas (steering system) and efferman (position and type of motors). The goal was to implement as many realistic functions as possible – for example a 3-point linkage system and hood with auto-lock function. Motorized functions XL Motor for propulsion (4 wheel driving) Servo-Motor for steering (with a linking system similar to the one in the original Claas) L-Motor for linkage system (hoist up / down) L-Motor for rear PTO (clockwise) and hydraulic pump (against clockwise) – one motor drives two functions depending on direction of rotation The motorized functions are powered by one sbrick in combination with a standard battery box (under the hood). Pneumatic functions Motorized pump is connected to a hydraulic connection at front and rear to support attachments with hydraulic power (and a valve to switch between front and rear) Manual functions 3 steering modes (4-wheel-steering, front-wheel-steering, crab-steering) with manual switch (similar as in the original Claas) Openable hood with auto-lock system - meaning you can lift the tractor by the hood 180° rotatable cabin (rotatable by a small black gear) Easy-accessible power-on-of-switch (as in the original Claas) Switch to change between front and rear linkage system (small gearbox) Other functions Pendular front axle (with soft suspension springs for stabilization) 3-point linkage system at front and rear with auto-lock connection (front: 1 mini LA, rear: 2 mini LA) which is quite robust LED-lights on hood and cabin (2 pairs) Trailer hitch (tow ball at rear) Attachments beside the 3-point linkage system (front / rear) and the trailer hitch you can add weight on top of the rear wheels or you can add a gooseneck connection with working driveshaft I already built a snow plow and a snow blower which I will portrait soon The functions work well as long as the resistance is not to strong. Pictures [edit: new upload, bigger preview size] Video Severin -

10.000 Subsribers special - Mashup
Zerobricks posted a topic in LEGO Technic, Mindstorms, Model Team and Scale Modeling
First if all I totally forgot to post this model here on the forum, guess better late than never Now to explain a bit about the motives behind this model before I go into specific details. Counter on my youtube channel was nearing 10.000 so I wanted to make something trully special. I was not sure what kind of a model I want to make, a sportscar, offroader, construction machine, so the decision came to MAKE ALL AT ONCE. The model would also incoporate ideas from the last decade of Lego technic product to go along with my 10 years on youtube. Starting with the design, the front end is heavily inspired by 42083 and 41999. Notice the front wheels are from 42056. The first motorized function is adjustable front suspension inspired by 8297: The front end can raise by 3 centiemetrs to allow the model to negotiate rough terrain. Continuing towards the cab, which was inspired by 41999, we can pop up the hood to find a green colored 10 cylinder engine inspred by 42030: Cab doors are inspired by the doors from 42069, which open at the angle. Opening the doors you can find a full interrior with two adjustable seats andworking steering wheel: In the center of the cab there is a gearbox which movel lineary to switch between 3+R gears using a special mechanism. This emchanisem translates the sliding action into usable inputs for the gearbox: Going further back, there is a section holding the battery box and, orange lever and utensils on the left side. I will explain the function of the orange lever later. On the opposite, right side there are 2 M motors powering all the motorized functions. Notice the mysterious red lever which is used for switching motorized functions. Notice the pump used to power the pneumatic functions. There are also two electric switches to reverse the two driving M motors. If we continue towards the back, we can see there is a pair of linear actuators used to manipulate the container. The red lever switches power from one of the M motor between the adjustable front suspension and linear actuators. But not only can the linear actuators tilt the container, but they can also pick up and load the entire thing. To switch between tilting or picking up, the orange lever is used to lock the individual segments of the lifting arm. This function is inspired by 8052. The arm can reach out and pick up the container with ease: If we continue and look at the photo of the back side you may notice a PTO output along with a strange mechanism with rubber bands: Same motor that powers adjustable front suspension, linear actuators also powers the PTO output via 24 tooth clutch gear. Notice that the PTO output uses a CV joint in order to slide the axles into it without friction. The rubber band mechanism is used to hold the rear attachment. This was inspired by 8110 and 42054. Here is a sum up the functions of the model so far: 1. Motorized functions Adjustable font suspension Tilting of the container Picking up and lifting of the container Pneumatic compressor and storage provided by two air tanks powered rear PTO 2. Manual functions: 10 cylinder engine powered via rear wheels through a 3+R gearbox 3+R gearbox Steering controlled by steering wheels inside the cab AND the light on the right side of the roof Openable doors Openable hood Adjutstable seats Independent front suspension Solid live axle assembly in the rear - inspired by 42043 Features: Both front axles are at a positive cats angle, allwing the fat Porsche wheels to self-center Due to the immense weight, each rear solid axle is supported by 4 yellow very hard springs The 3+R gearbox is derived from my diagonal gearbox featured in the Dominator TRS Due to its framed design the gearbox provides a very rigid backbone to the model A 5 tubed exhaust seemed appropriate for the 10 cylinder engine I hope this photo helps you understand all the functions and features a bit better. Each color of the model's chassis represents a different module. Next we will look at the rear attachment built for this model. The attachment is multifunctional, combining linear actuators, pneumatics and 4-way switchbox to actuate all the functions: In total the attachemnt features following functions powered by a PTO via 4-way switchbox: Extension of the control arms via small actuators and a lever mechanism Lowering of the control arms via large actuators - inspried by 42009 Rotation of the arm Spooling up a winch which allows the arm to be used as a crane arm - inspired by 8258 Additionally there are 4 pneumatic function powered by the compressor and air stored in the two pneumatic tanks on the truck itself: Raising of the primary arm joint Raising of the secondary arm joint Tilting of the showel - inspired by 8043 Closure of the blue pneumatic claws - inspired by 8110 Some intersting facts about this attachment module: All of the penumatic functions + rope of the winch pass through the turntable. Rotation of the turntable is limited to some 350 degrees to avoid all those tubes and rope tangling up The structure of the arm with diagonal arms is inspired by crane arms Frictionless 8 tooth gears allow the white 16L axles to slide with ease while powering the two large actuators used for support legs The 4-way switchbox is one of my most complex and sense assemblies and it took me 2 days to design with support of LDD. Winch uses a friction pin to keep the rope from unloading when the winch function is off. The blue claw uses rubber bricks for better grip Combining the main model with the atatchment resluts in a model which weighs around 5 kilograms and is over a meter long! Some facts about the design, and build of the model: The whole model took me over 2 months to design and built, biggest challenging being the gearbox, container arm and rear attachment switchbox. A lot of care was placed into keeping all the functions working reliably with a limited power source (M motor) and safely with no gears skipping or breaking. The model uses around 16 universal and 3 CV joints to transfer the power to the suspension lifting mechanism, PTO, both steering sytsems and drive axles. Each rear axle is capable of supporting the whole model's weight, the weak point are the Power Puller tyres which sag quite a lot, especially on the third axle. Thanks to it's stiff gearbox, this model has one of the stiffest central frames I ever built allowing the model to be easily picked up by diagonal front and rear wheel without excessive flex. Gas canisters and first aid from 42069 are featured on this model The hood ornament is a bunny from a Lego Friends set This is my first model to use the white pneumatic air tanks for it's intended purpose. The model is covered with glow in the dark parts close to its edges, so its visible at night - useful when you are wandering around your building area at night A photo of the mashup's total of 8 glow in the dark bionicle claw/eye pieces: You can see the model in action in the following feature video: Finally I would like to thank you for reading through this massive post and for helping me reach 10.000 subscribers. -
I just started getting into Technic and I'm starting to buy sets both for parts and to learn some techniques. I already have the Arocs, Heavy Lift Helicopter and BMW bike, and I'm looking to buy another. I've decided on either 42054 or 42069, both of which I've found for about €105. In your opinion, which would be the better buy for me?
-

[MOC] Off-road truck (model c for 42054)
Hogwartus posted a topic in LEGO Technic, Mindstorms, Model Team and Scale Modeling
I' ve decided to make an alternative model for 42054 CLAAS XERION 5000 TRAC VC set. I' ve wanted to design something different from all those excellent c models already made, so I made a truck capable of off-road conditions, with crane and many other functions. The result: Functions: rear axle drive with 4 piston engine steering live axle suspension side outriggers cabin tilting rear PTO (power take off) crane arm rotation crane arm 1st stage elevation crane arm 2nd stage elevation grabber closing/opening Please watch the video to see this machine in action and for more details. This model is powered by one m motor with rotation direction selection. It powers main selector, crane selector. and PTO. Main selector switches between worm gear powered functions and arm rotation. When worm gear functions are selected, there is another switch to choose between outriggers and cabin tilting. The crane selector switches between 1st and 2nd stage elevation. I had to use some interesting (I think) solutions because of parts selection in 42054 set: Piston engine There are no piston engine parts in the set, so i made them from some connectors. You can see it working in the video. Suspension There are no shock absorbers or wishbones too. So I' ve made a suspension based on twisting axles: Every wishbone is suspended independly. 3 of those connected to axle make a well-working long travel soft off-road suspension: Grabber There was a grabber in original set, but when building the grabber I've already used the worm gear for more important functions, so I' ve designed a different locking mechanism: Turning the green axle makes the red grabber frame move up and down and becouse of engaging the blue knob gear with h-frame opening and closing blue grabber. Instructions Instructions are already available here on rebrickable! I hope you liked this model. -
Hello Over the past couple of months I have been enjoying building 42054 - what a great little set. Once I'd finished it, I wet about MODing the appearance somewhat, and have ended up with two different set-ups. Descriptions and photos below (hopefully the pics aren't too big, but apologies in advance to the mods if I've messed it up yet again...) Configuration 1 - 8-wheels with stock silage plough & cosmetic modifications Apart from the obvious addition of four extra wheels, I also modified the bodywork as follows: - Altered wheel hubs (apologies, I can't remember who did this white/red mod to the Claas wheels originally, think there's videos on Youtube but if that person is a member EB then thanks to you.) - More rounded fenders/mudguards, both front and back. - Exhaust with chrome parts and decals. - Windscreen wiper to deal with any flying 'muck' - see Configuration 2 below... - Chrome filler cap. - Additional spotlights at the front. - Slight change to roof detail including aerial/additional red hazard lights to rear. - Improved step ladder. - Additional warning decals at front. So, nothing very revolutionary or technically interesting, but I enjoyed making the changes and personally I think the mudguards look better than the stock versions. I did build the crane first but didn't like how bulky it was compared to the tractor, so I ended up with the stock 'B model' () silage plough. I took it outside for some photos: Configuration 2 - 4-wheels with slurry tank trailer & cosmetic modifications I then removed the plough and the extra wheels, and set about creating my first-ever MOC. I was inspired, first generally by the amazing work on 42054 of @BrickbyBrickTechnic, and secondly by one of these - single-axle slurry tank trailers: My tank includes: - Dual slurry pipes and sprayers, for the sprayin' of that muck. - Third wheel for stabilisation when disconnected from tractor (can be released by partly pulling out the axle with stop & red bush). - Custom decals. - Fake on/off switch for slurry pump. - Full set of hazard notices and warning lights, plus chains on the hitch. - Black cover can be easily slid back by removing a couple of securing axles. For when it's time to blast-clean the old muck, before re-filling with fresh muck. I absolutely acknowledge that my MOC is only an approximation of the above, rather than a replica (in particular, using the available spare pieces at my disposal, I wasn't able to recreate the cylindrical shape of the tank). It also doesn't use particularly great building techniques and hasn't got decent functions. However my aim was to create something for my Claas to tow that looked quite nice, and also to complete my first ever actual proper MOC (one previous failed attempt notwithstanding). By these criteria, I achieved something of which I'm happy. I'd love to hear your opinions, but I realise that it isn't up to much, so no worries if you don't have an opinion on any of this, one way or the other.... I also added some headlight effects, again influenced by @BrickbyBrickTechnic's past work on the Claas:
-
[MOC] 2-stage tractor | 42054 C model [LEGO IDEAS]
BrickbyBrickTechnic posted a topic in LEGO Technic, Mindstorms, Model Team and Scale Modeling
Hey everyone, Presenting my last 42054 C model for a long time. This is a 2-stage tractor, a very interesting model (at least in my opinion) because of its steering system which features articulated steering and front wheel steering to create 4 steering modes. I also added a lawn mower attachment which has 2 motorized functions. Additionally, the whole model is very detailed. How about some pictures? Well, that's it. I hope you enjoy this MOC. I sure had a ton of fun building it! Please leave a comment! BbBT -
[WIP] 2-stage Tractor | 42054 C model (Refinements to attachment)
BrickbyBrickTechnic posted a topic in LEGO Technic, Mindstorms, Model Team and Scale Modeling
I'm not sure if 2 stage tractor is the right term, but @Milan posted this beautiful picture at some point and some lights turned on in my head: CURRENT STATE: So I decided to build one. It will have the same 4 steering modes shown above. Referencing the picture down below, the yellow axle controls front wheel steering, parallel track, and combined front wheel and chassis. The black axle only controls articulated steering, in order to align the chassis to let the other modes work. Therefore, everything must be aligned in order for parallel track and combined front wheel and chassis. It is all controlled by a gearbox. Additionally, there will be a PTO and I will make a lawn mower attachment with 2 functions (both motorized). Here are some pictures. First (2nd-5th picture) are the 4 steering modes and then how they are controlled. Please excuse the photo quality: That's all. Please leave criticism and comments. I will post a video of steering soon. BbBT -
[WIP] Backhoe Loader- 42054 C model (Finished!)
BrickbyBrickTechnic posted a topic in LEGO Technic, Mindstorms, Model Team and Scale Modeling
Another 42054 C model. It'll have 3 power functions, and at least 4 manual functions. The front will have a grabber like in @M_longer's C model, though without any function: -Front stage 1 (powered) -rotation rear excavator (powered) -rear excavator stage 1 (powered) -front stage 2 (manual) -rear excavator stage 2 (manual) -HoG steering (manual) -opening doors CURRENT STATE: Here are some pictures: Leave a comment! More progress soon. BrickbyBrickTechnic -
 REVIEW - 42054 - CLAAS XERION 5000 TRAC VC INTRODUCTION First of all my apologies. Sorry it took so long for this review to be published. Sometimes there are other things in life that need attention. Next year I will try to keep July free for LEGO reviews With all the news about the 42056 - Porsche GT3 RS and the 42055 - Bucket Wheel Excavator, you would almost forget there are two other great sets coming up during the second half of 2016. One of which is the 42053 - Volvo EW160E, while the other is the 42054 - Claas Xerion 5000 Trac VC. Today we will be reviewing the latter. Like LEGO it seems that CLAAS also likes its name spelled with capitals, so from now on I will happily oblige. While I live in an area which is flooded by tractors and farm equipment, the CLAAS doesn't seem to be very popular in Holland, while CLAAS is a brand which originated in Germany, not too far away. I have never been a real fan of LEGO Technic farm equipment models. To be honest; I have skipped all of them. They just didn't look interesting enough. How different the CLAAS is. I'll just throw it out there...this is love af first sight. Sometimes the real model looks even better than in the pictures. If this is the case with the CLAAS, it's definitely one of the best looking models ever made. Usually you don't draw conclusions in the introduction, but I simply felt the need to address the feeling that I have when I look at this model. CLAAS being one of the biggest (if not THE biggest) manufacturers of combine harvesters, we might be treated with another CLAAS model in the future. So, not having bought a single farm equipment set, combined with my limited knowledge of real farm equipment, I had to invest some time to get acquainted with the CLAAS XERION 5000 TRAC VC. In case you are wondering what VC stands for, it's the designation for Variable Cab, meaning the cab can be rotated backwards, to facilitate driving backwards....or is it forward?! At CLAAS, VC stands for Variable Cab. The rotating cab is the most convenient reverse-drive system imaginable. At the press of a button, the entire cab moves from its central position to the rear-facing position above the rear axle in seconds. The controls rotate automatically with the cab, so all functions remain the same when operating in the rear position. For high driving comfort on the road, the cab is centrally positioned between the axles. In the silage clamp, on the field, in the forest or in the mountains, the XERION with the cab rotated over the rear axle becomes a user-friendly self-propelled machine with a unique view of the job in hand. If you are looking for more information, here's the Brochure and Technical data. Funny fact about this set is that it's simply addressed as one of the 2H 2016 sets, while with almost 2000 parts, it would definitely have qualified as a flagship a couple of years ago. This is a clear indication that the Technic product line has been evolving rapidly. I start to wonder how big this model actually is. Let's open the box and find out. SET INFORMATION Number: 42054 Title: Claas Xerion 5000 Trac VC Theme: Technic Released: 2016 Part Count: 1977 Box Weight: 2834 gr Box Dimensions: 58,0 cm x 37,2 cm x 9,8 cm Set Price (MSRP): € 159 Price per Part: € 0,080 Links: Brickset, Bricklink THE BOX Having the Porsche and BWE around almost makes you forget that this isn't the Prima Donna of 2016. The box doesn't help either, since it's quite a big lady. A few years ago it could have easily passed as a flagship set. As usual, the front shows a nice picture of the model. The right side indicates that this is a PF powered set, where the M-motor and PF Battery Box are included. Bottom right tells us the crane arm and cabin are motorized. At this point it's not exactly clear what the motorization entails, but I bet the backside of the box will show us more details. BACK The back of the box (click to enlarge) shows us that the boom of the crane can be raised and lowered using Power Functions, as well as rotating the crane. Also, the cabin can be rotated using Power Functions, which is obviously super cool! I'm really anxious to find out how this works. The lower left corner shows us the three steering modes of the CLAAS XERION. Yes, you heard it right, three steering modes! Just like the Porsche should have had The lower right corner shows a picture of the B-model, which is actually the same tractor, with a different attachment. The crane has been transformed into a silage plow. As you can see, the cabin (and thus controls) are facing a different direction than in the picture of the A-model. Like the Unimog I expect lots of modifications and attachments for this model! CONTENTS OF THE BOX The box contains the following items: 1x Sealed instruction manual and sticker sheet 11x Bags for step 1 4x Bags for step 2 1x Unsealed PF battery box 1x Sealed PF M motor 4x Red rims 4x Awesome new tires This is how it looks when you throw everything on one big pile. INSTRUCTION MANUAL AND STICKERS The instructions are provided in a square bound book, sealed in a bag with the stickers. I really like this way of packing the manual and stickers. Keeps both the book and sticker sheet unharmed. Below are detailed pictures of the book and sticker sheet. The latter contains lots of little stickers for switches and controls. This means the model will have lots of functions....yay! PF COMPONENTS A PF Battery Box and a sealed PF M-motor. RIMS AND TIRES Without a doubt the single most eye-catching elements when opening the box are the new tires! 11 BAGS FOR STEP 1 4 BAGS FOR STEP 2 HIGHLIGHTED PARTS Back by popular demand is the Highlighted parts section. For this set it's quite elaborate. Not because it contains loads of new parts, but it does contain quite a few new-ish parts in large numbers. This indicates that the designer used some of the new building techniques in this set. And there's something funny going on with the axles, so let's start with those. AXLES Red and Yellow axles have been introduced in most of the 1H 2016 sets. What's striking though, is that this contains axles in both the regular black and grey color, as well as the latest yellow and red versions. Here you can see that we get both the grey and yellow 5L and 7L axles. I have included only a single grey version to make my point. Actually there are 11 yellow and 5 grey 5L axles and 6 yellow and 15 grey 7L axles. Same goes for the red 4L and 8L axles, which have a black counterpart (also a single one included in the picture). This set contains 9 red and 4 black 4L axles and 2 red and 2 black 8L axles. Makes sense, right?! At this point I am really starting to wonder what the strategy behind the axle color distribution is. Is TLG getting rid of their old stock or is there a better explanation? Hopefully we will discover some logic, but I highly doubt it. On the left you can see the new (2016) 3L Axle with Stop and on the right you see the 2012 4L Axle with Center Stop. Inclusion of the latter is not so special, if it weren't for the quantity. A total of 12 are included, which is more than in any other set. And even a single 11L axle in yellow, which completes the uneven yellow axle family (3L, 5L, 7L, 9L and 11L). Fun fact; the 3L axle in yellow has been introduced in 2015 (in the LEGO Ideas Wall-e set) and has been used in quite a few 2016 sets, but not in any of the Technic sets. Same goes for the 9L axle, which has been used in three non-Technic sets. Adds another layer to the axle mystery. Let's talk Pins and Pin Connectors. 3L PIN WITH 1L/2L AXLE This set includes 20 3L Pin with 2L Axle from 2015 and a whopping 31 3L Pin with 1L Axle from 2014. AXLE/PIN WITH PIN HOLE If you are in need of Pin with Pin Hole from 2014, look no further. This set contains 49 of 'em. Yes that's right, 49!! And 14 of its axle counterpart Axle with Pin Hole from 2016. AXLE AND PIN CONNECTOR HUB WITH 2 AXLES This set also comes with 12 Axle and Pin Connector Hub with 2 Axles. Already introduced in 2012, but relatively new in black. 1L PIN CONNECTOR Introduced in 2015, received with some surprise from the community. Why do we need this 1L Pin Connector?! Well, there's 54 in this set so we are bound to find out why it's useful. H-FRAME (DOG BONE) In my review of the 42023 Construction Crew (one of my two first reviews) I introduced this part. The Liftarm 3 X 5 Perpendicular H-Shape Thick a.k.a. Dog Bone Frame or H-Frame. A compact versatile frame which appeared in quite a few sets but never in such quantities. This set contains 10 of them. CURVED PANEL The 3 x 6 x 3 Curved Panel was already available in blue and yellow and now it's also available in black. You only get a single one in this set though. TURNTABLES This new turntable was introduced in 2015 and it's the first time it appears twice in a single set. It's comprised of two parts, The Top and The Base. STEERING WHEEL HUB Introduced in the Porsche (only because it was available first) and now also available in the CLAAS. Two of them in the Porsche but if you like to build 4W steering this is the set for you. It contains 4 Steering Wheel Hub Holder with 2 Pin Holes and 2 Axle Holes. LIME GREEN IS THE NEW YELLOW A reasonably large selection of lime green parts. Not sure if it's visible in this picture but apparently lime green is the new yellow, when it comes to parts being identically colored. Variation in lime green is significant. This picture shows a detailed view of the color difference. It's clearly visible near the 2x1 plate. The connectors and liftarm do differ as well. Good news is that there are some new parts available in lime green: 1x Panel Fairing # 5 Long Smooth, Side A 1x Panel Fairing # 6 Long Smooth, Side B 1x Panel Fairing # 1 Long Smooth, Side A 1x Panel Fairing # 2 Long Smooth, Side B 2x 16L Soft Axle (Flex Axle DISHES This 6x6 Inverted Rader Dish isn't new, but it's the first time we see it in red. This picture also shows the reflection of the light bounced off the ceiling. RIMS The rims are your run of the mill 56mm D. x 34mm Technic Racing Rims, with the unique feature that, like the 6x6 Inverted Dishes, these come in red for the first time. TIRES Four brand new 107 x 44R Tractor Tires! PART LIST Here's the complete list of 1977 parts. THE TRACTOR The build consists of two phases, the tractor and the crane. Obviously we will start with building the tractor. Get your #1 bags, rims, tires and PF components....we are about to begin! We start by building the chassis. The back side of the chassis to be specific. You can already see part of the steering mode selector mechanism taking shape. REAR MOUNT The manually operated rear mount which will later be used to attach the crane (or other attachments). Manual operations include raising and lowering the attachment. There's a PTO (Power take-off) which will be connected to the PF motor, so it's not operated manually. Here you can see the rear mount attached to the chassis. The bottom view shows the PTO drive shaft. STEERING Since this tractor has 4 wheel steering, the rear axle also needs to be steerable. To accomplish that, the new wheel hubs are used. No rack and pinion yet?! Or no rack and pinion at all?! I was wondering why the blue Axle Pin is used in favor of a Pin without friction. Normally my best guess is that these parts are used in the B-model, which isn't the case for this model. The only possible thing I can imagine is that the friction is needed to prevent wobbling, and the axle end makes sure the steering is smoothly. Best of both worlds kind of thing. The yellow 1/2 bush limits the steering angle. A limited steering angle is something that's bothering me frequently in Technic models. So I tried to remove the bushes and replace the 3L axles with 2L axles. This does improve the steering angle. However, as you can see in the pictures below, there's a reason the steering angle is limited. The left tire is touching the chassis. We will need to work with the default setup. Which actually isn't that bad in the end. The following picture clearly explains why we need red 4L axles, while there are also black 4L axles in this set. Or does it? Clearly no rack and pinion steering. Instead there's a cleaver mechanism transforming rotational movement into linear movement and back into rotational movement again. The linkage on the red axles can be moved into three different positions for the three different steering modes. Here's a short video demonstrating the mechanism: A manually operated lever on the back sets the linkage in one of three positions, selecting the steering mode. Stickers are used to indicate the different modes. Another short video of the steering mechanism: The pictures below show the different steering modes, respectively: Crab steering Front wheel steering Four wheel steering The video below shows a demonstration of the different steering modes: The bottom view of the chassis: The video below shows the bottom view of the steering mechanism: BARMAN Of course this mechanism is no surprise at all, since our good friend Barman already figured it out ages ago. Obviously a variation of the setup, but the basic are definitely the same. Well done Barman! PTO In the picture below you can clearly see that the PTO runs from the front to the back. Even though this model doesn't have a powered front attachment, it's prepared to have one. Kudos to the designer for this feature! GEARBOX This gearbox is used to power the different functions. As you can see there are two Clutch Gears. One is for the PTO and the other one is for the cab rotation. Here's how the gearbox will be attached to the chassis. Switching the change over catch results in changing direction of the function. This is confirmed by looking at the left side of the gearbox, the "differential like setup". MOTORIZATION A Power Functions M-motor is used to power all the functions. Since there's no driving or steering involved, the M-motor is just fine! CHASSIS Picture below shows the chassis without the battery box, but with both front and rear mounts Here you can see a video of how the battery box switch works. This is a rather ingenious mechanism. CONTROL PANEL In the images below you can see why we need 54 1L Connectors. They might not be necessary, but I do like 'em. They are aesthetically pleasing and avoids having gaps in the model. Otherwise bushes would be used, which definitely don't look as good as the 1L Connectors. Here's a detailed view of the control panel on the side of the vehicle. One switch will turn the battery box on and off, while the other rotates the cabin back and forth. Here's the control panel attached to the vehicle. This surely is one of the best looking control panels I have seen. HOOD The lime green hood, combined with the white roof and red rims, is one of the most recognizable sections of the CLAAS. Unlike other hoods this isn't just a couple of panels and done. It's actually quite a big build. The front of the hoods actually needs a CLAAS stickers, which I forgot before taking pictures. The hoods can be lifted and held up with a support axle. Usually you will see the fake engine, but now there's a battery box. To be clear; there's no fake engine at all. Which is perfectly fine given the fact that the battery box is well hidden inside the model. Closing the hood results in this pretty picture. I am already starting to like the looks of this model. The build also gets more interesting along the way. In the beginning there's much going on without really making sense. Seems like a bit here and a bit there. Some constructions seem rather flimsy. However, the further you progress, the better the builds get, to a point where it's actually a great building experience. CABIN Here you can see the base of the cabin, which actually has a nice feature. When the cabin rotates a little wheel underneath lifts the cabin a stud or two. This results in the cabin freely rotating around its axle. When it has turned 180 degrees, it falls in place again. Here you can see the up and down mode of the base of the cabin. The finished cabin looks stunning!! The back of the cabin has some intricate details, like the fire extinguisher and the 50 km/h sign. In the cabin there a computer display showing the field. I think you can even fit a minifig on the chair. Here's a sequence of images demonstrating the rotation of the cabin. You can clearly see the raising and lowering of the cabin when it rotates. FINISHED TRACTOR After finishing the cabin, you end stage 1 and the tractor is finished. I can only come to this conclusion: Yes, it looks great in real life too! And great is an understatement. This is one of the best looking Technic models ever! I wasn't a big fan of lime green, but it just went up a couple of notches on my ladder. Especially in combination with white and red! I can't think of a single thing I don't like about the tractor. Even the battery box is nicely hidden inside the model, while it still can be easily switched on and off. Cabin rotation is how it's supposed to be and there's a front and back PTO. Simply amazing! OOPS! I missed two of the headlights. Thanks to Charlesw for pointing this out THE CRANE After the 1st stage, you enter the 2nd stage...building the crane! I have included a picture of the crane on my work desktop, instead of my photography desktop. Looking at the pictures, it appears that I have no OCD when it comes to arranging parts before the build. On the left side of the crane (where I already applied the stickers) you can see the controls for the crane. Two levers, both with an up and down mode. One of them will rotate the crane, while the other will raise and lower the boom. For all you photography enthusiasts; these two pictures are taken with f14 instead of f20, resulting in a sharp picture but slightly blurred (out of focus) background. This draws attention to the model, while still being able to figure out what's going on in the background. I used to shoot everything with f20, which would have resulted in an entirely focused picture. Three more images of the base of the crane. This time without the unnecessary cluttering with extra parts. FINISHED CRANE Lo and behold, the crane! First of all, I am not the biggest fan of cranes. Why not? Because they have a tendency not to work properly, especially the Pneumatic ones (apologies to the Pneumatic fanboys). Therefor it's worth to mention that I actually like this one. A decent design with functions that actually work. Admittedly the manual functions are not that great and maybe a bit flimsy, but that will always be the case when building in this scale. Most important are the two motorized functions, which work like a charm. The mechanism to attach the crane to the tractor is nifty too, although it can be a bit of a struggle to attach it to the PTO. This takes some practice. FINISHED MODEL Meet the CLAAS XERION 5000 TRAC VC! I have said it before and I will say it again; this is one good looking model. The shapes, the design, combined with the CLAAS color scheme makes it really stand out. Admittedly, the crane doesn't improve the looks of the model. Being an attachment, I don't really mind. The nose of the CLAAS looks so cool. Especially with the weights on the front attachment and those new tires. I really love this picture. Another think I absolutely love is the cabin of the model. All kinds of small details and the overall look is stunning. The crane is....well.....a crane. It's not ugly, nor is it a beauty. Technically it's working properly, which is the most important thing. It does kind of bend over a bit, but it doesn't bend the chassis. It's caused by the way it's mounted to the rear attachment. Raising the attachment will straighten the crane a bit. The rear attachment is quite solid, which is good thing. The outriggers need to used for extra stability. This side view show what I mean by the crane leaning over. The rear view of the entire model. I love the fire extinguisher and the 50 km/h sign! Another front view of the model. LEFT OVER PARTS Quite a few 1L Connectors left. Makes you wonder whether I skipped a few. Or they are used in the B-model. FEATURES AND FUNCTIONS So the model looks good. Does it function properly?! And what exactly are the functions?! After the last building step, the manual shows four pages with functions! The first two pages concentrate on operating the crane and cabin, using the PF functions. The other two pages focus on the different steering modes. Let's take a look at the video to see these functions in action: The front attachment is manually operated and can be raised and lowered. Attaching to the chassis is easy, so it can be easily changed for another attachment. There's a front PTO, which leaves you with loads of options. I'm sure we will see some nice MODs being published in the future. Rotating the cab is quite fun to do. It works as expected and the automatic raising and lowering of the cabin adds coolness to the operation. Thumbs up for the rotating cab Then there's the three mode steering. Basically the steering modes work fine. The mechanism is very clever. So it all good? Well, there are some minor issues. Turning the steering gear needs quite a bit of force, which can result in accidentaly turning the cabin instead of steering. Another issue is the significant amount of slack in the steering mechanism. New wheel hubs were introduced this year, but they are no improvement in terms of slack. This model is best steering when driving it. This will reduce the amount of force on the steering linkage and it will also diminish the slack. All in all the steering modes work properly and the entire steering mechanism is awesome. This makes up for the lack of rear wheel steering in the Porsche! Like I said earlier; usually I am not a big fan of cranes. However, this one works properly. The motorized functions have been implemented very well. They are easy to operate, without confusion about which function does what. The manual functions work as expected, nothing special. I haven't paid much attention to the tires so far. I reckon they deserve a review of their own. Enough has been said about them already, so I will simply echo what other have been saying; they are awesome! Best tire since the Unimog tires. They have enough grip for Truck Trial. One thing I am not sure about though is how well they will stick to the rim. As you can see in the video, they detach pretty easily. Something which might happen when driving through rough terrain. I hope TLG will release a smaller version of these tires in the near future, for other tractors or even combine harvesters. Both the attachments can be mounted and dismounted easily and the mechanisms to do so are nifty. Attaching an axle to the PTO can be tricky, but it will get easier after some practice. B-MODEL When building the B-model the tractor remains intact. The crane turns into a silage plow, which actually looks quite good. I will leave this one for you to build SUMMARY To summarize how I feel about this set is pretty easy. I love it! This set has everything a proper Technic set should have. Stunning looks and lots of great functions. Not sure if this is the best Technic set ever, but it is the best Technic set I ever reviewed. PROS Looks amazing Lots of functions Super cool three mode steering Functions working properly Lots of playability Front and rear PTO Suitable for MODding Lots of new pins and connectors Cool new tires Some parts in new colors Battery box nicely tucked away inside the model CONS Slack in steering Steering needs some force and can result in turning the cabin instead Makes you want another one I'd like to stress that these cons are really minor cons! SCORE Okay, so how do I grade this set? 9 DESIGN CLAAS written all over it. Looks amazing. 9 BUILDING EXPERIENCE Starts a bit unstructured, but ends well. 10 FEATURES Can't do any better than this. 9 PLAYABILITY All the cool functions offer lots of playability 9 PARTS High quantities of new pins and connectors. Oh, and them tires! 9 VALUE FOR MONEY This is what to expect of a big Technic set. 9,2 PINNACLE OF LEGO TECHNIC FINAL WORDS This set will be modified heavily, utilizing the front and rear PTO. Can't wait to see what people come up with. It's only a matter of time before we see a double wheeled version: Well, that didn't take long (posted by ctx1769, see next page): And what to think of a potential new CLAAS Lexion Combine Harvester with new smaller versions of the CLAAS tires in the rear. Yes please! Thanks you for reading this review. All pictures can be found in my album.
 -

Claas Xerion 42054 motorising
Raltech posted a topic in LEGO Technic, Mindstorms, Model Team and Scale Modeling
Hello good people, I am finding interest again in Lego Technic (40 year old nostalgic dude from Holland). I bought myself the forementioned set which I will open not earlier till the holidays. I will need to get myself familiair again with the new technic bricks and systematics. I am also thinking of motorising the Claas Tractor and making it RC. Will be a nice challenge. Now, I read about the S brick receiver and thinking about buying this one for this project and a few motor units separate, incl. cables of course. What would you guys recommend in buying for this project in terms of motors? I would think the S brick, two servo motor's for steering and one XL motor for driving itself? And can this all be powered by the standard batteryholder that was included in the original set, through the S-Brick? Also, would this set in itself be suited for redoing or will be there be a lot of other parts be involved too? Just looking for some insights of people who have done this before. I do understand that this is a quite difficult task, but a man has to set dots on the horizon hehe Any input is appreciated. Thanks! -

[MOD] 42054 Motorized Claas Xerion 5000 Trac VC
KirTech LAB posted a topic in LEGO Technic, Mindstorms, Model Team and Scale Modeling
Hi! I was very impressed by new 42054 set so I’ve decided to motorize it. The chassis was completely replaced but the body is the same like in the official set. There are four motorized functions in my model: AWD, front and rear steering and cab rotation. Also I’ve added electric PTO for outer RC attachments. I plan to create new rig in the near future. Let’s see my MOD in action: A few photos: New transmission: BB switch as in original set: Electric PTO: Thanks for watching! I hope you like it :) -
[MOC] Forest Skidder: 42054 C model
BrickbyBrickTechnic posted a topic in LEGO Technic, Mindstorms, Model Team and Scale Modeling
4 big crushing tires! When I saw the 42054, the first thing I thought was "FOREST SKIDDER!". When I got the set, I built a crop sprayer ;) But now, a month later, I actually did build a forest skidder. And here it is! The MOC features 6 functions, including 3 power functions: Crane stage 1, crane stage 2, and lifting of the front ripper blade. The manual functions are a pendular axle, HoG steering, and operating the grabber. The model suffered from awkward proportions throughout the build due to the complexity of the gearbox and placement of the Battery Box. The hood suffered from the brunt of it; it awkwardly hides the battery box and is too high. Video here: Pictures: So That's all- next MOC of mine should be interesting ;) Thank you! BrickbyBrickTechnic -
[WIP] Forest Skidder- 42054 C model (ALMOST DONE)
BrickbyBrickTechnic posted a topic in LEGO Technic, Mindstorms, Model Team and Scale Modeling
Anyone remember this B model? I personally think it sucks. So I decided to rebuild it, but as a C model of set 42054. These are the functions the finished model will have: -Crane stage 1 (motorized) -Crane stage 2 (motorized) -Front ripper blade (motorized) -Grabber (manual) -Articulated steering (manual) -Simulated suspension Here's what I have so far: This is the rear with the basis for the crane. This is the 2 axis articulated joint. This gives a simulated suspension. So that's it for now! Stay tuned for updates, as they will be coming soon! BrickbyBrickTechnic -
[MOC] Crop Sprayer- 42054 C model (INSTRUCTIONS READY)
BrickbyBrickTechnic posted a topic in LEGO Technic, Mindstorms, Model Team and Scale Modeling
Hey everyone, I would like to present my latest finished MOC, the crop sprayer built from 42054. it has 2 motorized and 1 manual function. The build went relatively smoothly, though toward the end, a problem arose where the model simply refused to roll forward. I originally thought this was because of the model being front heavy (which it is) but then I saw that the wheel hubs were parting toward the outside when rolling forward, so the wheels were hitting the chassis, which made it stop rolling. This problem could have been avoided if the model didn't need to have so much ground clearance. On the other hand, it steers very smoothly and the motorized functions work smoothly. The motorized functions are the deploying and lowering/raising of the sprayer arms. More can be seen in the video. Pictures are below with added lights: Overall I was happy with the look and function of the model. If you have a comment or some criticism, please leave below as I would love to hear from you. Videography tips would be especially helpful, as I feel my videography is subpar compared to most on this forum. Thanks for reading/watching! BrickbyBrickTechnic -
.
-
[WIP] Crop Sprayer, 42054 c model [FINISHED, video soon]
BrickbyBrickTechnic posted a topic in LEGO Technic, Mindstorms, Model Team and Scale Modeling
So you're probably wondering what an Amazone Pantera 4502-H is. It's farm equipment, the 4502-H is a crop sprayer. I get that @eric trax is the farming equipment guy around here, but I couldn't not build this. Here's what the real life vehicle looks like: The wheels aren't a perfect match, but if I build this right and get good suggestions from you guys amybe that will be the only inaccuracy :) Here's what I got so far: It's just the base for the 3 steering modes, which this thing has. In the end, it will have some more manual functions and 2 power functions. Thanks for reading! Suggestion are wanted to make this MOC the best it can be. BrickbyBrickTechnic -
 I have a question regarding a changeover issue with the 42054 Class tractor set. In the rear of the set is the crane grabber unit with 2 levers/changeovers. With my model, the right lever (facing the rear/crane) seems to activate the mechanism even while in neutral. Has this happened to anyone else? Does anyone have a suggestion for a new(ish) Technic builder to correct it? I took the unit off and played with the mechanism for a bit, but cannot tell what the cause might be.
 -

[VIDEO REVIEW] 42054 - CLAAS XERION 5000 TRAC VC
Sariel posted a topic in LEGO Technic, Mindstorms, Model Team and Scale Modeling
This time I present to you the epic story of a tractor I fell in love with (even though it's not perfect), a hamster having a bath and one mean turkey. But seriously, that thing makes 42056 look ugly. Pros: - real beauty, IMHO can rival the 42056 Porsche - excellent big new tires, exquisite stickers - great modding material thanks to standarized PTOs; you can make custom attachments for it - brilliant steering system and cabin rotation mechanism - best source of new and recent pieces in this price range - reasonably priced for a set with PF and many new pieces - very easy to control - lime is love, lime is life Cons: - the cabin and the hood are pretty flimsy - no actual B-model, just another attachment instead - very complex internal construction and steering system leave little room to mod the actual tractor - only one attachment with motorized functions - the crane seems rather crude compared to the tractor and can barely lift anything -
2016 2H sets + inside of the LEGO factory
Sariel posted a topic in LEGO Technic, Mindstorms, Model Team and Scale Modeling
And much, much more here: Want more? Check my full report with a ton of photos: http://www.eurobricks.com/forum/index.php?showtopic=134111
