Search the Community
Showing results for tags '42083'.
Found 11 results
-

[WIP][MOC] Samuel's Bugatti workshop
SamuelYsc posted a topic in LEGO Technic, Mindstorms, Model Team and Scale Modeling
Warning: Long post and many pics, mobile user might be careful about the data usage. And bad English. Damn when will this end. This post is more like a record post, I will try to list all the modifications I did on the model. Chapter One: Begining 2018 Aug - 2018 Oct All things start from 2018 mid-August, Lego has officially release the Bugatti Chiron 42083. But I am too broke and poor can't afford it yet (still a student), so I have decide to just do some crazy build at the Lego Digital Designer (LDD) to pretend I have one of it. For the first, I found the 42083.LDD file at this post and the first modification I did is trying to convert it to RC with Buwizz. Here are some of the first references I found on the internet, the source has lost. Then I am just thinking would I do something crazy than this? And I pop up an idea. 8 XL power Bugatti Chiron And all the things are starting from this idea... v2.3 24/08/2018 This is the first power configuration I did, the xl motor is having a gear ratio at 1:3. Which I regret later when I finish building in real life later but that is another story. Also due to the space limit, I have to remove the original big fat W16 and replace it with Didumos's w16 engine design. v2.5 25/08/2018 This is the final configuration I have come with and found this is extremely clever(?), even at the current latest version of the mod still has not change too much of this setup. Chapter Two: The first build 2018 Sep - 2018 Oct After I finish the first (wrong) power configuration, I have another idea is to convert this project to Bugatti Vision instead of Chiron. Also, the color configuration changes to Panda set but highlighted with red. v2.8 29/08/2018 from this. V3.9 16/10/2018 To this. And then I finally have the money to afford this and build it in real life. And the first build has completed, the looks are ok but the road test has successfully failed. As I said before, the gear ratio is 1:3 (12:36), it did run smooth but the 12T gear is damage so fast and it is hard to replace. So on the later versions, It has downgraded to 1:1.6667 (12:20) so the damage is not too high. Also, the RC door is lovely and so so smooth. I am happy with it. The mechanism of the RC door is simple, using an L shape as a Principle of leverage to push out the door. And it is driven by 2x M Motors, one for each side. v3.9 16/10/2018 Chapter Three: The raise of Pneumatic 2018 Oct - 2018 Dec And after the first in real life build setup, things got more and more crazy. The first idea is to make a wide-body kit to let it more steady and heavy. v4.7 09/12/2018 v4.7 inside 09/12/2018 As you can see things go super crazy right here, some of them are working and some of them did not. First, the yellow 5L beam represent of Pneumatic Cylinder V2 1 x 5, the LDD did not have this parts, so... The title of this modification is Pneumatic, include: - Pneumatic Suspension (not work so well at this stage) - Pneumatic center differential lock (failed, rejected) - Pneumatic Disc Brakes (not work at all, rejected) - Pneumatic Door / Pneumatic Dynamic Suspension control (works good after 5 modification later) - Pneumatic Rear Wing control (works well, although I have changed the wing completely at the latest version) "Pneumatic Driven Clutch Brakes & Pneumatic Rear Spoiler Control & Door / Pneumatic Dynamic Suspension control" switch This sound crazy but it is basically having a Servo motor to switch pneumatic valve to active 2 set of action: Set A: - Suspension control (soft/hard) - lock center differential - Un-deploy rear wing - Deactivate Brakes v4.7 09/12/2018 Set B: - Door control (left and right) - unlock center differential - Deploy rear wing - Activate Brakes v4.7 09/12/2018 At then, of course, I have to build it to see how fail it would. Also, you might see there are some electrical wire, those are the custom light, but I don't like it too much at the end. (removed later) And after finished the build, only the rear wing and the SetA/B switch works. - Pneumatic Suspension (too weak and need to redesign) - Pneumatic center differential lock (the differential did not engage well) - Pneumatic Disc Brakes (it can active but can't deactivate, wtf) - Pneumatic Door / Pneumatic Dynamic Suspension control (works good) - Pneumatic Rear Wing control (works well) SetA/B switch works smooth And the first major that has to be solved has to be the Suspension design, I have underrated the weight of the car (~3.4kg), it has to be SOME Suspension. Chapter Four: Redesign the Suspensions 2019 Jan - 2019 Mar Then I saw a post about redesign the whole 42083: [Review|Rant|Mod|MOC|WIP] 42083 revisited by Erik Leppen His suspension redesign has given me an idea... Photo by Erik Leppen And then pop! A new set of suspension design has finished. (Same, yellow 5L beam represent of Pneumatic Cylinder V2 1 x 5) v5 Front 19/03/2019 v5 rear 19/03/2019 Real-life build. New vs old Also, I have remove the rear&front differential to replace with 3:1 (36:12) gear for more tough. (Now planing to replace with new differential 65414&65413) But it turns out it still too weak and soft, so I decided to add 2 hard spring suspension each side. v6.2 30/06/2019 The topside is hard spring suspension and the lower is Pneumatic Cylinder. And it turns out too hard this time... Solution: decrease one spring suspension on each side. Problem solved. Chapter Five: Divo and Second real-life build & first photo shooting 2019 Mar And the next title update is to convert it to the color of Bugatti Divo. v6 28/06/2019 Real-life build. At this stage(v6) I thought I finish this model, it is a good time to stop. And I did feel it is a bit of ugly now but I like it at that moment. So I decided to let it have a Pro photo shooting. Nikon D810 with Sigma ART 40mm With 2 AD200 Flashlight And here are some the pics: Full album here: imgur It is funny that the figure is 1/10 scale and the car is 1/8, it feels so small. And also you see there are lots of stickers, which I don't like it a month later and super regret why I do this. Chapter Six: The come back of 5292 2019 June - 2019 July As all we know, the Lego 5292 Buggy RC motor has discontinued from TLG. And it is selling like 100USD for one on the internet. At the first brainstorm planning, I did have a plan to have 8x 5292 Buggy power plan, but due to the cost, it has been rejected. But one day, I saw this on China market. What the. China has already china the 5292?!!! And it only sold as 68RMB! (~9.8USD) And then this forbidden update has been relaunched. v6 28/06/2019 Due to the size of the 5292 is a bit bigger than 2XL motors, most of the body frame has to be redesign. v9 13/01/2020 Real-life build. And it turns out pretty damn nice! Even in Buwizz slow power mode, it runs pretty smooth too. Due to space limitations and wait for new differential 65414&65413 then I will bring it to a bigger to have a run test. Chapter Seven: The real Divo 2019 June - 2019 Nov One day, I am scrolling Facebook and saw this post from Marc Vink. Post link: link His creation is amazing and his rear light did gave me an idea... Why don't I convert my Bugatti to a truly Divo? Not a Divo-vision thing. Photo by Marc Vink And I have try to create my own one. (Reference to Marc Vink's design) v6.1 29/06/2019 v7.7 25/10/2019 And I think that is it, that is the one. Order parts, build it. Finished and it did look way better than I expected! -

42083 - Bugatti Chiron
Jurss posted a topic in LEGO Technic, Mindstorms, Model Team and Scale Modeling
SO, what we know: On shelfs on 1. august ~359 EUR 3599 parts new rims new hubs light grey 2x5 panel (seems so, not existing DBG) This is what the text says: the lego group is pleased to announce today the partnership between bugatti and lego technic. The second set from the Lego Technic Ultimate Series will be created as part of this collaboration. ...LEGO: "after the success of the porsche gt3 rs it was important for us to find a partner with an iconic vehicle which is unique in the automotive industry, with bugatti we have achieved just that" ...BUGATTI: "we are very proud of the chiron and We are honored that there will now be a lego technic version of this exceptional supercar, and our designers and engineers have enjoyed working with the lego technic team and the result is an authentic replica of the chiron. " -

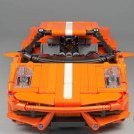
Audi R8 Spyder RWD - 42083 B model
Porsche96 posted a topic in LEGO Technic, Mindstorms, Model Team and Scale Modeling
Audi R8 Spyder Specifications Length/width/height: 71s / 29s / 18s (57/25/25 cm) Scale: 1:8 Weight: 2293g Parts: 2701 Features Front and rear independent suspension 4-speed sequential gearbox Working V10 engine RWD Steered wheels by HOG Working steering wheel Convertible roof Openable doors, hood and engine bay A suitcase in the trunk Recently, a lot of alternative models have been created, so I decided to make mine :) I bought the 42083 in last year. I am big fan of automotive and supercars, so for me it was obligatory. After building the main model, I thouht that it would be cool to build something else. I set myself few goals: use only the parts from the set, improve the suspension and transmission (in Chiron it doesn't work perfect), reproduce reasonably realistic look and make a working convertible roof. At the beginning, I was building the Lamborghini Huracan. I built the chassis and the rear part of bodywork, but when I started building the front it was really hard to model it. In the Huracan the front nose goes really low, with a large angle from the bonnet. With using Chiron's mudguards there was a huge hole between them and the nose. It wasn't looking good, so I decided to make a different model. I haven't had to think long. Lamborghini Huracan and Audi R8 are quite similar. They belong the same group, both have V10 engine and similar dimensions. I started the building of Audi this time from the front, it looked quite good, so I was continuing the building of Audi R8. Here are some WIP photos. The car has steered front axle, by using the HOG with working steering wheel. There is no AWD, so the steering radius is quite good. In the front and in the rear there is independent suspension, in both based on liftarms 1x7. This is due the fact that with longer wishbones there is bigger leverage and the suspension is stiffer. For this reason too, there is no Quattro transmission, short wishbones used in Chiron create too little leverage, and trying to extend them ends up with a colission of the inside part of the wheel with the wishbone. Under the fake V10 there is a gearbox with "only" four gears. This is due to use the driving rings as a exauhst tips and maximum lowering of the V10 to place above it the roof. In my opinion more gears doesn't make sense, beacuse in 8-speed gearbox you can't see the difference in rpm of the pistons between next gears. The gears are changed sequentialy by a lever in the middle tunnel. In the mechanism there is a lock to prevent shifting from 1st to 4th gear and vice versa. The system of the gear change works on similar principle as in other MOCs of supercars - Charbel's McLaren 720s or T-Lego's Lamborghini Centenario. I think that this placing of the lever is better to use than the paddle shifters, esspecially that there is no roof. I think that the best feature is the convertible roof. Designing appropiate geometry of movement of the roof and engine cover was quite a big challange. I started the work from designing the movement of the roof itself, which had to avoid the seats. The next problem was the engine cover, which firstly had to move while opening the roof, and secondly I wanted to make it openable to show the engine bay. At the end I had to synchronize both movements so that the both elements do not block each other. The roof and the engine cover slide out with using some links, built from liftarms and connectors. The whole convertible roof mechanism took me above two weeks. While building it was important to me to replicate the details well. In the interior there are pedals, air-conditioning and at the driver's side a wall in the middle tunnel. In the real Audi R8 Spyder you can not look inside the engine bay, there is only a little cover at the end of the car, where are the basic fluids. However, I made openable rear cover to show the fake V10. I tried at my best to build the engine bay, and under the rear cover there is even an oil plug :) Chiron comparison. Thank you very much to Audi Poznań Franowo ASO for the interest and allowing me to take few photos with the real Audi R8. I am happy with this model. Despite limited amounts of parts the car is not bad. I plan to make a RC version in one color. Don't forget to watch the video! The Gallery Rebrickable -

[REVIEW] 42083 - Bugatti Chiron
Jim posted a topic in LEGO Technic, Mindstorms, Model Team and Scale Modeling
REVIEW - 42083 - BUGATTI CHIRON INTRODUCTION First of all, my apologies for bringing you this review so late. There were some logistical and communication issues, which caused a delay in the delivery of the set. The set was due to arrive before the LEGO Fan Media Days, but mine arrived after the event. Throw some personal obligations in the mix and you have a belated review. Also, this review won't be as elaborate as the one I did for the Porsche GT3 RS. Sorry about that too. Nevertheless, I hope will enjoy the pics and some of my insights. I was fortunate enough to receive an invitation to join the unveiling of the Bugatti Chiron on the 1st of June (2018), which totally rocked. For those of you who are interested, here's a link to the Bugatti page on the LEGO website and a link to the LEGO page on the Bugatti website. If you see this icon, you can click the image on the left or right side of the image, to cycle through alternative images. PICTURES Pictures can be clicked to view hi-res versions. More pictures can be found in my Flickr album. DISCLAIMER This set has been provided by the CEE Team of TLG. It's not my goal to promote this set. It's my goal to give you an honest opinion about it. Therefor, the opinion in this review is my own and is in no way linked to TLG. SET INFORMATION Number: 42083 Title: Bugatti Chiron Theme: Technic Released: 2018 Part Count: 3.599 Box Weight: 5,9 kg (approx) Box Dimensions: 57 cm x 37,5 cm x 15 cm Set Price (MSRP): £ 329.99 / $ 349.99 / € 369,99 Price per Part: £ 0.092 / $ 0.097 / € 0,103 Links: Brickset, Bricklink THE BOX As you have come to expect, the box is more luxurious than the regular LEGO Technic sets. The blue on blue effect of the vehicle and background is working for me. And I like the reflection underneath the car. The upper right corner of the box shows that this set is also built in a 1:8 scale, like the Porsche. Some people state that the box is a waste of money and they prefer a regular box. Since this will probably only slice a couple of euros of the price, I prefer having a luxurious box for the "UCS" models. Since you are paying top dollar already, you might as well get a nice box with your model. I throw away every other Technic box, but I wouldn't think of throwing this one away. The back of the box shows some key elements of the car. And it shows the sexy behind of the car. More praise for that later. Nope, these are not my left-over parts from the build. This the content of a bag I received at the unveiling event. The USB sticks contain media kit for both Bugatti and LEGO (click here to download the LEGO Media Kit and Bugatti Media Kit). And when I run a flat, I can at least change it CONTENTS OF THE BOX The side of the box shows the profile view of the car. Click on the images to show the inside of the box. There are six boxes, one for each step of the build. The box contains two books, instead of one. And since the Bugatti is built in two parts (before the marriage) this allows you to start the build together with someone else. The second book. And the sticker sheet. I would be nice to get a second sticker sheet with a set like this. My Flickr album has pictures of the numbered bags, used in the different stages. HIGHLIGHTED PARTS I skipped this section in my Porsche review, but I agree it's worth having the Highlighted Parts section. RIMS Let's start with the most unique and prominent part of them all...the rims. Specially designed for the Chiron. And man, this design is magnificent. Absolutely spot on. Since they are dark blue it might be difficult to use them in MOCs, but given the number of dark blue panels in this set, we will most likely see more dark blue MOCs in the future. A thing worth noting is that the pins are attached to the rims. Unlike other rims, which have holes (female), these rims have pins (male). This makes them harder to use with some of the previously used setups. On the other hand, this set comes with very cool brake discs and calipers, which can be used in MOCs as well. As you can see in the image below, all of the common rims come with holes, instead of pins. BLUE PANELS At first, I wasn't happy with the idea of this set being blue on blue, but then I found out TLG used my two favorite shades of blue. It's a public secret I am a big fan of dark azure and that's no different for dark blue, used in the 41999 - 4x4 Crawler Exclusive Edition and later in the 42064 - Ocean Explorer. I have compiled a list of modern panels in dark azure and dark blue. I think this list is complete, but feel free to check for accuracy DARK AZURE 2 x Panel Car Mudguard Arched 15 x 2 x 5 2 x Panel Curved 11 x 3 with 2 Pin Holes through Panel Surface (new in Bugatti) 0 x Panel Curved 11 x 3 with 10 Pin Holes through Panel Surface 0 x Panel Curved 3 x 6 x 3 (non-existent) 0 x Panel Curved 3 x 13 2 x Panel Fairing # 1 Small Smooth Short, Side A 2 x Panel Fairing # 2 Small Smooth Short, Side B 0 x Panel Fairing # 3 Small Smooth Long, Side A 0 x Panel Fairing # 4 Small Smooth Long, Side B 2 x Panel Fairing # 5 Long Smooth, Side A 2 x Panel Fairing # 6 Long Smooth, Side B 2 x Panel Fairing #13 Large Short Smooth, Side A 2 x Panel Fairing #14 Large Short Smooth, Side B 1 x Panel Fairing #17 Large Smooth, Side A (new in Bugatti) 1 x Panel Fairing #18 Large Smooth, Side B (new in Bugatti) 1 x Panel Fairing #21 Very Small Smooth, Side B (new in Bugatti) 1 x Panel Fairing #22 Very Small Smooth, Side A (new in Bugatti) 0 x Panel Plate 3 x 11 x 1 0 x Panel Plate 5 x 11 x 1 DARK BLUE 2 x Panel Car Mudguard Arched 15 x 2 x 5 (new in Bugatti) 0 x Panel Curved 11 x 3 with 2 Pin Holes through Panel Surface (non-existent) 0 x Panel Curved 11 x 3 with 10 Pin Holes through Panel Surface 2 x Panel Curved 3 x 6 x 3 6 x Panel Curved 3 x 13 1 x Panel Fairing # 1 Small Smooth Short, Side A 1 x Panel Fairing # 2 Small Smooth Short, Side B 0 x Panel Fairing # 3 Small Smooth Long, Side A (non-existent) 0 x Panel Fairing # 4 Small Smooth Long, Side B (non-existent) 2 x Panel Fairing # 5 Long Smooth, Side A 2 x Panel Fairing # 6 Long Smooth, Side B 2 x Panel Fairing #13 Large Short Smooth, Side A (new in Bugatti) 2 x Panel Fairing #14 Large Short Smooth, Side B (new in Bugatti) 1 x Panel Fairing #17 Large Smooth, Side A (new in Bugatti) 1 x Panel Fairing #18 Large Smooth, Side B (new in Bugatti) 6 x Panel Fairing #21 Very Small Smooth, Side B 6 x Panel Fairing #22 Very Small Smooth, Side A 4 x Panel Plate 3 x 11 x 1 0 x Panel Plate 5 x 11 x 1 (still unique to 41999) There are lots of new dark azure and dark blue parts in this sets, like liftarms and soft hoses. For a full list, I recommend checking the Bricklink Inventory or looking at the inventory pics in the next section. DISC BRAKES On Bricklink these are called Steering Wheel Hubs 3 Pin Holes Round, but I will simply call them disc brakes. I love how these turned out. 1L PIN CONNECTOR Both were already available in these colors in 2017, but it's worth noting that this part is getting more and more common in different colors. I do like this part a lot. CONNECTORS New in the regular blue color. Makes you wonder why TLG introduced the connector with hole in blue, since neither of the three sets which have them in blue are depending on this color. TLG tends to use new colors in multiple sets, but we might see the real reason for producing it in one of the future sets. The same goes for the perpendicular split connector btw. ROTARY CHANGEOVER CATCH This cool new part is specifically designed for the gearbox on the Chiron. It can engage gears by using a rotary movement, instead of sideways/lateral motion. I'm sure we will see cool new applications for this part in future sets. I heard something about it being used in one of the 2H sets already. DRIVING RING EXTENSION This new driving ring extension has 8 teeth inside, which results in less slack. 20T DOUBLE BEVEL GEAR WITH CLUTCH This gear is basicallyh the same as the regular 20T bevel gear, but it has a pin hole, instead of axle hole. And it has clutches on both sides. 3L AXLE PIN Most likely, following the "we need more colors" pattern we have seen lately, this part is introduced in red this year. We used to have dark bluish grey for this part, but now we have red too. I wonder if dark bluish grey will be phased out. 5 x 7 FRAME If you need 5 x 7 frames in black, this is the set for you. Besides buying them separately, this is your best choice to get lots (16) of 'em. PART LIST THE BUILD It looks like the build starts with a Monocoque, but that's not the case. This simply is the rear of the chassis. Lots has been written and said about the suspension in the Chiron. In the following video you can see that even without the springs attached, the liftarms don't move easily. However, with the springs attached, the suspension looks strong enough for the weight of the car. Later we will verify if that is indeed the case. The wheel hubs are connected to the new Steering Wheel Hub (a.k.a. disc brakes). I'm sure we will see these discs in future sets, as brakes or maybe as something totally different. Here's the front view of the rear suspension. The bottom view shows the new 20T bevel gear with clutch connected to the differential. No, this is not the marriage. And I don't think you can call it an engagement either. The first kiss, maybe. Part of the chassis is connected to the rear suspension. The gearbox uses a new type of axle connector, already used in some earlier sets. Where the white connector has lots of friction, the driving ring can move freely over the grey connector. The video below demonstrates the two axle connectors. And after the first kiss comes....okay, I won't go any further with this analogy. Anyway, the gearbox is connected to the rear of the chassis. Again from a different angle. W16 ENGINE Here's the top and bottom view of the W16 engine. The engine doesn't use a single crankshaft, but a construction with three axles and three 24T gears. Admittedly, I would have loved to see a custom built engine with other parts than the standard pistons and cylinders, like the MACK truck. However, I don't think this is a bad solution. The engine operates smoothly and it's fun the see all the pistons moving. It does feel like a beast of an engine. Let's mount the engine by attaching it to the chassis. Again from a different angle. FRONT CHASSIS The rear of the chassis is finished, gearbox is in place and the motor has been built. It's time to move on to the front of the car. The front suspension also uses two springs on each side. Again from a different angle. This is what the front chassis looks like when the front suspension has been attached. There is a single clutch gear in this model. It's in the center of the vehicle, near the mechanism for the gear shifter (Forward/Reverse). Since the Chiron doesn't have a center diff, this model doesn't have one either. In the real car, there's full control over the power sent to the front and rear axle. This is done electronically. Obviously, the LEGO model doesn't have this kind of advanced mechanisms. Therefore, a clutch gear is used to avoid straing on the drivetrain. One thing I noticed is that the clutch gear is not attached with a 5L axle with stop, but with a regular 5L axle. I wonder why?! Next is the mechanism for the flappy paddles. It's a rather odd but ingenious system. This pictures clearly shows the white 1L connectors, which makes this mechanism possible. The video below demonstrates the gear shifter. It's not so stable yet, because it's not enforced by the chassis. The paddles in the Porsche were attached to the steering wheel. However, the elastic bands were placed in a position where they limited the operability of the paddles. The Chiron uses a different mechanism, where the paddles are positioned in front of the driver's seat, under the steering wheel. The front of the chassis right before the marriage. You can already see some of the tan interior and the dark blue exterior. Here's a video demonstrating the gear shifter and steering. THE MARRIAGE It's time for the marriage of the rear and front of the chassis. This is the result of the marriage. It's actually starting to look like a proper supercar. At this point I tested the gear shifting sequence. Rumor has it that there once was a supercar with incorrect gear shifting sequence, so I was pleased that I could clearly see (and feel) that the sequence was correct This car has a proper 8 + R gearbox, which means that it has 8 forward gears and just a single reverse. Some of us expected the have 8 reverse gears as well, but TLG did a proper job getting the gearbox right. One minor gripe is that the real Chiron only has 7 forward gears, but that's something I can live with. From this point it's mostly exterior work on the body. The spoiler neatly aligns with the rest of the bodywork. The rear of the car is so f.... sexy. I absolutely love how this is designed. And actually, I really like the bright red, instead of a trans-clear variant. This color makes it really stand out. Allegedly, the reason for not doing it in trans-clear, is that the material of the flex axles (and panels) is not suitable for trans-clear colors. The tan upholstery is partially made up of system bricks. I like the way the chairs worked out, but I probably would have added some more system bricks to avoid the gap in the seats. Here you can clearly see the gap I am referring to. After the interior we continue with the duo-tone exterior. When I first heard that the car would be blue-on-blue I was a bit disappointed. I was actually hoping for black-and-blue. I figured TLG would use regular blue, but I didn't think of dark blue. Admittedly, I was immediately convinced when I saw the dark azure and dark blue combination. And let's face it, duo tone blue is a trademark of Bugatti, so it makes a lot of sense to use these colors. The doors are added to the vehicle. They do feel a bit flimsy and there's no door lock. They look nice, but using the stickers on the tiles instead of flex axles and the flimsyness leaves room for improvement. Bit of a cop out if you ask me. When the first picture was leaked, it only showed the front of the car. It immediately generated lots of negative comments. Since I had already seen the back (and the rest) of the car, I was convinced that it wasn't so bad as many claimed. And when I look at the picture below, I still think the front worked out nicely. What I especially like are the angles in the bodywork. We have seen some Chiron MOCs, but they are mostly square cars with flex axles. This car has lots of exotic angles, replicating its real world counterpart. I'm not saying it's perfect, but I absolutely like how it worked out. And I don't mind the gaps in the bodywork. After all, it's not a Creator Expert car, but Technic. And last but definitely not least....the rims! If the car isn't good looking already, these rims take the cake. Absolutely stunning! Of course we need some rubber to transfer the power to the road! All in all I really enjoyed the build. I liked it better than the Porsche. Partially due to non-rushed building, but also because the gearbox, engine and other key elements are more fun to build. COMPLETED MODEL Low and behold, a LEGO Technic Bugatti Chiron! Looking at the real car, you can see that the lighter blue resembles regular Technic blue more than dark azure. However, I am very happy that TLG still chose to go with dark azure. It results in a higher contrast between the two colors, it's better for dark azure part availability and it's just a better color blue The spoiler isn't fully extended in this picture. It's halfway between neutral (folded) and extended. On the left you can see the lead designer of the Bugatti. Oh wait, that's not entirely correct :wink: For those of you not familiar with the history of Eurobricks; this is Kim Thomsen (@KimT), former (technically he is still a member) Eurobricks member and he is member of the Community Engagement team at TLG. He is our contact for most of the activities. The right picture shows the actual designers, from left to right: Jachin Schwalbe - Bugatti Head of Chassis and Tire Development Achim Anscheidt - Bugatti Design Director Aurelien Rouffiange - TLG Designer Andrew Woodman - TLG Senior Design Manager Here you can clearly see the different angles, which definitely must have been challenging for Aurelien. Almost as good looking as the LEGO version hehe. As I said before, the rear of the car looks absolutely stunning. I can't get enough of this view. Usually the front of the car gives it its distinct look, and the rear...is just the rear. This car has a very distinct rear as well. I like how the W16 worked out. The engine has been partially covered with system bricks to give it the "big engine look", but you can still see most of the cylinders, in contrast to the Porsche. In this image you can see that the door isn't entire closed. This could have easily been avoided by adding door locks. Other than that, the car looks magnificent. Another great view of the back. Looking at this image, I start to wonder how this car will look like when the bodywork is entirely made in dark blue, and possibly losing the grey rigid hoses. The profile view is also very beautiful, but two odd thing stand out. First is the flex axle and rigid hose combo comprising the front grill. I somehow feel this could have looked better using a single axle or hose. The other thing is that the flex axles continue as stickers. This just doesn't feel entirely right. Especially since we have seen some simple, but very good looking, MODs, using rigid hoses. Some of the negative or odd things aside, I absolutely love the looks of this car. The duo-tone blue is stunning and the rims are out of this world. If you look closely at the rims, you will notice that the tires are not mounted "correctly". The rims slightly protrude the tires. Apparently Bugatti designers found the rims to be too small when mounted correctly. This was a very simple solution to make them look a bit bigger. At first I wasn't convinced by this solution, but upon seeing the solution in real life, I was convinced that it indeed looked better. And look at those disc brakes ... fantastic! The real ones don't look too shabby either There are a lot of odd angles, which are implemented very well. It's obviously a matter of personal taste, but I do like the looks of this car better than the Porsche's. Maybe it's the sophisticated color scheme. Combine dark azure with the classy dark blue and you have an instant winner. But of course, it's not only about colors, it's about shapes as well. The bottom of the chassis looks really clean. The tan interior looks great, especially with the stickers on the dashboard and on the inside of the doors. The Frunk (front trunk) opens to reveal the Bugatti bag. Like the Frunk, the space in the bag will be limited too. Where we are going, we don't need trunk or bag space These are the left-over parts after the build and the brick-built key you can use to raise the spoiler. The real car has key which can activate ludicrous speed (Spaceballs anyone?!). Although I like the gimmick of the LEGO key, I would have rather seen a spoiler which was raised with a lever next to the seat, or a similar solution. Without the key inserted. SUMMARY Being a model of a supecar, there's only so much functionality one can expect. However, with a hefty price tag, one can expect the functions to work properly. STEERING Basic functionality is steering, which doesn't work that well. The weight of the car, combined with the lack of HoG (Hand of God) steering, makes this car virtually unsteerable. When you manage to steer at a maximum angle, the turning radius is even bigger than Yo Mama. SUSPENSION After the gearbox issues in the Porsche two years ago, the suspension developed to be the flaw of this set. When you push the bodywork down, it doesn't come up again. This goes for the front AND the back. Maybe TLG don't see this as a flaw, but I do think this should work better. I have seen a solution where some of the friction pins were replace with frictionless pins and the suspension worked better. Maybe TLG (and Bugatti) considered the suspension to be too wobbly with frictionless pins, but this being a LEGO model, I feel the model should return to normal state after pushing the suspension down. For me, it's not a deal breaker, but I wonder how much thought went into this. DOORS The doors are very wobbly when opening. Besides that, there's no door locking mechanism. We have seen some pretty simple MODs, which would have solved this problem instantly. I don't get why simple details like these are so often omited in Technic models. GEARBOX For me, the gearbox lives up to the expectation. TLG went all out and designed some cool new elements to make sure this supercar has a properly working gearbox. Of course, there are always people who can make a better version, but after gearbox-gate two years ago, I'm very pleased with this one. W16 ENGINE Also, subject to many debates...the W16 engine. For the connaisseurs, this isn't really a W16 engine. It's more like a stacked V8 or a V8 with two extra 4-cylinder blocks. I would have loved for TLG to design some new engine elements as well, but I reckon they will leave that for future supercars. I can also imagine that the Bugatti is unique with a 16 cylinder engine, so designing special elements might be unneccesarily expensive. And to be honest; I do think the current setup is a proper solution for the W16. The engine works like a charm. DRIVETRAIN Something which does slightly bother me is the slack in the entire drivetrain. I have tested the gearbox sequence, which is flawless. But when you look at the pistons in the completed model, they sometimes only start turning after 50cm of driving. So many gears need to be engaged, that slack is building up. So, after the closed engine compartment of the Porsche, we now get a semi-open engine compartment, but the pistons aren't very responsive. SPOILER Raising the spoiler with the key is a nice gimmick, but I'd rather have a lever in the interior. Or maybe, have it linked to a fake brake pedal. Or, as a middle ground, be able to insert the key somewhere else in the chassis/bodywork, instead of fiddling in the wheel arch. CONCLUSION Some people claim (or rather, shout on every social media they can find) that this model is overpriced. At a price of € 369,99 for 3.599 parts, I don't think it's overpriced. Is it cheap? Definitely not. But in terms of part count you get what you can expect of a Technic set. It's not that this set is filled with System parts, as was expected before the unveiling. Do I think this set is worth this kind of money?! I find this question difficult to answer. It all depends on your needs, financial situation etc. If you like to buy Technic for the functions and to build other stuff with, then this set is probably not for you. But if you are into cool looking supercars, then this set is definitely worth the money. Like the Porsche, I will probably pick up an extra copy, just to have a collection of MISB supercars. As with most things in life, it's all about expectations. When the Porsche was released, we didn't really know what to expect. Therefore, some of the AFOLs were disappointed. Admittedly, I was a bit let down too, in some aspects. Now that we know the concept behind the "UCS" Technic models, we know better what to expect. So, does this model live up to my expectations? Yes, it does! The new gearbox surpasses my expectations, while I am somewhat disappointed with some of the other features. Overall, I do like this model better than the Porsche. The build is slightly more fun, the gearbox works better and I do love the duo-tone color scheme. Oh, and did I mention the gorgeous looking rear of the car?! All things considered I do love this set. If you are into the Porsche, you will definitely love this set. If you think the Porsche is just an expensive display model, you can easily skip this set as well. On the other hand; this line of supercars is probably the best chance, for most of us, of getting a collection of supercars SCORE From now on I will omit the scoring section. Not all sets have the same criteria and not all people are looking for the same things in a set. What can be a good parts pack for one builder, can be a lousy one for the other etc. A set like this, is not built for playability, so it's useless to rate the playability. Therefore, I think it's better to have a written summary with my feelings and let you decide the score yourself. I will end with a "which one do I like best" list, which I will use for future reference, when reviewing supercars. This list reflects my current preference: Bugatti Chiron Porsche GT3 RS FINAL WORDS Thanks you for reading this review. All pictures can be found here. Since the poll is still broken, I haven't included it, but I still like to hear what you think of this set? -
 I wanted to start this topic, because, I believe there are some super-critical steps all of us may miss the assembly/positioning detail in it. After all, it is still the one of the top-three most complex LEGO Technic sets ever produced in its history. Kindly let me start and you continue if you see the step very “tricky”... I’ll just give one step for now: Book 1, Buildbox 2, Step 213! Note: By the way, did the new Chiron’s suspensions have been “fixed”, or “am I dreaming/installing it wrong”? Best Regards, Idris
 -

10.000 Subsribers special - Mashup
Zerobricks posted a topic in LEGO Technic, Mindstorms, Model Team and Scale Modeling
First if all I totally forgot to post this model here on the forum, guess better late than never Now to explain a bit about the motives behind this model before I go into specific details. Counter on my youtube channel was nearing 10.000 so I wanted to make something trully special. I was not sure what kind of a model I want to make, a sportscar, offroader, construction machine, so the decision came to MAKE ALL AT ONCE. The model would also incoporate ideas from the last decade of Lego technic product to go along with my 10 years on youtube. Starting with the design, the front end is heavily inspired by 42083 and 41999. Notice the front wheels are from 42056. The first motorized function is adjustable front suspension inspired by 8297: The front end can raise by 3 centiemetrs to allow the model to negotiate rough terrain. Continuing towards the cab, which was inspired by 41999, we can pop up the hood to find a green colored 10 cylinder engine inspred by 42030: Cab doors are inspired by the doors from 42069, which open at the angle. Opening the doors you can find a full interrior with two adjustable seats andworking steering wheel: In the center of the cab there is a gearbox which movel lineary to switch between 3+R gears using a special mechanism. This emchanisem translates the sliding action into usable inputs for the gearbox: Going further back, there is a section holding the battery box and, orange lever and utensils on the left side. I will explain the function of the orange lever later. On the opposite, right side there are 2 M motors powering all the motorized functions. Notice the mysterious red lever which is used for switching motorized functions. Notice the pump used to power the pneumatic functions. There are also two electric switches to reverse the two driving M motors. If we continue towards the back, we can see there is a pair of linear actuators used to manipulate the container. The red lever switches power from one of the M motor between the adjustable front suspension and linear actuators. But not only can the linear actuators tilt the container, but they can also pick up and load the entire thing. To switch between tilting or picking up, the orange lever is used to lock the individual segments of the lifting arm. This function is inspired by 8052. The arm can reach out and pick up the container with ease: If we continue and look at the photo of the back side you may notice a PTO output along with a strange mechanism with rubber bands: Same motor that powers adjustable front suspension, linear actuators also powers the PTO output via 24 tooth clutch gear. Notice that the PTO output uses a CV joint in order to slide the axles into it without friction. The rubber band mechanism is used to hold the rear attachment. This was inspired by 8110 and 42054. Here is a sum up the functions of the model so far: 1. Motorized functions Adjustable font suspension Tilting of the container Picking up and lifting of the container Pneumatic compressor and storage provided by two air tanks powered rear PTO 2. Manual functions: 10 cylinder engine powered via rear wheels through a 3+R gearbox 3+R gearbox Steering controlled by steering wheels inside the cab AND the light on the right side of the roof Openable doors Openable hood Adjutstable seats Independent front suspension Solid live axle assembly in the rear - inspired by 42043 Features: Both front axles are at a positive cats angle, allwing the fat Porsche wheels to self-center Due to the immense weight, each rear solid axle is supported by 4 yellow very hard springs The 3+R gearbox is derived from my diagonal gearbox featured in the Dominator TRS Due to its framed design the gearbox provides a very rigid backbone to the model A 5 tubed exhaust seemed appropriate for the 10 cylinder engine I hope this photo helps you understand all the functions and features a bit better. Each color of the model's chassis represents a different module. Next we will look at the rear attachment built for this model. The attachment is multifunctional, combining linear actuators, pneumatics and 4-way switchbox to actuate all the functions: In total the attachemnt features following functions powered by a PTO via 4-way switchbox: Extension of the control arms via small actuators and a lever mechanism Lowering of the control arms via large actuators - inspried by 42009 Rotation of the arm Spooling up a winch which allows the arm to be used as a crane arm - inspired by 8258 Additionally there are 4 pneumatic function powered by the compressor and air stored in the two pneumatic tanks on the truck itself: Raising of the primary arm joint Raising of the secondary arm joint Tilting of the showel - inspired by 8043 Closure of the blue pneumatic claws - inspired by 8110 Some intersting facts about this attachment module: All of the penumatic functions + rope of the winch pass through the turntable. Rotation of the turntable is limited to some 350 degrees to avoid all those tubes and rope tangling up The structure of the arm with diagonal arms is inspired by crane arms Frictionless 8 tooth gears allow the white 16L axles to slide with ease while powering the two large actuators used for support legs The 4-way switchbox is one of my most complex and sense assemblies and it took me 2 days to design with support of LDD. Winch uses a friction pin to keep the rope from unloading when the winch function is off. The blue claw uses rubber bricks for better grip Combining the main model with the atatchment resluts in a model which weighs around 5 kilograms and is over a meter long! Some facts about the design, and build of the model: The whole model took me over 2 months to design and built, biggest challenging being the gearbox, container arm and rear attachment switchbox. A lot of care was placed into keeping all the functions working reliably with a limited power source (M motor) and safely with no gears skipping or breaking. The model uses around 16 universal and 3 CV joints to transfer the power to the suspension lifting mechanism, PTO, both steering sytsems and drive axles. Each rear axle is capable of supporting the whole model's weight, the weak point are the Power Puller tyres which sag quite a lot, especially on the third axle. Thanks to it's stiff gearbox, this model has one of the stiffest central frames I ever built allowing the model to be easily picked up by diagonal front and rear wheel without excessive flex. Gas canisters and first aid from 42069 are featured on this model The hood ornament is a bunny from a Lego Friends set This is my first model to use the white pneumatic air tanks for it's intended purpose. The model is covered with glow in the dark parts close to its edges, so its visible at night - useful when you are wandering around your building area at night A photo of the mashup's total of 8 glow in the dark bionicle claw/eye pieces: You can see the model in action in the following feature video: Finally I would like to thank you for reading through this massive post and for helping me reach 10.000 subscribers. -

Timelapse build of Bugatti Chiron 42083
DugaldIC posted a topic in LEGO Technic, Mindstorms, Model Team and Scale Modeling
Hey everyone, so last Friday @Lox Legoand I woke up super early and headed to the closest Lego store. By 10:05am we were proud new owners of the Bugatti set, that afternoon we got to building and decided to try out a timelapse build. I hope you enjoy! Last but not least, keep an eye out on future posts as Lox and I plan on building a B model for the Bugatti! -
 Sorry for adding yet another Chiron topic, but my videos are buried on like 40th page of the general Chiron thread. And I have two that I think you'll like, with more coming shortly. First is the official Chiron reveal that has taken place at LEGO House in Billund Denmark today, with real, actual Bugatti Chiron and people from both LEGO and Bugatti, and the other is a complete review of the 42083 Chiron set. I will also have a POV speed build and interview with Lego and Bugatti designers coming up later. I'm also proud to have been part of the official Chiron live build that was completed at 6 hours and 20 minutes (my first Chiron build has taken 7 hours 30 minutes), and left my fingers completely numb ;) The Chiron reveal (presentation starts around 9:00): The Chiron review: POV speed build:
 -
 Hi all, We are announcing the BuWizz fast car COMPETITION! 1. Build a LEGO fast car with BuWizz, 2. Record a stunning video 3. Upload the video to: http://bit.ly/WinBuWizz 4. Win compelling prizes: 1st place: LEGO Technic 42083 Bugatti Chiron 2nd place: 2x BuWizz 3rd place: 1x BuWizz RULES: http://bit.ly/WinBuWizz Deadline for video submission: Mar 31 2018 24:00 PST Public voting for best videos starts Apr 1 2018 0:00 PST, ends Apr 15 2018 24:00 PST 10 best videos enter the finals; winner will be selected by 3 person jury (members TBA) and announced on Apr 25 2018 You can compete or vote for your favorite videos and help Competitors to the second round. Let the GAMES begin BuWizz Team
 -
Bugatti Chiron 1:8
Leviathan posted a topic in LEGO Technic, Mindstorms, Model Team and Scale Modeling
Hi everyone ! Fasten your seat belts, because today I’m reaching the top speed of 420 km/h with this replica of the Bugatti Chiron 1:8 scale ! Around 4,000 parts, a weight of 3,7 Kg it takes me 2 years of study and design to achieved it. First of all, the pictures renders are slightly different than the video content. I made some modifications (for the roof...) The french manufacturer mixed-up performances and sophisticated design for an unique masterpiece with only few units sold for. The real challenge grabbed my attention so I decided to design it. For more informations about the car, please visit : The road map includes parameters following : 1:8 scale (using of 42056 tires) PFS features (powered by one Buwizz ®) 7 speeds Dual-Clutch Gearbox (DSG) Full 4WD transmission A good approximation of the bodywork Active spoiler feature A high rigid chassis Modular assembly This MOC includes a lot of characteristics as well basics manual ones that more complex ones. But first, here are some pictures below : Main features : Dimensions : 56 x 24 x 16 cm Weight : 3,7 Kg Power supply : 1 Buwizz with easy access Motorisation : 5 mottons Independent suspensions Manual ones : Openable doors with locking system, and openable hood by friction Steering HOG Unplugable motorisation (RC motors and steering ) for playability because the car is very heavy ! Openable trunk providing self-invented W16 engine details and Buwizz access Openable gloves box… …hidding a secret key witch unlock nice PFS features ! (insipired by the real top speed key) After a long build process, I’m very proud of the result. During development, I decided to put an additional feature to improve playability : a small lever to unplug motorisation. Indeed, the car is very heavy so you can’t move it easily. From wheels to the drive train and the 2 RC motors, the high gear reduction lock any movement. The secret key system create some kind of manual interaction allowing selection between 2 motorised features powered by one M motor : Spoiler extension (3 handling modes reachable) Adjustable suspension in height I’ve made a small video to illustrate spoiler mechanism : I found inspiration on Pipasseyoyo Bugatti Veyron system for height setting https://www.youtube.com/watch?v=eaX5JLdBcyg. Irreversibility is performed by 4 worms screw, one for each axle. http://www.techlug.fr/Forum/topic10504.html I assume all similarity with @Didumos69 anti-roll bar and torsion bars system on the front axle. His advanced setup is very strong and reliable. https://www.eurobricks.com/forum/index.php?/forums/topic/143038-moc-rugged-supercar-hammerhead-19-scale/ Remote ones : 5 motors : 2x RC motors / 2x M motors / 1x XL motor 7 speeds Dual-Clutch Gearbox (DSG) driven by XL motor Spoiler animate by 1 M motor and its own gearbox Suspension height controlled by the same M motor Steering by 1 motor or the HOG Full 4WD transmission driven by 2 RC motors Gearbox ratios : 1st : 1:9 2nd : 1:6 3rd : 1:5,4 4th : 1:4,5 5th : 1:3 6th : 1:2 7th : 1:1,8 R : 1:9 Gearbox inspiration : @Sheepo Rubicon Jeep shifting system :http://www.sheepo.es/2016/06/jeep-wrangler-rubicon-instructions.html @ibessonov gearbox : https://rebrickable.com/mocs/MOC-5565/ibessonov/sequential-rc-4-speed-dual-clutch-gearbox-with-pf-servo-motor/#comments Other pictures : Hell yeah Enjoy pictures in HQ : https://flic.kr/s/aHsm9s9M7C And here is the video : I hope you'll like it ! I'm making instruction video for the DSG gearbox, see you soon ! -

Bugatti Chiron W16 engine (mini-sized)
nerdsforprez posted a topic in LEGO Technic, Mindstorms, Model Team and Scale Modeling
Hey Everyone, So with the announcement of 42083 I have had W16 engines on my mind. Thought I would make a little rendition of my own. It is too small for 42083, but it is Technic Figure scale, based on newer proposals of mini-engines that have been around for a while. Complete with the four turbos (at least the appearance of them). I wish something like this could be in 42083, for based on the promo video I think any proposal with the current engine blocks will be too big, chunky and overall sloppy-looking.