Search the Community
Showing results for tags 'volkswagen'.
Found 38 results
-
Back again with another 8 studder, this one being the VW bus featured in the BBC sitcom "The Cleaner", starring Greg Davies. Complete with crime scene clean up kit in the back, accurate decals, and a plethora of SNOT techniques, the free instructions can be downloaded on Rebrickable One of my personal gripes with other LEGO models I've seen with rear wheel spats or "fender skirts" for the americans, is that the rear wheels are recessed by a non insignificant amount compared to the front wheels. My primary aim was to ameliorate this by means of using the half-stud thick panel piece mounted upside-down. Thus, the front and rear wheels are collinear, without sitting too far into the arches. Full photoshoot on my Bricksafe
-
I wanted to make a Beetle for a long time... But, as usual, not a normal one. This is a RatRod/Slammed/Rockclimber/Flamethrower beetle. Minifig Speed Champions Scale The custom rims are made by Brickthebrick
-
My attempt at making a minifig scaled Volkswagen Beetle, couldn't do it all in red like I Initially wanted, but I think this colour combo makes it looks sporty. One minifigure can be seated inside although I did not provide proof of that. Lego Volkswagen Beetle by legomanijak, on Flickr Lego Volkswagen Beetle by legomanijak, on Flickr Lego Volkswagen Beetle by legomanijak, on Flickr
-

1960s Hippie bus (Volkswagen T1 campervan) - 8 wide MOC - finished 1/18/23
Murdoch17 posted a topic in LEGO Town
"This far-out VW bus is, like, full of positive vibes. No negative energy is allowed onboard, and no squares either. You're not a square are you? ...Groovy. I'm on my way to Woodstock for three days of peace, love, and music to tune in, turn on, and drop out. I'll also be protesting the Vietnam War on the way back to San Francisco. Wanna come along, man?" - The Hippie So, I was looking through my back catalog of downloaded LDD models and found this one from 2013 and the Build Together campaign Lego had at that time. They had a website for it an everything, and after a decade of waiting, this 8-wide bus finally resurfaced and caught my eye. I added a bunch of flowers, an hippie CMF fig (plus a custom female counterpart fig) and a far-out new paint job. The rear features a hitch for towing a trailer. Unfortunately the large door on the other side does not open... I didn't design it right and am NOT going to tear this apart to fix it. The inside has been decked out with all new details: a lava lamp, bed, table and chair, along with two chairs up front. As you might have guessed, the roof is mostly removable. UPDATE 1/18/23: Real world photos added! Thoughts? -

[MOC] Volkswagen EuroVan T4 RC
Danifill posted a topic in LEGO Technic, Mindstorms, Model Team and Scale Modeling
Hello! After being inactive for quite some time I managed to build another model - VW EuroVan T4 RC! It features some RC and manual functions: - RWD (unlike the real model), driven by a buggy motor (slow output) - steering with a Servo motor - suspension on both sides (independent rubber suspension in the front and live axle in the back) - working headlights and taillights - openable bonnet with some minor detailing underneath - easy acces to the BuWizz module through an openable door on the roof - everything is powered by BuWizz 2.0 Model's chassis is supposed to be an improved version of one of my previous creations, this time it got better steering stability. I kept the wheels bigger along with the arches, as it provides better performance. All in all, it turned out pretty fun to drive! (However, the ground clearance isn't the best, so I prefer keeping it indoors :D) Video link: Some photos: Thank you! -
MOC#87 VW T1 Camper Van. It is my latest MOC. I also spent four months creating the stop motion animation for this MOC. Welcome to take a look: More MOC on my homepage: https://www.bricksboy.com/moc
-
From: brothers-brick.com EDIT: @VBBN posted a review for this set, so I suppose this topic is redundant now .
-

[TC20] Volkswagen T1 Camper Van (10220)
RuTechBrothers posted a topic in LEGO Technic, Mindstorms, Model Team and Scale Modeling
I decided to join the Technic Studless Recreation competition. Someone starts building a car with a chassis, but I decided to start with ❤ The heart of the model will be a 4-cylinder opposed engine. -
The latest incarnation of my VW Beetle MOC, in minifigure scale. Incorporating new backend shaping to assist with the difficult matter of the curves. Enjoy
-

[MOC] Lego Technic VW Golf GTI TCR
Nura posted a topic in LEGO Technic, Mindstorms, Model Team and Scale Modeling
MOC Volkswagen Golf GTI TCR in Lego Technic Dear friends of the LEGO Technic theme world, in this post I present you my latest MOC of the VW Golf GTI TCR. The model has an elaborate front axle for the front-wheel drive, a 4-speed DSG transmission, steering, brake and a pneumatic lifting system. I used two SBricks for control. My version is built with 3d printed wheels, but lego wheels fit, too. Drive: 2 XL motors Steering: 1 servo motor Gearbox: 2 servo motors Brake: 1 M motor Control: 2 SBricks Light: 3 pairs of LEDs First, I'll show you a picture and the YouTube Video In the following I would like to introduce you to the individual functions and the history of the project. Preparations: In 2017 I saw a photo of the prototype for the first time and as a VW fan I knew directly that this would be my next project. Because there were no blueprints from this vehicle, I took the blueprints of the basic model, VW Golf 7, and overlaid it with appropriate pictures of the vehicle. The scale was set with the choice of tires (Wheel 56mm D. x 34mm, Tire 68.8 x 36 ZR (15038 / 44771)), to 1: 9. After that I converted all dimensions into studs. Construction of the front axle: Now it was time to get the bricks out of the boxes. First, I built the front axle. The model has a front-wheel drive with Ackermann geometry, caster, stabilizer, suspension and brake. The drive axle for the fake engine runs in the lower part of the axle to couple directly to the XL motors in the back. Without consideration of the Ackermann geometry, I have created a YouTube video for the front axle. For the construction manual I am not sure if I should install the Ackermann geometry there. Some used parts are very rare and expensive. In the video you can also see how the brake works. By rotation, two rubber bricks are pressed against the differential. With the SBrick control, I have created a sequence that first lets the M motor press against the differential and releasing it again. Due to the scale a disc brake was not possible in the wheel. The suspension was massively strengthened in the course of the project, so that the vehicle weight is held up. Unfortunately, the stabilizer (red) has no longer a technical function. YouTube - Front axle Construction of the rear axle: For the rear axle, I initially had the idea that the wheels should have a slight camber. I have implemented this as followed. Maybe someone else can use this. However, this was implemented later due to the vehicle weight and the desire that a multi-link axle by VW is represented. Construction of the 4-speed DSG transmission: The construction of the transmission took the most time. I wanted a transmission that could be controlled blind with the smartphone. It should work reliable and without constant monitoring of the moving parts. In addition, it had to be so small that it fits "between" the front seats (The model has like the original only a driver's seat.) and under the seat, but in front of the drive module. Overall, it was very limited. Here is a photo of the final version, which is very trivial operated with two servos. One servo controls the 1st and 3rd gear, and the other servo controls the gears 2 and 4. This allows quick and smooth switching. An extra video is also available. YouTube - Gearbox Construction of the pneumatic lifting system: At that moment I was done with the chassis. However, the pneumatic lifting system fascinated me and in other MOCs something like that was already realized. Since there was still room for the necessary works, I developed and installed three modules with cylinders. Here's an example of how I built the front left cylinder. In general: I built and organized the entire model in modules. The chassis is subdivided into the following submodels: front axle, transmission module, drive module and rear axle. The rear lifting cylinder is integrated in the drive module. The front lift cylinders connect to the transmission module. Then all modules can be assembled to the entire chassis and fastened with a few connectors. Other modules are the fake engine and the dashboard with steering gear for the moving steering wheel. The conclusion has formed the body. Again, I worked with many submodels, so you could always work on small to medium sized submodels. This has especially facilitated my work in the Stud.io program. The entire model is already built in BrickLink’s Stud.io with all building steps. I am still considering whether I should offer the construction manual for sale or keeping it unique. Too many companies are copying MOCs and do not refer to the artists. You can find more pictures on BrickSafe or my Social Media channels on Facebook and Instagram. Give me a feedback and ask your questions here in the thread. I like to explain the things even further in detail. I love the render function in Stud.io :-) -

minifig scale reworking of TLG classics [MOC]
bamsham363 posted a topic in LEGO Technic, Mindstorms, Model Team and Scale Modeling
Enjoy, my scale reworkings all 6 wide -
Models in this thread: #1: Wrecker (60056 MOD) #2: Container Truck (60027 MOD) #3: Ice Cream Truck (70804 MOD) #4: Joe the Plumber's Badass Step Van (70811 MOD) #5: Sunshine Surfer Van/Volkswagen T2 "Bay Window" Camper Van (Creator 31079 MOD) Hi all, while everybody seems to be freaking out about "alternate models a 7-10 year old could build" I have a different suggestion to make: alternate models for grown-ups - we're AFOLs after all, aren't we? Of course what I'm thinking of are no real alternates - you will have to add quite a few parts. But what you - hopefully - get are more elaborate City vehicles that are supposed to go well with the modulars. As we all know Town vehicles are primarily designed for Children, they lack the complexity of the CC buildings. On the other hand they often have attractive colour designs plus great functional elements that are worth preserving. Thus what I'll try to do is to modify some vehicles according to the following rules: using the typical design elements of Town vehicles (windscreens, mudguards etc.) omitting most of the studs fixing holes where possible keeping all that’s nice and replacing all that’s too simple using not too fancy building techniques, models must be easy to reproduce use of stickers from the set allowed keeping or even enhancing the playability functions must be functions, devices shouldn’t be movable just by hand seating at least one fig - but under no circumstances in the center of the cockpit ;-) 100% Lego, no third party stuff allowed By saying no fancy techniques there is one - very important - exception: the wheels (but more on that subject later). This is the actual range of widths I'm building all my vehicles in: #1: 60056 Custom Wrecker The original model of this wrecker (see http://brickset.com/sets/60056-1/Tow-Truck) is one of my favourite town sets of the actual range. I really love its nice colour scheme plus there are some great design elements which I've tried to preserve as you may see. As said, wheels are very important in my opinion, that's why I try to avoid the usual City wheel/mudguard combination which leads to a certain monotony in town layouts, especially due to the fact that the same combination is being used on passenger cars and on trucks which makes no sense to me. Thus I try to use as many combinations as possible. Another advantage of this is that you get different types of wheels with many different diameters suitable for quite a few purposes. Another important aspect of this model is functionality - a tow truck should be usable for towing purposes. The original set is already quite functional, however, I wanted to have separate functions for the boom and for the lifting cradle. Plus both should be functions in the above mentioned sense, that means, not just movable by hand. That's why some technical stuff is built in - which is much easier with a 7w than a 6w form factor, as you may recognize. That's the way it works: Thanks for looking, some more pics on my Flickr. More vehicles to come.
-
A new home for my VW Collection, be it old or new or rodded, enjoy
-
I've got to use some points by the end of the year and I'm considering putting them towards the Bus, or the Beetle. I really like the bus but I'm not crazy about the red. I'm curious if anyone knows if there is list of color options I could swap out. Or if going to brickset to see if the color I'd like is available in all the pieces. I'm wanting to replace the red with lime green or a shade of blue. So my options are buy the bus and bricklink the color pieces i want to change(I probably have a good portion of them). Or buy the beetle and then bricklink the entire bus( of which I currently have about half or a little more of the pieces in my bricklink store) So what would you do if you were in my shoes.
-
[MOC] Esso Gas Station 1953
Norton74 posted a topic in LEGO Technic, Mindstorms, Model Team and Scale Modeling
Put a tiger in your tank!* - Part 2 Few days ago I presented the Volkswagen T1 Esso Service that was the first part of my latest MOC. Today I'm happy and proud to show you the second part: a classic Esso gas Station designed in 1953 by Dutch modernist architect Willem Marinus Dudok. My LEGO Dudok Esso gas station has the same features of the real one: an elegant design, a v-shaped roof on both sides, two gas pumps on a dark grey platform, different advertising signs and other stuff. The shop is on the front of the station; a detailed service garage is located at the back. There are a lot of details both outside and inside the building, let's take a look. In the shop you can find a big desk with a vintage phone, a cash register and a architect lamp. A big clock is positioned on the wall close to the shelves where you can see the oil cans and an old radio. Two neon lights and a fan are hung on the ceiling support. The garage at the back features a lot of utensils, advertising signs and other stuff. My VW Type 2 T1 decked up in Esso livery fits perfectly in this scene. Take a look at the Michelin Man (Bibendum)...I love it! The design of Dudok was simple and brilliant simultaneously. According to the mission he received from ESSO Netherlands, the station had to be functional and inexpensive to produce. It was just after World War II and raw materials were scarce. At the same time the road network grew and pumping stations had to be placed anywhere. 112 Dudok Esso stations were placed along the Dutch highways. Below an overview. Below you can see the real Esso station photographed at the National Automobile Museum Collection Louwman (The Netherlands) where was placed in 2004. I built this brand new MOC last winter and I’m particularly fond of it. More pics and info on my flickr photostream. *Put a tiger in your tank! was the Esso slogan during the sixties and seventies. All the best and happy building! Andrea - Norton74 -
It's Christmas time... What if Santa couldn't find his sleigh? I'm sure he'd drive a Vee Dub T2 full of gifts... Merry Christmas to all of you! Andrea Lattanzio | Norton74
-
Sharing my MOC 6 studs wide build Volkswagen type 2 Camper Van made for the Detective in modular building DO. Hmm..I reckon this will be useful during his long hours surveillance and investigative work. My other MOC vehicles for modular building: MOC Volkswagon Beetle Type 1 for Pet Shop: http://www.eurobricks.com/forum/index.php?/forums/topic/141253-moc-volkswagon-beetle-type-1/ MOD Cadillac v16 Convertible for Palace Cinema: http://www.eurobricks.com/forum/index.php?/forums/topic/121161-moc-1938-cadillac-v16-convertible/ MOC A4 Checker Cab for Cafe corner: http://www.eurobricks.com/forum/index.php?/forums/topic/123511-moc-1950-a4-checker-cab/ MOC Ford Thunderbird (First Generation): http://www.eurobricks.com/forum/index.php?/forums/topic/143150-moc-1955-ford-thunderbird-first-generation/
-
A revamped version with new elements from the latest LDD parts update! I especially like the SNOT portion of the roof's front section and the improved tail lights!
-
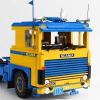
Here's what I know! - Set # is 10252 - $100 - Release in August, July VIP pre-sale That is about it. I'll post more info when I have it. Enjoy!
-
[MOC] Volkswagen T1 Esso Service | “canvas” pick-up
Norton74 posted a topic in LEGO Technic, Mindstorms, Model Team and Scale Modeling
Put a tiger in your tank!* - Part 1 This VW Type 2 T1 “canvas” pick-up is the LEGO replica of a real T1 registered in 1956 in The Netherlands. It was used by the M.v. Noord, a little company based in Amstelveen (close to Amsterdam) that sold and delivered petroleum for domestic heating. Pieter Grabijn, son in law of the son of the first owner, found it in a barn few years ago. It was totally rusty. Peter restored the red pick entirely and now the machine looks really appealing. Below the T1 pictured at the circuit of Zandvoort (NL). This LEGO T1 is based on my previous Road Service T1 but with a different livery. Canvas stitching technique is the same I've used before but this T1 has both the right side and the back side of the canvas rolled up. The tarpaulin is also a little bit lower. Ready to be delivered petroleum jerry cans are located on the load compartment. The license plate is an old Dutch one: PV 88 17. The writing on the load compartment sides means "Esso petroleum for your domestic heating" (It's written in Dutch). Few days ago I posted the T1 on my Facebook page and when the owner saw the post he couldn't believe, he was incredibly happy for this LEGO replica. He showed the T1 to his father in law (the son of the first owner) who cried for the happiness and for the good old memories the T1 reminded him. He still lives in the same address you can see on the doors and even the phone number is the same...This is really incredible! *If you were born in the seventies, then you remember the famous slogan of the Tiger... -
Only original Lego parts are installed on all vehicles. Volkswagen Golf MK1 from the 70's: BMW 2002 from the 70's: Porsche 911 from the 70's:
-
Since i got my hands on this beautiful quarter dome piece i knew that sometime i was going to use it in a little Volksrod but everytime i was trying to build the rest i couldn't get past the cabin section! Then out of nowhere, Calin https://www.flickr.com/photos/_tiler/ posts his beautiful Volksrod https://www.flickr.c...ler/24838347625 and without knowing it he solves my riddle!! That chair is exactly what i needed! The rest you can see it! Just because it wasn't very time consuming, there are some instructions...
-
[MOC] Oldtimer Volkswagen Service and Repair Workshop
Norton74 posted a topic in LEGO Technic, Mindstorms, Model Team and Scale Modeling
Hello folks! Few weeks ago I presented my version of the VW T1: the canvas covered pick-up for Volkswagen Service. Now I show you my last MOC, an Oldtimer workshop for Volkswagen "Bulli family". The right place for my T1 (and not only...). Here some pictures: In order to build the internal of the workshop I watched my real garage where I used to spend a lot of time restoring and repairing old motorcycles and bicycles. There are many tools and details in the workshop. [ Last winter I spent many nights to build this workshop and I'm very satisfied with this MOC. Soon probably others Transporter will be recovered in this garage… For more pictures, details and informations: flickr MOCpages -

[MOC] Nooteboom 8 Axle Semi Trailer
JaapTechnic posted a topic in LEGO Technic, Mindstorms, Model Team and Scale Modeling
LEGO Mercedes-Benz Actros 4160 SLT With Nooteboom MCO 121 by Jaap Kroon, on Flickr LEGO Mercedes-Benz Actros 4160 SLT With Nooteboom MCO 121 by Jaap Kroon, on Flickr After years making prototypes of steered trailers, we, JaapTechnic and LiftingBricks, finally made it to create a system to make a semi trailer with automated steering axles. This system uses the angular displacement of the fifth wheel to steer the axles. This all happens with pure LEGO powerfunctions. In the following video you can watch this system in action. In the video are the following models presented: Nooteboom MCO 121 semi trailer Mercedes-Benz Actros 4160 SLT Volkswagen Transporter T5 escort van Liebherr LTM 11200-9.1 build by LiftingBricks For the Nooteboom and Mercedes are building instructions available. The Volkswagen van will be digitalised for instructions end 2015, begin 2016. Nooteboom 8 axle semi trailer Functions: Lights 7 automatic steered axles by PF servos Length: 113cm (153cm extended) Parts: 2768 Mercedes-Benz Actros 4160 SLT Functions: Lights; front bumper and warning lights 2 steered axles by PF servo 2 driven axles by XL motor SBrick Length: 46cm Parts: 2722 Volkswagen Transporter T5 Functions: Lights; 24 LifeLites LEDs with customised circuitboard Frontwheel steering by PF servo Rear wheel driven by L motor SBrick Length: 32,5cm Parts: unknown Volkswagen Transporter T5 stuck in the sand by Jaap Kroon, on Flickr Lego volkswagen transporter t5 interior (WIP) by Jaap Kroon, on Flickr LEGO Mercedes-Benz Actros 4160 SLT With Nooteboom MCO 121 by Jaap Kroon, on Flickr LEGO Mercedes-Benz Actros 4160 SLT With Nooteboom MCO 121 by Jaap Kroon, on Flickr -
New box for 10220 Volkswagen T1 Campervan? http://i.imgur.com/LVrEpog.jpg