Search the Community
Showing results for tags 'Review'.
Found 810 results
-
Let me start with a little confession: while I've stumbled upon bits and pieces of the Doctor Who series in the past, I never really watched a full episode until last summer, when a friend of mine managed to convince me. I started with season one of the 2005 reboot, and was not really thrilled with it. But I kept going, and things got a bit more engaging. Then, after the long drawn 10th Doctor-Rose affair found its conclusion, and Tennant said his final 'I don't want to go.', I found my Doctor. I know Whovians are forever debating about who the best Doctor is, and I do not want to start a debate here. I just love the fact TLG included Matt Smith's 11th Doctor in this set, instead of making it a Capaldi solo one. Smith's incarnation is the most captivating of the reboot, in my opinion, and watching him go around as the Doctor is like watching a fireworks' show, waiting for that moment when the big shot will be fired. Does the new 21304 Ideas Doctor Who set keep up with these expectation? Let's find out. Geronimo! Set Info Theme: LEGO IDEAS Set name: Doctor Who Set Number: 21304 Price: US $ 59.99, GB £ 49.99, EUR € 59,99 Pieces: 623 Figures: 4 + 2 brick built Daleks Year of release: 2015 Links: Peeron, Bricklink and Brickset. Disclaimer - As it is based on a product based on an ongoing TV series, this review will contain references and possible spoilers. I would advise you to get your bearings on Doctor Who (at least since the 2005 reboot) before reading it. I'll include links to external sources (wikia articles, images and even few YouTube videos) to help non-Whovians, but don't blame me for not using spoiler tags. The Box The box, as usual with LEGO IDEAS sets, is more compact than those of other themed sets of similar parts/price range. Its size is 26.3 x 19 x 7.3 cm, and the cardboard is sturdier than that used for common LEGO boxes, meaning it's meant to be a collection item in itself, instead of just a container for the parts and instructions. Front The front shows a picture of the complete set, with the console and open TARDIS connected and under attack by a pair of Daleks, while the 12th Doctor and Clara run around in circles trying to find a strategy, or perhaps to understand why there are Daleks inside the control room, or even where the walls have gone at all... Meanwhile, a Weeping Angel and the 11th Doctor serenely watch the scene from a small window-like panel in the middle of the right side. A draw of a flying TARDIS, the LEGO, BBC and Doctor Who logos complete the upper part of the composition, while the age and set number info are in the lower left corner. On the right, a LEGO IDEAS logo also informs us that this is the 11th (coincidence? Rule 8: Never ignore a coincidence. Unless you're busy, then always ignore a coincidence.) set in this line. The background is composed of dark blue hexagons with lighter blue lines and areas of yellow-orange to lighten it and give more visibility to the mainly grey/blue hues of the build. Back The back includes two 'play feature' panels, one which is very reminiscent of the last shots of Time of the Doctor, with Clara and the newly regenerated 12th Doctor in the control room, and the other showing the moves you need to perform to open the TARDIS walls and connect it to the console area, while Capaldi sternly waits to be able to step inside the control room. At the bottom, you can see the four minifigs and a side view of the brick-built DalekTM. Each character is identified by his/her/its name and a 'REGENERATION' notice explains that there is no mistake, but the blur indicates the transition between 11th and 12th Doctors; whether the fez also regenerated into a sonic screwdriver is unclear and will probably be the cause of everlasting debate for future generations. Finally, a blue panel on the left, including info in six languages about the LEGO IDEAS programme, and the LEGO, BBC and Doctor Who logos fill the rest of the space. Sides The top of the box shows a 1:1 size shot of the 12th Doctor, flanked by a menacing Weeping Angel about to attack the 11th and Clara, while Matt Smith is probably taunting it. LEGO logo and set number are on the left. If you look carefully, you'll also notice a strange crack on the upper left. I'm not really sure if it's just an accidental feature due to un-careful handling, or if someone is trying to enter this universe via this scar in space and time. The bottom side is covered in the usual LEGO legal warnings and copyright statements, plus the dedicated BCC ones this time around. Contents Inside Upon opening the box, we find six un-numbered bags, and the instructions manual. Following the IDEAS tradition (with few notable exceptions), the set does not make use of stickers. Recoloured parts This set makes large use of re-coloured parts, or as others could say, is has been a perfect excuse for TLG to start producing more parts in (mainly) Dark Blue. Therefore, we have 8 Dark Blue Tile 2 x 2 Corner, 6 Dark Blue Tile, Round 1 x 1, 2 Dark Blue Plate 6 x 6, 4 Dark Tan Plate, Modified 1 x 2 with Clip Horizontal on End, 4 Dark Tan Plate, Modified 1 x 2 with Handle on End - Closed Ends, 24 Dark Blue Window 1 x 2 x 2 Flat Front, 14 Dark Blue Glass for Window 1 x 2 x 2 Flat Front, 4 Dark Blue Plate 3 x 3, 4 Dark Blue Brick, Modified 1 x 2 with Studs on 1 Side, 4 Dark Tan Brick, Modified 1 x 2 with Studs on 2 Sides, 4 Dark Blue Hinge Plate 1 x 4 Swivel Top / Base Complete Assembly, 2 Dark Tan Tile, Round 2 x 2 with Hole, 5 Dark Blue Tile 1 x 3 and 5 Black Plate, Round 1 x 1 with Open Stud. New pieces New pieces are equally as interesting. They include the two Dark Blue Tile 1 x 3 with decoration which form the POLICE BOX sign (4 of each), the Dark Blue Glass for Window 1 x 2 x 2 Flat Front with the St. JOHN AMBULANCE logo, the White Glass for Window 1 x 2 x 2 Flat Front with the Police Phone instructions, the 8 White Glass for Window 1 x 2 x 2 Flat Front with the windows pattern, the White Glass for Window 1 x 4 x 6 with TARDIS door interior pattern, 2 Dark Tan Dish 2 x 2 Inverted (Radar) with Dalek top dish designs, the Light Bluish Gray Tile, Round 2 x 2 with Gallifreyan symbols, the 2 Dark Bluish Gray Road Sign Clip-On 2 x 2 Square Open O Clip with Gallifreyan symbols, the 2 Pearl Gold Sonic Screwdriver, the Dark Bluish Gray Tile, Round 2 x 2 with Open Stud, the Trans-Clear Minifig, Neck Bracket with 2 Back Studs and the 3 Trans-Clear Tile, Round 1 x 1 with Pin. All printed parts are exceptionally good in quality and detail, and faithful to the source material. The only part which is slightly different from the original is the sonic screwdriver, not sporting the black on the handle and the chrome/metallic gray on the head. That is excusable, though, as the black part would be right where the minifig hand grasps the accessory, and a black paint there would be easily removed through use; moreover, it would probably be too difficult to have both the green and chrome/metallic paints on the head, and the printing process could turn the part into a mess all too easily. All in all, the part is readily recognisable, and works well as is. Rare pieces The set also includes a few rare parts, such as 10 Dark Blue Plate 2 x 2 Corner, a Dark Bluish Grey Minifig, Utensil Zip Line Handle, 3 Dark Bluish Gray Arm Skeleton, Bent with Clips at 90 degrees (Vertical Grip), 2 Light Bluish Gray Technic, Disk 3 x 3, 2 Trans-Light Blue Technic Wedge Belt Wheel (Pulley), 4 Light Bluish Gray Wedge 2 x 2 (Slope 45 Corner) and 4 Dark Blue Plate 1 x 3. Extras The extras include the usual assortment of small round plates, generic parts and tiles, cheese slopes and Technic bits. Of special interest is the second copy of the sonic screwdriver, which will allow both Doctors to carry theirs. Manual Front The front cover of the instructions manual has the same basic picture and composition as the front of the box. In addition to that, a link to the LEGO IDEAS website is provided, along with a note in 8 languages informing us that the same booklet is available in each respective language on the site. On the inside cover, we find a short text which gives us context and info about both the Doctor and the BBC TV show. The first page is dedicated to the 12th Doctor and Clara inside the TARDIS control room. This, along with providing a stylish start to the manual, gives us an idea of the material the set is based on. The main difference between the pic and the actual LEGO set is the orange colour of the tubes in the column you can spot right behind the Doctor. This difference seems to be related to the fact that the TARDIS control room scheme used in the set is that of the 7th season of the show, with Matt Smith's 11th Doctor's blue accents, while the photo is from the 8th season and sports Capaldi's orange. Here's a random page. As usual, pieces call-outs and step numbers help us during the build. The background is very similar to that behind the picture on the box and manual fronts, but with a more yellow-ish/tan hue. The manual, following the IDEAS sets' tradition, includes tons of info and details on both the source material and set design process. I limited the parts shown here to the above mentioned first pages and this, which is one of the last, giving us an insight on Andrew Clark, who submitted the original project on the LEGO IDEAS site, and his experience designing and finalising the set with LEGO designers. The very last pages are dedicated to the usual LEGO commercial ads, and since a LEGO Dimensions Doctor Who Level Pack is about to hit the market, what better product to show on this manual? Minifigures Following the order in which the minifigures are shown on the back of the box, we start with the 11th Doctor. 11th Doctor This peculiar incarnation of the Doctor displays one of the most recognisable looks in the entire series, with his distinctive bow tie, and the iconic (since seasons 7, mainly) waistcoat. For this set, designers decided to use his brown coat from season 7 (though it could have been a bit darker), which is one of the main attires for the 11th Doctor, even if not the one he used in the episode Time of the Doctor the set is supposedly based on. All in all, I really like this version of Matt Smith's character, and I've even come to like the red stripped shirt, which I did not particularly appreciate in the first images. The head has a double expression: the stern but satisfied look the Doctor sports when dealing with important matters, and the smiling face he uses when happy/joking, or, sometimes, when taunting his enemies right in the middle of a crisis. I know some lamented a lack of precision in the hair piece choice for this minifigure. I must say I quite like this part for him (it is the one I used to use for my custom version up 'till now). What I'd personally change is the hue of brown: the set uses a Reddish Brown, while I prefer, as more accurate, a Dark Reddish Brown. 12th Doctor The post-regeneration 12th Doctor wears the purple coat mostly used by Smith in the end of season 7, and only worn by Capaldi in the final moments of Time of the Doctor and in the first episode of season 8. As you can notice, the bow tie is gone just before the regeneration (check ), and so is the smile. The 12th Doctor is a sterner man then his previous incarnation, and his smiles are quite seldom, and mainly meant to scare his enemies. Also because of this, the head only has one print. Since the 12th Doctor is dubbed 'eyebrows', LEGO designers marked the characteristic feature making for an unmistakable resemblance.The hair piece is a new mould, and looks very good on this figure. It is sculpted with lots of details, especially on the back. Since, as already mentioned, a LEGO Dimension pack including another version of the 12th Doctor is about to be available, I managed to get hold of that too, to be able to show you a comparison between the two figs. The Dimensions one sports the usual (as of season 8) attire of Capaldi's doctor, dark blue with crimson red highlights. I can honestly say that I like both versions and I would be hard-pressed to choose one as the best of the two. Head and hair pieces are the same for both figures. Clara Clara Oswald, being the companion who followed the Doctor in his transition between the 11th and 12th incarnations, was the natural choice for this set. Her minifigure is indeed spot-on. I like both the torso and leg pieces, with distinctive, yet generic enough designs to be used for other themes, too. I may be a bit out of date with minifigures' printing styles, but I'm sure this is the first minifigure I own with the back of the legs printed like the front and sides, which I largely appreciate. Just like the 11th Doctor, Clara's had has a dual face print: a serene look, and a more perplexed one (who wouldn't be perplexed after dealing with Matt Smith's Doctor for a bit?). The hair piece is a common one, but still a good choice for the character. Weeping Angel Warning: this picture could turn into an actual Weeping Angel, which could either break your neck, or send you back in time to an era without LEGO, and then feed on our AFOL's despair. That said, the Weeping Angel figure is quite a surprise. Not for its design, which works very well, but because Weeping Angels play a very minor role in Time of the Doctor, and in most of the Clara era. To be perfectly honest, I would have expected a Cyberman to be in this set in its place. To the figure itself, now. As you can see, the detail of the vest is really good, and very reminiscent of that used for the Statue of Liberty CMF. The back of the torso has a print which is normally covered by the Chima wings, which are attached with the new neck bracket. The head has two faces: the calm, statue-like one, and the aggressive, maniacal one, which is very fitting for one of the most frightful and relentless enemies in the Doctor Who universe. The choice of the hair piece seems very good, too. Build Getting started The build starts with the control room, and, specifically, with its base. As you can see, this portion makes quite extensive use of Trans-Light Blue parts; too bad the rest of the build will cover them and make it almost impossible to spot them. Step on it Just a few more steps, and we have the control room floor, entrance platform and stairs in place. The supports surrounding the platform will remain empty 'till the very last steps of this portion of the build. How to build an hexagon The central column is treated as a separate part for most of its build. The lower portion, made of mainly Technic parts, will allow us to build the hexagonal console, which is no easy task with the current LEGO palette of pieces. You can see through the Trans-Light Blue cylinders that the column is strengthened by the use of two Technic axle parts. Keen observers will also notice that those pieces are of two different colours, one black and one gray. Whether this is meant to represent the internal mechanisms of the TARDIS, or it is a simple strategy for kids to better tell the two apart is not clear to me. Few round plates and two radar dishes complete the top of the column with a really simplified version of the Time Rotors. Almost there With the console in place and all the controls ready to be used, we are almost at the last steps of this section. Watch where you go! The railings, external control panels and movable monitors, the control room is now complete. As-sem-ble! Next up are the two Daleks, which are not considered as part of the minifigures, due to their brick built nature. The build is pretty easy, and modular. Many fans will be able to build their army, with different colours. The only exclusive part is the printed dish, of course. Ex-ter-mi-nate! Once build, the Dalek is ready to do his job, which is to ex-ter-mi-nate all non-Dalek life forms in the universe. As one would easily assume, they are not the best species you could encounter in your time and space travels. These specific Daleks, given their colour, seem to be based in design on the Time War variant, as deduced from the Dalek Colour Schemes and Hierarchy map. You looked shorter on TV Though the original Dalek design marked them as circa 163 cm tall, these LEGO Dalek, probably on steroids, are taller than a minifigure, meaning they are somewhere around 2 meters in (LEGO scale) height. Laying foundations And now we get to the other star of the set, the TARDIS (Time and Relative Dimension In Space) herself, or, as the 11th Doctor calls her, Sexy! Of course, we start from the base, which is an unusual 7x7 studs. This size is reached by the use of a 6x6 plate, two 1x6 and a 1x1 additional plates, and kept together by the overlying layer of tiles and smaller plates. Through the door, or maybe not One of the most peculiar features of this set is the fact that the parts composing the exterior door of the TARDIS are those opposed to the part of the build that actually opens up to reveal the interior. As counterintuitive as that may be, the explanation is quite simple (as we'll see more clearly in as short while): the back of the 'door' must be completely visible in the assembled-with-the-control-room stage, so it needs to be a whole wall. Fans may still mod their TARDIS so that the front doors are on the split side, but the inner face door is opposed to them. It's just a matter of personal preference. Almost a cabinet The rest of the walls are built very easily, as the window parts must just be stuck one upon the other in a repetitive manner. Four walls and a roof By adding the POLICE BOX signs and the roof, we complete the build and are almost ready to start to investigate the play features. I'll just spend a few words on the signs themselves by saying that though the gap between the two parts looks a bit awkward, it is better looking in real life than you could expect from pictures. This thing is huge! Due to the fact that it includes a raised platform that must match up with the console room, and the strange height/width LEGO ratio, the closed TARDIS is huge when compared to a minifigure, way bigger than its real-life counterpart. Nonetheless, it's a beautiful build and a great model to display. Finished set All together Once we assemble the control room and the open TARDIS, we get the full set, complete with its minifigures and brick-built Daleks. The set has a satisfying size, which gives it importance, and the parts connect with harmony, both in size and colour scheme. Inside the TARDIS As mentioned, the inside of the TARDIS includes a raised platform which connects with the one at the back of the control room. This can also be used to place and store your favourite Doctor, or Clara (the winged Weeping Angel and the Daleks do not fit in) when travelling through the time and space continuum. Ready... Connect! The two parts connect via a combination of Technic axle (on the control room side) and brick (inside the blue box). This link will keep the two in place during play, but will not bear excessive roughness. While the TARDIS is pretty swooshable, the rest of the build isn't, and should not be used as an extended space-ship mid flight. Bonus Images How LEGO Weeping Angels earned their name Is this Trenzalore already? Trenzalore How I met your Dalek Finally! Final Comments Overall, this IDEAS set is very faithful to its source material and pretty rich in both details and minifigs (counting the brick-built Daleks in this category for once). The colour scheme, though guided by the original one, is well done and harmonic. Moreover, you get two models, which can combine into a bigger one or be used separately, for both play and display purposes, and also offer great potential for mod-ers and moc-ers. Design & Colour scheme – 10/10 (Very accurate to the source material and rich of well-finished details.) Minifigs – 10/10 (Though most Whovians will lament the lack of one Doctor or Companion or the other, the choices made for this set are very good, and the design and detail of the figures are great.) Parts – 9/10 (Great variety of useful parts, a reasonable amount of new pieces, and quite a few cool printed ones (no stickers!).) Playability – 10/10 (As a Doctor Who set, the only limit to playability is one's imagination, and both Andrew Clark and the LEGO designers did their best to add nice play features to the set. The one I find most entertaining is the 'regeneration feature' shown on the back of the box, though!) Build – 8/10 (Nothing too complex, but some efficient solutions are used, along with quite a bit of SNOT-ing for the TARDIS and the hexagonal console.) Price – 10/10 (For a set linked to a license, this one is extremely well priced, as you get 600+ parts for 60 €.) Overall: 9.5/10 Excellent As always, questions, comments, and pic requests welcome! If you like my reviews, and would like to learn how it's done, please consider joining the Reviewers Academy: http://www.eurobrick...showtopic=20631
-
Just in time for Christmas 2015, LEGO has cashed in once again on the Frozen fever with… Special thanks to CopMike and the LEGO CEE team for providing this set! Set Name: Arendelle Castle Celebration Set #: 41068 Theme: Disney Princess - Frozen Parts: 477 Figures: 2 Minidolls + Olaf Year of Release: 2015 Price at Release: USD 60 Brickset Bricklink(not yet available) Flickr Set You might've noticed my slight pun in the first line - this set is based upon Disney's short film Frozen Fever, which I found so aptly named due to there being a Frozen fever in the sense of everybody going gaga over Frozen, while this short makes people even more gaga over Frozen and provides new outfits for Elsa and Anna that parents will surely have to buy for their little girls. I did see Disney's recent live-action Cinderella, so I saw Frozen Fever in the theater, but I watched it again online before writing this review. Rest assured that this review will be about the LEGO set and not about Frozen, but how come Elsa can suddenly sprout flowers and design clothing with the flick of her wrist in Frozen Fever? I thought ice was her thing? It makes absolutely no sense, and that's why Frozen Fever strikes me as a marketing ploy to sell more dresses to children. Anywho, I'm not going to let my gripes with the source material get in the way of reviewing, so let's get on to the pretty set before us. PACKAGING The front of the box has some lovely, vibrant colors as you'd expect from a Disney Princess product. The animated Elsa and Anna wear their Frozen Fever outfits, letting you know with subtlety what the set's based upon. LEGO has wasted no time in assuring you that the facade-like Castle contains an interior, including a Castle-rear pic right on the front. The back highlights the interior, with a bunch of scenes meant to show… roleplay, I guess? It shows you right off the bat that there are next to no true 'play features' in this set, not that a dollhouse-style building needs them anyway. The snowflake atop the Castle was too tall for the front of the box, so it's been wrapped onto the top. Else looks a bit lonely in the 1:1 picture, with no other pictures up here. I would have expected a scene with Anna, Olaf, and the mini snow-things. INSTRUCTIONS The instructions come in a single glue-bound booklet, similar to that of large sets like the Ninjago Airjitzu Temple, for example. I prefer this over multiple smaller booklets, if only because it means you can't misplace one out of three instruction booklets. I do speak from experience… The inside has just a simple lavender color with no frills added. I actually wanted to highlight this particular step because the designer chose to use two 1x1 bricks with clip to attach the door instead of the 1x3 brick with two clips. Perhaps it was done for structure, but I appreciate that the color scheme of the parts was kept consistent, as it often is not with the 1x3 being used. The back contains an ad for the Palace Pets sets and their show Whisker Haven. Note that it features Pocahontas, who has not yet appeared in LEGO form. Is it a hint? For the parts-list pages, please see here and here. STICKER SHEET Stickers are no fun and I'm less good at applying them than I once thought. Luckily all of the stickers in this set go on tiles or sides of bricks, if that makes it any better. For those that like to use stickers for customization, this set offers some lovely designs. I wanted to stay true to the intent of the design, so I applied them all. PARTS & THE BUILD Straight outta the box come four numbered bags (still transitioning from the old design to the new), one larger and one smaller dark tan plate, and the agua/light bluish green slide. Doesn't feel like a whole lot, but I already love all that aqua. NOTE: I inevitably missed some interesting parts in (I think) every parts picture. I will do my best to highlight them in text. Also, while I will try to be as accurate as possible, a lot of these colors look very similar and I might muck up the names of them now and again. Feel free to correct me. Bag 1 If it wasn't clear to you already, this set is a bright-parts and recolor treasure trove. Certainly new and very exciting are the stem pieces in lavender. The plain heads in medium lavender, light royal blue (Chima Eris color), and whichever pink color that is are also pretty cool, and I think one or both of the flower colors I picked are new as well. I forgot to highlight the 2x2 round plates with center stud, aka round 2x2 jumpers, which come in dark azure and white. Feast your eyes on the piles for anything else I forgot. Bag 1 builds the outdoor celebration stuff and the beginnings of the Castle, including nice ice tile-age. I was a bit worried building the balloon decorations that use the lavender stems - too much force might break them, and even placing the heads atop the flowers felt dangerous. Placing all of the flowers outside the Castle gets a bit tedious, but the result is worth it. Bag 2 Bag 2 contains considerably less colorful goodness than Bag 1, but still plenty of goodness on the whole. The real standouts would have to be the small leaf pieces new in white. A little bit of purple, sand green, and shades of pink help liven things up, as well as those roof-topping pieces in light aqua. I picked out those two light/Barraki eye pieces to show that, while all four included should be the same color, the one I put on the left is a lighter shade than the other three (one of which is on the right). Odd. The parts in this bag basically finish off the first floor of the Castle, and include Anna. Applying the stickers, especially on the door, was a bit of a pain (and my fingerprints are now embedded in the set), but the designs do look nice. Bag 3 In Bag 3 we hit the blues, or really the trans blues and the light aquas. I have really loved that light aqua color ever since I first got it in the Cars Tokyo Pitstop set, and it's great to see all of the useful slopes in that color (which are all exclusive to this set for now, if Bricklink leads me true). I was quite surprised to see that the 1x6 tiles are in fact printed, which confounds me a bit even though three are included in the set. But heck, of course I'll take prints! At this point we've made a lot of progress on the Castle, though it still needs a fake 1-brick wide roof to top itself off. Bag 4 Getting over the wonderful explosion of aqua in this final bag, there are some other exclusive parts like those Scala dishes in dark bley and Chima fire wings cast in glitter trans-light blue veering on trans-clear. I have no idea why the trans 1x2 brick isn't trans-light blue seeing as it's used as a continuation of the windows. It's a pretty color on its own, but it doesn't make much sense. Surprise! The Castle is finished at the end of this final bag. Leftovers Some people hate eating leftovers, but we can all agree to appreciate LEGO leftovers (I hope). Lots of pretty things here, like another lavender stem and orange unicorn horn, as well as many wonderful colors of bits and bobs. MINIDOLLS & Other Characters As usual for Minidoll sets, not a lot of characters. Luckily, you only need to purchase the other new Frozen set to get the other characters necessary for the scene, so things could be worse (like having Jasmine but no Aladdin). I'm really mixed on the Elsa and Anna in this set. Nearly everything positive about them has a negative. The unique hairpieces are nice (including Anna's new one), but Elsa's still needs to be white and not blonde-ish. The detailing on the outfits looks lovely, but Elsa's doesn't match the color in the source material, which has much more blue in it. Elsa's face kind of works, but Anna's really doesn't remind me of her at all, even with the freckles. I wish LEGO would gives its Minidolls more expressive exp<b></b>ressions, especially in the Disney line where they represent expressive characters. I'm also not a fan of the huge flower and how it sits on Anna's hair, but Elsa's new crown looks good. Those hairpieces do have really great styling all around. Interestingly, Elsa's cape is longer than the minidoll body, so that it can 'flow.' The effect kind of works, though it makes her fall over sometimes since the cape is somewhat stiff. Both hairpieces also have a spot to attach another accessory on the back. The cape has a nice design, despite being the wrong color. Unlike a lot of Friends hairpieces which are quite voluminous, these more contained ones look right at home on minifigures. Ginny and Luna are trying out some new styles. The buildable figures round out the characters of the set. Olaf looks recognizable, but as others have pointed out he looks a bit off without the strands of hair. He just looks a little wrong. The little snow-things that Elsa coughs up (literally) are bundles of cuteness, though. Even a little hair printing on Olaf would've helped. ACCESSORIES Unusually, this set falls a little light in the true accessory department. We only get Loki's staff, a few cups, ice skates, a bow, glittery blue fire, and Harry's acceptance letter from Hogwarts. Some other parts used as decoration could instead be used as accessories, though, such as the water wings and LEGO's version of the Halo sword. Chima breastplate not included. FINISHED SET Here's everything you get - the Castle, the party stuff, the characters. The colors all go together quite well, creating a bright and lively set in wonderful pastels, which I greatly prefer to bright primaries. As I like to do, let me take you on the grand LEGO tour. Outdoor Decor For the outdoor party scene, we get a table with some foodstuffs, stools that make wonderful use of the old rocket tip piece, a gift, and some balloon ornaments. I've already mentioned how the balloon ornaments were a bit frightening to put together, but they look absolutely stunning when done. The cake is nowhere near the size of the cake in Frozen Fever, of course, but it does approximate the design at a tiny scale. The gift makes use of some cool new-ish parts, but is otherwise lackluster as it's quite small and only contains a bow. I hope Anna wanted a new bow. Removable Furniture For whatever reason, a chosen few items from the interior get attached via jumper plates and are thus easily removed. I'm not sure why anyone would want to remove the fireplaces, and I can't see how that facilitates more play, but there you have it. The sand green fireplace looks really lovely, while the white one is just ok. The color scheme of the white one doesn't strike me as very fireplace-y. The bed has a pleasant girly color scheme with lovely sticker designs. The interior looks a bit bare without the furniture, so I don't really recommend removing those pieces. What's really odd is that not all of the furniture is as easily removable. If everything came out easily, it would make more sense to me. The Castle - Exterior The designer has really done a splendid job making the Castle recognizable. If you Google Image 'Arendelle Castle' you'll find that this set is really not so accurate at all, but I'd say it doesn't matter since one look at this tells me what it is. It's like the difference between what you think a person looks like in your head and that person's appearance in real life - both represent the person. This Castle really looks quite right, and quite pleasing. Of course, the whole facade design does strike one as kind of odd. Even dead-on you can tell it's flat, but turn it just a little and it really starts to show. Since the whole design works on the principle of merely approximating the shape of Arendelle Castle, I'm not against the facade choice. The sloping roofs would have been hard to pull off with legal building techniques and looking good at this scale (by my estimation, anyway), and this way the Castle has both a good shape and a very open, playable interior. On the ground floor, the Chima wings work really well as Elsa's ice fountain sculptures (albeit at a very small scale, once again). The dark tan of the ground doesn't mesh very well with trans-light blue, but it's understandable that the designer wanted to differentiate the ground from the color of the Castle walls. The tiling does make posing minidolls quite easy. Looks, some of Anna's Friends have arrived to join the party! The only design choice on the outside that I don't really like is the lack of window glass in the upstairs side windows. I would think the design could have been altered just a little to accommodate some large window panes. This way, Anna can comically escape her icy sister. The Castle - Interior Here's an overview of the backside. It doesn't have an awful lot going on, especially on the lower level which is left with quite some empty space, but it does have enough for plenty of fun. On the right side of the ground floor we have a nice grandfather clock that reminds me a bit of the one in The Burrow (though all they have in common is that they are both clocks), some cheery flowers, a bright chez for Anna to lollygag about, and a painting on/in the wall. If the trapeze artist losing her shoe is some sort of reference, it's lost on me. There are ice skates in the clock (makes perfect sense), which have the unfortunate side of effect of forcing you to always have a container were you to re-use the stickered part. On the other side is a pretty stickered rug that ties the room together (literally, it's structural), and the sand green removable fireplace, re-instated in its rightful place. Elsa can sit by it to get warm, which I'm sure she loves to do. In the bedroom upstairs, I've painstakingly recreated the scene from Frozen Fever in which Elsa wakes up Anna. I hope you like my expert figure-posing skills. Another nice rug in here, by the way. Or perhaps it's Elsa's bedroom, and Anna would like to know if she wants to build a snowman. If not, Anna can make a quick getaway on the conveniently located slide. Speaking of the slide, it's the only real 'play feature.' Elsa does indeed slide around on ice in Frozen Fever, so it kind of works in the context of the scene, though I had to try many times to even get the figures to slide down so it doesn't really work as a toy thing. Oh well. Better than another spiral staircase, maybe? THE END I've already said a lot, so if you've read it all, I commend you. If you haven't, here's where I recap everything. Parts - This set is a tremendous parts pack, provided you like the sorts of colors on offer. There are exclusive re-colors to be had, the highlights of which would have to be the lavender stems, white foliage, and all of the aqua. Really great stuff there. Figures - As I detailed above, I have issues with these figures. The have pretty dresses, but there are problems. The hairpieces are quite good and usable on minifigures, which is a big plus. Unless you or your loved one is gaga about Frozen, I wouldn't buy this set for the figures by any means (especially since Olaf is coming in a polybag sometime). Design - Some may fault the facade design, but I don't. Overally, the model pleases the eye, and reminds one of the source material well. Tan and 'normal' shades work well with the aqua and pinks, coming together for a fun-looking and vibrant set. Price - Here's the one thing I haven't touched upon yet. Almost all of the Disney Princess sets seem a little overpriced, by five or ten dollars if we're talking USD (which I always am). This set would make a much better buy at 50 USD than 60, but even at 60 I can feel it. The Castle is almost substantial enough that 60 seems ok. I can't comment on the price in other parts of the world, which will be much higher as always, but perhaps the differences in price possibilities apply to your currency as well. Overall, I'd say this is a fun and worthwhile set, one that I would definitely recommend for your consideration either at full price or eventually for a few dollars/euros/yen less. Yours truly, CloneyO, signing off.
-

Review Review: 70816 Benny's Spaceship, Spaceship, SPACESHIP!
Rufus posted a topic in Special LEGO Themes
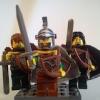
Due for general release in June, Benny's Spaceship is possibly the most eagerly anticipated set of the year so far, and certainly that of the LEGO Movie range. Sporting the approximate livery of the early 'Blue Era' Classic Space sets, and the ringed planet CS logo, the ship might be considered a spiritual successor to the exalted 497/928 Galaxy Explorer: regarded by many as one of the finest LEGO sets of all time. I was lucky to win this set as a prize in a speed-building competition at the Eurobricks Event 2014 - though they were selling the set at the LEGOLAND Park. Let's see if the model lives up to expectations. Review: 70816 Benny's Spaceship, Spaceship, SPACESHIP! Set Information Name: Benny's Spaceship, Spaceship, SPACESHIP! Number: 70816 Theme: The LEGO Movie Release: June 2014 Parts: 939 Figures: 5 (including Astro Kitty) Price: GB £<unknown> | US $99.99 | EUR <unknown> | AU $<unknown> | CA $<unknown> | DKK 899 (as I recall) Links ... Shop@Home ... Brickset ... Bricklink ... Peeron The Box Click for a larger frontal image The ship just about squeezes on to the front of the glossy box; not helped by the enormity of the LEGO Movie logo which obscures part of the model. Behind is a faux-CITY backdrop, picked out in contrasting orange to highlight the mostly-blue set; there's a lovely use of parallel lines from the film-strip motifs flanking the long ship to give the illusion of speed, spoiled only slightly by the reverse perspective of the film strip in the top left corner. The five figures occupy the bottom right corner; they are shown again in 1:1 scale on the box top. The design of the rear of the box is rather clever. The film-strip decorations here diverge in a pattern resembling a movie clapperboard; the space between is bisected by the LEGO-ish fencing, and the resulting halves filled by the ship and its various accessories respectively. Click for a larger image Various play-features are demonstrated in the insets along the bottom - we'll see them in action later - and the final inset reminds us that the set is from the LEGO Movie - if the gigantic logo on the front was too subtle. I am pleased to see that the box opens with side flaps, requiring no tearing to get inside. The Instructions The two manuals come in a cardboard-backed bag, so mine were pristine. Both are of similar thickness; their glossy covers have acres of space making the ship look a little lost. You will be delighted to find that the Win! page at the rear of book one has had a long-awaited makeover. Inside, the building steps sit against a CREATOR-style blue background with yellow edging. This and the blue and grey hues of the model itself combine to make the instructions rather dark, as best seen on the introduction page; however, I didn't encounter any colour confusion during the build. The instruction steps are nicely paced, and throughout there's the feeling that you're making progress; though some steps have you adding only one part, it's usually an important part. The rear of manual two contains the usual set inventory; click the links for pages one, two, and three. Stickers Well, we knew there would be some. The decal sheet is printed on clear plastic; the large number of white decals necessitated the use of a black background for the photo. I was disappointed to find that the Classic Space logos on the large blue tails are stickered; however, that of the 2x4 slopes is printed. Still, at least this means you could potentially use the stickers elsewhere. The rows of computer screens on the left are shout-outs to these pieces which sadly are no longer produced; centre-top is a temperature-gauge panel featuring the characters LL20791. If you need me to explain the significance of 'LL929' then go and read this! The Parts Seven polybags (officially 'pre-packs', I learned in Billund ) each build a separate module; see them all here. It is possible to build each separately, and assemble them together at the end, but there will be a few pieces left loose until you put them all together. Bag One builds the smaller ships, Emmet, Wyldstyle and the Robot Pilot: Highlights of this selection for me are the four black inverted bows, new to me but in several sets since last year; the gun with clip, which features in several Movie sets; and the Piece of Resistance, new here in (I think) pearl dark grey Flat Silver. New in blue and in a separate bag at the bottom right is Wyldstyle's hoodie piece, which we'll see later. Classic Space is represented by the 1985 droid body, the 1978 plate with handles, and the space seat bracket which first appeared in 1984. None are especially rare nowadays. The remaining modules all build the ship; I've partnered two together for speed. More space seats appear in modules two and three, which begin to show off the colour scheme of blue, greys light and dark, black and yellow. The incongruous red brick will be buried deep inside the model, you may be relieved to know. It's a fairly unremarkable selection here, but you will be pleased to see that the Classic Space logo is indeed printed on the 2x4 slope. This part never featured a logo in the original Classic Space sets; it wasn't released until 1999. Whether TLG have deliberately avoided using 2x3 slopes (which did appear with the CS logo) to prevent flooding the classic market is anyone's guess. I've also shown a close-up of the space seat pieces, and this inverted 2x8x2 double-curve which appears only in two other sets since last year. Benny and Astro Kitty first appear in bag five, shown here with bag four. The big cockpit canopy from the latest UCS X-Wing, here in trans-yellow, is hard to miss. Note that the jumper plates (centre-bottom) are the newer mold design with a lip and central stud-grip; to the right of these are four 12L flexible hoses which appear in several Movie sets. Highlights of these two modules are the trans-yellow 1x4 wall elements, found previously only in 2010's Lunar Limo; the three 1x1 plates, new in pearl gold (one is spare); and the new 2x2 corner tiles, found only in the Friends Sunshine Ranch and the Simpsons House. The printed 1x4 tile is worthy of mention. In the instructions and set inventory, the printing is shown as 'MA-XXXXXXXX', so I assume the characters are chosen at random at the time of printing, effectively making each set unique. I'll be interested to see which codes others get. There's more Classic Space appeal in bags six and seven, and I'm not talking just about the two more CS logo slopes. Two jet engines, first appearing in 1981 and last seen in 2010's Luke's Landspeeder, accompany the obligatory loudspeakers/manoeuvring thrusters which no Classic Spaceship should be without. There are more droid body parts, here used for their original purpose, and accompanied by the original droid arms, which are still in regular use today. There are even a couple of the original 2x2-2x2 brackets, here in black. The big Technic shooters are new with a yellow tip, but I don't suppose you care. The Figures From left to right: Robot Pilot, Astro Kitty, Space Wyldstyle, Benny, and Robo Emmet. I'm not sure how many of these (or at least their costumes) were in the Movie; certainly Emmet did the robot head thing later in the film, and Benny is Benny. I've only seen it the once. We'll start with the boring characters. Robot Pilot wears an 'evil-Octan' flight suit over - interestingly - a suit and tie . His head wouldn't look out of place in the Star Wars universe, though there is no alternative 'face' on the rear. Neither is there for Robo Emmet, but at least his aluminium foil head continues round the rear. Apart from the head, Emmet is very similar to his Collectable Minifigure equivalent, except with light bluish grey hands ... ... and silver printing on the feet, which continues onto the side of the legs. I can't recall whether this featured in the film. Next up, the girls (assuming Kitty is a girl; you never know!). Kitty has the pearl gold 1x1 plates as her feet; the rest of her costume resembles a blue space-suit, with its own CS logo printed - albeit badly, in my case - on the 1x3 arch. Her head is designed to look like you're seeing her face through a blue helmet, and it's reasonably successful. Space Wyldstyle is - in my opinion - the highlight of the figures. She's got a curvaceous torso, similar to her regular black outfit2, but with a Classic Space-esque motif which continues onto the legs, and round the back; best of all, she's got a spiffing hoodie which is a separate piece, and I hope we'll see more of that outside the Movie range. Note that, unlike her black outfit as it appears in the Super Cycle Chase2, she does not have a printed arm, and there is a black mark on the torso neck, suggesting she's Made in Denmark. I expect Benny will be sought-after, at least because he only appears in this and the Sea Cow - the two most expensive sets in the range. Here he is with a classic blue spaceman (Benny is at positions 1, 2, and 4 if it's not immediately obvious ): I like the way that Benny looks like an aged classic figure without being too similar - CS logos lose their gold by fading far more easily than they get scratched, and the helmet is of course a new mold. His classic smiley is slightly different to the older ones, and he has his crazy manic look on the reverse. Benny's helmet has a much thicker chinstrap than the original, itself of the 'thick chinstrap' variant; the alternative 'thin chinstrap' type was notoriously prone to cracking: hence the joke with Benny's. I seem to have both thin and thick types in my CS collection. Benny has been designed to be distinct from the generic Space figures - mostly likely to make him a unique character, rather than to prevent upsetting the market for those who stockpile classic space figures. The Build To cut down on the length of the review, I've chosen to show the build process via a series of thumbnail images, with a few larger pictures to highlight interesting techniques. Module One builds the smaller ships; you'll get to see them later, but see here and here for their unstickered versions. The instructions direct you to assemble the ship as you go, but modules one and two are built separately until the end of bag 2; I've build each module individually. I wouldn't recommend this, as it makes attaching some of the later sections a little tricky. Click each thumbnail for a larger image: The rear section forms a cross of Technic rectangles, with tiling suggesting function to come. Onto this is bolted the forward cockpit and centre section, mostly built onto aircraft fuselage bottom parts. Next come the wings and middle/bottom engine ... ... which slot into the rear cross section to produce the following mechanism: Pushing the engine in slides the wings out. Simple yet clever; we'll see what effect this produces later. Note the three pronged plates at the inboard edge of each wing - these are used to attach the big Technic guns. Now some bitty sections are added: some as sub-builds, others built directly onto the emerging ship. In the first image, you can see how the engine intakes are created as SNOT-mounted castle windows; the octagonal section at the lower right contains an intriguing trench whose walls a formed of 2x4 SNOT brackets: it too me a moment or two to work out what this was for. Image two shows the big rear engine mounts, with some SNOT panelling disguising Technic beams, and a plate with some minor greebling and two droids. Finally some smaller sub-builds complete the ship. The Classic Space logo'd flaps contain a couple of nice tecnhiques: Firstly, the prongs of the trap door piece are 'converted' to Technic size with the use of stud-pins, creating a perfect fit to the 1x4 Technic bricks. Kudos to the part designers here for their forethought! I was delighted to see how the radar dishes are attached to the 2x2-2x2 brackets using an aircraft wheel hub, which effectively acts as a stud reverser here. A brilliant use of an otherwise unremarkable part. Note also the 2x2 round tile with centre hole, here holding an inverted stud. This is also used to attach the jet engines to the blue tails in the final module; it forms a very strong attachment. There are several of this very useful part in the set. The Finished Model Spaceship, We'll start with the little ships, which are rather cute: Two identical blue/grey flyers bear a distinct Classic Space resemblance with the 3W cones attached to space seat pieces. The trans-yellow canopies are stickered to produce what I suppose is a Head-Up Display; note that the 82/28 printed display tile is mounted upside down in the '28' position, for no particular reason that I can fathom. Underneath this are blue male clicky-hinges, one on each side, which are the attachment points for these ships onto the wing pieces of the main ship. Spaceship, Next up is the diminutive enemy craft: a dinky one-man ship stickered with the space-Octan logo: I really like this. The upsloping flag panels give it a vampiric look, helped by the purposeful-looking weaponry and powerful engines. The livery is to my eye somewhere between Blacktron and Space Police, though I confess I'm not too familiar with either of those lines. The inside is roomy, and the Robot Pilot sits comfortably in what is essentially a flying cockpit with wings. SNOT brackets hold the wings in place firmly, and a special mention goes to the SNOT-mounted 1x4 bows, attached cleverly via a headlight brick and a 1x1 brick with side stud. The three ships make a nice little playset on their own: All are swooshable, making for a nice aerial battle if you have three hands. I guess the blue ships are meant for atmospheric flight, as they aren't exactly airtight (though that doesn't seem to have been a problem for TLG in the past3 ). SPACESHIP! Click for an alternative image Similar to promotional pictures and the box art, this view will be familiar to many. The frontal oblique angle tends to emphasise the sleek low-profile design, and disguise the true size of the ship, which came as a bit of a surprise to me. I do like the gentle tapering of the front, both laterally and in profile; I can live without the flick-fire missiles, but the shape would probably look a little odd without the forward outriggers they are mounted to. The nose-cone is rather reminiscent of 1981's 6929 Star Fleet Voyager4. The low-profile design is even more apparent when viewed from the front; I could imagine the ship would be very streamlined if that mattered in any way in space. Admittedly, the overall design with its sleek nose, wings, and lovely but superfluous engine air intakes looks rather more befitting an aircraft than a spacecraft: a role at which it excels in the film, as I recall. Click each thumbnail for a larger image Round the back, the three large engines have exhaust flames formed by 1x1 round tiles on stud pins; there are only four on the bottom/middle engine, as two of the stud holes are used for 3L friction pins; these can be replaced if you like to keep things consistent, with only minimal risk of the central axle sliding out. See an oblique view of the engines here. I love the way the oblique-mounted tails sit almost parallel on each side. This side view isn't especially dynamic (click the picture for a more 'action'-esque shot), but it demonstrates some important points. Firstly, the wedge-shaped profile is most apparent from this angle: the rise from the skinny nose to the bulky tail is quite dramatic, and the angle perfectly extends the rake of the cockpit canopy. Click for an alternative image Secondly, the underside sits flat on whatever surface it is placed: there is no landing gear; and not even any inverted domes to reduce scratching when it is inevitably slid along the antique dining room table. I'm disappointed by this, but not particularly surprised: this is very much an action set; however, since the model will undoubtedly appeal to casual adult fans even beyond the usual AFOL demographic, it would be nice to have some way to display it. A UCS-style stand would work, but if given a choice I'd plump for retractable landing gear, which would help to disguise those ugly Technic blocks which are all-too visible under the wings. There is, after all, plenty of room for landing gear underneath the wings, though you'd have to modify the front end somehow to make a tripod. This is the best view to appreciate the ship's overall shape: the sides slope gently at the front, with the angle becoming steeper around the centre section, until it sweeps outward around the wings, and tapering again at the rear. Does it remind you of anything?5 On the whole, the colours work well here, though some of the black is a little incongrous, particularly the flick-fire mounts at the front. I'm not so keen on the blue plate on the base of the middle engine; this is blue to ensure all the 2x8 plates in the set are the same colour. The shape is admittedly less easy to discern from the top, but you do get to see how each section of the ship bulks out progressively front to rear. Click for an alternative image This is an excellent time to comment on the stickers, which are present I think more for the Classic Space reference than because they add to the model; you can compare to the set without stickers here or here. Certainly, the 'LL929' decals are part of the set's charm, and the white stripe along the sides of the cockpit looks smart, even if it isn't completely essential. The CS logo stickers on the rear tails are a must; they look great and are easy to apply, unlike some of the others as we shall see later. You can easily swap out stickered pieces for spares as none are placed across multiple pieces. As we move toward the rear, the bulk of the rearward hull becomes apparent, and you start to get a better idea of the size of this thing: Click for an alternative image Note the manoeuvring thrusters - a prerequisite of any Classic Space vessel; though here they have the 'green-for-starboard, red-for-port' lights configuration of aircraft, real or LEGO (these days, at least). The shapely contours of the rear engine casings can be seen at the back. The gaps between the body and the wing flanges are a little unsightly - exposing the Technic bricks as they do - and not altogether necessary, since the flanges do not need to lift beyond horizontal and indeed will flap around if the ship is inverted. You can see this gap clearly in this three-quarter view, which is otherwise a lovely angle. Click for an alternative image Note the Technic clutch pieces forming what I suppose are exhausts from outrigger engines, in homage to the great 497/928, though they are diminutive next to the three enormous main thrusters. Under these are the firing triggers for the big Technic guns. Some blue slopes make for neat C-shaped contouring of the rearmost hull. Features Now we've had a good look round the outside, it's time to see what the ship can do. First up, a closer look at the nose section: Note the modern take on the Classic Space 3x6 slope. The huge, detailed logo is lacking, but the dark grey stripes and the contouring of the corner wedges do help to smarten and modernise the look. I like the way the latters' angle is continued forward, tapering to the blue nose cone. Again, the black flick-fire mounts look a little out of place; I think dark or light bluish grey would have been a better choice. Note how the cockpit canopy sits flush with the 1x3 slopes at its rear, just like in the UCS X-Wing. The big cockpit canopy can open to ninety degrees, revealing a spacious interior with seating for three, even allowing for hoodies, airtanks or pieces of resistance. There's even space for coffee cups or radios, though Benny's radio will rattle around with nowhere to clip it. Two modern printed control panels sit under red and green lights: presumably Benny has trouble remembering left from right. One of the Classic Space computer stickered panels is partly visible; this one is nicely applied, the other is wonky despite my best efforts. Here are the three humanoid protagonists in situ: Wyldstyle's seat is raised a little higher to allow for the join between aircraft fuselage bases; I think she'd choose this seat. Although Emmet can sit comfortably even wearing his Piece, his helmet prevents closing the cockpit lid fully in this position. Removing the Piece allows him to lean back slightly, solving the problem. You can see this view of the cockpit without the figures here. Behind the cockpit, we find the 2x4 SNOT bracket-lined trench which is where, of course, Astro Kitty sits, as I'm sure you've figured. I hope her costume is indeed a spacesuit, as she's open to vacuum here. She has another control panel, this time in '82' configuration, but no way to use it unless her whiskers are more than just sensory. She doesn't actually attach to the yellow round brick, so the droid body behind acts as a kind of latch to stop her falling out. Pulling the black bush-pins behind ... ... allows the octagonal section to separate entirely, creating a little flying saucer for Kitty. It isn't clear whether this is a deliberate feature, and the black pins aren't easy to pull out, but it's kinda cool to have a section that separates. Kitty's flying saucer is heavily armed with those spring lasers. I'm sure kids think they're awesome, but I hate them, and their placement on this model - in the place you find most natural to put your thumb if picking the ship up with one hand - will ensure they soon disappear behind the furniture. No wonder the set comes with a spare. It is certainly intended for the saucer to hinge - lifting it reveals another compartment: Here Emmet and Wyldstyle can sit and do important things, not excluding drinking coffee, though the computer panels suggest these things should include work. It isn't quite possible to close the lid with them sitting there, unless you remove hoodies and Pieces and whatnot. See the section without figures here. Note the 'LATCH' stickers flanking the saucer. The irony? It doesn't latch. I would guess this area is the engineering bay, as the forward area contains tools, and at the rear is a stickered window looking at a dalek brick (1x1 with studs on all sides) with a yellow gem in each face. I presume this is meant to be a power source, dilithium crystal or whatever. It's a nice touch which would be a whole lot easier to see were it not for the damn sticker. It's a nice decal, but it decided it would immediately attach itself at a kooky angle, and removing it to reposition left half of the adhesive behind. And this is why I HATE STICKERS. A note on the black and yellow parts visible in this and the previous shot. There's a lot of black and yellow in the set, referring to the bumblebee stripes of the original Blue Era CS sets, but it is used more as filler rather than decoration. Perhaps that's a good thing, but I for one wouldn't be averse to a little more black and yellow striping on the ship. Progressing towards the stern, we encounter the radar dish which till now I've left in the 'down' position. It lifts in a manner reminiscent of the rear radar of the great 6980 Galaxy Commander4, except this one rotates too. Underneath are two little droids very much in the style of the 1980s robots which first appeared around 1985: I presume these are repair droids, judging by how they are stowed away, but I guess they could be multi-purpose. Another thoughtful and unexpected touch. Now we come to the flagship feature of the set: the extending wings. Pushing the centre/bottom engine in extends both wings outward in a single, smooth, easy movement: Click for a larger image This pushes the big Technic guns into their 'ready to fire' position. It sounds a little lame, but it's really rather effective, and fun; also, it greatly increases the wingspan, particularly if ... ... you attach the little blue/grey ships to the wingtips: Note how one wing folds to allow the little craft to dock; if the other wing remains extended, it perfectly continues the taper of the wing. A beautiful feature. As I was saying, with the smaller craft attached and the wings extended, the wingspan is very impressive: As, indeed, is this ship as a whole. ... But is it Classic Space? Well of course it isn't, you silly, it's a LEGO Movie set. Still, you'd be forgiven for thinking otherwise, even allowing for the clash of old and new and grey, and even though the ideal comparator - the iconic 928 itself - isn't shown here. (My restored Classic Space sets are packed away, and you can't dismantle and rebuild these old sets willy-nilly without cracking a few parts on the way). Benny's spaceship is a homage to the original: it is rather more a modern take on the old classics; perhaps what TLG would have produced today had the Blue Era line miraculously continued to the present. Call it Neo-Classic Space; with the LEGO Ideas (formerly CUUSOO) Exo-Suit coming later this year I do hope for a bit of a Classic Space revival. Conclusion Even without the nostalgia, this is a cool ship. It is sleek, streamlined, yet sturdy; there is just the right balance between functionality and greebling; it is fun for play and great for display. Add in the Classic Space charm and the set hits another dimension of awesome. There are things the designer might have done differently: the ship could have been built with an opening rear, like 497/928, or with separating sections, like 6980; however, I think they were wise to keep the set different enough to prevent it being branded a re-hash of an old classic. I would like to have seen landing gear, or other ground-based activity, which was one of the charms of the old range; this is very much a model for swooshing. But it's still pretty awesome. Of course, I'm writing from the perspective of an AFOL who fondly remembers the originals, and my definition of cool might not match that of the set's target demographic, or even younger AFOLs to whom Spyrius was perhaps the epitome of awesome. Because, let's face it, the model wasn't included in the Movie, and subsequently made into a set, just for us die-hard AFOLs; it is there to appeal to that other mysterious - and much larger - group of people: those who had LEGO as a kid, but no longer routinely collect or build LEGO, but who just happen to be the right age to be taking their kids to the cinema. Design & Build 9 She's a beautiful and cleverly-designed ship, and an engaging and enjoyable build; a point is lost only for the lack of landing gear. Parts 7 There are a heap of big parts with limited uses, so you'd be unlikely to buy the set as a parts pack unless you're building Neo-Classic Space. Figures 9 Four of the figures are exclusive to this set, and Benny is only available otherwise in the pricier Sea Cow; you've got to love Wyldstyle's outfit. I'm not sure quite how collectable the figures are, though. Playability 9 Opening hatches, detachable ships, a rather one-sided battle with a dinky black ship, shooty things and extendable wings - the set is a load of fun. If I have one concern it's that the ship might be a little too large for small hands to handle easily, but I'm sure TLG have tested for this! Value 8 It's a little hard for me to judge as I don't yet know the UK price, but based on US $100 the value doesn't look so great part for cent. However, you do get and awesome ship and a bunch of exclusive figures. Overall 84% My Score 9/10 For me, this set is the highlight of the LEGO Movie range. If you're a TLM aficionado, or a Space fan, or you like anything that flies, or you just want a cheaper Benny, then this set is a must. Thanks for reading! I hope you enjoyed the review. Please leave a comment! Rufus References & Acknowledgements More pictures on my flick r album Photo credits: [1] Rocket Brick at Marutan.net with some great Classic Space resources [2] Picture and Link to Clone O'Patra's 70808 Super Cycle Chase Review [3] Greg Hyland's comics at FBTB [4] Star Fleet Voyager and Galaxy Commander pictures from 1000steine via Brickset [5] Classic Space Logo slope by drdavewatford at Gimme Lego Thanks to KimT for the prize, CopMike and Bonaparte for the Event organisation See other The LEGO Movie reviews here -

[REVIEW] Timmyton 5.5 Robotic Shark (by Builderdude35)
DamonMM2000 posted a topic in LEGO Technic, Mindstorms, Model Team and Scale Modeling
Here is my model review of the Timmyton 5.5 robot shark built by Builderdude35. It is built using only one 31313 LEGO Mindstorms Ev3 set. Technical features: 1 programmable Intelligent Brick, 2 Large Motors, 1 Medium Motor, 1 Color Sensor, 1 InfraRed Sensor -
It's that time of year again when the days get shorter, the nights get colder, and children all around the world stare longingly into warmly lit toy shops and prepare their wishlist to send to Santa. This is also the time when The Lego Group releases their latest Winter Village set which has been an annual tradition for the past seven years. These sets have been very popular, especially among AFOLs, and are always highly anticipated. However, while some entries in this series have been more popular than others, none has been as controversial as this year's set, the Winter Toy Shop, which is a re-release of the first Winter Village set, 10199 Winter Toy Shop from 2009. It seems that many think that this set didn't need to be remade and would have preferred a new set instead, or that it is not different enough from the original and will be redundant in a completionist's collection. Does it deserve all the hate? Let's find out. Disclaimer: I don't own the 2009 version, so I can't compare them visually, but I will do my best to let you know what is different in this version. If you do need a visual reference, you can refer to Svelte's excellent review of the original. Set Number: 10249 Name: Winter Toy Shop Theme: Creator Year of Release: 2015 Pieces: 898 Minifigs: 8 Price: £59.99 / $79.99 / 69.99€ S@H description: S@H Bricklink Brickset The Box The box art of this set is similar to that of the original, but there are some notable differences. The Christmas tree is on the right side of the image this time while the park bench is on the left and of course it features this year's design for Creator boxes with the dark blue stripe along the right side and the "Expert" logo in the top right corner. There's also a small picture of the back of the toy shop and the background looks less cartoony than on the original. The back is also very similar, showing a different angle of the toy shop along with some close-ups, although this time there is no minifig lineup. Instead, the minifig lineup is on the right side of the box. It also includes the accessories that each minifig comes with and some of the toys. On the left side of the box there is a thumbnail of the box art and the set name in six different languages. They also want to make sure that you know that there are batteries included by saying it in dozens of languages. The top of the box features the inventory and a 1:1 scale reference with the female caroler. On the bottom there is a picture that reminds you that there is a light brick included in this set, in case that wasn't clear from the front of the box, and it confirms that yes, it is a bad idea to put it in water, in case you were planning to go swimming with your Winter Toy Shop. The Contents Inside the box there are two instruction booklets and two groups of bags, one for each instruction booklet. While two groups of bags is not as many as there usually are in other sets of this size, it's still better than the first version of this set where the bags weren't numbered at all, so this makes the build a bit easier. The large bag in Group 1 and the two large bags in Group 2 have a white stripe going down the middle of the bag and only have one group number printed on it along with some other number and some kind of scan code. I have no idea why they made this distinction for these bags or what that code is for, so if any of you know the purpose of this, please let me know in the comments below. Here is a random instructions page. As you can see, the building steps can get quite challenging as they sometimes include many different pieces in one step, especially when it uses a lot of brown pieces which are very dark and hard to see in the instructions, living up to the set's status as an expert-level set. Most of the time, though, the instructions are pretty clear and easy enough to follow. There are some parts in new colors in this set that weren't in the first version or any other set until now, such as that large, flat Technic arch in dark green, the jester hat in orange and blue, one of those new 2z2 round jumper tiles in brown, a golden frog(!), and a snowboard in dark blue. There are also some rare Friends parts that make their Creator debut here such as the skis in azure and that new clear 1x1 round tile with a tiny tube coming out of it which is usually used as a stand for Friends accessories and is a very useful piece, especially for SNOT techniques (and no, I'm not talking about the type of snot that many people usually have stuck in their nose around this time of year). There are some printed parts as well, such as the clock tile, the letter tile, and the register slope like in the first version of the set. We also get a new face print for the white cat which is more in line with other modern cat designs. But the best part is the shop sign which is printed this time around. It features a lovely wood pattern, the words "toy shop", and a toy soldier on both sides of the sign. Which is ironic since the shop doesn't seem to sell any toy soldiers like this, but it looks so good on the sign that I won't sue them for false advertising. The Minifigs Let's start with the most unique figures in this set, the carolers. These two were also the highlight in the first version of the set, but in the original they both had the same head (this one -> ) which featured a very questionable facial expression that could easily be taken out of context. In this version, they have unique faces which look much better and help distinguish their gender. The male caroler uses Lord Vampyre's torso which looks quite snazzy on him. Maybe this is Lord Vampyre before he became a vampire? The female caroler is easily the best minifig in the set, though, because in addition to her exclusive head, she also gets an exclusive torso and skirt print! A huge improvement over the generic unprinted one in the original. She also gets the queen hair in dark brown and Aragorn's lined cape instead of two combined regular capes. This set truly is the Return of the Queen! The snowman is technically not a minifig, but as you can see here, he is exactly as tall as one and he is the first thing you build after the minifigs, so I included him here. He has mostly the same design as before, except this time he has robot claws for arms instead of levers. Which is good since they allow him to hold accessories such as his broom. His carrot nose is included separately again. The carolers both have back printing while the snowman looks no different from the back than he does from the front. Here you can see the black side of the female's cape. This lined cape is so much nicer than the solution they used in the original. Next up we have what I assume is a married couple who are likely the parents of at least one of the kids, as well as the toymaker who I will call Geppetto. The man in the pinstripe suit was not included in the first version of the set, so he's a bonus minifig! These guys are fairly generic, but they have some detailed torso prints, so they look pretty nice. Geppetto seems to have gotten younger since the release of the original set since his gray hair has now turned dark tan and he doesn't seem to need glasses anymore. The men both have back printing, but the woman is the only one in this set who doesn't get a back print. Why you gotta be so discriminating against women, LEGO?! Last but not least, there are the kids. One of the boys wears dark blue pants, a green jacket, and a wool cap. He looks a bit like a lumberjack, so let's call him lumberjack boy, or Jack for short. The little girl wears an outfit that wouldn't look out of place in the Friends theme with a lavender scarf and pants. I'll call her Lavender. The second boy is wearing an Octan jacket and a sports helmet which makes it ironic that he is the one not doing any winter sports on the box art. I'll call him President Business Junior, or PBJ for short. All of the kids have fairly detailed back printing which makes up for the fact that much like the adults, they are made out of mostly common parts. PBJ's helmet and scarf cover up the back of his head nicely which is important as you will see in the next picture. What's also great about these figs is that half of them have a double-sided head. Here you can see PBJ doing his best Macaulay Culkin impression. I also removed his scarf so you can see the printing on his torso better. But he's not the only one who seems to be easily scared. The mother also has a very alarmed expression. Maybe she got surprised by the Jack-in-the-box or maybe she just realized how expensive toys are nowadays. You can see the female caroler's back printing here. Her alternate expression is a non-singing face which is very nice to have and I wish the male caroler could have one too. She looks quite cute with those rosy cheeks. But the most adorable out of all of them has to be the little girl. She comes with a pouting sad face that will melt your heart. Please, don't cry! I'll buy you any toy you want, just stop looking at me like that! The Build The first half of the build is dedicated to the surroundings of the toy shop. It includes the Christmas tree, the park bench, the snowman, the toys, the carolers, Jack and Lavender. The large bag contains two smaller bags with small pieces, a white box that contains the caroler's cape, and the jester hat in its own little bag. The first thing you build after the minifigs and the snowman is the toys. This version of the set has a lot more toys than the original which is good because I always felt that the first Toy Shop was a bit light on toys. Also, the ones that were in the original have been updated. For example, instead of the two pairs of skis, you now get one pair of skis that use the new ski mold and a snowboard. The Jack-in-the-box is mostly the same, except it now has an orange and blue color scheme instead of the red and blue from the original. This change was probably not necessary, but hey, at least we get a new jester hat out of it. And instead of the brick-built teddy bear you get the new teddy bear mold. I have mixed feelings about this change because I actually kinda liked the brick-built teddy design and using a specialized mold seems to be going against the spirit of Creator sets, but on the other hand I can't deny that the molded teddy looks better than the blocky old one. Meh. The new toys include a tugboat which has some rounded Technic pieces as its hull, a biplane, a rocket, a helicopter, and a truck that cleverly uses roller skates for its wheels. These are all quite brilliant designs that feel like micro versions of Lego City sets and make a great addition to the set. Here is a back view of some of the more complex models. As you can see, the Friends accessory stand has been cleverly used to hold the biplane's fin in place and to provide a stand for the helicopter. The Jack-in-the-box has a hinged lid. The only thing that bugs me a bit is the T-piece on top of the helicopter that holds the rotor in place, but I can't think of any better way they could have done it. Next is the ladder that is used to decorate the tree which is exactly the same as the first version. The supports are on a click-hinge, so they can be adjusted or folded away. Then, you build the tree itself. You begins, of course, with the stand which is mostly the same design as before, but this time the plates at the bottom are brown instead of white and have golden studs as feet. Next, you build the first layer of branches. The main difference in this version of the tree is that this one actually has a brown stem rather than just a Technic axle on which you stack the layers of branches one by one. You wont be able to see the stem in the final result, but I like this change as it makes the tree more realistic. Then you add the second layer of branches. This one doesn't have lights/candles and attaches to the lower layer at an angle using the four trans-yellow studs close to the stem. The third layer is added. This one has lights again. Each layer is similar in that they are all made out of green plates that are built around a 4x4 ring plate, but they get smaller each time and are constructed differently enough for the build not to feel repetitive. With the addition of the fourth layer, we get close to finishing the tree. Lastly, you add one more layer and the tip of the tree. Now it's time to decorate the tree! However, it's not as fun as it sounds since that requires you to add lights to the two chains/ropes first which can get a bit repetitive. The clips holding the lights to the chain were white, but this time they're pearl gold which looks much nicer in my opinion. The next part of the build is the park bench with the streetlamp and the little tree. This is a fairly quick build with not much to it. The fishbowl helmet parts are a useful piece that you don't see too often, so it's nice to get them again in this remake. The design is pretty much the same as in the original set except for the wreaths on the streetlamp which use a green life preserver instead of a round 2x2 plate. This is another instance where they use a specialized piece instead of a brick-built solution, but I'm okay with that because unlike with the teddy bear, this part was not originally intended to be a wreath, so it's still nice part usage. The second half of the build is dedicated to the toy shop itself and includes the couple, Geppetto, and PBJ. Please note that there is a fourth 6x10 plate burried under the parts. You begin by tiling the floor, setting up the walls, and adding the interior items such as the fireplace, the cash register, and the toy displays. Next, you add the walls, windows, and the door and the ground floor of the shop is finished. So far, the build is the same as the old toy shop, except this time they decided to have the white stripes on the marquees be the longer ones instead of the dark red ones for some reason. I don't know why they did this and kinda would have preverred to get dark red 1x1 plates instead of white, but it doesn't detract from the look of the shop, so I don't really care. Now we begin with the upper floor. This is where things start to look a little different. Can you tell the difference? The difference is that this time they attach the roof using clip-hinges instead of bulky Technic constructions which gives you more space on this floor and allows it to look more like an actual attic. They even tile the floor next to the frog clock. Aftter adding the roof, the build is finished. The main roof feels a bit loose since it's only attached to the building by one side. I'm not sure if this was an issue in the old toy shop, but it's not a big deal. I just wouldn't pick the set up by the roof. What I do like is that they used double cheese slopes on the awning on the outer wall of the tower instead of singles which makes it a bit easier to build. I like how the supports under the tower roof now match those of the main roof. The wreaths have also been updated like the ones on the streetlamp. And those Technic arches under the roof look a lot more like garlands now. On the original, they were dark gray, so I didn't even know they were supposed to be garlands and assumed they were part of the architecture. The shop sign looks a lot better now that it is printed. The old one just looked like a white flag. I also like how the small plates under the marquee give it a wavy look and they included two trees in different sizes on the right side of the shop. The back is nice and open and allows you to see the rest of the toys, the robot, train, and race car, all of which have just as much of a simple and clever design as the other toys. The clock looks much nicer with the new golden frog. Because golden frogs make everything better. Spare Parts There are quite a few small parts left over, including a roller skate and one of those Friends accessory stands which will come in handy. The Complete Set Here you can see the full set together. It looks quite nice and festive with all the little details and there are many scenes that you can play out with it: You can have the minifigs decorate the tree, have the kids play in the snow, have the carolers sing by the bench, have the toymaker build some toys in his workshop, or have the parents buy presents for their kids. It's a festive, toy-filled Winter Wonderland! The fireplace looks cozy and I like the brick pattern going up the chimney. The entrance of the shop looks a bit empty aside from the cash register. I feel like they could have displayed some more toys here, but oh well. Being a set targeted at teens and adults, there aren't really any play features aside from the light brick which is attached to a hinge, so you can either activate it by pressing the button with your finger or tilting the brick upward so that the button is pressed against the roof. However, since the roof is not connected in the middle and only attached on the sides, it tends to split open a bit when you do that, so I'm not sure if attaching the roof this way here was such a good idea. Nevertheless, it looks quite nice when the light is lit. Ratings Design: 5/5 - This set is as gorgeous as it was back in 2009! The small updates that they made are mostly good ones, although the absence of a brick-built teddy is a bit disappointing and the new way the roof is attached, while not as bulky as before, makes the roof slightly unstable, but those are just nitpicks. Build: 5/5 - There are some interesting building techniques here, such as those on the tree, the roof, and the toys. The fact that the parts are only split into two groups and the part callouts can get fairly complex makes it a challenging, enjoyable build. Minifigs: 5/5 - They did a great job updating the figs in this set. While only 3 of the torsos in the original had any printing, all of the torsos have printing front and back in this set, even the skirt and cape of the female caroler. You get two exclusive heads and half of the heads are double-sided, plus you get 8 instead of 7 minifigs. You really can't ask for more in a Creator set. Playability: 4/5 - This set is more meant to be displayed than to be played with, but there are plenty of things to play with if you want. All the different minifigs, accessories, and set pieces make for endless possibilities for play. It's especially fun to swoosh the micro vehicles around. Parts: 3/5 - There are lots of good parts here. Most of them are fairly common, but there are some rare parts and some even in exclusive colors. Price: 4/5 - This set costs $20 more than the original, but considering that this set has nearly 900 pieces, including some rare and exclusive ones, as well as more minifigs with much better printing, I think $80 is still a fair price. Overall: 5/5 - So what's my opinion of this set? For a remake, I think it's great. They managed to make a good set even better. Are the changes minor? Yes. Are they an improvement? Mostly, yes. Were they necessary? Perhaps not, but it's good that they made them instead of just re-releasing the exact same set. So if you didn't get the first Winter Toy Shop, I can highly recommend getting this one. If you do already have the old version, this one might still be worth picking up for the hugely improved minifigs and rare parts alone. As for the controversy over re-releasing the Winter Toy Shop, I can see where the haters are coming from, but I find their complaints to be quite petty. I can understand if you're disappointed because you already have the first Winter Toy Shop and were looking forward to a new set this year, but there's always next year. If you're a completist and feel like TLG is forcing you to buy a set you don't need, you're wrong. Nobody is forcing you to buy anything but yourself. If you decide to buy every set in a theme no matter what it is, that's your problem, not LEGO's. So put down your torches and pitchforks and just be glad that they improved the set design and gave us another chance to buy this classic set. There are far worse things that can happen in this world than Lego re-releasing one of their most popular sets. Sorry for that little rant. So what is your opinion on re-releases like this? Please cast your vote in the poll above. I hope you enjoyed this special Eurobricks Reviewers Academy review and would like to thank The Lego Group for the opportunity to review this set. Happy Holidays everyone! Bat-Toys by Okay Yaramanoglu, on Flickr
-

[REVIEW] 42047 - Police Interceptor
Jim posted a topic in LEGO Technic, Mindstorms, Model Team and Scale Modeling
REVIEW - 42047 - POLICE INTERCEPTOR INTRODUCTION Starting with the 42010 - Off-road Racer and 42011 - Race Car in 2013, TLG released two sets in the first half of each year, using a pull-back motor. The pull-back motor allows the model to be pulled back, followed by forward motion. Usually there's no apparent relation between the two set, other than the ability to combine them into an alternate build. This year there seems to some sort of Cops and Robbers scene going on. A Getaway Racer and a Police Interceptor. That can't be a coincidence. Makes you wonder who will be victorious, the good guys or the bad guys. Let's find out! Note: All images can be clicked for hi-res versions. SET INFORMATION Number: 42047 Title: Police Interceptor Theme: Technic Released: 2016 Part Count: 185 Box Weight: 325 gr Box Dimensions: 26,0 cm x 13,8 cm x 5,9 cm Set Price (MSRP): € 19,99 Price per Part: € 0,108 Links: Brickset, Bricklink THE BOX The box has the same dimensions as previous year's pullback motor sets. In the lower right corner there's a visual explanation of the pullback mechanism. Lime green might seem unusual for a police car, but it might work out better than expected. CONTENT OF THE BOX The box contains: 1 Instructions Booklet 1 Sticker Sheet 2 Technic Liftarms 1 Pull-back Motor 3 Bags INSTRUCTION BOOKLET The instruction booklet for the main model. Unfortunately no booklet for the alternate model. STICKER SHEET The sticker sheet shows similar lime green details as found in the rest of the model. PULL-BACK MOTOR AND LIFTARMS The pull-back motor and liftarms haven't been sealed in plastic bags. BAGS Three bags containing the rest of the parts. HIGHLIGHTED PARTS This section describes the new and/or otherwise interesting parts. 7L AXLE IN YELLOW The 7L Axle has never been released in yellow before. This year TLG surprised us with releasing axles in different colors, like yellow, red and orange. This set only contains a yellow 7L Axle, but you can checkout my other reviews to see which other axles have been (re)released. This 7L Axle has also been used in the Drag Racer. LIME GREEN PARTS The 30.4mm D. x 20mm Wheels are unique to this set. They have been released in various colors, but never in lime green. The 3x3 L-shaped Thin Liftarms haven't been released in lime green since 2001. TIRES These 43.2 x 22 ZR Tires haven't been used in pullback sets before. They do appear in 48 other sets though, so they aren't very rare. WHITE PANELS If you haven't bought Commander Cody or the Mercedes Arocs this looks like the perfect set to get some of the small white panels. PART LIST This set contains 185 parts, shown below. THE BUILD Since it's a small model, I will skip the building steps. I hereby present the finished Police Interceptor. I was on the fence about lime green, but seeing it in real life takes every doubt away. Although not your average police color scheme, the lime green does add a kick to this set. I do love the overall SUV shape of the model. The Driving Ring Connector used in the chassis of the Race Cart (see my review) are used constructing the roof of this model. That relatively new parts proves to be very versatile. Even though there are quite a few stickers, which add some lime green details to the model, the model looks great without stickers too. It doesn't rely as much on the stickers at the Getaway Racer does. The chassis is pretty basic, using the pullback motor in the rear axle. VIDEO Here's a short video showing the model. LEFTOVER PARTS A few common leftover parts. FEATURES AND FUNCTIONS VIDEO Here's a video demonstrating the pull-back functionality. And yes, my girlfriend was kind enough to catch the model before it fell to the ground B-MODEL The alternate model, the Extreme Police Racer, is a combined build with the Getaway Racer, which you can see on the back of the box. Unfortunately the instructions for the combined B-model are not included, so I didn't get a chance to build it. The double rear-wheeled formula one type racer seems to be cool enough to give it a go. SUMMARY I think this is one of the best looking pull-back racers, together with the 42026 Black-Champion-Racer from 2014. The Getaway Racer looks very good too, but it does rely heavily on it's stickers. Lime green adds a kick to this model. Combined with white it provides a great color scheme. The model itself has a very distinctive SUV look, which is properly executed. Negative aspects are hard to find. This is a winner!! SCORE How do I grade the good guy in this year's duo. 9 DESIGN The lime green actually works. Less dependent on stickers than the Getaway Racer. 7 BUILDING EXPERIENCE Nothing out of the ordinary. 7 FEATURES Limited to the pull-back functionality. 7 PLAYABILITY Combined with the Getaway Racer, kids will love it. 8 PARTS Lime green rims are unique to this set. Lots of useful white parts. 8 VALUE FOR MONEY Pullback sets always deliver a certain value. 7,7 GOOD GUYS DON'T ALWAYS FINISH LAST More image can be found on my Flickr page. Thank you for reading. I hope you enjoyed it. -

Review REVIEW: #70167 Invizable Gold Getaway
Bob De Quatre posted a topic in LEGO Action and Adventure Themes
Introduction In 2014, Lego released the Ultra Agents theme, with a bunch of hugjly trained agents, using lots of techological gadget to fight super vilains. That sounded promising, and it was! Today I'll review one of the entry sets of 2015 wave: Invizable Gold Getaway. One agent, one bad guy, a cool looking and transformable motorcycle, that sound great! But is it really? Set information Set Name: Invizable Gold Getaway Set Number: 70167 Number of Pieces: 236 Theme: Ultra Agents Year Release: 2015 Prices: £17.99 / $19.99 / €19.99 #70167 on Brickset #70167 on Rebrickable Packaging The front of the box shows the artwork for this wave: The Ultra Agents logo and Jack Fury looking straight into Antimatter's eyes. I'm almost sure they're doing a thumb battle, but we'll probably never knows. Of course, Invizable's ride and Steve Zeal's motorcycle are shown in action, with Invizable dragging a safe. It will be your mission to prevent him from stealing the gold! In the bottom left corner of the box is an indication that this set contains Appbricks. We'll see what these are later in this review. The rear of the box reveal all the play features. Agent Zeal's motorcycle transforms and can now fly, while Invizable's craft is shown sailing on water. Not sure if that's the best way to escape a flying motorcycle! The vault door can be opened to get the gold ingot it contains. And of course the stud shooters shoot studs... There is also an illustration of how to use Appbricks to build an Appbrick gadget and how to use to unlock content in the Ultra Agents 2 app. A side of the box presents the minifigs included, Steve Zeal and Invizable. There is also a stud shooter as size reference, and lots of translations in various languages. Content of the box The box contains 3 unnumbered bags of parts, an instructions booklet and a stickers sheet. There is a bag of large parts, a bag of medium parts and a bag of small parts. But the large parts bag also contains a small bag of small parts... Instruction The instructions booklet cover's art is exactly the same as the front of the box. And the back cover shows the usual "win boy" disguised as a CMF robot. Instructions pages are pretty clear and I got no problem identifying parts and colors. Their background is light blue with a grey fading and some technical printings near the edges. Two pages inform you that you should get the Ultra Agents 2 app, to use your newly acquired Appbricks. Those two pages don't give much details on the app itself, but that's something I'll explain at the end of this review. Just after the app advertisement, there is a page showing the whole range of this Ultra Agents wave. Minifigures The set contains two glasses-wearing minifigures: Steve Zeal and Invizable. Agent Zeal wears a nice enhanced suit with printed legs, and despite his grim face, he seems like a cool guy with his sunglasses and messy hair. Invizable attire seems to come straight from a 70's gangster movie or a Beach Boys video clip, with a nice dark red suit, a round collar shirt with what seems like a bills pattern, a large round pendant, a tan cowboy hat and golden glasses. Note that Invizable was featured in the Ninjago animated serie and seemed to be on the "good side". The torso's back of each minifig is printed, even if Invizable back printing is pretty simple. Steve's head is doublesided and shows him with a big smile. Invizable's head is also doublesided, picturing his face without the sunglasses. Interesting parts The set contains some rare parts. The 2x2 brick with rotation joint socket in trans-light blue only appears in 3 sets. The 6x2x2 windscreen with handle and the Light Cover with Internal Bar / Bionicle Barraki Eye in trans-light blue are only available in the Ultra Agents Mission HQ. The 6x6 dish with solid studs in black is new this year and is only available in UltraCopter vs AntiMatter(but is available with hollow studs). The 2x2 curved brick with lip is only found in the Gorilla Grodd Goes Banana set, on Wonder Woman invisible jet. Coincidence? Maybe... The trans-black 4x4 dish is exclusive to this set, even if it was produced before but printed in Star Wars sets. The most interesting parts of the set are the dishes. You got one exclusive 4x4 dish, four new 6x6 dishes in black, four 6x6 webbed dishes in light bluish grey and four 6x6 webbed dishes in trans-light blue. Build The first thing we'll build is Invizable's little jet. It's a very easy build, with only around 20 bricks, but with three stickers! Note that you'll have to fold down the wings for the jet to stand. The safe is then built. It has a nice look with the trans-black parts, a few trans-yellow parts and the two stickers with technical patterns. Surprisingly the base has both dimensions uneven. The door mechanism is well done and could easily used in MOCs. There is also a chain that can be fixed on the rear of Invizable's jet. With the first steps of agent Zeal's motorcycle we'll build a strong base on which everything will be connected. This picture illustrate something that bothers me in this set. We got 14 trans-light blue 1x2 plates, but most of them aren't visible in the final model. I don't know why the designer hid so many of these inside the model, while they could be shown and enhance the futuristic look of the motorcycle. The rear wheels assembly feels really bulky, and although the trans-blue rotation ball socket gives it a nice touch, it's not very nice looking. I really think the designer could have done it in a different and better looking way. As you can see on the final build, the front wheel construction is much less bulky than the rear wheel, and I think more fitting for a motorcycle. On each side of Agent Zeal are parts that simulate lights and what seems to be thrusters. There are also supports for two white studs shooters. These parts are very sleeks thanks to black curved part, but add to the bulky feeling of the build. The last build of the set is the Appbrick gadget. AppBricks are 1x1 black bricks with a stud on one side, and a special stud on the opposite side. To make them detectable by touchscreens, they are made of a different material. The build is extremely simple, but note that you can build the AppBrick gadget like you want, as long as the AppBricks stay at the same position. The spare parts notably include a 16L Dark bluish grey chain and a black lever with white base. Play features The main play feature is the transformation of Agent Zeal motorcycle. I was surprised that the wheels rotate toward the top, my sci-fi instinct would have made them rotate toward the bottom. The model looks pretty cool when transformed and obviously feels less bulky. I'm sure most will play with it in this form, as I found the "normal" mode not that easy to play with. First there is no steering mechanism, and with wheels that large and the blue bionicle eyes preventing you to tilt the model, you're up for only straight chases... The rear wheels don't turn well, but that's probably due to the parts being new. Agent Zeal is pursuing Invizable, trying to escape with the gold filled safe! Let's bet he is a formidable shooter, since the studs shooter guns are angled and so can't fire in front of the motorcycle. Some new sets (like the upcoming minecraft sets) includes stud shooters on plates. these would have been a better choice, but maybe they weren't available when this set was designed. Ultra Agents 2 App Lego create mobile applications to go with its latest themes. There is a Ninjago app, a Bionicle app, and of course an Ultra Agents app. There are in fact two Ultra Agents applications, the first feature last year's sets while the second features sets from this wave, including Invizable Gold Getaway. The application give access to interactive graphics comics, games and alt-builds instructions. The AppBrick gadgets can be used to play games or discover secrets in the comics. I'm not very familliar with that sort of applications, but it seems well done and rather easy to use for children. Even I was able to use it, and get access to the alt-build for this set. It doesn't use much bricks, but I'm pretty there is another alt-build that could be unlocked by winning games and discovering secrets in the comics. Conclusion Design: 9/10 - A bit too bulky, but still a great motorcycle! An the other smaller builds are quite nice. Parts: 10/10 - The parts selection is really nice with brackets, hinges and of course the dishes, and a nice amount of rare and unusual parts. Build: 8/10 - Clever and sturdy builds, but nothing exceptionnal. Playability: 8/10 - If you like vilain chases, this set is made for you. And who never dreamt of riding a transformable motorcycle? Minifigs: 8/10 - Agent Zeal suit is quite common (appears 8 times), but Invizable clothes are great, if you like their 70's vibe. Price: 10/10 - A very good price given the parts selection, even more when on sale. Overall: 53/60 (88%) - A great set, fun and affordable, with nice minifigures. Not much play features, but sufficient for a set of that size. In my opinion perfect for the targeted 7-12 years old children market. -
Introduction: Have you ever dreamed of that moment when your ultimate wish finally comes true as you step out of the shuttle and, reaching down to touch the rocky surface of your destination, finally and irrevocably demolish your childhood impressions of the moon as a blob of Swiss cheese? Yeah, me neither. If you happened to be able to fit inside a LEGO brick, you could come pretty close in this 7467 International Space Station set. But although I’m short, I’m not quite that short. So I’ll stay on the outside, and see if I can bring you a different perspective on the appealing mess of solar panels, extending arms, and moving clips that this set is. Your first look at it comes courtesy of Brickset. Second, a boxed shot from BrickLink. Next I’ll present you with my picture of this seven-paneled, heavily stickered set. Looks pretty technologically advanced. I’d like to see what size those panels would be to scale! Product Details: Name: International Space Station Number: #7467 Theme: Discovery Year: 2003 Pieces: 162 Minifigures: 0 Price: USD $15.00 Source: Brickset Interested in building it yourself? You can download the instructions here! Instructions: Since this is such an old set, and one that was given to me used, I don’t have the box. But I do have the instructions, so never fear, you’re not getting out of all the paperwork! Here’s a random page. The booklet has a nice solar system atmosphere. And the back inside pages. Is anyone else wondering why the minifigure size shuttle gets the same size solar panels as this set? Let’s take a look at the back. It’s rather curiously square, but all in all, the instruction booklet is pretty nice. I mentioned the stickers earlier, and I’ll take the opportunity to state the obvious and say that they are already applied. Only two are missing, to the best of my knowledge (the two sides of the shuttle’s tail fin); I’ll point that out more specifically when we get there. I counted twenty-eight total (sure glad I didn’t have to apply all those myself!). Of those, three at least are STAMPS (STickers Across Multiple PieceS) and two others might be STAMPS if they hadn’t gotten ever so slightly crumpled somewhere along the line. But! There is one piece of printed goodness! Spot me if you can! Build: Below is a shot of the complete parts selection available in this set. I didn’t dare to take the pieces with STAMPS apart but the rest is dismantled. And yes, that’s twenty-four clips (sixteen white 1x1s and four double sided old grey arms). With all the random solar panels and what not sticking out all over, I figured a “barebones” view might help. Next up – remember those twenty-four clips? This thing is insanely poseable. What does I.S.S. stand for, you ask? Well, it might stand for International Space Station, but Insane Series of Solar panels is another good guess. Now a view from the back: Note the chrome plated piece on the end of the metal detector! Now let’s take a good look at the shuttle! For such a small build, it’s really nice. Note the missing tail fin stickers, and the printed nosepiece! Also notice the placing of cones inside a brick with two technic pin holes. If I recall correctly, that would be an “illegal” technique by today’s standards. The technic pin holes are ever so slightly smaller than the size of a stud, I believe. Snap it on the Insane Series of Solar panels and you’re ready to go! Of course, extreme poseability brings problems of its own with it. “Houston, we have a problem!” Important! Smoke and excess flame NOT included in the International Space Station. As for the building experience itself, if you like clipping things together, and if you like mind boggling almost-not-quite mirror image building, you’ll love this. For the rest of us, it’s not bad, as long as you aren’t too concerned about following the instructions in every jot and tittle. Conclusion: So here we are, wrapping up our look at the International Space Station. It’s got a few things going against it; the excessive amount of stickers, the fact that it can easily be inconveniently posed, and (in my opinion) the “old” greys. On the other hand, it is impressively tall, surprisingly sturdy, and includes a very neat little shuttle. So let’s systematize this and see what we’ve got! Playability: 6/10 – Like I said, this thing is pretty well over the top in terms of poseability. But on the other hand, there isn’t really a whole lot to do other than swoosh the little shuttle around. To be sure, swooshing shuttles is sometimes satisfying, but other times you just want to have an all-out battle. So it ranks just above average for me! Design: 8/10 – It is pretty cool, that I’ve got to admit. Also, given the projections sticking out all over the place, the final build is remarkably sturdy and the attachment point for the shuttle is at the perfect spot. Swooshablility: 9/10 – Obviously, you’re not going to be swooshing the station itself around – at least, I hope not! – but when it comes to the shuttle, that thing really can be fun! Price: 9/10 – Let’s just say that if you find this for $15 dollars, it’s a bargain! Right now it is priced at just over $85 dollars new on BrickLink. It has quite a few nifty white pieces, lots of clips which I’m always using and losing, and stands at a satisfying size. Personally, I’m not a fan of the old greys so that counts against it, but otherwise it’s a nice, well priced set… that is, it was. Overall: 8/10 – Well above the average score, this set is aesthetically appealing without completely losing all play value. While I can’t see the seven year olds flocking around it, it seems to be pretty eye catching for slightly older children. And space has always been an intriguing theme! So… we have lift off! Now let’s go and disprove this Swiss cheese thing once and for all! Important! Smoke and excess flame NOT included in the International Space Station.
-
Ice cream "machine," or ice cream truck? That's your choice in… Set Title: Ice Cream Machine Set #: 70804 Theme: The LEGO Movie Pieces: 344 Minifigures: 3 Year of Release: 2014 Price at Release: USD 30 Just browse the pics? Flickr set INTRODUCTION Who doesn't like ice cream? And who doesn't like pink? Tell me, who doesn't like giant LEGO ice cream cones? The answer to all of those questions is, of course, only crazy people. I consider myself at least partially sane, so I indeed was thrilled with the prospect of a LEGO set involving ice cream, pink and a giant ice cream cone. Let's check it out! BOX As the 2-in-1 boxes go, this one if fairly fun. The colors really pop, and the model looks ok. The ice cream truck in the corner looks better, though. The back shows you a bigger picture of the very lovely ice cream truck, and also wants to make you think that flick-fires actually work and are fun. This box is actually a little fatter than the other 2-in-1s, for some reason. Our cast is Ice Cream Mike, Ice Cream Jo, and Cardio Carrie. I wonder if she's the same as blood-soked Carrie. All look fun. CONTENTS Mmmmm, plenty of pink. I like. Like all these 2-in-1s, three booklets: micromanager, flying machine, and truck. In all of these booklets, there are warnings about not shooting things in your eye. The ridiculous thing is that they usually show them twice for one missile, often in a row, like here! I think people actually deserve medals if you manage to shoot a flick fire all the way into your eye. There are a bunch of stickers, but they add character to the set. It seems like Octan runs absolutely everything in this film. MINIFIGURES These minifigures are all a lot of fun. We've gotten workout outfits in the collectible series, but this one is still nice. The ice cream outfits are great too, but sadly the white printing was too thin so the white on the torso doesn't match up with the legs. Sad. Carrie has a reverse face with a mouth shape pretty similar to Sharon Shoehorn. Nice though. Mike's face is great too. Everybody has simple back printing. Carrie has serious lats. Since it didn't show up well on the previous photos, I snapped a close-up of Carrie's face to show the little sweat drops. They're a lovely little detail. SET - MICROMANAGER No legs no love. This might be my least favorite of all of these, but it's still kind of cute. This one actually has more of a play feature, which makes it sacrifice more of the cute feature. So here it is: a mini version of a play feature that has shown up in a number of sets dating back to Vikings. Usually there's an actual launching mechanism, but this time you're just supposed to rapidly flick the missiles yourself. I tried it and… it actually works, using your thumb to pop them out. So I guess flick fires can work. SET - ICE CREAM MACHINE The flying machine leaves a number of useful pieces leftover. The big tubes are actually just general extras, and never used. It's actually a pretty fun plane. The pink pops, the ice cream details are nice, and the big cone is a great "weapon." It also looks enough like a truck that was randomly converted into a plane, which I like. It looks very cheerful. The color coordinated green and blue ice-cream shooters are cool. There's plenty to make me want to go pew-pew-pew as I swoosh it around. Got to have some tail lights on the back. I hope Mike is holding onto something tight, because otherwise he's going to zoom right out of the open back! He does have a nice big pole to hold onto. The minifigures even look like they're having a good time. SET - ICE CREAM TRUCK The truck model leaves even more leftovers. Basically, if you buy the set for the truck, you'll get some nice extra plates in great colors to add to your Friends collection. That's a fantastic looking truck right there. Nice and tall, and long, with a fantastic color scheme. We've never gotten a truck like this in City, and it's great! The giant ice cream cone on top using the drill piece is ingenious. Both sides are open for plenty of ice cream serving all around. The back has a window that just shows the ice cream vats inside, and has a bunch of lime studs for decoration. The tail lights are quite small and hidden down below. As you can see, the set comes with plenty of the new ice cream cone piece, though a lot of them are used for decoration. You could pull them down and serve them to people if you want, though. The inside has a little SNOTted freezer for popsicles, plus the soft serve vats and plenty of room for the figures. Great details. COMPLETE SET and CONCLUSION This is certainly my favorite of the 2-in-1s. The truck is superb, and nothing like what we get in City. The only issue is that the printing on the ice cream torsos is too thin, but it's not a deal-breaker. This is a fun one right here. Only the garbage truck to go to finish up the 2-in-1 sets!
-

REVIEW: 70736 Attack of the Morro Dragon
Exetrius posted a topic in LEGO Action and Adventure Themes
Hi everyone, I'm glad to post my first review here on Eurobricks: Attack of the Morro Dragon from the Ninjago ghost wave. I picked this set up at LEGO World Utrecht 2015 for a good price (52 euros), along with some other cool stuff, so I thought that I might as well review it. Christmas is approaching and therefore the best time of the year to get some fine Lego offers. So, for those of you who have waited patiently, this review may be helpful. So, let's get started! Name: 70736 Attack of the Morro Dragon Theme: LEGO Ninjago Piece count: 658 Minifigs: 6 Year released: 2015 Retail price: USA $69.99 UK £59.99 GER €69.99 Front of the box Back of the box Minifigs displayed on the side The box has fairly odd and impractical dimensions. It's thin and very broad. My experiments found that it is especially impractical when trying to transport it in narrow places such as the aisles of a train, the bus or your ordinary bicycle bag. Contents of the box In the box we find 5 numbered bags, one instruction booklet plus sticker sheet and fabric wings, nicely backed with cardboard. No real surprises there. Instructions Random page Sticker sheet Nice stickers, beautiful, I love them... and I won't apply them! Content of the bags A striking amount of pieces in the colour Spring Yellowish Green. Before the release of this set (and the rest of the ghost wave), parts in this particular colour were quite rare, that changed a lot! There are also very little pieces in colours that are off the main colour scheme, which is nice. Pieces of interest Again, lots of (existing) parts in Spring Yellowish Green, exclusive wing fabric, Trans Neon Yellow chain piece, Trans Black aeroblade piece, recoloured Elemental Blade, glow in the dark 1x1 stud and cone, and one of the most peculiar ones...... is not in this picture! The black Formula 1 nose. Anyway, some pretty cool stuff. The ninja From the good guy side we get Kai and Jay. I like their so-called Deepstone armor variant, especially Jay's. Great designs that are also both useful outside the Ninjago universe. The new (upon release) hoods and black shoulder pads look slick. One complaint: still the same serious/angry expressions that have been used since 2011. C'mon.... The ghosts Even now the excitement of newness has worn of, the ghost figs remain spectacular. Upon release, these introduced a lot of new things: A dual-coloured ghost leg piece, transparent legs in Tr. Neon Yell., and two different hoods. One of which is partly transparent to back-light the transparent ghost head. Neat effect! The torso/leg prints don't interest me too much, but overall these minifigs are one of the better Ninjago baddies. A downside, however, of the bizarre colour scheme is that it is hard to use the parts in a different context. Oh, right, they have names: in the middle is Yokai, right (with the straw hat) is Cowler, left (with the leg piece) is Chain Master Wryath. Oh, and two Skreemers are also included. These were all fine, but now it's time for the real star of the show! Evil Green Ninja Yup, that is really how they call him! The set is called the Attack of the Morro Dragon, and the person who is most clearly portrayed as it's rider and master is called.... Evil Green Ninja Anyway, it is Lloyd who is possessed by Morro, so basically Morro. This is first-class nitpicking, because this was the only bad thing I had to say about him. Oh my.... he looks just darn awesome! The two head and torso gear pieces show no less then four different 'cloth' layers, on top of the detailed printing! I really love the detailed printing on his torso and legs, and these will be useful in a different context! This is a top-notch fig! I don't have any pictures of the building process, unfortunately. Bag 1 builds the shrine and a hover board, bag 2 is partly for other hover board and all the rest is for the Morro Dragon, which was a great build. Let's check that out! Morro Dragon in flight Just look at how majestic this beast of a dragon is! I didn't expect it to come out as good as the Master Wu Dragon, but I was wrong... it came out even better! The box art really doesn't show this monster from it's best angles, I hope I did better. How does it compare to it's counterpart in this wave, the Master Wu Dragon? Size comparison As you can see, it's HUGE, has a superb colour scheme, a very menacing look. And it swooshes around nicely, thanks to a cleverly integrated hole for your finger. The simulated kind of waving motion that runs from head to tail is one of my favorite design elements of this build. It feels like a very authentic Japanese ghost dragon, but with wings added, which is fine. I think this a fantastic display piece, but what about articulation? Flight attack pose Passes the test. That was just the warm-up, though... Will it succeed... in doing... an upright standing pose??? Look Morro! No hands! It frickn' does it! Honestly, I didn't expect it to do so. It is in fact a little tough to pull off, given that the center of gravity lies nowhere near it's hips and the tail is not much of a counterweight. I really like this pose. Conclusion: it poses well. There are a few articulation flaws, however. The wings for example can't reach a 100% horizontal pose (let alone angling them further down) due to the front legs under them getting in the way. Furthermore, the head can't be moved sideways and up-movement is very limited. Overall, I think the motion is decent. The whole set My apologies for not having separate pictures for the sidekick builds. The two hover boards have a cool design and are fun to play around with. I do have some complaints about the shrine. Though structures in Ninjago sets generally don't make sense compared to their appearance in the show, but this one is really odd. It's colour scheme is in accordance with neither the show, nor the other structures in the Ninjago ghost wave, at all. I don't like the bright red plus black against the white. However, I admit that it came out better than expected, as I thought it would look ugly from all angles. But, with the two walls set up in front of the shrine, like a gate, it makes sense to me and looks.. eh... decent. A good thing: the shrine has some good parts, like the many masonry bricks. Spare parts Always nice to get spare blades! Verdict I think the Morro Dragon is fantastic, maybe even the biggest and best brick-built dragon to-date. Menacing, huge and great poses. Nice figs too, especially Morro Evil Green Ninja, who is superb and was a major draw to buy this set. Little hover boards are fun and the shrine turned out OK. I don't think that I would have bought it, even with my new view on the set, if I had to pay the original price, it's on the high end for me (I try to avoid buying expensive sets for display only). Taken everything into account, I'd rate this set 8/10 I hope it has been helpful. I already know that the quality of my photo's leaves a lot to improve. (I should have either a better camera or better lighting for this, preferably both ) Other than that: please share some tips or tops about this review, again, it's only my first! Thanks for reading and have a good day! -
Eurobricks MCW Moderator and Reviewers Academy Teacher LuxorV has reviewed the latest LEGO Ideas offering: 21304 Doctor Who. Check out the in-depth review in the Licensed Themes forum.
-
This is a review for the set 6022 Horse Cart from 1984 Here is an overview of the set here we see a page of the building instructions, it looks a bit like it is drawn Here is the cart, it is a nice little cart that isnt to big or out of proportion. Here we can see the minifigures that come with this set, a soldier, and an archer Here we see the accessoires, a spear with a red and a yellow flag, an axe, a sword and the rare round shield, a bow, and a sadle for the horse. I appologise for the bad photoquality, but i don't really have a good camera at my disposal. Hope you enjoyed the review
-
Who let the wolves out? Were they ever in? These questions and more will get no follow-up in this new-fangled review of… Set Name: Worriz' Combat Lair Set #: 70009 Theme: Legends of Chima Pieces: 664 Minifigures: 6 Year of Release: 2013 Price at Release: USD 70, GBP 60, EUR 70 Bricklink it! Flickr album! INTRODUCTION Full frontal disclosure: I was never very excited about Chima and I'm not sad that it will no longer be with us. I like the minifigures for their parts, especially the feline faces which look great in a number of custom minifigure applications, but I never cared for the sets. The whole animal-look thing was an interesting concept, but more often than not it seemed to me that the animal-head ate up a ton of parts, leaving the rest of a model to be a bony, technic jumble. I'm mostly a playset kind of guy anyway; if I'm going to like a vehicle, it better have some meat on its bones. How, then, am I here right now, reviewing one of the largest purely-vehicular sets of this entire theme? Easy: sales. I'm a sucker for sales. I've since learned to curb my wallet a bit, but at 40% off the old me would've bought just about anything. Since I own the set, I thought I might as well go through in a detailed review and see if it meets my 'all Chima sets are a crappy bunch of technic with an animal head' expectations. INSTRUCTIONS Usually set artwork ranges from 'inoffensive' to 'quite good,' but I must say they were stretching here to make this set look exciting. They've placed most of the minifigures in physically impossible positions, including a couple of the wolves 'standing' on the truck. Do you see how, on the front booklet, one of the rotors on the helicopter is awkwardly behind those old gun-like pieces? It's like that on the box too. There's really nothing about this artwork that would make me want this set. Even though there are six complete sub models, the instruction booklets still break smack-dab in the middle. Right, makes sense. Remember the old days when LEGO would make awesome displays of whole themes placed together on built landscapes, and then photograph the setups for promotional materials? Actually they still do for City, so that's something, but not for their 'big bang tons of tie-in merchandise' theme Legends of Chima. Instead, we get this supremely cruddy photoshop job of a few sets together. My favorite thing (besides for the magically reversed image of the Lair) is Grizzam (the white gorilla) now swinging off to nowhere. In my head he's saying "F*** this battle, I'm out of here." LEGO's 2D backdrop artists are doing a great job, though. STICKERS Since I bought this set on-the-cheap and will surely break it down for parts, I did not apply stickers. These stickers do actually look pretty cool, and I'm sure would work well in a variety of sci-fi, post-apocalyptic, or other type of grungy setting. I didn't think they'd make or break the look of the set; pretty sure I can give it a fair review without them. INTERESTING PARTS This set does include a fair number of rare, interesting, or otherwise useful parts (for anyone that doesn't exclusively build bright fairy princess castles with studs purely on top). I went through and picked these out based on a combination of personal preference and what I thought other people like. There are a ton of SNOT pieces and tiles, which are always great, as well as a bunch of varieties of slopes. The dark red is in there just because it's cool and I like it. All-in-all, even at full price this set makes a decent parts pack provided you like this type of part. MINIFIGURES Finally, my favorite section!!!!!!!!!1 Like I said in the intro, I do like the Chimafigs. They are absolutely covered in finely detailed prints which inevitably get covered up by other things, so first I'll look at them all decked-out before closing in on the details. These minifigs get some pretty cool weapons - did you know that the trans-red serrated thingies the wolves have only come in this set (in that color)? That's pretty cool! The gun build for Windra, the wolf matriarch, looks great and its main component is quite rare in flat silver to boot! The good guy weapons look great too. I should also mention that the white, jagged cape on the wovles only comes in two sets (and on the SDCC exclusive Collector minifig). For those that cared about collecting the minifigures or cared about the characters, this set was a great way to get most of the wolf tribe. From left to right, you get Worriz (the young leader or something), Wilhurt (the brute-force muscle-man?), Windra (exclusive to this set and the real brains behind the tribe?), and Wakz (the old wizened military commander?). I've added the fifth member, Winzar, on the far right. I happened to have him from a polybag. I do appreciate how much the members of the wolf tribe vary. They fit together, for sure, but they all have distinct differences in their prints down to things like different sizes of teeth on their 'face-helmets.' They're a fun, rugged bunch. Back to just the minifigs in this set… they all have cool back prints too, though I don't think the fur-and-tail detail on Wakz is very successful. The armor plating on Worriz looks simply wonderful, and so useful for castle/fantasy. The daggers on Windra stand out as a fun detail too, making her seem very dangerous. I like the Chima 'face-helmets' for what they are, but what I really love about the Chimafigures is their head-prints. I was so surprised when the theme launched that LEGO had gone all-out on the head prints when the figs were intended to wear their helmets, but I love it. You might not think it, but the more humanoid faces look fantastic in a variety of headgear like hoods, helmets, and the like. My lion-headed green spacemen always bring a smile to my face. I don't care for the bird ones, so Eris' head does nothing for me. Worriz also looks a bit… strange. The other wolves and Grizzam could be quite useful, though. Truly surprising was the fact that not only did the Chimafigs have head prints, most of them had two! You don't want to mess with these wolves when they're angry - they look liable to literally bite your head off. Grizzam looks more like you made a bad play-on-words pun. Eris I screwed up, and put her 'angry' face in the previous picture and her 'happy' face in this picture. If you can tell the difference between the two, you win eternal happiness. THE SET - By Parts Though the set artwork might lead you to believe that the set contains just two models (big truck and copter), the box assures you that it splits into five. I count six. … Obi-Wan: From a certain point of view. … In any case, I'll go through them now in build order before looking at the result of their combination. Athletic Wheelchairs The build starts weak with these two, er, things, that are supposed to evoke wolf paws but to me evoke athletic wheelchairs. No matter their name, they don't look good. Had these been packaged as a set on their own, I believe they would have joined the 'awful tiny set' ranks occupied by the Spider-Trike and Mandarin's Flame-Thrower Lawn-Mower. You will notice the pieces usually used to attach wheels sticking out conspicuously on the back. These hint at a play feature that actually works quite well and is really fun. Bottom line: even though these models tend toward the 'garbage' side of things, they turn out ok in the context of the larger set. Wolficopter After a poor first showing, the build progresses into one of the best models: the copter. The overall shaping looks nice, with a touch of wolf nose on the front. It's not intended to have its rotor folded down when not on the truck, so I had to prop it up with a wolfy friend. Though the set uses a very limited color palette of just light bley, dark bley, black, and dark red (with smatterings of white and red), it still comes off looking a bit jumbled and colorful. I get that LEGO doesn't go for monochrome much, and it might make a set harder to build for the childrens, but eliminating black or one of the bleys would make this thing look much sleeker. Regular red really comes off as unnecessary here against the dark red, and the model would look much better with only the darker shade. What really makes the copter is the fact that the rotor incorporates well folded up and unfolds wonderfully with quite an impressive wingspan. Plus, wolfy is no longer needed with the rotor unfolded - the redistributed weight keeps it from falling back. I guess it's worth noting that in fantasy Chima land there's no need for such physics-necessitated things as tail rotors. But really I don't mind. I'll admit I've been making you wait for it - what REALLY sells the copter is that the rotor spins really, really well. Maybe it's the excessive wingspan, the way it's attached, or something else, but whatever it is this things spins amazingly and is therefore a ton of fun. Truck Flying swiftly along, we come to the beginnings of a larger part of the model: namely, the Wolfy truck part. This isn't the sort of build I enjoy. There's a lot of Technic, a strange slidey mechanism locked down by Technic and SNOT stuff, and a general sense of 'where the hell is this thing going.' The end of booklet 2 (and bag 3) leaves me with this: I wrongly believed that those black Technic beams will become some sort of play feature. They won't. Next comes the head. As usual with Chima, the head displays the wonders of modern, imaginative LEGO set design. Also as usual, there's a crap-ton of parts crammed into a relatively small space that do nothing for the model but look nice. So far, this truck meets my 'bunch of technic with a part-eating head' expectations. As far as the build goes, the instructions next have you make the little side equipment compartments, and then you move on to the prison attachment. However, I photographed the truck with the Wheelchairs already attached to the front, since it really looks a bit terrible without them (yes, I actually did the set a favor). With the Wheelchairs attached, the Wolf Truck really looks quite nice and menacing. Mean-looking head, big rough wheels, some kind of attack paws in the front - nice. You would not want to have this beast coming at you, staring you down. It looks really menacing and ready to flatten you into a road-kill pancake (presuming you're an animal, since everybody is an animal in Chimaland). It also looks fairly decent when viewed from the side, though it becomes apparent that the truck is pickup-style, given that there's not much of anything besides the head. Still, it works. I like the use of the Chi crystals as a sort of super-charged jet exhaust. Even though the whole truck gives off a 'big n tough' vibe, which would usually make it seem not so fast, these engines get you thinking about this thing tearing up some pristine landscapes and leaving them in dire need of new vegetation. But now we come to some issues. Let me pose the question - what does one want out of a truck? I'd say two things: rolling well and space to put minifigures to engage in roll-play. The wolf tribe gets only this as their base, after all, so they better get some room to have tactical meetings and strategize their hits against the meddling Lions, Eagles, Gorillas, and whoever else. ALAS, this truck is just a bunch of gappy technic and other structural stuff. There's no real place to pose minifigs at all. I understand that the helicopter needs a place to rest here (which I will show later on the completed set), but couldn't LEGO have achieved both? Couldn't the designer have filled in some of these spaces with a few plates and added some consoles at which the wolves could work? As it is, Worriz might fall through the cracks and end up roadkill himself. Onto more lameness, we get these storage units on each side that look nice but have very little function. The one that's left empty can't fit any of the weapons included in this set, and the other one has two saws, which I suppose are meant to be repair tools? "Oh hey, the engine broke." "Eh, just give it the ol' saw." Right. Despite its flaws, the wolf truck still makes it into my good book due to its very awesome playfeature (and its general good looks, which I've already mentioned). Seriously, shooting off those wheelchairs and knocking over minifigures doesn't get old. Plus, unlike with most of LEGO's shooters, these projectiles won't be lost very easily since they're so large. This one's a winner. Prison Pod We get a significant down-grade in build size with the next section: this prison pod. The parts use here veers into 'extravagant' territory - it really has more tiles and detailing than a prison pod needs. All those tiles certainly make it look quite nice, but with respect to the set I think the parts could have been better used making the truck less gappy. From a parts pack perspective… whatever, I'll be grateful for the tiles. Unlike the near-useless storage containers on the truck, this prison has plenty of room to do what it needs to do - namely, house prisoners. I even managed to fit Eris in there. Overall - job well done on the prison, LEGO. Cycle What? - you say! Cycles have their wheels facing the same direction as the driver! - Aha! Fooled you again, did I. This cycle can both incorporate into the larger vehicle, and pop off, having its wheels rotate to turn it into a cycle! Vehicles that can fold and be functional always get me. That's part of why I love the copter in this set, and why I loved that Shield car set. For you see, the wheels fold out to make a functional cycle. Just position the gun out a little bit for balance, and it even rolls fairly well and stays standing due to the width of the heavy-duty wheels. Simply put, I dig the look of this thing all around. The asymmetry really works for it; even the side with the technic parts exposed looks alright and I appreciate the tiling. The gun might be ridiculously huge and impractical, but the whole thing is fantastical, so I don't mind. The gun being attached by ball-joint gives it a superb range of motion and makes for fun scenarios like this - 'Ha, thought I couldn't shoot you over there? Guess again!' WHOLE SET Now that I've gone through everything separately, it's time to click everything together and see how the thing stacks up as a huge 'Combat Lair,' whatever the heck that means. I must start off by saying that in person I really don't care for it. All together, it looks like a big bland jumble that's too large and ugly. Some of my photographs make it look much better than it is - looking over my Flickr set, even I kind of like it. But I'll start with a picture that illustrates what you'd be looking at in real life: See? It's quite large, but has no substance. The colors all blend together and almost negate any detail, making even the good sections fade away into the mass. The engines that look cool on the truck part now presumably spit Chi exhaust right on the prison, and there are no additional engines on the back since that's where the cycle goes. The copter just sits on the thing with no attachment points, and it doesn't really integrate into the model. It looks much better on its own. Take the copter off, and the issues become even more apparent. There's just no substance here at all: no place to pose figures, no place for our wolf friends to relax on their ride, no meeting center. What kind of a mobile base is this? LEGO got 'mobile' down, but it seems they forgot the 'base.' Here's my best attempt at getting some roleplay going. I'm really reaching here. I know what some readers may be thinking. Essentially it's a big truck for kids. Isn't it awesome enough that the set makes one huge truck and splits into a bunch of vehicles? Can't kids roleplay with the minifigures on the floor next to the truck anyway? What's CloneyO griping about? Let me explain. Firstly I'm griping about the plain fact that the huge combined vehicle looks ugly. It's drab, it's full of holes. I appreciate aesthetics and have a feel for how I'd relate to a set were I a child, and this set would turn me off. It doesn't scream 'fun and excitement.' Further, even as a child I liked sets that have some interior. I liked trucks, but I wanted to put minifigures in them. The City line has a new Mobile Police Center all the time, and the fun there is having a full truck that also has a fun interior. What I expected out of a big, mobile base was some interior, and that's not what I got here. I got the Chima design brief of awesome animal head attached to gap-filled nonsense. But hey, these low-angle pictures make the thing look pretty decent: CONCLUSION The above picture shows what I like about the set (minus Grizzam - I like him too). Buuuuut wait, isn't that everything in the set? Yes, yes it is. Everything separately has merit. The Wolf Truck looks beastly and has a super-awesome play feature in the launching of the front claw wheelchairs. The copter has a rotor that spins like ace. The prison does what you want a prison to do and gets covered in lovely tiles. The cycle has a wonderful folding feature and an overall fun design. I indeed went about slamming the set as a whole; as one huge vehicle, it's a mess, no way to sugar coat that in my eyes. The basic Chima design principle of 'all look and no substance' gets put on display here in full effect. What's more, the color scheme involves too many colors and still results in a set that's drab and ugly. Yet I like the different components on their own, and the minifigures are a cool bunch for both collectors and customizers. They have neat weapons to boot. Ultimately, I don't much care for this set, but I enjoyed the experience of thinking about it. Chima's over, dead and gone, but with sets like this I can't help feeling that LEGO brought Chima's less-than-Ninjago performance on itself with sets like this. I simply can't see how this set would really appeal to children, being drab and lacking interior as it does. For adults, it's a reasonable parts pack, but not much else.
-
REVIEW: 70786 Gali Master of Water So the last few days have been crazy for me. I had to go to a clinic due to a sudden increase in heart speed and drop of blood pressure, my computer glitched out, and then my car was booted. On top of this I have to prepare for a Spanish 3040 exam tomorrow dealing with "Subjunctive Verbs." *Shivers* So yeah, it hasn't been that fun the last few days. As an escape I have been logging onto BZpower and Eurobricks frequently, as such a certain siren came and caught my ABS loving heart. Gali, the Master of Water. So with my nostalgia running overdrive, and a desire to escape for a moment from the drudgery of irregular Spanish verbs, I hunted down Gali in a local Smiths. So there she is, that siren which robbed me of 15 dollars... Her ABS glory coupled to a high sense of nostalgia for my simple childhood in 2001, made it easy for Gali to take my heart. But first before I built her I had to procure some food... My plan for chips and salsa was killed by a super tough salsa can lid... Was this can of salsa going to stand between me and my Gali? Fortunately no, since Kivoda the Protector of Water offered an alternative dinner: the fruit of Ga-Okoto. Fresh StarKist Tuna, raised in Okoto, packaged in Ecuador! Kivoda was more than excited for me to save Gali from her box enclosed status, and did all in his power to release her from the carboard prison! I told you I was going to be studying Spanish tonight... Maestro oddly enough translates as both Master and Teacher. So maybe Gali is now the Teacher of Water! With a mighty relic from the stash of President Buisness, the mighty sword of "Kni-Fe de Booter!" I saved Gali from her boxed state. And there it is, Gali's pieces... As per Eurobricks tradition we must all stare at this photo of "New and Interesting Pieces." Please don't drool while admiring this. This is probably the craziest piece ever: Yeah, so anyway Gali's build starts of simple enough. This part should take Bionicle fans all of 5 seconds of intesne labor. You know, all of Gali was a simple build. I was hoping she could compare to the build of a modular building, but for some reason Lego expects us to have simple builds in 15 dollar sets (obvious sarcasm)... At least it didn't take me 4 hours like a modular does! I love that Lego has included gearboxes in Bionicle again, it is such a wonderful throwback to the classic 2001 sets. Here is Gali near completion, torso pieceless and headless... Her torso plate is a Hero Factory Breakout torso, so if anybody wants to remove her lovely printed chest piece to shove a small circle with an H into her heart... be my guest. And the moment we have all been wating for... Gali in the flesh! That mask really finishes it off, as soon as the mask is placed her character really comes out. She has a very sleek, feminine, war like appearance. As other reviewers have noted, Gali's fins can link so she can become a Bio-Mermaid and recreate scenes of Disney's hit classic "The Little Mermaid." Gali: "Up where they talk, up where they walk, up where they stay all day in the sun!!!" Gali's staff can become a battle axe, and as you may have noticed I put the fins on upside down... Oops. Kivoda is happy to have a fellow water tribe friend now... The Toa and Protector pairings look great together, very reminisent of the Toa and Turaga pairings in classic Bionicle. Of course with pieces from the Protector of water Gali can get some new equipment to battle for Okoto! Although not as complex as Bionicle G1's combiner models, this is a lot more visually pleasing than slapping Gali together with a green and white Toa to build a wide hipped three torso Kaita... Here is Gali with my entire 2015 Bionicle collection. Sorry the photo is a bit blurry. Gali stands out wonderfully, I like how her blue is contrasting with Tahu's red. So my thoughts on Gali are is that she is a wonderfull addition to the Bionicle range. The last time I bought a Gali set was back in 2001 itself, and I can see very plainly how Lego has improved on Bionicle in the past 14 years. Gali is a great figure, and stands out in a collection. She is a must have for anybody interseted in Bionicle 2015. What is that Kivoda? I have to return to reality now? Sigh... time to study those irregular verbs and subjunctive for that exam tomorrow. Hasta luego mis amigos!
-
It is no secret that Marvel is one of the most successful companies right now. From the Avengers to the X-Men and down to even the most obscure characters like Ant-Man, every one of their movies has been a big hit until now. The latest Marvel movie, Fant4stic, was released last month and while I have not seen it yet, I'm sure it's just as great as their other movies. I mean, it has the word "Fantastic" in the title after all! And being the smart business that they are, The Lego Company decided to get in on the hype early and capitalize on this movie's undoubtful success two years in advance by making a set featuring Fant4stic's main villain, Dr. Doom. Now that's what I call forward thinking! But did they do a good job with it or were they being overhasty? Let's find out! Set Number: 76005 Name: Spider-Man: Daily Bugle Showdown Theme: Marvel Super Heroes Subtheme: Ultimate Spider-Man Year of Release: 2013 Pieces: 476 Minifigs: 5 Price: $49.99 USD S@H description: The first thing that comes to mind after reading this description is: Wow, that's a lot of TMs! Anyway, here are some resource links for this set: Brickset Bricklink Rebrickable The Box Since this set is based on the Ultimate Spider-Man cartoon, the box has the usual USM design with the red Marvel Super Heroes background, an illustration of Spidey in the upper right corner, and the USM logo in the lower right. As usual, there is a minifig line up in the lower left, and since this was before the terrible redesign, you can see the full body of the minifigs. I really miss this type of line up. There is quite a lot going on here: Doctor Doom attacking the Daily Bugle in his jet while simultaneously reaching for J. Jonah Jameson below with his jet's claw, Spider-Man (reluctantly) swings in to save him, while Nova fights off the Beetle. It's a pretty cool scene, even though it's not very accurate to the show. In "Beetle Mania", the episode that this set is based on, the Beetle was indeed out to kill JJJ, but it was in order to stop him from exposing his identity, not Spider-Man's (although Spidey was next on JJJ's list). And while he is a recurring villain on the show, Doctor doom had nothing to do with this plot and didn't even appear in the episode aside from a brief cameo. It's awesome that they included him anyway, though, so I'm not gonna complain. Note that the tower is so tall that it wraps around the top of the box. There, you can also see a scale reference with the Spider-Man minifig. On the back of the box, you can see the interior of the Bugle and all of its play features which there are quite a few of since this is a playset. It's all illustrated pretty well, although Lego's choice of sound effects is still a mystery to me. I don't get why they don't go for Spider-Man's signature "Fwip!" instead of "Fazzing!" and I didn't know that a breaking window made the sound "Btoom!" but I digress. Contents Inside the box you will find three instruction booklets (one smaller than the others), a comic book, a fairly large sticker sheet, five numbered bags, and two loose pieces: A white string piece and a gray 16x8 plate. There aren't really any notable pieces and nobody cares about the comic bock (no offense to the artist), so lets get right to the instructions. They are pretty straight forward and easy to follow. Some of the pages have a ghostly image of Spidey, Nova, and Dr. Doom in the top right corner which is fitting since these are all minifigs that appear in this set (which is strangely not something that can be said for many other Super Heroes instructions with this type of artwork). Minifigures As with most Super Heroes sets, most people will get this set mainly for the minifigs, so without further ado, let's talk about them. Spider-Man is the same old bootless one you get in almost every USM set. Not much to say about him. Some might complain that we don't get Spidey's alter ego Peter Parker in this set, but in the USM cartoon, MJ is actually the one who works at the Daily Bugle, not Peter. Curse the creators of this cartoon for ruining our chances of getting a new Peter Parker minifig by trying to mix things up. Next we get J. Jonah Jameson. He appeared in a Spider-Man 2 set before, but this is a complete redesign. He now has a blue suit with a red tie, a unique face print, and that combed-back hair in dark gray. This new hairpiece doesn't suit him at all and the old flat top hair was perfect for him in my opinion, so I don't know why they changed it. The good thing about this change, however, is the fact that this piece is exclusive to this set in that color. Nova on the other hand is spot-on. He comes with a new helmet mold and some nice torso printing. However, he, too, is missing his boots. TLC should have started making dual-colored legs a long time ago. Here are some reference images to compare them to. Okay, so JJJ's hair may not be completely black in the show, but I still think they should have given his minifig a black hairpiece. His suit is also not quite the right color. He rarely appears in person in the show (including the episode this set is based on) and is usually seen on screens around New York, so this is the best picture of him I could find. I guess I should be happy they included a minifig of him at all. In the episode, it was actually Mary Jane who was at the Bugle during Beetle's attack, so it would have made more sense to include her, but we got her in the Spider-copter set one year later, so that's ok. All three of them have back printing. In JJJ's case I'm using that term loosely since it is only comprised of two lines, but it's nice that they went through the trouble of adding them. Both JJJ and Nova come with angry alternate faces. It almost looks like they're trying to out-angry each other. Who do you think looks angrier? Let me know in the comments section below. Now let's talk about the bad guys. Even though he would be better off in a Fantastic Four set, it's great to finally get Victor Van Doom, one of the greatest Marvel villains ever and in comics in general. He comes with a dark green hood which was new and exclusive in that color at the time, and he is the only minifig in this set that has leg printing. Beetle is a regular minifig with wings. The metallic printing on his face and torso is pretty nice, but I wish it would have continued onto his legs as well. The Beetle looks quite accurate to his on-screen counterpart. The only thing that could have improved him is a new helmet mold with pointy eyebrows/antennae. Doctor Doom, however, looks nothing like he does in the movie. I just don't understand how Lego could have messed him up so badly. Maybe they were working off of early concept art or something. Here is a back view of Doom and Beetle. Beetle would be a pretty boring minifig if it wasn't for his wings which are awesome with their holographic texture. They are so mesmerizing, I could look at those things all day. This piece also appeared in trans. light green in the Galaxy Squad sets which came out at the same time. Here they are without their gear. As you can see, they both have back printing as well. And no, Doctor Doom does not come with an alternate facial expression, which is fine since you can't see much of his expressions due to his mask anyway. Here's a look at Dr. Doom and Nova without their headgear. Some say that Doom's face looks too cartoony, but I think it looks fine. Nova is wearing stylish goggles as a way of explaining his white eyes. It's a far better explanation than the Bat-sweatband. They did the same thing with the masked Wolverine later. Here are all the figs with their accessories. JJJ comes with a camera so that he can take "more pictures of Spider-Man!" Beetle comes with one of those overused ADU guns which is a very poor representation of his wrist-mounted blasters. I hate to say it, but even those bulky new stud shooters would have been a better representation of his weapons. Spidey comes with his usual string of webbing and Nova comes with some Iron Man style translucent studs. The weird thing is that they are red while his powers have a blue glow in the show. Doctor Doom sadly doesn't get any accessories, but who needs weapons when you have a jet with a claw and flick-fire missiles. The Build The first bag contains Spider-Man, a brick separator, and the parts to build the ground floor of the DBC building. After a quick and straight-forward build, you get this. The dumpster and street lamp are separate from the building and since the lamp post is not built onto any baseplate and is quite top-heavy, it gets knocked over pretty easily. Maybe it's meant to be that way, but I would have preferred it if you could stick it onto the baseplate of the building on which there is unfortunately not enough space to do so. As you would expect, the second bag has the parts for the first floor of the building. This is also the bag that contains Beetle. After another fairly simple build, you'll find yourself with a two story building with a spiderweb one side and a fire escape on the other. However, you have to apply three stickers during this section of the build which is never fun. Can you guess what's in bag number 3? Yup, the second floor of the building. You don't need superpowers to predict that one. Also, this bag contains Nova and Jameson. The build of this section is a bit repetitive since the second floor is mostly the same as the first and it takes slightly longer to build since you have to build the rooftop as well. Also, in addition to the two window stickers you have to apply ten 2x2 tile stickers! Trying to do this without having any of them being crooked is a real pain in the megablocks. The next bag contains Doctor Doom and the cockpit of his jet. Doom's cape is in the usual square white box and the string for the claw is folded up in a piece of tape. Here's what you get at the end of this section. Looks more like an escape pod than a jet at this point. The final bag is the smallest as it only includes the few parts needed to finish the Doom jet. Once you build the wings and tail, you stick them onto the cockpit via Technic pins and you're done. Spare Parts These are the parts that are left over after the build. There is the brick separator of course, an extra antenna, and the usual little bits and bops. What's really awesome, though, is that they give you an extra pair of Beetle's wings! Considering what a neat piece this is and that this is the only set in which it comes in trans-black make this a very welcome spare that you can use in your customs. The Finished Set Here is the complete set. The DBC building looks quite tall, especially when you count the antenna. Comparing it to a screenshot from the episode, the general look of the building is there, although there are some inaccuracies. Aside from the fact that it is obviously way down-scaled, the screens that show JJJ ranting about Spider-Man should have been hexagonal, not square, and should have wrapped around the building. However, considering how many stickers you would have had to apply if they would have made it accurate, I'm actually glad they kept the screen mercifully small. Much like Doctor Doom himself, the Doom jet didn't actually appear in the Beetle Mania episode. However, it did appear in a later episode titled "Not A Toy" in which Spider-Man plays around with Captain America's shield, accidentally drops it in Doctor Doom's Latvarian embassy and has to try to retrieve it. And yes, that episode was as godawful as it sounds. Here's a screenshot of the jet from that episode. Like with the DBC, they managed to capture the general shape of the vehicle, although it doesn't look quite as good as in the show. The color scheme is too dark and it looks kind of blockier. Let's take a closer look at the jet. There is no real way to reel the claw in unfortunately. However, there is a stud on the back of the jet that you can stick it onto. Needless to say, this is not the ideal way of storing it. I would have much preferred it if they would have attached it onto winch instead. The engines on the wings can be turned, even though they don't turn in the show, and there is a flick-fire missile on each side. Even if it's not much to look at, at least it's a very swooshable vehicle. On top of each wing there is a tile with the emblem of Latvaria. There was no such emplems on the jet in the cartoon, but they are useful pieces that make it clear whose jet it is, so I'm glad they included them. There is nothing inside the cockpit except for a seat and unless you want to ruin Dr. Doom's nice dark green cape, I wouldn't put him inside of it. They could have at least printed a control panel onto that empty 2x2 tile. Play Features Since this is a playset, let's look at all the play features it has to offer. Like all playsets, the building is open in the back so you can play inside. On the ground floor, there is a potted plant and... nothing else. Seriously? Is this all they could come up with for this floor? They could have included a security desk, a lounge, a second plant, or anything else! As it is, it's just a boring empty lobby. The first floor is a bit more interesting. There is a safe, a swiveling chair, and a pin board with various pictures of Spider-Man. There is one tile that reads: "The true identity of Spider-Man" which is supposedly what the villains are after. I wonder how Jameson got this information in the first place. Speaking of Jameson, the second floor is devoted to his office where he can sit and yell at his non-present employees, demanding "more pictures of Spider-Man!" It also has a swiveling chair as well as a desk with a lamp and a computer. There is a Technic beam connecting his desk with the ceiling of the first floor which you can remove in order to take off the upper half of the building, but it's difficult to do, so I don't recommend it. As you may have noticed in the picture above, there are a few red pegs sticking out of the building. These are for triggering the play features. Most of them are on the roof. There is one on what looks like an air conditioning unit. If you place Spider-Man holding is web-string on the jumper plate in front of it and push the peg, Spidey goes bungee-jumping off the building. Wee! There is also one that sticks out of the side of the building which when pulled triggers a trap door. The third red peg on the roof can be used to pop off the DBC sign. Why is it called the DBC, you ask? It stands for Daily Bugle Communications since in this version of Spider-Man, the Daily Bugle is not only a newspaper, but a news TV station as well, one that promotes its own highly biased views. So basically the Fox News of the Marvel universe. I guess if you're an old school Spider-Man fan, you could just leave off the "C" and have it just stand for Daily Bugle. The sign above the main entrance wont be so easily modified however. There is also a peg between the first and second floor which when pushed pops out one of the windows on the first floor. The safe is only attached to a couple of jumper plates and has some jumper plates on top of it as well, so you can easily attach the Doom jet's claw to it and rip it out of the building as seen on the back of the box. There are also some SNOT bricks on the corners of the building that you can attach spiderwebs or Spidey himself onto for some wall-crawling and webslinging action. This is not so much a play feature as it is just a feature, but as I mentioned earlier, there is a fire escape on the left side of the building. This was a neat idea as it helps it feel like a building in New York City, but it is executed very poorly. There is no hole big enough for the minifigs to climb down through, so they would have to climb down the ladders from the outside which makes no sense. No wonder Spider-Man always needs to rescue people from burning buildings. There is one more play feature in the form of the dumpster. You can open the lid, put a minifig inside, and make them jump by hitting a tab in the back. Remember, this is before the introduction of super jumpers, but nevertheless it's a pretty strange place to launch minifigs out of. I guess even Super Heroes like to do some dumpster diving. You don't think this was funny? No? Well, me neither, but that's the type of humor that this show loves to use. Sigh. Anyway, let's get on to the ratings. Ratings Design: 2/5 - The set looks ok. Despite many inaccuracies, the DBC building and the jet somewhat resemble their on-screen counterparts and don't look too bad, but they definitely could be better. Build: 1/5 - A mostly unchallenging and repetitive build with an attrocious amount of stickers. Minifigs: 4/5 - Definitely the strongest point of the set. Some of the figs could be better, but four out of five of them are exclusive to this set. Doctor Doom is easily the best and probably the most desirable one - unless the Fant4stic movie portraits him so badly that nobody will be interested in him, but that's impossible. Playability: 4/5 - As you would expect from a playset, the playability is quite high, although I still feel like there could have been more. Parts: 3/5 - Not many rare parts. If you're looking for parts for building your own skyscraper with tan walls and lots of doors and windows though, this set is for you. Price: 3/5 - At 476 parts for $50, this set is a bit pricey, but it is somewhat justified by all the large window and wall pieces. Overall: 3/5 - This set is mediocre at best. Playsets are always a good choice for Spider-Man sets since they give Spidey something to swing from, but unfortunately they are rarely pulled off well. The jet is blocky, the building is bare-bones, and the price feels too high. The only reason to get this set are the four exclusive minifigs. This set was discontinued early this year, but if you still see it on clearance somewhere, go ahead and get one for the minifigs and parts, or buy multiples and use the parts to build a better DBC building. I hope you enjoyed this review. It is part of the Reviewers Academy's 7th Anniversary. We're not doing a big celebration this year due to other commitments, but look out for more reviews with the 7th Anniversary banner soon. Now, if you'll excuse me, I am off to see Fant4stic. I hope it's as fantastic as it promises to be! (2 hours later) I was wrong! I was horribly, horribly wrong!
-
Totally awesome desert cameo micro action figures by Mega Bloks Set CNC67 unboxing, review and action display. New for Fall 2015. Nice sniper rifle, machine gun drum barrel, ski mask and face mask! Desert outpost with digi cameo tarp not bad either.
-

Mega Bloks Call of Duty ATLAS TROOPERS Advanced Warfare Unboxing, Revi
Chewybricks posted a topic in Community
Totally Awesome Atlas Troopers in depth review! -
Hi, today I will make a review of a bootleg Hero Factory I buy at Thailand four months ago. The culture of bootlegging offical Lego sets are already been popular at Asia here since from 10-15 years ago. Some of members here say that the bootlegs are not as good as the offical sets, but some members say that bootlegs set can be as good as offical sets. So, is this set I brought can able to fight the quality of offical lego sets, or been terrible enough to put in the dustbin? Check this review and find the answer! The Packaging/ Instruction Bootleg Stormer 2.0 Review by Armstrong X-Wing, on Flickr The set itself is packaged similar to most of the Deluxe Class Transformers toys produced by Hasbro. I already throwed the plastic cover, so here we have the cardboard that complet the packaging of the set itself. As seen in this picture, the instruction is already printed on the cardboard. Honestly, the instruction on the cardboard is poorly maked and the steps are very confusing. So about the build, I will build the set using the parts available. Bootleg Stormer 2.0 Review by Armstrong X-Wing, on Flickr At the back here, you can see a simple ilustration of the whole collection of this line that also featuring a bootleg Surge 2.0, Evo 2.0, Breez 2.0, Furno 2.0, Stormer 2.0, and Nex 2.0 with the wrong colour scheme. The CGI effect is very poor, make the offical one looks like a masterpiece. The Parts Bootleg Stormer 2.0 Review by Armstrong X-Wing, on Flickr In this set, the figure is already builded and packaged in the packaging, but here's the parts that available in this set. Almost every parts at here are the same design with the real counterpart, so nothing special here. The parts also compatible with the offical Hero Factory sets, but the quality is not. Althrough the parts in this set didn't fall off when the set itself is complete, but the balljoints are very loose and has barely any friction. Bootleg Stormer 2.0 Review by Armstrong X-Wing, on Flickr Different from their real counterpart, the 2.0 upper helmet and the 2.0 middle helmet part can be connected to a Glatorian head via a axle. Bootleg Stormer 2.0 Review by Armstrong X-Wing, on Flickr Here's a picture of how the middle helmet part connected to the upper 2.0 helmet part. Bootleg Stormer 2.0 Review by Armstrong X-Wing, on Flickr However, this connection also cause a new problem. When the 2.0 helmet connected to the Glatorian head, the design of the Glatorian head stops the 2.0 helmet part from able to been push deeper and cause the eye of the Glatorian head appear below the eye hole of the 2.0 helmet. The Build As I say before, the instruction is very confusing and poorly maked. So, I will build this set according to the instruction of 2067 Evo 2.0. Here we start the build! Bootleg Stormer 2.0 Review by Armstrong X-Wing, on Flickr Bootleg Stormer 2.0 Review by Armstrong X-Wing, on Flickr Bootleg Stormer 2.0 Review by Armstrong X-Wing, on Flickr First, we build the torso, legs and arms. Bootleg Stormer 2.0 Review by Armstrong X-Wing, on Flickr Then, we add the head and armor on legs and arms. Bootleg Stormer 2.0 Review by Armstrong X-Wing, on Flickr Bootleg Stormer 2.0 Review by Armstrong X-Wing, on Flickr We add the head gear and the body chest, and after we insert the hero core, we get...... The Completed Set Front Bootleg Stormer 2.0 Review by Armstrong X-Wing, on Flickr Here, we have Stormer 2.0 (Err, Bootleg Stormer 2.0) completed. He looks good and awesome...... Bootleg Stormer 2.0 Review by Armstrong X-Wing, on Flickr ...But the the back is not. Bootleg Stormer 2.0 here also suffer for a hollow back syndrome, similar to the real Stormer 2.0 and the hollow back is also easy to spot because of the colour of the body armor. Posability Who's there? Bootleg Stormer 2.0 Review by Armstrong X-Wing, on Flickr Yes, they you are.Move the legs more and he will fall down. Victory! Bootleg Stormer 2.0 Review by Armstrong X-Wing, on Flickr Be careful ! Bootleg Stormer 2.0 Review by Armstrong X-Wing, on Flickr Bonus Images Here'sa image of this set when compared to 44019 Rocka Stealth Machine. Bootleg Stormer 2.0 Review by Armstrong X-Wing, on Flickr Final Comment Overall, this set is not a very good set. Sure this set has a bunch of recolours, but the quality of the parts and the posability of this set really cause this set receive a not so good rating from me. Sure you can get this set at Thailand, but seriously I don't recommend it. Colour Scheme - 6/10 Parts - 5/10 Design - 3/10 Posability - 4/10 Quality - 3/10 Overall - 21/50 Below Average More pictures available here (Once public): https://www.flickr.c...th/21347442395/ All comments are welcomed.
-
NAME: Drillex Diamond Job SET NUMBER: 70168 THEME: Ultra Agents YEAR OF RELEASE: 2015 MSRP: 29.99 USD Shop@Home description: Welcome to my review of set 70168 Drillex Diamond Job. This set has been on my radar for a while now, and when I saw it on a 20% off discount yesterday at my local Lego store, it was the last straw. I just can't resist a good deal! Even at a discount, is this set worth the price? Read on to find out! THE BOX The front box art is certainly attractive. The orange tank stands out nicely against the darker background. I would like to call your attention to the graphic in the top right corner; the agent in the special suit (What are they called again? ) vs. Antimatter is very nicely designed and complements the box nicely. If I were a small child this set would definitely catch my eye as I wandered through the toy aisle. The back of the showcases the set features. I won't go into too much detail now as I will focus on the play features later in the review. THE BUILD After ripping open viciously carefully opening the box and dumping out its contents, you will find an instruction manual, a small DSS, two loose Technic beams, and two numbered bags of delicious parts. Unfortunately my DSS was crumpled. Instead of echoing every review ever and groaning about how Lego packages stickers, let's take a look at the contents of Bag 1! And here they are nicely arranged for your viewing pleasure. Some pieces of interest: A fancy new neck bracket, some trans-blue wings, and a purple gem. I don't think I've seen one of those before. Bag 1 also builds our first minifigure, Ultra Agent Curtis Bolt. Don't worry, I'll cover the figures later. Right away we get to use those free-floating Technic beams. Near the end of the bag we encouner our first sticker in the form of a control panel ion what I assume is the cockpit of the tank. Luckily it is fairly easy to apply. Not long after the first bag is complete. We have the base of the tank, a holder for the gem, and Mr. Bolt with his snazzy new jetpack/glider thing. Just a couple unremarkable extra pieces this time around. Let's move onto Bag 2, shall we? More delicious parts! The contents painstakingly arranged by everyone's relatively new, soon-to-be favorite reviewer mediumsnowman! (That's me!) Some pieces of interest are included, such as the trans-red canopy, some interesting gears, drills, and Drillex's armor/gauntlet pieces. We also get the villain of this set, the aptly named Drillex. (Get it? His name is Drillex and he drives a giant drill machine? Haha! It's funny. Laugh. ) We're moving along nicely, bulking up the tank, adding a wheel, applying some stickers, and then... ... ... There's no way around it. You gotta buckle down and just... DO IT! It took me a little over 5 minutes to put together both tracks. See? I timed myself. The tank is nearly complete! Add some armor plating, build the drill, and... Voila! Eet ees complete! Well, not quite. How could you forget the all-important app brick gadget? Looking back on it it seems I built it upside down. Oh well. It's not like I'm even going to use it anyways. This bag has a couple extra pieces. Now the set is complete! Without further ado, let's take a look at the finished model. THE MODEL Not much to say here. The set is nice-looking from every angle and is very smartly designed. THE FEATURES First off there is this little fellow. It appears to be some sort of display pedestal from which Drillex can try and steal the jewel from. The pedestal is guarded by a laser web, but it doesn't seem very effective as two of the sides are left unguarded! Drillex can just snatch the jewel right out of there. See? Mr. Bolt is equipped with a stud shooter and this handy little jetpack. It's simple, but it serves its purpose. As usual, the stud shooter fires studs. I don't have a video, you'll just have to take my word for it. The cockpit comfortably fits Drillex, even with his bulky armor. There are also some stud shooters on the back of the tank. These ones shoot studs too. Isn't that surprising? When you move the tank forward, some gears turn the drills around in the front. It's fairly cool, but I'm too lazy to take a quality video and upload it. You'll just have to take my word for it. On a brighter note, let's take a look at the minifigures! THE MINIFIGURES This set contains two minifigures; Curtis Bolt and Drillex. Let's take a look at Mr. Bolt first. Agent Bolt is a nicely designed figure, with a well detailed torso and legs. My only gripe is the black hips stand out and would have been better in dark blue. I can see his face having lots of usability in sci-fi themes. Back printing is just the icing on the cake! He also has an alternate face. It seems just about every figure has one these days... Now moving on to the Ultra Agent's villain, the fearsome and aptly named Drillex! His armor and drill-gloves look nice, but they limit is ability to grab things and drive the tank. The box art suggests he carries the jewel like this... I much prefer him without the armor and gloves, as you can more clearly see his exceptionally detailed torso. He too has back printing! So, what do I think of the whole set? Read on to find out the question that has plagued us since the beginning of this rather long-winded review! THE RATINGS DESIGN: A solid design. The tank looks good from all angles and props to the designer for effectively integrating the play features. 7/10 PARTS: This set is a great one for parts. Tank treads, Technic pieces, a trans-red canopy, a good assortment of plates and slopes in a rare color... What more could you want? 9/10 MINIFIGURES: As I said before, the minifigures are well detailed and could work well in most sci-fi settings. 8/10 PLAYABLITY: This set has good playability. Two opposing factions fighting over something, as well as a vehicle that has a satisfying and effective play feature. I imagine a small child would immensely enjoy this set. 8/10 PRICE: At first glance, this seems like a good set for the price. 312 pieces for $30 seems like a good deal. Then consider that the tank treads take up a good portion of that piece count and think again. Luckily I was able to nab it on a discount. This seems much more like a $25 set than a $30 set. 6/10 TOTAL: 38/50 or 76% The ratings may not completely agree, but I think this set is more than the sum of its parts. Want cool pieces, desirable minifigures, and an engaging build? Pick up 70168 Drillex Diamond Job today! Thanks for reading my review! Feel free to leave comments and suggestions down below, as well as your thoughts on the set. I'll leave you with a reference to one of my favorite movies, The Incredibles. Until next time! EDIT: Fixed some typos and added a picture I forgot the first time around
-

REVIEW: LEGO Star Wars Poe's X-Wing Fighter with BB-8 (Video)
Zusammengebaut posted a topic in LEGO Star Wars
Hello everybody, this is my review of the new set Poe's X-Wing Fighter with BB-8 and three minifigures. A lot of images with details you can find right here. And I embedd the video-review - in german, but again with a lot of details. This is a really cool set, and: The cockpit is a print, not a sticker! If you have any qestions because of the video, please fell free to contact me at any time. Best wishes Anders -
Review: 8515 RoboRider Wheels Item number: 8515 Pieces: 4 Original RRP (2000): $1.99 In the year 2000, Lego's RoboRiders line was teetering on its last legs, but it wasn't ready to drive over a cliff with a brick on the gas pedal just yet. Not only was the penultimate The Boss set released, but Lego also started producing these mixed packs of RoboRider wheels, much like what was done with Slizers and of course, Bionicle. Each little box contained four, randomly selected RoboRider wheels, in not only colours included in the sets, but also two exclusive colours; trans. orange and black. Box As you can see, my copy of the box is in very poor shape. This here was a recent eBay win - £1, with £3 p&p. I was quite chuffed with that bargain, as you can likely imagine. The front of the box has a cool graphic, featuring the RoboRiders logo imposed over a grey RoboRider wheel. The glowing details within the center of the wheel are really eye-catching. A small graphic clarifies that the box contains four wheels. The sides of the box show the eight characters that can be found on the wheels. I really love the art style to these guys - they remind me of chibis, or SD Gundam figures. It's also worth noting that a couple of them have Lego-inspired detailing, which is nice. Also worth noting is the coloured hoops around the characters - these represent the possible colours of wheels available in the box. This brings back some memories. The top of the box provides the URL to the RoboRiders website, which is of course no longer online. I believe there was an online game available on the site back in the day, which one could use codes gained from the RoboRiders toys with. And finally, the back of the box. I shan't show you the bottom, as it's just boring legal information. Anywho, the back of the box shows us all six of the canister-sized RoboRiders, and demonstrates the wheel firing function with the Power RoboRider. On the left is an illustration pertaining to the vicious ice region of the RoboRider world, and on the right is what I assume to be the scene of a volcanic eruption. These illustrations are a nice little bonus, and help to set the scene for the wild world of the RoboRiders. The back of the box opens up as such to reveal the inner contents. Originally, one punch out the perforated tab to open the rear flap, but I wanted to be a little more careful... And failed miserably at doing so. But anyway, as you can see, the box is more that spacious. I'd expect some form of literature, like a small poster of pamphlet, to fill up all the empty space. But, I guess the boxes were made bigger so as to fill up more shelf space and seem more prominent. Contents While the contents of each box is different, I though it'd still be fun to take a look inside. As promised by the box contains four individual wheels, randomly selected. I got the Laser character on a yellow wheel, the Fuel character on a grey wheel, and the Dynamite and Flame characters on trans. orange wheels. What's interesting - and exciting - is that, as I mentioned earlier, the trans. orange wheel colour never appeared outside of these wheel packs. Just for kicks, here's those trans. orange wheels on the Power RoboRider. Overall If you were a kid, teen or adult who had been collecting the RoboRiders back then, these were certainly a fantastic bonus item. Before these packs were released, I assume the only way one would complete a collection of RoboRider wheels would be to buy multiple copies of the sets, so it makes sense that the boxsets were produced. The inclusion of two exclusive colours to the mix is a fantastic bonus too, and I'm glad that I personally got a pair of trans. orange wheels. However, I feel that one thing that could've improved these things would be the inclusion of something other than the wheels. Maybe a head piece, or a wheel shooter, or maybe just a small poser or pamphlet. As it stands though, these little things are pretty nifty, but I wouldn't actively go hunting for them on eBay though - RoboRider wheels are very easy to find on Bricklink for very little money. But, if you do find one cheap, I say to bite - you never know what you might get!
-

LEGO Pictorial Review: 70739 Airjitzu Kai Flyer
Ramidalis posted a topic in LEGO Action and Adventure Themes
Hello guys. This is my first review (perhaps and new post) in this forum, so I bit nervous about am I doing all things right, also I worrying about my English skills :) Ok, never mind. As I have writing reviews on this set in several others languages I found there is no any information about these series yet neither on BrickSet or Bricklink, so I nervous of being pathfinder - it's not my role :D But on another hand I'm very exited because no one have reviewed this one (may be is, but didn't seen). Ok, now we start: Set#: 70739 Name: Airjitzu Kai Flyer Theme: Ninjago Year: 2015 Pieces: 47 (counted all except minifigure and his mask) Minifigs: 1 MSP: € 9,99 Take a look of this awesome flying model. At first glance it doesn't look so cool, but when you test it, your opinion will change, this stuff is really fun, especially when you're playing in team (: Packaging is very similar to Legends of Chima Speedorz theme (those which are more newer). Also there is some similar functions including that belt. From another side there is some pictures on how to construct this model, how to rip it and fly :) There is also pictured Kai (red ninja) minifigure, some weapons and two golden shuriken. Also advert of all Airjitzu sets in this line yet. Instructions - there is no any file for now in Lego Service web, but perhaps they will ad soon. Also inside the booklet there is some kind of link to the web page, where should be some of Airjitzu hints, from how to till watch how I can :) But still nothing. Now I'm thinking, may be it's a bug, that we have these sets in our local stores already, when all the world is awaiting for it's release? :D This is that belt I mentioned before. Looks not very strong? Trust me it is :) As these sets were designed to kids, who uses bricks not very carefully (not all but a majority) so some parts should be made very strong, and with friend from our LUG we have tested it well :) Ok, lets see how looks our new styled ninja Kai. As I don't like Ninjago a lot, so all minifigures seems to me the same - not interesting, but not this time. This one restyled minifigure looks pretty cool from both sides, even mask looks more detailed than ever (maybe be shown). There is enough cool prints form front and back. In face side we see any kind of hieroglyph (anyone knows the meaning?) and from back we can see something reminding to lion (or tiger) face. Also like that flame pattern. As you can see this guy also has red skin head - perhaps hands and arms are showing red skin too. But from face mimic it looks frightening, is he really good guy? This is how looks almost whole set (excluding extra parts, weapons and rip belt). As shown on the box, minifigure can be placed in the glass cabin, but its funny, because there is no studs on the floor so minifigure could stand fixated. Besides this air spinner flying better without figure. There is no chance cabin will open in the air, because it fits well in sockets. Lever is designed well - its very comfortable to handle it, but it could be bigger a bit (don't forget it designed to children). What we got here? I think its one of the coolest sorts of weapons. Golden shuriken and single sword are a bit flexible. Some extra parts. Frequently extra parts in these sets come from weapons, some time from lever. And this is how it looks in comparison - see any big differences? All sets are almost the same, change only a color, and you'll get another handle. Also there is different icons with hieroglyphs. Spin it carefully, don't point it on your face, don't spin it strong at home - there is some consequences :D Thanks for your time and I'm waiting for comments :) The bigger photos you can find on our LitLug Flickr acc. -

Review: 40116 "Invasion from Below polybag" (Breez on Mecha)
Pikachu posted a topic in LEGO Action Figures
Let me show you a review of set 40116. Set Name: Invasion from Below polybag Set Number: 40116 Piece count: 22 Figures: 1 Year: 2014 The set is quite rare, but I managed to get one in the one of LEGO brand store. Packaging is a plastic bag. Through the gap on the rear side you can see the contents. Let's look at the details. 22 parts for Mecha & 9 for Breez. Instructions is printed on a double-sided color paper. Assembly is very simple. Three spare parts. One of them - a rare "tablet" with the emblem of Hero Factory. Let's assemble minifigure of Breeze. The Beauty One! Side view. Pay attention to the ledge at the back of armor, and later you will understand what it is for. The backrest. Let's assemble Mecha. First is the chassis. Front view. View from behind. Sideways. The pilot's seat. There is a hole in it for a thorn in the armor. That is how the pilot is fixed in seat. Seat can be assembled to Mecha with the help of a ball socket. Full Mecha complete. Sideways. Behind. Slightly above. Breeze takes its place inside the Mecha! Great view full face. A bit on the side. Complete sideview. Let's test how it works! Swing ... Block! Stand on one leg. Kneel. Levers to the side - it's time to get out. Ooh! It feels so unusual to go on the ground with own feet ;-) With You was a Breez with its new Mini Mecha! Thank you, your Pikachu ... The results of set: Pluses of a set: - Minifigure of Breeze - Not a bad semi-universal Mecha. Minuses of a set: - For polybag - it's just a Fairy Tale !. Summary: Definitely worth to buy for any purpose and age. P.S. And if you get the item 11289 and attach it to the seat - it will be much better! Bonus photos of improved Mecha. Static. Dynamic. And do not forget about the protection of our younger brothers! Bunny approves ;-) -
Summer is almost here, and the ice-cream shop at the old Heartlake Lighthouse has opened for a new season. Join Stephanie and Kate and enjoy your favourite ice-cream flavour. Basic info of the set Set no.: 41094 Name: Heartlake Lighthouse Theme: Friends Year: 2015 Pieces: 473 Minifigs: 2 (plus a seal) Age group: 6 - 12 Price: £ 39.99 / US$ 39.99 / EUR 39.99 Price per part: 8.455 p / 8.455 c / 8.455 c Links: Bricklink, Brickset, LEGO S@H The box The front of the box is a standard Friends design, with curved sides of the box. The top right corner has a cartoon picture of the five main Friends characters, while at the bottom right there's a picture of the two Friends, Stephanie and Kate, included in this set. The box art is lovely, and I like the balloon in the background. In the bottom left corner, there's a small picture of the back of the lighthouse, which I find a bit redundant. It's too small to see the details, and as most of them are shown on the back, this picture could be omitted from the box art. The back of the box is nicely showing all the wonderful details, and is actually very appealing. Almost half of the box is covered with small windows showing different details and play features of the set. Although these little windows reveal much of the details of the set, and take away the element of surprise, I find them really useful in presenting the set. My favourite feature window on the back of the box is the one showing set's accessories. I admit I was simply captivated by all the ice-cream flavours available in the ice-cream shop. In addition, there's a new hair pin in the shape of a flower, and a coin of 5 FMU (Friends Monetary Unit). The sides of the box are following the standard box design. There are typical hearts, paws, butterflies, stars, flowers and musical notes on a lavender background. On one side, there's also a smaller picture of the set. The top of the box has a picture of Stephanie as a measure of size. This is a nice feature, but I would expect something more catching here, as there are plenty of other interesting parts in the set. The booklet The front art design of the two instruction booklets copies the box art. If you have a sharp eye, you can notice the bottom left corner of the booklet is torn. That's how I got it. Also, the booklet was twisted a bit, and stayed like this even after a couple of days under a box full of parts. Inside the instruction booklet, there are no surprises. The background is lavender, and the odd pages have a small heart watermark, which is a typical feature in Friends' instruction booklets. Individual building steps are simple, and if needed, placement of some parts is emphasizes with arrows. The back of the instruction booklet surprised me with an image of the new series, the Elves. I bought and opened the set in late January, so the Elves were still an upcoming series. In a way, they are connected to Friends series (the Elves use the same minidoll design) so this shouldn't be a surprise. The parts Inside the box, there are two instruction booklets, a sticker sheet, and a 8x16 medium azure plate. Parts not being inside the polybags is becoming a fashion, and I'd really like to know why is that. At least in this case, the plate is not that big, and could easily be packed inside a bags. Also, with its sharp edges it might contribute to damaging the instruction booklets. The parts are organized in four numbered bags. Considering the part count (473) numbered bags are expected. Each of the numbered bag had inside one smaller bag with the small parts. The sticker sheet was only slightly bend in my case, and I was happy not to see it damaged. In general, I don't like stickers as much as I like printed parts, but with the Friends series, there are some neat design. However, this is the first set where I actually applied only some of the stickers. If you read through the review, you'll see what I mean. Inside bag no. 1 the majority of the larger parts are in white and tan. Medium azure plates stand out a bit, but only due to the bright colour. When organizing the parts for the picture, I was surprised to see that Kate's torso was not packed inside a smaller bag as Olivia's torso and both of their legs were. Other special and interesting parts in the first bag are the bright pink boat, ice-cream cone, reddish brown plates with swirl top and a bright pink flower with pointed petals as hair accessory. Inside bag no. 2 the most parts are in white and medium blue, but there's also a fair amount of bright pink. An interesting part here is the bright pink 2x2 macaroni brick, and it appears in this set only. In addition to bright pink, medium lavender is another Friendly colour in this bag. I also like the flower plates in green, red and dark pink. Another rare part are the white doors, as they are available in four sets only. Bag no. 3 contains roof slopes in dark blue, and more of bright pink bricks for the lighthouse tower. I was excited to see inverted corner slopes in dark blue and the 2x3 and 1x2 slopes in dark blue. These are not very common, but they'd allow more dynamic roof tops in every city. In addition to flower plates in green, red and dark pink, a bright light orange flower plates are included as well. Bag no. 4 has more specific parts than the first three. Also, the most interesting parts can be found here. There's a lot of white parts included, but the most interesting parts are in other colours. An exciting recolour is the quarter round fence in magenta, which appeared in 3 other sets. Starting from left to right, there's a lot of the flower plates, and they come also in lavender, which is a new colour for this part in 2015. There are also some ice-cream parts included, such as a trans-neon green popsicle, ice-cream scoops in bright light orange and lime, and round plates with swirled top in bright pink and white. The most interesting parts in this set are shown on the picture above. Most of them are recolours of the existing parts, while some are completely new and unique to the set. Some of them I mentioned before, but just to emphasize my favourites. It's really nice to have a boat hull in yet another colour. If you're after bright pink bricks, this set is worth having for the variety of them. But then there's also the ice-cream cone and scoops, (not so) new plant, lavender flower plate and a printed coin plate. In my opinion, this set has a great value in these small and special parts. There's a lot of extra parts in this set and they are a nice selection. Mostly, they are the usual combination of small and easily lost parts, but there's are also some really nice extras. I really like the amount of extra flower plates, 5 FMU coin plate, and the round plates with swirled top. The minifigs Stephanie (left) and Kate (right) are the main characters in this set. Stephanie is one of the 5 original Friends, while Kate is not. I was a bit surprised to find out that Kate is not unique to this set, but she appeared in two other sets, namely 41000 Water Scooter Fun and 41037 Stephanie's Beach House. Kate is enjoying a scoop of chocolate ice-cream, while Stephanie seems to be more interested in taking photography. Stephanie is sporting a medium lavender wrap around skirt unique to this set and green top with stripes. She also wears modern trans-purple sunglasses, available in only 3 sets. Kate is wearing a bright light orange layered skirt, which is common in this theme in other colours as well, and a bikini top which she wore also in 41008 Heartlake City Pool and 41034 Summer Caravan. It's really nice to have more variety in Friends' clothing and the wrap around skirt in lavender will fit nicely with other tops. There's no printing on the back, but it would be nice to see the striped pattern on Stephanie's top. Both of them also have hair accessories. Stephanie has sunglasses, which are different from the ones that appeared in previous Friends sets. Also, they look more realistic being a trans-colour. Kate has a flower hairpin, which is a new design. I wouldn't mind using this part as a real flower. The obstacle for this is the small pin, which doesn't fit the holes in plant leaves, but it fits the flowers and can be then attached to the bottom side of the leaves. The build The building of the set starts with a minibuild setting for the seal. It's a small rocky island in the middle of the water. It's a very simple build, but it's effective for the purpose. I'd prefer a grey jumper plate on the top or if it has to be green, dark green would be great as well to present a wet algae on the top of the rocks. Reddish brown seal is rare, but not unique to this set, and has appeared first in the Friends Animal series 6. It looks really cute seating on top of the rocks. I'm guessing Stephanie is observing him/her through her binoculars. There's no printing except the eyes, which are not so realistic, but they do give the seal a cute look. The next minibuild is the boat. It's hardly considered a build on its own, as only few parts are added as equipment. There are wooden benches for sitting, and a special tile so hold the minidolls in place while enjoying the boat ride. I really like the brown bars as an extension of the paddles, as they allow minidolls to hold the paddles and actually row. What I don't like about the boat is the flags colour. I'm not sure red and pink go together, and almost every other colour would fit better. Stephanie likes taking a boat out to the lake (or sea) to observe the seals. The boat is big enough to accommodate also her equipment, the camera and the binoculars. And if she wants company, she can move her equipment to the front of the boat to free seating for one of her friends. The building then continues with the base for the lighthouse. My favourite part here are the brown pillars, on which the pier is latter build on. These are hidden in the next steps, and I wanted to show that the designers also had in mind these hidden details. The finished base for the island has three different areas. There's a small patch of grass on which the lighthouse tower will be built on, and a large wooden area for the adjacent building and the pier. The medium azure plates are nice for the water, as they create a more tropical atmosphere. The building of the lighthouse starts with the base of the tower where a small toilet is. White dome bottom is used for the toilet, which is simple design, but works fine. A weird detail is the dark pink flower on top of the toilet tank, but I'm guessing it's there as decoration, and not a part of the toilet tank. The details of the toilet are hidden as soon as the walls are built up. It's here where the white door is used, and I have to say that this is the most appropriate door colour and design for toilets. When I first put a toilet in one of my MOCs, I had a huge dilemma which door to use. It's really great TLG started making this door also in non-transparent colours. Initially, I was sceptic about bright pink walls of the lighthouse, but the colour fits nicely. The door should have a sign to indicate the toilet behind them, but I decided against using the sticker. I plan to use those door in MOCs, and I'm not sure they'll be used as toilets only, so I'm also glad the door is not printed to have a choice to used them as something else as well. Next the base of the adjacent house is build. It's a combination of white and medium blue. I like this choice of colours, as they complement bright pink nicely. A cute design are also the floor lamps, two are positioned at the base of the walls, and latter more are added to the patio area. I was surprised to see that the building continues with the front wall, as it felt a bit unstable. Another colour is introduced as the canopy, and it blends in with the colour scheme really nicely. The front door to the ice-cream shop is ''decorated'' with an ''open'' sticker sign. Left wall is latter build, and the window on the side has the same canopy. The odd parts here are the yellow window panes. The really look out of place. I wish white panes or a glass would be used instead. Additional pillars that give more stability to the walls are built, and they partly cover the cute floor lamps. Later on, the building of the lighthouse continues with the second floor. This floor act more as a storage space than actual floor, as it's a place where Kate stores various bottles. I'm guessing these are soap and air-fresheners used in the toilet bellow. The house part is finished at this point, and the colour scheme pops to life here. The combination of blues and pinks is really pleasant to the eye. The plate above the roof window has a sticker on, so that everyone can see from a far that this is where the ice-cream shop is. Only thing out of place, at least in my opinion, are the yellow window panes. More details are added also to the back of the building. There's a loft area above the shop with a makeshift bed and a wonderful view through the window. In the lighthouse tower a map is added to the top floor together with very simple ladder. The map is the same as in the 41097 Heartlake Hot Ait Baloon. I consider myself an experienced builder, yet here I made a colossal mistake when building the cooler case for the ice-cream in the shop. I used the larger trans-clear panels. I discovered this mistake when I was looking for those large panels in latter steps. Obviously, the instructions to open one bag at a time make sense even if you're a bit older. This is how the lighthouse and its adjacent building looks in the winter. The patio is empty, and more details can be seen that way. The new magenta curved fence is used at the top of the lighthouse, and the radar dish in magenta is used as a roof. Overall, despite the pink and magenta not being traditional lighthouse colours, the colour scheme is really pleasant, and even the yellow window panes don't looks so disturbing. In the last few steps, more details are added to the patio in front of the house. There's a small table where Kate is enjoying her chocolate ice-cream, and as it seems she has another portion of strawberry ice-cream waiting for her. In the back, there's an advertising board showing the ice-cream selection. While this is a lovely detail, it's a bit hidden in the back. Also, the before mentioned floor lamps are added to the patio, and I can almost imagine the atmosphere in the evenings. On the right side to the door, there's a large model of an ice-cream cone with 4 scoops of vanilla, pistachio, chocolate and strawberry ice-cream. It's a nice decorative element, and uses technic cross axle to position the scoops at different angles. Also, some greenery is added to the walls of the lighthouse tower. The finished product After 103 building steps the Heartlake Lighthouse is finally finished. Considering the small patio, it looks full. In addition to Stephanie arriving to the lighthouse in her boat, and the little seal sunbathing at the rocks nearby, there's not much more room for any other visitor. For some reason, while building the set I had an impression that the lighthouse is accessible only by boat, and that it is not build on the shore of the lake or sea. I'm guessing the tile map helped with this perception. There's not much details left to reveal on the back side. The coolers in the shop are filled with the various ice-creams. A lamp is added to the loft area. It's a simple design, and has a handle to carry the light around. All in all, there's easy access to the back of the building, and the various areas allow lots of play action. There's a cashier in the shop close to the window, so you can sell/buy the ice-creams outside the shop... ...or you can go inside to have a better look at all the tasty ice-cream flavours. If you had too much to drink, you can use the toilet in the lighthouse tower. The space is tight, but at least the toilet seat is down. That's actually the only place for the minidolls to stand in the lighthouse tower. The other two floors are too low, and too small to fit a minidoll in, and it would be much better if only one floor was made instead of two. Kate has access to the loft above the ice-cream shop, where she can have a quick nap on the bed, or just sit and watch the view through the window. Stephanie enjoys the view from the top platform, observing the seal, and taking photographs. I tried to position her with a camera taking a selfie, but apparently with no wrist movement, that's not possible. A view from the right side shows the plants growing at the bottom of the lighthouse tower. I like the leaves climbing on the walls, and there could be more of the new grass stems at the bottom, not so much to fill the space, but more to increase their availability. A view from the left side reveals the details on the patio. The advertisement board stands out more from this side, and it has a rotating base, so you can position it whichever way you like. At the table, there's seating for two, so Kate can invite over some of her friends. The Final Verdict Design: 10/10 The overall design is great and I cannot think of any flaws or improvements. Considering the target population of 6-12 year olds, the build is simple and well done. Also, it takes a while to actually build this large set, and the process is very enjoyable. Some of the parts included in the set are available in few sets only, and they add more value to the set. Overall, the colour scheme is lovely and amount of details is great. Parts: 10/10 The parts in the set are a nice selection of various bits and pieces in interesting colours. The not so common parts makes this set also a nice purchase as a parts pack. I like the variety of parts in bright pink, the magenta fence, and the ice-cream scoops. When I was deciding on buying the set, the parts list was an extra reason to get the set. Also, you get a lot of extra small parts, and there's a bunch of flower plates in 5 different colours. Build: 8/10 The building of the set is relatively simple and straight forward, and is appropriate even for the less experienced builders. The advanced level of the set can mostly be considered due to a large number of parts, as it takes more time to assembly it. The finished product is stable and allows lots of play action, however when building it, it didn't feel this way all the time. The walls of the tower are built by stacking bricks without offsetting them. Due to the curved walls of the tower, there's no other way to do this, yet I'd still prefer the sets to teach the kids how to build stable walls by offsetting. Playability: 10/10 As it's standard for the Friends sets, aimed mostly at young girls, playability is the most important feature of this set. However, there's enough action for everyone, and the set doesn't feel as it's only for girls. There are not many moving features, the playability is based more on the imagination of the player. You can row the boat around the lighthouse and search for seals though. Also, the ladder at the back can be moved to allow access to the loft above the shop. The value of the set is in playing out different scenarios. You can play shop, or watch the view from the tower, or tell scary stories in the loft at night, or simply enjoy the ice-creams. Minifigs: 9/10 Stephanie wears a lavender skirt, available only in this set, and both Stephanie and Kate have accessories that are not so common. The flower pin Kate is wearing can also be used as a real flower, although it can be connected to leaves only in combination with classic flowers. Also, their torsos are available in few different sets only. However, there's always need for different tops and bottom of minidolls. Price: 9/10 It's a large set, so the price is not that surprising. The price per part is great actually, but if the size of the parts is considered, it's not so great anymore as there's a lot of very small parts. However, keeping in mind there's some rare parts included in this set, the selection of parts is actually great for this prize. I'm not considering getting an extra copy, but the set as a whole is a great parts pack for builders oriented in creating houses and landscape. Overall: 56/60 (93.3%) As the overall score implies, this is a set worth having. The design is interesting and pleasing to the eye and offers a lot of playability. Building it is appropriate for both beginners as well as more experienced builders. The parts selection is nice, and has rare parts attractive to AFOLs. Considering the price, it's not the cheapest, but it offers a lot of interesting colours and rare parts. The parts have a potential to be used in different themes, and the set is a great buy also for the parts alone. It's not the distance, it's the goal that motivates you.
-
Hi evey EuroBrickers from all around the world.Today i would like to make a review about hte Lego City Police Accesory Set that released at February 2013. Set Information Set name : Lego City Police Accesory Set Set number : 850617 Piece count : 34 Age recommended : 5+ Theme : Lego City Police Year released : February 2013 Price : $14.99 Lego Shop website description: Fight crime in LEGO® City! Fight crime in LEGO® City with 4 prebuilt police minifigures and a police dog! Begin or expand your LEGO City Police collection with tons of story-sparking accessories including a police barrier, bone, handcuffs, binocular element, metal detector element, flashlight, walkie-talkie element set, briefcase and 2 megaphones.• Includes dog and 3 pre-built male and 1 female police minifigures with accessories• Features police barrier, bone element, 2 handcuff elements, binocular element, metal detector element, flashlight, walkie-talkie element set, briefcase and 2 megaphones.• Expand your LEGO® City Police collection! The Box/Packaging I accidentally throw away the box/packaging of this accesory set,but here is how the packaging look like according to LEGO Shop Website. As you see from the picture,the set is packed with a plastic cover that sealed on a smooth textured cardboard with a simple ilustration.I don't very like how TLC design the packaging,because the plastic cover can be easily opened by sharp object like scissors and dagger.I prefer to packing the set in a small box. The Build Same like the City Fire Accesory sets,the minifigures has already been built.Nothing special here. The Minifigures Same like the City Fire Accesory sets,this set is provided with 4 minifigures.In this set,you got 1 SWAT male Police Officer minifigure with hair,2 SWAT Male Police Officer with SWAT helmet,and 1 SWAT female Police Officer.here is the front look at the minifigures. I don't like how the visor attached to the helmet.Same like the other 2013 City Police set,you use this helmet thing and connect the visor like how you connect this goggles piece to Hoth rebel trooper helmet in Star Wars sets.but the visor is not sturdy and it will easily fall out from the helmet.None of the minifigures has a alternate face. The back view of the minifigures. All minifigures in this accesory set has back printings,which is not a bad thing. The Accesories In this accesory set,you get 2 handcurfs,2 torch light,1 mini suitcase,1 white road block that also available in 60044,1 dog,1 white bone,1 redesigned metal detector,2 black megaphones that used as blaster from the early years of Star Wars theme,2 over-sized walkie-talkie and 1 mini binocular. Some interesting parts in this accesory set. The whole set with minifigures. Rating Minifigures - 6/10 Nice and detailed printings on the minifigures,but I need some new face printings in the City Theme minifigures line. Parts - 6/10 Nothing special,except the dog,redesigned metal detector,the road block,and the bone. Build - 0/10 Nothing to build. Price - 3/10 Expensive for what you get when you compare it to the other $15 - $20 sets. Design - 2/10 For a accesory set,what the heck is the word "design"? Overall - 5/10 Final Verdict After I buyed this set and play with it with my City police forces,I rate this set as a average set.Althrough this set has good minifigures,give me some good pieces,and expand your City police forces,but if you compare this set to 7279,60042,and the other $15 - $20 sets,it's expensive for what you get. Overall,not the worst accesory set you can get,but not the best accesory set. Thanks for reading this review! The end. By Armstrong Yong


.thumb.png.9e4550e6d7606030f9d13d7d604b4ec6.png)