Search the Community
Showing results for tags 'mansion'.
Found 21 results
-
 This house was digitally built in 2018, really built in 2019, then languished in a WIP state for several years before being finished last month. Enjoy the pictures - this model has been a long rough ride since the beginning, but it was worth it! I was inspired to create this model from the 2018 Jurassic World set 75930, Indoraptor Rampage at Lockwood Estate, with some design cues from set 10228, Haunted House. The dollhouse-style model was built from the set pictures, with the play features removed and opening rear sections added to match the front half. The house folds apart, doll house style, with the rear section opening in quarters up to 90 degrees. (Technic pins hold the model shut for transport and ease of handling) The modular building compatible base is able to be removed from the building to facilitate access to the inside details. The rear of the mansion features a back door (perfect for escapes when the locals get feisty about the scientist playing god again!) and the chimney flue. Moving inside, The bottom floor features the living room and dining rooms, while the second floor is the bedroom, study and pipe organ rooms. The third floor features the laboratory for the study of time travel. The rear door to the outside is in the right rear section, while the safe containing the house's title and family paper work is directly above on the second level. This area also has stairs from first to second floors and what appears to be Frankenstein's monster on the third floor's operating table! The left rear quarter features the fireplace and telephone on the first floor and a bed for the second floor's master bedroom. The stairs to the third floor are also on this side. It seems the time stone from the Marvel Universe is also here... I wonder what the Doctor plans on doing with it? I built the roadster model by heavily stretching set 40532 - Vintage Taxi by about seven studs. This allowed for me to add in mechanical details. I added a covered spare tire at the rear of the car, and blacked out the back windscreen to give the impression of a fabric convertible top. As an added bonus, the car still seats two figures with room in the trunk for luggage. (Any and all resemblance in the mad doctor to moderators, living, dead, or otherwise, is totally coincidental. It is totally not @Professor Thaum in his younger years. ) The rear of the MOC. Inside view of the car, with seating for two and room for baggage. ...and that's all I've got. Thoughts, comments, complaints and suggestions welcome!
 -
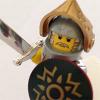
THE MASK OF ZORRO left its mark to my childhood in 1998. At my young age, I was pretty impressed what I watched. The way that this mysterious, dark hero with his black mask and cape was fighting for peasents against Spanish dons. The scenes, costumes, acting, story... they were all attracted me. Before I decided to make a Zorro moc, I planned to build an old Spanish manor, but later on I thought, why not. About the movie, I find many similarities with Pirates of The Caribbean so if you haven't watched Zorro but like PoC, give a chance. ~Z~
-
Mad Scientist Mansion - with 1920's blue roadster, and time machine - steampunk real world MOCs
Murdoch17 posted a topic in LEGO Town
This story is set in my Adventures / Monster fighters / Pharaoh's Quest Universe of the early 1920's. (First off, I want to apologize for these photos: I didn't have an area big enough to handle the four story tall building, so I improvised. It doesn't look very pretty, but it's passable.) I was inspired to create this model from the 2018 Jurassic World set 75930, Indoraptor Rampage at Lockwood Estate, with some design cues from set 10228, Haunted House. I made the mansion to replace this other MOC I had made, but don't worry, the other building still exists, it's just empty right now. The Wormwood Estate The dollhouse-style model was built from the set pictures, with the play features removed and opening rear sections added to match the front half. The model also features a round window for letting in moon light in on the mad doctor's experiments, along with lightning rods on top of the house. (for powering his experiments) The rear of the mansion features a back door (perfect for escapes when the locals get feisty about the scientist playing with time travel again!) and the chimney flue. The bottom floor features the living room and dining rooms, while the second floor is the bedroom, study and pipe organ rooms. The third floor features the laboratory for the study of time travel. The rear door to the outside is in this section, while the safe containing the house's title and family paper work is directly above on the second level. This area also has stairs from first to second floors. The left rear quarter features the fireplace and telephone on the first floor and a bed for the second floor's master bedroom. The stairs to the third floor are also on this side. The Wormwood Family Automobile The stylish car is heavily modified version of Brick-Link set BL19011 (Vintage Roadster) turned blue. The car model is about 10 studs wide (with a large overhang on each side due to the white fenders on front and rear) and is 36 studs long, front bumper to rear bumper. The car can now seat two mini-figure's in the seating area, and as before feature removable engine cowling sections for a look at the V8 heart of the car. The headlights are now secured more tightly, and the front windscreen glass is now trans-black and not inclined anymore. (it was bugging the heck out of me that it wouldn't stay in place!) The taillights were moved down onto the rear bumper. No real reason for the change, it just seemed like a good idea. The Time Machine Vehicle (TMV) Here is the Scientist's 1920's-period time machine, rebuilt from set 76109 (Quantum Realm Explorers). I fixed the rotating side engines of the original Marvel superheroes set, as these objects are now (mostly) locked in the position shown. The Time Travelers' Family, Friends & Foes In order from Left to Right: Mr. Harold Sutton: wealthy financial backer of Dr. Wormwood's experiments with time travel. Secretly wishes to have full control over the project for it's use by an unknown, Sinister third party. Mrs. Evelyn Sutton: sister of Dr. Wormwood (whom she despises) and step-mother of Gracie Sutton. Married to Mr. Sutton, who shares in her secret hatred of Dr. Wormwood. Grandad Joseph Wormwood: Father of Dr. Wormwood and Evelyn Sutton, and grandfather of Billy. His wife is deceased and he is living with Nancy, Billy, and the Doctor in Wormwood Manor. Gracie Sutton: Stepdaughter of Evelyn, and daughter of Harold Sutton & a complete sociopath. She enjoys tormenting people for pleasure, including younger cousin Billy Wormwood. Billy Wormwood: son of Nancy Wormwood and the good Doctor. Secretly tormented by cousin Gracie, he tries to find an escape from his predicament in any way. Nancy Wormwood: mother of Billy, and is concerned by Gracie's "play dates" with her son. After spying on Gracie Sutton tormenting Billy, she forbids her from seeing him, which puts the Doctor's financial backing at risk as payback by the Sutton family. "X": The mysterious masked man (woman?) who kidnaps Billy in 1922 with his time travel equipment. This person is also showed up on the Wormwood's estate lawn many years ago, resulting in Dr. Wormwood's fascination with time travel. Mrs. Katie Johnson: Town busybody and local telephone operator, who keeps an ear to private conversations for her own gain. Wife of Officer Pete Johnson, who (usually) keeps her in line. Officer Pete Johnson: Member of Scotland Yard and lives near Sutton Estate & Wormwood Manor. Is keen to know just what's going on when Billy get's kidnapped by "X" and Dr. Wormwood goes off to find him in time and space. NOT PICTURED: Dr. William Wormwood: The brains behind the brand-new invention of the time machine vehicle (or TMV, for short) and rebuilder of the giant mechanoid the Brass Automaton. Father of Billy, husband of Nancy, and financial backing recipient of the Sutton family, as his fortune was wiped out in his previous attempts at travel through time. The end of the Story? More may come later, I'm not quite sure on what steampunk thing to build after the robot, which now has his own thread. As usual, comments, questions and comments are always welcome! -
Here is my new corner modular building based on the TV series The Nanny. I made 3 facades and all the floors are removable. There are 2,600 parts and the main figures in the series. You can watch the video and more details on Ideas. HERE
-
Hello everyone! Today i present to your attention my new long-term construction - Old Victorian Vampire Mansion! It all started in 2016, when I wanted to "increase" my most favorite set 10228 Haunted House, which, not counting little size, was perfect stylistically! But to increase it, leaving in the same performance, was not interesting to me. I watched a lot of works on this topic on the Internet and finally formed an image of the acting model in my head. Next, I counted the budget and ... postponed it to "later"))) It was lucky that my LUG join Lagbalk last year. There, I ordered the most costly part - bricks modified with masonry. The exact amount used did not count, but the figure is about 1000 bricks (in the equivalent of 1x2). A year waited for those brics and now the moment of assembly has come. The second inaccessible element was the skeletal legs, which were used as decor on the roof (there are about 150 of them). After several Bricklink-orders the house was ready. It has all 4 walls (the back part is quit simple except that the chimney). In the right window of the second floor is mounted a red light-brick. It works by pressing a button on the back of the building, creating the effect of villainous processes in the room. All other standard windows are closed "jalousie", that would not pass light, deadly for vampires. Actually, the vampire pair itself is already arrived to the entrance on theirs carriage harnessed by two black horses. On each side of the house there are two enchanted trees, which frighten all uninvited guests. So, let's have a look: Victorian Haunted Mansion. Lord Vampire and his bride just arrived for theirs home. Photo by Dwalin Forkbeard by Anton Kushnir, on Flickr Victorian Haunted Mansion. Lord Vampire and his bride just arrived for theirs home. Photo by Dwalin Forkbeard by Anton Kushnir, on Flickr
-
Benny's Classic Space mansion and town car - 75930 / 70906 MODs
Murdoch17 posted a topic in LEGO Town
I was inspired to create this model from the 2018 Jurassic World set 75930, Indoraptor Rampage at Lockwood Estate, with some design cues from set 10228, Haunted House, although in blue and white with trans yellow glass. The dollhouse-style model was built from the set pictures and from features from the movie itself, with the fall-apart play features removed and opening rear sections added to match the front half. The model also features a round "time window" for Benny to experiment with in his spare time. As usual, this classic space logo printed piece goes where this 4 x 2 slope is, just below the front balcony and right above the front door. The house without any figures, cars, or giant robots. The very large satellite dish on the roof is so Benny can communicate with the Classic Space fleet in any weather: rain, sunshine, snow, solar wind-storm, or nuclear fallout. Whatever the weather, Benny gets through! The rear of the mansion features a conservatory and the chimney flue, along with a back door and rear porch light. The house folds apart, with the two rear sections opening in quarters up to 90 degrees, while the conservatory opens up to 180 to allow for figure placement. (Up to five Technic pins can hold the model shut at key points for transportation with ease and handling with little fragility.) The front half on the found floor features the entry hall, TV room with couch and dining room. The second floor features the custom-printed super computer (un-printed here in LDD) and Benny's bedroom. The uppermost two floors features the science lab, with the time window and several other science experiments. Here is the huge 1970's super computer LL9000 (custom printed part) which takes up a sizable amount of space on the second level wall just above the entry hall. The right rear quarter features the conservatory and some furniture on the second and third floors, plus the dining room on the first floor. This section also has stairs from first to second floors, plus a '80's video game cabinet (Astro Nut, of course!) on the second floor. The left rear quarter features the fireplace and the stairs to the third floor, plus a miniature space monorail layout and a TV with VCR. This is Benny the 1980-something space guy's 1979 Moonraker made by Neptune Auto Group. The engine has been upgraded from a gasoline chugging-monster into a more environmentally-friendly Hydrogen-3 Fusion engine to turn it into a modern mechanical beast with a retro exterior. Benny added bigger tires to the car to get it over the craters of the small moon where Benny was stationed. The car also has a spare tire located on the opening trunk. The roof is removable, and the three seats can fit figures with air-tanks and helmets. The doors open in the front normally, but in the rear they open in a reversed pattern to create a wider opening. Real life version The building as it sits right now, before it gets torn apart to create the version seen in the first part above. Most of it's parts will be donated to create the mansion. As always, comments, questions, suggestions, and complaints are welcome! -

[MOC] LEGO Medieval Inspired Mansion, 1 of 3 (Modular)
DK_Titan posted a topic in LEGO Historic Themes
This is the newest addition to our LEGO Medieval Layout - a mansion for the masters as well as an integrated smaller building for the servants. The main colours of the building are Cool Yellow, Dark Red, Dark Brown and Reddish Brown. After having been stored in boxes for almost a year, our medieval buildings, towers and trees have finally seen the "light of day". -
After my original 2016 LEGO Addams Family Mansion received such great IDEAS fan support (10,000 votes!), I have created a Modular version keeping under the 3,000 part IDEAS limit, and used normal modular dimensions. Although some reduction in detail was inevitable as the original had over 7,000 parts, the Mansion remains in its full glory. I hope you enjoy it as much as I enjoyed building it! https://ideas.lego.com/projects/10fc83f1-dcdd-4472-9db3-9a7b2aa3d88c https://www.flickr.com/photos/140336078@N03/sets/72157693298629335
-
Adventurers - Sinister Hall with Roaring 1920's style car - 70912 / 70911 real life MOCs
Murdoch17 posted a topic in LEGO Town
(NOTE: Since this is a Adventurers building for my town and not situated in a jungle, desert or something like that, I thought it would be okay to post it in the town forum. If the mods don't like it here, feel free to move it to the Action and Adventure forum.) This model was inspired by set 70912, (Arkham Asylum) from the LEGO Batman Movie theme and was built for Lord Sam Sinister, the main bad guy from the Adventurers theme. Whereas that set is only the front facade of the building, this model features two opening rear quarter sections to reveal the interior details plus a tower in the front above the front door. The model consists of three sections: the front half, the left quarter and the right quarter. The stylish car is modified version of set 70911, (Arctic Roller). The car model is about 8 studs wide (with a tiny 1/2 stud bit of overhang on each side due to the front rims) and 28 studs long in total. This model can fit one figure sans top-hat in the driver's seat and has space for a briefcase or top hat in the trunk. The rear of the mansion features rows of windows and a stone fireplace flue on the left side, plus a window on the lower left for the small dungeon. The model consists of three sections: the front half, the left quarter and the right quarter. Each section is connected to the next with two hinges and a small set of two Technic pins (one per side) to lock it shut. The front half of the building features a drawing room on the left side of the picture, a living room on the opposite side, and the bedroom on the upper floor, which also has access to the tower above the main entrance. The spaces below the stairs are a wine cellar / kitchen on the right with the large casks, and on the left is the dungeon for any do-gooder spying on Sam Sinister. The right quarter has the other half of the ground floor dining room and part of the kitchen / wine cellar, a couch in the living room and a phonograph in the bedroom. The left quarter features the fireplace mantle and flue (the year 1892 as stated above the fireplace mantle reflects the year of the house's construction) , plus one half of the dining room on the ground floor. The room with the bars on the windows is the dungeon for unwelcome "guests" of Sam Sinister. The car by itself is about 8 studs wide (with a tiny 1/2 stud bit of overhang on each side due to the front wheel wells) and 28 studs long in total. As a side note, the headlights are not clipped in the same way as the original set had, and are instead sandwiched in place with 1 x 6 plates and headlight bricks. The rear of the car features a license plate for Lord Sam Sinister and dual exhaust. The car can fit two figures sans top-hat in the driver's seat and has space for a briefcase or top hat in the trunk. EDITED 1/3/18: Added real life pictures and newly updated text. Of course, comments, questions and complaints are welcome, and a big shout out to @sander1992 who, among others, are helping keep the Adventurers spirit very much alive! -
Sinister victorian mansion with 1920's luxury 70911-style car - real life models
Murdoch17 posted a topic in LEGO Town
The house was originally made in 2007 as a digital construct by Brickshelf user "Widdi" and was found by me at this address back in late 2014. I then changed the color, added a garage and a back half to the building, and eventually put in a chimney styled after the one in set 10228. The car on the other hand was inspired by this build which was in turn a modified version of set 70911, (Arctic Roller) This model is Sam Sinister's largest ride to date and lacks the spring loaded shooters of the original set. I replaced them with a proper car grille. The garage to the side of the building is unusual, as Victorian houses never had them. Thus, I've decided it was a later addition in 1918 by Sam Sinister when he inherited the house from his father, just after Sam returned from World War I. The rear of the building features a large amount of windows, while the far side has a stone chimney flue. The second floor features the master bedroom / writing room with a small balcony on the right hand side. The furniture on the upper floor features a bed, a desk, table with lamp, a cabinet, and a grandfather clock. The ground floor is little crowded with the kitchen and living room appliances / furniture. The items seen here includes a stove, wine cabinet, table with two chairs, phonograph, couch, curio cabinet, and pool table. The sign above the fireplace is supposed to read "1912" for that is the year the house was built. The building is modular, so the roof top, second floor, and ground floor all come apart from each other. The car by itself is about 8 studs wide (with a tiny 1/2 stud bit of overhang on each side due to the front wheel wells) and 28 studs long in total. As a side note, the headlights are not clipped in the same way as the original set had, and are instead sandwiched in place with 1 x 6 plates sand headlight bricks. The rear of the car features a license plate for Lord Sam Sinister and dual exhaust. The gray round thing on the trunk is supposed to house a spare tire, but it doesn't.... it's really just for looks. Two figures (sans tall hats) can fit side-by-side in the car, and their is space in the opening trunk for a briefcase. The teeny tiny mini-figure out by the front door of the house is Lord Sam Sinister... it just gives you an idea how massive the house and car really are! Fictional information on the house's history: Built in 1912, Sinister Manor is one of the last houses built in the Victorian Style of architecture in Ironwood county. It was built by Lord Gregory Sinister for his family, and features one thing not usually seen on Victorian houses: a automobile garage (it was added later on in 1918 when Sam Sinister returned from the Great War.) The house was left to Gregory's family, (his son Sam Sinister & his sister Alexis Sinister) upon the elder Sinister's death of a stroke in 1913. Sam Sinister went on to serve in the British army in World War I, losing his left hand in the conflict and replacing it with a iron hook. When he returned from the conflict Sam set about continuing his fathers tradition: collecting treasures and precious artifacts, through legal and illegal means. The collection was stored in the Attic of the sinister Mansion until it became too large and was moved to a more secure (and secret) location. Thoughts? Complaints? Questions? Feel free to post them! Main Post Edited 2/14/17: added new pictures of the building and the new car. LDD file for both car and house available here. -

(MOC)-Modular City Mansion - A step by step building description.
kevin8 posted a topic in LEGO Town
Good morning to everyone. Today I am starting with a new idea (for me). I will relate the construction of my last modular building. This new building has been designed for the last LDD/LDraw Eurobricks contest in the Freebuild category, earning the fourth placing, that is like the wooden medal :D . While building it I will update my Flickr gallery. I also take this opportunity to illustrate the techniques used and the reasons that led me to certain choices, as well as any changes in the course of work . Anyway, I tell you that I do not have all the parts yet, something is still on the run, but I hope that everything will be ready by the week. Let's start. As you could see from the images of the LDD renderings, I tend to use unusual colors for hidden parts. It's the "sign" to identify every parts I can "fish" in my "old and ugly" bag of used parts, when collecting the pieces from my collection. What you can see right now is that the base that holds the floor is in fact multicolored... it's not a problem since it will be completely covered. On the back of the building I have already placed the final part of the downpipes. The problem in this case is that the 1x1 lbg cone does not stick well on the green baseplate so I have to add a 1x1 lbg plate between them. Let's go back to the base of the floor. When designing with LDD I incredibly found a lot of attack points in common between the straight underside base and the 45 degrees structure of the floor. I found it amazing, but in the end I decided not to investigate. Ldd is not quite accurate, in fact in some cases does not allow things that work in real life (try to attach a 2x1 plate with the two holes on the side of a technic brick ... ) and allows others that are not feasible ... During the construction I have placed all the 1x1 round plates as in the picture, only to discover that there was no way to hook the floor. I finally decided to put one of them centered and put another in the corner to lock the eventual rotation of the floor, as you can see in the second photo. The slanted floor has already been seen in several Moc, the technique is nice, but leads to some considerations: the first is that it forces to have a rather raised floor, the second is that the walls must be at least 2 bricks thick to hide the teeth resulting by the disposition of the tiles. As we will see later, you can hide everything well with some basic tricks. For the first time in my modulars (and especially because attending a contest, and well, with diagonal floor, studs didn't fit well), I decided to use tiles instead of plates... I still prefer the second choice to grant more gameplay, but in fact it results more pleasing. Cad design allows to position all the attachment points of table and chairs without having to undo the work of construction. In any case, I added some 1x1 dbg plates where I could place the minifigs . At the entrance I placed two little pinetrees pot. The streetlights have been attached to a 2x2 plate in order to have the foot outside of the pavement, as occurred in the Parisienne #10243. As soon as possible, the following... https://www.flickr.c...57643933765153/ Here the second part http://www.eurobricks.com/forum/index.php?showtopic=96063entry1903268 And the last part http://www.eurobricks.com/forum/index.php?showtopic=96063entry1912380 Enjoy it. -
Hello everyone! This is my first MOC ever and it is still under construction. It will be one of my sceneries for my upcoming brickfilm. The idea is to build the Avengers mansion with some of Tony Starks sneaky engineering skills. I wanted to add the gantry machine to the movie at all costs. It can be moved back and forth. The big sliding doors and the balcony with the desk and couch can be opened so Iron Man can land directly and change the suit or whatever. I have a big problem with the balcony. The joints that are used to open it, are not as stable as needed. Maybe you have some idea how to fix it? Of course I will add some more images as I progress. What is planned? - Iron Man armory/lab - Avengers showroom with all the different Avengers - A garage with different vehicles If you guys have some ideas just let me know :) Greetings, qoob
-
Hello! I am back with a new townhouse/mansion MOC. It is inspired by the official LEGO Simpson's House set; however, I found that the set was too suburban to fit well with my urban city, so I decided to take the essence of the house and transform it into a modular building. IMG_9676 by Topper (TT for short), on Flickr Here is the front of the exterior, featuring some SNOT technique and a simple, green door. IMG_9693 by Topper (TT for short), on Flickr This is the first floor interior Thank you so much for the feedback, I really appreciate it. I just wanted to include the spirit of the Simpson's house into my city, as well as fulfill my girlish desires to have a dollhouse made out of Lego bricks. Thanks again, and if you would like you can see this creation in more detail on YouTube at: ... Or Flickr at: https://www.flickr.c...157656628227885
-
Hello, everyone, here is my most recent MOC which I will be adding to the CCC XII. A clan of elves live in a beautiful manor protected by the natural surrounding mountains and cliffs. They are currently being confronted by members of a friendly clan to settle a dispute. More pictures on my Brickshelf page.
-
This classic 90's LEGO-styled model was originally built in 2007 by a Brickshelf user named "Widdi". That user uploaded the instructions (seen here: http://www.brickshel...ry.cgi?f=249223 ) which I stumbled upon and built / modified in Lego Digital Designer. I put another story on top for the tower, set furniture inside, added a back half, and worked a garage into the structure. The Sinister Mansion: Where you will never want to leave! Fictional Background for the house: Built in 1910, Sinister Manor is one of the last surviving houses in the Edwardian Style of architecture in Ironwood county. It was built by Lord Gregory Sinister for his family, and features one addition not usually seen on Edwardian houses: a automobile garage. The house was left to Gregory's family, (his son Sam Sinister & his sister Alexis Sinister) upon the elder Sinister's death of a stroke in 1913. Sam Sinister went on to serve in the British army in World War I, losing his left hand in the conflict and replacing it with a iron hook. When he returned from the conflict Sam set about continuing his fathers tradition: collecting treasure precious artifacts, through legal and illegal means. The collection was stored in the Attic of the sinister Mansion until it became too large and was moved to a more secure (and secret) location. The inside features the furniture from my Haunted House (10228) MOD, including (but not limited to): a Queen size bed, stove, table, phonograph, sidetable with lamp plus the couch. The first floor I has the living / dining rooms, as the couch, stove and table and other associated items are there. The second floor features the master bedroom with a small balcony on the right side. The third floor is the attic, which is empty. The tower / roof (fourth floor) is also empty. The Rear of the house. This model is significantly cheaper / less parts intensive than my other Victorian Mansion (the one based off the Monster Fighter's "Haunted House") This car, the Ogel Mark III, goes in the garage. Here are the cars statistics: Model Name: Ogel MK III Configuration: two seat Engine Class: V8 Designer: Lord Ogel Build Date: 1925 Builder: Ogel Motor Car Works Current Owner: Lord Sam Sinister Length: 21 studs Width: 6 studs Height: 5 bricks Top Speed: 88 MPH Fictional background for the car: After the Orient Expedition of 1924, Lord Sam Sinister's Island Racer was seized by Soviet (Russian) forces when Sinister tried bribing his way onto the Trans-Siberian express without the proper papers. Sinister was put on the next train out of Russia without the car. In early 1925 he boarded the Simplon-Orient Express bound for Paris from Istanbul. While in Paris he telephoned the Ogel Motor Car Corporation asking for a newer, faster and more expensive car to be sent to his home at Sinister Manor in three weeks. Sinister arrived at his Edwardian-style manor to find this car waiting for him. It features two seats, a spare tire, a much longer wheelbase and goes 13 miles per hour faster than his old car. LDD file for the house & car: http://www.mocpages....1416516743m.lxf Comments, questions and complaints welcome!
-
Hello! Presenting to you my newest MOC and project in ideas.lego The legend of ZORRO The set is basically the governor's mansion and Zorro is about to break in :) I hope I can count on your help with feed back and support regardless of this being possibly being a big and pricey set. Please support if you like it - ideas.lego - might think they have business case.Either way your opinion and feed back is always good Anyway i leave the link for your consideration - https://ideas.lego.com/projects/83319 Now for the set photos and all the details: P.S. all roof come easily off for increased playability and to check the inside and all the detaisl. When closed it also works as a phenomenal display (So I think :P )
-
Greetings! I'm not a usual poster in this side of EB, but with the EB LDD/LDraw 2014 Contest I thought I may as well post my model here for the benefit of those who don't hang out in the LDD/LDraw section. The images link to (slightly) larger-sized ones. You can download the .L3B File here: .L3B File Comments and Criticism is welcome. Thanks for viewing.
-

Ah ha! The perfect place for an Adult Lego Addict!
bricksare4me posted a topic in Hello! My name is...
Hi everyone! I am new here. My reintroduction to Lego started with the Monster Fighters Haunted House. Then I got interested in Architecture, and Superhero figures. I also love the "home assessories" Lego items. -
Review: 76007 Iron Man: Malibu Mansion Attack By Captain Nemo Name: Iron Man: Malibu Mansion Attack Set Number: 76007 Pieces: 364 Price: US $39.99 Ages: 6-12 Minifigures: 5 Theme: Superheroes Subtheme: Marvel, Iron Man 3 Year of Release: March 2013 Price per Piece: 10.986c Here we go! If you’re reading this then you’re now both looking at my first review on Eurobricks, or well anywhere, and looking at the culmination of two days work to bring you this extensive review on the new Iron Man set, 76007 Malibu Mansion attack! A rigorous voting process cut down the open casting call of 300 photos to these select 8 (Or Something?), photos for your pleasure, and hopefully they’ll give you all the views you need on the flagship set of this small Iron Man wave. Box: Size: 15 x 10.3 x 2.2 in If you’re looking down the isle like I was, it may take just a bit of work to spot this one out of the group. While having a box the same size as the recent “Bat &Tumbler” Batman set (Hulk is there to give a minifigure reference), the general dark image and the dark red boarders blend in the box with both the past waves and the newer sets; which while making it uniform, makes it actually stand out less (That and putting it on the top shelf midway inside the LotR theme for some reason; thanks Toy’s R Us). Featured on the cover is the image of immediate peril. Tony Stark is grasping for his life holding onto his collapsing cliff-side house; with Pepper Potts, donned in Mark 42 amour, flying to his rescue; opposite the Mandarin and an Extremis soldier blasting the building from their dark green helicopter. Overall, the image really depicts what the set is about and the reasoning for the specific play features on the back. The back of the box features a collage of comic like picture actions depicting everything in the set. Both the play features are shown (Top left), as is the…wait for it…Flick Fire missiles from the helicopter (Top right). Included are a few sound effect words, that I think somewhat takeaway from the seriousness of the situation (“Thunng” is not an explosion word, nor should it be used so lightly in reference to a house blowing up!). The sides of the box have all the standard information, and it uses the Mark 42 suit as the actual minifigure size reference. An image of the figure line up is also included, as is the image of the lettering on the box stating the set is for “Iron Man 3”. Contents: Upon opening the box, you’ll find three numbered bags, two instruction manuals of different sizes, one comic book, and one sticker sheet. I don’t know why the instruction booklets are different sizes, since there really does not seem to be a reason for it. Inside the instruction booklets however, are the watermark images of the Mark 42 Iron Man and the Mandarin in robes (Picture Featured further down this review). Also included is a nice comic book which I refuse to open—sorry readers, but want to be surprised when I see the film, and so I’m going to try and keep spoilers to a minimum. I’m sure the comic is really bad anyways…Anyways, also shown here is the infamous sticker sheet. Now I don’t hate stickers, and for the most part I think they’re ok, but later on in the build, those stickers on trans clear pieces really become a pain—at the start though, they’re ok. The back of the comic includes the standard minifigure line up, although this time it only includes Marvel sets. Images of the previous 2012 line figures are present, as are the Ultimate Spider-man figures, and the rest of the Iron Man 3 line up. Build (1-3): Bag 1: Ten Rings Helicopter, Mandarin, Extremis Solider The first bag creates and completes the villain’s helicopter, as well as includes the minifigures for the two villains of the set, the Mandarin and an Extremis Soldier (See Minifigures). You’ll first notice how the bag feels almost empty, and the pieces that are there are used up rather quickly—this is slightly disappointing as the helicopter could use some extra bulk when it’s completed. It’s a fast build on this helicopter section, and soon you’ll see a dark green chopper sitting on your table. The build is simple, and it offers little surprises, though I was interested in the build of the front section, which features a 1x2 external headlight brick which is new to me (See Interesting parts). The stickers on this early build are good, but generally unnecessary. I don’t know why Lego believes it’s best to put the symbol of the villain on their vehicle—do they want to be spotted and caught?! The Ten Rings sticker on this vehicle however blends far better than some other villains counter parts (Cough: Bane’s Tumbler), though they could be left off with out any major loss. In terms of the helicopter when it’s complete, you’ll immediately notice that it’s small and slim. Of the superhero helicopters we’ve seen so far, this is defiantly the sleekest one, though not in a good way. I’ve included a comparison to the Joker’s new helicopter, and intend to soon include a picture of it next to Deadpool’s helicopter, which is unfortunately out of my reach right now. This chopper is actually more similar to the Deadpool one., but I digress. A front view of the helicopter makes the vehicle appear somewhat bulky and stronger than it actually is; however any angle on the sides immediately shows you how low down and empty it is. To me, it actually almost looks like some force pushed down on the top of the vehicle and squished it. I think this is mostly because of the sleek low windshield, which gives the whole feeling of being low down. Again, like in the Deadpool helicopter (Which this one seems to almost copy), this chopper too includes an open section for storage (?), though this chopper’s storage space is far smaller and really seems like wasted space (Question to self: where are Lego Engines on Lego helicopters?). The missile hookups on the chopper are pretty standard, much like the Joker’s chopper. There is a small 2x3 stand for minifigures/Mandarin to stand/sit on, which is nice, but it’s almost too extreme to think of it actually being used. Because of the low helicopter height, there’s also little clearance for passengers who risk standing on the edge of the chopper with no constraints whatsoever. There’s also a small clip on each side of the chopper to hold the Mandarin’s ADU gun, which is nice since he’ll need both hands to hold on. Sadly the only function of this chopper is the Flick Fire missiles. Personally I don’t have a problem with Flick Fire missiles—as long as they make sense when being used. The missiles on this chopper make sense being there, but I wish there was perhaps a function that allowed them to appear or hide inside the chopper, much like the more civilian looking chopper which blows up the Malibu Mansion on the Iron Man 3 trailer. One last note on the chopper; while I can forgive the missiles, I cannot however forgive the lack of controls! There’s nothing inside the chopper for the pilot of use! There’s even a 2x2 slope in red which could have easily and effortlessly been replaced by as sloped control brick! Well I guess I now know why the Extremis Solider is so angry… Bag 2: Starting Malibu Mansion, Tony Stark, Pepper Potts, Mark 42, Mark 5 suitcase, Extinguisher Robot Bag 2 begins what will be the bulk of the set, the Mansion itself. It also surprisingly includes all the remaining minifigures, Tony Stark, Pepper Potts, the Mark 42 armor, and the Extinguisher Robot. Also included is a little nod to the second Iron Man film, is the suitcase (With the aid of builder applied stickers unfortunately) which contains the Mark 5 armor that was used to fight against Whiplash at the car race in Monte Carlo. Its a sweet nod, and a smart one too since it’s really only one piece and two stickers—though if there was one piece that should be printed in this set, it should be that. The Mark 42 helmet like all Iron Man ones, comes separately bagged. It’s also important to note that Bag 2 begins the use of the second slightly larger sized Instruction Booklet; an image of this is included above. The build of Bag 2 starts off quickly, and gets the functions placed down from the start. Beneath the “Hall of Armor” is a function built that allows the hall to explode, but more on that later. Once the floor is placed down, you build what perhaps maybe one of the best parts of the set, the small kitchenette. Next to the Hall of Armor is a small lime green and tan kitchen, which could be the gem of this set. It really makes the whole mansion feel more like a home than just a warehouse of Iron Men, which the rest of the set gives impressions of. Included is a very nicely built smoothie machine; and if I have any complaint it may just be that perhaps the shelves are a bit too high—though that’s more comical than anything. After building the kitchen, we move to the most dangerous part of the set (For builders that is!), the large trans-clear stickers! Dun, dun, dunnn! The Hall of Armor is mostly shown through two large blue windows which the builder must apply stickers to. Take note, it will be easier to apply the sticker with the glass panel not attached to the frame. When carefully applied, the end result is gorgeous! It makes the Hall look really high tech, and classy—the whole mansion in fact has that modern age looking “clean” and bright vibe. The Hall, while much smaller than many Eurobricks members wished for (Though I think they should be happy we get it!), is designed to hold the previously released Iron Man suits; as it has name places for Mark 6 and 7. While neither of those suits are included, it nonetheless is a great feature and encourages people to collect the suits (In contrast to Batman, where I guess he just leaves his excess suits lying around like I do). Granted these old suits then get blown up, but…you know… Anyways, it’s time to put in some of the scenic windows. You apply one of the three windows in Bag 2, which requires you to apply two stickers on two bricks. The first sticker goes simply on a white 1x6 brick for looks, which is nice, but the second sticker goes on the large trans-clear window. This is perhaps the most annoying sticker (Along with it’s window counterpart in Bag 3) because not only is the sticker clear—and prone to fingerprints—but it’s also small and not sized to perfectly fit straight on the window. This makes the sticker both hard to get straight and at the right height in regards to the other window which you’ll apply later (Which I badly applied as slightly higher than this one). The sticker on the window depicts Starks super-cool computer thing that can be viewed on various surfaces, this time being on a window, and is showing that an alert is going on off the cliff towards the air (Ergo the Ten Rings helicopter is coming). This sticker ends Bag 2! Bag 3: Finishing the Mansion The third and final bag is all about finishing the mansion, which happens faster then you might thing. The start of Bag 3 begins where the former ended, with you having to place a sticker on another large window panel. Surprise, it’s still challenging to do. This sticker depicts a screen that’s analyzing the helicopter that is coming. In my opinion however, from what we’ve seen in the easiest trailers, it seems like the helicopter is a surprise attack, so these stickers definatly go against that notion. Much like the stickers on the helicopter, these window ones are also not necessarily required, and so they can be left off without loss if the builder chooses to. Having constructed the small floor plate and attached the second window, the build moves to constructing the second main function, which will blow out the third window (See Functions). Also included in this area is the required doorway to nowhere. The roof is then built being composed mostly of two large curved slope pieces in white, as well as a few tiles. There is a small roof/balcony section which would allow someone to stand on the roof. The last section of the mansion is a control center/repair section. This is attached at the back of the main floor section, and helps fill out the mansion, if making it seem a bit cramped in the process. The final two stickers are used on trans-blue screens to depict a high-tech computer, and the large computer itself is on a rotating stand (Like the chopper, this too could use a control plate or two). The repair section is modest to say the least, and is really more like a wrench rack than anything. Attaching this section completes the build of Bag 3, as well as finishes off the build section of the set! But oh, there’s far more then that! Minifigures: Ah the minifigures, the main thing most people first look at reviews for! Notice I placed them further to the end of the review to force people to at least look at the rest of it—hahaha! I win! Anyways let’s get going. For each figures I’ve included multiple pictures, a small bio, their purpose in the set, and a critique of them, so let’s check out the figures! 76007 Characters: Extinguisher Robot, Pepper Potts, Tony Stark, Mark 42, the Mandarin, Extremis Soldier. Tony Stark: Genius, billionaire, playboy, philanthropist; superhero. The title character, owner of the Mansion, and the Iron Man armors; who needs to be saved himself in this set! This is the first time we get a minifigure of Tony Stark not in his Iron Man armor; and it’s a great addition. This “civilian” Stark is great, and a big draw for the set. He’s wearing his standard movie shirt in a very nice torso print, and it lightly depicts the arch-reactor in his chest (With a triangle symbol from the second film). His back printing is also very nice and simple, and this Stark includes the new Tony face print with a cocky/determined look and an “Oh s**t!” face. The short hair on his head is in dark brown, though I think black would have been better. Either way, a solid figure and a great draw for the set. Pepper Potts: Tony Stark’s girlfriend, associate, and assistant. In this set, she saves Tony from imminent doom by donning the Mark 42 armor. This is the first time we’ve seen Pepper in minifigure form, and the (Short) wait did not disappoint! She’s in a clean cut white suit, looking all classy, and is a great addition to the set. Pepper sports a long burnt orange ponytail hair, as well as duel faces of a sweet smile and mid-level shock; both of which have cute freckles. Her torso print is simple, but features a thin gold necklace and uses grey triangles to slim her figure. Overall, she’s perfect, and is an important awaited character. Mark 42 Armor: The latest armor constructed by Tony Stark, which features far more gold than the previous versions. Currently information on it is mostly unknown, but both Tony and Pepper don the suit in the set/movie. It’s first interesting to note that the suit in this set comes with a plain white head, and as indicated on pictures, other sets, and in the instruction booklet, both Tony Stark and Pepper Potts wear the suit at different times. Coincidentally, this means that there are many faces underneath the suit, as much as 5. Now to the outside of the suit, which most people are concerned with anyways. Immediately you’ll notice that there is far more gold on this suit then any other Iron Man suit. He has extensive glossy (Kinda like chrome but not that shiny) gold from his torso to his toes, and features the classic circle arch-reactor. The back print includes more gold along with higher levels of silver. The Mark 42 also has gold hands as opposed to dark red. The helmet mold is the same as the previous 2012 Iron Men; and the four pieces required to give him the look of flying are also included. Below are images of the Mark 42 standing next to the previously released Mark 6 and 7; which are not included in this set. The Mandarin: Arch-nemesis of Iron Man and self proclaimed “teacher”, the Mandarin is the leader of the international terrorist organization known as The Ten Rings. What is the Ten Rings? The Ten Rings in the Iron Man films is a terrorist organization led by Mandarin, and is the same organization who kidnapped Tony Stark at the start of the first film which led to the creation of Iron Man. Ah the Mandarin. I was so excited when waiting to see pictures of him…and then this…but then, once I acquired the figure in the set, he’s actually not too bad! I’ve been noticing a trend lately that I usually hate the superhero minifigures when I first see them, but once they’re in my hand they turn to gold—and appear much better in person. Mandarin is no exception, and while the initial pictures of him were mostly negative on account of the hair choices, in person he is so cool. The beard is still a bit off, and it’s a bit of a negative that it covers his nice torso print, but he’s a very nice figure. He has two face prints, one stern and the other angry, which both look great with or without the beard on. This version of Mandarin includes a dark green cape and leg printing, both of which are nice. His torso has the symbol of the Ten Rings, and he has minor/forgettable back printing. The more I look at this figure, the more I like it, and really that’s just an amazing bonus. However the more I look at ADU guns the more I hate it. I wish Lego would stop using the ADU gun—it’s everywhere all the time now. At least change the color to black which looks far better. I do understand that Lego is making this line more “kid friendly”, hence the lack of actual guns, but come on! Extremis Soldier: Unnamed henchmen whose been infected by the Extremis virus. What is Extremis? Extremis is a virus that basically works like a super-serum (Think Captain America). While it gives superhuman strength, it also greatly increases the infected person’s rage; and is so dangerous there’s only a small portion of the population who can take it without it killing them. The Extremis storyline is the main setting for Iron Man 3. In terms of henchmen (Whom I should know about!), the Extremis Soldier is top notch! First off, yes his head does glow in the dark, as the pictures indicate, but that’s not all! While his standard face shows a stern look, his alternative face is a rage fueled, red vein filled, horror show. His face prints are very, very, nice and he’s defiantly a great figure. While the head is a bit limited in use (Sick Superman anyone?), his torso could be used in many themes; it’s a dark bley muscular powerhouse with more red veins popping out. The Extremis Solider includes a nice back print and has dark brown hair with black hands and pants. I definitely want to pick up multiples of him. Functions: All of the functions of this set all revolve around destroying the Mansion…which you know is the first thing you want to do after spending so long building it. Hall of Armor Explosion: The first and most heart reaching function is the ability to destroy the Hall of Armor. This is done by pushing down with not much effort on a red lever at the back right wall of the mansion. Below is a picture of the process, which is rather quick. For the most part this is successful, though I’ve found that sometimes the Iron Men get stuck with their helmets hitting the roof when launched out, which is disappointing. I think that perhaps it would have been best to use a similar function that is next described. Scenic Glass Explosion The next function is the explosion of one of the three large glass panels, to which Tony then falls out of (According to logic or something). The panel flies out very well with almost no effort, and there’s a clip just below the frame that allows Tony to hang for dear life. The only disappointment being that unless the Mansion is hanging over like a table edge, he’ll just be laying there. And finally of course there’s those Flick Fire missiles on the chopper, though surprisingly there’s nothing for them to hit and nock down—bit of a disappointment there. Extras, Interesting pieces, and Extra Pictures : Here’s a picture of some of the more interesting parts of the set, as well as the extra pieces. An extra black lightsaber handle is included, which is the best of the leftovers. Conclusion: Hello? Still awake? I am…so let’s wrap this up! Minifigures: 9/10 The minifigures in this set are great, and really they’re a major draw for this set. No doubt people will buy this set just for Tony and Pepper or the unique variant Mandarin. Designs: 6/10 Overall this set is an ok design. The helicopter is easily the worst and most forgettable part of the set, with the cramped and small interior in close second. However, great choices like including a kitchen and the Extinguisher Robot with the Mark 5 greatly bring up this score. Parts: 10/10 All the parts are good and useful; I especially like the roof and the Hall of Armor stickers. The only parts that are a downer are some of the stickers and the ADU gun, but I don’t see them as a huge deal. Price: 9/10 For being a $40 set, this is very nice. Its price per piece is just over the golden range (10c < 10.986c) and what you get for that is nice. The minifigures themselves will be valuable, and overall it’s a great deal. Playability: 8/10 This has some good play features, especially in terms of functions such as explosions. I do think though that the Mansion is actually set up for play very well with the Kitchen and all for expanded play that’s not just related to the helicopter attack. Overall: 42/50 = B+ Overall, I have to say I like this set. It’s a nice build, if somewhat quick and short, and includes a list of characters I’m very happy to have. The helicopter is a disappointment, as is the somewhat cramped nature of the Mansion, but overall it’s good. I do feel however that if given a large price point, this set could he huge—if expanded, it could be a large selling set, something in the line of the Unexpected Gathering. Really this is a good flagship set for a small Iron Man wave, and it is the best of the three. So if you’re even the slightest fan of Iron Man, don’t let this set slip past you! Enjoy ~Nemo
-
Most of us were a little disappointed when 76007 Malibu Mansion came out. It was too tiny a set to do Tony's house justice! Once I bought it, I set about make a version of what I would hope a $100 or $120 version of the set would be like if LEGO were to release one. I hope you enjoy the results. Stark Mansion Interior by Tereglith, on Flickr Basement by Tereglith, on Flickr Cellular, Modular, Interactivodular by Tereglith, on Flickr One of the only play features I was able to include: the basement furniture is removable and easily rearrangeable.(Also Tony's design station rotates, like in the original set) Basement Rearranged by Tereglith, on Flickr Hall of Armors by Tereglith, on Flickr Mk. I, Mk. VII, and Mk. XLII. The Mk. I is essentially a tablescrap. I hope to get War Machine in there soon, but none of my local stores are carrying Extremis Seaport Battle yet . The Hall of Armors isn't nearly as big or impressive as some of the other ones in this forum, but that's because I didn't want it to overwhelm the basement area - I just wanted it to be a part of the basement area. And I was running out of ight gray pieces Supplies corner by Tereglith, on Flickr I just couldn't resist including those awesome design windows. Nick Fury: Felon of S.H.I.E.L.D. by Tereglith, on Flickr Breaking and entering is a serious crime, folks Living Room Layout by Tereglith, on Flickr Armchair by Tereglith, on Flickr "How many of my chairs are you going to sit in, Nick?" "Every. Single. One. Motherf***er." Fireplace by Tereglith, on Flickr Tony's tasteful interior design includes this modernist fireplace and an... orb... thingy. They're all the rage. Stark Mansion Balcony by Tereglith, on Flickr Tableau 2 by Tereglith, on Flickr Get it together, Tony. You can't keep falling off of things like this. Watchin' TV by Tereglith, on Flickr When Pepper wants to see Bill O'Reilly complain about her lack of qualifications, this is where she goes. Stark Mansion Top by Tereglith, on Flickr Cast of Characters by Tereglith, on Flickr Thanks for viewing!
-
Hey, Here's my first Iron Man MOC in LDD. It's Malibu Mansion from Marvel films. 473 pieces. Pictures: Front Back Side