Search the Community
Showing results for tags 'Power functions'.
Found 368 results
-
(WIP) [MOC] LEGO TECHNIC RADIAL POWERED PLANE
omardib21 posted a topic in LEGO Technic, Mindstorms, Model Team and Scale Modeling
hello!!! my new moc, still wip, 3 days of work, im a lil bit tired, the plane already take form, need to fit flaps, interior and some other stufs, heres the video!! my submarine getting small hahaha working radial engine into plane Thanks!!! -
Presenting my self-propelled rail car for cat lovers. Cat Train Rail Car by dr_spock_888, on Flickr The idea is have something that may be of interest to the young female audience at our LUG's public display events. I seem to have some boxcab fan influence in my toy design exercise.
-
[MOC] - my moc cars collection, all made by me
omardib21 posted a topic in LEGO Technic, Mindstorms, Model Team and Scale Modeling
hello!! people ask me for put pics from my ferrari, here i will show my cars ferrari f50, f1 race car, and my mad max rc power functions dodge my ferrari its for just showing, not for play or put motors the f1 i build the chassis to carry buggy motor and pf stufs, but im out of money so i decided to make a non motorised version and my dodge that im using 3 train power functions motors, its very fast, take more than 10km thats it i hope you like it guys!!!! pics: PB134257 by Omar Dib, no Flickr PB134255 by Omar Dib, no Flickr PB134253 by Omar Dib, no Flickr PB134262 by Omar Dib, no Flickr PB134261 by Omar Dib, no Flickr PB134260 by Omar Dib, no Flickr PB134259 by Omar Dib, no Flickr PB134258 by Omar Dib, no Flickr -

[MOC] Spinning Gimbals
sheo posted a topic in LEGO Technic, Mindstorms, Model Team and Scale Modeling
The origins of the idea: The core of this model consists of three rings which can independently rotate around three perpendicular axes. These pivoted rings are called gimbals. Gimbals have been used in a wide variety of engineering applications since ancient times till modern days. Gimbal suspension is used to provide stability to objects inside unstable environment, e.g. compasses on ships and gyroscopes on planes. Furthermore, the simplicity and effectiveness of gimbals often attracted artists' attention. In science fiction and fantasy, gimbals have been used to represent complex contraptions capable of creating new physical effects and even manipulating the very fabric of reality. Some of the examples include the machine from the 1997 movie Contact, the gravity drive from the movie Event Horizon, mass relays from the video game series Mass Effect and even the Time-Turner from the movie Harry Potter and the Prisoner of Azkaban. LEGO implementation: The idea of this model is to set gimbals in motion. Complex transmission allows each of the three motors to independently operate one of the three rings. Therefore the contraption is very easy to control. The rings and the frame are perfectly rigid and secure. The design of the model is intentionally minimalistic so that it could be used as a part of larger models. Video demonstration: Simple version: There is also a simplified version of the model with only two rotating rings and one motor. It may be also actuated by hand. Video demonstration and speed test of this version: Afterword: If you like this idea, please support my project on LEGO Ideas and share it with your friends! Thank you for your attention! -

[MOC] Día de Muertos - Animated skeleton ready for the parade
autoreverse posted a topic in Special LEGO Themes
- The Dead are alive - "007 Spectre" opening scene anyone ? Día de Muertos celebrations are taking place in Mexico at this time of the year. I have always liked their atmosphere and aesthetics, and the way they honor the memory of lost relatives and friends in a colorful an joyful way. (yes, I do have a sweet spot for The Book of Life and Grim Fandango too) This is my best attempt at creating a float that could take part into the parade. I wanted motion, as much of it as possible. So it has : forward / backward moving legs / arms / head spinning platform (subtly) dancing mariachi All movements are linked together, speed is adjusted with the remote control. It also includes lights, because the parade does not stop at night ! Powered by : 1 M-motor - 3 PF lights - 1 IR receiver - 1 PF speed remote control - 1 PF AAA battery box (88000) + black light to enhance the night shots Please enjoy ! Link to the video (could not embed it, sorry) : El Dia de Muertos by autoreverse, on Flickr and a few stills : Thank you for passing by ! [First contribution by the way, after years of delightful lurking. Yay !] -
SET REVIEW: 10254 WINTER HOLIDAY TRAIN (including Power Functions) Introduction It is my pleasure to present to the EB community a review of the 10254 Winter Holiday Train. This is the latest yearly installment in the Winter Village series of sets from The LEGO Group and promises to be an exciting addition to Winter Village collections which do not have the previous winter-themed train 10173 Holiday Train released in 2006. Since the release of that earlier set, we have seen many other trains released that fall outside the standard LEGO City theme, such as the Emerald Night and Horizon Express. I have been impressed with those models and so my hopes for this set were very high on hearing of the release. For many fans, a winter train that doesn't cost a small fortune on the secondary market is to be welcomed. I hope that this review will assist you all with considering whether to add this set to your collection. I have also included a segment on the adaptability to use with Power Functions, which I think is a really well thought out part of this set, although the set DOES NOT come with the Power Functions parts necessary to motorise it; these are sold separately. My thanks to EB LUG Ambassador CopMike and the LEGO CEE Team and Designers for the opportunity to review this set for the EB community. Set information Name: Winter Holiday Train Number: 10254 Theme: LEGO Creator / Winter Holiday Theme Year: 2016 Pieces: 734 Price: USD $99.99, GBP 69.99£, EURO 89,99€, NZD $179.99 Resources: Brickset, BrickLink Packaging I'll begin with some images of the packing for this set. The box is of moderate size (479x282x89mm) and features great detail shots on the back. One side features a layout of the included track including measurements of the size of the train and diameter of the circular track. The close-up shots on the back of the box give a good indication of the various play features this set has, which will be discussed later in this review. It also makes it clear that the set can be motorised with certain power functions sets, sold separately. Box Front Box Rear Box Close-Ups Box Contents The box contains 7 plastic bags of parts, 1 for part 1, 3 for part 2, 2 for part 3 and a separate one containing wheels and couplings. There are also 4 sets of 4 curved track pieces and two instruction manuals contained inside plastic packaging to prevent creasing. No cardboard behind the instruction manuals but they were unbent and in good shape. The set contains no sticker sheet. Contents Overall Individual Contents Instruction Booklet There are two instruction booklets with this set. The first is a small half size booklet containing instructions for the first part of the build: the station and presents. The second booklet is A4 opening along the long edge not the short edge and contains instructions for the full train. First Booklet Booklet Size Comparison Inside Sample Pages Minifigures The set comes with 5 minifigures, two children and three adults: the train conductor, engineer and a passenger. There is a nice variety of colours and unique prints here, with one face printed on both sides and four of the five torsos printed on both sides. The train conductor has some nice details such as the gold pocket watch. The choice of face for the conductor is my one criticism of this selection. While he could look old and serious, to me he looks grumpy, and this is particularly evident in some of the box art where we see him waving from the back of the train and helping load presents; he doesn't look like he wants to be there at all! It does at least add some variety to the usual cheery faces however. The female adult minifigure has the dual-sided face. The first side shows a big enthusiastic smile, perfect for posing with the playing children. The opposite side tells a different story; here we see a peaceful sleeping face, likely happy to have a moment to rest (I'm sure most parents can understand this one!). It works quite well in the box art with the woman sleeping on the train station bench while the children play around her. There is a good variety of head accessories with several different types of hair, so this set will add a bit of diversity to a Winter Village collection. Minifigures Front Minifigures Back Minifigure Alternative Face Interesting Train Parts I thought some of the train parts deserved a picture of their own before we get to building the set. There are a couple of different sizes of train wheel, with the biggest driving wheels in red and the engine leading wheels in red also with some black ones for one of the carriages. The rest of the carriage wheels are standard black train wheels that connect with a thin metal rod. The picture below shows one of each size, as well as a couple of other train parts such as the not so common pilot piece (cowcatcher) which will go on the front and the magnetic couplings, of which there are 5 in the set (1 for the back of the train and 2 for each carriage). I also included the white leaves because why not, I like them. Train Parts (and white tree piece) The Build - Part 1: Platform and Presents Now let's get on to the build. Part one contains the small station platform, two minifigures and all of the presents in the set. There are some interesting parts including a clear 2x2 domed piece, roller skates, a printed 1x1 tile with a number pad on it and a nice assortment of small coloured pieces. And of course we can't forget an orange brick separator! Parts contained in Part 1 We then move to building the station. The station is quite small but has a couple of nice details such as the snow tiles (always nice to have white 1x3 tiles) and the lamp post. As far as lamp posts go I wouldn't call this one my favourite, but it is nice enough and seems to be a compulsory requirement of most Winter Village style sets. This improves on previous single-lamp posts from Winter Village sets, trying a different piece for the glass rather than the two-part sphere pieces and uses the green life saver piece as a wreath, which is nice, with a touch of gold as well to brighten things up. The simple bench finishes the station off. Overall a simple little build, not intended to be a major part of the set but nonetheless it is a necessary one. Railway Station Next we have the present,s which are always a bit of fun. There is a nice selection of presents in the set, with three wrapped gifts, a robot, a boat, a spaceship, a fire engine and a windup toy. The robot is very cute and can hold items with its "hands". The child minifigure also comes with a radio piece suggesting the toys can be remote controlled for a bit of added play/imagination value. I like the design of these presents; they are recogniseable and also sturdy. Presents The whole first part to the build makes for a nice collection of items that will add to a Holiday-themed scene. There is a nice assortment of colours and presents in here, plenty to be delivered by train to the waiting children! Completed Part 1 Build Let's not forget the spare parts, this section comes with a few. Spare Parts for Part 1 of the Build The Build - Part 2: Locomotive Part 2 of the build is my favourite as now we get to build the locomotive! This part contains the engine and tender. The selection of parts for the locomotive presents a nice range of shapes and colours, primarily black, green and red. Some of the interesting train parts have already been noted. Parts contained in Part 2 The engine build was fun, not too complex but with some interesting parts used to create the shape of the train, such as axes and goblets. Build in Progress The driving wheels are on their own block, which includes a technic brick for the pin connection with the tender; no coupling here. Attaching the Driving Wheels The floating leading wheels have a couple of decorative features that stand out from the usual, including multiple colours (red and some small gold 1x1 round plates for a little extra bling) plus the distinctive pilot piece (cowcatcher) which makes the shape of this loco stand out. The Leading Wheels Now we just need to add the cab and finish the boiler! Completed Chassis with all Wheels The completed engine is a polished build with lots of colour and a distinctive small steam engine silhouette. The locomotive is categorised as a 4-2-0 with four leading wheels and two driving wheels. The design is based on a Jervis type engine. The scale is too small to replicate many steam engine features like the Emerald Night manages, but the shape has many distinctive features such as the cone-shaped funnel and distinctive pilot on the front. I particularly like the curve of the boiler which is a nice improvement from the 10173 set with its very angular boiler. The Finished Engine Some of the details include a smoke plume, domed safety valve, a gold bell and the cylinders for the pistons (although there are no moving pistons unfortunately). Engine Side The cab of the engine is quite cozy, with just enough space to fit a single minifigure. There are two brackets for tools and a generic printed train control panel which doesn't really fit the steam locomotive that well. An attempt at some valves and a safety glass would have been nice, although difficult in the limited space (potentially the white bar near the top could be a safety glass, use your imagination!). Engine Cab All in all I do like the profile of this engine, it has some neat colours and details for the size and the shape is easily recogniseable. One or two improvements could be made but on the whole it is an attractive build to have at the front of the train. Engine Front Profile Next in this Part is the tender for the engine. As far as tenders go, I again really like the side profile of this, it has a good shape that compliments the engine,as we will see. The Tender Looking inside, there is a little less detail. We have a single sloped plate with some black round pieces near the top to represent coal. The engine doesn't have anything resembling a firebox inside the cab anyway! The coal is only near the top edge, to be visible over the sides I imagine. Inside the Tender The back end of the tender has a few nice pieces to add some texture to what would otherwise be a black plate, so this adds some interest to the build. Her we have our first magnetic coupling piece to connect up to the wagons. Back of the Tender On the whole the tender has some nice colur and details; it serves its purpose. The inside is not as exciting as the outside, but to add any more detail to the coal piles would require a lot of smaller piece (which, with the part to cost ratio, may not have been impossible). Let's see what it looks like all connected up. Complete Engine and Tender Overall this locomotive is a great build. It looks good on display and will definitely look impressive with other Winter Village sets. It may be quite small compared to other Lego trains, but it fits well into the theme. I mostly like the colour scheme, although the white at the front stands out at me a bit much. In the design, the biggest flaw in my opinion is the coupling between the engine and the tender, which can be seen more clearly in the next picture. I really dislike that to uncouple the tender from the engine it is necessary to lift the tender off the tracks (unless you are really set on pulling that pin out of the tender piece). Two more magnetic couplings would not have gone amiss here, like on the Emerald Night between the engine and tender. Locomotive Side View Coupling aside, I do like this engine, and it is just the right size for a circular track too (often the bigger trains look very long on a simple circle). Here are a couple of pictures of it on some track before we build the carriages. Some of the genius of this design will become evident in the final segment of this review when I adapt the train to motorise it with Power Functions elements. Locomotive goes Choo Choo Choo Choo Off into the Distance And let's not forget the spare parts! Part 2 Spare Parts The Build - Part 3: Carriages The last part of the set is the build for the two carriages; a flatbed for presents (with a Christmas-train twist) and a small caboose. There is a wide assortment of pieces, shown below. Pieces in Part 3 We start building the flatbed first. I like the intricacy of this build for what is essentially a flat wagon, it packs some neat design features. Flatbed Build Progress The gold and dark blue elements on the sides (using a Studs Not On Top building technique) are nice touches, but what I really like about this carriage is that the Christmas Tree and miniature train on top rotate as the carriage moves along the tracks! This is so much fun and uses a worm gear to make sure it doesn't spin too fast. Christmas Tree Spin Mechanic The miniature train itself is very cute and curves around under the tree like so. Train on a train folks, does it get better than this? The presents from part one can be stored in the section on the right. With the tree added, it is a nice carriage, far more interesting than most rolling stock flat beds, the Christmas vibe is impossible to miss (although perhaps not the most practical carriage at other times of year!). Flat Bed Complete Next up is the small caboose, which is a nice carriage to sit at the back of the train. Inside is a small table with two chairs, a cup and what could be a lamp or a flask full of hot chocolate if you have that on your mind! Caboose Build in Progress The completed carriage is nice, small but with features including the raised roof in the middle, gold lanterns at each end and the white leaves with coloured baubles, replicated from the tender. The roof is easily removable to place minifigures inside. Completed Caboose As for swoosh-ability around the track, it gets a pass. Choo Choo Caboose! That completes part 3, so we'll end with the two carriages together. The carriages are good builds and fit the Christmas theme well; we have a tree, a place to store presents and a cozy table to sit around and drink a warm drink (ignoring that it may be a bit drafty with the gaps around the doors with the train is moving!). The single tan axle on the flatbed train really bugs me in terms of colour scheme, but other than that I don't have any complaints. Completed Part 3 Carriages Complete Set There we have it, all done! Before I move to the conclusion however, I would like to throw in the optional Power Functions elements, all sold separately. Power Functions (Sold Separately) One thing that really impressed me about the design of this set is how easy it is to motorise it. To do so, you will need the following four Power Functions pieces/sets which are ALL SOLD SEPARATELY. Alternatively, if you own a recent Lego City train set, you can raid the parts from that, like I did. For those of you looking to purchase these separately, the set numbers are 8879, 8884, 88000 and 88002. Power Functions Parts (Sets 8879, 8884, 88000 and 88002) The set includes instructions for pulling the locomotive apart to fit in the Power Functions elements. For such a small train, they manage to cram these parts in really well! Here is the disassembled engine to show what needs to be removed so that you can add the powered wheels and remote control hub. Disassembled Engine The modules come apart quickly and easily and the whole thing can be motorised within a couple of minutes. There is a hole in the floor of the cab for the cables to come up through, and then the rest of the cables just.. sort of fit in there. That's the only downside to motorising this set; some of the design features are lost and, due to the size, the grey Power Functions parts can't easily be hidden without changing the shape or using a lot more parts, so some of the aesthetic is lost. Motorised Train That said, the designers did a great job of not only incorporating the Power Functions but making it easy to do so, and easy to switch back too. As noted though, it is quite hard to hide, particularly the cables, which mostly do manage to fit inside the cab with some spillage. Cables After motorising your train, you are also left with a few parts to do with as you will, or to swap back into place for display purposes. Motorised Train with Spare Segments Overall, very impressed with the Power Functions conversion considering the size of the build. Conclusion It is necessary to come up with a score for the set, so here are my thoughts below overall. Design: 8/10 – The set is well designed and has some interesting play features. The spinning tree is notable and there are a lot of accessories to increase play value. This was a 7 as I do think improvements could be made, but I have given it an 8 as the quick adaptability to Power Functions really blew my mind a bit! Parts: 8/10 – An interesting selection of parts with some good colour options for use in future building. Build: 9/10 – The build experience is fun and engaging but not too complex. This would be a good set to build in an afternoon with the kids at Christmas. There is nothing repetitive and there are lots of fun features to discover as you build. Price: 6/10 – The price per piece is unfortunately a downside to the set, coming in at 0.136 USD per piece. That said I still value the build and design so I would not let this discourage you. It is a bit too costly I would say just to buy for parts, but certainly worth it for the build experience and display model (certainly an improvement on last year's Winter Village re-release...). Overall view: It's a great addition to the Winter Village series in my view. There are a lot of features, a lot of interesting and colourful parts, and the build is fun to do. One more carriage would have been a nice addition but other than that and the few design points noted throughout, the set is a great build and the adaptability to Power Functions is quick and easily done in a few minutes. Of course if you are more traditional and wish to push the set around yourself, it also works well for that. I would recommend displaying without any Power Functions on it if possible as they do remove some of the details and the battery box in particular is not at all concealed. As with many train sets, it does not come with much track (so as to keep the price down), but this can be expanded with additional track sold separately. Thanks for reading and do let me know your thoughts on this Winter Village installation in the comments below. Will you be buying it? Or have you already bought it? Feel free to share your views and your own pictures!
-
Hello. Last weekend we had our major exhibition at the North of Portugal, PLUG Braga BRInCKa 2016. Me and my wife showed this LEGO aquarium, "As Sereias e a Cidade Perdida" ("The Mermaids and the Lost City"): Water (near 15l) of course, is not LEGO. All other parts are LEGO except some nuts I used: - 2 small M3 nuts inside the shell to force it to go down when air escapes (I'm also not sure if pneumatic tubes are LEGO or not, I got them at bricklink some time ago). Those 2 nuts could probably be replaced with LEGO magnets but I don't care much for purism. - near 140 M5 nuts inside the large green bricks at the bottom to increase weight and prevents all bricks from floating around (could use boat weight bricks, have enough for that but would take lots of space The air compressor is from Sariel - two pumps generate the curtain's bubbles, one pump is for the shell movement and the fourth pump is for the pyramid. There's also a Power Functions Light - one LED inside the pyramid and the other near the shell, behind the dolphin. The idea came after Paredes de Coura Fan Event, in June, where I attended Oton Ribic "Water" presentation. All those blue slopes came from Paredes de Coura and I had to do something with them. For the exhibition I used a few drops of a sodium hypochlorite solution to prevent algae and other micro-organisms to grow. So no real fish could be shown but I used a small Nemo electro-mechanical toy fish that swims a few seconds each time someone knocked the aquarium glass (sorry, forgot to record). A few more photos at flickr
-

MOD - 42024 Container Truck Full RC
Chilekesh posted a topic in LEGO Technic, Mindstorms, Model Team and Scale Modeling
Hi everyone, Here's my modification of Lego Technic 42024 Container Truck set. In addition to original functions (steering, outriggers and container lifting) it has: - 6x4 driving, - 90° tilting of the driver's cabin, - Working & tilting steering wheel, - Fake V8 engine (working), - Led lights, and is completely remote controlled. I used: - 1 L-motor for 6x4 driving - 1 Servo motor for steering - 1 M-motor for outriggers - 1 M-motor for lifting the container - 1 M-motor for tilting the cabin - 1 rechargeable battery box - 3 IR receivers - 1 set of led lights - 1 x 20 cm extension cable Bricksafe: http://bricksafe.com/pages/Chilekesh/42024-rc (*.lxf file can be found here). Rebrickable: http://rebrickable.com/mocs/Chilekesh/42024-container-truck-motorized-rc Any suggestions on improvements are very welcome. Cheers and happy building! -
MOD - 8416 Fork-lift Motorized & RC
Chilekesh posted a topic in LEGO Technic, Mindstorms, Model Team and Scale Modeling
Hi everyone, Here's my modification of 8416, fully motorized and remote controlled. An additional function is the working & tilting steering wheel. The PF elements used are: - 1 M-motor for driving - 1 Servo motor for steering - 1 M-motor for lifting - 1 M-motor for tilting the lifting assembly. - 2 IR receivers - 1 Rechargeable battery box Rebrickable: http://rebrickable.com/mocs/Chilekesh/8416-fork-lift-motorized-rc Bricksafe: http://bricksafe.com/pages/Chilekesh/8416-motorized (*.lxf file can be downloaded here). Any suggestions on improvements are very welcome. Happy building! -
LeTourneau L-2350 wheel loader
Tamas Juhasz posted a topic in LEGO Technic, Mindstorms, Model Team and Scale Modeling
Until the Maz 535 is finished, I'll present some of my MOCs, which are a bit older, but weren't publicized yet. I start with the LeTourneau L-2350 wheel loader, the largest in the world. I made a scale model, with PF IR remote. All functions are motorized: - Drive - Steering - Bucket lifting - Bucket tilting Except drive, everything works via strings and reels. This way it could be built in this scale, there is really a limited space inside, autovalves or servo operated penumatic valves with compressor aren't possible. Weight: 1058 g Top speed: 0,6 km/h Parts count: 680 Video: Pictures: Gallery: With blueprints: Feel free to ask or comment. -
Hello everyone, I would like to share my MOC - Swinging Pirate Ship Ride which is featuring one PF 8883 medium motor Here is the Video: I am gathering support in Lego Ideas, if you like it, you can give me a support: https://ideas.lego.com/projects/146444 Thank you!
-
I have some difficulties in placing this topic in correct section. Should it be Trains? On the other hand it is supposed to work in a modular town, that's why I put it in Town. This is my biggest creation so far. Actually those are two modulars designed to be placed together on a display. The depth is 48 studs instead of regular 32 because of tracks and platform. I decided it was unrealistic to stick to 32 and still have decent building. Anyway, on with presentation :) What I hope is apparent from the picture above is that I incorporated some lights into these structures. The old 9V battery box is in the warehouse and gives power to all six pairs of lights (2x 9V in warehouse and 4x PF in station). There is also old style 9V switch that controls turning lights on and off without the need to reach for the battery box (black switch on the side of the warehouse). Before I show you the warehouse let's have a look at the platform: The warehouse: This is how the electric parts are distributed in the warehouse. You can also see the inside with some pallets and a cupboard for employees. Now, let's have a look at the station building: First - the roof. This is where I put all the lights that go with the station. This is how it looks like from the underside: That's 4 pairs of PF lights, one PF extension cable and one 9V cable to provide easy to disconnect outlet. The station itself has some nice flowers on the front, benches for passengers, some roof over the platform and a phone booth. That's what you could already see from the outside. So let's have a look inside :) There is a bit o a stir at the moment because of some careless passenger. Don't worry - this is being cleaned as we speak :) Looking from the front of the station you have confectionery that sells ice cream too and on the right your typical railway station fast food stand (with microwave in case your yesterday pizza is cold! :D) Looking from the platform side on the left there are some tables belonging to the restaurant, ticket booth and some waiting area. On the right there is an obligatory public toilet :), two gaming machines and luggage deposit lockers. If you wonder how it looks in town - its natural environment - here are just a couple of pictures: Full gallery is available as always on my Bricksafe: http://bricksafe.com...-with-warehouse
-
[MOC] Motorizable Skycrane
Anto posted a topic in LEGO Technic, Mindstorms, Model Team and Scale Modeling
Hello ! I have made this skycrane for a contest on TechLUG. The objectives were : Have a mechanism for the rotation of the rotors A host mechanism The helicopter must can catch a container It can have a motorization with a battery box and a M motor for the rotation of the rotors ant the host mechanism We had a maximum of 900 parts I chose to make a gearbox to have the possibility to choose between the rotation of the rotors or the host mechanism. The gearbox is activated by a crank. There is a linear clutch to have progressive acceleration of the rotors and to secure they when the M motor is turning. On these pictures, you can see the rotors mechanism. Here, the pictures of the host mechanism. The clamp is openable by a little mechanism. The motorizatioon can be add in the cab, by removing the interior. It is not the best solution, but there is not space is this helicopter. (You can see it in the video) For the design, I choosed to have a thin fairing. The advantage is the helicopter is more resembling reality ; but there is little place for the mechanic. There are just 2 seats in the cab. A made a detailled turbine. It is imposing, it released to the fairing. -
[MOC] RC Articulated Tractor
Anto posted a topic in LEGO Technic, Mindstorms, Model Team and Scale Modeling
Hi everyone ! This is a MOC I made 2 years ago. It is an artulated tractor. It has 2 RC functions : driving by a XL motor and steering by a M motor. There is a 2 speeds gearbox that you can select manually. The articulation allows the 4 wheels still touch the floor. There is a rear lift to hook tools. The PTO can be able and disable by the lever near the seat. Steering : The rear lift : The PTO : (the driving ring catches the bush. The rotation is done trought the rear differential) I tried to do a good design, with a lot of panels. The hood and the seat are red ; the mudguard are black. There is a lot of details like front and rear headlights, exhaust, switches. This tractor has 3 tools. You can see it in the video. :) -
 Hi everyone! I'm happy to present my newest Lego creation, the completely remote controlled K.I.T.T.! I'm still young, but old enough to know and like Knight Rider. It's the reason, why I recreated K.I.T.T., the main character of the series. Of course with a huge amount of Power Functions! Driving, steering, working scanner and headlights. Six motors, two extenision wires, two pairs of leds, two switches, two IR receivers and an AAA battery box. As many electronic parts, as possible! :D It is my third model at a bigger scale. The building was very interesting. There were a lot of technical challenges with the chassis and the body shaping was difficult, too, because usually I make smaller models. Hope, that I can make more MOCs at similar scales in the future. There are a lot of Lego replicas on the net. For example I found out, that I use the black minifig shields for the wheels. After it I saw, that Firas has already done it! The working scanner and headlights aren't new, too. But! As far as I know, this is the smallest K.I.T.T., which contains these functions! At first please watch the video! Below I tell some things about it, and later there are information about the fuctions and technical detailes! Hope you like it! :) At first I send a huge thank you the three persons, whose names are at the end of the video, for lending me some PF parts, a camera tripod and making the music! It's the first time, that I don't use downloaded music, so I'm very happy! :) Kitt has an enemy, called Karr. Karr was the first car, but he was evil. I built at first Kitt, but later it came into my mind, that it would be more interesting and unusual to build Karr. But almost everyone likes Kitt, and almost noone likes Karr. So finally I decided to put more Kitt scenes into the video and upload the car, as Kitt. I started shooting. I brought out to the street two reflectors, the car and the camera. There are scenes, where you can see two cars together. The truth is that I have only one. After every scenes I exchanged some parts of the body, and continued shooting, without changing the position of the camera. Later I cut the pictures near each other. And it was shocking to watch the scenes on the computer! I thought, that the red light in the dark night will be very impressive and will look very cool. But Karr looks much better. The overall look of him, and the yellow light definitely win against Kitt. I went out again, to make some scenes about Kitt, but the result wasn't better I don't know why, but my camera likes the yellow light better, than the red light. The appearance of Kitt is not so strong, as I thought at first. It is weak But the screenplay allows you to decide, who wins! :) Despite the difficulties, I really liked to make this movie and like the result. Hope, you like it, too! Driving: The car is drived by an L Motor, with a gear ratio 1:1, through a differential. Steering: It is very simple, too. I used a Servo Motor. The other two functions are more interesting. Working headlights: I used two M Motors. If I push the button on the remote control, I start to operate both ones. One of them opens the lights, the other one switches them on. It is impossible to push and release the button fast enough, so I had to use slippery mechanisms. For the opening I used a clutch gear, you can see it on the bottomview picture. But at this level of cramming, there isn't enough place for a clutch gear everywhere, so I found out a new solution. Between the two connectors, there is a small piece of rigid hose. If the switch reaches its end position, the hose can rotate calmly further in one of the connectors, and the mechanism waits my reaction time. Working scanner: Two M Motors again. One of them switches on the light and the other motor, which starts to move the light. The switching mechanism is very similar to one of the pneumatic autovalve. After it changed the position of the PF switch, it rotates further and doesnt cause damage. The construction, which transforms the rotation of the motor to the linear motion of the red light, contains three liftarms. More pictures on my MOCpage! Thanks for watching!
 -
 They call those who ride them "rednecks". But while you may ponder whether the setup like this is an overkill or not, a pickup mounted on 10' wheels is a thing to remember no matter the circumstances. Features: ► forward/reverse drive ► separately-driven L6 turbocharged Diesel engine with moving pistons and cooling fan ► steering ► differential and gearing for speed ► simplified cockpit with steering wheel and IR-receiver seats. ► opening cab doors and hood ► exhaust stack ► details such as radiator with grille, front and rear lights, bull bar and reinforced bumpers, roof rack with extra floodlights, rear view mirrors, desert safety flag and fenders 42030 C-model, uses more than 80% of set's parts (loose assumption). 42 studs long and heavy. Despite its weight and only one XL motor as means of propulsion, it has a quite decent speed - it picks up (pun intended) a huge momentum - and an impressive turning radius. Engine is separately powered by L motor. Steering is much like in a video game, where both reverse and brakes are controlled by the same button. Unsuspected bonus: by accident, the bed is perfectly shaped to hold the RC control unit which consists of two RC pilots with a standard RC-car additions. The set's M motor lies dormant, waiting to be used on some extra function I can't currently come up with. It'd be hard to craft the instructions in LDD, but I'll try one day.
 -

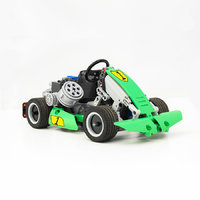
Yellow Buggy – A tiny and robust RC LEGO car
bartneck posted a topic in LEGO Technic, Mindstorms, Model Team and Scale Modeling
This is a very small, robust, reliable and easy to maintain buggy. It is ideal for letting your kids play with all day. The design goal was to make a robust car as small and simple as possible. This means most of all no suspension system since that would require the use of CV joints. They are known to break and while they work nicely in LEGO super cars that you carefully push around the floor, it does not work with kids trying to race and crash their RC cars. CV joints will break. Of course it is possible to create a LEGO RC car with suspension and even four wheel drive/steering, but then you end up with LEGO’s own RC Crawler. The goal was to keep it small, simple and robust. One of the problems I encountered when letting kids play with the RC cars all day is that the axles in the differential tend to slip and move out. I hence build a differential assembly in which the axles are completely locked in and cannot move. The worst thing that could still happen is that a wheel comes off which is easy to fix. The car uses only one L-Motor and is pretty fast for that. The turning radius is very tight and the car is just fun to drive. The differential makes it perfect to drive around tight corners. The heavy battery pack is right on top of the back axle, giving it the best friction. Well, it does not accelerate like an F1, but it might still make a small difference. Building instructions, LXF, and further information are available. -
A LEGO Wind Turbine MOC and MOD of the LEGO Vestas Wind Turbine 4999. The original 4999 sets are not only hard to find today but expensive so we worked with what we had in our inventory and bricklinked most of the key structural parts which were the 9 x White Slope, Curved 8 x 6 x 2 Double part #45411 and Curved 8 x 6 x 2 Inverted Double part #45410. Since we were starting from scratch we changed the original scene of the restaurant into a modern seaside house. The modern and modest seaside house features minimal interiors with PF lights for both interior and exterior Here's a full overview video of our LEGO Wind Turbine MOC in detail with all it's Power Functions in action. Enjoy!
-
Hello, Eurobricks. I wanted to post this page because a few days back, I FINALLY managed to get a 4x8 train motor, so I could motorize the engines on my Lego Helicarrier. But when I put in all the power function accessories, the lights came on, but the rotors barely spun for a second. I was wondering if anyone else had motorized their helicarrier, and experienced a similar problem. If so, do you have any solutions to how on fix the problem? Thank you, Th3_Br1ck_Kid
-
My LEGO version of the Baldwin DR-12-8-1500/2 "Centipede". The Centipede was Baldwin Locomotive Work's first attempt at a road diesel locomotive. Its unique feature was 12 axles which made the locomotive looked like a centipede. Unfortunately, it was not reliable and none was saved from the scrap yard. My MOC is powered by LEGO Power Functions. It follows LEGO 6 wide train toy style. It is approx. 60 studs long. Baldwin DR-12-8-1500/2 Centipede by dr_spock_888, on Flickr View from back. The Centipede was original built for passenger service but engine failures left it relegated to freight service. Access to Power Functions AAA battery box. The batteries also adds weight on top of the PF Train motor. Access to engineer in cab for playability (and changing Infrared Receiver channel): It can negiotiate LEGO R40 curves and switches. Although it looks like it is going to take out anything next to the curves. I had to add a lot of articulation to the wheel arrangement. It would look best on the largest ME curved track. I think it is a suitable MOC for all those metal axles I have been making for bogies. There is something interesting about having lots of wheels on equipment.
-

Making vehicles articulated
OriolesFan957 posted a topic in LEGO Technic, Mindstorms, Model Team and Scale Modeling
Hi, I have recently started a tracked vehicle project. I have made a few other topics about it, building it etc. I was wondering if anyone has made a vehicle then turned around and made it articulated. (Especially tracked) I also need tips on how to do this. Thanks -
Anyone know anything about suspension for tracked vehicles?
OriolesFan957 posted a topic in LEGO Technic, Mindstorms, Model Team and Scale Modeling
Hi, I am building a tracked all terrain vehicle, wondering if anyone knows about suspension for tracked vehicles. I also need to know how to upload pictures. -
[HELP] Tips and Pointers for a Tracked Vehicle
OriolesFan957 posted a topic in LEGO Technic, Mindstorms, Model Team and Scale Modeling
Hi, I am working on a new project which is a tracked vehicle, I have started on it and remodeled it 3 times already. I am new to tracked suspension and wanted to incorporate hard shocks. The motor I will be using is the Lego XL motor. -
[MOC] Jeep Wrangler
legomarat posted a topic in LEGO Technic, Mindstorms, Model Team and Scale Modeling
RC driving and steering. All wheel drive and Live axle suspension Lifted with Mickey Thompson tires: Internals More on my Flickr Youtube video (I know doesn't work in some countries, you can find it on flickr too) -
I am looking to build a MOC and want to use drivers either equal in scale the PRR's T1 or larger in scale. I believe BBB XL drivers are still too small, so what is the next best option? Here are a few I was thinking of: 1) Contacting BBB and trying to get a custom set of deivers made. 2) Contacting the custom siderods guy and getting a custom,set of drivers made. 3) Purchasing Lionel T1 wheels and modifying a few bricks to use them. 1 and 2 will be pricey, but it will be closer to true lego. 3 will add weight, improve traction, and reduce derails at high speed, but will need to modify lego brick. Other suggestions welcome!