Search the Community
Showing results for tags 'WIp'.
Found 314 results
-
-
- 5 replies
-
- captain james cook
- ships
-
(and 2 more)
Tagged with:
-
Greetings! Once again I present to you a LDraw MOC made in SR 3D Builder for the Free Build category of Eurobricks' just finished LDD/LDraw 2014 Contest. I didn't have time to do the roofing well or even the basement, which I originally had plans to make, but if I get around to doing them later I will post updates. One of the great things about creating digital buildings is that you don't need to destroy the old before you build the new, so you can get back to your MOC whenever you want. Anyway, here goes: This first picture is, well, pretty self-explanatory I guess. It's the main floor of the building, the only one that I've built thus far. I wanted to try something new with the walls and I had used the overlapping 2 x 2 Round Plates many times for roofing, but I thought it would be interesting to try as the wall itself. Here's the Kitchen: Living Room: Bedrooms from different angles: Finally the complete build with a slapped together roof: I had a fun time working on all the furniture, but may have taken a bit too long with it. Anyway, here is the is the SR 3D Builder file, which is also available in the corresponding topic in the LDraw forum. Hope you enjoy this build. I took care to try to make the MOC fully buildable with real LEGO pieces. I checked on Bricklink for them. Some are not very common though and I may have accidentally included one or two parts that weren't, but overall it should be buildable. By the way, in case you haven't, do check out the contest entries in the LDraw forum, some are really, really good.
-
[WIP] Ford GTHO Phase 3
Doc_Brown posted a topic in LEGO Technic, Mindstorms, Model Team and Scale Modeling
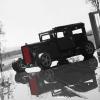
Here is the 1971 ford GTHO WIP. Hope you guys like it. Any suggestions are welcome, particularly regarding the corners of the car, do you think its smooth enough, Cheers. -

[MOC] [WIP] Old Skool Rat Rod
EvilEnderman posted a topic in LEGO Technic, Mindstorms, Model Team and Scale Modeling
Ello all, been a while since I've posted an MOC here. Over this weekend, I've been working on a studfull build (haven't built like this for a long time) My aim was to make a small-mid scale rod, with realistic functions. It contains: 4 speed gearbox v6 fake engine Cowl steering (HOG) Not to mention the 'gothic' shredded interior. However, before I start the main bodywork, it's just that when I look at it so far, it doesn't seem right... http://imgur.com/a/fCTuH Edit: @Jim - Thank you for the tip - I have resized them all to a max width of 1000, which should be fine! What do you guys think? - What's that thing that isn't right, or anything to improve? (Will post progress here too) - I will be finishing the build definitely! Thanks! - Enderman -
So here's my Wip for the GNAR. The front hull is done, I'm waiting to place an order to finish up the back/tweak the rest. I'd really appreciate it if you'd leave some feedback regarding proportions and sail set ups. I have since changed the figure head. The preliminary mast here is just a place holder. And here's the updated figurehead. I'd appreciate your thoughts and suggestions. This is my first ship, so I'm pretty unsure how to go about doing this. Also, Gylden Abiron means Golden Revolution in old English.
-
Hey guys i am curently working on a big brickfilm now and well, I thought I would make a topic for it. Each day, i will post my days progress until it is complete. i will do designing the set comming up with the plot ect. Feed back and comments will be much apreciated! Keep on watching and see you tommorow on, Day 1! :classic: (Mods correct me if I am doing anything wrong beacuse i'm new and still exploring )
-

[WIP] 9 Axle Mobile Crane
Saberwing40k posted a topic in LEGO Technic, Mindstorms, Model Team and Scale Modeling
Well, it's certainly about time I made a work in progress thread for this monstrosity. A while ago, I decided that I wanted to build a 9 axle mobile crane, similar to a Terex AC 1000, with all of the features. I chose the crane for several reasons, including: -The fact that it has star formation outriggers, rather than telescopic ones, which would be easier to make strong. - The Sideways Superlift, or SSL. On the real crane, it is used to maintain tension on the boom, allowing the crane to lift heavier loads. A problem with many Lego cranes is that the booms sag, something I hope this will remedy. -The sheer size of the thing gives more room for including functions, like steering and outriggers. (more on that later) As a model, I want to be able to have: Fully remote control drive and steering Swapable steering modes, from normal to crab steer Automatically deploying outriggers, using only one channel Full crane functions, winch, luff, slew, and boom extension. SSL, to maintain tension on boom Minimum amount of parts to be fitted by hand, instead having everything attached. Lights A red and black Mammoet inspired livery Be able to lift 42009 at minimum radius. Now, with those goals in mind, I made a prototype boom: The colors are awful, but it was a good proof of concept. It weighed 2954 [2366 in revised version.] grams, extended to 263 centimeters long, and was 105 cm retracted. I say was because I took this apart and made version two, which sadly hasn't been photographed yet. This version of the boom uses an XL motor for extension of the first section, operating through a very long drive shaft, a reinforced bevel gear box, and then a worm gear to 40z gear setup. The second section has 2 slaved M motors for power, which operates through a nightmarishly complex gear train, and extends the 3rd and 4th sections together, via a rope system. The SSL spreader mechanism was just as bad, having to operate through a spline shaft. This version had a number of problems, including drivetrains that were needlessly complex, and it weight too much. The new version is lighter and simpler. The boom head. The reel on the side is one of two that operate the 4th boom section, through the pulley system described here: Jennifer Clark also describes this on her site, and it is used in 8421 and 42009. However, I had to actually use string reels, because nothing else was long enough. This is actually my 5th or sixth try at this, because initially I had a motor at each section, but when that proved too complex, I employed this solution. Another snag I hit was getting the 3rd section to extend. I was for a time using a custom gear rack made out of pins, but that ultimately proved to be too unreliable, so I went through my boxes of stuff, and got enough gear racks to make it work. Moving on, this was one of the easy parts. The base of the boom, with the mechanical cylinders that would have elevated it, and the XL motor that extends one of the sections. The LA brackets carry the gears that would have driven the SSL from motors in the superstructure. The SSL The above picture shows the extension mechanism, with 2 u joints to make an awkward connection, and the SSL mechanism. The SSL would have been elevated by a linear actuator, then spread by two small ones. The spreader actuators are driven through a worm gear, which is free to slide along the red 12L axle, maintaining connection to the rest of the drive train at all times. However, this mechanism is over complex and flimsy, meaning that it will receive a redesign. And now, for the pictures of this boom fully extended: So far, the boom is mostly complete, and I have prototypes for most sub systems, so this should be great once finished. Progress Edit: I have made some progress on this project, namely working out some of the stuff involved with the outriggers. The below picture is a mockup of the crane on the turntable, with all the wheels in their correct locations. The lime beams in the foreground are my width guide for when I'm building axles. The crane is going to be about 23 studs wide when complete. Most of the outrigger is figured out, but now my real challenge is figuring out how to integrate the superstructure and the lifting cylinders. Below is a picture of the outrigger mechanism as it is complete right now. More Progress: I have built most of the superstructure that holds the boom. It is made with some Znap truss pieces, and is quite strong. Also shown is the chain drive, which switches on a set of recievers in the superstructure. The winches and all that will go behind this unit, on a piece that is detachable, for ease of transport. Slowly, but surely, this project is coming along. Be patient. -
Just for fun. I had a few hours with nothing to do. So, I wanted to play around with LDD. With the LEGO movie coming up, "Maybe build a quick theater for fun?" I thought. First the screen: I put two 32x32 white base plate and a 16x32 white base plate and it looked like a screen. (Note: sizes in LDD can be tricky.) I looked up screen sizes: Standard screen 4x3 ratio 40x30 studs High Definition 16x9 ratio 48x27 studs Cinema Wide Screen 2.39 to 1 ratio ~72x30 studs 30 studs is easy to convert ratios than 32 so I blacked out non screen areas. White area of the screen is 72x30 studs. The screen looked good. Next played with chairs. Simple red chair has no cup holder. Make a blue chair with cup holder that can fit in a 4x4 area. Next how to step up the screen. (Note: this is where I found out how BIG it was!) Made side braces and a wall that I could quickly copy and paste. Screen can slide out top. It is BIG. the screen base is on THREE 16x32 black base plates. 16x96 and 35 bricks high. High means room for a balcony. Balcony means need stairs. Next the need for stairs. I build a stairs to copy and paste. And I don't like the blue floor for the stairs showing on a brown wall. (need a rebuild but I ran out of time.) Speakers, lights, balcony, bathrooms, ticket seller, popcorn vender, soda, candy, movie posters, projector... And that is not even the stage I was thinking up. I was thinking a modular stage. Removable screen, Orchestra pit, Back stage dressing rooms, lights, curtains... So many ideas and no time to build. Can't wait to see The LEGO Movie. hehehe.
-
This is my WIP Topic since I've figured out all my questions about the build. This is my first tank build and I think it's going pretty well! It is based off the Ripsaw, but has some differences: ^I had to use some interesting techniques to connect both the studded and studless construction. ^My table's pretty messy during builds I need to brace the structure in the rear and make a simple lightweight connection from front to back to place the electronics box and battery on. Hope you like it!
- 20 replies
-
- Ripsaw
- first tank
-
(and 3 more)
Tagged with:
-

[WIP] Shock(and kids)-resistant Helicopter
paulblda posted a topic in LEGO Technic, Mindstorms, Model Team and Scale Modeling
Hey everyone, this is my very first MOC presented here on EB. This MOC's goal is to entertain my 3yo neighbour, therefore it should be shock-resistant and child-proof. Also the propellers will rotate as the heli's wheels rotate (while the heli being pulled on the floor of course). Maybe I will change the colour-scheme, but most of my spare parts are in black, so this is what it will probably look like. Comments are of course welcome. I can add the LDD file, if wanted.- 4 replies
-
- helicopter
- wip
-
(and 1 more)
Tagged with:
-

Questions about Tank-building
z3_2drive posted a topic in LEGO Technic, Mindstorms, Model Team and Scale Modeling
For my next build I am planning to make a high-speed RC offroad tank with 4 buggy motors, similar in design to a Ripsaw. This will be my topic for any questions/discussion that may come up during the build. My recent BL orders have yet to come, so for now I only have one question. Are drive motors located at only one end of the vehicle? Or can they be placed at both 'axles'? It would seem simpler to have only the rear end driven, or would it be better to evenly distribute torque and avoid stress at one end? -

Technyk32231's MOCs, WIPs, and ideas
Technyk32231 posted a topic in LEGO Technic, Mindstorms, Model Team and Scale Modeling
Ok, here is a gearbox I made. It was made to be realistic, so it only has two shafts, one for input, the other for output. I had to make two types of gears myself, a 20 tooth clutch gear and a 24 tooth clutch gear. The 24 tooth clutch gear was cut off of an old type differential, and the 20 tooth clutch gear was made by hollowing out the center of a regular 20 tooth double bevel gear, cutting the teeth off of a regular 16 tooth clutch gear, and putting the 16 tooth inside the 20 tooth. The gearbox is a 6 speed + 2 reverse gearbox, so 8 gears total. Really though, it's a 3+R gearbox hooked up to a 2 speed transfer case. http://www.brickshelf.com/gallery/technyk32/Miscellaneous/Forum/img_20130531_072212.jpg The picture is too large to embed, and sorry for horrible quality, it was taken on my mobile, and gearbox is long disassembled. Maybe sometime I'll rebuild it and take better photos. Here is a car I made a while ago to teat steering and suspension. I lost the shot where it isn't upside down, sorry. These photos were also taken on my mobile. I'll take more pics of the front axle later, the model has already been disassembled, but I kept the front axle for future projects. These photos are also too large, so I'm putting links. http://www.brickshelf.com/gallery/technyk32/Miscellaneous/Forum/img_20130522_070614.jpg This is a good WIP photo, taken of the first version of the front axle. Later, this axle would lose the shock absorbers and gain improved steering geometry and suspension travel. http://www.brickshelf.com/gallery/technyk32/Miscellaneous/Forum/img_20130528_071434.jpg This is the new front axle. The vertical 6L link is for suspension. This model has all-round floating solid axle suspension with transverse torsion bars. As you can see, this new front axle has caster angle. I couldn't get the shock absorbers to work correctly, and I wasn't satisfied with the suspension travel, so that's why I switched to torsion bars. It works very nicely. The caster angle is achieved by simply moving the upper links backwards. The front suspension is a triangulated 4 link type, and the rear suspension is a 3 link with a bionicle ball joint. This model has no fake engine, as the main focus of this model was steering and suspension. Plus, the front suspension took up too much room for a fake engine. http://www.brickshelf.com/gallery/technyk32/Miscellaneous/Forum/img_20130528_071406.jpg Here is the underside shot. The center of the model is held together by the floor and "doors" entirely, forming part of the central body, almost like a unibody construction. Oh, and here is just a strange mechanism I made. As the input rotates, the output "punches" in and out. http://www.brickshelf.com/gallery/technyk32/Miscellaneous/Forum/img_20130612_072035.jpg- 8 replies
-
- Technyk32231
- moc
-
(and 3 more)
Tagged with:
-

[WIP] Tower Crane
LegoMonkeyMan posted a topic in LEGO Technic, Mindstorms, Model Team and Scale Modeling
I have been working on a mostly rc tower crane for a few weeks (I don't have much time to build). And I wanted to show some progress. Because I couldn't shrink the size of my pictures I have them visible on my website. http://legomonkeyman.weebly.com/work-in-progress.html Hope you like it. -

[TRIPLE] Merlins mystery WIP
Merlin posted a topic in LEGO Technic, Mindstorms, Model Team and Scale Modeling
So, here is the beginning for my entry... This is the first model more or less finished, althoug it might not look like it :P I am wanting a more "rough" "industrial" look on this one, with a kick of humour... Anyway, I'm not telling you what it is supposed to be, or what the overall theme is. As it is kinda special looking, I thought it might be fun for you all to guess :) I haven't counted the peices yet, but I am very confident that I am withinthe 500part limit. Peices include: 2 power functions m motors 1 power function lights 1 power functions IR receiver and the red light is from a RCX light sensor via fiberoptics. -
Hello! Due to recent developements I'm forced to post this thread about my plans for the Triple contest. This was the first thing that popped to my mind and I was aware that someone else will propably come up with it aswell. Oh well. The trio is a combine harvester, a tractor and a trailer for the grains. First one of which is not presentable yet. Trailer and tractor look fine currently but their functions need some fine tuning yet. Pictures with terrible cellphone quality for that authentic mystery wip feeling. I call dibs!
-
I'm currently working on some models inspired by the Alien Conquest theme. What I like about the original AC is the alien heads, the "classic" alien's representation (like the flying saucer, the abduction, etc...) and I tried to keep these elements while building with my style which is so better. The sets I've already built: 99001 Alien pod and ADU attack jetpack Alien invader F51"Lotus" fighter Flying squid saucer B51 "Watchbird" bomber / assist aircraft The harvester All terrain DCA unit 99008 ADU command center All of these, except the ADU command center, are in the "quality and improvement" phase Here is a preview of the Alien invader and the Lotus fighter, and a render of the Flying squid saucer I put on flicker a few days ago. The chase preview par BobDeQuatre, sur Flickr Flying squid saucer par BobDeQuatre, sur Flickr Hope you'll like them
- 17 replies
-

[WIP] 6x6 Articulated Truck
KopMaister posted a topic in LEGO Technic, Mindstorms, Model Team and Scale Modeling
hello, hello! i'm currently working on a new trial truck. it features: -Tandem axles on the rear axle. - Articulated steering. - 1x NXT motor for propultion. - 1x L-motor for steering. - 1x Battery box. Now, here are some pictures of the work in progress: And to top it off: Hope you like it :P -
Hi, I'm making my first MOC here, I started a few hours ago using MLCad (it's also my first time using a program to build). I'm trying to reproduce a train from my country (Belgium), it's an automotive that I've taken for years and it seemed easy to build for a first time. Here's what it looks like (I've taken the pics at dusk 'cause I thought about it too late, I'll get some better tomorrow): Here's what I came up with for now: What you can see here's 8 stud wide, 7.66 high and about 38 long. My only question for now is: You've probably already faced this problem trying to MOC a train yourself, is there a nice way to get rid of the hole/space caused by the front window on the sides ? (I hope the question is understandable) Thanks for reading/helpingme.
-

Technyk32231's MOCs and WIPs
Technyk32231 posted a topic in LEGO Technic, Mindstorms, Model Team and Scale Modeling
I am making a thread with all of my MOCs and WIPs. These will even sometimes be failed or abandoned projects, or just ideas. You may also post suggestions, and feel free to criticize, but please give at least a tiny bit of credit if you copy one of my ideas. They are free to use, I just don't like people claiming them as their own, unless they came up with it independently or before me without me knowing. -

New Prototype Crawler Axle
z3_2drive posted a topic in LEGO Technic, Mindstorms, Model Team and Scale Modeling
April Fool's day has passed, so it's time to get serious. After building my large speed chassis with the new hubs, I was so eager to build I disassembled it right away I think I have a video, but not completely sure, because I deleted some... Anyway after a couple days of messing around with various ideas I came up with a solid prototype. Features are: 4 link connections, gear reduction 1:9-using a nifty reduction right before the 5x7 frame(which has knob wheels so I don't break any bevel gears), a telescopic driveshaft which I got from a youtube video-not sure who it was by; new 8t gears, and to top it off, my 1.9 Rok Lox tires Photos: I guess I will build a chassis then the front axle. This crawler will probably use buggy motors considering the reduction. -
Hello everyone. I wanted to get some feedback on some SoNE free-builds I have started. I have never done a MOC much less post it online. They are a WIP and are not ready to be judged. I will also end up changing the names of each after I have more time to think about them. (When they are ready I will post each one in its own/new topic.) The only reason why I didn't make them bigger/more detailed is because I don't have very many pieces of the right color needed in the various builds. (90%-95% of my pieces are built into my LEGO sets and I don't want to disassemble any sets.) Constructive criticism is welcome! Thank you! Name: Mini Hoth Police Stand Scout Trooper arresting a rowdy Stormtrooper. Name: Communications Room on a Star Destroyer. Name: Guarding on Tatooine in a former pond. (Hence the plants.)
-
Hello there Here is what i've worked on in the past two weeks, it's still a Work in Progres (it will always be ) More Photo's and some Video's http://www.flickr.com/photos/epjl/ Index: 24-2-2013 30-4-2013 3-6-2013
-
Hey guys this will be my first post here and I'd firstly like to say that this site is awesome and that I hope I live up to the MOC-ing standards that are around here Secondly I would like to present you my latest project that is still in progress Bumblebee ! As I said in description still rough changes are due but I must find the time to work on him :D Hope you like it ! Bumblebee WIP by vlad t.., on Flickr Bumblebee WIP by vlad t.., on Flickr
- 13 replies
-
- transformers
- lego
- (and 5 more)
-

W.I.P: First moc post!
weavil posted a topic in LEGO Technic, Mindstorms, Model Team and Scale Modeling
Finally, as the title says, felt like it was time. But I think it was tired of hide in the big mess on the table. It's more like a version 0.5 in the pictures, but have improved it some. I will need to improve it in time, but its a start for now. Sorry I'm lazy and didn't resize them so I could put some in the post. They are just teasers. Don't want to show to much yet. And here they are! -
This is basicly a combination of a milenium falcon cockpit, a sith fury, a lot of weapons and my imagination (this isn't star wars anymore :P ) Sith Fury: I didn't like the cockpit of the sith fury but I looove the shape of the wings..... it looks sooo evil :P so I used that as a starting point and even kept most of the wings original Milenium falcon: bought it dirt cheap for parts and the cockpit, been looking at a lot of sets that had the right cocpit just can't get enough of building things that I wasn't capable of when i was a kid the pilot: (made him look as evil as possible) the ship: (interior is still a work in progress) -foldable wings -lots of firepower -foldable landing gear there is room for 4 minifigs or 2 minifigs and cargo 3 compartiments: -place for the pilot -place for a gunner -place for 2 minifigs or cargo in the back pics of the inside will come soon, those are still a WIP Added some extra engines ;) + view on the cargobay door I'm still trying to figure out what to do with the baseplate to display the ship so ideas are always welcome Thanks for watching so far ;)
- 4 replies
-
- sith fury
- milenium falcon
-
(and 3 more)
Tagged with:


