Search the Community
Showing results for tags 'Review'.
Found 810 results
-
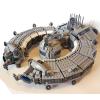
Introduction: With a slick black exterior highlighted by light blue, Solomon Blaze’s hovercraft is the ultimate bad-guy capturing machine! Not only is the finished build snazzy, but the building process uses several neat techniques to create the eye-catching details. Let’s take a look at how we got from 313 pieces to the vehicle pictured above! Product Details: Name: Infearno Interception Number: #70162 Theme: Ultra Agents Year: 2014 Pieces: 313 Minifigures: 2 Price: USD $29.99 Source: Brickset Paper Contents: The box shows the agent’s vehicle to full advantage, and also points out the round transparent-orange piece Blaze is looking for, probably a lethal fire creating concoction, if Infearno’s name is any indication. The back of the box shows off the set functions in a bit more detail. The sides of the box give us some close-ups on the minifigures and the “mission” piece. Like most LEGO instruction booklets, this one features the same design as the box front, with minimal text changes. A random page reveals an off-blue background with measuring strips along the side, suggesting that this is part of some top secret communication. The inventory page gives us a quick glance at what’s coming. And the back features the classic “Win” advertisement, this time with the green ninja, Lloyd, blurting it out! Last but not least, we come upon the dreaded sticker sheet. The stickers are printed on a clear background, so one must be careful with fingerprints. I found most of the stickers quite necessary for the finished build… it didn’t look the same without the agent’s symbol or the side wiring! Build: After dumping out the first bag, here’s what we have: Well, it took a little subsequent organization. I haven’t got the knack of pouring things out quite that neatly yet! Those pieces conspire to get us here: During this first part of the build, we set the stage for a future ejection seat function. Bag two arranges this way: And that finishes the vehicle off for us! You’ll notice I put the stickers on. I found it rather silly that the screen on the windshield faces outward, so afterwards I tried to take it off and put it on in the inside – unsuccessfully. Minifigures: The set includes two minifigures; Solomon Blaze, apparently the agent leader, and Infearno, a notorious and obviously rather fiery villain. Beneath his fiery mask the villain hides quite a scowl. Underneath his armor he also hides some nice printing. Both minifigures have back printing. Infearno also has a surfboard-fire scooter affair that gives him a lift when he wants it. It’s small and simple, nothing to write home about. Solomon Blaze sports one of the nifty new minifigure size blasters. The blasters shoot the 1x1 rounds remarkably far – I've often been concerned about losing one or two! Vehicle Functions: The final vehicle, agent included, looks like this: The main function is the ability for the interceptor to change into a hovercraft, with a few turns of its wheels. The front two turn down to provide presumably something of a magnetic field effect, and the two back wheels turn down as well. A back view: There are a couple of problems with the function; for one thing, both the front and back wheels are designed to give the vehicle lift, but what is going to power it through the air? Plus, the back wheels are at a pretty extreme angle. In my opinion they ought to rotate toward the back of the vehicle, giving it a bit of propulsion power, and leaving the front wheels to provide lift. Of course we’re talking hypothetically here; since nothing like this actually exists, fault can’t exactly be found with the current model on the basis of realistic-ness, but the more possible it looks, the better! Another fairly important structural flaw is the fact that, while in upright position, the wheels hardly turn. This is likely because the curved piece on the bottom of the axle sticks out ever so slightly, making a slight tilt necessary for smooth rolling. I also thought the front quite empty with nothing but orange cones underneath the cockpit. While we’re on the subject of design flaws, I’ll mention another one; I found the six exposed studs on the side of the vehicle rather annoying. Naturally the cockpit opens: Descending to the smaller functions of the set, the back opens up to reveal a few spring-loaded missiles. These missiles are quite powerful, perfect for those who are tired of all the flick-fires we’ve been getting! Another important function is the ejector seat – pushing the red button at the back ejects a round flying disc with Blaze on top – hopefully. The disc is rather plain, once it’s outside of the cockpit. Conclusion: As you may have noticed, I found quite a few problems with the vehicle. In fact, I was left rather disappointed after building it – it looked rather plain compared to what I had expected, and had several problems when it came to the hovercraft function. The ejector seat was a bit of a pleasant surprise as I hadn’t realized the set included that function when I bought it. However, even that wasn’t much to write home about! The minifigures were fair, but by no means breathtakingly so. I wasn’t sure there were very many redeemable points about it at all. Nevertheless, after examining it from all different angles, checking out the functions, and getting a few ideas as to how I could improve it, the vehicle started to grow on me. It really is an excellent concept that just needed a few tweaks to steal the show. I was able to correct almost all the problems mentioned above, and as an added plus I enjoyed the time I spent modifying it at least as much as the rest of the building time! In the final analysis, the set was definitely worth it, and although not at all display-ready in its original form, a change here and there can improve that 100%. It’s not perfect by a long shot, but Infearno’s Interception has the basics down! Playability: 9/10 – If it breaks down a bit in other areas, the set’s playability stands the test. The flaws with the functions don’t interfere with that so much as with the aesthetics, and I had plenty of fun swooshing it around or firing at a row of minifigures or catapulting poor Solomon as far as he could go… you name it! Design: 4/10 – Here’s where the rubber really hits the road, and I’ll have to admit it burns up a good deal. Several of the functions are seriously lacking, and there are quite a few exposed studs in places where a bit of greebling or something of the sort could have improved it pretty easily. Minifigures: 8/10 – As I’ve mentioned before, the minifigures aren’t spectacular, but they do have nice printing, especially on Infearno. Price: 8.5/10 – Considering the piece count, it’s a fairly good deal, and several of the pieces are quite useful. Plus, there’s a fair quantity of transparent light blue – always a great color for sci-fi type builds! Overall: 8/10 – As you can see I gave the set a slightly larger overall score than the average of the other scores would seem to warrant. That’s because, in the final analysis, the set has lots of potential, both in play and in modification possibilities. Yes, the design has its flaws, but they aren’t irremediable, and after all that’s what Lego is all about – building and changing things however you like!
-

75902 - The Mistery Machine - Scooby Doo - Stop motion Build Video Rev
jolurove posted a topic in LEGO Licensed
This is a video I made of this set. I'm really digging it! Brings a lot of memories. Enjoy! -
Hello, this is my review of the Lego Ideas Set "The Big Bang Theory" (21302). And if you like, a lot of sunny images you can find right here, with many details. Bazinga! :-) Best wishes Andres
-
My life seems to have been nothing but Campers recently. Still, when I saw a few of the new 2014 CITY sets available already at a certain toy store, I couldn't pass up the opportunity to produce an early review, given my love of CITY civilian vehicles. Having reviewed 2012's 4435 Car and Caravan, I'm interested to see how this latest addition to the outdoor recreation collection compares. Review: 60057 Camper Van Set Information Name: Camper Van Number: 60057 Theme: CITY Release: 2014 Parts: 195 Figures: 2 Price: GB £17.99 | US $19.99 | EUR xx.xx | AU $xx.xx | CA $xx.xx | DKK xxxxxx.xx Links ... Shop@Home ... Brickset ... Bricklink ... Peeron The Box Click for a larger full frontal image No matter how far our intrepid campers stray from the concrete jungle, it seems they cannot escape the City's looming tower, still visible over the trees in the background. The nine-year-old blue box surround suits this set; the lady protagonist paddles happily in the blue while her chappie puts his oar in from the artistically-rendered shore. As usual, this European version of the box features no part count, suggested age range or Choking Hazard warning. Several nicely-tesselated insets demonstrate the set's features on the rear. Modularity is assured, in the recent subdued format of bags alone rather than the individual modules' builds. Click for a larger image The highlight for me here is the fantastic spread of the new 2014 vehicles. I can live without the fire truck, but just about every vehicle here is right up my street. Gotta get that car transporter! Click here for a close-up. Note that the subversive Pokemon-esque 'Collect them all!' mantra (Pokemantra?) has gone; collecting all of these would be a daunting task for your average nine-year-old, and expensive for his or her parents. Our life-jacketed heroes parade with oars aloft on the box top: Ginger dude shows off his orange top in the scale inset. I really like that treescape in the background. Measuring 260 x 190 x 58 mm, the box is the standard size for this price point, demonstrated here in comparison to 2013's 60018 Cement Mixer: I've yet to even open the cement mixer box. Box Contents The usual thumb-tabs open the box, and out fall two polybags, each containing a smaller bag for fiddly bits; two instruction manuals; and the Dreaded Sticker Sheet: I dread stickers far less these days, particularly since the days of STickers Across Multiple Pieces seem to be over, and I even put these on this time. They are printed on a glossy white background, which isn't quite the same shade as the white of the bricks, but this isn't too noticeable. The Instructions Two similarly-sized manuals are provided, identical on the front save for the module number; both have covers made from thinner paper similar to the inside pages, rather than the glossier covers found on many instruction booklets. On the inside front cover, the newish cartoon demonstrates how you should sort your pieces before building; opposite this, acres of blue space surround diminutive depictions of the modular build: I don't know if it is deliberate, but the blus background has a vague watery pattern ... ... which continues throughout: The build is simple and rather pedestrian; the only SNOT-work is seen here on the front bumper. Piece call-outs are a little reduntant in a set of this size, but I'm not complaining. At the rear are found an advertisement for one of the new CREATOR sets, a CITY diorama, and the two pages of inventory. Page one is here; page two is on the inside rear cover ... ... and demonstrates the thinness of the cover paper and the presence of the evil WGW kid on the rear. The Parts The red canoe is the highlight of the parts from Module 1: it appeared in a few Pirates sets in the mid-1990s, and the mold hadn't been seen since 2001 until 2013's 79107 Comanche Camp brought it back to us in Reddish Brown. Otherwise, the selection is unremarkable except for the 1x3 tiles, which come for the first time in Green. Module 2's contents are a little more interesting, with some useful tiles, and I'm delighted to see smaller Dark Tan plates in a low-priced set. The newer-style trap door and frame appear for the first time in white; I was excited to see the R5 droid head in plain light bluish grey, but it also appeared in two Star Wars sets last year. The Figs Meet Tom and Barbara. Tom is not called that because he's ginger; he has a lopsided facial expression which could be a smirk, or sceptical, or indicative of some neurological condition. He sports an orange anorak first seen in 2011's CREATOR 5770 Lighthouse Island. Both torsos have back printing. Barbara has evil hair, and a nice blouse ... ... but it's the same as that of Olivia from the Car and Caravan set: Barbara, alone out of the foursome, seems at least to be a Happy Camper. Maybe that's because of all the fun that can be had with paddles. The life-jackets are the newer kind: narrower than their earlier counterparts but leaving a small but unsightly gap in the neck region. Both Tom and Barbara sit comfortably in the canoe, and there's room for more. The set comes with a spare oar, but no extra life-jackets, so if John and Olivia want to join them it'll be at their own risk. It's nice to see the couple rafting together, though I suspect the reality will be more like this. The Camper No build pictures for this simple set; just straight down to business! I was critical of the newish front end piece when it appeared in the 60017 Flatbed Truck; I'm still not 100% sold on it, but here, helped by the 1x2 curved slopes to either side, it does help to define the contours of the van's front end. I like the multiple appearances of ornage indicator lights, and the clicky-hinged wing mirrors look fab. The van's lines are for the most part clean and purposeful, helped by the unbroken stripes in green and dark tan: colours which are replicated on the stickers, so don't apply them if you want to modify the set with different colours. I'm not so keen on the white mudguards - they look a little odd next to the bluish grey of the camper base. You may notice a slight oddity in the construction: the front mudguards are mounted a plate higher than the rear. This isn't too obvious - I failed to notice myself until typing the review - but it does spoil the image a little. The rear mudguards sit lower in order to maintain the green stripe and provide a tile surface for the opening side - there isn't a way to avoid this without making the whole camper a plate taller. It might be possible to lower the front mudguards if this height difference bothers you, but this will result in the front bumper looking incongruously high. There are nice curves to the roof, brought about by the 4x6 car bonnet panel sitting flush with the larger roof piece in front, and the curve slopes to the rear. The back end is a little spartan - it could do with a ladder to the roof, or possibly a rear window. The blocky bley mass at the base here demonstrates the simple construction technique throughout; the cliff face of bley broken only by the sticker and the dark bluish grey plate edge at centre-bottom. This dark bley plate forms part of the chassis: If the dark bley bothers you, you might switch the two 2-wide plates over here; this will fix the dark bley spot at the rear, but might weaken the chassis. Features The cab has opening doors, as do most CITY vehicles these days; I recall a few years ago that AFOLs bemoaned the lack of doors - proof that The LEGO Group does listen to its fanbase. Barbara is driving, today. There is space atop a blue brick next the steering wheel for the obligatory coffee mug; in front of this, two grille tiles neaten the cab nicely, and might represent ventilation or heating. The cab can easily be reconfigured for right hand drive if you prefer. A high arch provides easy access to the rear of the camper ... ... and allows Tom to join Barbara in the cab, albeit sitting sideways. To allow access to the rear, the whole left side of the van opens: You can see here why the rear mudguard is lower - if it were a plate higher, it would prevent the side opening. The roof is also easily removed, allowing adult fingers to manipulate the figures with ease: Tom and Barbara have a decent-sized table, a large double bed, and the grille tile at the bed's foot could I suppose represent a stove - though there's no other cooking equipment. Unlike in the Caravan, this camper's bed sleeps two comfortably - though one of them has to sleep on their side. Note the stickered television screen on the wall - a similar feature to the Caravan, which was showing a scene related to one of its sister sets (the Dirt Bike Transporter). If 60057's television is meant to relate to another set, I can't tell which. The horizontal bars, which I presume are meant to represent static, look a little like scratches. Up on the roof, there's a handy compartment for storing the oars and life-jackets, or whatever camping paraphenalia you fancy. A minor criticism: unless the boat is attached to the roof, there is no way to secure the trap door; this means repeatedly having to pick the oars off the floor when you inevitably forget and turn the van upside down. The front section also has sizeable storage space, and here the lid is more firmly attached: So firmly that it can be tricky to open. There's not much to store in there, but I guess it depends what you want to use your camper for. The 2x2 jumper plate and the R5 head provide a little detail, but they are there to allow attachement of the canoe to the roof ... ... like this: There's a little ambiguity as to exactly how the boat should attach; it can sit a stud further back than this, or a half stud to either side, but I think this position looks best. The red of the canoe really sets of the colours of the van - now it looks really smart! Comparison to other camper vehicles Let's now see how this latest camper compares to the most recent CITY camper, 2009's 7639 Camper: The latest version is taller, with a more detailed, textured front end, and wing mirrors, and I prefer the trans-clear headlights; although the newish bonnet (hood) piece adds contour to the front, I do miss the SNOT grille tiles. The rake of the windscreen is shallower in the new set. The disadvantage of the addition of wing mirrors is a two plate-high step at the top of the windscreen, but this is a minor point. 60057 is considerably longer than 7639: a good four studs, bumper to bumper, though 7639 has a stud's overhang at the rear. I'd like to draw your attention here to the subtle but important difference between the two, and to which I alluded in my review of the Car and Caravan set: 60057 has a more sober livery, and a more realistic overall design; however it loses a chunk of the Classic Town cuteness that exudes from its immediate predecessor. Lacking from the rear of the new set is any means for Tom and Barbara to get onto the roof - the set is crying out for a ladder, but even a window would help to break the cliff-face monotony. I do like the round tiled lights. There really needs to be some detail on that bley boxy bottom. The 2009 Camper allowed both walls to open, giving easy access to the cosy interior; 2014's left wall opens completely, and the roof is removable. There's much more space in the new one, partly because the table has been pushed right to the front; if you want Tom and Barbara to share a romantic dinner, then you can reposition the blue driver's seat without tooo much difficulty. 7639's latching mechanism was fiddly - you have to unclip and reclip the rear lamp. 60057 has no latching mechanism at all, but it isn't necessary: the stiffness of the plate hinges means the door stays in position. 60057's living quarters share a lot in common with 2012's 4435 Caravan: the window/wall panel/small window configuration is identical, as is (or should be) the placement of a television on the inside of the white wall panel. The opening mechanism is similar, but simplified in the Camper Van, and the interior has been tidied up somewhat; I'm pleased that the Camper has trans-black windows rather than the Police-ish trans blue of the Caravan. I like to think that TLG listened to me here. Conclusion When I reviewed the 4435 Car & Caravan, I was in retrospect rather unfair to it. I complained about the sobriety of the colour scheme (of the caravan, at least), which, compared to the cute lime green and curvy 7639 camper, seemed rather too masculine. The likely explanation for this is the arrival of the Friends range necessitating a wider dichotomy from the principally boy-oriented CITY range; however, seeing this latest camper, I begin to see to logic. The result makes up for the loss of Classic Town cuteness with a huge dose of realism: 60057 looks like a LEGO version of a real camper. Whether this is the right direction to take is up for debate; however, if this is the designer's intent, I would say it has been a success. Of course there will be niggles: the colors and position of the mudguards are a little fussy; the rear bottom is too simplistic in its boxy bleyness; and there needs to be a ladder or something else at the rear - else how are Tom and Barbara ever going to get that canoe back on the roof? I can live with the mudguards, and if I find I can't live with the rear I will modify it. This is a lovely little set: smart and realistic, but fun for play. The only quandry is whether to choose this over the many other wonderful civilian vehicles now available. Design & Build 8 A realistic design and smart livery is achieved effortlessly despite the simple build. It could just do with a little something more at the rear. Parts 8 It's great to see the return of the kayak-style boat, even if its uses are somewhat limited. There's a number of useful parts in white, and the smaller dark tan plates are most welcome, even if there's only a few of them. Figures 7 Tom and Barbara's torsos are both nice, and though not unique they aren't so common. It's a shame that Barbara wears the same top as Olivia, because if you have the caravan, you're likely to want to show the two sets together. Playability 9 Plenty of storage compartments, and easy accessibility to the interior, give the set an edge over earlier camping-related sets. Other uses for the paddles I will leave to your imagination. Value 9 The expected inflation hike for this price point maintains the 10c per part guideline, though many of these parts are large and specialised. But you wouldn't buy this set for the parts alone: it's a great-looking vehicle, a fun play set, and a super addition to your LEGO town. Overall 82% My Score 9/10 The triumph of this set is the achievement of a very realistic-looking camper and a fun play set for a simple build. And it's just one of many great looking civilian sets new for 2014! Your dilemma should not be which to buy, but which to buy first. Thanks for reading! I hope you enjoyed the review. Please tell us what you think! Rufus Resources My flickr Photoset 4435 Car and Caravan Review 7639 Camper Review by Macoco No joke to end with, I'm afraid, but here's a picture of the more recent camping vehicles together: If you like my reviews, and would like to learn how it's done, please consider joining the Reviewers Academy:
-
Stop Motion review (presentation) 6044 King's Cariage Année: 1995 Pieces: 124 Minifigures: 3 Price: 16,50$
-
Hello again everyone! Didn't plan on buying this set but I found it on sale and I needed a Sabine minifig. (Good reasons I know) You are probably all waiting for summer a wave reviews or some episode VII images but this set has not been reviewed yet. So here is my fourth review: Ezra's Speeder Bike! Name: Ezra's Speeder Bike Theme: Star Wars / Rebels Year: 2015 Pieces: 253 Minifigures: 3 Price: USA 19.99$, ENG 19.99£, CAN 24.99$, EUR 26.99€ Ressources: Brickset Lego store description Front of the box has the 2015 art: A Stormtrooper helmet tagged with a rebel alliance crest. Same as the other sets of the winter wave. On the back we see the play features and a little action scene. Inside the box there is 2 numbered bags, the instruction booklet and the sticker sheet. The instruction booklet has the same image as the box cover but without the set name and the number of pieces. The back of the booklet with the win minifigure. Spare parts. Some studs and some little piece in orange and green. Also we get 2 spare parts that could be used as guns. The completed model: both speeder are exactly the same except for the paint job. Front view Back view Side view The above picture has a bad quality so I added 2 more to show the side (see the next 2 pictures) Top view The front of the speeder can be extended to make it longer longer. Comparison shot: it does make it a little longer (approximately the same length has brick built front wing) Now on to the minifigures. We get 3 of them: Ezra Bridger, Sabine Wren and a Stormtrooper. Sabine is the same version as the one in the Assault Carrier and Era is the same as in the Phantom. The Stormtrooper is the same as every Stormtrooper in Rebels sets (including the BP). All the minifigs have leg printing. The stormtrooper has the normal clone face and Ezra and Sabine both have an alternate face. The printing on Sabine's hair is really neat. It has 2 colors like in the show. Back view: all the minifigures have back printing Rating ------ These three points are not included in final score. Price: 8/10 – 253 pieces for 19.99$ is under the 10 cents per piece ration. We get 2 nice never seen before speeder and 3 minifigure: Ezra, the main hero of Rebels. Sabine which is exclusive to this set (not anymore) and a Stormtrooper (We never have too much of these). There is not many big pieces but also very few small technic piece or studs. So the piece count is not inflated like we see in some other technic heavy sets. The price is great for a Star Wars set! Parts: 7.5/10 – Nice dark green parts which are not that common.Also most of the piece are bricks. Very few technics piece. This set is useful for spare parts. Build 8/10 – The build was surprising! It as 29 steps for 1 speeder bike. It took me longer to build this set then I anticipated because it has so many small steps. The build is well thought and fun. Since both speeder are the same, you have the same build twice. ------ Design 7.5/10 – The speeders look like the source material in the show. The green one is repainted by Ezra and the other Rebels and we see it in an episode (I don't remember which one). The white one is exactly like the Imperial one we see many time in the show. Still the studs shooter on the side don't look very good and are a little flimsy. They are not accurate since the canons are on the front of the speeder in the show. Also the front of the speeder doesn't always extend smoothly. Sometime one side will extend more then the other and the front will fall off. Also It could have come with a little trailer of stolen (or to be stolen) fruits like we saw in the show. Still the speeders are good and were bigger then I expected them to be. It is always nice to add diversity to your collection of speeder bikes! Minifigures: 6.5/10 – We get 3 minifigure. It's a good number for a set this set so no complaints here. We get a Stormtrooper with a clone face. It is always nice to have another trooper, unless you hate the Rebels version. It would have been better to have a pilot for the speeder bike rather then a Stormtrooper to be more show accurate. Ezra is the same as in the Phantom set so it still as the same problem of miscoloration of his hair and suit. (His hair should be blue and his suit darker) He does have is lightsaber this time. If you watch the show you won't find the choice of his hilt to be that bad. Sabine is exclusive to this set. (not anymore: she is available in the assault carrier) Her hair piece and suit are really nice but her skin coloration is wrong. She should have a darker tone like in the show where she is the same colors as a Latina or Polynesian. Also her helmet is not included in this set. The minifigure are a great selection for this set but they each have some little problems that will catch your eyes if you watch the show. Playability: 8.5/10 – Two speeders, one bad guy, one good guy and his 'crush'. Everything a kid needs to have fun. The speeders have studs shooter which are amazing for recreating chases seen in the TV show. Complement this with a few more Stormtroopers and you can occupy your little Jedi for hours! OVERALL 7.5/10 – A nice above average set that really came as a surprise for me as I did not intend to buy it at first. The speeders look like the ones in the show and offer a nice playability with the minifigures. Also it lets you get a helmet-less Sabine and Ezra (with lightsaber) for a low price. The stormtrooper is also nice but it should have been a speeder bike driver instead. A set to pick up to complete your Rebel crew and add to your speeder bike collection. A must if you like the show! Thoughts and critiques welcomes! Also if there is any grammar mistake burning your eyes, please PM me and I will edit. Thanks for reading!
-
Lego 21121 Minecraft Desert Outpost Thanks to Lego and EuroBricks for making this review possible! This will be a little different review than normal. Somehow I've just never gotten into Minecraft, but my two boys (9 and 5) are addicted to it. So since it's currently way past their bedtimes, I'm first writing a review myself looking at this as a Lego set but with basically no knowledge of the source material. Then tomorrow I'll have them give me an education and add that to the review. That said.... on with the details! Name: Desert Outpost Set Number: 21121 Pieces: 519 Price: $59.99 Minifigs: 5 Theme: Minecraft Year of Release: 2015 Links: Bricklink Brickset The Box So, a set of blocks based on a game about blocks and giant pixels. Hm. Nice logo and pixelated background at the top, with a face or something over at the top right corner. Frowning ghost face? Messed up Mickey Mouse head? Not really sure.... As for the set, well, it's a desert outpost. With a river flowing next to it. Um.... isn't that against the rules of a desert? From the boys - there's lots of rivers in the Minecraftian deserts. And the logo in the corner is a Creeper face, even though there aren't any in this set. And they really like the action of the box front with the TNT flying and such. The 1:1 On top of the box Lego used one of the minifigs to illustrate the size. It's a skeleton with a blocky head instead of the normal minifig head. And armor. Why's a skeleton need armor? It's already dead! Guess the boys will have to explain that one too. What they can't explain is why Lego used a minifig for scale. Anyone buying Lego sets probably already knows how big a minifig is. It seems to me that using something else from the set would make more sense, but there's not really anything else that would give easy scale. On vehicle sets, a wheel works well. Here, I guess they did as well as they could with a fig with a weapon. The Back of the Box The back is a standard display of play features. I won't recite them all since you can see the picture. I do find it a little odd to see the "build your own creation" in the bottom corner and the top center. Isn't that the exact point of both Lego and Minecraft? Do people REALLY need that spelled out explicitly for them these days? The Contents 3 numbered bags, some baseplates, and a manual. Simple. The Manual The manual is book-bound, not a stapled booklet, and nicely made. I'm not in love with the pale green background, more of a traditional light blue fan myself, but it's ok. You can see here there's no problem distinguishing light/dark grey or light/dark tan, but there were a couple times at the start of a section of building that it was less clear since there's only one color in use so far. Also, why are the print colors so far off the brick colors? For kicks I tried placing bricks on the page and it's crazy how different the colors are from the book. My wife and I do photography, so we understand the challenge of making prints match the screen or a physical object. But this is LEGO. They could do it. Once they defined the colors once they'd be pretty much done. So why is it so different? It'd make it easier for those times different color shades are unclear if the print color matched the brick color - just hold the parts to the page! Sort of how Technic sets often have a 1:1 scale axle on the page to help you get the right one from all the different sizes. The Minecraft Ad At the back of the manual is an ad for Minecraft, with a 70s looking dude playing along with his daughter on a "Blockstation 500" desktop computer. Personally, I love the style. I've read enough actual ads like that from back in the day to appreciate it. It sorta reminds me of a Pixar movie - it's an ad geared at kids but has lots of hidden details the adults would appreciate. Like the massive beard. And the collared shirt / sweater / jacket combo. And the Apple ][ style computer. Nicely done. The only flaw is a computer of that vintage with a full color screen :) The Other Sets That ad is followed by an ad for the other Lego Minecraft sets. The original micro sets are not included, but the 2014 and 2015 sets are all shown. The Part List For those who want, here's the inventory from the set. Yes, there is a brick separator. The Special Parts There's a variety of specialty and printed pieces. Not sure how much use any of them have outside the blocky Minecraft style, but they work here. The Minifigs Technically, I think Lego counts the wolf as a fig, but it's not built with the other figs in the manual. You'll see it soon. These 4 figs are nice though. The skeletons get Minecraft heads, and the two other characters are decent. It seems that "Alex" is a female Alex, based on the orange hair printing onto her torso. That is sort of a bummer, since it limits the usefulness of that torso for other things. The weapons and armor likewise are pretty limited to the Minecraft world. From the boys - You get the two main characters that you can be in the game, so this is a good starting set for someone. The armor and helmets are cool, but it'd be great if Lego could make the armor leggings and shoes. The Minifigs' Backs Alex gets the only back printing, and no one has alternate faces. The Build, 1 The first part of the build is a few small objects. A wolf, I think a crate?, a red torch?, a grey thing, and then 4 other torches. I do like the grooved bricks used for the wolf legs, but beyond that, not sure what I'm looking at here. From the boys - it's a wolf, tamed since it has a red collar, then a crafting table where you make things in the game. Super useful, you pretty much can't play Minecraft without it. Next is a redstone torch used in redstone circuits. There's also a furnace for cooking both food and other things, and finally regular torches to keep monsters away. The Build, 2 More small items. Some brown bin thing that based on the box art is a little one-man boat, a few plant things, and then I assume a red bed. The small bin is a boat used to travel in the water or for fishing. The green cylinders are sugarcane used to make paper or sugar, both very useful in the game. The Build, 3 And still more small items. First I see what appears to be an unfinished green tree, and then a TNT launcher. No dad, that's a cactus and a TNT Dispenser. Ok, I guess I can see the cactus. Still say it looks unfinished, but everything in Minecraft sorta does :) The Build, 4 Finally, into the meat of the build. I definitely like the brown flower parts used in the door to give it some interest. And we obviously have a play feature there in the ground - pressing on the smooth section of the tan tile makes the grey tiles flip up. I'm betting the tan blocks fill that grey area and get launched out. That's a wooden door, not as good as an iron door. Zombies can break the wooden doors. Lego did a good job matching the game doors. The Build, 5 The build moves on to another platform. This will be the main part of the outpost, so it's a large baseplate with some feet under it to raise it. And yes, I counted studs carefully to put that brown brick right where it's supposed to be, even though it doesn't really matter. The Build, 6 After flipping the base over, we get to start building some walls and water. The Build, 7 It takes a LOT of jumper plates to get that offset row of dark grey "brick bricks" in the right place. And that basket thing and grey thing that we build earlier now get a home. Still have no idea what they are... We answered about the crafting table and furnace earlier dad, we're NOT going over it again. Remember, I wrote this ALL before talking to you. Oh yeah. Ok, well, we're not sure why they did the two stud lower walls and 1 stud darker wall sections. That doesn't look like Minecraft to us. The Build, 8 The door is attached here, and they made a pretty ingenious and discreet doorstop out of a couple headlight bricks with a dark grey tile across them. The Build, 9 We turn it around and build more of the tower. There's also a bunch of those 2x2 bricks with jumper plates on top piled up here. That looks like when my chest gets full and I have extra blocks and pile them outside my house since I don't have room. The Build, 10 After another spin around we get to add the base with the flipper that we built earlier. I'm sure my boys with drive us all insane using it to launch those tan blocks all over the house. We also add the green thing - in context, I'm assuming it's a cactus - and the TNT dropper. The Build, 11 Let's make a couple more small bases, hinge them together, and give one a splash of blue. And with all those jumper plates, I'm sure there's walls coming. The Build, 12 I've opened it up here to show what's going on. The bed is in the room, and the weird walls were built as pre-fab sections and put into place. These walls look better than the other walls. Although the bricks in the windows look more like fences than windows from the game. And the bed is actually too big, but it had to be to look right and fit a minifig. The Build, 13 Now I've closed it back up, added more walls, and started on the roof. Still weird, and sorta boring. Grey walls get old after a while... We love the water slopes. It could be bigger, but even like this the boat will slide down and across the blue plate. The Build, 14 This secondary building gets joined to the main base and a few more accessories are added, like the plants. The Build, The End So... the bedroom gets a roof, the tower still looks incomplete, and there's a bunch of creatures around that I don't understand. The tower gets a big door, but the bedroom has just a little swinging panel? You can't really see it in this photo, but there's some water in the back corner. But it's not connected to the water up front! The TNT dropper and the block launcher both work great though, so the playability is nice. Big fail Lego - Steve has a sword AND a cookie, but you can only hold one thing at a time in the game. There's probably mods that change that, but you can't do this in the official game. And if this is daytime, then the skeleton with no armor would be dead or on fire from the sunlight. Having the redstone torch up with the TNT dispenser is right though, since you need a redstone circuit to make the dispenser work. The Leftovers Here's the leftover parts, all from bags 1 and 3. Bag 2 had no little parts, so no extras. Nothing surprising either, but these little 1 stud parts are always nice to have more of. The Playset The bases have hinges between sections, so it can open up like this. There's also a seam with a hinge under the bedroom, but the roof holds it together. If you remove the brown roof then that building can split open. We like the set opening, since it's easier to reach places and play. The Boat No idea why in the desert there's a guy in a tiny boat holding a cookie. Because that's all part of Minecraft, dad. Duh. Why does it have to make sense? The Alternate Build Remember how the box talked about "building your own creations" with "inspiration included?" Instead of the alternate models that we see in Creator or Technic lines, this set includes a modified version. First, you remove walls and other parts to get down to this. Then you rebuild with those pieces (and it does use just about all of them) into... The Alternate Outpost A much taller tower. But now the TNT doesn't fall onto the launcher, and the bedroom building is looking very incomplete. Neither is a big issue - just turn the top of the tower and use some other Legos to finish the building - but it just feels like a weak effort here to me. On the other hand, it's pretty much what my boys would have done anyway! The tower is awesome! The TNT flies further from higher up, and it's like a lookout tower to see if bad guys are coming. See, I was right... My wife thinks the regular model looks better though, and I agree. The Conclusion So, what's my conclusion on this model? It's definitely aimed at a specific fanbase, as opposed to things like City. And even Chima or Super Heroes have their source material, but this just seems more specific to me. Those other licenced themes are easier to play with without knowing the source. The price is ok, since you do get several figs and larger parts instead of tons of 1x1 bricks like many sets do. We think it's great, maybe even better than the other Minecraft sets we have. The TNT dispenser and boat are great, plus the wolf... and you get Alex! The Ratings Value: 7/10 - Close to 10 cents a piece, and you get 5 figs and a good size tan baseplate plus other largish plates. Design: 8/10 - Looks very Minecrafty, but a little plain. Minifigs: 10/10 - Good assortment, new Alex and wolf, and the boys liked that her hair was printed down onto her torse. Playability: 8/10 - Pretty good on its own, and easy to blend with other Minecraft sets or expand with other Legos. Parts: 6/10 - Appreciate the flexibility of these pieces for Minecraft use, but it'd be much more limited if you wanted to use them for other purposes. The unique parts are very specific to Minecraft. Overall: 6/10 or 10/10 - My score is low. I'm not the target market for this, since I've never played Minecraft. My boys on the other hand give it a 10 and are SO glad to have this set.
-

[MOC REVIEW] Dirk Klijn's Mclaren MP4-12C
Rishab N posted a topic in LEGO Technic, Mindstorms, Model Team and Scale Modeling
Some of you avid Top Gear fans out there may remember the episode in which Jeremy Clarkson tested the Alfa Romeo 8C while answering the question “Can a car ever be considered art?”His definition of art was that it must serve no other purpose other than to look good. He ended the episode by saying that yes a car can be art as the Alfa Romeo 8C looks absolutely stunning, yet it isn’t the best car out there. So the question is, can a Lego Technic car be considered art? Yes, it can. Meet Dirk Klijn’s Mclaren MP4 12C, a model designed with looks as a priority over functions. (larger versions of pictures can be found on my Bricksafe) When I first saw this car I was immediately amazed by it. All the gaps were filled in and the model looked incredibly realistic. As soon as the instructions were released I had to start gathering parts. It took me several months to gather all the parts, but I finally finished it and decided to write a review of this amazing model. The Build An interesting feature of this model is that it is built in a modular fashion. This means the model is built in sections and in theory should be easy to put together and take apart. More about that later. The build starts, as with most models, with the chassis. The chassis is one of the best I have seen. It is built starting with the middle section and then moves onto the axles. Other details are added and you have a complete chassis. Honestly I think I could just display the chassis by itself, as it looks stellar with a lot of details such as the engine bay and exhaust system. The model has working suspension, steering, and a working 4 speed gearbox with a linkage system. The gear box doesn’t work a lot of the time as the linkages cannot transfer enough force to engage a gear. I also had to add a half stud of length to one of my linkages in order for it to reach the gearbox lever properly. It’s a 3+R gearbox, but it’s not of much use in this model as the view to the engine pistons is obscured and the aforementioned linkage problems make it difficult to shift. Aside from that, the steering and suspension work flawlessly. Steering is transferred by CV joints to the dashboard, where a 14T gear connects to it and is geared to the steering wheel. The steering module is an absolute pain to connect to the front axle as one has to connect the CV joints to the dashboard while mounting it at the same time. It took me a good 20 minutes along with a few select words, for this module to finally get attached properly. I recommend partially disassembling the dashboard and attaching it to the chassis one part at a time as it makes it easier for the axles to connect to the dashboard. Also off topic, but check if your CV joints have a strong connection. Mine had weakened over time, and once I finally attached the dashboard, I tried to steer and the light gray part of the joint completely popped out of the model, and I had to replace it. The model’s suspension requires you to disassemble some 7.5L hard shock absorbers, which can be a bit difficult at first. Along with the shock absorbers, the model uses many other illegal techniques, which I will also cover later. Overall, one of the best chassis designs that I’ve seen in terms of looks, but a few parts can be a bit tricky, the shock absorbers must be disassembled, and the gearbox is not very good due to the linkage system. The build then moves onto the body, which is far more difficult compared to the chassis due to it not being fully strengthened until the whole module is almost done. I personally recommend adding a couple beams here and there to keep it stable while building, and then take them off when you’re finished. The body starts with the rear end and moves to the front. I won’t spoil too much about the building process, but there are some very interesting connections used to get all these angles. Many parts are mounted on only one pin or stud, which sacrifices rigidity for a better angle. The doors are opened using ball joints, which I always considered Bionicle type pieces, but it is quite a nice mechanism ; however, they don’t sit perfectly flush with the body unless they are forced a bit. Also they are quite heavy and are prone to breaking if not opened properly. Once the main body is finished the build moves on to the front fascia. This is possibly the most delicate area of the model and many illegal and weak connections are used to keep it together. The front grille is entirely made up of tiles attached to clips. This technique is now legal only with 1x1 tiles, but with other parts it doesn’t work. One of my 1x1 clip pieces actually broke after repeatedly reattaching the tile to it. Despite all this, I think the front looks absolutely beautiful. The grille is one of my favorite parts of this car and it really just looks absolutely fantastic. The rest of the front looks great and I especially like the panels behind the headlights as they are slightly angled outwards. Finally, the front is attached to the chassis and with a few more pieces here and there, the car is complete; however, when I attached the front of the car, the front suspension promptly collapsed. Dirk recommended adding a half bush to it to make it stiffer, but I didn’t implement this change as I didn’t want to disassemble part of the model; however, I recommend that anyone building this model implement this change while building the front axle in order to avoid this problem later. Also my doors collided with the front area, so I moved a couple pieces back one stud. Final Model After 3 days of building I was finally done. At this point I’ll let the pictures do the talking. This car's looks never cease to amaze me . I gotta say, Dirk absolutely nailed the looks on this model, especially the rear area Impressions (taking a leaf out of Sariel's reviews here, all credit for this idea goes to him) The model is a little bigger than a 1:10 Technic supercar, due to its body shape and building style. The model itself is absolutely stunning, but the illegal and weak connections quickly catch up as it is one of the most delicate models I've ever built. You think UCS, sculptures, and other display models are delicate? Forget them all. If you hold this model the wrong way, a few pieces are guaranteed to fall off. It took me a few tries and many pieces falling to find the right way to hold this model. Another problem is that you have to be very careful reassembling it as a little too much force and bam another piece from somewhere else falls out. Heck just during my photoshoot, I tried to shift the model around, and this happened I already discussed the door problems, but the wheels on this model are a massive problem. Here's the problem: Every single wheel is connected with a 3 axle connected to a Technic disc. The disc is connected to the wheel with a couple pins. The main problem is that the 3 axle simply cannot support the weight this wheel very well. Most Technic models use 8070 or 42000 hubs so this isn't really a problem for them. When you hold this model in the air, the wheels actually sag downward like this (its a bit exaggerated, but this is the best pic I could find) But that's ok as this model should not be held in the air, its a car not a plane. The problem with the wheel is that since the connection is so weak if you shift the models weight to the side to fix something, the wheels will slightly bend and can easily pop off. These are a pain to fix. Because of its delicacy I'm afraid to use the technical features of this model as I'm afraid I'll break something. Instead I leave it on my shelf and simply admire it like it is a fine piece of art. To answer our earlier question, yes a Technic car can be art as evidenced by this model. It looks wonderful, yet should be admired from a distance due to its fragility. Thus it only serves the purpose of looking good and I am absolutely ok with that Conclusion Build- 9.5/10 Very entertaining/frustrating build, and it is definitely not for a novice builder or for the faint of heart due to its illegal connections and fragility. Also the spring disassembly might be frowned upon by other builders Looks- 10/10 This car honestly looks like nothing else I've ever seen. I've been on this forum for almost 3 years and this car has to be one of the best looking creations that I've ever seen. Even the chassis has amazing attention to detail and looks just like the real thing. Parts Availability- 8.5/10 This MOC has about 2550 pieces and most are relatively easy to get; however, there are a few that are a bit of a pain and I'll list them for any other builders wanting to build this car: 3 16L red flex axles, 2 11L red flex axles(These aren't visible so could be replaced), 2 toggle joint connectors in red(Not rare but very uncommon nowadays), Steering rack(This isn't visible so could be replaced), Steering arms(These aren't visible so could be replaced I used light grey instead of black), and wheel covers( i replaced mine with brickbuilt ones and those look fine to me). I started off with 800 of the pieces and it cost me a little under $200 so not bad for a MOC of this size. Playability- 5/10 Sorry,but this has to be the weakest point of this MOC. Illegal and weak connections make this a very delicate model and I'm honestly afraid to touch it. The doors work well mostly, the steering feels very nice, it has a nice engine access hatch, and if you're daring you can try disassembling it into its modular components. Due to its delicacy I'm very afraid to even try disassembling it, and even though the modularity is nice, it isn't that easy to disassemble it. The gearbox linkages also aren't the best Instructions- 10/10 The instructions look great and are very well done. The steps are clear and some text reminders are given along the way to help you out. $15 is also a reasonable price Overall 43/50 It lost points for rigidity and parts availability, but it is honestly one of the best things I've ever seen and built. Honestly after i built it I was considering disassembling it and building some other supercar as I didn't like the spring dis-assembly and weakness, but every time I looked at it..... I forgave it for all its flaws. Its as good as any real piece of art out there IMO and is definitely going to be a permanent member of my collection. I highly recommend all of you build this model or just look through the instructions as it is so interesting. I would also like to nominate this MOC for the Hall of Fame as it truly deserves it Thanks for reading this review and please give me feedback so I can improve for my next review -
Introduction In this review I'll present you the Lego set #211119 The Dungeon, from the Minecraft line. I'm not a Minecraft expert, but I know how to put colored bricks together to create a world. Including this wave, Lego have produced 14 set based on the famous game, which shows how Lego believes in this partnership. I would not be surprised for this theme to continue for a few years. This set represent a Dungeon, which is supposed to be a small room, with a mob spawner and up to two chests. From that description it seems that Lego designed that set quite well, but let's see that in detail. Whitefang's review of 21120 The Snow Hideout mostlytechnic's review of 21121 Desert outpost Hinckley's review of 21122 Nether Fortress Also, I'd like to thanks Eurobricks and The Lego Group for the opportunity to review this set. Set information Set Name: Minecraft The Dungeon Set Number: 21119 Number of Pieces: 219 Theme: Minecraft Year Release: 2015 Prices: £17.99 / $19.99 / €19.99 #21119 on Brickset Packaging The front of the box follows the Lego Minecraft design, a the green square patterned area on the top with Lego Minecraft logo and a creeper face, an indication of the set number and recommanded age, the minifigs included with their name, and a picture of the set itself. There is also a "Build your own creations" add which promise us that inspiration is included. Seems sweet... The rear of the box shows the "alternate build" of the set, which consist of shifting one block of bricks from one place to another. The play features and the blocks included are also shown. Again the "build your own creations" is highlighted. It must be something really important in this set. On the usual green Minecraft background, a side of the box shows us the 1:1 picture. In this case it's a zombie mob. There is also a picture of the set, the same as the box front, Lego Minecraft logo and the set number. Content of the box The box contains an instruction booklet, three parts bags numbered from 1 to 2, and 2 8x8 dark bluish plates. The bag labeled 1 looks pretty empty, and I couldn't find the inspiration that should be included as indicated on the box. Bad sign... Instruction The instructions booklet's front sports the same picture as the front of the box, minus the minifigures highlight and the "Build your own creations" that said inspiration was included in the box. A page mentions in universal language that we should build the set following the bags numbers. And that's what we'll do, starting with the bag 1 as shown on the next page. The building instructions are easy to read on a light green background. Behold the "Build your own creations" pages, where inspiration flows like a rushing stream... Ok, the "inspiration" is just making a wall with five bricks... I was really hoping for some more creative ideas. We then have a page with a nice Lego Minecraft display, and a picture of the set with the play features highlighted. A double page shows us the sets from this wave and from the last, with all the minifigures and creatures included. We also got an ad page for Lego.com/minecraft, where we can find more informations on the Lego Minecraft products. As usual there is an ad fore the Lego club (I encourage you to suscribe if you have children, the free magazine is really nice and free). And of course the "win guy" page where a coffeeholic says we can win things by providing feedback about the set. Minifigures There are three minifigures in this set, two zombies and a Steve with an iron (or stone) pickaxe. Dark purple legs and dark azure torso, the three minifigs are identical, at least on what they wear. Steve is a fleshy, with the iconic square head, and so have a Light flesh printing on his torso. The zombies have green skin, so bright green hands and torso print. The torsos don't have any backprinting. Interesting parts The carrot top in bright light orange is exclusive to the Lego Minecraft theme, as is the treasure chest in medium dark flesh. The printed 1x1 plates only appeared in one other set. Build The bag labeled 1 gives us the minifigures and some of the set accesories: three torches, a chest with 2 wheat and a redstone dust, a lava patch with a cactus on it, the mob spawner cage, a tan/dark tan assembly, a mossy coblestone block, a sandstone block and a gold ore block. Moving on to bags 2, we start by building a strong base. We can see where the mechanism to rotate the mob spawner will take place. The base almost finished, with the rotating mechanism in place. The build is simple as it is just composed of bricks and plates, except for the technic mechanism. Dungeon are supposed to be in mossy cobblestone, and some dark green 1x1 tiles are randomly placed to simulate moss. The second play feature mechanism is put in place as we start to build up. The finished build, with all the minifigures and accessories in place. It seems like a great representation of an in-game dungeon. The materials have been respected (coblestone and mossy coblestone) as well as the mob spawner, the chest and the chest loot. The usual leftover parts are rather various and nice. We could even build a second cute mob spawner! Play features The set have two play features: a knob to rotate the mob spawner in its cage, and a trap wall. The trap wall is a simple but well designed feature, but I couldn't find an equivalent in-game. But the jewel of the set is the mob spawner. It seems really accurate to the game, with its rotating movement, the cage of course, and the four spot arround him to put torches as it is a way to defeat him. Sadly for Steve, Lego only gave him three torches... I must say I really like that mob spawner, it looks kinda cute. The tan assembly that we built with bag 1 can also be switched from place to place, and can be disassembled to build, if you have the required inspiration, what looks like a sand fall. Conclusion Design: 8/10 - A Minecraft design, true to the reference material. Parts: 6/10 - Some basic parts, nothing more. Build: 7/10 - Easy and straightforward builds. Playability: 8/10 - The play features are nice and work well. Minifigs: 7/10 - A Steve and two Zombies, that's not bad. Price: 8/10 - A little less than 10 cents per piece, with no rare parts and 3 minifigs, that's ok. Overall: 46/60 (77%) - A nice set for Minecraft fans, but I think not much to offer to the non-fans.
-
Hello, the Lego Star Wars Imperial Shuttle Tydirium is a huge set. The build is very enjoyble. Again, there a lot of technic-elements: I like that. Ths is my review (in german): And if you like, check out my sunny images of the shuttle. Have a nice day Andres
-
In honor of the impending marketing bonanza that The Force Awakens will inevitably inflict upon the world, I'd like to take a trip back in time. Just imagine... it's 1999: the release date of Star Wars Episode I: The Phantom Menace is dawning. A new Star Wars movie? Can you believe it?! The trailer had everything you could ever dream of: heated space battles, a demon with a double-bladed lightsaber, a young Obi-Wan Kenobi, a little kid, a cartoon rabbit... oh, wait. So on May 3, 1999, the entire population of the Earth was subjected to a marketing campaign unlike anything ever seen before (or since). Star Wars was everywhere! Everywhere. And in the immortal words of little Ani, "it [was] working!" I apologize, that reference was a bit of a stretch. So anyways, put yourself back into the shoes of your younger naiveself, before May 19, 1999 - before the deepest core of your being was challenged by The Phantom Menace. The Naboo Starfighter was the first in the new line of LEGO sets based on the film to be revealed, teased in a little catalog included with the early 1999 releases. As the catalog suggests, it was "so wizard, Ani." * (*Is the slogan "It's so wizard" an early reference to Episode I? Or was that just a random coincidence?) This tease blew me away as a kid. But did the model follow through? Was it wizard? Or did it suffer the same fate as the film it was based off of? Without further ado... Name: 7141 Naboo Starfighter Year: 1999 Pieces: 179 Minifigures: 4 RRP: USD $19.99 Links: Brickset, Bricklink 7141: Instructions Scan by montgomery.cloud, on Flickr PACKAGING I don't have any of the packaging for this set anymore, but I can extrapolate from other sets in the line that the box was rectangular and included a slide-out cardboard tray. Boxes in this era were a double-edged sword. On the one hand, the cardboard trays were a wonderful way to store parts and had a classy(ish) feel. On the other hand, the actual boxes were extremely flimsy and cheap in comparison. They were paper thin and ugly shelf wear was almost guaranteed (even with the utmost care). The actual graphic on the box/instructions portrays the scene where Anakin finds himself trapped inside the hanger of the Trade Federation doughnut. Subsequent versions would stray from this and instead focus around the blaster fight in Theed Hanger. The classic LEGO Star Wars logo is beautifully nostalgic - it's a shame that this type of logo was abandoned for the post-2001 releases. (Courtesy of toysperiod.com) The back of the box is typical for the classic line. On the left the figures are building the model. How nice of the Battle Droids to help little Ani and R2 out. Or they could be disassembling it. Whatever. The right showcases two alternate models: a racecar and a mech. Unlike the larger sets in the classic line, a comic highlighting various other alternate models is not included at the end of the instruction booklet. 7141: Instructions by montgomery.cloud, on Flickr The 1999 Episode I wave is curious in that it does not show screencaps from the film in the instruction manual like the first OT wave did. This is most likely because Lucasfilm wanted to keep Episode I a mystery... even though they released a novelization for the film on the same day as the rest of the merchandise. Later, the 2000-2001 sets would add in the screencaps. Something else of note: the little graphic behind the step numbers changes based on what you're building. Nifty! MINIFIGURES The set includes four minifigures: Anakin, R2, and two Battle Droids. Below I'll highlight some fairly wizard details about each. 7141: Anakin Skywalker by montgomery.cloud, on Flickr 7141: R2-D2 by montgomery.cloud, on Flickr 7141: Battle Droid by montgomery.cloud, on Flickr THE CART 7141: Cart Build by montgomery.cloud, on Flickr The build begins with this little tan cart for the Battle Droids. It's quick, only 10 steps, and it isn't too complicated either (unless you consider a two-piece hinge mechanism complicated). But there's a nice selection of parts here, including a tan 4x4 wedge (which is exclusive to this set!). 7141: Cart by montgomery.cloud, on Flickr The final product is... interesting. I don't really understand it and I don't remember it from the film, that's for sure. In a previous review by Mischa07, a user posted that it could be seen in the background somewhere. I can't confirm nor deny this claim as I haven't gone frame-by-frame through The Phantom Menace (because I value my sanity). If someone could provide a screencap to solve this sixteen year-old mystery, it would be most appreciated. Taking the cart by itself, I suppose it's a decent enough model. The top hinges up to reveal two printed 1x4 tiles which represent the engines. There's an awkward bare black bracket on the back (I'm proud of that sentence). I thought maybe it could serve as a gun rack by putting the handle into one of the hollow studs, but alas, it doesn't fit. So it's useless. Without any context to what this cart is or what it's supposed to do, this is the best I could come up with: 7141: Cart (2) by montgomery.cloud, on Flickr People probably didn't buy this set for the cart, though; they bought it for the real meat: THE NABOO STARFIGHTER 7141: Starfighter Build by montgomery.cloud, on Flickr The build is just as memorable as the cart's which is to say it isn't. It's a lot of stacking plates and slopes. There is one clever building mechanic used, however, which will be covered later on. Now some may label me something along the lines of a "hatorz" for my opinions on the prequels, but I'd like to think they're fair and balanced. Not everything The Phantom Menace did was terrible; in fact, one thing it excelled at was ship design. Doug Chiang deviated from the utilitarian and practical design of the Original Trilogy and instead (at the behest of ol' George) opted for a beautiful hand-sculpted look. The Naboo Starfighter is a great example of this: the craft is truly majestic in its simplistic, natural elegancy... 7141: Front by montgomery.cloud, on Flickr ...and the LEGO version is not. The shape of the Naboo Starfighter is very dificult to capture in this medium, and in 1999, LEGO's parts catalog and engineering was nowhere near sophisticated enough to pull it off. Most of the early Episode I sets suffered from the same problem:while the OT's angular vehicles were perfect for the simple and blocky design philosophy of the era, vehicles from The Phantom Menace were too complexly rounded. Now, keeping all that in mind, let's delve into what works and what doesn't: 7141: Dynamic Front by montgomery.cloud, on Flickr The model is accurate enough to be recognizable, but it has some flaws. Namely, it’s far too stubby; the back of the nose should really be extended by a few studs so the cockpit and the rest of the ship is shifted further back. It just doesn’t manage to capture the sweeping, smooth hood of its source material, no doubt due (in part) to the twin trans-green cones meant to represent the laser cannons. They look out of place and break up the flow. I see what the designer was going for, but I would’ve preferred additional slopes with a print of the barrel. I recognize that a fourth exclusive print is a lot to ask for in a $20 set though. 7141: Side by montgomery.cloud, on Flickr Moving farther back, we arrive at the cockpit. The printed parts provide some much needed detail and bring a modicum level of believability. I hate the use of 4x3 yellow slopes. A nice part to have, sure, but they bring an unnecessary width to the midsection. 7141: R2 Slot by montgomery.cloud, on Flickr Behind the cockpit is a slot for Ani’s Astromech aid. Unfortunately, while the “real” ship covers the droid up to the dome, the model leaves R2 almost entirely exposed. It’s extremely awkward. But, to be fair, although later versions have come close to achieving this effect, none have been completely successful. 7141: Cockpit by montgomery.cloud, on Flickr Inside the cockpit, things start to look up again. I love everything about the interior. It might be simple, but something about it feels real to me - I think it’s the consistency of the color scheme. Having recently bought its 2015 successor, I can say for certainty that the 1999 version’s cockpit is superior in almost every way. 7141: Dynamic Back by montgomery.cloud, on Flickr This is by far my favorite angle. It (mostly) hides the lack of length and the jagged slopes, and emphasizes its relatively smooth tapering on the engines and main section. For 1999, it’s rather impressive. 7141: Engine by montgomery.cloud, on Flickr The engine tails were accomplished using a simple but effective technique: a black technic bar is inserted into the end of the engine and allows for the 2x2 cylinder to be placed in the opposite direction. 7141: Bottom by montgomery.cloud, on Flickr Finally, we go below the ship, revealing another misstep - a confusing misstep as it sort of adds to the model in a way. This odd missile construction looks like garbage when the fighter is in the air (where it’ll be most of the time during play), but when it’s on the ground, it produces a nice levitating effect. It’s extremely flimsy as well; I imagine it would be a nuisance to kids who want to play with this thing. FINAL THOUGHTS 7141: Complete Set by montgomery.cloud, on Flickr All in all, this is a decent set… by 1999 standards. The Naboo Starfighter has already been remade three times... so which version should you buy? Well, it all depends on what you’re looking for. Are you a classic LEGO Star Wars fan? Do you have an odd fixation of the hype leading up to The Phantom Menace like me? Then you most likely have this set. Do you want an accurate representation of the ship? Are you interested in dozens of pointless side builds? Then there’s an excellent version in stores now that I wholeheartedly recommend buying. The point I’m trying to get at here is that you probably own this set if you have any interest in it. But, if you’re a relatively new collector with an open mind (and an open wallet), there’s a lot to like here. It’s one of the cheapest ways to get Anakin, there’s some Battle Droids to add to your collection, and most importantly, the Naboo Starfighter is arguably the most iconic vehicle from Episode I. If you’re looking for a set to represent the first wave of Episode I products, then look no farther: this is the set to get. It isn’t accurate, even considering the time period, but it’s charming. FINAL SCORES Playability – 8/10: This thing has everything you would want in a play set. I suppose instead of a useless cart LEGO could’ve given the droids some sort of attack vehicle. Minifigures – 10/10: Everyone integral to the scene is represented here. The battle droids are wonderful (and the set includes two!). Design – 7/10: Apart from the flimsy missile, the model is very sturdy. My issues mainly lie in the aesthetics of the Starfighter, which are just “okay” even by 1999 standards. Price --- 10/10: $19.99 for a ship… a cup… a ship… a speeder… what a bargain! Overall --- 8/10 And with that, this review has been concluded. If you’re nostalgic for the good ol’ days of hilarious Episode I speculation or just extremely curious like me, then check out the links below. I hope you enjoyed the review as much as I enjoyed writing it (which I did not). Be sure to tell me what you think of the set and my review of it. I'm a big boy, I can take the criticism. Probably. Prequel Rumors Dark Ocean Spider Butt The Silencer
-
Hi,everyone!This is my first review on Eurobricks and i sorry if there is any mistake in this review.The set i will reviewing is 60042 High Speed Police Chase that released in December 2013. As one of the 2014 City Police sets,this set featuring police officers in they normal blue police uniform busting crime in the city,same like the other 2014 City police sets.Different from 2011 City sets that also featuring police officers that wearing normal police uniform,2014 City Police sets feature blue police uniform and dark blue coloured police cap,which helps to set apart from the 2011 police sets.Same like High speed chase set from 2013 City theme,this set also featuring a scene that shows police officers that chase down crooks with the police forces vehicle,but smaller.many people asked that why I choose to buy this set instead of 60007 that featuring a exculsive minifigure,a unique game code,a police 4x4 vehicle that looks like a Hummer,a beautiful red sport car,and higher piece count?With the questions mentioned at up there,you may think this set is not needed,but are this set are seriously not needed,or this is a underrated small set? Let the review begins and enjoy reading this review! General Information Set name : High speed police chase Set number : 60042 Pieces : 110 Age recommended : 5-12 Theme : Lego City Police Year Released : 2014 (December 2013 in U.S) Price : $19.99 The Box At here,we have the front view of the box itself,with a police car chasing two crooks with their awesome dirt bike.At the left side of the box,the set number 60042 and the age range showed there.The design of the box is nothing new and special. At the back at the box,you can see some simple illustration about the features of the set itself.Nothing too special here,because most of the City sets has a simple illustration of the set like this . If you see the box patiently,you can see a 1:1 scale minifigure picture at the upper section of the box.here is a SWAT female Police minifigure as a comparision with the 1:1 scaled minifigure picture.Wow,it's exactly the same size! The instruction At the picture provided at down here,you can see the instruction booklet itself.At the front page,it's almost the same picture like the front view of the box.The instruction book itself has 48 pages. ( Including the front pages and back pages) A random page of the instruction book itself. At the rear pages of the instruction booklet,once again we meet the extremely annoying kid. The Set This small set is coming with two packet of the bricks and a sticker sheet.I applied all the stickers and i started build this small set. New/Interesting Parts Some interesting parts in this set. Bag one content The bag 1 contain the bricks to build the crooks,the ramp,and the motorbikes. Bag One Results Bag 2 At bag 2,we will build the police car and the police officer itself. Bag 2 Content Bag 2 results (Stickers applied) Completed Set The whole set in all glory. Minifigures This set comes with 3 minifigures,1 police officer,1 male crook,and 1 female crook.The police officer has a new designed torso printings.The crooks also has a new printing that shows they are wearing black jacket in a light grey and dark grey striped shirt.No alternate face printings in any of the minifigures. The back of the minifigures.All minifigures in this set have back-printing.No printing available at the minifigures leg. The Motorbikes This set also comes with 2 dirt bikes and 1 police car.Both motorbikes has golden rims,but their comes with different color.The black color one is my favorite. The crooks riding the dirt bikes. (Sorry of the blurry picture) The police car At here,you can see how the police car look from the front,side,and rear.Nothing too special here. When i first finished this set,i found a issue about this set is:Where is the backrest for the minifigure? But later I found out,Ah-ha !The police minifigure can put into the car with a sackbag at his back!This provides extra luggage spaces for the car,since the car lacks a luggage space. Because this car lacks a pair of door,you need to open the roof the put the police officer in the car.Why it's so difficult for the designers to include doors for the cars!? The ramp The ramp itself is simple but looks good.Nothing special here. Conclusion and rating Minifigures 6/10 : Nothing special in the minifigures in this set,but the printings are very detailed and we finally have a female crook. Parts 7/10 : Most of the pieces that have in this set are not dificuit to found,but we get 4 golden motorbike rims,1 green dustbin,2 recoloured dirt motorbike shell,1 recoloured motorbike frame and a neat-colored police hat. Playability 8/10 : This set is small.but it provides great playability for kida and this is a good set for your children's birthday. Build 6/10 : Nothing too challenging,but the final result is good. Price 5/10 : A little bit overpriced,will be better if lowered the price. Design 7/10 : The police car looks good and looks more like a real car,the ramp is good designed too. Overall : 76% - I'm am happy with this set because of the police car and if you want a low-costed lego Set for your children/friend,this set is suitabe for you and your wallet.Except for the price,I'm happy with this set and i want to keep it.
-

Review: 42008 Service Truck B-Model
mostlytechnic posted a topic in LEGO Technic, Mindstorms, Model Team and Scale Modeling
Lego 42008 Service Truck (B-Model) Thanks to EuroBricks for making this review possible! As I looked at the recent Technic sets, this was one that I thought looked interesting, but not enough to buy. So when the opportunity to review it came up, I jumped! The main model is a European-style heavy tow truck with pneumatics and motors, so that's pretty cool. But what about the B-model? It's a claw truck with a trailer. We've seen similar models from Lego before (we had the 9397 Logging Truck [though no trailer on that one], 8049 Tractor with Trailer, and we could stretch to the 8110 Unimog and 8258 Crane Truck as well). So how does this compare, since it's a B Model? (If you'd like to see my review of the main model, it's right over here) Name: Service Truck Set Number: 42008 Pieces: 1276 Price: $129.99 Minifigs: n/a Theme: Technic Year of Release: 2013 Links: Bricklink Peeron Brickset The Back of the Box The back of the box shows the B model for us. The instructions are online only, not printed, but that's normal. It seems to have a lot of functionality for a B model but is very similar to many other Technic sets with a claw arm and trailer. The Build, 1 Following the instructions on screen (not my preferred way to build, although at least the quality was decent on this set) we get the frame of the truck to start. The Build, 2 Now the back wall of the cab is partially installed, as well as most of the steering system in place. It's simpler than the main model, since there's only 1 steered axle this time. You can also see some of the weird design bits due to it being a B model, such as the exposed pin on the connector being used to brace the right angle in the steering. You can't see it, but actually BOTH pins of that connector are unused. The Build, 3 The cab's made a lot of progress. You can see a few more oddities, like the white license plate stickered beam that's mostly hidden. I probably should have turned it around, but oh well. (the manual doesn't show stickers on the B model). (and yes, I hadn't found one of the grey grill pieces, but I was tired of digging through the parts. I found it later and put it on) The Build, 4 Now the cab is done. It's ok. Not great, but ok. There's weird color things going on due to the part limitations, and the doors feel too recessed, and the "winch" on the front is just an excuse to use those pieces up. (and yes, I did it backwards in this photo. The cable should hang down the inside rather than the outside to make the ratchet work correctly) The Build, 5 The chassis has also been extended backwards. The rear axles are visible, as are the starting points for the crane, rear stabilizers, and lots of other pins waiting to be built upon. The Build, 6 Time for a gearbox. Looks like we'll have the central input shaft going to 3 outputs. The Build, 7 The gearbox slips into the frame and we get to connect up the outputs. As in the main model, we have a powered air compressor (the black and grey cylinder right in the center) plus, so far, an output going back through a couple u-joints to that vertical crane connection we saw in the last photo. The third output hasn't been used yet. The Build, 8 A whole layer has been added to the back of the truck. The third output from the gearbox now runs back to the outriggers. The colors all seem haphazard. It's understandable, but does make it obvious this wasn't the main model. The Build, 9 Those "wings" sticking out behind the cab turned out to be the battery mounts. Simple and effective, and it's unusual to see a horizontal battery box behind the cab like that. Also unusual, there's that mini-LA at an angle to rotate the crane. Lego has used linear methods (LAs or pneumatics) to rotate things before, but it's unusual. Since the main model didn't have a turntable, this is an alternate way of making a "powered" swiveling base. The Build, 10 That's a very unusual boom setup there. And seriously, an axle with a bush on it as a manual control for rotation? The whole setup is just weird and slapdash. I hope it at least works well... The Truck, Finished Here's the final truck. It functions, but it's got some issues. The pneumatic hoses are too stiff and since they come horizontally across the red beam, they keep the claw from hanging as freely as it should. And again, the controls are awkward. There's the manual rotation control on the left, the pneumatic control on top, and the gearbox controls on both sides. Too many levers in too many places. The the rear outriggers... they're there, but barely. The Truck, Reaching Out Here's the full reach of the crane. It'll reach the ground barely, and can rotate to the sides. It's not really enough to reach into the trailer though, if the trailer is connected behind the truck. To do any work, you need to park the truck between the load and the trailer. There are a bunch of beams left over you could use as a load, but the claw doesn't grab them very well. The Build, 11 Time for the trailer. A basic frame to start - axles for the single set of wheels, a "hitch" up front, and a manual leg that can come down. The Build, 12 Here's the start of the tipping setup. That is a weird linkage from the mini-LA to make the trailer tip sideways. And again, a bush as a knob to manually control it. The Trailer, Finished The previous frame mounts to the trailer and a bunch of panels fill out the trailer. Too bad there's random stickers all over. Guess it gives it a "distressed" look? The Trailer, Tipped That's as far as it tips, but it's enough to get the job done. The Conclusion So, what's my conclusion on this model? It's meh. The build is ok, the functions are ok, but the final thing feels definitely B and not main model material. The colors are random, the stickers are in the way, and the functions just feel haphazard.I'd recommend building it first so there's no stickers and you can see it for a day or two, and then take it apart and build the main model and leave that one built. It's much better than the B. The Ratings Value: 10/10 - It's so close to the famous 10 cents a part mark, and there's so many useful parts. Lots of panels, PF, pneumatics, so it's solid. Design: 4/10 - Haphazard colors, stickers from the main model, etc. Minifigs: n/a - Playability: 6/10 - It's got some functionality, but the controls are awkward and it doesn't actually pick things up well. The reach of the boom is short as well. Parts: 10/10 - It's got both pneumatics and PF, plus if you want green Technic, it's the only place to go. It's the only source of 1x7 beams, the best source for 1x9 and 1x13 beams, and the only current(ish) source for green panels. Overall: 5/10 - Ok to make once, but then build the main model since it's much better. -
Released as part of Lego's "Cargo" subtheme, this set is intended as a companion set for the 60021 Heliplane and 60022 Cargo Terminal. 3 bags, 2 booklets, 1 sticker sheet. In bag 1 came the parts for one of the minifigs, the handtruck, pallets and loads, and forklift. Bag 2 had another minifig and parts for the truck cab and frame. Bag 3 held parts for the truck's cargo carrying space. Contents of bag 1: To be honest, I found the choices of cargo to be a bit odd. The motor seems much larger than the kind of motor that would be found on the logger's ATV, and I'm pretty sure the fuel cans are NOT the kind of cargo that would be loaded onto a plane! That said, I really like the build and detailing of the engine itself; I see this as having plenty of potential for either an MOC vehicle of some sort, or for those building a diorama of a garage or maintenance depot or similar facility. Also included in bag 1 is a forklift, an orange (and somewhat diminutive by comparison) version of the forklift in the cargo terminal set: As usual, I replaced the offset rooftop beacon with a central cone: Just like the forklift in the terminal, this forklift uses a rubber band to keep the fork in a raised position. Bags 2 and 3 contain the truck itself, and I must admit it is quite a good-looking vehicle (I especially like the streamlined section on top of the cab!): In Lego, there's often a certain amount of balance between functionality and realism. In this set, it seems like realistic appearance was sacrificed somewhat for ease of loading and unloading (maybe they should have somehow made the truck look more like a "curtainside" design?): One thing I really like with this truck is how the grille is mostly made of bricks: Compared to many other recent city trucks ,which are much more likely to use just one row of bricks plus a large sticker. In this respect, the cab reminds me of the somewhat older 3180 tanker truck (cab pictured to the left) than its more contemporary companions (pictured on the right): The entire set: My thoughts: a pretty good set overall (I like the back-to-basics approach to the grille), let down somewhat by its odd choice of cargo and high price (40USD compared to 20-30USD for most of the other vehicles, although admittedly the forklift is much more substantial an accessory than what you usually receive with a vehicle set consisting of a single truck). Works much better as a component of the cargo terminal series than on its own: On the balance, I would give it a 7/10 on its own, and an 8/10 in conjunction with the other cargo sets.
-
Firstly I’d like to mention the biggest controversy with this set. It had been delayed for about two weeks here in the UK due to a production problem. The friction between the Technic pieces and the legs of the ant model were very loose. The updated sets have extra ‘2M Cross Axle W. Groove’ and ‘Nose Cone Small 1X1’ for each leg to make them more stable and it’s a successful change. I did try and use it without those two addition pieces (how it was originally produced) and they were not strong enough to hold the model with a little pressure on it, it would just want to get squashed. Nothing else was changed besides the instructions; the boxes are the same, without any changes, It’s hardly noticeable. I’m not sure if this is the same case for the U.S. as they have been available there since the June 1st release date. I’m not sure it they would go up in value or not. The Brick Fan has a picture of the two different instructions manuals for anyone who is still curious: http://www.thebrickf...tle-76039-issue When I first heard that that a set would be produced based on Marvel’s Ant-Man film I was shocked like many others because LEGO only releases sets based on one Marvel movie per year as shown in recent years ever since the ‘Super Heroes theme has been around . I hope that this trend continues in the future. So next year we would have an entire wave based on ‘Captain America: Civil War’ and at least one set based on ‘Doctor Strange’ around the same price as this set. It is a shame that LEGO never produced more sets based on the ‘Ant-Man’ movie, it has much more potential but I guess it could have got overloaded like the ‘Avengers: Age Of Ultron’ sets. Packaging Once again we have the Marvel Super Heroes banner across the top of the box which has the Ant-Man picture on the top right hand corner. The artwork showing the set is great as Ant-Man comes to the rescue to stop Yellow Jacket throwing screws and LEGO bricks across the floor or table. I would just like to point out that if this is indeed the final battle in a kid’s bedroom as the trailer suggests, then why on earth are there loose screws? Sometimes designers could have poetic licence so that may be the reason why. The bottom right has the movie logo as well as showing you the Minifigures included in the set. The new addition of the super jumper graphic makes it seem like only two Minifigures are included and they are showing you the ant-man Minifigure again as an example since the Ant-Man and Hank Pym figures are very similar in design. Minifigures This set contains three exclusive Minifigures: Ant-Man, Yellow Jacket and Hank Pym. The Ant-Man (Scott Lang) Minifigure’s printing is spot on in comparison to the movie however it could have easily had arm printing. The main problem I have is the helmet, in the movie it’s completely covered hoover in this set it looks like they when between the comics and the movie with the mouth opening. I personally think it could have been how early LEGO designs these sets. Not many people know that the studios send them early concept art which is why some scenes that sets depict which don’t appear in the final cut of the movies because changes were made in the production of the movie. These toy and product designs are done way before the movie is even filmed. Another problem with this set is the reuse of existing Minifigure heads in this case its Ezra Bridger’s head from Star Wars: Rebels. The printing on Yellow Jacket (Darren Cross) again is spot on besides not having arm printing. Its problem lies with the dark silver colour chosen, in the movie its black. This time LEGO has decided to reuse typical bad guy head which has also been used in many other sets, it suits him so I cannot complain. His mechanical harness is my biggest problem, it’s great for kids with the ability to move them and to shoot the studs, for collectors and perfectionist like me I would have recommended that they should have used ‘Leg W Ø3.2 Shaft 1/2 M’ in Black with yellow printing on it. I’m currently trying to figure out the design of my own. The harness itself is really bulky and it’s annoying that they used a tan piece which does not fit will with the contemporary design of the figure. Finally the most controversial figure: Hank Pym. This Minifigure is the most basic of the three with minimal printing since he was the original Ant-Man before hiring Scott Lang. He uses the Gandalf’s head which was also reused in the new Jurassic World sets. Hank Pym also comes with an extra black head piece to presumably cover his entire face since the helmet didn’t? I believe he might have flashbacks in the movie of him as Ant-Man. This could also be a figure that never shows up in the movie as it could have just been a scraped idea during early production. I don’t believe an old Hank Pym could shrink anymore which is why he retired; we have to wait until we see the movie in about a month! The complete set took about 30-45 minutes to assemble. This set contains 2 numbered bags (1-2) you also get the pair of wings loose in the box. Thankfully mine were not creased. This set has one instruction manual, a comic adventure which features all three sets from the Summer 2015 Marvel wave. The comic for Ant-Man is nothing special other than showing the same thing as the box where Yellow Jacket is tossing around screws and LEGO bricks. Most people normally dread stickers but I’m so thankful for LEGO making the graphics as stickers since The ‘LEGO’ logo can be used on other colours of ‘Flat Tile 2X2, Round’ pieces since they are clear backed. Someone did mention they are not but that may be for certain countries. I defiantly need to Bricklink a couple of the sticker sheets for my upcoming MOC’s! Bag 1 features all the smaller builds and accessories including the white base with the ‘giant’ LEGO bricks representing a ‘Bright Red, Brick 1x1 and a ‘Bright Yellow, Plate 1x2’ The set also comes with the regular ‘Bright Red, Brick 1x1 and a ‘Bright Yellow, Plate 1x2’ to scale back when the figures are at their normal sizes. When pictures first surfaced of the set these quickly caught my attention. The LEGO bricks really set a scale for the Minifigures in context but you can also use them as regular Minifigures. Now it makes me wonder if the LEGO bricks will be in the movie, or if it's just a nod to the LEGO brand! The trailer does feature some simple blocks and other toys but I guess this made the most sense for a LEGO product to have ‘giant’ LEGO bricks. The screws are a very nice small build; it makes you want to build some large tools to go with them. The bag also contains two small ‘Earth Blue’ ants which are really cool. As I mentioned before, a super jumper is included. I would really discourage you using them since they chip the back of the legs. I really hope LEGO fixes this for those kids; otherwise they will have broken Minifigures within a few months of play. It also contains Ant-Man (Scott Lang) and Yellow Jacket (Darren Cross) Bag 2 features the Hank Pym Minifigure and main ‘flying ant’ build which I over looked. The model starts with building the main framework for the legs and wing attachments. The legs have very limited movement due to the large leg pieces uses. The second part is the abdomen which is defiantly the heaviest part of the build. I partially like the why the designer rendered the back as it’s so sleek. The head is the final part of the ant’s main body with its cool transparent yellow eyes and small mouth details at the front. The wings are attached last which are connected to the main body with a single ball joint each which allows for full articulation. One problem I did come across is that that the ball joint areas are besides the seating area for Ant-Man so the legs slightly rub against them when placing him in and it also limits you from moving the figure forward or backwards. It’s an easy adjustment though, you can use a ‘Cross Axle 7M’ and place a ‘1/2 Bush’ at either side before you place the ‘Ball Cup 3M Ø10.2.’ The wing pieces themselves are really cool and realistic since they have the small textures. I also dislike how the Technic beams are exposed on the wing joints; you could easily fix that by replacing the two ‘Crossaxle 3M With Knob’ with two ‘Cross Axle 3M if you are going to keep the wings tightly attached. I guess with the why LEGO have designed it gives you an option on how tight you want the wings attached. I really like that they didn’t be really lazy and included grey or black pieces for the bottom, instead the when realistic and added the ‘New Dark Red’ pieces across bottom of the entire build of the flying ant. You can also see some small amount of pink pieces which are not just there for fun, do believe they are added as realistic details. The actual build was pretty decent for its price. The model is very sturdy and nothing has fallen apart after swooshing it around for a couple of hours. Final Analysis/ Conclusion I absolutely adore this flying ant, is size is fairly small for the price of the set. Since this is a singular set from a specific movie the production value of the pair of wings and the two new helmets greatly affected how much the designer could put into the set. I’m not complaining about the size of the ant, it’s a perfect size and I wouldn’t change the size or the model, even those minor quibbles because I won’t be playing with it. I just feel it’s slightly small for the price. The addition of the ‘giant’ LEGO bricks and catapult feature, small ants, screws all set the scene and give a full sample of what you can expect from the movie. For £19.99 you cannot go wrong; it’s a great impulse buy from a movie and you don’t need to get tons of sets to get all the characters. The Minifigures, model’s and playability is all there. This is defiantly one of the best set around this price that LEGO has released in a few years. Good job designer. It appeals to me more than the current larger models on the market for sure. I got it for the Minifigures; boy was is a surprise and a successful set overall! Design: 9/10 – The design of all the elements in this set are amazing and the way they have been rendered and executed in the movie context is just outstanding! There are a few small clever details, references and jokes in this set. Build: 9/10 – The build was quite refreshing from the normal cars and boats in the Super Heroes theme. Minifigs: 9/10 – Ant-Man, Yellow Jacket and Hank Pym are all exclusive and will mostly likely never be rereleased in future sets in these variants, as Marvel is guaranteed to update and alter the designs for future movies. Playability: 9/10 – A great playset, including a ‘flying’ ant and a catapult; what else can you get for £19.99! The ant model is mostly adjustable besides the limited movement on the legs. Parts: 9/10 – This set mostly consists ‘New Dark Red’ and ‘Earth Blue elements ‘as well as a hint of dark pink. It does include one or two odd exclusive recolours and don’t forget the exclusive helmets. Price: 9/10 – The overall models feel slightly small but the price is somewhat higher due to possible costs for new helmet moulds and the wings, the fact the price is fairly low it’s hard not avoid. Overall: 9/10 – Defiantly everything a young kid would want, some small nit-picks may frustrate AFOL’s and fans of the movies/ comics. I really hope you enjoyed this in depth review; feedback and criticism is much appreciated. You can find the full album of pictures here: https://www.flickr.c...157652352125904
-
Hello there! Recently, I got the 42037 set as a gift, so I thought I'd try to make a quick review for it! This review is simple, nothing as professional as something Sariel would make, but I just wanted to have a crack at it! Sorry if the music doesn't please you, it's hard to find good music for videos nowadays. Tell me if you liked it or not, I'll keep it in mind in case I ever make another review.
-
Ever wondered what LEGO set 264 looks like? BrickGrrl Hailee Hollingsworth reviews 3 sets from LEGO's 1974 lineup. LEGO set 264 Living Room, 272 Mirror and 293 Piano. Leave a comment to tell us what you think of these Throwback Thursday episodes of BrickGrrl.
-
Alright, so I usually do quick photo reviews when I get new sets. That's what I'll do here, but there's quite a few photos, so I thought I might as well make its own review thread. So, I got the Kwik-E-Mart by paying just2much on an early eBay copy. I think it's worth it, as this week I'm gonna be super busy, so I was able to build it Saturday and stuff. Here's my video review, I think it's one of my best: Well, let's get onto this photo review. The set is $200 USD with a little over 2100 pieces. The official release is April 15th for VIP members, May 1st for everyone else at LEGO Stores. And, if you want full size pictures, check out my Flickr by clicking here. The minifigures included are great. You get three exclusive minifigures (one being a completely exclusive character- the first time LEGO has ever put an exclusive mould in a Direct to Consumer set), and you get three of the series most popular characters in their normal attire for those who missed out on the first Simpsons minifigures series. The Kwik-E-Mart's exterior is loaded with lots of sticker details. The only printed detail you'll see in the exterior is the dial pad in the phone booth, which has appeared in some other licensed themes since last year. ( ^^^ right here is there the store can be opened- a simple Technic pin and receiver keeps it in place and allows for opening and closing) The roof of the store includes the garden shown in the Paul McCartney episode. The roof can be slided out/in once you open it with the hinge part. Here's a look at the store with the roof removed. The floors are a nice sand blue color, coming with 8x16 thin plates: And, for the interior, from the view of the store opened with the hinges at the back that I mentioned earlier: The left front corner, which includes some arcade machines of Bonestorm and Great White Hunter, an amazingly done Buzz cola soda machine, juice machine, the checkout counter, ect: The right front corner, with food aisles, freezers, and a frozen Jasper sticker: The back left corner, which includes some nice coffee kettle builds, the donut tray, hotdogs, ect: The right back corner, which has a door leading to a very small hallway that only has a mouse and cheese in it. The hallway leads to the employees only door in the back, and it's very hard to get in the door way (not that there's anything to do inside there): Also included is Clancy's copcar, which fits three figures: Here's a look at the piece list in the instructions, click on each to be lead to an enlarged version of the pic: Also included are some awesome printed pieces, and two unprinted coffee cups! Honestly, I think this set is perfect. The price is fantastic, and has a great PPP ratio. They really went above and beyond by including Snake in this set. I honestly think it's better than the Simpsons House in terms of accuracy and the value here- so many cool pieces printed and in exclusive colors. So, that's my quick picture review. Hope you guys enjoyed, and I'd love to hear your thoughts!
-
Stop motion review of 6264 Forbidden Cove. Subtheme: Islanders Year: 1994 Pieces: 214 Minifigs: 4 Price: $29,75 BrickSet, BrickLink
-
Hello again everyone! Continuing to review the sets I bought during the May the Fourth sale. This is my last review of the 2015 winter wave as I don't have the other sets that still need a review and I don't plan buying them. They are: 75081 T-16 Skyhopper 75084: Wookiee Gunship 75086: Battle Droid Troop Carrier 75087: Anakin's Custom Jedi Starfighter 75090: Ezra's Speeder Bike If anyone could review these. Thanks! So now on to the review This is my third review : 75089 Geonosis Troopers Name: Geonosis Troopers Theme: Star Wars / Expended universe / The Clone Wars Year: 2015 Pieces: 105 Minifigures: 4 Price: USA 12.99$, ENG 11.99£, CAN 15.99$, EUR 16.99€ Ressources: Brickset Lego store description The front of the box with the new 2015 art: A stormtrooper helmet tagged with a rebel alliance crest. Your standard box art for 2015. On the back of the box, we see the play features and the number os stud shooter and the number of spare studs. Also shown is the clone troopers and the walker's features. In the box, the pieces come in 2 bags and with the instruction booklet. The instruction booklet with the same image as the box on the cover. The back with the win minifigure. Spare parts: mainly spare studs. It's a battlepack! The completed model. The walker with the new stud "gatlin" gun ready to fire! Side view 1 Side view 2 Top view Back view With the legs posed like it's recommended in the manual The walker as 3 features: movable legs, the "gatlin gun" and the opening cockpit. Here is the cockpit opened and closed. Closed The walker is unstable if both legs aren't placed the same way And now what you were all waiting for: The Minifigures! We get 4 of them; 2 Geonosis airborne troopers and 2 Geonosis troopers. The battlepacks comes with 2 different heads: the standard clone trooper face and another one with a different facial expression. The Geonosis trooper compared to the to the Kashyyyk trooper and Utapau trooper. We can see that the camo pattern is different then the Kashyyyk trooper. It has the same back printing as the one from the Utapau BP. Back view The airborne trooper compared to the Utapau BP one. Back view Rating ------ These three points are not included in final score. Price: 6/10 – 105 pieces for 12.99$ is above the 10 cents per piece ration. Also like other battlepacks with the gatlin gun, 20 of those piece are studs for the guns and the canon. Still we get 4 amazing minifigures and a small vehicule. Parts: 7.5/10 – Many of the pieces are studs but we get a nice assortement of pieces in geonosian tan that could be usefull for any desert moc. You love or you don't the new gatlin gun. Build 7/10 – The build takes around 10 minutes. No special technic are involved in the build. Battlepacks are about minifigures and not the building experience, so no surprise here ------ Design 5/10 – This walker is not based on any source material but we have seen enough walkers that we know how it should look or not look like. From the front and from the side the model does look good but looks bad from behind because of a complete lack of detail. There is only so much you can do with 50-60 pieces. You can fit 2 minifigures and their guns on the walker. The legs are movable, the cockpit can be opened and closed and the gatlin gun does shoot fast and far. Still it's a little hard to place the legs in display mode. (refer to image legs posed like it's recommended in the manual) If both legs aren't place the same way, the walker will be very unstable or it will fall. Besides, the walker can't stand on 1 leg and thus it limits the different poses it can take. It's an average build. Nothing amazing. Still it might bring some memories to some of the first walker of the very first battlepack released: the clone walkers BP. Minifigures: 10/10 – The minifigures are outstanding. The camo printing on both troopers is very detailled and beautifull. Printed legs, and backprint on all 4 minifigures. The airborne trooper helmet is also very well made and looks just like the source material. Troopers from a new clone legion is always welcome for MOCs and dioramas. Also we get 2 different faces wich is good for an all clone battlepack. Playability: 6/10 – Not much play features except for the gatlin canon and the opening cockpit. It's hard to set the legs in display mode and both legs must be placed the same way if not the model will be unstable or it won't even stand. The movable legs can't really considered a play feature in this case. Still the shooter is fun to use and so are the minifigure's guns. This is a one faction battlepacks. It's meant to be played with other sets so you can have targets to shoot at! OVERALL 7/10 – A good battlepack. The minifigure are definitively the highlight of the set as you would expect. Adding a new clone legion to your collection is always nice even tho some would have prefered a more "famous" legion like the Galactic Marines or the 501th. Seeing another variant of the airborne trooper is also very nice because the mold for the helmet is amazing. The vehicule included could have been better. In the end this is an above average battlepack with outsanding minifigures that carry a rather average walker. Thoughts and critiques welcomes! Also if there is any grammar mistake burning your eyes, please PM me and I will edit. Thanks for reading!
-
Hello again everyone! Continuing to review the sets I bought during the May the Fourth sale. So here is my second review : 75088 Senate Commando Troopers Name: Senate Commando Troopers Theme: Star Wars / The Clone Wars Year: 2015 Pieces: 106 Minifigures: 4 Price: USA 12.99$, ENG 11.99£, CAN 15.99$, EUR 16.99€ Resource: Brickset Lego store description The front of the box with the new 2015 art: A stormtrooper helmet tagged with a rebel alliance crest. Same as the other sets of the winter wave. On the back, we see the troopers in action, the number of spare studs included and the play features of the canon. In the box, the pieces come in 2 bags and there is also the instruction booklet. The instruction booklet has the same image as the box on the cover. The back with the win minifigure. Spare parts. Mainly spare studs for the guns as you can expect from a battlepack. The completed model. The canon is equiped with the new stud "gatlin" gun. Side view 1 Side view 2 Back view Top view The legs can be adjusted Legs down Legs up The canon can be aimed up and down. This is the lowest angle it can be placed in. We now move to the minifigures: the highlight and purpose of the battlepack. We get 4 of them. Three senate commando troopers and one senate commando captain. The captain as a different face from the 3 other troopers. The 3 troopers have the clone face from other clone battlepacks. The captain as some white painting on his helmet, torso and leg. The back printing is similar. Rating ------ These three points are not included in final score. Price: 6/10 – 106 pieces for 12.99$ is above the 10 cents per piece ration. Also 20 of those piece are studs for the guns and the canon. Still we get 4 great minifigures that were really expensive on the aftermarket because they were released in only 2 sets years ago. Plus the canon is a nice little build. We are use by now to this kind of pricing for battlepacks. Parts: 7/10 – 20 of the pieces are studs but we get 7 pieces in republic red and only 2-3 technic pieces. The "gatlin" canon is a really nice piece. Build 7/10 – Nothing fancy here. The building process will take you no longer then 10 minutes. No special technic are involved in the build. ------ Design 7.5/10 – Since the canon is not based on any source material it's difficult to compare it. Still, with the colors and style we have no problems imagining this canon as an anti aircraft gun that would be around the senate protecting it from attacks. The canon looks great overall, but the side of the barrel (Image: side view 1) could have been better. Also, some might find it too "bulky". It looks more like a mortar then a canon. Minifigures: 9/10 – The 4 minifigures are amazing. Printed legs and printed back torso. The fact that we get a captain and 3 troopers is great. Its nice to have a captain. It adds diversity to the battleback but they still look good displayed together. Only complaint: we should have goten 4 different faces since the senate commando troopers are not clones. Playability: 7.5/10 – Like other one faction only battlepacks, it complement other sets really well. By itself you can shoots the canon and play with the troopers but you will defenetly need bad guy to shoot at. The shooter on the canon rotates on the sides and up and down. It works really well and shoots far. Kids should have a blast using it. OVERALL 8/10 – A nice little battlepack. The minifigures are great and so is the canon. Its not everyday we get a senate related sets and non clones troopers of the prequel era. In fact this is the first prequel battlepack wich does not contain any clones. They look great standing next to Palpatine in his office and you can make an Emperor arrival moc PT style. This is an above average set that you should pick up if you would like to add to your republic force with non clone elements and a neat canon. Thoughts and critiques welcomes! Also if there is any grammar mistake burning your eyes, please PM me and I will edit. Thanks for reading!
-
Hello everyone! I was browsing the forum for some reviews of the sets I bought during the May the Fourth sale and I noticed many were missing. So I thought I would make a review to fill that gap and contribute to the LSW community. So here is my first review : 75085 Hailfire Droid Name: Hailfire Droid Theme: Star Wars / Episode II Year: 2015 Pieces: 163 Minifigures: 3 Price: USA 19.99$ (Target exclusive), ENG 19.99£, CAN 24.99$, EUR 26.99€ Ressources: Brickset Lego store description The box The front of the box with the new 2015 art: A stormtrooper helmet tagged with a rebel alliance crest. On the back, we can see the play features and images of the lone clone trooper fighting. Inside the box there is 3 numbered bags, the 2 loose printed wheels and the instruction booklet. There is only one instruction booklet with the same image as the box on the cover The back Spare parts The build The build after bag one. The middle piece of the model. The build after bag 2. The inside part of the wheel holders The build after bag 3. The outside part of the wheel holders. The model is now complete. The completed model (back view) The completed model (side view 1) The completed model (side view 2) The completed model (top view) The wheels in straight mode. The model is not stable and will roll back and forth if you surface is not 100% flat. The wheels can be folded down 90 degrees but more than this and the wheels don't touch the ground and the model doesn't roll anymore. The minifigures Now on to the minifigures. We get 3 of them. One clone trooper Lieutenant and 2 Super Battle Droid. The Super Battle Droid. The same as the one release with other episode 2 sets. The 'incomplete' back The clone Lieutenant compared to the polybag version we got in october 2013 Note: The sets comes with only one clone trooper. The one on the left is from the polybag. The one on the right is from this set. As you can see they are both exactly te same except the newer version as leg printing. ( I just noticed the printing on my new lieutenant's helmet is a bit off. Maybe I should call and request a new helmet.) The back is exactly the same Rating --------- These two point are not included in final score.I will still rate them as they are important for some people. Let me explain: Price: Too much dependent on where you live and your Lego budget. Also, Lego is kid oriented even with the big AFOL community. Most Lego sets are gift to childrens so the price will not affect the overall feeling of a kid toward is play set since they don't pay for it and generally they won't know the price. Parts: only affect the overall score for MOCCERS who need pieces for their mocs. This should not affect the rating of people who display their model and/or play with it and don't dismantles them for parts. Price: 5/10 – 163 pieces for 20$ is under the 10 cents per piece ratio. Still if you are interested in the clone Lieutenant, 20$ is the price you would have payed on the aftermarket for one. I feel another clone trooper should have been included at this price. Parts: 6/10 – The printed wheels are exclusive to this set. They are the highlights in term of parts, depending if you like them or not. We also gets some pieces in 2 different shades of brown. But most pieces are small grey and black bricks that don't seem that interesting. We also get a lot of technic pieces. --------- Build 6/10 – Except for the middle section, its a pretty repetitive build. It should take around 15-20 minutes to build this set. It's an easy build. Design 6/10 – I think this all comes down to if you like the printed wheels or not. It does look somewhat like the source material but it should have bigger wheels and more rocket launchers. Also you cannot leave the spring loaded missiles in the launchers because they will damage the spring if you leave them in too long. It won't damage the spring but I don't leave my spring launcher loaded because I don't like having "loaded" shooters on display. Thus it diminishes the value of this set as a display piece. Minifigures: 5/10 – The Clone Lieutenant is a great minifigure and the highlight of this sets. This is a good way of getting the Lieutenant for those who missed the polybag and don't want to pay the ridiculous aftermarket prices. The two droids are a bad selection for this set. We should have gotten 2 brown battle droids instead of 2 SBD. In the worst case t least 1 brown battle droid and 1 SBD. Also a fourth minifig should have been included. Playability: 6/10 – You get 4 spring loaded missiles shooters and wheels to roll around. So this is pretty swooshable. But by itself there is not much to do because you get 2 SBD and only 1 clone trooper. This set is clearly meant to complement other Geonosis sets from the 2013 wave. OVERALL 5.75/10 – Definitively not one of the best set of the winter wave. I would not recommend this set alone but it's decent complement to your Geonosis collection. Also even if the minifigure selection is not the best, this set is worth getting for those who missed the clone Lieutenant polybag. I am pretty sure we won't get a third chance to get a blue phase one clone trooper. Here is a little bonus for those who got through the review Thoughts and critiques welcomes! I tried my best for the lighting while I took the pictures. I tried pretty much all the lamps in my house and this is the best result I got. Are they too dark? Also if there is any grammar mistake burning your eyes, please PM me and I will edit. Thanks for reading! PS: Could a moderator please PM me. I would like to add polls.
-
Greetings, my friends! Summer is finally here, and what better place to enjoy it than on the water? The popular Friends line has had a few beach-themed sets already, but not an actual ship yet. However, this is about to change soon with what is literally the flagship set of this year's Friends sets, and today it is my honor to bring you this exclusive early review of one of the most anticipated sets this summer, the Dolphin Cruiser! Set Number: 41015 Name: Dolphin Cruiser Theme: Friends Year of Release: 2013 Pieces: 612 Minidolls: 3 Price: $69.99 USD Brickset Bricklink Brickshelf The Box A few days ago, I received a package at my doorstep with the Lego logo and an official Lego address label on it. Inside this package was the set, which despite the lack of any cushioning material was still in very good shape! It's a fairly large and wide box with the usual purple frame and the indented side edges. It also has the same updated illustration of the main five girls in the upper right corner as the sets that were released earlier this year. The box art depicts a gorgeous scene of the Dolphin Cruiser swimming by the Heartlake beach and the Friends having fun. As you can see, this is one of the European boxes which are known to have much less text than the American versions. There is not much information about the set other than the set number and the intended age range. There is also a statement below those numbers proclaiming that this "ship does not float". This may be a disappointment to some people, but for those of us who have some experience with Lego ships this was already expected. Aside from the Lego Friends logo and the set number, there isn't anything at the top of the box except for these pictures of the minidolls. It doesn't even mention their names, just that the picture of Mia is at a 1:1 scale, but that's OK since it states their names on the front of the box. I guess in Europe they really let the pictures do all the talking, which is not a bad thing. The back of the box has a picture which shows that the top of the ship can be taken off to reveal the interior and lots of small panels showing various scenes that can be played out with this set. There are also pictures which tell you helpful things about the set as in every Friends set, such as how many bags there are, how many parts the minidolls consist of, or what kind of accessories are included. I kind of wish other Lego sets would have this kind of information. It sure looks like the friends are having a lot of fun. I just hope that dolphin sees Mia coming down that slide in time. Contents Looks like the picture on the back of the box was correct! There are indeed 5 numbered bags and two instruction booklets, along with a fairly small sticker sheet and some loose large parts such as the boat hulls, the water slide, and the flex tubes. The first page of the instructions has a demonstration of a minidoll building a set step by step which is adorable in my opinion. It's a perfect Friends version of that generic City minifig doing the same in other Lego instructions. Here's a random instructions page. All pages have a lavender background and clear part call-outs. Also, every page with an odd page number has a light silhouette of some butterflies and hearts. On the last page of booklet 1 there is a check list of all the minidolls from this year's sets. Towards the end of booklet 2 it shows you where all the summer sets are located at in Heartlake City. That's some pretty neat information which, again, I wish they would have in other Lego themes. There are many other nice pictures and illustrations of the Dolphin Cruiser and the other summer sets which I will let you discover on your own. They sure put a lot of effort into making these sets look good and appealing to girls! These are some of the notable pieces in this set. There are various pieces in medium azure, including skis which have been exclusive to the Friends advent calendar in this color until now. We also get the hair accessories in dark purple which only appear in one other set, the Pet Salon. Other pieces in rare colors include 1x1 round tiles in orange, 1x2 tiles in magenta, and 1x2 bricks in trans-purple. There are some new molds as well, such as a 1x2x2 curved slope, a 1x2 plate with a clip at the center of one side, and the ice cream cone which made its debut earlier this year in the Heartlake City Pool and the Ice Cream Stand polybag. There are some printed pieces too, such as the pink life preserver tile and the 1x1 orange juice box brick which have appeared in a few sets before, but also a new piece which no teenaged girl should be without: a smartphone! Looks like Heartlake City's technology is a few decades ahead of Lego City, who are still using walkie talkies and landlines. Minidolls This set comes with three minidolls: two girls and (gasp!) a boy! One of the girls is Mia the animal lover, who makes a lot of sense to be included in this set since it is named after an animal! She even sports a new summerly outfit with a dolphin and seastar motif on it. The other one is Maya who is a new character. The cherry blossoms on her shirt and her dark hair with bangs make me think she is supposed to be Asian, but I can't say for sure. She has Stephanie's hair in black and the same legs as Isabella. The boy's name is Andrew and he brings some much wanted gender deversity to Heartlake City. He has a surfer hairpiece and a blue shirt with a small sailboat on it, both of which are very fitting for the set. I can't put my finger on it, but somehow Andrew reminds me of another boy who preteen girls like... Well played, Lego, well played. But how is anybody supposed to compete with a guy who looks like a teen idol?! When you look at the minidolls from the side, you'll see that the boy's torso mold is different from the girls. Which is good because it would be quite odd if he had breasts. None of them have back printing unfortunately, but that's common for minidolls. And here are the stars of the set, the dolphins! We get two in different colors in this set, sand blue and light blue. The eye lashes on one of them tell me that the darker one is supposed to be a boy and the other a girl. They are smaller and rounder than the old Paradisa dolphins, and due to that and their eye prints they probably wont integrate into other Lego themes too well, but for the Friends theme they are perfect! They have two anti-studs on their tails and one on their belly, so they can be posed as if they're jumping out of the water or lying on an elevated surface. It's also possible to stick them on a pole. Not sure how that could be useful, but it's good to know. Their fins are shaped so that a minifig/doll can hold on to it and ride them. Also, their blowholes can be plugged up with bows and other accessories. Seems kind of cruel to me, but whatever. The Build The first bag contains Mia, Andrew, the male dolphin, and the parts for the jetski and the base of the boat. First, you build the jetski. It's a quick and simple build, but it ends up looking pretty good. Certainly much better than the one in 41000 Water Scooter Fun. It has some clips on one side, but more on that later. Next, you assemble the base of the Cruiser. Not a lot of details at this point. The second bag contains Maya, the female dolphin, and most of the interior of the ship. The beds and sofa are attached to the ground only by two 2x2 round plates each which makes it easy to put them in and, if you wish, take them back out later. The third bag has most of the pieces to finish off the lower deck. Lots of white and tan here. You almost can't tell this is part of a Friends set! This is the part where you attach the water slide. Bag four contains all the pieces to finish off the second storey. After this part, it already starts looking like a complete ship. The fifth bag includes all the pieces for the upper deck, which happen to be most of the pieces with the girly colors. And here is the finished Cruiser! It looks quite impressive, and not too girly. The overall design definitely makes it look modern and luxurious. It looks great from just about every angle. All those azure pieces give it a cool, refreshing feel. The only thing I find odd is that there seem to be windows missing in the second storey. There is already a sloped window piece that would fit perfectly into those six gaps, so I don't know why they left them out, but if it really bothers you and you have six of those windows on hand, that should be an easy fix. The wave stickers at the front give it a nice dynamic look. One of them reads "HLC" which I'm guessing stands for Heartlake City. There is a large opening in the back that allows you to see right into the interior since there are no doors. Lets hope it doesn't get too windy out at sea! Looking at it from the side, the Dolphin Cruiser looks quite sleek. There is a life preserver on the left side. There is no life preserver on the other side since that's where the slide is. The slide is not too obtrusive and actually adds to the overall dynamic look of the ship. The only thing that bugs me a little here is that triangle-shaped gap between the row of windows and the white slope at the lower front. Again, if you have an extra two of those windows, that should be an easy fix, but it just makes me wonder why TLG didn't include those pieces to begin with and avoided this little flaw.. Looking from above, it just has the usual Lego boat shape. No complaints here. At the bottom it has several of those round slide shoe parts to make it glide over the floor better. The Complete Set Here's the ship with the jetski, dolphins, and minidolls. Now we're ready to go on a cruise! They all look very nice together, don't they? Play Features There is lots to do on this ship! On the top deck, you can seat a minidoll at the steering wheel or serve drinks at the little bar. There is a sonar for finding dolphins and there are two studs on the wall which act as a socket for the smartphone so that you can pretend to play music from it over the speakers on the sides. The only thing that I don't like here is that the steering wheel is way too far for a minidoll to reach, but that's a common issue with the Friends sets. On the main deck, you can have the girls relax on the sun loungers and enjoy a drink or a banana. Also, the big window in the front can be opened to see inside. In the back of the ship, the friends can climb up the ladder (which has a similar design as the one in Olivia's Tree House - plus points for consistency!) and slide down the water slide (which is the same as in the Heartlake City Pool from earlier this year) or feed the Dolphins with the bucket of fish. There is also a life vest sticker and a shower with a shampoo bottle and knobs for hot and cold water. The use of a frying pan as a shower head is quite clever here. Also, as you can see, the jetski's clips can be used to attach it to the bar underneath the life preserver in order to store it. Neat! The top of the Cruiser can easily be taken off to play inside the cabin. There are cheese slopes and arches which help it slide back into place easily. The interior is surprisingly well furnished! Inside the first room there is a plant and a big couch for relaxing. The next room is a restroom with a toilet and a rack of towels. I guess there is no such thing as privacy in the world of Friends, though, because there are no doors and one of the walls is transparent. On the other side of the couch, there is little kitchen area with a sink and a small fridge where the orange juice can be stored. On top of the fridge there is some ice cream, one for each of the friends. I think this area is a little dark and boring and doesn't quite fit with the rest of the set. I would have prefered it if they would have included two more cupboards instead of these black bricks. There is another sink in the bathroom, along with some Technic beams where you can stick the combs, hair dryer, and mirror. It's kind of tough to put them there since it's such a small space, but maybe it's just because I have such big manly hands. I think it would have been nice if they would have included a mirror sticker to put behind the faucet, but not necessary I guess. Did I mention I'm manly? In the back, there is a bedroom with two beds with brick-built flower patterns on the sheets. It's nice that they didn't use a sticker for these, and that they made the beds different. There is also a lamp, a box to store the hair accessories in, a TV, and a pin board with pictures. Seems quite cozy! And just for fun, here's a comparison to my Friend Ship. They look quite similar, don't they? Either Lego stole my idea or I'm really good at predicting sets! Spare Parts There are various 1x1 pieces left over, along with a string and the brick seperator. Ratings Design: 5/5 - Aside from some missing windows and doors, this ship looks beautiful! It's mostly white and doesn't have many parts in girly colors, so it will appeal to boys and girls alike and will easily integrate into Lego City as well! It's sleek, modern, and luxurious. What more could you ask for? Build: 5/5 - Aside from the boat hull and the slide, there aren't many large pieces, so there is a lot to build, and the build is diverse enough to keep it interesting throughout. Minidolls: 5/5 - All the minidolls are exclusive to this set and have very fitting outfits. Maya and Andrew are both new characters and it's great to finally get some more males in this theme! And do I even need to mention how cute and awesome the dolphins are? Playability: 5/5 - There is a lot to do in this set! You can drive around, look for dolphins, feed them, ride the water slide, take a shower, take a nap or freshen up in the cabin, serve drinks at the bar, ski on the water, and much more! There are hours of fun to be had with this set! Parts: 5/5 - There are several parts in rare colors or molds and not many of them are in Friends-specific colors, so most of them are reusable in other themes. The azure pieces are especially nice to have. Price: 4/5 - $70 for 612 pieces does seem a tad much, but considering that there are some very large pieces like the hull and the slide included, it actually seems fair and it's well worth it for such a great set. Overall: 5/5 - Lego has got a real winner on their hands here! I was not very interested in the Friends line when it first came out, but I find myself liking it more and more, whether it's for the rare parts or for the thoughtful designs. This is a beautiful and fun set that will appeal to most people. It has a ton of play features and some nice exclusive figures, including dolphins! It's a perfect summer time set and I'm sure every girl would love to have it. I would recommend it to anyone. Well, that's all I have to say about this set. I hope you enjoyed this exclusive early review. If you liked it and would like to learn how to make reviews like this, join us in the Eurobricks Reviewers Academy! Now if you'll excuse me, I feel the need to go grill a steak or wrestle a bear or do something else manly.
-
Hello Eurobricks members and web crawlers alike. Let's review a set that I feel isn't getting near enough love this wave: the Imperial Troop Transport 75078. USD $12.99 CAN $15.99 UK $11.99 GER €16.99 FRA €14.99 Product Description: Track down the rebels on planet Lothal with the armored LEGO Star Wars Imperial Troop Transport battle pack. Issue your Stormtroopers with stud shooters, load them up and get ready to deploy. If they come under attack, jump onto the roof and fire the dual flick missiles from the turret to send the rebels running for cover! Includes 4 Stormtrooper minifigures with assorted weapons. Includes 4 Stormtrooper minifigures with assorted weapons Imperial Troop Transport features a dual flick missile turret and space for 4 Stormtroopers and their weapons Also includes extra ammunition Weapons include 4 stud shooters Load up the troops and track down some rebels Man the turret and fire the flick missiles Store the extra ammunition in the storage box with handles Expand your LEGO® Star Wars collection with this great battle pack As featured in the Star Wars: Rebelsanimated TV series Imperial Troop Transport measures over 3” (8cm) high, 2” (6cm) long and 3” (9cm) wide I wanted to do a review of this set because I think it's an all-around keeper - a well rounded battlepack with some great value. It's also going somewhat unnoticed in a wave with more exciting designs and figures. It's true this kit is only 4 of the same figure, but in my opinion it's a solid figure to have four of. If any moderator wants to add a poll, be my guest. Otherwise, feel free to reply with your impression of the set. Here's the front of the box, standard 2014-2015 wave "Rebels" grey/orange. And the back. Love the four-shot at the top right. The contents: Here are the stars of the show - the Star Wars: Rebels-era Stormtroopers. From what I've read the printing/grill on the front of the trooper mask is a cause of some protest for Lego Star Wars fans - some say it's too grinnish, distorted and unfamiliar. We'll get to that later. All four troopers are identical, except two of them have a different facial expression. Here's the troopers' backs. And with the stud shooters, which although I agree are somewhat not-so-great for minifigs, have had success recently integrating them onto ships and vehicles. Here are some steps throughout the build, which is surprisingly more time consuming than it looks. And that's the whole Imperial Troop Transport. Does it look like the real one? Sorta. With that economy of pieces? Certainly. But... it's small. It's actually around the right height... about as high as a person standing, a bit taller. On the show, there are three placements on both sides for troopers to ride in (or prisoners to be transported in) and this model only has two per side. Big drawback: there's no interior. But I guess the general shape is represented with pretty small pieces and simple slopes. If you can squeeze those 4 studs into the crate, great. Slide the cargo crate in the middle (always nice to have more of those) and the troopers pit more or less easily into their placements. If they are holding guns, particularly stud shooters, it is cumbersome to align them in properly. Very few spare pieces left over, but I do like me some extra x1 white round studs. You can turn them into jogan fruit. :D All together, here's the side view... ... and the front. Neither side is a beauty, these ITT blobs look best at an angle. It's a surprisingly sturdy build though, all together. Here's a look at the underside. This kit comes with enough 1x2 trans clear bricks to make some people happy... about 6 or so in total I think. Here are a couple of my improvements: First of all, give these troopers some proper blasters. Second, that turret on top doesn't look right. Not a fan of the flick fires on something so small. So with two black lightsaber hilts, I switched around the turret a bit in the hopes that it looks a *tiny* bit more screen-accurate. Ratings: Personally, I love this kit because the price is great for the number of troopers you get... and I don't mind the Rebels-era stormtrooper helmet variant. Some people do, though. They don't like the shape of the mouth and I can understand that. I'd also read that some don't like how pronounced the blue grill details are on the sides of the mask. Well here's a bit of a perspective: I have a number of "vintage" stormtroopers from various sets all the way back to 1999 and the printing on stormtroopers then was terrible. Here's a comparison: Yes, there's a huge gap in printing between the "teeth" of about a dozen of my Millennium-era troopers (above, right) and it looks sad. I have all of them assigned to the bowels of the Death Star and on board the ISD so that most people don't see them. Compared to these old dudes... four troopers for fifteen bucks, IMO this kit is a no-brainer. Snap these up on sale! I plan to get at least two more next sale and then I'll store some away for future gifts. I can only hope that the episode 7 kits coming out are this generous in an offering - 4 troopers for $15 is a great deal. You can never have too many troopers. ;) Can you? Parts: 9/10 Decent! These are useful slopes and bricks in grey, a few clear pieces and grey plates. You could probably do a lot with this pile of pieces. Price 10/10 Absolutely stellar. Bring a shopping cart when these are on sale... unless you only can stand pure original trilogy stormtroopers. Build 8/10 It's okay... I built two of these and got lost briefly both times because the pieces looked so similar. Again, the flick fires make me crazy and I had to tweak it right away. Design 7/10 Scale wise: the size of the transport compared with the AT-DP is pretty close to what we have in the show. There is criticism to be leveled here, though. Looking at the wide berth of the transport in the show I think better pieces could have been chosen to create the round front. And I know it needed to be a certain price point but... I dunno. Take out the stud shooters and make it a full stud wider? I would have enjoyed an ITT at a $25 or $30 price point but I'm expecting some clever MOC'ers here to come up with something. Minifigures - 10/10 Awesome. The reason I am doing this review is to give this sweet, misunderstood set for what it is - a battlepack for Imperial Troopers that hasn't been matched since 7667 Imperial Drop Ship back in good old 2007 (OMG it was USD $9.99). I won't ding points for the helmet because it is meant to be a representation of troopers from Star Wars Rebels... and that's how they look. And sometimes It's great to get four-of something in a battlepack instead of two you want... and two you don't. Playability- 9/10 This is a pretty solid set, it looks okay without troopers, great with them loaded and there's a Lothal vibe where they're parked. It's solid and is easy to handle and manipulate. Overall 9/10 My final thought... run and don't walk the next day these babies are on sale. As a Canadian AFL, there aren't that many sets that I feel are of such good value even at regular retail price. If you like the Rebels Troopers, now's your chance to really expand your imperial army. Feel free to add your comments, ratings and why. You can, of course, re-enact some rad battle scenes on top of these transports: "Your master has deceived you into thinking you can become a Jedi..." Rebels Season two can't come soon enough!
-
Indexed by Moderator Lego 10233 Horizon Express Lego's newest adult fan-oriented train is the Horizon Express. Based off the French TGV (most notably the 1980s orange livery), it's a high-speed passenger train. The TGV has a distinctive sloped nose and end-to-end symmetry, so Lego designed this set for AFOLs to buy a pair and put them back to back. The set comes as a stand alone train, but includes instructions for motorization and works fine on all Lego tracks. Even if you only plan to display it, I'd recommend getting some straight track lengths to put it on. When this set was announced online, the train fans immediately began poring over the images, looking for any details of interest. A few things quickly became topics of discussion: The SNOT arrows on the sides of the locomotive (ok, so technically they call it a "power car," but I'm sticking with locomotive throughout this review since that's what most people would call it), the windows, some new parts like the pneumatic connector being used in the pantographs, new colors - lots of orange - and the few stickers and printed parts. Lego generously provided this prerelease set to Eurobricks for reviewing, and EB generously provided it to me for this writeup. Enjoy! Name: Horizon Express Set Number: 10233 Pieces: 1351 Price: US $129.99 CA $149.99 DE 99.99€ UK 79.99 £ DK 899.00 DKK Minifigs: 6 Theme: Expert Creator Year of Release: 2013 Links: Bricklink Peeron Brickset The Box... The Box by mostlytechnic, on Flickr I came home from work to find this - a white box all the way from Denmark. With a Lego address label... Opening the Box Inside the Box by mostlytechnic, on Flickr Inside, some genuine European bubble wrap. I wonder if it's different than American bubble wrap. Metric dimensions? Different smelling air? Do the bubbles sound different when you pop them, sorta like how European police sirens are different than our American ones? Oh, wait. No one cares about the bubble wrap. There's also a Lego Horizon Express set in there. Better get that out fast and get reviewing! The Box, Front The Box, Front by mostlytechnic, on Flickr The front of the box has a nice action shot of the train. Note that there's not really track its running on - don't want to possibly confuse people into thinking track is included. Being a European box, it's a bit plainer than our American versions, but it's got nice insets of the dimensions and minifigs. It's also marked "Expert" - apparently Lego is now highlighting the larger, AFOL-oriented sets this way within the Creator line. The Box, Top The Box, Top by mostlytechnic, on Flickr Like other Creator sets, an inventory of parts is on top of the box. Unlike most, it's crammed full of tiny parts since there's so many in this large set. I love that the 1:1 size indicator is the SNOT built arrow graphic from the side of the locomotive - it's a part the fans have been discussing since the set was first revealed, so Lego is obviously thinking about the target market clearly with this set. This one's for the fans. The Box, Back The Box, Back by mostlytechnic, on Flickr Unlike the front, the back of the box is crowded and busy. Lots of action shots dominate - opening up to show the interiors down the left, the big station shot at the bottom, and details of the car furnishings at the top. The middle has plugs for the expandability of the set. Two can be run back to back to make a longer, more accurate looking train, and you can pick up PowerFunctions parts to electrify the set. The Box, Bottom The Box, Bottom by mostlytechnic, on Flickr On the bottom are the mandatory production location listing (Denmark, Hungary, Mexico, Germany, China, and Czech Republic in this case) and choking warnings. There's also though a neat shot of the train with the roof off, so buyers can see inside. Nice way to fill the space with a new image. The Contents The Contents by mostlytechnic, on Flickr Lots of bags here - numbered 1 through 3 (since there's 3 cars, I bet I know how they're divided...), the three train baseplates, a bag with the magnetic couplings and tubing, and the manuals and sticker sheet, nicely protected with cardboard so they are pristine. Much appreciated, Lego! The Stickers The Stickers by mostlytechnic, on Flickr Like the Emerald Night, the set includes extra stickers. The manual only has you apply the two decorative stickers, the #14 stickers to the locomotive, and the #1 and #2 stickers to the cars. If you got a second set, you could make that have locomotive #10 and number additional cars all the way through 9. That'd be a long train, but I'm sure it won't be long before a LUG somewhere is showing one off. The Manuals The Manuals, Backs by mostlytechnic, on Flickr There are three manuals, one for each car. The fronts are all the same image from the front of the box. The backs have some new (at least I don't recall seeing them before) images - no more "WIN!" kid! The Manuals, Page 1 The Manuals, Page 1 by mostlytechnic, on Flickr The first manual starts with more new graphics - instead of the old pictographs telling you not to work on carpet and not to dump them all together, now we get a minifig kid building one group at a time. There's also a very nice set of photos on how to use the brick separator - I'm sure lots of people didn't realize how useful and flexible it is, so this is a great educational tool. There's also a text and QR code reference to lego.com/brickseparator for more information. The Manuals The Manuals by mostlytechnic, on Flickr The instructions themselves are plain but clear. There's no extraneous graphics, just clear instructions. I had no trouble at any point in the build knowing what to add - helped of course by the rarity of grey parts, but still, it's a nicely made manual. With all the black in the set, the new outlines on black parts help a lot as well. The Special Parts The Special Parts by mostlytechnic, on Flickr Lucy the engineer here will show us some of the special parts in the set. There's the brick separator - despite the image in the manual, it's NOT ORANGE! That's nice, since practically the entire rest of the set IS. There's some train slope parts in orange and black, the decorative train wheel sides, a printed windshield (new print, as far as I can tell), the pneumatic connector in dark bluish grey (new color), a couple printed tiles (unique to this set) and a few of the new and rare 2x2 inverted tiles. Building the Locomotive, 1 Building the Locomotive, 1 by mostlytechnic, on Flickr Time to start building. The locomotive begins with a train base and a rim of bricks. There are the mandatory parts that make no sense yet (the blue handles) and some grills and jumper plates at the front that will come in useful later. Building the Locomotive, 2 Building the Locomotive, 2 by mostlytechnic, on Flickr At the rear of the locomotive is this interesting part. I assume it's supposed to be some electrical equipment (it's right below where the pantographs will eventually be), but you can see how the bars on it are used to hold the end of the snot arrows. Building the Locomotive, 3 Building the Locomotive, 3 by mostlytechnic, on Flickr Here's details of how those arrows are made. It's just cheese slopes on 1x1 plates with clips, and then all attached to the bars. It's simple and ingenious, and it's a technique that many people will never have seen before. Building the Locomotive, 4 Building the Locomotive, 4 by mostlytechnic, on Flickr The nose of the locomotive is built separately. There's a number of different snot attachments used, clear headlight bricks that are *actually used as headlights!!!*, and a seat and control panel for the engineer. There's also the usual interesting part usage, such as the black grills that will never be seen and could easily have been any other 1x2 part. Building the Locomotive, 5 Building the Locomotive, 5 by mostlytechnic, on Flickr The nose is coming together now - two of the orange wedge pieces stack up, and orange and while tiles and curves are added to the snot connections to make the lower sides. Building the Locomotive, 6 Building the Locomotive, 6 by mostlytechnic, on Flickr The nose attaches to the body of the locomotive by the grey plate under the driver's seat. Other parts of the body have been added as well - lots of grill bricks, some recessed handles (using those jumper plates in the beginning), and the printed tiles via more SNOT work. The tiles do make a nice transition between the orange and black, but the printing could be better. The white and orange ink aren't opaque enough, so they show the black through. It would have been better to use a white tile and print the orange and black on it, or use heavier printing of the white and orange on the black tile. Plus, this is such a specific part. The train would look strange without it since it's designed for it, but I can't see using it anywhere else. Building the Locomotive, 7 Building the Locomotive, 7 by mostlytechnic, on Flickr A row of orange adds another stripe to the sides, and you can see here all the interior space left available for eventual motorization of the set. Building the Locomotive, 8 Building the Locomotive, 8 by mostlytechnic, on Flickr Ok, what on earth is this? Random parts joined together, with pins holding the brown bottom and the grey/orange top together... this is one of those moments where you are following directions without having a clue what it'll turn out being. I love those parts of building... Building the Locomotive, 9 Building the Locomotive, 9 by mostlytechnic, on Flickr It's a transformer! Well, sorta. Twist the orange parts around, thanks to the pin connections, and now you have some unique angles that will look great under the locomotive. Building the Locomotive, 10 Building the Locomotive, 10 by mostlytechnic, on Flickr Bogey time. Anyone who's built other Lego trains will find these pretty normal. I love though how they build two with very different methods yet they look so similar. The left bogey uses the special train wheel holders, metal axles, and wheels, and then adds some black minifig heads and other parts as decoration. The right bogey uses technic beams as a frame, wheels on technic axles, and then the decorative side pieces. Building the Locomotive, 11 Building the Locomotive, 11 by mostlytechnic, on Flickr If you're familiar with the TGV or other high speed trains, you know they have interesting air splitters under the front end for aerodynamics. So let's make that here - note the dark tan rails inside the orange wedge. Those will be useful in a second. Building the Locomotive, 12 Building the Locomotive, 12 by mostlytechnic, on Flickr With the loco upside down, we can add the splitter. The orange wedge slides into the bricks with grooves, making a nice upside down slope. Building the Locomotive, 13 Building the Locomotive, 13 by mostlytechnic, on Flickr The grey portion attaches to the few stud holes left visible in the previous photo, and a couple orange tiles brace it all together. Building the Locomotive, 14 Building the Locomotive, 14 by mostlytechnic, on Flickr Since the set doesn't include electronics, Lego fills in the interior with some decorations, much like they did with the Maersk train. There's a block of random pieces that looks strangely similar to the PF receiver, a unit that I suppose is supposed to be some electrical or motor equipment, and of course, the very nice pantographs using the pneumatic connectors as joints. They work great here. Building the Locomotive, Finished Building the Locomotive, Finished by mostlytechnic, on Flickr The complete locomotive. You can clearly see here how the printed tile doesn't quite match in color, but also how nice the rest of the unit is. There's a TON of black cheese graters on the roof. The stripes just look great, and the snot arrows nicely break up the large black expanse. Building the Locomotive, A Flaw Building the Locomotive, a flaw by mostlytechnic, on Flickr This, however, bugs me. There's no roof under the pantograph, so you can see all the way to the floor under it. Building the First Car, 1 Building the First Car, 1 by mostlytechnic, on Flickr The first car begins with a baseplate and assorted parts down one side. Some things are pretty obvious if you've build Lego trains before - the long grey plate will have some chairs on it later I'm sure, but other parts I don't yet know about - like the weird snot section at the left, or the grey neck bracket. Building the First Car, 2 Building the First Car, 2 by mostlytechnic, on Flickr Now it's coming together. Chairs and racks for luggage are filling in the space, there's a computer screen, and there's long black tiles down both sides. Building the First Car, 3 Building the First Car, 3 by mostlytechnic, on Flickr Time for the windows. The fans immediately jumped all over the window design as soon as photos got on the internet. These are tall windows laid on their side, so there's some fiddly snot work to make it happen. This section of the build uses a lot of small parts - headlight bricks, 1x1 plates, 1x1 tiles, etc - to hold it together. Building the First Car, 4 Building the First Car, 4 by mostlytechnic, on Flickr A row of windows goes down each side of the car and white and orange stripes are added. It's still very flimsy at this point though - only a few studs hold each side together. There's also nice brick-built doors at the end where you can add the number stickers to the window. Building the First Car, 5 Building the First Car, 5 by mostlytechnic, on Flickr This unit will go under the car to fill in between the wheels. Like on the locomotive, pins are used to make otherwise-impossible angles, and there's a pair of 2x2 orange tiles that will fill in the holes in the train baseplate from underneath. I found it interesting though that Lego used the silver 1x1 round plates. You can't see them and they're not used anywhere else in the build. Why not save a few pennies and use 1x1 square plates or even round ones in another color? Heck, I'll probably replace them on mine and have some flat silver 1x1s to use in something else. Building the First Car, 6 Building the First Car, 6 by mostlytechnic, on Flickr Two more bogeys. The left is a very common Lego design, used on lots of other trains over the years. The right one is different. It's a Jacobs bogey and goes between two cars so they share it, hence the pins on the ends rather than one in the middle. Building the First Car, 7 Building the First Car, 7 by mostlytechnic, on Flickr The roof. Lots of black. I actually like the couple spots where cheese wedge and a tile break up the smooth curve. There's also some tubing running the length of the roof to mimic the power cable on the roof of the real TGV. Building the First Car, 8 Building the First Car, 8 by mostlytechnic, on Flickr A look inside the car. That strange bunch of snot work at the very beginning turned out to be a bathroom, complete with sliding door. However, as a train car, it's pretty cramped. You can't actually get a fig past the bathroom and there's studs sticking into the aisle (some snot plates were used just to stick up and keep the long window section from being pushed inside the car when you handle it). But just stick the roof on and car 1 is done. Building the Second Car, 1 Building the Second Car, 1 by mostlytechnic, on Flickr Car 2 starts similar to number 1, but obviously the interior will be different. Big thumbs up to Lego for having the cars be unique. My wife saw this and immediately guessed the white overhangs will be tables (she's right). Building the Second Car, 2 Building the Second Car, 2 by mostlytechnic, on Flickr This is obviously the eating car. Seats with tables, the coffee maker, and a bar at the end. Yep, a bar. But it's Lego, so I assume they're serving fancy bottled water and maybe some sparkling juice. The rest of this car is built like the first - windows, then roof - so now we'll jump ahead. The Finished Train The Finished Train by mostlytechnic, on Flickr I love how the train flows. The stripes run the length just like they should, making it look like a complete train rather than a random assortment of cars like freight trains do. To nitpick though, I don't like how the hump at the start of the first car sticks up higher than the locomotive. I think that should be flush, but they had to cheat a little on the back of the locomotive to make the pantograph the way they wanted to. [edit: comments have pointed out that the real TGV is like this - Lego modeled it accurately. It's just not how I would have done it.] Also, the windows are too low - if you have figs seated inside, the windows are below their heads. They'd have to crawl to see outside. They look good from the outside though; it's just Lego proportions being off a bit. The limitations of Lego also mean there's more gap between the cars than there should be and the whole thing is too short, but it's still nice. I've seen some interesting work happening in the EB Train forum though on spring-loaded bogeys to fix this passenger train issue (basically, the cars can be closer together while in straight track, but then spread apart a little to negotiate curves) and I'd love to see Lego do something like that. I think it takes up space inside the car though, and they want the playability more. The length would definitely be helped by adding a second set to extend it. Sadly, there's not parts provided to make the Jacobs bogey in the middle. The official pic on the back of the box shows the double train using two bogeys in the middle. I'm sure anyone buying two sets to make a longer train will modify the middle to have the Jacobs bogey again there. Opening the Finished Train Opening the Finished Train by mostlytechnic, on Flickr The Horizon Express opens nicely for play. I especially like that the top of the walls on the passenger cars come off with the roof, making the interior easier to access. The Minifigs The Minifigs by mostlytechnic, on Flickr Here's the six figs that come with the train. It's a nice assortment: and engineer (female), a steward (male) and four passengers. I'm not a minifig expert, so I'm not sure what's new and old about these figs, but they're all nice. The Minifigs The Minifigs by mostlytechnic, on Flickr Most have back printing, but there's no second face on any of them. I appreciate though having 6 different hairpieces though. Power Functions, 1 Power Functions, 1 by mostlytechnic, on Flickr The third book of the instructions includes step-by-step instructions for powering the train, assuming you have all the needed electical parts. First, a bunch of the loco comes apart. Power Functions, 2 Power Functions, 2 by mostlytechnic, on Flickr Here's what you need to power it - a speed remote control, an IR receiver, a battery box (I'm using the 6 AAA battery box, but Lego recommends the rechargeable battery box and transformer), PF lights (if you want headlights), and a train motor. Pricey if you don't already have them, although using the AAA battery box over the rechargeable one saves $50 or so. Power Functions, 3 Power Functions, 3 by mostlytechnic, on Flickr First the decorative sides are put onto the train motor. Power Functions, 4 Power Functions, 4 by mostlytechnic, on Flickr The PF lights stick into the trans clear headlight bricks and the wires run on each side of the engineer. Finally the reason for those blue handles in the very beginning is revealed - they make it MUCH easier to mount the center brick of the lights to the base of the train without disassembling more of the walls. Power Functions, 5 Power Functions, 5 by mostlytechnic, on Flickr The IR receiver and battery box mount in the space freed up by removing the other parts. This is a perfect snug fit. According to the manual, you're supposed to put the lights and motor on separate channels of the receiver so you can control them independently. Since I have multiple trains, I didn't want to use up two channels like that, so I stacked them on the receiver. At first I had the lights as the top plug, and then the battery box wouldn't fit. It's so precise in there that raising the light plug 2 plates made the cord block the battery box. I reversed the plugs (since there's plenty of extra wire coming from the motor) and it worked fine. For people who want to run dual motors, it might be tricky. You need a switch to reverse the second motor, and there's not much room for that. I don't know if a switch would fit behind the driver. Stacking a third plug on the receiver also might hit the pantograph. The Trio The Trio by mostlytechnic, on Flickr The three recent AFOL trains - Emerald Night, Maersk, and Horizon Express. Steam, diesel freight, and electric passenger. Very different in every way, but all well-recreated in Lego. Comparison to the Real Thing Wow, Lego nailed it. They replaced the TGV logo at the back with their arrows since this isn't officially a TGV. Otherwise, look how much it matches. The sticker on the nose. The grey chin. Even the little windows on the side of the driver, that they used the backs of headlight bricks to make. The cheese graters on the roof, the grills on the side, the size of the stripes. About the only way to get closer in appearance would be to have a custom nose part molded (like some of the old trains did) but that wouldn't be nearly as cool as the brick-built version. The Video (click through to YouTube to see in 1080p) In the video you can see how nicely the train runs. I never got it up to full speed, since my straights aren't long enough to do it without crashing. I have no doubt the LUGs will soon have long versions of this train running on their high-speed layouts. You can also see how well it handles curves and switches, both in forward and reverse. The nose does overhang though, so make sure to leave room around your track. The Conclusion If you're a train fan and like passenger trains, get this set. It's a great design and better than the 7938 Passenger Train. It's got the playability of the 7938, but looks better for the adult fan. The color scheme stands out and it'll look good either on a layout or as a static display model. The Ratings Value: 9/10 - It's more than the EN or Maersk cost, but there's also more parts. It has a lot of a less-common color, but not as fantastically usable as the EN's dark green or Maersk blue. Still, it's at the 10 cents a part sweet spot, has 6 figs, and all the train-specific parts, so the value is solid. Design: 8/10 - The look is good, but personally, not as good as EN and Maersk. I think the HE suffers more from the shorter design, and there's some minor flaws IMHO (under the pantograph, the printed tiles, etc). It feels less detailed than the other two, but the real train is much sleeker and less "greebled" than a steam or diesel loco as well. Playability: 8/10 - It's got nice playability, but I can't go higher since other train sets (3677, 7938, 7939) come completely with the Power Functions and track and accessories, the Maersk had containers and a truck, etc. However, this is targeted at a fan base that likely already has track and motors and stations, so I understand not including that. Parts: 9/10 - A number of new or rare parts, LOTS of orange. Can't help but wonder what it'd have looked like in dark blue or dark red though... or the modern blue and silver livery. Can you imagine tons of flat silver bricks and parts :) Overall: 8/10 - Part of this is simply bias - I'm not a big passenger train fan. Here in the US they're rare. Trains here are cargo and that's just visually more interesting I think. I appreciate what Lego did here, making a very different train from EN and Maersk, it's just not my cup of tea like those were (for the record, I own two of each of those - along with 7939 and 3677 cargo trains). For what it is, it's well done, attractive, and ripe for modding. I can already picture people making longer versions of this (longer individual cars that is) and running them on some of those high-speed layouts they have in European LUGs. It will look fantastic there. On my layout, not as much. Additionally, when I look at EN or Maersk, those are nearly flawless. The railings on Maersk annoy me since they get out of shape so easily, and EN has a cord from the tender to the locomotive if you power it, but those are minor. The printed tile and hole under the pantograph here bug me more. Still, it's a solid train and I have no doubt it'll appeal to tons of fans. Just be ready to buy 2 of them, because you know you'll want a second.
.thumb.png.9e4550e6d7606030f9d13d7d604b4ec6.png)