Search the Community
Showing results for tags 'track'.
Found 57 results
-
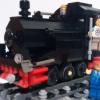
Hi All , just signed in to this forum cause I was wondering about something .... I'm into the 12 volt train system again and was wondering about modified 12 volt track . Hs anyone done some modifiyng on tracks , switches ,etc. ? Here's some pics of my own creations untill now... A half straight track with original contacts a point prototype with same angle as 2 curved rails Let's see what you guys have !
-
We're currently working on a number of additional track types for the monorail system. Over the last few months we had a few requests for a 'monorail track tile': a tile with a monorail rail on it. Integrating monorail track into the pavement of a city layout is be one the potential applications. The tile itself is pretty straightforward, getting that tile connected with the standard monorail track is not. You can see a first prototype of these tracks below. On the right you have a prototype of a 4x8 prototype tile; on the left you see an adapter to connect that tile to the standard monorail track. It works but the ramp is too short and it's rather bumpy when the train goes over it. We're going to redesign the connector as a 4x16 ramp. The final ramp would also be printed at a higher resolution to have a smoother surface. Making curves with this system would not be straightforward either, the main issue here is that different sections along the curve all would require different connectors to match the stud pattern below. But that's not unfeasible to make, but it would be a bit of a puzzle to assemble the track. Another idea that I had was to add a 'narrow gauge train track style connector' to the tiles, as such you could assemble them without needing a base plate; that might be handy for the curves. These are just prototypes to explore the possibilities of this system. What do think ?
-

Using rubber caterpillar tracks in LDD
pdxbricks posted a topic in Digital LEGO: Tools, Techniques, and Projects
My daughter is trying to design a Mindstorms robot for her school's FLL league in LDD, and would like to use rubber tracks instead of wheels. Neither of us could figure out how to put two rims into the track, part # 56145 Rim Wide w. Cross 30x20 fits on one side of the track, but not on the other one, like it would on a real model. Has anyone found a way to actually use these rubber tracks successfully in LDD? Thank you! -
I am sure this has been done in various variations over the years after Lego ceased production of train track crossing (last produced in 1999 for 9v tracks). I only have PF train tracks so I made my own version. Below is a Bluerender rendered version I put together in LDD and below that are actual brick built. Note that the track requires to be raised as a result, by a brick, or at least 2 plates. Update: Here is the updated crossing only image that has a center tiled section to help with 2878c01 train wheels which have a narrower wheel spacing. Train Track Crossover Ver2 Crossing only by Miro Dudas, on Flickr https://drive.google.com/open?id=0B3ME1BfzxExrR3YtRVN5Vi1hUEE Miro
-

nControl - New track design and automation software
Lowa posted a topic in Digital LEGO: Tools, Techniques, and Projects
We have been working on a software to design and automate LEGO train and monorail layouts. The first BETA version of nControl is out and can be downloaded for free from the 4DBrix site. It has a track planner for train and monorail layouts and has the first elements of the automation simulation: track switches, traffic lights and sound effects. We also have 2 YouTube videos to get you started. Download link: https://www.4dbrix.com/downloads Getting started videos: https://youtu.be/wddnCAJZTlQ https://youtu.be/w2RDMXt1sgQ Let us know what you think; any feedback, suggestions or ideas for additional features are welcome! Lowa -
Hi everyone, I have created a small landscape based on the first novel of the Harry Potter series. The scene is the first time that Harry is in Gringotts with Hagrid by his side and they are escorted by Griphook through the caves. I wanted a few tracks in the built and one of the tracks needed a drop. I was glad that I had the right tubes to create the track. Here is a picture of the built. Here is the link to my Flickr album. https://www.flickr.com/photos/137652851@N07/albums/72157673161817395/with/29253037211/ The photo's are also on my brickshelf account. http://www.brickshelf.com/cgi-bin/gallery.cgi?f=564894 Questions and feedback are welcome. Sander
-
Here is the result of spending a few restful days at the seaside with a handful of arctic sets: the Goliath, a heavy arctic snowcat. It is built from parts coming from the other arctic vehicles in order to combine some of their play features. Arctic team in action by Veynom, on Flickr The Goliath is great at crossing any kind of difficult landscape: Goliath in Action by Veynom, on Flickr Arctic Goliath Snowcat by Veynom, on Flickr The Goliath is packed with many features; - forward cab to host the driver and an additional passenger with room for some equipment as well; - large storage compartiment in the centre to put 2 crates; - fully equipped lab at the rear side; - tow cable; - Plenty of powerful lights to enlighten the arctic night; - remote camera on the roof; - Additional storage locations around the vehicle to clip many different tools; - radar and radio antennas. Rien de tel pour épauler l'équipe : Goliath deployed. by Veynom, on Flickr Here is the lab: Inside the Goliath by Veynom, on Flickr More pictures: Arctic Goliath Snowcat by Veynom, on Flickr Arctic Goliath Snowcat by Veynom, on Flickr Arctic team in action by Veynom, on Flickr I know making an arctic vehicle during summer and taking pictures on the beach is not perfect as background for the model, sadly, I can't change sand into snow. ;) Arctic team in action by Veynom, on Flickr Arctic Goliath by Veynom, on Flickr I love holidays. I hope you enjoy yours as well.
-
What is the best tank's width ? As you know, I am interested in tank and you can see my tests on this thread, http://www.eurobricks.com/forum/index.php?showtopic=119844 During my tests, I found that the more the tank's width was big, the less the track goes out of his lane during a turn on a spot. I have the intuition that when the track follows a large circle, the friction caused by ripage is less. I guess this is because of the shorter distance of the extremities of the track and the perimeter of the circle. But how to prove it? I will like to make a video on the subject, but I have not done great studies and I'm afraid to say stupid things. Could someone explain this without too much math? Thank you in advance.
-

Lego – Funny little tank in a Mars field #7
oracid posted a topic in LEGO Technic, Mindstorms, Model Team and Scale Modeling
10 minutes, it is very long, but I promise you that you will not be disappointed by this latest video of my little series. For those who are interested, they can see the "making off" of the full series here: http://www.eurobricks.com/forum/index.php?showtopic=119844 -
Hello all fellow train folks, today I have another MOC but it isn't a train, it is a track piece that we haven't been able to get in 10 years. Here it is more info to follow. 1). It has to be the same size as previous tracks. 2). It would need to use minimal parts and be easy to construct. 3). It would need to be as quiet as possible or be as quiet as standard Lego tracks when the train rolls over it. 4). It would have to be stable and would not fall apart in use. I hope you all enjoy my MOC and this track piece. I you feel inclined constructive criticism is always welcome! If you thought It was brilliant you can support it here: https://ideas.lego.com/projects/131973
-
Looking for some ideas for a nice simple track to run 60051 and 60052 and add the cargo Crain and maybe train station 60050. Maybe a double loop etc. Looked up online but not a lot of luck.
-
Hello, I am just starting with Lego trains but I am familiar with the trains. I already got HO and Merklin N trains. Here is what I got : Tracks only : 6 x 7499 Flexible and Straight Tracks 1 x 7895 Switching Tracks 1 x 7996 Train Rail Crossing Box : 1 x 60051 High-Speed Passenger Train 1 x 66374 City Super Pack 4 in 1 (damn, I just see I got 66405 not 66374) So : 6 x 8 + 4 + 20 = 72 straight 16 + 20 + 4 = 40 curves 1 crossing 6 switchings I got some goals for my track : - 2 trains can run at the same times - it can reverse a train - it can park unused wagons - One part is for *speed train* so with as few crossing as possible - A station stop track (where a train can stop allowing other to run) - Not a too large nor long layout (due to WAF) 3 meters long and as narrow as possible Due to Super Pack 66405, I will have use flex track (dont like them much) because 4 curves are missing. I will place the flex track in the reversing loop area. Any advice about my track layout is welcome !!! Current size is 2.88 m x 1.22 mm. Ps : Sorry for my poor English.
-
Did anyone use all curve tracks included ME Models track? I just designed a loop layout that used all curve tracks! But I am very sad because I can't play it at my home:( My tables are shorter than 3m. Do you have any idea?
-
Hi! I'm in the process of revamping my layout. One thing I wanted to change was to make the track bed look as realistic as possible. Namely, I wanted single spaced railroad ties instead of the Lego double spaced tie. Single spaced ties are easy to do on the straight sections but the curves present more of a challenge. I looked around the forum for design ideas and didn't see anything specific so set about to figure out the problem myself. Seeing some of the great layouts on here (Texas LUG, PennLUG) I knew it could be done which makes the battle a little easier. Here is what I came up with. DSC01329 by Scott Roys, on Flickr DSC01331 by Scott Roys, on Flickr
-
Hi all, I've been hording a large amount of railway tracks: partly from my old Lego from the 90's and from the 60051 and 60052 sets. I usually try to be creative when I make a track for my son, but I kinda miss the overview when I do the layout. Do any of you know of a tool, or can you suggest a method, for planning the layout of your railway tracks before lying on your knees on the floor with a big stack of tracks? I'm open for any suggestion
-
Hello everyone, a spot has just opened up on my layout for one more lego train. I was wondering what everyone thinks is the best, and i already have the 7939 yellow cargo train, 7938 red passenger train, horizon express, hogwarts express that is motorized with power functions, one extra set of power functions and 2 4.5 volt trains from the blue track era. I was thinking in the maersk or emerald night but they are both expensive so i can only really get 1 with my budget for lego trains. So please give your feedback and thank you in advance:)
-
Now that ME Models is shipping its much anticipated alternative Lego train track components, I really wanted to see what sort of layouts could be built with these elements. Many of us use the superb BlueBrick software tool for designing layouts both for individual and collaborative use. BlueBrick does not have library support for ME track components and therefore, I decided to make a custom library add-on for BlueBrick to include ME track. I have created two BlueBrick compatible libraries to assist with train layout planning by expanding the range of elements available for design. ME Models Track Components - This can be used as an expansion pack for the existing BlueBrick Track parts library. Simply extract the downloaded archive into the pre-existing \parts\Track folder. Complete LEGO® Train System Schematic Elements - This is completely new library developed specifically for symbolic or schematic track planning. It is a complete library including track elements from LEGO®, ME-Models, as well as custom track elements such as stub-switches and crossovers. The library is freely available for download at my website at: www.brickdimensions.com/resources/trains ME-Models library: BlueBrick Library for ME Models Track by michaelgale, on Flickr New Schematic Track Planning Library: Universal Track Planning Library by michaelgale, on Flickr BlueBrick screenshot with schematic track planning components: Universal Track Planning for BlueBrick by michaelgale, on Flickr
-
Hey guys, I have seen about 3-4 different types of packaging for the old blue 4.5v rails and I am wondering If I can date them easily by the box style without opening it This is my sealed box: Lego 155 MISB with plastic shrink warp fully intact. by Railco1, on Flickr Lego 155 MISB with plastic shrink warp fully intact. by Railco1, on Flickr I hope someone can help me date this without opening it accurately! Thanks -RailCo P.S. Should I open it?
-
My son just got his first lego train set for christmas the cargo train). I'm looking for extra track for him, can only find the straight, curved, flex and switching track. Is there really no junction track, or bridges, for the lego trains?
-
Hello I would like some advice on my layout to make it compact and use a fair amount of track. I have 160 tracks. A lot of it is 4.5 volt. The rest is power functions. 20 PF straights, 56 4.5 volt straights. 30 PF curves, 60 4.5. I have 2 switches of each type. Thx.
-
After some recent interest in the MKIII decoupler, it made me think should I put it on Ideas ? Would it stand on its own, or should I group it with other track items or lighting ? If you look at what TLG has said over the years, that automated controls/lights and other stuff which would turn our train layouts into proper model railways is not going to happen. If you look at the interview with the designers of the 2014 trains in issue 15 of Railbricks magazine, you'll see the reasons why. So alone it is. I have no misconceptions that this very easy design could match the great models this program has produced (Ghostbusters, Exo Suit etc..) That's not the point, I'm glad they changed its name to Ideas, because this is one that fits the definition. Throw in a railroad minifig and you've got an Ideas Polybag ! So if you've built one, going to build one or just like the concept, please take a minute to register your support for the Simple Decoupler on the Ideas website. thanks CB This thread is where it all started
-
Hi! I began to develop Truck Trial competition in Sankt-Peterburg(Russia).Up to this point there weren't competition like this, so I started from Mini truck trial. Basic rules - the distance between the wheels 13-15 studs and the largest diameter wheels - 62 mm. Soon, I will show to you video from meeting. Off course I made short video with my truck. I found cool track in my garden And some pictures of car.
-
My first piece of track. Here my first piece of embeded straight track project, it's printing!!!! :D Printed!!!
-
[ full gallery] As everyone knows, lego curves are very tight, so one has to build short rolling stock to make it around the curves without problems. Unfortunately, even at 6 wide many passenger train cars built to scale should be 50+ studs long, e.g., my Superliner cars were built with accurate length to width proportions and they are 52 studs long. They look HORRIBLE in the curves, with a single car spanning a quarter turn- notice that the ends swing out almost six studs (a full car width) past the adjacent car in the pictures below. These long cars on the short curves also have so much drag that it is hard to find a good speed that the engine can pull through one curve that will not send the train speeding away on the straight track to derail at the next curve. <<regular lego curves Over the past few years several folks have promised wide radius curves and I've grown weary of waiting for someone to actually produce a viable curve. So I set out to build my own. I contemplated 3D printing, but it would be way too expensive. After several initial attempts, I settled on using third party ABS rail stock glued to lego tiles (yes, "glue" is a four letter word, but so is "lego," grin... in any event, this exercise is definitely not for the purist). The tricky issues are the fact that the lego gauge does not split well into LDU, and worse, making nice smooth curves. <<new custom curves My solution was to make a rail gauge to ensure that the rails have the correct spacing. I am still revising the design, but once I've finalized it, I plan to offer the rail gauges for sale. For my prototype there were several things I had to decide upon. I personally like the look of one stud ties, but they do not provide a good opportunity for a rail joint on a curve. So I decided to use two stud ties for now, mimicking the look of the old 4.5v rails. I also had to choose the curve radius. I wanted to go wide. Until I prove this works, I want to do only two track segments per quarter turn. So with these constraints and my rail stock the widest I could go was twice the radius of regular lego curves, and so that is what I chose for my prototypes. After I finish one loop of track, I'll experiment with other radii. In fact one could even do variable radius curves, but it would be more work to figure out the transitions, so that is something to play with in the future. The rails are darker than lego dark gray, that shouldn't be a problem if the entire loop is the same color. The straight track went fairly easy, with a single segment coming in at 76 studs (4 studs short of 5 regular lego track segments). The curves took a lot more time to get right, but I think I've got the process figured out now (I'll need to make another quarter turn before I know for sure). This shot shows one segment of the new curve next to four segments of lego curve. My 52 stud long cars work so much better on these wide radius curves. Aesthetically, I think the 52 stud long cars would look better on even larger radii curves (perhaps my next project). Meanwhile, I think the curves look about right for my 42 stud long cars, as shown below. before after More to come, but for now, you can find a few more examples of my progress thus far here (including a transition piece to adapt to conventional PF track- primarily for switches- which I have no intention of making... at least not any time soon). Oh, and if you scroll back up to the top image in this post, you'll see the middle tie on the curve sticks out one stud. That's because I grabbed a 2x2 plate instead of a 1x2 to connect the rails. Also, my carpet has a little give, so I had to put a plate underneath the joints too to keep the weight of the train from popping the rail joints. I hope that will not be the case when I set it up on a hard floor, and I'll keep you posted when I test it. Worst case is that I'll need to add a layer of plates below, in which case I'll disguise it like ballast and then I can go to single stud ties. [ full gallery]
-
Well, I've been lurking on these forums for a while. Time for me to contribute. Since a few weeks, my daughter and me have had a (modest) train layout with a cargo train, a passenger train, three sets of switching tracks and a decent amount of track. Having been an avid lego builder in my younger years, I really love sharing this with her. Anyway, because we were both eager to add some excitement to the setup, I decided to sacrifice two straight pieces of PF track and make a track crossing (whoa, accidents!). How I did it: The first of the two straights was cut in three pieces by cutting out a track section one stud wide on the 6th position, on both sides. Next, the center piece of this chopped up straight was disposed of its side studs. The second straight was also butchered by removing its central 2x2 and both of its central 2x1 side studs. Four more studs were removed on its sides as can be seen on the image. In addition to that, four grooves were carved out of this second straight. Tools used: a sharp knife, a miniature circular saw blade (on a Dremel clone) and a miniature grinder on the same Dremel. No glue whatsoever. It took a while to do this (+- 1 hour). To help making the cuts on the right place, I sacrificed two of my old lego 8x1 flats: it is quite convenient to click one of these on the piece of track right where it needs to be cut. The sawblade can then glide along them. (Honestly, the sacrificed pieces already suffered a dog attack in the early nineties. So it's not really a big loss ) The result: Everything fitted together: And by means of some 2x2 plates (I should probably get some bluish grey ones ), all the parts are connected: The result was added it to our layout and I must say that this piece makes the track a whole lot more interesting when trying to drive two PF trains around. With all the crashes we have had so far, I must say it's a good thing we still have my old faithful eighties firefighter helicopter around. Note: I did not consider buying a 4519 since I can't really justify its ~25€ price tag (used) for my PF setup. And of course it was just a nice silly project I enjoyed doing .