Search the Community
Showing results for tags 'Review'.
Found 810 results
-
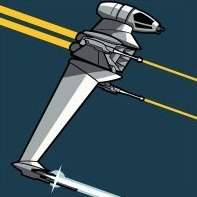
I'd like to begin this review with a (slightly modified) quote from Gandalf the Grey: "AFOLs. You can learn all there is to know about their ways in a month, and yet after a hundred years they can still surprise you." When I asked you which set I should review first, I had never expected the polybag to be the most requested set. I thought you'd go for Dragon Bolt or one of the heroes (well, Stormer was mentioned at least once, same goes for Frost Beast). But I don't want to complain about that. It's just a funny surprise. Set name: Exclusive Accessory Pack* Set Number: 40084 Price: ** Pieces: 9 (but only 6, according to the instructions) Year of release: July 2013 (Europe) *Well, I guess it's the name, since there's no specific name on the bag itself. **The pack itself is free, but you can only get it with another Hero Factory purchase. The bag The front of the polybag shows the black brain and the fire sword on a green background. One thing I find noteworthy on this bag is the title in another language (I guess it's French, but I'm not sure). The bag shows the title in yet another language, but otherwise it's relatively dull. So let's slice this up! The parts I was pleasantly surprised to find out that all of the TECHNIC pieces are included two times in the bag, especially the sword hilt piece - it really grew on me in the last wave, so I'm happy to get even more of these. This is also most likely not a particular case, since my other bag contained the same pieces. Here we have the exclusive black brain slug, which makes this pack so interesting. The slug itself is a redeco of the other brain slugs, cast in black rubbery plastic with a solid red eye section, so aside from the (solid) colour, it's identical with the regular brains. That means of course it got the same amount of detail as the others. I really like the brain-like detailing on it. It connects of course in the exact same way like it's less exclusive brethren. Pictures of interest from the instructions Due to the small size of this set, the instructions are not a booklet but just a single sheet of paper. Here we have the actual building instructions for the sword (ironically, there's an error in the assembly if you look at the steps 2 and 3). Turn the instructions around and you'll find a nice poster of the previous wave's bad guys and their brain slugs. A smart move, since that poster encourages kids to upgrade those guys with the flame sword and the black brain too. Building the set I guess that picture shows clearly the proper assembly of the sword. It's basically assembled in a way similiar to Furno XL's sword, only far less complex. Design and playability Well, both the sword and the slug look pretty nice. However, both of these can't really interact with eachother since the slug doesn't have any hands or such. But that doesn't matter, because you can get this set only with another Hero Factory set, which you can of course upgrade using these extra parts! Here I replaced Furno XL's default sword with the sword from this set. I could of course also try to combine both blades to make an even bigger sword. Final thoughts What can I say about a free parts pack aside from the obvious fact that it's a cool idea? The Accessory Pack is a very nice parts pack (even if you put the brain slug aside). If you happen to know a LEGO store near you (or decide to order Hero Factory sets online), I can only recommend you to get this pack, since it comes with a small yet versatile number of parts.
-
Every two or three years, the CITY range gets a spread of new civilian sets, and 2014 is such a year. They tend mostly to be vehicles, since CREATOR seems to have stolen the houses; but there have been some great offerings of late and this year's sets look to be continuing the standard. I was very impressed by 2012's 4433 Dirt Bike Transporter - a set with an attractive design and bursting with play features - so I'm looking forward to seeing how this latest similar offering compares. Review: 60058 SUV with Watercraft Set Information Name: SUV with Watercraft Number: 60058 Theme: CITY Release: January 2014 Parts: 219 Figures: 2 Price: GB £17.99 | US $19.99 | EUR 19.99 - 21.99 | AU $29.99 | CA $24.99 | DKK 179.95 Links ... Shop@Home ... Brickset ... Bricklink The Box Click for a large full-frontal image I like the sandy shoreline the vehicle is perched on, which fades into dunes and scrubland, with the ever-present CITY silhouette beyond. It is similar to the scene occupied by the Camper, though bereft of trees; and here the landscape seems less hemmed in. Indeed, 60058 continues the semi-aquatic theme of the 60057 Camper set, though we are warned that in this case the Watercraft Do Not Float. Customary set highlights adorn the rear, above the panorama of this year's attractive spread of vehicles: Click for a larger image I love the stunning oblique shot of the SUV and trailer in the centre-right. I would have used something similar for the cover image except it doesn't show off the whole set so well. Chase me! The two dudes play on their craft on the box top ... ... a mere stone's throw away from the bustling CITY-scape. The box is, of course, an identical size to that of the Camper set, and indeed to any set at this price range over the past few years: for a comparison, click here. The Instructions Two papery-covered manuals are identical except for the module number. Interestingly, the second dude and his watercraft are absent from the picture. There are acres of space on the inside pages. Despite some parts of similar colour (eg. 1x6 plates in black and dark bluish-grey), colour differentiation isn't a problem. The build is simple, with piece callouts often demanding only one or two parts per step; I built the SUV in about five minutes. The customary inventory is spread over two pages at the rear of Book 2. Sticker Sheet Several decals are crammed into a small area (for a sense of scale, see the Box Contents). Their mostly-rectangular design makes applying them refreshingly straight-forward. Note the two dashboard stickers displaying different speeds, and the green narrow pair declaring '160 HP'. My car is only 122 horsepower! Interestingly, the instructions indicate to place the '48' dashboard sticker onto the green boat; I dread to think what the power output of the orange boat must be. Assuming that 'HP' does stand for horsepower - maybe it's Hit Points. The Parts Module 1 builds the SUV. Some useful SNOT brackets brighten up an otherwise unremarkable selection, though I won't complain about the trans-black windows (especially the 4-wide Classic Town windscreen ). I hate those modified bricks with wing ends, a white example of which is lurking on the left of the picture. This one will thankfully lurk invisibly on the finished model, where it is used purely as filler. One of the far more useful 2x4 black tiles is similarly invisible on the finished car, from where it can be pilfered without breaking the set. The highlight of Module 2, for me at least, are the four new wheels and tyres. I say new - two came last year in the Cargo Terminal plane set - but they're new to me, and potentially useful - we'll look at them again in situ later. Otherwise, a number of large and chunky parts will likely be confined to the 'useless parts' bin later, but some more SNOT brackets are most welcome. The two 2x4 curved slopes are new in orange and lime green, but as these are in my opinion two of the most useless colours in the entire LEGO palette, I'm not going to get over-excited by them. The Minifigures The wetsuit-guy simply had to be Johnny (even though he's not actually surfing), which I guess makes the sunglasses-dude Bodhi. Ten bonus points if you get the reference! Bodhi does at least have a surfer on his torso, without which he'd look like he was wearing a bloodstained string vest. His torso could be found previously only in three sets; his face is in need of some stubble. Johnny's wetsuit is new to me, but appeared in a couple of sets last year; it's rather nice. Both torsos have back printing; I love the wetsuit's zip! Two narrow lifejackets accompany the figures, much like in the Camper set. The LEGO Group clearly have safety in mind! I don't think I've ever seen anyone wearing a wetsuit and a lifejacket, but I'm no expert in watersports. Again, these narrow life vests leave a nasty gap in the neck area, but I prefer them to their oversized predecessors. The Complete Set First let's look at the SUV. The car has a simple yet smart design; the increased rake of the newer windscreen piece makes it look suitable sporty. There are no doors; whilst the 1x3 bley brick might allow the placement of doors, the windscreen would make them useless, so Bodhi will have to use a Dukes of Hazzard manoeuvre to get in. The 'gap' between dark bley and black plates between the wheel arches is deliberate; it mimics a footplate, though not entirely successfully. I think I'd rather some of these had been used. The rear end will be familiar to anyone who has 2009's 4x4 from the 7635 Horse Trailer set. I quite like the SNOT-mounted cheese wedges, though to my eyes they sit a little to proud of the rear. I'd also much rather separate orange and red lights had been used; however, the 1x2 trans-red plates are attached only via one stud (either end of a 1x4 SNOT brick), so this wouldn't have been possible without a redesign. I think simplicity of build has triumphed over attractiveness of design here. The protruding rear cheeses are all the more noticeable from the side: Absent from this rendition of the 4x4 vehicle is any attempt at a roof rack, which is a shame. I like the newer-style wide wheel arches, which can accommodate larger wheels; I do wonder however if these wheels are a little too large. The roof comes off easily in sections (and perhaps this explains why there isn't a roof rack), allowing Bodhi and Johnny to sit inside in relative comfort. Bodhi: 'Don't get my seat all wet!' Trailer and Watercraft The two jetskis sit side-by-side on the trailer. They have to touch: they can be mounted a little further back than this, but there is no ambiguity as to their lateral placement. In front is an Octan fuel cylinder (the lever is apparently a pump), and a green slope/tap thingy which according to the Shop@Home blurb is a 'gas can'. I wasn't sure what it was for; it can be used to store the lifejackets with a bit of fiddling. Without the jetskis, the trailer is rather plain, but the pattern of tiles and grilles is smart. There is no rear ramp; I guess the watercraft can be lifted onto the trailer. Now it's time to look again at the newish wheels. They are perhaps a little too snazzy for a simple trailer, but they are the same diameter as the 'standard' CITY wheels, allowing a multitude of uses ... ... a single example of which is here: I've replaced the standard wheels of the car from the 4432 Car & Caravan set with these new wheels. They look rather nice: sporty, with low-profile tyres, and they aren't as wide thus eliminating the 'protruding tyre' problem of many CITY vehicles. I like them! The jetskis themselves are identical aside from the colour and stickers; the design is simple but pleasingly realistic. The SNOT plate at the rear mimics the jet nozzles; the handlebars are attached via a robot arm on a 1x2 plate with vertical pole, allowing a degree of rotation. Johnny and Bodhi can grip the handlebars with ease, allowing them to pose as they wish (a random trans-clear cheese is helping here): Comparison to Similar Sets This is the third six-wide four-wheel drive vehicle LEGO has produced in recent years. Here's the latest with 2009's 4WD from the 7635 Horse Trailer set and 2012's 4435 Dirt Bike Transporter: I still love 7635's Range Rover look; 4435's vehicle looks more like a Land Rover Discovery, but its front end, free of the usual bonnet piece, is fresh and interesting. Compared to them, 60058's SUV looks more like the typical oversized shopping trolley we have to suffer today; it kinda reminds me of a Toyota RAV4. The "Toyota"'s rear window configuration is similar to that of the "Range Rover"'s; though it's tail lights can't compete. Bonus points for the rear registration plate, though, seen here devoid of sticker for fair comparison. The "Discovery"'s rear end has the added advantage of an opening tailgate, at the expense of inadequate tail lights. The lack of roof rack is apparent here, and for me those wheels are simply too large - we're straying into Monster Wheels territory here; they may appeal to the kids, but I'd prefer something that would be happy on a CITY street. I think the medium wheels on the "Discovery" represent a decent compromise. It's interesting that both 60058 and 4425 employ orange and lime green vehicles. Of the two trailers, the latest set's is simpler, but arguably neater; the new wheels look a little on the large side, but I think that's preferable to 4435's 1990s Town wheels which provide rather pitiable ground clearance. However, 4435 wins over in the accessories: two removable toolboxes (replete with tools) are included, along with two flagposts for marking a course, motorcycle helmets with clearly intentional storage mounting points, and mustard dispensers fire extinguishers. 60058's trailer has only the two jetskis and means of refuelling. Seen side-by-side, the two sets complement each other well, and that perhaps explains the choice of orange and lime for the watercraft. 60058's SUV has neater lines, but I miss the interesting front end of 4435, and the opening rear. Mostly, there are far fewer play functions on this latest set when compared to its immediate predecessor, which was a super set in every respect - and consequently very hard to beat. Conclusion This is a fun set. The SUV is attractive, and roomy, seating the two figures with ease; the trailer is detachable and with the two realistic jetskis provides lots of play options. It has its drawbacks - apart from the watercraft, the colour scheme is decidedly drab; and the oversized wheels of the SUV unfortunately give it a <insert that tiresome argument> look. Owners of 4435 are likely to be somewhat disappointed - many of that set's myriad play functions are absent - but 4435 was an awesome set. They do make a good matching pair, so don't let the pared-down functions put you off if you're considering buying 60058; it also makes an excellent companion to this year's 60057 Camper if you're into watersports! Design & Build 7 The build feels simpler than many recent similar sets; if this was intentional to increase appeal to the target audience, I'd say it's a success. Nevertheless, the resulting model is smart and realistic; spoilt for me mainly by the silly wheels, but some brighter colours wouldn't go amiss. Parts 6 There's not a huge number of parts that you can't get elsewhere, but there are a handful of useful SNOT brackets, and I like the newer low-profile tyres. Figures 7 I love Johnny's wetsuit! Shame it's available more cheaply elsewhere, but it isn't a common part. Bodhi's body is also not common, but far less appealing to me. Playability 8 It might not be a patch on 4435, but there is still copious play potential with this set, and it'll fit in reasonably well to your CITY. A few pedestrians might get squished by those wheels, but it'll give the Emergency Services something to do. Value 8 Part for penny this is a good value set, and the play options only increase the score. Overall 72% My Score 7/10 This is a solid set: fun for kids; for adults, it's ok, but if you're expecting another 4435 you may be a trifle disappointed. Thanks for reading! I hope you enjoyed the review. Please let us know what you think! Rufus Resources My 60057 Camper review My flickr Set If you like my reviews, and would like to learn how it's done, please consider joining the Reviewers Academy:
-
Well hello there! Welcome to what is most likely the best review you will ever... well, no. I lied. This is my first review, as well as my first post. So hi! I've been looking forward to some Batman sets tied to the Nolanverse and couldn't resist picking this up. I also thought I'd try my hand at a review. So, here goes. Set Name: The Bat vs. Bane: Tumbler Chase Set #: 76001 Theme: DC Superheroes Pieces: 368 Minifigures: 3 Year of Release: 2013 Price at Release: US $39.99 - AU $69.99 - UK - £39.99 Packaging/Box: Nothing too special here, although the TDKR logo in the bottom corner was somewhat interesting. The art behind the vehicles is actually better than I was expecting, and is somewhat reminiscent of Gotham in the film. I'm not sure why Commissioner Gordon is firing at the Tumbler. Reverse: Contents I was a bit surprised to see multiple booklets in this set, given the size. Aside from that, you get three bags, the standard comic book (which I believe is the same one included with the Arkham Asylum set and others), and a code to download the PC version of the original Lego Batman. While I own a gaming PC, I can't imagine that most of the kids buying or receiving this set do. However, upon further reflection that was really the only viable option, as I don't believe Lego Batman is on the marketplace of either the PS3 or Xbox 360. Cool that they threw it in there regardless! (Adding to my already enormous backlog of unfinished games). Also seemed a bit odd that all the minifigures weren't included in the first bag, but instead each bag contained the parts for one. Bag 1 had Bane, Bag 2 had Batman, etc. My only thought was that they wanted you to build the figure with the respective vehicle, thus Bane in the first bag with the Tumbler. Finally, the stickers. No. Just no. I'm not going to rehash the usual sticker hatred, I don't think anyone prefers them to printed pieces. But why did the designers feel the need to add what are essentially Bane logos/mascots to the tumbler in this set? Why would there be an image of Bane's mask on the front and hatch of the tumbler. It makes absolutely no sense, and it detracts horribly from what is already a sketchy recreation of the vehicle in the film. The same can be said about the bat logo on The Bat (you wouldn't have known the vehicle called "The Bat" belonged to Batman if you didn't see that logo?), but at least it's not quite as glaring. Extremely disappointing either way. Parts Due to a complete lack of competence on my part, I only remembered to take a picture of the contents of bag one splayed out on the table. Pictures aside, rest assured bag two and three do indeed contain Batman, Gordon and The Bat. As you can see, quite a few tan pieces. The sadly not pictured bags two and three contain blue and black pieces, which of course is quite unusual. No, really. They do! Minifigures As far as I'm concerned, this is easily the best part of the set. I'm a huge fan of the film trilogy, and the opportunity to get my hands on a Bane minifgure was something I couldn't miss. Thus, let's start with Bane: Reverse: My own excitement from the fact that this even exists aside, the detailing is pretty good. Bane's mask has a nice silver paint, and the plates on his armor also have a darker metallic paint which looks pretty great. While I would have preferred a molded headpiece over the printed mask, it still looks great even with the weird split between the print on the sides of his head. Aside from that, the legs are a bit barren but the lack of leg printing makes sense in this case. Batman: The suit printing is great, although perhaps more inspired by the design of the suit in The Dark Knight. The lack of some basic leg printing is disappointing, I think even just some kneecap bits would have been incredible. Not clear on the grey color either, but it still looks fantastic. Reverse: Back printing is excellent as well, especially the metallic ribbing. Without cowl: Commissioner Gordon Not much to comment on here. The swat uniform is pretty much what I expected, and it looks exactly like a minifig version of Gary Oldman. I'm satisfied. Could it have been better? Sure. But all in all, it's fine. Build I didn't document the entire build, but I compiled a fair chunk of it. Nothing crazy to comment on, just a fairly standard build with some of the new-ish SNOT pieces seen in, for example, the Arkham Asylum set. I'll let the pictures take it from here: Tumbler: The Bat: Completed Set I'm going to be a bit critical here, so be prepared. Well, maybe a bit of an overstatement, it's not going to be that bad. Let's start with the tumbler! Doesn't look too bad! However, there are a few flaws. For example, the design. (I said I was going to be critical. I meant it) While it retains the distinctive look of the tumbler, it is easily one of the worst designs I've seen of the tumbler. The oversized tumbler from the Batman Begins set a few years ago was better, most of the MOC's I see are much better, and to be completely honest it's just disappointing. It's also way too small. There's the usual flick fire bit, hidden by some flaps (which I definitely appreciate, I'm not a fan of the aesthetic qualities of the flickfire setup). From the front: Definitely a tumbler. It's worth noting that when a minifigure is in the cockpit, their head is up near the hatch, not by the window. Hmm. The flame is kind of cool, and somewhat accurate to the films. However, the lack of double tires is completely unacceptable. That is a defining feature of the real vehicle's design, and the lack of it here is just bad. If I had to choose only one thing to fix about this set, it would doubtless be this glaring flaw. I could go on for days about how disappointing this is, so I'll just move on. One more picture, from the side: I lied again, I still have one more with Bane: The Bat: Not sure why I had the wings folded flat in the last two, but now you know it's possible! Which is totally why I did that. Yes... completely planned. Oddly enough, I actually like this model better than the Tumbler. Does the cockpit design remind me of something I built a decade ago? Absolutely. It's not very good. It's also worth noting that literally almost ever MOC I've seen of the bat is better than this one. But once fully assembled and articulated properly, it's a pretty cool looking vehicle that does look essentially like the one in the film. My only real complaint is the blue highlights. I hate them. They have no purpose, and they really detract from the set. Also, Nightwing. Ratings: Minifigures: 8/10 - Bane is great, Batman is pretty great but could be better, and Gordon is kind of just... there. He exists, and I can't find anything objectively bad about him, but... I feel that it could have been better. Parts: 7/10 - Nothing special. I don't have a lot of tan pieces, and there was one or two new SNOT pieces, but just an average selection. Design: 5/10 - It's pretty bad. The tumbler is missing significant, defining features and is not movie accurate at all. The Bane mask logo stickers are almost unforgivable. The Bat is merely ok, but the cockpit is dated, and the blue trim is unnecessary and overall detracting. Price: 6/10 - Not bad. I paid $39 USD, and I feel like I got my money's worth, which I've only thought before about the UCS R2-D2. However, the price in several other regions, specifically the U.K, is absurd. Playability: 8/10 - Playability seems to be the only thing this set was designed in mind of, with the tumbler and The Bat being very sturdy, and of course the atrocious stickers. Yes, I mention the stickers here because the only reason I can imagine someone justifying their existence is to make sure it looks cool enough for the demographic it's targeted at. Overall: 6/10 - I want to like this set. Honestly. And for the most part, I do! It has some cool elements, and the minifigures are amazing, especially if your a fan of the films. For me, even with all the problems this set has, it was worth the purchase because of the property it was based on. However, that isn't enough. I hadn't purchased any sets from any themes aside from Star Wars until this point, and as far as design goes I have to say this is the worst Lego set I own. Even the 7144 Slave 1 I own from over a decade ago was a better depiction of the source material than the vehicles in this set. Unless you love the films, I can't recommend this set, and even as someone who does love the films I was quite disappointed with almost every aspect of it. I'm crossing my fingers that future sets in TDKR sub-theme will be much, much better designed. Thanks for reading, or glancing at the pictures as I often do myself. As I mentioned, this is my first review so any tips would be appreciated and put to use in the future. Hope you enjoyed! Edit (1/07/2013): I updated the original pricing score to reflect the pricing in other regions.
-
It's that time of the year again! A new series of the friends animals has arrived and I have acquired them all to bring you another review (and to complete my collection, of course). If you haven't read my reviews of the last 2 series, click on the links and start reading (but don't forget to come back here when you're done!) Series 1 review Series 2 review Let's get started and see if this series still holds up. The bags The design of the bags hasn't changed a bit from the last series. On the front is still a picture of the set that's included, with a cutesy picture of the animal in the top right corner and the Friends girls holding the animals of this series in the bottom left. On the back the new animals are also represented and it makes clear it's series 3 in a number of different languages. Inside the bags we find a smaller transparent bag with the parts in it, and a small booklet which contains the instructions for the main set, and a link to the website where you're supposed to find the instructions for the alternative set and the combined set you can make when you've got all 3 sets of the wave. I say supposed because, no matter how hard I looked, on the site I could only find the instructions for the normal and combined sets, the instructions for the alternative build where nowhere to be found. (no worries, I still got them build, I just had to use the small sample image in the manual as a reference, which provided a welcome challenge). The inside of the booklet is basically the same as it was for the previous sets. clear instructions, with no part callouts (not that you would need them for these sets). 41023 - Fawn's Forest Set Nr: 41023 Theme: Friends Year released: 2013 Nr of parts: 35 Price: £2.99 / US$4.99 / €4.99 The part collection for this set is quite nice. You get the expected collection of brown, green and pink pieces, but for me the best parts are the magenta cherries and the printed mushroom head. Oh deer... This animal takes some getting used to. When I first saw pictures of it I hated it. When I first got it out of the bag I disliked it. After looking at it for a while longer I.... Kind of started to like it. By the time you're reading this it will probably be impossible to get me to part with it. I am still convinced the snout is too short, but dammit, I can't stop myself from liking it all the same. All I can say is, reserve your judgement of this piece until you've got to hold it in your own hands. It really does look better in real life then on any of the pictures. It's got a hole in it's back for attaching accessories. When you've completed the model, it should look like this. It's a nice little tree, with colorful blossoms on the leaves, a small hole (probably made by a woodpecker), and a classic mushroom. On the ground is another leaf with a feeding bowl placed on top for the fawn to eat cherries out of. I like it, it's a nice little spring scene (which we get in the autumn, but who cares, right?). The alternative model is also quite nice, for a change. It created some nice undergrowth for the fawn to frolic around in. I just don't know how I feel about feeding it decorative bows... 41024 - Parrot's Perch Set Nr: 41024 Theme: Friends Year released: 2013 Nr of parts: 32 Price: £2.99 / US$4.99 / €4.99 Some nice white fences, a couple of bright light blue round bricks and a dark pink basket make up for the most recognizable parts in this collection, but for me the biggest surprise was the Technic pins (I know you can see them on the front of the bag, I just didn't really look at the picture all that well before opening the bag). And then we come onto my biggest disappointment for this series, the "parrot". It's just a normal friends bird, painted green. It doesn't even look like a parrot. In my oppinion they should've either used on of the existing parrot molds (which may not be cute and detailed enough for this series), or made a new mold. Or, as a third option, just call it anything but a bloody parrot! Anyway, it's got a small hole on the top of the head to attach an accessory. And the molding is of good quality and detail. With the build done you get a small perch for the "parrot" to sit on and feed, and a bird house which has some characteristics of a roman temple. I quite like both of them, the perch for it's simplicity, and the birdhouse for it's great architectural design. The alternative model I am less excited about. It just looks like some blocks jumbled together by a 5 year old. 41025 - Puppy's Playhouse Set Nr: 41025 Theme: Friends Year released: 2013 Nr of parts: 39 Price: £2.99 / US$4.99 / €4.99 This set has some nice medium lavender slopes and medium dark flesh masonry bricks, among a collection of white and tan parts. And we get another dog, are they running out of animal types to use? I wonder. Well, at least it's not another poodle. The dog actually looks kinda cute, with it's little cocked head (including hole for accessories). Everything considered it's a pretty nice mold. The dog gets a nice looking doghouse to sleep in, complete with a bowl containing a bone, which is the only sustenance LEGO dogs apparently need. Additionally there's a see-saw for the dog to play on (or a catapult to launch him with, depending on your mood). For the alternative build the dog get's a shittier doghouse, which offers much less protection, and the feeding bowl gets better protection from the rain. Wouldn't want that bone to get soggy! The combined build The combined build makes yet another protective alcove for the bone (still don't want it to get wet), a place for the deer to stand, with what I assume is supposed to be a faucet to fill the bowl with water. And a great looking house for the "parrot". The models all look well enough, but unlike the previous series, they don't really form a larger scene, which I found to be the best part about the combined models. Conclusions: (Disclaimer: I don't believe in giving numerical scores. It is up to the reader to decide what they think of any given model, and I believe mandatory scores detract from this notion.) minifigs: Like before, the animals are all made very well, but they may be a bit too cute for some. Though I still can't get over that damn "parrot". Parts: A nice collection of parts, for the small price you pay. build/design: No real complaints here. What you get is pretty nice, especially the main models. Playability: Still the same, some playability, but adding a minidoll of you own makes the possibilities endless. I am still very much in love with these sets, and hope this isn't the last we will see of them.
-
Happy new year, fellow studheads! Here’s to a good and prosperous one and all that… Ah, and here’s to a very good year gone by as well. Yeah, I guess you could say I’ve been around for a while now… I can still remember having new year’s day lunch as a kid at the Breezeway Café – their chef was a real master, and he’d fix me up the juiciest steaks! I’d dream of them for weeks whenever my parents would drag me up to their cabin along the Rocky River. I don’t suppose the mountains have changed much, and luckily I don’t go hiking too often anymore – I’ve had more than my fair share of baked bean cans. Now, the town – that’s a different story: when I think back, it seems everyone used to have their front door – and back wall – open for you… I guess it’s just that everything looks much simpler when you’re a kid and you walk around with a smile on your face all day long. Aside from all of that nostalgia though, let’s be honest, we’ve had it pretty good in recent years as well. True, some of our fellow townsmen may have developed a more lax attitude towards their facial hair upkeep, and traffic has definitely become a bit of a bother considering the amount of heavy trucks and equipment roaming the streets… but it’s a good thing the industry’s booming, now that our town is starting to turn into a proper city. More business brings more residents – and these days there’s plenty more girls in the streets as well! Speaking of which, let me tell you, up until a few years ago, there really wasn’t all that much you could do if you wanted to impress your date – in my teenage years, I even took a girl on a sightseeing tour of the local gold mine. Suffice it to say, she was far from impressed. But that’s also been changing in recent years! The first major new introduction to our fine city was that huge corner hotel with the fancy new Italian café on the first floor. Nice buildings like that have been popping up here and there, and even the local fire department which seemed pretty content with changing headquarters every other year has now moved into a renovated old building that has become the pride and joy of our downtown district. But let’s get back to taking girls out on dates. Less than a year ago, the city’s new cinema opened its doors to visitors and I was lucky enough to score two tickets to the grand opening of “Forever Sorting”. I was keen to impress a girl I’d just met – and that definitely helped; the date went really well, even though we had to miss out on the first part of the “dinner and a show” standard – she said she wasn’t a big fan of pizza or fast food… which was just as well, since I hadn’t picked up my paycheck anyway. We have been going out for quite a while – and now that our city has its very own Parisian Restaurant, I can finally take her out for a proper meal as well. Mind you, I live just across the street from the Restaurant, so I was literally there when they were laying the foundations. I remember that actually building it didn’t take too long; the construction team just seemed so agitated to get it done. Weirdly enough, the first sign of things to come was the pavement they arranged outside the place. That and the fancy red carpets– I still can’t quite fathom how they managed to keep them in such pristine condition… While they were still building the place, Bob – a childhood friend of mine working in the construction industry – sneaked me into the kitchen. He said that it was built to the exact specifications provided by Albert, the owner and chef of the new place. The interior space didn’t seem too big, but had room for everything – I guess Albert knew exactly where he was going to cook his starters, main dishes and deserts; and I could already imagine the magic happening in there. On the ground level, I could see that the central piece would be a stylish rustic wooden bar – and straight away, I knew just where my favourite table was. While I was watching them build the Restaurant, I was busy daydreaming about what would happen at that table – but that’s a whole different story. The contractors did a rather good job of cleaning up the place – the backyard looked pretty neat, and I could only hope that Albert would keep it that way once he opened his restaurant. In all honesty, there has been talk of rodents now keeping a regular watch on the restaurant’s trash bins, but personally, I’d dismiss it as rumors spread by the jealous owner of the pizza parlor a few blocks down the road. The restaurant’s façade started shaping up as soon as the builders were done with the first floor. They erected these gorgeous marble columns along the front, which really complemented the building’s broad windows. Albert had also managed to find space for a couple of tables for two at the front, and the fancy red carpet met its match in the red canopy above – which, aside from looking just as chic, served to shield the restaurant’s carefully devised menu from the elements – and stated to the neighborhood that the new place would bear its proud chef / owner’s name. Rumour has it that our new French neighbour has ordered the draperies that go behind the grand windows on the first floor from all the way across the pond. If that’s the case, I’m guessing he splashed out quite a bit – although Bob tells me that those things are not so original and he’s seen a pretty similar design and execution in one of those other fancy buildings around town… As you can tell, having friends in all the right places certainly pays off – Bob kept providing me with access to the place as construction works developed. In what seemed like no time, his crew was done with the first floor and started work on the second storey. Leading up to the entrance of the second floor is an open staircase that looks impossible to tackle with a serving platter in one hand and a bunch of glasses in the other – and if it were me, not even the sturdy-looking railing would be enough to keep from toppling over. But I guess Albert’s waiter is not as clumsy – the guy certainly doesn’t seem to mind serving the two outside tables on that floor. The second storey itself is designed to serve as living quarters – Bob told me it was purchased before construction began by a scooter-loving girl who goes by the name of Stella. Her curious red toy has definitely livened up the neighbourhood, and is something we don’t see much of around these parts… From what I’ve been told, Stella doesn’t like having things too cluttered up around her so she keeps her place pretty neat and tidy. The nice Murphy bed she’s had installed definitely helps for that – and the fireplace corner with a reading niche adds tons of atmosphere to her living arrangement. And before you ask, no, I don’t do breaking and entering, and I’m not one of those guys that enjoy peaking in other people’s windows either – although, come to think of it, the windows on the second storey do seem to allow quite a bit of sunlight in. The reason why I’m aware of all those details about Stella’s abode is that, in a weird twist of events, Bob got together with Stella while working on that very same building. He’s now even looking to buy his own scooter… but that’s also a whole different story. Let’s move on to the third floor of the building. Seen from where I live, that is definitely an architectural masterstroke. Its flowing curvy forms in dark blue are broken up by an elaborate attic window and a couple of symmetrical ornaments that complement the marble columns leading up the façade. I could, however, almost swear I’ve seen the filigree ornamentation adorning the lower part of that floor used as headdress by some indigenous local tribe… The third floor is accessible via a rear outside staircase going up from the restaurant’s upper terrace. The top of the building is where Albert can usually be found outside his regular business hours – it’s the place where he has chosen to express his second passion other than the culinary art – painting. I paid him a visit a couple of weeks ago and I must tell you, the view he gets from that top floor is stunning. But then again, it would be – I live across the street, after all! The atelier is not too functional though – Albert’s easel and painting board easily take up half the space there. The moody artistic atmosphere also goes together quite well with the rustic fireplace, but it does feel as though it can get a bit too gloomy at times. So Albert has had some fancy electrical work done in there that allows him to get a ton of natural sunlight… at the expense of a whole lot of privacy. But I guess an artist knows best what it is that he needs for inspiration. As long as we keep getting Albert’s priceless (albeit a tad pricey) Foie gras, he may well do as he pleases with his roof! Well, I guess this pretty much concludes our tour of the city’s latest pride and joy. In all honesty, I must say I’ve seen buildings around these parts come and go; some of their designs get revisited, others end up repurposed or redeveloped instead. I’m pretty sure that Albert’s Parisian Restaurant is one for the ages. Not just as a great place to have a fine meal, but also as one of the architectural masterstrokes in town. Seeing Chez Albert go up was a joy – but not half as much as having it across my front door and watching it every morning when I go to work. Certainly, this will always remain a dear place to me. Oh, and speaking of that – in case you’re curious as to those daydreams I mentioned a bit earlier on – I guess you could call that my new year’s resolution… Yeah, I’m a lucky guy, feel free to envy me! The only thing that’s actually troubling me though is that I still need to consult Albert as to what I could actually fit that massive ring inside though… Shoot, wait – I almost forgot the best part of it all! Lucky for you, I’ve also got the whole thing being constructed – on tape. It was my way of returning the favour to Bob (he insisted on having all the details available for future reference), and now I think it's something everyone can enjoy. Voila: With your permission, I’ll use the end of this (re)view to break character just for a bit. First of all – may the new year bring you all good health and success! And at least one copy of the 10243 Parisian Restaurant each. Because "Chez Albert" is right up there alongside the Café Corner as one of the sets that you just have to have - unlike its predecessor though, it can not rely on novelty alone. Which is probably why this set's building techniques are actually what sets it apart - with elaborate yet sturdy and utterly enjoyable approaches, and a beautifully thought out interior design. As you could probably tell, absolutely no corners were cut in the making of the Parisian Restaurant and Jamie Berard has, yet again, gifted us with a brick-built masterpiece. Furthermore, allow me to take this opportunity to express my most sincere gratitude towards TLG and LEGO’s Community Operations Manager for EU and Asia, Jan Beyer, who provided our LUG with the wonderful opportunity to review this set for you guys. In case you can read Cyrillic, feel free to head over to our forum and read the Bulgarian version of this review. Then come back and tell me if you've spotted all the differences! And last but not least – kudos to my partners in crime for this review, who include my significant Otter, fellow LUG member Akeyzerr, as well as his significant …erm, well, Akeyzeuse? I’m just not too good with French... Anyway – the photos and the awesome stop-motion video for this review are all Akeyzerr’s work (yes, he is a very patient and meticulous guy!), make sure you check out the Flickr set to see them in hi-res, as well as the .
-
Hey guys, I thought I would try my hand at a review! I haven't seen one for the Mirkwood Elf Army set pop up on Eurobricks yet so I figured I would cover that one. This is my first review so bear with me! Name: Mirkwood Elf Army Set Number: 79012 Pieces: 276 Price: $29.99, £29.99, €39.99 Ages: 8-14 Minifigures: 6 +Warg Theme: The Hobbit Year of Release: December 1st, 2013 Price Per Piece: $0.11 Official Description: The Orcs are trespassing on the lands of the great Elven king, Thranduil, and a thrilling battle is inevitable. Climb the rotating tree at the edge of Mirkwood Forest and keep watch. When the Gundabad Orc warriors draw near on foot or riding the ferocious brown Warg, defend the Elven stronghold with the Mirkwood™ Elf army. Watch out for Orcs using the ladder to scale the wall. Flick missiles from the wall, then grab a weapon from the rack and attack! Split the tree in two for ambush mode to send Elven warriors flying over the wall and shock the Orc invaders! Includes 6 minifigures with assorted weapons and accessories: Thranduil, Mirkwood Elf, 2 Mirkwood Elf Archers and 2 Gundabad Orcs. So there we have it, a thrilling battle from the movie! Because Thranduil was seen so many times fending off orcs and brown wargs at an elven wall Despite movie inaccuracies, this is still a great set and I am liking what we get here... Box The front of the box shows Thranduil kicking a ladder over which an orc was trying to use to scale the wall. We see a missile being fired in the middle of the box, 2 elf archers manning the wall, and a third Mirkwood Elf scout charging out on foot (probably to engage the brown Warg coming around the side). Very instense stuff! The box art, like the rest of the Desolation of Smaug Hobbit sets, is absolutely beautiful. We have the mountain with blue at the tops and behind the set what appears to be the edge of a forest where this wall would be set up. Defend those borders elves! On the back of the box we see several pictures of the Mirkwood Elves and Thranduil fending off the Gundabad Orc horde with their Warg. The back also pictures all the weapons included in the set as well as outlining the 2 main play features, an elf catapult and... surprise, surprise, a flick fire missile! We never see those! The top pictures all the beauitful minifigures in this set. From left to right we have two Gundabad Orcs, two Mirkwood Elf Archers, a Mirkwood Elf, and Thranduil. Contents Here is the manual. Nothing new here, the same scene we see on the front of the box. There is only one manual for this set seeing as it is smaller. Of course it was crumpled up pretty bad in the box since there is no cardboard to keep it flat. A Peek inside the manual. The second page of it shows the Lego boy dumping out the numbered bags and building everything in order. The next page shows what each bag builds. Pretty standard stuff. The fourth page has the assembly of the first few minifigures (Thranduil, the Gundabad Orc with shoulder pads, and the Mirkwood Elf with hair), as well as the brown Warg. Page 36 starts the construction of pieces from bag two and has the rest of the minifigures being built (Gunadabad Orc and two Mirkwood Elves with green hoods). The manual's pages have a nice blue tint to them with a slightly weathered look. The back features all the pieces in the set, two pages with all the minifigures from this wave, and a couple advertisements. The advertisement are for next years Hobbit wave, the Lego Hobbit video game, and all the other wave two Hobbit sets. Everything else we get still in it's packaging! Aka the GOOD STUFF. Sorry, I couldn't resist opening the brown Warg IMMEDIATELY. He comes in his own packaging All the pieces dumped out and ready to be built with. As you can see there are plenty of brown and tan pieces in this set. Kind of a nice break from all gray in the other LotR and Hobbit sets. There arn't a ton of unique pieces from what I can tell. You do get three light gray smaller archers seen in the Council of Elrond set, as well as three small olive green leaves. Here are all the weapons we get. We get a light gray longsword and broad scimitar with nicks, two PoP daggers, three longbows, a dark gray spear, and two elven oval shields with new print. This is a fairly nice assortment of weapons other than the spear. Some translucent green gems we get in this set which are hidden in a barrel. I can only assume this was taken from the Hobbit book because there it is stated the elves love emeralds, howevere in the film I could of swore Thranduil states he longs for clear gems? Minifigures Ahh, finally the good stuff, amirite?! Here we have a picture of all six minifigures assembled. The two Gundabad orcs are on the far left, Thranduil is in the middle, and the three Mirkwood Elves are on the right. We get two identicle Mirkwood Elf Archers with green hoods and one labeled just a Mirkwood Elf with elven ears and medium brown hair (the same color as the Mirkwood Elf Guard in the Barrel Escape set, not the darker brown found on Elrond and the Mirkwood Elf Chief). The Gundabad Orcs come in dark brown outfits adorned with bones and a loin cloth, while their skin is an orangish color. They have white war paint on their face and a very fiece look, as all orcs do dontcha know. Thranduil has an olive green torso and gray legs, both of which have a silvery metallic chain mail look to them. The Mirkwood elves have nice dark brown and green uniforms with stiching and leaves. The printing on these figures is amazing! Here we see the back of the Gundabad Orc. He has some dark brown blotches on his head with a few gray hair strands. No double sided face printing here unfortunately, since there would be nothing to cover it! It would of been nice had Lego thrown in at least one of the lovely hair/ear pieces found on the orcs in the Dol Guldur Ambush set. All well. His back has printing which features more skeletan pieces, including a spine and some bone spikes around his neck. There is no printing on the back of his legs. This is an identicle pair of Gundabad Orcs to those we get in the Dol Guldur Battle set. This is the back of one of the Mirkwood Elf Archers. All three have the same double sided face, also found on the Mirkwood Elf Guard form the Barrel Escape set and the polybag from last year. One facial expression is a somber look while the other is a fierce combat one. We get more beautiful printing on the back of the torso, but unfortunately the legs are blank. Thranduil with his red cape on. How regal! His hair hoesn't fit very well over the "hump" on the back of the cape, just like the other long elven hair molds. Other than that small issue he looks very movie accurate. Lego did a wonderful job on him. The back of Thranduil with his hair on. His hair coveres up most of the back printing. The crown is a solid orange all the way around despite us being able to see his hair strands underneath in a few places. It is made of the soft, rubbery plastic and well done overall. While Thranduil is never seen fighting or outside his keep in the film, it's nice to get him in a set this wave. I just wish it would of been in a different set instead of an army builder. Unlike Eomer in the Uruk-hai Army set, Thranduil does not blend very easily with an army because he looks very unique The back of Thandruil without his hair. As you can see he has more of the silvery metallic look found on the front of the figure and a few creases and seams on his shirt. He also has no back printing on his legs. He has a double sided face, one of which is a calm look and the other this fierce look. I love the bushy eyebrows on him, very accurate! A comparrison of the Mirkwood Elf Archer found in this set to last years Mirkwood Elf Guard polybag. This years version is a big improvement! The costume matches the dark green hood MUCH better than last years olive green shirt. Unfortunately this dark green cape does NOT come with the set. It's a real shame because I feel like it really completes the look of the Mirkwood Elf Scout. Of course it would be a pain with the quivers... but it's a sacrifice I would of made! Last but not least the brown Warg! This is one of the highlights of the set imo. He has black eyes with white pupils, unlike the last two wargs in the Attack of the Wargs set who had solid white eyes. Around his eyes is a lighter brown, almost mustard color. The dark brown matches the 2x2 brick a little better than this picture lets on, but it's not perfect. It's definetly nice to get another colored Warg, and one in an army builder to boot! Build The start of the tree base. More of the tree base built. The inside of the tree base where there is a barrel full of emeralds, and a back view of the tree. The rotating mechanism for the platform has been placed as you can see. A simple branch that goes on the top of the rotating platform. The elfapult (cataelf?) is ready to fire, sir! The tree section of the set completed. The front of the catapult pushes down to launch the standing minifigure in the back. The tree branch sitting on the catapult flips off when the catapult moves up using this piece which is connected to a 2x2 brick with a hole and pin in it. This whole platform can be rotated for a full 360 degrees of elf launching! Before we can start on the wall section of this build we first have to create this highly useless weapon rack. I am not really sure why it was included when the weapon holders could of easily been added to the inside of the wall. I would of rather seen the pieces for this used to raise the height of the wall a brick or so. You can connect this part to either side of the completed wall when you are done. The beginning of the wall. The right section of the wall. The middle AND right section of the wall connected. All sections of the wall connected as viewed from the inside. An outter view of the wall with all sections connected. The wall all completed! A close up of the wall flick fire missile. Those elves and their ingenuity, the orcs will NEVER expect a missile fired from the middle of a wall! The last build is the ladder used by the orcs to scale the wall, even though they could probably just climb over without it The wall and tree, both fully completed and connected! And inside perspective. There are a few stands for the archers and the cove for the gems. Not much room other than that! The set with it's walls straightened out and the ladder attached. A side view of the completed model, with all sections of the wall bent as much as they will bend. Three complete Mirkwood Elf Army sets attached to one another. This is the minimum amount you need to form a "complete" wall where all sides attach to one another and there are no openings. A top down view of three sets connected to give you an idea of the shape (which can be slightly changed). I kind of like this confirguration for a smaller outpost. Four Mirkwood Elf Army sets connected. In this formation you get a square shape, unlike the triangle with three. Now things are starting to feel more like a full blown fort! An overhead view of four set connected to give you an idea of the shape. Sorry the picture is blurry, you get the idea though! Extra Pieces There's not a lot of extras here, just a few headlights, 1v1 squares, an olive slope, and a few pins. Conclusion Overall this is a decent enough set. The walls are very short and this particular design was never seen in the film. It was probably based on early prelim images of the gate seen during the Barrels out of Bond scene in the film. As a stand alone army builder (it does not connect to a larger set like the Uruk-hai Army does, just connects to other Mirkwood Elf Army sets) I feel like Thranduil should have been left out and included in another set to give it more multiple purchase appeal. I also feel three elves all in their scout gear was one to many, I would of loved to of seen at least one elf in armor. I also feel like the Gundabad Orcs could of use the hair and ear head piece. Despite these small issues I feel this set is overall very good. The real stars of it are the minfigures and Warg who all have great prints and look spectactular! Playability: 8/10 There are a decent number of play features in this set considering it's on the cheaper side of things. You get a weirdly placed flick fire missile and the elven catapult launcher. I think people will have tons of fun with the simple good and evil conflict between the orcs, warg, and elves though. Design: 7/10 This set is never seen in the movie and the walls are FAR to short. Other than that the design seems alright. The tree doesn't look terrible and the walls adorned with the unique elven shields are fairly pleasing. Price: 8/10 The price per piece is pretty decent for this set considering it as a number of large pieces like the swivel plate in the tree and the Warg. Other than Thranduil's hair there are no new molds however. The lack of orc hair and ears is a real bummer. Minifigures: 9/10 Like with most of the LotR/Hobbit sets, the minifigures are the stars of this set. You get a good number of them since it is an army builder, and all except the orcs have unique prints. I feel like Lego really should of included an armored elf here, if they had done that this would be an easy 10. Thranduil is a nice addition, but I feel he would of been better placed in another set not meant as an army builder. The Warg is a nice color and a wonderful addition. Parts: 7/10 Nothing amazing here. The gray arches and small olive leaves are nice. It's also a nice change of pace to get some brown and tan pieces rather than more gray found in most of the other Hobbit and LotR sets. Total: 38/50 Thanks for reading guys! Let me know how I can improve future reviews! I hope you all enjoyed
-
This set is about to disappear from the shelves. It is already Sold Out on Shop@Home in all the countries I checked, and it is fast disappearing from the shelves in most shops. I got this on sale for £12.49, which is pretty good value for the parts. This 'quick review' is a little experiment - an attempt to document the set while I still have chance, and to see if there's mileage in doing future reviews in this style. A full-scale review is pretty time-consuming, so this is a potential way to increase the review output. Review: 7291 Street Rebel Theme: CREATOR Availability: 2012 - 2013 Parts: 196 Price: GB £17.99 | US $19.99 | EUR 19.99 - 22.99 Links ... Shop@Home ... Bricklink ... Brickset The Box Click each frame for a larger image The standard CREATOR box is nicely square, and relatively heavy, containing two instruction manuals and a larger than average parts selection. The rear does a good job of showcasing the three builds - all motorbikes; in each case the stand is deployed, and a solitary inset depicts the other play feature of the main build - the rear wheel's suspension. The Instructions The three models are crammed into two booklets: the first with papery covers for the main model, and containing the set inventory and WGW kid; the second with shiny thicker covers for both secondary builds and with instructions right up to the back cover. The familiar blue CREATOR background with yellow surround is found throughout, with part call-outs for all models. Model One - Street Rebel Street Rebel is a handsome sports bike with a working rear 'suspension' formed from two elastic bands, two large headlights mounted on the front forks, and 'working' steering which we'll examine in more detail shortly. The body is mostly brick-built, with a little Technic for strength; Technic forms the majority of the front forks and the rear pivots. I've partly disassembled the side to show the Technic bracing for the body, and also the minor SNOT-work on the side: I like the way the large 45-degree angled liftarm is pinned in two places. Nothing ground-breaking, but it had never occurred to me that these liftarms might be used this way, so I've learned something! The bike looks a little tall with the rear axle at full extension; in reality the weight of the bike would compress the suspension somewhat ... ... and here it is at full compression, mimicked by removing the elastic: It's also a good view of the rather makeshift exhaust, which points disappointingly skywards in this pose - it's one of the weakest points of the set. The top view is very smart : The steering in all three models is based around this part. Here it is at maximum deflection, which isn't very far. This wouldn't be a problem at speed as cornering would be achieved more by leaning the bike (except that the square tyres won't help in this respect!), but manoeuvring at low speed would be rather tricky. The bike looks purposeful from the rear: Again, the exhaust looks a little naff, and the rear mudguard - which the instructions indicate should be angled upwards somewhat, though it isn't clear - is rather too short for my tastes. Overall, though, it's a smart machine with clean and sporty lines, and quite impressive in its simplicity. Those wheels could be useful for larger vehicles - shame there's only two of them! Model Two - Big Chopper 'Zed's dead, baby. Zed's dead.' The elongated handlebars and front forks clearly indicate that this bike is not a bike, it's a chopper. Some clever use of inverted Technic allows the 2x3 dark bley plate to sit studs-downward; it ins't doing anything but being a plate, but I like the touch. Alone of all the models, the chopper's headlight actually faces forward ... ... though you can angle it up if you wish. All three models have a stand; this one and the third are a little different to the primary model. Note the rear mudguard - it's attached studs downward via a clippy-hinge, allowing the use of a slope to give a nice contour, at the expense of ugly visible anti-studs. The chopper has the best steering angle of the three, but even then its play isn't huge. This view allows another look at the SNOT rear mudguard/seat, and also the interesting use of SNOT bows to create a reasonably realistic fuel tank. The long front forks make the chopper's body sit leaning slightly backwards: This isn't the model's best angle: the ugly exposed Technic bricks don't look so hot. Note the construction of black bricks and inverted slopes at the bottom centre: I thought these may be there to prevent excessive downward force breaking the model, but you'd have to use a LOT of force to break it, and the black bricks won't help if you do. Model Three - Retro Bike I was at a slight loss as to what to call this one, but it reminds me quite strongly of 1970s police motorcycles (think Magnum Force). Shop@Home calls it a moped, and you can see why, given the curvy rear end, but then the tyres look a little too beefy. However, the seating configuration would fit with a moped. I like the use of the bows to add curves to the sides, and the angled Technic liftarms to recreate the splashguard (or whatever it might be called!) in front of the footplates. I know nothing about mopeds. It's looking more and more mopedy to me now. Again, the bike leans backward slightly, though not as markedly as the chopper. The rear mudguard is a little basic, but it works; the exhausts, mounted a little too high, less so. Of course, there's a stand, and this one works well. It's design is identical to that of the chopper. This bike has the least effective steering of the three, caused by a slight difference to the design: a 5-long liftarm sits within the prongs of the steering bracket, restricting movement quite severely. The picture is kind to it: the front wheel hardly moves at all. Note that the front headlight always stays in line with the body, which might make driving at night somewhat hairy! Conclusion I'm always impressed by the ability of LEGO designers to cram three models into (most) CREATOR sets, using the same parts to produce a maximum of variety whilst utilising different techniques to keep the builds interesting. At first glance, the three models do look similar (they're all bikes, after all . Except the chopper ) but they are all very different types of bike; thus providing a little education in addition to the building fun - at least for thise who haven't seen Pulp Fiction. This isn't a jaw-dropping set, by any means - but it's fun and instructive. If you can pick one up on sale before it disappears, do so: but if so, with those big tyres that aren't so useful in pairs - if I were you I'd pick up two. Thanks for reading! This quick review is intended to provide a record of this set for posterity without taking an age to write. I don't propose to write every review like this; please do let me know what you think of the concept. Rufus
-

[REVIEW] 8862 - Backhoe Grader
ABslego posted a topic in LEGO Technic, Mindstorms, Model Team and Scale Modeling
Recently I had the opportunity to buy this nice oldie. It is the 1989 Technic flagship set, 25 years old, but still in great condition Many Technic fans will still remember this set from their childhood. I've never had it, it was too expensive :) So for me it's the first time building it. The box front and rear: Compared with the currently used boxes for the big sets, this is rather a small box. Despite it's age, it is still in very good state. The parts: This set comes with a total of 671 parts. Not a huge amount of pieces, but it does have a good variety. A lot of beams, plates, gears, axles and of course pneumatics. Also some special parts: I've never seen that big black brick before. It's really heavy and is used as a counterweight in front of this machine. Another not so common part is the threaded shaft. Builing: What immediately stands out is that instructions are more difficult than today. A lot more pieces are added in each single step. Building is going really fast forward, and it's much easier to forget something. You'll see in the pics below, how fast it goes. I have to say, I like that! The sets of these days I often find too easy. After 4 steps: Step 5: At step 10: Step 13: Step 15: Step 18: Step 20: a lot of pneumatic hoses Step 22: Step 24: Step 26: finished the back boom. Step 27: this is already the last step. The complete front bucket is build in this last step :) Finished: First let's compared it to it's newer brother, the Technic set 8455. As you can see the 8862 is a bit larger. Also the difference between studded and non-studded is clearly visible here, but both has it's charms. Also their functioning varies quite a bit. The newer 8455 is completely pneumatic, while the 8862 has only a pneumatic back bucket. The turning of the back bucket, the complete front bucket system and the outriggers are all operated mechanical. Some parts in this old set have already an improved version. For example the bevel gears. The old ones (left) just are not as good as the new ones are (right). Sometimes they just pop off the shaft, and they do not run as smoothly as the new version does. Conclusion Personally, I like the 8455 a little bit more, but this set is also highly recommended! Pros Lots of functions (8 in total) Great playability High nostalgia factor Big model Scale and looks are good Interesting B model Cons Front scope is a bit weak The bevel gears Which set you love the most? -
All & more photos available in full size on Flickr 75022 Mandalorian Speeder Star Wars set based on The Clone Wars season 5 Released 2nd half of 2013. Parts: 211 Mass: 325g MSRP/RRP: $24.99 USD, £24.99 GBP, €29.99 EUR, $29.99 CAD, $39.99 AUD, $? NZD (currently unavailable) TLG's blurb: Attack with Darth Maul in the Mandalorian™ Speeder! Get to the rendezvous point in the LEGO® Star Wars™ Mandalorian™ Speeder with the treacherous Sith Lord Darth Maul minifigure with mechanical legs. Plot the Mandalorian takeover and take on anyone who gets in your way with hidden flick missiles, rear weapon storage and elevating cannon! Then, face off in minifigure combat with his legendary Darksaber! Includes 3 minifigures with weapons: Clone Wars Darth Maul and 2 Mandalorian Super Commandos. • Includes 3 minifigures with weapons: Darth Maul and 2 Mandalorian™ Super Commandos • Features hidden flick missiles under the hood, rear weapon storage and elevating gun • Weapons include a Lightsaber, Darksaber and 2 blasters • Collect Darth Maul with mechanical Clone Wars legs • Unleash the hidden flick missiles! • Elevate the gun and aim to fire! • Battle with the legendary Darksaber • Relive the excitement of [i]Star Wars™: The Clone Wars[/i] animated TV series • Measures over 3" (8cm) high, 7" (19cm) long and 4" (12cm) wide Instructions for download: (7MB) http://cache.lego.co...ons/6050596.pdf (International version) http://cache.lego.co...ons/6050597.pdf (NA version - ie in English, Spanish & French) Bricklink | Lego Shop@Home | Brickset Reference images: Unfortunately this is the only image I can find that shows the speeder. Here's Darth Chicken: Here are the Death Watch super commandos: Apologies for some of the photos, it was getting dark when I built & photographed the set. The Mandalorians are very difficult to get photos of without reflection off the helmets, I don't think I eventually succeeded, but I certainly did get frustrated. This set is one of 2 released in the second half of 2013 based on the now discontinued animated TV show The Clone Wars. A well known villain returns from being thought dead, and attempts to seize power, using potential allies as stepping stones. He becomes the new leader of Mandalore with super commandos part of his forces, this is where this Lego set fits into the story. Let's have a look at it. As is typical, we start with The Box. It seemed a big box for the size & price of the set. It's bigger box than for the Tank Droid set, even though the price is the same. It is very possible that that gives an illusion of better value for money. As is normal for Star Wars sets, the cardboard is very glossy and smooth. I found boxes from this wave to be more difficult to open than usual, I had a bit more trouble prying the boxes open without tearing the cardboard this time. Maybe they're using a different glue, the knife wasn't as slick as usual. Box shows us what we're in for, a car-based speeder with obligatory flick-fire missiles, a couple of super commandos from Mandalore, and a Sith, this one being the Zabrak Darth Maul, with mechanical legs. Setting is in the capital city on Mandalore, and the very nice 2013 SuperYoda green box art border really makes the packaging attractive. Back shows us the posability of the builds & minifigs and also the flick-fire action. Along the top of the box are the full sized images of the included minifigs, also shown in smaller scale on the front. We are alerted to the fact that these minifigs were not previously available. One side of the box also alerts us to this set being new... I'm not quite sure of many occasions when you would release a set that isn't new though. On the underside we have a lesson in safety, linguistics and economics. Next, we go Inside The Box Contents of the box are an instruction booklet, a sticker sheet, & 3 unnumbered bags. The minifig parts are divided through the bags. Sticker sheet: Only 5 stickers, and no tiny ones that are impossible. My sheet (as is common) was annoyingly curled up. Let's see the instruction booklet. Nothing unusual on the front. The bags are not numbered for this set, you do the "pour all the bags onto the table and sort by colour" approach this time around. The instructions themselves are exactly as you would expect, no real need to look at them here. If you want a look, check out the link provided above for the pdf, but here we can see how to put the minifigs together. Towards the back of the booklet is a nice action artwork of a few of this wave's sets. Parts inventory as per usual. We don't need to see the back, we know what hideous horrors adorn the back of instruction booklets. Now for the parts: Who doesn't like blue cheese? Not much in the unusual category, but here is a close-up of the chicken legs: Minifigs: Shirtless Darth Maul from The Clone Wars, he fetches a hefty price on BL. Well, now he's available in a small standard set. Except with chicken legs. He comes with both his red lightsabre and also the late Pre Vizsla's darksabre. (A trophy I suppose.) The super commando helmet & jetpack are shiny, rather than the flat colours used previously. It isn't mentioned anywhere in the set, nor is it obvious at first glance, but the 2 minifigs have different face printing. The left image shows the head used for the Pre Vizsla minifig, the one on the right the generic Mandalorian minifig. Not sure? Mando mouths point down at the sides. Pre's points slightly upwards, has pointier cheek bones, less defined eyebrows, bigger eyes, inverted chin, and forehead lines. Both are still quite ugly... The untidy armour appearance is very curious seeing as though these guys weren't really around for very long, they must've just thrown a blotch of red paint at their uniforms and not let it dry or something. Interesting about the black hand on the helmets. Another Saruman/Count Dooku Christopher Lee parallel to think about. Except it's Darth Maul, not his successor. Here is an intermediate step in the build, showing how the flick-fire contraption works. The front of the speeder is to the left, we see 1 seat in front, 2 seats behind that, between them are 2 clips for holding blasters. Behind them, in the (not yet covered) boot/trunk is storage for the lightsabre & darksabre. The small construction shown above slides forward on tiles when the outer handle is moved in that direction, thus pushing the missile out. These bits weren't used. A look at all angles of the final built set: (Front is pointing up here) 8 boat studs mean this thing really coasts across the carpet! Zooms even better than a wheeled vehicle. (and here) Room on the back for a minifig to stand and fire the cannon/gun thing Darth Maul / Savage Opress comparison: Mandalorian armour comparison: The bounty hunter in the Jek-14 set has the same helmet piece but the printing is completely different. Model/set evaluation: It's fairly basic looking, but I like it. This is my only car-based speeder, all the others I have are the bike-based type. It's good to have a Lego vehicle where there is a place to seat all of the minifigs. They all sit snugly, Darth Maul fits fine despite his different (and longer) legs. The cannon/gun thing only tilts up and down. An easy turntable mod can make it swivel too. The build is fairly normal, I wouldn't expect your young fellas to have any more challenges than usual if at all. It isn't a boring build, if you might be thinking that. I have the Tank Droid set too, I feel that this set is better value-for-money or at least more satisfying, but who doesn't want a Jango Fett minifig? I might grab another of these to add to my super commando numbers, we'll see. I think the dark blue look great, I don't think you need to know what this set is to like the look of it. Is it a good parts pack? Well it has a lot of plates and such, and not too many parts that are useless for anything else. It's not quite my scene so I am only guessing. Minifig selection: Robotic leg Darth Maul and two Mandalorians. I always really love the colour combination of red, black & grey ... win-win-win as far as this set is concerned! I may have preferred Darth Maul to use dark red rather than red though. Good minifigs to have, we could be happy with a bunch of those super commandos so 2 is good. Unfortunate that with The Clone Wars finished, Bo Katan & Satine minifigs will probably not eventuate. It would've been nice to have 1 of those 2 in this set, but that would need to be not at the expense of any of the 3 we have. If you were to go for multiples of this set, you would only have extra Darth Mauls. That sounds okay, but none of his parts are useful for anything else. Offload onto Bricklink I suppose. Thanks for reading/skimming, I hope this was useful to you. Any other photo requests let me know. Any questions/comments feel free to share, or suggestions/corrections - including the poll.
-
Set Name: Battle of Hoth Set #: 75014 Theme: Star Wars Pieces: 426 Minifigures: 6 (General Rieekan, Luke Skywalker, Hoth Rebel Trooper x2, Snowtrooper x2) Year of Release: 2013 Price: 64.99 CAD INTRODUCTION Hello Eurobricks! Today durring the «rush for Christmas» at Toy’s R Us, I’ve found and purchased the 75014 Battle of Hoth, and I decided to bringing you a review of this set (My first one!). BOX The 2013 boxes are dark and green and I’m love it! It was a big sept beyound 2012 an older boxes concerns the graphic design. At the front of the box, we see the content of this set, and the minifigs. Close up on the minifigs... Top of the box show us the actual size of the General Rieekan with his cap. Back of the box After carefully opening the box, good suprise the box is almost full! CONTENTS Inside, we are greeted by 3 big empty bags of parts, a bag for the tauntaun, 2 instruction manuals, and a stickers sheet. Close up on the stickers sheet... On this stickers sheet; 9 stickers in total, 8 for the snowspeeder; control screens (pilot and harpon), engines and outside decals. The other one for the control screen of General Rieekan desk. INSTRUCTIONS The front of the 2 manuals shows us the front of the box. The first pages of the first one show us a new "don't open all bags" visual, and a "how to use the Brickseparator" with a QR code for an how-to I supposed (I haven’t try it). After that, we have the bag repartition. Bags repartition. Here, the pages showing the brick list. THE BUILD In the first bag, we get to build Luke new minifigure, and the Snowspeeder; One step of construction: Under the ship, we have that type of parts... (First time I see that!) The snowspeeder finished: Harpoon improvement Other Minifigs: Nice printed heads for Snowtroopers General Rieekan in the bag n°3 The probe droid: The Echo base trench: Overall of the set Spare parts... RATINGS Functions: Not too many but the flick-fire is well placed in the canon and the trench offer a good playability. 8/10 Parts: Nothing too exciting, but the General Rieekan fig. 8/10 Price: At $64.99 CAD for 426 parts it's not very good. But it's a Star Wars set... 5/10 Accuracy: The best Snowspeeder, probe droid and canon yet. 9/10 Overall: Buy for complete your Hoth setting... 8/10
-
REVIEW: 60015 - Coast Guard Plane In the summer wave of 2013 Lego has release a number of sets related to the coast guard. The last time Lego used this theme was in 2008, which was when I was still in the dark ages so for me, someone who loves the sea and boats, this was quite an exciting announcement. As soon as the sets hit the stores, I bought them, and build them, and boy did they deliver. It's been quite a while since my last review in this series, but I've finale gotten my hands on the LEGO store exclusive Coast Guard Plane. Now let's see if that exclusiveness made the set more awesome or not. Coast guard review index: 60011 - Surfer Rescue 60012 - 4x4 & Diving Boat 60013 - Coast Guard Helicopter 60014 - Coast Guard Patrol 60015 - Coast Guard Plane 60015 - Coast Guard Plane Set Nr: 60015 Theme: City Year released: 2013 Nr of parts: 279 Minifigs: 3 Price: US$44.99 / €44.99 / £34.99 The box On the front of the box we get a scene that reeks of danger, as the fishing boat is making a lot of water and the coast guard plane comes in way to low and will probably ram the boat. Yep, those fishermen are in a heap of trouble! In the bottom right corner we are reminded that the fishing boat really floats, which I, once again, don't recommend trying after applying the stickers to the sides of the craft. On the side of the box we see that the fishermen have made it to shore safely and continue their craft from a pier, while the pilot of the plane walk up to them, presumably to apologize for his reckless flying earlier on. On the back of the box we are reminded of the modular building method and the other sets in the coast guard series. on the right hand side we get some images to steer kids in the right direction, giving them a LEGO approved scenario to play out with the set. The instructions The set comes with two booklets. the first one detailing how to build the boat, and the second one for the plane. The building instructions are very clear, with a nice watery background that in no way interferes with the build. I think by now we all know what's on the back of these booklets (and are desperately trying to forget that same information), so I'll refrain from putting those here. If, for whatever reason, you are still curious about the backs, just look at any of my other coastguard reviews, since it's basically the same. The contents Appart from the booklets, you will be getting 4 bags with the stuff it's all about: LEGO's. You will also find a couple of stickers... ...and a ship's hull and "Orange Aircraft Fuselage Curved Aft Section 6 x 10 Bottom" which didn't fit into the bags. The build In the first bag we find the parts for the ship, which are predominantly blacks and grays, with some green thrown in for good measure. Also in the bag are two cartons with string. The first order of business is assembling the two fishermen. They both have nice looking front print, but no back printing. The guy on the left has a pair of scissors and a pencil in his front pocket, which I doubt have a great usability while fishing (okay, maybe the scissors can be useful). The fig on the right has a very basic look to him. To be honest, they don't really look at home on a fishing boat, I would've liked the figs to have some more appropriate clothing. Let the building start! To start off we assemble the back part of the boat. After which the powerful looking engine is added. We then build up the sides and front of the ship and put a base in the center for the cabin. The cabin is added, with a great use of the lances as antennas (antennae?). And then we add some more details and the boat is done!. I like the aesthetic of this small fishing boat. The only thing I'n not so sure about is the 2 water spouts signifying leakage, but I guess they can be removed easily enough. In the second bag we find the parts to build the base of the plane. We get a wide variety of colors, with the orange, blue and yellow parts, as well as the usual blacks, grays and whites. The console is a printed part. Here we have the pilot of the plane, wearing the same safety harness as most of his colleagues from the other sets, as well as some bitchin' sunglasses. We start by building the base of the plane. which, I must say, at this point looked quite unimpressive to me. The center of the plane is build up, and that's it for the second bag. Nice detail: In the cockpit are a wrench and fire extinguisher. In the third bad we find a lot of white and grays, with a bit of blue and yellow sprinkled in for good measure. The wings are added and we finally get a better feel for the size of this thing. It may not be so bad after all. The top is added, making it look like some weir cocoon with wings attached to it. Next up is the tail section. Now it's starting to look like a plane! A few details are added to the top of the plane, and the props are attached. Damn, those look like some powerful engines. In the fourth bag we get a lot of duplicate parts, which is to be expected when building two identical pontoons. The pontoons are build simple but effective. The have a nice sleek look to them. And when we add them to the plane we are... ...Done! Despite some doubts in the start this turned out to be a very nice looking plane. One complaint however is the internal space. There is enough space for the pilot in the cabin, but there is no way he can rescue those fishermen with that plane, unless they have to sit on the pontoons and hold on for dear life. The plane has a very good look about it, both from the front and from the back. Conclusions (Disclaimer: I don't believe in giving numerical scores. It is up to the reader to decide what they think of any given model, and I believe mandatory scores detract from this notion.) minifigs: The fishermen don't really look the part, but I guess they are sufficient. build/design: The plane would've been nicer with some more internal space, but the overall designs of both the plane and the boat are great. Playability: You get people to be rescued, and someone to rescue them. What more could you want? Overall I think this is a nice set, but maybe a little bit overpriced. Nevertheless I'm glad to add it to my collection. Now, since there isn't enough space for them to fit in the plane, the fishermen better start scooping the water out using their tiny bucket!
-
I was looking through the bionicle review index and saw that several sets were not reviewed. I have an extensive collection of bionicle myself, so here's my best try at filling in some of the gaps. bionicle review: gadunka set name: gadunka set number: 8922 theme: bionicle piece count: 176 price: US $20 EUR £14.99 date released: 2007 I apologize for some of the blurry photos, I haven't mastered my camera skills yet. As far as his story goes, gadunka was originally a tiny sea creature, who was exposed to the mask of life, which transformed him into this giant monster. with his newfound strength, he went on a rampage attacking the toa. later on the mask reversed its effect and transformed him back. I don't have the box, so I'll go to the instructions. instructions: Here we see gadunka in an attack stance, standing over a pit of some kind. I liked the 2007 box design. it appears as if you were viewing it from some kind of scope or radar. and the underwater effect is represented well. the figure front: side: back: Gadunka is a very peculiar titan, he has an unusually wide and thick torso, and a huge gaping jaw, which makes for a very bulky look. His weapons include three claws on each hand, and a squid launcher. the color scheme is primarily dark blue, with silver and some lighter blue highlights. torso: It's an interesting build. using three inika torsos and a 2004 matoran torso. the lighter blue hordika limbs provide connection for gadunka's arms, his head connects the two ball joints up top. his legs connect to the four ball joints to the sides. two "squids" are included. although there are supposed to be an orangish-yellowish color, my cats chewed them up. so they have been replaced with blue ones. here he is next to toa nuparu for size reference. He's not much taller than the average bionicle, but he is much thicker and wider. arms: The arms have kalmah armor in silver, (which was new at the time) dark blue rahkshi legs, and three small blades. (I believe those were introduced in 2007 as well) the hands make use of these small ball joints. which provide a good range of motion the middle one however, does not move. squid launcher: the infamous squid launcher. these have a pretty bad reputation. I actually like this things. although the idea of using live squid for ammo seems kinda odd. One thing I don't understand is if gadunka is just some kind of creature, how did he obtain a squid launcher and figure out how to operate it? legs: Interesting parts on the legs include silver piraka feet, vahki legs, inika arm armor, and these support type things. Again we have a very bulky look portrayed. which works well for this figure. head: The head is huge! you could probably fit one of the old matoran in there! the blue skull piece is glow in the dark, and it uses silver ehlek spines for teeth, a dark red clawed piraka foot for a tongue, and neon green bohrok eyes. Here's gadunka and toa nuparu in battle. Overall, it's a good set with decent pose ability and some interesting parts. it's bulky and intimidating compared to other bionicles. for a price range of about $20, i would recommend it. thanks for reading.
-
Christmas came early this year for me as I was selected to review a few upcoming Hobbit set. According to my latest LEGO magazine these are available for purchase Nov. 27th, so here is an early preview. BASIC INFORMATION: Set Name: Escape from Mirkwood Spiders Set Number: 79001 Pieces: 298 Minifigs: 4 Price: $29.99 USD, $34.99 CAD Theme: The Hobbit Year Released: 2012 RESOURCES: (high res pics available here) THE REVIEW: The Box Front: In typical LEGO form the box is fun. It shows all the aspects of the set and it is exciting. The surroundings are similar to The Lord of the Rings boxes as you'd expect. One special thing to note is the red label indicating that this is a Special Preview Set. This is not a sticker, it is actually part of the print on the box. Back: There is a lot going on the back of the box, which is great because that means you get a lot for your money in this set. The box pictures do a better job than I could of showing how to free the dwarfs from the webs, and how the mini spiders can jump out via a flick fire type lever. There is also a section for the weapons, a picture showcasing the glow in the dark pieces on the spiders and mushrooms. Side: The side of the box features one of the figures in actual size, which is common among LEGO sets with minifigures in them. The writing is the title of the movie in many different languages. There is also a phrase that says "Kili the Dwarf" in a multiple of languages. Instructions The instructions display the same image as the box which is standard LEGO procedure, but again being that this is a special preview set, it has the phrase "Special The Hobbit Trilogy Preview Set!" This was also printed on the instructions like the box. Very interesting, plus I think this is a good hint to the fact that we will get sets from all 3 films. All Pieces I am one of those who bypasses the numbered bags for the good old pile of bricks approach. I think this is because this is how it was when I was a kid. I like how dark these sets in terms of pieces. The dark red is something I have practically none of, so it's a welcoming color to my collection. Weapons Pieces I chose to show the weapons separately because I was pleasantly surprised with how many weapons you get for the size of the set. The dagger might look familiar as it's the same piece found in the Prince of Persia sets. Extra Pieces As always we jump forward in time to show the extra pieces in this set. I was quite surprised to see one of the printed daggers coming in as an extra piece. Besides the dagger we get a few nice dark red pieces and some teeth and a bone. All pieces i welcome as they are not the most usual of pieces. Minifigures Front: From left to right we have Legolas Greenleaf, Tauriel, Fili the Dwarf, and Kili the Dwarf. I am pleased with the quality and amount of printing on these figures. I've never been a fan of the small legs since they don't bend but they really do position the dwarfs at the right height so it's hard to complain. Alternate faces: I applaud TLG for giving every figure in this set a two sided face, I love the emotion they are putting into minifigures these days. Back: I really like the hairpiece on the dwarfs , it's long yet it doesn't fall straight down, it's almost like it's waiving in the wind a little bit. Conveniently this allows for the arrow quiver to fit under the hair if you so choose. Build Process Spider Build: It starts off with a small 4x2 base. Nice dark brown with 4 legs spots open, wait don't spiders have 8? They certainly do, the tooth piece works very well as a skinny spider leg. A few steps later and we are done. The two white studs glow in the dark. I like how the abdomen was not forgotten and this really looks like a spider. LEGO has come a long way and the newer sets just keep getting better and better. Rinse and Repeat The set comes with two Mirkwood spiders which are identical. Two is always better than one though. Building the set, structure 1 The first few steps yield us a black and red rock like structure that houses one of the bows and some bones from a previous kill. The dark red really goes well with the black. The skull is the regular skeleton skull. Building the Set, Structure 2 We are starting to build the second larger structure and the technic piece with the red piece on it will later be used to eject the spider onto any passers by. I apologize for my horrible fingerprint on the 2x1 cheese slope. I feel so embarrassed. Building the Set, Structure 2.1 More dark red, black and some dark browns. The technic pic is so this piece can combine with the main structure soon. Is the leaf in dark red new? If not I don't have any and I love them! Structure 2 When you snap the two pieces together you get a rock structure similar to the first one but larger and with a few more features. I think a growing theme in the Hobbit line will be mushrooms, the white stud at the base glows in the dark. Right under the mushrooms is where the small spider is able to be launched out with a flick fire motion. Structure 2 alternate view On the back side of this structure we have the brown release lever which breaks the structure down to release the dwarfs from the spiders web. Spider launch feature The red pin can be flicked like a flick fire missile and the spider under the mushrooms will fly at any un-suspecting passer by. The spider isn't all that hidden, but it has a nice little home to live in until it's time to attack. Complete Set Here we have the whole set together. This set layout reminds me of the Ewok Attack Set from the Star Wars line this year. It has a small structure and the focus is on the minifigures. Here the dwarfs have been spun into webs by the Mirkwood Spiders. The netting is very thing and I think does a good job of resembling webbing. next I'll show you how to get those poor dwarfs down. By pulling the brown pin out the majority of the structure will fall down, giving access to the trapped dwarfs. The top portion swings down on the technic pin and the dwarfs are now accessible. Hooray! Final: The set overall is a great addition to any Lord of the Rings set, or future Hobbit set. I think the pieces that come in this set are in some unique colors and I like the generous offerings of minifigures. Lets hit the totals. Design: 8/10 I like how it looks. The darker colors really fit the theme. I obviously have not seen the movie yet, but being that it's the same theme as Lord of the Rings, I think they did a good job with the figures, weapons and creatures. It really has that Lord of the Rings feel. As much as these types of sets would be good in numbers or to compliment a larger scene, I sometimes find myself looking for more. I know we are within a certain price point here, but a base plate would be fantastic. Parts: 8/10 I give this an 8 because I feel like it has some not so normal parts and some really nice dark red pieces. This is the kind of set that when broken down, is still a good set. This is because of the pieces. Sets like this that don't have a lot of mass but have a lot of details are usually good parts sets. Build: 8/10 I'm sticking with the 8 ranking because this is a little fragile when building. It's not like it falls apart in your hands, but there isn't a main study piece or structure to build off of. You definitely need a flat sturdy surface for this build. The instructions were great as are most of TLG's offerings, I did however find myself having to backtrack a few times because I had misplaced a piece, or forgotten it all together. This may be because I'm getting old, but when I went back, I was surprised where the piece was. I wouldn't put too much weight on this since it very well could have just been my error. Minifigs: 9/10 I love the details on these minifigures. The printing on the legs really gives their outfits hat extra needed flare. The hair pieces are great, although the elf ones cannot really be re-used, unless you are creating an elf character. With that said, since TLG was going for an elf character, they nailed it. The ears line up just right, although you can't turn their heads otherwise their ears will not line up. Also a 10 escaped this category because short minifigures still have stationary legs. This has to be one of my biggest complaints about LEGO period. It bothers some more than others, but I would love to see legs that are short but can still move like regular fig's legs. Granted the height of the legs for the dwarfs is pretty spot on. Playability: 8/10 Even though this set has some great features, it feels like it's lacking overall structure. I know it's a stretch especially in the $20 range, but some sort of base plate would have helped this set out a lot. The spider webs are a nice touch, but to me these seem like more of a display option that a play one. The flick fire spider and the pin to drop the structure down are the kinds of features that LEGO has been incorporating into sets for years now. It's these small details that make the set what it is and in my eyes a play set. Price: 8/10 At $30 I think this worth buying. It seams a little expensive but when you get down to the nitty gritty, it's not. You get 4 very nicely detailed minifigures, some great weapons, some cool pieces in dark red as well as other nice parts that can be used for MOC'ing, almost 300 pieces in total. It's a stretch but I would have loved a base plate in this set to tie the two structures together. Total: 49/60 82% is not bad, not at all. My overall view on this set is positive. If you liked the Lord of the Rings line, you'll like this set as well. It has a good balance of minifigures, parts, and features. I'm sure some of my minor complaints will be null if you collect the entire line and build a big scene out of them. I try to judge sets by themselves but sometimes it helps to look at the bigger picture. Whether you only buy this set, or collect all of the Hobbit line, this is a good buy. The set is priced accordingly with other LEGO licensed sets. So again if you get nothing else from this review than the last sentence, I say this is a BUY!!
-
REVIEW: 60012 - 4x4 & Diving Boat Coast guard review index: 60011 - Surfer Rescue 60012 - 4x4 & Diving Boat 60013 - Coast Guard Helicopter 60014 - Coast Guard Patrol 60015 - Coast Guard Plane In the summer wave of 2013 Lego has release a number of sets related to the coast guard. The last time Lego used this theme was in 2008, which was when I was still in the dark ages so for me, someone who loves the sea and boats, this was quite an exciting announcement. As soon as the sets hit the stores, I bought them, and build them, and boy did they deliver. After reviewing the smallest set in the wave it is time to move up a step and take a look at the next set in this wave. 60012 - 4x4 & Diving Boat Set Nr: 60012 Theme: City Year released: 2013 Nr of parts: 128 Minifigs: 2 Price: US$19.99 / €12.99 / £9.99 The Box On the front of the box we see the 4x4 parked on a small beach, while the two coast guards unload the motorboat from the trailer. In the bottom right corner we can see that the "boat really floats", though I would not recommend putting it in the water after applying the stickers, which are not exactly waterproof. On the back of the box the first thing you will notice is the diver in the top right corner yelling and waving at you, desperate to get some attention. The rest of the back is adorned with images which illustrate the play features of this set. On the side of the box the coast guard and the diver have just come ashore with their little boat and are staring in amazement at the floating frame with a sideways 1:1 scale coast guard in it. The coast guard is using his radio to let the base know about this weird anomaly. The instructions The front of the instruction booklet has the same scene as the front of the box. Inside we are first presented with the builds we will be getting out of each of the bags. Followed by instructions on how to build this set. the color differentiation is good and not once did I get colors confused (I'm looking at you, black and dark grey!). Also, part callouts are available at each step. In the back, the first advertisement is the same coast guard theme advertisement as in the smaller set, so for my opinions I will have to redirect you there. (yes, I'm too lazy to copy paste my own text.) The second advertisement is for the latest fire fighters sets. With these two adds side by side I think I can safely assume that life in LEGO City is never safe. Be it on sea or on land, your life is always in peril. The next spread has the LEGO City started set advertisement again, and a part list. The back is screaming at us yet again to fill in some survey. As I don't like being told what to do by screaming kids, I'll just NOT fill out the survey. Ha! The parts Just as a reminder. Just like the last set, I was too impatient and build the whole thing before taking it apart again to take the review pics. Which means that all stickers have already been applied to the various parts. The first things to fall out of the box are a sheet of stickers and this boat. No, I have no idea why the sticker in the front looks so dirty in the bottom right corner. It does not look like that in real life. The parts for bag 1 make the 4x4 and the Coast Guard. There is a nice selection of colors, with the orange sticking out the most. The second bag has considerably less parts, and consists of the trailer, the boat buildup and the diver. Both bags contain no printed parts except for the minifigs. The minifigs The coast guard has a greatly detailed uniform printed on the torso, which unfortunately is mostly covered up by the life jacket. The head is printed on only one side, and is a very basic smiley face, which I really like, a great neutral exp<b></b>ression. The diver has a one sided face with some stubble, and a very well printer torso with a lot of belts. I asume the printed on life vest is not buoyant, seeing as that would severely limit his ability to do his job, he is, after all, a diver, not a floater. The build The build starts with the underside of the 4x4. The axles are put at a reasonable distance from the frame, to simulate off road suspension. Next we start with the building of the car body. I must wonder about the use of the 1x2 grille bricks, which seem to serve no purpose other than part diversity. On a side note, I later discovered I forgot to put a blue 2x3 plate in the driver's pit. This mistake was rectified later on. All the orange parts are added to the car, and the body is starting to take shape. The back end of the car is finished off first. The single stud has a purpose we will get onto later. Finale the driver's cabin is put into it's place and finishes off the car. On the sides of the cabin are connection points for the handheld transceiver and the megaphone. On the rook is a small search light, for those after dark missions. From the back angle you can see the hitching point for the trailer, as well as a third break light near the roof of the car. Next up is a mini build for a stand to put the diving gear on. The gear fits on the stand quite well, and at no time did I have the feeling any of the parts where about to fall off. When driving around the stand can be attached to the single stud on the rear of the car. It's very well secured, though still easy to remove. Moving on to the second bag, we start with building the trailer. I have to give special mention to the way the suspension is made. The addition of the sloped surfaces makes it look more organic than just a single axle plate sticking out of the bottom. The trailer is completed quite quickly. One big drawback i have to point out here is the lack of any kind of stand. The trailer just can't stand up straight without being attached to the car. The last build of this set is the boat. It's simple but effective, though I have to wonder about the interior space. there's only really room for one fig inside, so either the coast guard or the diver can take the boat out to sea, not both at the same time, which would be more logical, as the coast guard can drop off the diver at the diving point, and then use the boat to cruise around searching for signs of people in need. But then again, that's just me nitpicking. From the back you can see the elegant engine, which really looks the part. Everything attached. The trailer hitches to the car very easily, and the boat sits very well on top of the trailer, with just enough connections to keep it in place, but not so much as to make it difficult to remove the boat from the trailer. Another small annoyance, however, can be found at this time, which is that to transport both minifigs, one has to sit in the boat while driving around, which hardly seems safe. Conclusions (Disclaimer: I don't believe in giving numerical scores. It is up to the reader to decide what they think of any given model, and I believe mandatory scores detract from this notion.) minifigs: The torso and head printing is of good quality and detail, overall I quite like these figs. build/design: The car is nice and sturdy, and even though they're quite simple in design, the trailer and boat still look the part. I still would've liked to see more seats in the car and boat. Playability: You can drive around and do some diving, but with no body to rescue, the play features are somewhat underwhelming. Overall the set looks nice enough, but is somewhat underwhelming in it's features. It really has to be combined with other coastguard sets for the best experience.
-
REVIEW: 71002 LEGO Collectable Minifigures Series 11
WhiteFang posted a topic in Special LEGO Themes
Hello everyone, Many of you have been highly anticipated of this elusive eleventh series and only until recently in mid-July where the Internet have seen picture leaks and distribution in Poland of this LEGO Collectable Minifigure Series 11. I am sure many of you are anticipating and wondering if this traditional pictorial review will ever come and I am extremely glad to be able to deliver once more to share this iconic reviewing traditional feature of my favourite LEGO Collectable Minifigures right here exclusively in Eurobricks. In the not too far distant past, The LEGO Group (TLG) had just recently released Series 9 in just six months ago and Series 9 is now slated for 'retiring soon' and 'sold out' in the Shop@Home/US. Series 10 is still currently available but I am sure with the new Series 11 coming to the stores worldwide, it is only a matter of time before Series 10 face the same fate as Series 11. LEGO fans will have to act fast before you miss the LEGO Collectable Minifigures craze. Firstly and always, I will like to give my very most sincere continued thank you and gratitude to TLG for giving me this very exclusive 'early' insight before others, so I could have enough spare time to work, evaluate and review this brand new LEGO Collectable Minifigures Series. I will also like to give my thanks to Eurobricks Staff/LEGO Ambassador, CopMike and my fellow Eurobricks Staffers for being so helpful and supportive to this reviewing endeavour. Last but not least, the most important person which I must thank, is my beloved wife, Kim/Belun for being very understanding and supportive throughout this chaotic and hectic period of ours! I am almost saddened if I can't release this review at the given releasing date especially since so many things are happening all at one go. I am truly glad that I am able to see the end of rainbow and able to share this reviewing achievement with everyone once more. As always, we shall do a re-cap for all of the past Eurobricks Collectable Minifigures polls once more. It started with a humble beginning of Series 1 followed by Series 2 in the year 2010 and it continue to spread like wildfire with another 3 strong waves of minifigures craze in the year 2011, putting Series 3, Series 4 and Series 5 in an excellent harvesting year. In the year 2012, we celebrated with Series 6, Series 7 and recent Series 8. With the beginning of the year 2013, we have the recent Series 9 and Series 10. Now, I will like to invite the Eurobricks Community to cast their votes into this brand new Series 11 poll statistics as well. Name: 71002 LEGO Collectable Minifigures Series 11 Theme: LEGO System / Collectable Minifigures / Series 11 Year: 2013 Minifigs: 16 unique minifigures Price for 1 box: USD N.A, GBP N.A, EURO N.A, SGD $294.00 Price for 1 packet: USD 2.99, GBP 1.99, EURO N.A, SGD $4.90 Resources: Brickset, BrickLink An image of an 71002 LEGO Collectable Minifigures Series 11 box This eleventh series came in a very nice and cosy green schema which certainly adds some holiday spirit into it which kind of suitable for the upcoming Christmas festive mood at the end of the year. [Reference 1] [Reference 2] [Reference 3] The 11 different colour packaging themes for Series 1 to 11 boxes The amount of efforts to retrieve all of these boxes from my storage area is pretty hard and I hardly have the desire to keep empty boxes in its original state since storage space is a scarce resource to me. Putting them together is just always an amazing feat and all of these boxes have actually exceeded the studio background height. However, it is definitely worth it to place all of the 11 LEGO Collectable Minifigures boxes together for this superb unique group photo which is a sight to behold to witness the different colour transition for the different series. What could possibly contain within these mysterious sealed packets? This is the next new incredible Eleventh Series for the legendary LEGO Collectable Minifigures Series Theme The LEGO Collectable Minifigures Series (CMFs) is slated for worldwide release on the 1st August 2013 or 1st September 2013. This is another outstanding piece of achievement for this very special LEGO theme, where it has successfully released a total of three series in the year of 2013. The TLG CMFs design team has certainly outdo themselves by able to amaze and marvel us with so many more new integrative and unique minifigures' designs. I am sure most of us have not taken aback by the recent maniacal craze of hunting Series 10 - Mr. Gold? Despite of the Mr. Gold craze, the LEGO CMFs theme remain a force not to be reckon with and continue to stand proud which shall remain as one of the popular themes to acquire for many LEGO fans out there. I will leave to our fans to decide for themselves if Series 11 continue to live up to the high expectations. To me, this series remain a huge importance in the LEGO history and affirming my belief that all of these minifigures in the past, present and future series will continue to be regarded as part of the 'Golden Age' for the LEGO CMFs theme. Please do note that the naming that I have use for this review are official TLG minifigures naming for Series 11. So, there is absolute no doubt or misinterpretation on the naming used. Front view comparison between Series 1, 2, 3, 4, 5, 6, 7, 8, 9, 10 and 11 packets Wow, just plain wow! Isn't it amazing when all of the packets for the entire series are placed together for a group photo? This is just so magical to see the entire different packets for Series 1 to 11. There are altogether 11 different packets and design packagings for this single theme since the birth of the LEGO CMFs. Many of the earlier series such as 1 and 2 are considered to be pretty vintage at this point of release since the access to acquire these older series are considered to be a hefty challenge for forking out more money to purchase them in the secondary market since they are released in lesser quantities unlike those more recent released series. Just take any of this packet and open it. If you can just hold all of the 11 packets in your hand based on the above illustrated image. Rip it open and you discover a random LEGO minifigure that can be special to the person who is buying it. Be it for the parents, children, AFOLs, casual shoppers, there is always a random something for everyone of us and I guess this is an easy way to bring back a person who is in the dark ages by tempting them to open up these packets! To add on, I actually got a bin of unopened packets which I have not marked them with, even though I am sure the minifigures which I have bought are the ones I like. It is just that it is still quite a random feeling for me not to find out what it is in there, without the touch and feel method. Take a closer look at these. This is the front view of the Series 11 packet, while this shows the back view of it. Last but not least, this is an image that shows the back view comparison of all packets. I am going to repeat this very same golden rule, likewise in all of my previous reviews. If you are intending to narrow the precious and scarce minifigures that you are collecting, please continue to hone the touch and feel method. It is an useful skill set to acquire and locate the minifigures that you want without wasting additional money to randomly acquire them especially when you are intending to buy large quantities. Your sole mission is to memorise and remember the minifigures assortments for each of the specialised designs. Isolate and identify the most unique accessory or accessories that appeared for the particular minifigure. From there, eliminate the torso, head and legs away and feel for other parts. The only disadvantage of this method is much idle time will be most likely wasted if the minifigures that you are seeking for does not exist in the box or ending up having sore numb thumbs after feeling. However, I personally feel that this approach is the most practical that works the best for me than any other uncommon approaches. Front view of the Minifigs Series 11 promotional leaflet Back view of the Minifigs Series 11 promotional leaflet 1) The savage Barbarian The savage barbarian can be regarded as a person who is perceived to be uncivilised, rude, wild, unrestrained and insensitive. More importantly, the barbarian is also known for its feat brute strength that could certainly overwhelmed its opponents in relative ease. The immense fierce appearance of his, is very taunting especially with the remaining battle scars that etched deep into his skin. Even though his appearance may not be as gallant as a shiny knight but his quest for freedom and brotherhood continue to be strongly desired. I could have make it up but the barbarian is someone who I will like to form a tribe of warriors or even mercenaries awaiting at the tavern to accept any dangerous and highly paid quests. Parts assortment The parts assortment is decent and I am glad to see two sharp gladius swords that allow him to master duo swordsmanship which clearly demonstrate his strong offensive approach. There are two different prints on his either side view. The first image show the wrap on his wrist while the second image show the wrist guard or similar on his other hand. I am also very pleased to note the side prints of his legs which add some fair details in it. There is also back printing at the back of the Barbarian. The hairpiece also reminded me of the character, Prince Dastan in the Prince of Persia movie which is a fine hairpiece to use it for many other scenarios. Aren't we look quite similar to one another? Fighting for my freedom Ferocious Warriors 2) The stoic Scarecrow The stoic scarecrow may look unglamorous but in actual fact, the scarecrow's main intention is to act as a decoy or mannequin which resemble in the form of human being wearing in old tattered clothings. It is placed and positioned in the midst of the crop fields to discourage the presence of birds such as crows or sparrows to disrupt the growing of crops. Basically, the Scarecrow is meant to scare these birds away. It is not the same type as the DC Batman Comic villain, 'Scarecrow'. For my take, I am extremely happy to see a scarecrow looking character appearing which is geared towards the LEGO Farm theme. I will probably welcome a fleet of these scarecrows to be ready for placing in the crop fields. Parts assortment The parts assortment is excellent. You are able to notice that the straw hat and the crow are some of the appealing factor and it is probably good news for some fans that the two parts can be separated from one another which will allow them to use the black crow as another fine piece of animal and the straw hat as an useful new head-ware. From this angle, you are able to take a closer look at the scarecrow Furthermore, I am most welcomed with the inclusion of the uncommon pitchfork accessory which was recently re-introduced back as reddish brown colour unlike the old Classic Castle brown appearance. Till this date, there are a total of 17 sets which contain a pitchfork. You will also notice that there are some detailed side printing on this side and the other side which both reflect different prints at the sleeve. Not to miss out, that there is a back printing as well. This is indeed a fine designed minifigure in this series. The body of the Scarecrow My crops will be safe from crows 3) The festive Bavarian Lady I supposed this festive looking lady is originally from Bavaria which is located in south east of Germany. Her attire is a type of traditional dress, known as Dirndl. Pardon for my lack of knowledge in this area, as I have only commonly seen this attire in Germany where many young women are seen wearing during the period of Oktoberfest in Munich. Nonetheless, this is a very lovely and bubbly female minifigure with its slight freckled wide grin smile. I will definitely like to use her as a medieval villager since her outfit is rather suited in that era. Parts assortment I really wish to see her holding a mug of beer, but perhaps it is not recommended to be seen at her hand since TLG's general target audience is the children. Her hairpiece is a new lovely ponytail design and you can enjoy the beautiful sight right from her back. The green and white apron is made up of cloth piece which is similar to the past recent cloth skirt pieces like the Series 8, Fairy. The pretzel is still a nice repetitive accessory which is first seen with the Series 8, Lederhosen Guy. Will you like to have some delicious pretzels? Forest Friends 4) The nasty Evil Mech Evil space villains welcomed a new addition into the space family and able to match up with the first Series 9, Battle Mech. This nasty looking evil mech is more cold looking and it is randomly rumoured to be associated with the Classic Space villain, Blacktron. It does not look friendly and certainly pose a threat to many others. Parts assortment The parts assortment is decent and even though I am really glad that this Evil Mech come with a space weapon but I did not expect to see a loud hailer and a illuminate green cone to form the space blaster. I am more hoping to see a complete new design of the weapon to increase the space weaponry assortment. After you have removed the Evil Mech's helmet off, you will be able to notice the green looking robotic head with all of the laser targeting markings and range on the visual lens. There are nice detailed printing which can be found at the side, while at the back revealed his large jet-pack that enable him to manoeuvre freely above ground. Taking the Evil Mech's armour off Space Rivals Space Factions 5) The fearsome Tiki Warrior The fearsome looking Tiki Warrior is my favourite character of the lot, simply because it re-introduce the presence of Classic Pirates, Islanders. It is also a magnificent design of a total re-creation of this defender of its native tribe which will be seen in some illustrative images below. I could see this character being very popular among Castle and Pirates fans, and more importantly you will soon be able to understand the key reason of its popular artificial demand. Parts assortment The parts assortment is very good and if I will like to improve it further, I will certainly like to see an inclusion of a newly designed shield. The giant face mask is made up of soft-medium rubber material and the paint detail is excellent. Not only to mention that they have re-introduced the Islander's hairstyle. You will be able to observe greater details from the side view. You are my protector Meet the Tribal Warriors Tribal Warriors lining up A little modification to the Tiki Warrior Protect our villagers from danger 6) The yummy Gingerbread Man This minifigure will certainly make lots of people smile, and I myself included. The yummy Gingerbread Man is a very delicious biscuit or cookie which is baked for special festive occasions.It even have its own fairytale story. I will be very most tempted to dip it into a glass of milk, but fortunately this is inedible and it will probably be good to leave it intact. Parts assortment The parts assortment is pretty neat and the design to create the Gingerbread Man is amazing. It has the height of the regular LEGO minifigure and yet it has a very unique body constitution which can be seen from the side and the back. The headpiece is a flat circular structure which enable him to lie just flat on the oven stove for baking. The colourings of the facial exp<b></b>ressions, buttons and legs are equally impressive. To be honest, I can't find much flaw in this design and I think this is one of the nice design in this new series. The red mug with the print, 'Dunk Me' is equally great and such mug designs are always much preferred than just mono looking ones. Dunk Me! Don't eat me LEGO Fairytales 7) The festive Holiday Elf Holiday Elf are great helpers to Santa Clause. Because without their hardwork, children from all over the world will not have Christmas presents. Therefore, this festive dwarf-looking Elf is on a mission to pack and wrap presents for Santa Clause and it is definitely a nice minifigure to add into the seasonal characters together for celebration. Parts assortment The parts assortment is nice especially with the 2x2 printed gift wrap tile which proved to be versatile for many other building purposes. A different teddy bear colour shade is also nice to be included with this minifigure as it created more gift variations. As you can see from the side and the back, you will notice that the elvish ears are attached to the green hat. Christmas Gifts Where shall I wrap you in? Working very hard for Christmas 8) The elusive Yeti The elusive Yeti or commonly known as the Abominable Snowman may not be a myth afterall especially since the TLG designers have managed to capture such cute lovely looking Yeti instead. When I first see the possibility of this character appearing, I wondered how it will look like. To my expectations, the Yeti is unbelievably adorable which could be inappropriate for some and since this is also not a costume minifigure, then I believe the usage of it as a practical joke will be rather real to our LEGO minifigures. Parts assortment The parts assortment is decent and the new blue ice cream stick is welcoming. You can observe the white fur on the torso and legs and along with the brand new headpiece for the Yeti facial exp<b></b>ression. The back view reveal the different layers of furs that depict the Yeti's iconic feature. Run for our lives!!! 9) The adventurous Mountain Climber The adventurous Mountain Climber is a professional high risk taker that challenge high altitudes right to the top of the summit. Apparently, he is well-trained with his trusty equipment gear including those mountain carbines that are seen at the waist. His specialised profession is medical expertise and I trust he is able to assist others since he bear the proficiency badge that will readily available to help his team mates and others. Parts assortment The parts assortment is not too bad and the equipment of the mountain climber is pretty good too especially with the new rope that will assist him in the climbing expedition. His availability will serve useful mountaineer expeditions. Climbing up with bit by bit Fear of heights??? You will be our medic specialist 10) The industrial Welder The Welder works hard in the strenuous tough environment of many industries where welding expertise is required. Welding can be considered a dangerous specialised profession where safety has to be considered and applied at the highest personal protection level. Without those personal protection equipment in place, it will put the Welder in a vulnerable position that will compromise his safety. Parts assortment The parts assortment is good and you will be able to observe the good selection of his welding equipment that make up of the following welding components including the printed flammable 1x1 orange cylinder bottle. He also donned in his protective long sleeve jackets and heavy duty leather gloves together with his wielding helmet to protect his eyes against from high UV light. I am tired after an intense day of work Assembling the Robot together Shall we head to Jim's bar for a drink? 11) The analytical Scientist The analytical Scientist will always review the test results carefully before proceeding further, likewise with her many unknown chemical substances that are available at her disposal. She will be able to mix different chemicals together to form many different possibilities that will assist in her research. It is welcoming to see a female Scientist joining into the City civilians population. Parts assortment The parts assortment are not too bad especially when there are two new viral bottles in light blue and green chemical liquids. Her clean white outfit also match her profession well and I will also suggest to use it for other medical professions as well since their attire is relatively similar to one another. On another note, I have to take a very close look and realised that this Scientist is known as Professor C.Sodin. I could be wrong since my eyesight is getting much poorer. Therefore, it is definitely not quite regarded as a research assistant. Different sort of scientists DO exist 12) The slick Jazz Musician Aww, he looks real slick just like the Blue Brothers. His black cool outfit and his killing saxophone could just blow your mind away. I could recall fans hoping to see a Jazz Musician like himself and include him in a 'live' band for Jazz music coverage. It will definitely be a stunning sight. I am already thinking of some possible fun settings for him to perform. Parts assortment Everyone will like to zoom into the saxophone since this is one of the highly anticipated accessory in this Series. The design of the saxophone is highly detailed with its pearl gold colour. This will enhance the musical bands by placing more of such instruments into playing. As for the rest, his black attire is suitable and able to integrate as a regular City civilian Men in Black 13) The friendly Diner Waitress The friendly Diner Waitress is an iconic sight back in the United States, during the 1950s where you will be able to find them serving the dining customers at the diners by moving up and forth with the roller skates. The waitress are able to serve their orders with speed and ease through the roller skates. There are lots of balancing to be involved but firstly balancing yourself, followed by the order. Parts assortment The parts assortment is decent and the outfit certainly look pretty retro as well. You are able to see theback view of her in skates before she rolled off with the strawberry ice cream float order. As you looked closely into her uniform, you will notice that her name is called Tara and this is another fine secret teasing facts of the design team which are incorporated into the minifigure's design. The front of the LEGO Service Industry Can I be on your team? 14) The kind Grandma After seeing the first appearance of Series 10, Grandpa, I am already hoping for a Grandma to be accompanying our dear Grandpa. True enough without a long wait, the kind Grandma make its appearance into this series with many fine detailed features. I find it very heart warming to see TLG to able to create Grandparents into the LEGO family. Parts assortment Apart from the usual picnic basket, you will find a nice new animal cat that make a fine companion to Grandma and personally I find it to be well designed. You will also notice that Grandma's knitted sweater also revealed several cat's printing near its waistline. The back view also reveal Grandma's grey looking hairdo. Visiting Grandma Meow Meow and Woof Woof Both of them are still close as ever Grandparents are always such a great inspiration to our lives... 15) The dutiful Constable One look and you will know this Constable is doing his rounds in his No.1 Uniform in the United Kingdom even though it is quite uncommon for the law enforcers to be wearing this uniform in present times. It is very welcoming to see him appearing as part of the LEGO minifigures community. I am pretty fond of his moustache on his look which is deemed iconic as well. I could not find any flaws in it and the design is spot-on. Parts assortment The parts assortment is good and the baton is wonderful new accessory addition. You can see how the Constable able to grip his baton tightly at his hand. The custodian ('bobby') helmet is done in a very nice manner as well too and I am very pleased with it too. Apparently his badge indicates JCF and his collar ID number is 1337. I really wondered what does that mean. Anyone can enlighten me a little? Law Enforcers in the LEGO City and Town The iconic British characters 16) The caring Lady Robot I did not expect to see a female companion for our Series 6, Clockwork Robot and I don't really think it is necessary to create this design. It is a lovely design but I am not very fond of it and used it for other intended purposes than to place it by his side. I am sure it does appeal to fans who enjoy a good retro 1950s looking robots as a form of variation and as far as my limited memory could recall, I don't quite remember seeing a female robot version. I could be wrong. Well, to me, the Lady Robot will be my least favourite among the 16 new minifigures. Parts assortment The parts assortment is mediocre and there are no other accessory which can be held by her hand. At least, give her some equipment to hold onto, other than just empty hands. The design of the back view is the same approach as the Clockwork Robot which allow the robots to wind up its potential energy. The robotic duo Robotic Sidekicks A concluding thought for the Collectable Minifigures Series 1, 2, 3, 4, 5, 6, 7, 8, 9, 10 and 11 Let's take a moment and view this awesome super big family group image which I have assembled for your viewing pleasure! It is getting a little less comfortable and more complicated to assemble all of these LEGO CMFs within a 48x48 grey baseplate. It will be even more challenging for me to squeeze the next new series within this fixed boundaries but I am confident that I will be able to find a solution to it when the time comes. So, what do you think and feel of this entire LEGO CMFs with everything being presented in this image? In my case, it is simply amazing with tremendous loads of excitement to see this entire LEGO CMFs theme altogether. I fully understand that some of us are feeling very exhausted and tiring to continue collecting this theme as TLG has been releasing at a very fast pace since the year 2010 and it have revamped and given a new meaning of collecting these minifigures especially when one of each of this is simply a new identity of its own where there are so many new possibilities that have been created in just a single theme that is proudly a TLG's own unique product range. I will love to see this continue and wish TLG to strive harder to actively promote this LEGO CMFs as we moved on. I hope this will continue to serve as one of the landmark themes within TLG to reach out more LEGO collectors and fans of all ages because I am very confident that there is definitely one minifigure out there in each series that you will adore most. Now with a total of 176 minifigures released for the entire Series 1 to 11, not including Mr.Gold which unfortunately I do not have the blessings to own it and the recent acquired Toy Soldier that can only be obtained through The Minifigures Character Encylopedia. It is no easy feat to be able to collect this entire theme especially when you have joined the parade much later where Series 1 and 2 are limited in numbers on a global scale. Although I have taken a long time to put these minifigures together for a new group image, but I have definitely and surely enjoy this process that is considered tremendously a lots of minifigures to be seen and is no easy feat to attain and to complete. Every time, I do this step, it is always very incredible to see how much and how far this theme had evolved to a greater magnificent transformation that formed a new pillar which formed the new blocks of LEGO products range. With Series 11 releasing soon, I am still quite unsure whether if we will see any Series 12 in the near future. I hope there is and we will be ready for the future LEGO CMFs Series. All in all, my wish is to be able to see this magical theme to continue wave after wave in every new calendar year. General Statistics for Minifigures Series 11 Below is the combination which I have received from my box, 4 Barbarians 2 Scarecrows 2 Bavarian Ladies 4 Evil Mechs 2 Tiki Warriors 4 Gingerbread Men 4 Holiday Elves 6 Yetis 6 Mountain Climbers 6 Welders 4 Scientists 2 Jazz Musicians 2 Diner Waitresses 2 Grandmas 6 Constables 4 Lady Robots Based on the above distribution, I have managed to achieve only two full complete sets of 16 one-of-a kind minifigures each. It means I will have 28 remaining random spares left. Read down to find out what are the remaining spares I have. My remaining spares 2 Barbarians 0 Scarecrows 0 Bavarian Ladies 2 Evil Mechs 0 Tiki Warriors 2 Gingerbread Men 2 Holiday Elves 4 Yetis 4 Mountain Climbers 4 Welders 2 Scientists 0 Jazz Musicians 0 Diner Waitresses 0 Grandmas 4 Constables 2 Lady Robots Data Analysis Based on the complete new data which I have complied, I have indicated my basic analysis based on my own take. Buying one full complete MISB box will allow you to achieve two maximum complete unique sets. I believe this is the new distribution which is being considered for a full box of 30 since TLG is intending to market the LEGO CMFs series with effect of the recent Series 9 to be sold in a box of 30 and 60 to market and reach out to new and different group of consumers. Therefore, if you are buying a box of 30, you will definitely be given a full complete set, while a box of 60 will certainly give you 2 complete set. On a personal note, I do not quite like the way the new distribution is being configured, not because of the given completed series for a full MISB box. I felt the allocation for the minifigures types is not quite the way I will like it to have. It is because there are not many filers minifigures under the group of six, like the Welders, Mountain Climbers and Yetis. I am not pleased to see these minifigures types to be given with a higher frequency. The only little consolation is the nice looking Constable being given the group of six treatment but still, I will prefer to see the Barbarian or the Tiki Warriors instead to be given a better distribution treatment. So far, each of the 16 unique collectable minifigures have an equal chance of getting 2 out of 32 packets, when a fresh untouched box is opened and consumers will rush in to buy it separately. That will be a 6.25% probability based only on 32 packets. When you add the remaining 28 spares into the calculation, the probability will varies further. 6 unique minifigures are now only available at 12 out of 60 packets and this translates to 20% in total and 3.33% each, which makes it very much harder than before to achieve by just doing it randomly. However, it is a great pity that the Tiki Warriors and the Scarecrows are classified as the lowest probability distribution point since there are only two each in each sealed box. The Tiki Warrior maybe classified as a potential army builder minifigure since it is closely related with the Classic Pirates, Islanders theme but I am not quite sure if it will be the most expensive minifigure in Series 11 even though it might be a very popular choice but definitely not as popular as its predecessors like the Series 2, Spartan or Series 3 Elf. There are lesser army building minifigures choices in this Series and the other likely potential ones will be the Barbarian and the rest of it will probably be good with just a few of them since this series is much inclined towards the City settings. I am neutral with the rest of the distribution and I really wish that some of the lowest probability distribution point like the Jazz Musician, Scarecrow and Grandma can be given slightly more in quantities . Overall, I am not very upset with the way in how the LEGO Collectable Minifigures distribution listing is being done but I am definitely not quite pleased about it. What do you guys think about this round of distribution? Do you share my same sentiments? To conclude and summaries, based on the probability demonstrated by this review, as an example, here are the results, Very High probability 1) Yetis 2) Mountain Climbers 3) Welders 4) Constables Total range: 40% (increases by 15% more based on 3 complete sets equation) Each: 10% Medium probability 1) Barbarians 2) Evil Mechs 3) Gingerbread Men 4) Holiday Elves 5) Scientists 6) Lady Robots Total range: 40% (remains the same based on 3 complete sets equation) Each: 6.67% Very Low probability 1) Scarecrows 2) Bavarian Ladies 3) Tiki Warriors 4) Jazz Musicians 5) Diner Waitresses 6) Grandmas Total range: 20% (decreases by 15% less based on 3 complete sets equation) Each 3.33% Some of my close-up images of my current LEGO Collectable Minifigures Series collection To conclude, the LEGO Collectable Minifigures Series 11 has done a good job to introduce more new minifigures into the LEGO CMFs theme that has reached another new heights. Perhaps, I felt that Series 11 did not create a larger hype other than not seeing the leaks earlier, but it does not create the greater hype due to lack of 'Where is Mr.Gold?' campaign or equivalent which is first revealed in Series 10. To me, that is a good news and it avoided unnecessary distractions which caused quite an uproar in hunting Mr.Gold. In this new Series, I noticed that there are more City related designs and professions than any other playing themes. The best thing about this new Series is to be able to see the new Yeti, Gingerbread Man and Welder which are totally a new designing concept that have never been seen before. It is no easy feat to be able to work on a continuous tight schedule and able to design and deliver new LEGO Minifigures with their wonderful pool of ideas which is obtained by many inspirations. I am confident that the imagination for creativity in the TLG CMFs design team will always be strong. This is also the only single avenue where we can see many exciting new minifigures at one go that can never be achieve in the regular LEGO theme releases where stand-alone minifigure concept is not possible where the theme revolve around it. Overall, I find this series to be a little weaker than its predecessors similar to Series 8, but I am not complaining that this series is not living up to my expectations as each of these new minifigure's design will be sought for by every different LEGO fans. Please note that the LEGO Collectable Minifigures Series 11 do not contain the placement of LEGO spare parts/accessories. This was practiced since the start of LEGO Collectable Minifigures Series 3. Summary review Playability: 8/10 (Many more new LEGO Collectable Minifigures integration across many new and existing themes.) Design: 8.5/10 (Good detailed and limited new LEGO minifigures' parts and accessories with more endless incredible accessories like the new cat, saxophone, baton, etc.) Price: 8/10 (I believe pricing will remain the same and to me, the quality has certainly improved on overall.) Overall: 8.2/10 (Another high rating for the LEGO CMFs and it is definitely worth buying and collecting these new minifigures.) I gave it a "5" based on my Review Score Card. What about yours? I hope every one of you enjoyed reading this simple review of mine. Comments and Criticisms are strongly welcomed. Pictures can be found in My Flickr and My Brickshelf (When moderated) If you are interested to read the past LEGO Collectable Minifigures Series reviews, you may find the following links below! 8683: Collectable Minifigures Series 1 8684: Collectable Minifigures Series 2 8803: Collectable Minifigures Series 3 8804: Collectable Minifigures Series 4 8805: Collectable Minifigures Series 5 8827: Collectable Minifigures Series 6 8831: Collectable Minifigures Series 7 8833: Collectable Minifigures Series 8 71000: Collectable Minifigures Series 9 71001: Collectable Minifigures Series 10 The LEGO Collectable Minifigures Series 11 will be launching on the 1st August 2013 or 1st September 2013 (worldwide) -
New licensed themes are always a welcome development to our beloved hobby, but let's admit it, LEGO has been churning out new licensed themes lately at a pace that has become increasingly difficult for us FOLs to 'follow'. Good thing I'm a non-completist selective buyer, so I normally just pick up the best, or two, sets of the theme. So when the new licensed theme Disney's The Lone Ranger came out this year, the set that stood out among the rest for me and the one that really got my interest was the 79108 - Stagecoach Escape - for a variety of reasons: a great-looking minifig line-up, a good selection of new parts, and a visually-appealing stagecoach build. So how does the actual set meet my initial expectations? Join me in this review as I find out. Set Information Set Name: Stagecoach Escape Set Number: 79108 Theme: The Lone Ranger Year: 2013 Pieces: 279 Minifigures: 5 Price: $29.99 Links: Brickset | Bricklink | Peeron (not yet inventoried) | LEGO Shop@Home Product Description Make a famous Lone Ranger Stagecoach Escape! Look out for the bandits going after Red Harrington’s valuable silver locked in the vault in the Stagecoach Escape! Launch the baggage off the back to slow the bad guys down! Then jump down onto the galloping horses, detach them from the wagon and help the Lone Ranger and Tonto to chase the outlaws off before they steal the stash! Includes 5 minifigures with weapons and accessories: the Lone Ranger, Tonto, Red Harrington and 2 bandits, Jesus and Barret. • Includes 5 minifigures with weapons and accessories: the Lone Ranger, Tonto, Red Harrington and the 2 bandits, Jesus and Barret • Features opening doors and roof, baggage launch function, opening vault with silver bar, mailbag with letter and 2 detachable horses • Also includes bandit’s horse • Weapons include 3 revolvers, rifle and 2 knives • Accessories include a pocket watch decorated element and dynamite • Detach the horses and chase the bandits away! • Launch the baggage and send the villains tumbling! • Battle to protect the silver • Open the stagecoach roof and doors to play inside • Stagecoach measures over 5" (13cm) high, 5" (14cm) long and 2" (7cm) wide The Box The boxart for this new product line comprise of a top yellow motif with the obligatory logos of LEGO, Disney, and The Lone Ranger, along with the image of the Lone Ranger as he appears in the upcoming movie. The brightly-colored packaging seems a bit of a clashing contrast with the predominantly subdued earth-toned, steampunkish hues evoked by the movie source material. I like the action-packed scene depicted in the coverart, with all the characters and elements of the set involved in a seemingly high-speed Wild West chase, the details of which we won't know until the movie comes out in August. The usual minifig line-up appears at the bottom right corner (which we'll look at more closely later), and the rest of the standard set details complete the front of the box. As what we've all been accustomed to, the set features are presented at the back in separate panels surrounding the main image of the complete set. I do feel however, that most of the so-called 'playable' features of the set are kinda 'forced' and seems to have been thrown in there as "space fillers" (like Tonto holding a compass pocket-watch, and Red Harrington somewhat distressed with a letter?). I may be just saying this since I don't know the importance of these particular bits in the actual movie, so I'll try to give these the benefit of the doubt. There are two images of the minifig line-up shown in the box: the 1:1 actual size image of the minifigs at the top and the half versions in the front (lower right corner) with their descriptive names of the character. The font used is a nice touch consistent with the Wild Western theme of the movie. Now I'd like to highlight a significant mistake in the minifig line-up: the "Barret" shown is actually Kyle from 79110 Silver Mine Shootout (thanks to 8Brickmario for this info). Probably this was a last minute change in the minifig line-up (Kyle was supposed to be in this set until Barret was included instead). The Contents There are three plastic numbered bags containing the pieces of the set, along with a single instruction booklet and a sticker sheet. No loose parts are included. The Instruction Booklet The instruction booklet bears the same coverart as the box minus the set details and the minfig line-up, which allows you to appreciate more the minute details of the artwork, like the realistic sand drift dust effect. The Sticker Sheet There is one small sticker sheet included in the set, which provides the decorative printing of the stagecoach. It's interesting to see the slight gold metallic sheen in the stickers. The Parts Bag #1 Contents As the starting point of all LEGO sets, the first bag contains the initial parts needed for the base of the build - in this case the stagecoach's base, comprised of the greys, blacks, wooden browns, and the wagon wheels. The two new black horse molds are also inlcuded in this bag, as well as the first two minifgs - Lone Ranger and Jesus. Bag #2 Contents Black and red dominate the parts selection of the second bag, which will expectedly be used for the body of he stagecoach. The Tonto minifigure parts are in this bag, and note that the hairpiece comes in a separate plastic packaging, signifying it was produced or printed in a different location from the rest of the parts. Bag #3 Contents The last bag contains the finshing pieces for the build, together with the two remaining minfigs of the set - Red Harrington and Barret. The third brown horse of the set is also part of Bag #3. Interesting Pieces This set has several new (but not exclusive) pieces: like the Dark Bluish Gray Plate, Modified 1 x 2 with Pin Hole, Black Technic, Pin Connector Perpendicular 2 x 4 Bent, and the new hand pistol pieces, in flat silver and pearl dark grey colors. (My apologies if I have inlcuded the Black Hinge Plate 2 x 2 Locking with 1 Finger on Top, which is new to me but is acually a 2-year old piece already. ) The compass pocket-watch piece has some nice detailed printing on the 1x1 tile, and the exclusive headpieces with detachable accessories are also something to behold. The Minifigs Consistent with the marketing strategy of sets nowadays, this set offers a sumptuous treat of beautiful-looking and highly-detailed minifigs of five of the characters in the movie. Aside from the aesthetics, another good aspect of this minifig line-up is the balance between the protagnosists (2) and the antagonsits (2), and one in between (1), plus the fact that the two main characters in the movie - the Lone Ranger and Tonto - are included, makes the set even more tempting to get. Now let's take a closer look at these lovely minfigures individually: The Lone Ranger The Lone Ranger minfigure may not be as flamboyant as Tonto or Red Harrington, but it certainly succintly captures the look of the movie character. It has leg prints and back prints, though no alternative facial expression. Comparing it with the actual look of the movie chracacter, one would easily notice that the minifig is a clean-cut (shaven!) version of the Lone Ranger. The holster was also curiousy missing on the leg prints. But overall, the minifig is a pretty good representation of the Lone Ranger in LEGO. Tonto Thanks in part of being an eccentric Johnny Depp character, the Tonto minifig has 'lots of personality' on it. From the highly-detailed hairpiece with the dead crow accessory to the face-painted head to the intricate native American printing of the torso and legs, this minifig is as colorfully weird as it gets! The Tonto minifig has an alternative nervous/scared facial expression. Removing the hairpiece reveals the front hair and tribal necklace printing and the simple back muscle print details. The minifig is quite accurate with the source material, though IMO it would've been better if it had a more serious facial expression like the ones pictured (and from the trailers I've seen so far) as compared to the slight smile of the current one. And it seems the designers decided to give the minifig a dash of bright olive green accent on the hairpiece, which is clearly not found on the actual Tonto. Red Harrington Bright red dress, white stockings on one leg, curly orange hairdo with small green girly hat, quite a flmaboyant minifig isn't she? And using a short cape as a skirt piece? Brilliantly clever! (first time done on a minifig from what I know). The Red Harrington minfig also has a second expression - a scared damsel-in-distress facade. As mentioned earlier, the hat is detachable from the hairpiece, which makes both pieces useful in minfig customization. What's a Johnny Depp movie without Helena Bonham-Carter right? I think the three little facial line prints of the minifig is convincing enough to depict a middle-aged woman. The torso and leg prints seem to be accurate (the stocking can be seen in a scene in the latest movie trailer), but the hat is violet in the pictures shown (though she could have worn a green one in the movie - we still don't know yet). But personally, this the minfig I like the best in this line-up. Barret One of the two bandits in pursuit of Red Harrington and her silver-containing vault, the Barret minfigure is as Wild West Outlawish as it gets - a dirty villainous mug (unshaven face, evil sideburns, maniacal eye-bagged stare), unruly outfit and the signature black hat and gloves. Jesus I would go on a limb and assume the character's name is not pronounced as Jesus (Christ) but rather as Hey-sus (Mexican pronunciation). Now that is cleared, we could focus on the minifig . I like the fact that he has a completely different look than Barret even through they are scum buddies - different hat mold and color, different outfit color and print design, and he even has a bandit handkerchief. We don't know how important these characters are in the movie, but if they aren't, then it's an added bonus to get different variations of torso, legs, heads, and accessories considering minor roles in the source material. Here's a group shot of the protagonists: ...and the bad guys: Like I said, I love the variation of the minifig elements and accessories, which is very useful in minifig customization. Horses Well, horses aren't minifigures but I'd just like to highlight that the set gives a rare opportunity to get three of the new horse molds, with the two black horses exclusive to this set at the moment (different from the black Nazgul horses). When was the last time, and what was the last set, to give at least three horses in a set? (and a relatively small set to boot). Heck, even the large LOTR sets didn't give this much 'horse love'. The Build Bag # 1 Build The base of the stagecoach is solidly built from the first bag of parts, and unlike the initial builds from other sets, this could actually be ridden' and taken into action already, right? (the horses are ready, the wheel mechanism is soundly attached to the base, there is a space for the driver's seat - this one is ready to go! ) Bag #2 Build This is one minor repetitive step in the Bag #2 build - the sides of the stagecoach body. But other than that, almost all steps are unique and non-repeating. The majority of the stagecoach body is built from the second bag of parts, along with the Tonto figure. There is one interesting bit I noticed when building at this stage (though not pictured): 1x1 bricks with holes were used as regular 1x1 bricks, which I think is a clever cost-saving move (since the holed 1x1s have less plastic than the regular 1x1s but provide the same use). Also note that at this point, there was no instructions yet to add this build to the previous build from Bag #1. Bag #3 Build I deviated a bit from the instructions since I wanted to show the elements built from the third bag of pieces (those were actually meant to be added together with the two previous builds to form the final product): these include the curved base of the stagecoach body, the detachable roof, some decorative tiles and the baggage (mail, vault). One thing I noticed is that the four brown 4-L bars could've been already added to the body of the stagecoach built from Bag #2, so I don't know why these had to be added on the last part(?). The Completed Build Combining all the individual builds from the three bags and we'll end up with this lovely-looking stagecoach complemented by the five minifigs. Quite a nice array of elements for a pretty solid set isn't it? Leftover Parts There are a couple of those new pistols and the compass pocket-watch-printed 1x1 tile from the leftover parts. A closer look at the Stagecoach Despite how great-looking this stagecoach is the main criticism about it is it's insanely absurdly oversized. Wth this view, it is very clear that is indeed signficantly larger than real-world stagecoaches, like these ones: Now one could argue that this stagecoach is based on a fictional movie where there are machine gun-wielding Wild West trains or a man resurrected from the dead, so an over-sized stagecoach isn't a far-fetched idea right? In any case, the inherent beauty of LEGO is we could always modify builds according to our liking, so I'm pretty sure with the proper amount of inspiration and parts this could be easily 'modded' to approximate the size of real-life stagecoaches. Here's a couple more views of the stagecoach: Set Features Left: The driver's box comfortably seats one person, and it is accurately high as real-world stagecoaches. Right: The front wheel mechanism is cleverly designed in such a way that it could turn left or right and even adjust up-and-down in response to the motion of the horses. I think this is one of the brilliant aspects of the build and the designer's really went out of their way to give us a working wheel mechanism that is far better than the standard fixed wheel-hub set-up. The rear wheels are fixed by the way, but it has a certain 'fragility' that realistically captures the instability of horse-drawn carriages/coaches. So how does the passengers get on to the stagecoach? Owing to its ginormous size, one has to exert extrat effort to ride this baby. But seriously, the passengers can be put inside by removing the detachable roof and putting the minfigs inside (right). Ironically, despite its gigantic size, the stagecoach only accomodates two passengers inside, though a third could probably be squeezed in there and several more could hitch a ride at the top of the roof or at the sides using handrails. Getting out of the stagecoach is as problematic as getting in for minifigs. Now I know why Red Harrington had that scared alternative expression Good thing our ever-reliable duo are ready to help a lending catching hand. There is a storage compartment at the back of the stagecoach that has some sort of baggage-launching mechanism to "send the villains stumbling" as the S@H description says. All you need is to open the cover, push down on the technic knobs and the briefcase will flip away, though I'm not so sure about its accuracy against villainous bandits (haven't tried it, sorry! ). This vault is the primary reason why the two bandits are chasing our heroes in the stagecoach - it contains Red Harrington's valuable silver! Little do they know it's a decoy as it's just made of ABS plastic! Kidding aside, the vault is nicely built and serves its purpose - though we still don't know its accuracy until we see the movie. There are several more features that I wasn't able to take pictures of, like the detachable connection of the horses from the stagecoach (and apparently you could ride them that way as shown at the back of the box ), the detachable roof and the storage space above (though it can be seen from the other pics), and the 4-L bar and even the tan 1x2 modified plates at the top of the stagecoach windows which could be used as handrails. Rating the Set Design – 8/10 The stagecoach is a visual eye-candy, it's a gorgeous build with a nice balance of aesthetic beauty and working functionality (wheel mechanism, storage compartments, passenger interior) - well that is until it is placed side-by-side with standard minfigs and horses. I would've wanted to give this a perfect score, but its oversized stature simply cannot be ignored, so I'm rightfully bringing the score down a couple of notches. Build – 9/10 I was very pleased with the technic-based wheel mechanism, I thought it was a pretty neat realistic feature that required extra effort by the designers instead of giving us the old and tired fixed wheel set-up. It was also refreshing to see a conscious attempt to use less plastic in builds (using 1x1 bricks with holes for regular 1x1 bricks), that garners a plus point for me. Parts – 8/10 There was a good number of relatively new parts, though I'm impressed the most by the three horses provided by this set. Minifigures – 10/10 Normally, I try to not make the minifigs as the sole reason why I buy sets, but this turned out to be better than I expected as I bought this set mainly for the stagecoach but the minfigs made this a much more rewarding purchase. The wildly beautiful Tonto and Red Harrngton figs with exclusive pieces and accessories, the useful and interchangeable cowboy parts of the Lone Ranger and the two bandits, this minifig line-up is certainly a winner! Playability – 7/10 The designers tried their best to put in extra features like the baggage-launcher at the back of the stagecoach, but I still think the only playability this set offers is the "chase role-playing" between our heroes and the baddies. Though even if it's the only real play value, I think kids would still pretty much enjoy their playing time with this set. Price – 9/10 I think this has a great value for a US$30 set: well-designed stagecoach, five minifigures, three horses, and a good selection of parts, can't really complain about that - except that I live in that part of the world where its SRP is 250% more expensive (US$75) and even if I got it at 25% discount it still is god-damn expensive. Lucky Americans! Overall: 85% So did the set meet my initial expectations? I'd say it did, and it passed with flying colors! It's not a perfect set, but it's certainly a great-valued purchase. If there's any set that a casual FOL would like to buy to 'try' or 'sample' this new Lone Ranger theme - I highly recommend this one. Parting Shot Mix-and-match fashion isn't for everybody... And to get you excited for the upcoming The Lone Ranger movie, here is the latest trailer (the third one released so far I believe): Thanks for taking the time to read my review! Comments are always very much welcome! .
-
When I first got news of this figure, I knew I had to own one. What Tolkien fan in their right mind would pass up a Last Alliance Elrond minifigure? However, it was a preorder bonus so I had to dish out a fair amount for him figure. Keep reading for my 25th review special! Set Information: Name: Elrond Set Number: 5000202 Pieces: 6 Price: Preorder Bonus Ages: 6+ Minifigs: 1 Theme: Lord of the Rings Year of Release: 2012 Bricklink Brickset Flickr Set Baggy: The front of the bag has an action pose of Elrond over what could be actual movie footage. It's to small to tell. Then we have the Lord of the Rings banner, Saurons middle finger with the ring on it. Flipping the bag over, we have the usual safety spiel. However, there is no clear line where the color print didn't go, so we can't see the contents of the bag. The baggy is the exact same size as the Darth Maul promo polybag, which is slightly smaller than a normal polybag. Contents: There are only six parts in the bag, and no extras, but I'm already drooling over that sword! Minifigure: So, here he is, out of the bag, and in his full glory. He does look good doesn't he? I have no complaints what-so-ever about him, but let's go a bit more in-depth. Starting with a straight on shot, the first thing that jumps out at me are the colors. We have gold, a soft green, and a darker blue. They all work together perfectly here, capturing the essence of the costume. LEGO did an excellent job making the design simple but still keeping that detail. He has the same hair as Legolas and Haldir, but in dark brown. Notice he has a short cape rather than the long one featured on the bag. I'm still unsure as to why this happened, but I'll be emailing LEGO to see if I can get a long one. The armor continues on the back, even though we don't see it in the movie, I'm sure it looked something like this. A side-by-side comparison of the minifigure and Hugo Weaving who plays Elrond. There's no dirt on any of the minifigure's clothing, but I think that probably would have made it to busy. Other than that, it looks like a great recreation of him. Lastly, a quick comparison of the three elf minifigures available. They all have drawn faces and serious expressions. Nothing funny about these three. Conclusion I'm very happy with this figure. LEGO did an excellent job adapting him into LEGO form, and I can't complain about the color scheme. That sword still has me drooling, so many opportunities to use it. If you're on the fence about Elrond, go get yourself one, he's worth it! Ratings: Playability: 9/10 He's as playable as any minifigure, I don't do much playing myself, and less so with this guy as I paid a nice sum for him. Design: 10/10 The design is perfect, then again, there wasn't much LEGO had to do to this guy. But they adapted him nicely. Price: 8/10 Like I said, I dished out $25 for this guy, which I think is pretty fair for how limited his release was. Minifigure: 10/10 If LEGO, keeps making figures like this I think it's time I get a job. Parts: 10/10 I just love that new sword mold. It looks like a perfect representation of the movie prop. Total: 47/50 Not a perfect score, but I don't think minifigures really work on a scale like this. Like this review? Want to learn how to make good reviews? Then join the Reviewers Academy!
-
Hello all! Here are a few pictures of my upgrade to The DeLorean Time Machine set. If you have an upgrade to share, put a picture below so we can all see it!
-
Set Information Name: Tractor Number: 6608 Theme: Town Sub-Theme: Maintenance Year: 1982 Pieces: 21 Price: Pocket money set Minifigures: 1 Databases: BrickLink; Brickset; Peeron Introduction I’ve been meaning to fill in some of the gaps in the reviews index with my collection. So first up is this little gem from 1982, one I've always been very fond of – usually the first of my town sets that gets built when the bug hits to build the entire theme. Instructions I've long lost the original box, but the cover features the classic minimalist town background whilst the reverse side of the pamphlet features some alternative builds, a go-kart and a couple of dragster-like vehicles. Parts Laid out here are all 17 parts (21 if you count the 4 tyres). No stickers or printed pieces feature here – all except the tyres and axles are obtainable nowadays. Minifigs Probably one of the simplest minifigs ever produced – not even front printed! The fig looks like a general townsperson, nothing to indicate a farm/maintenance theme here. This particular arrangement only featured in this set. The torso lacks any sort of internal bracing – take care removing his arms – and insert short legs at your peril! The Build The model really captures that appealing ‘dinky-toy’ look. TLG would later recycle the design (often featuring a lifting bucket) in several sets: 6603 Shovel Truck (1985) - Yellow 6504 Tractor (1988) - Blue 1633 Mini Loader (1990) - Yellow 6541 Intercoastal Seaport (1991) - Blue 4563 Load and Haul Railroad (1991) - Red (edit - thanks eurotrash!) Summary Playability: 7/10 - Just loving the noisy racket those old wheels make! Design: 9/10 - Pretty much perfect to the point that TLG keeps using it – most recently with 4899. Minifigs: 8/10 - Although nondescript, can be used for nearly anything town-related. Price: 8/10 - Pocket money sets are in short supply nowadays, often available only in certain regions or with promotional periods. Overall: 8/10 - One of those timeless designs that just screams classic Lego. Anyway, thanks for reading – I’ll be back with more reviews in the near future!
-
When I saw the release pictures of this little christmas set I really needed to have it. It fits perfectly with the other christmas sets, and I just have a weakness for christmass trees. So, lets see how this free set holds up! This is my first review made, and english is not my native language so please bear with me! Theme: Seasonal Holiday Set name: Christmas Tree Stand Set Number: 40082 Price: $9,99 / Free Pieces: 115 Minifigures: 2 Year of release: 2013 The Box: The box has a really nice design, featering a nice scene where the lady buys a christmas tree. A big red stamp display that this is a 2013 exclusive set, which makes it that much better. The back features the 2 limited edition sets from this year, the christmas tree stand and the car. They both fit together perfectly and make for a nice play set on its own. The sides of the box are very standard, the bottom shows again the red stamp and the top displays the salesman with a broom at actual size. Nothing special here! Inside the box: Inside the box we find 3 seperate bags. Can't wait too open them! The instructions are very clear and simple to follow, with a nice part call-out on every step and a relaxing blue background. Inside the bags: The first bag, with a brand new purple hat! I think its really pretty and fits the winter style perfectly. Also some lego money, which I cant get enough off. The second bag, nothing special here. The third bag, with some lovely christmas trees and dark red tiles. And all of the parts in one big collection! Minifigs Here are the 2 lovely minifigures, and the lady of course with her brand new purple hat. I also really like the scarf of her. And now, the actual build. We start off with this small tool rack, I think it would have been fine without the bricks under it, but this works great too. The next thing we build is -of course- the stand where the shopkeeper sells his trees from. I really love the design, although I think the bright red tiles on the roof are a bit too vibrant, but I love the little lights under it and the decoration. Its also really small, only 4 studs wide. And to finish it all off, the railings are attached to both sides of the building so the shopkeeper can fence of his christmas trees! There is also some lovely decoration placed on it. Finished! And there we have it, our end result after we have placed the christmas trees inside the fence. Woo! I really love the look of it, its small yet has a lot of playability. And with a few other christmas sets combined. It fits perfectly with the other sets! Don't really pay attention to the lay out, I set it quickly up for the picture. Final comments: This is my first review I've made, so I would love to have some feedback! English is not my native language so writing lots of text is hard for me, and there might be lots of errors in the review. Sorry for that! Design & Colour scheme – 9/10 (I really love the design, and the colours just fit perfectly with the christmas theme and all the other sets.) Minifig – 8/10 (Just your basic minifigs, but I really love the purple hat so a little higher) Parts – 8/10 (I love getting the christmas trees, and ofcourse the purple hat, apart from that there is not a lot going on.) Playability – 8/10 (I love that it has a lot of playability for such a small set, so thats really cool.) Build – 7/10 (Really simple, so nothing special.) Price – 10/10 (Its free! I would almost like it to give it a higher point for this) Overall: 8.3, Really good!
-
Set name: Jet Rocka Set Number: 44014 Price: $35USD , 35 Euro Pieces: 290 Year of release: 2013 Peeron Bricklink Brickset The Packaging The second half of the Hero Factory sets this year continue the Brain Attack theme and style set by the first, with bright green packaging seeping with the infectious yellow influence of the brain slug creatures. Jet Rocka is the largest set of the year, and is the only set to come packaged in a traditional cardboard box, since both Funro XL and Dragon Bolt have made the transition to the resealable plastic packet. Front When you walk into the LEGO aisle of your local toy store, the Hero Factory sets should be easy to spot with their bright high contrast colours. While you may have trouble singling out a specific Hero Factory packet, Jet Rocka stands out with a very large (but thin) box, showcasing Rocka heroically jetting through the city, firing at multiple unseen villains in the sky and on the ground below! The background art isn’t terribly colourful or interesting compared to previous years, but it conveys the scene well and puts all the focus on what’s actually in the box; Jet Rocka. Back Flipping the box around, you get a clear demonstration of the jetpack’s play features, which include Zamor launchers, flick fire missiles, trigger controlled wings and a pivoting windscreen. Rocka’s Hero Core comes with a code worth a tremendous 3000 Game Points, for use online. Inflation must be rampant during the monster crisis, since last year the comparable Speeda Demon only came with 900 Game Points! The cynic in me thinks that this is a devious marketing strategy to make the new sets seem more valuable than the old sets, but the other side of me thinks it’s working! Buying Hero Cores on Bricklink for their Game Points will be complete anarchy if it wasn’t already. The sides of the box contains the usual warnings and disclaimers, plus some odd alternate language names; Rocka Reactor and Rocka Ultrasónico. I personally preferred BIONICLE’s use of fictional names for vehicle sets, because it avoided a set in story needing multiple distinct names due to a word or pun not translating properly. Contents Pry open the cardboard flaps, and you’ll find the contents of the set split between three bags, with the large Power Miner wheels thrown in separately. One bag is for Rocka, so there’s the potential challenge to bag build him! Also included are the instruction booklet and a dreaded sticker sheet, although the stickers are excellently designed and generic enough to be useful for other creations. Pieces Bag One contains Rocka’s parts, which are a healthy mix of armour, bones and smaller pins/detail parts. Compared to previous vehicle sets (aside from Speeda Demon), the focus has always been on the vehicle over the rider, but Rocka “Five” manages to include a fair selection of useful shells in Gold and joints in Dark Bley, unless you already have most of the previous iterations of Rocka. Bags Two and Three contain the pieces required to build the jetpack, and they consist largely of Technic beams, connectors, pins and axles. This set is invaluable for creating larger MOCs with a Technic based construction, but you get very little in the way of weapons and armour parts compared to a regular sized Hero Factory set. Pieces of note include 8 total Phantoka/Makuta – Matoran connectors, 6 White panel fins and a large selection of Light Bley connectors/beams, including 6 new 1x3 beams with perpendicular axles, which serve the purpose of the 1x2 beam versions, but without the half-stud offset on the perpendicular axle. This set only features one recoloured part – an Apple Trans-Green windshield, which isn’t very exciting for Bionicle MOCists, but would be of interest to Spaceship builders. However, there are a fair number of interesting pieces especially if you don’t have many Brain Attack sets yet, particularly the Trans-Green shells and 4 rubber reinforced bone sockets. Rocka comes with the same helmet, head and visor as his other iteration earlier this year, which is great for using the helmet as a shoulder armour piece. Instructions There is only a single instruction booklet, which is large in area and satisfyingly thick. I’m glad it wasn’t split over multiple thinner instruction booklets, although the model probably wasn’t large to warrant it. The instructions are clear and easy to follow, and I had no trouble differentiating the different colours. It’s a bit strange at first to see the Technic beams rendered without the inter-pinhole recesses, but it’s necessary to keep the instruction images clean in the later stages of construction, otherwise all the overlaying beams and holes could become a maze of meaningless black lines. In the back of the booklet there are the usual adds for the other sets of the wave, in this case the menacing Dragon Bolt and the Stormer/Frost Beast pair. The Hero Factory show and this page suggest that Dragon Bolt is Rocka’s pair, but there is no combiner model to affirm that (and there is a combiner model between Dragon Bolt and Surge). Jet Rocka is the odd set out in that sense, but hopefully he might receive his own combiner/alternate model instructions online or as part of the Club magazine There is also an add for the Chima constraction sets, who we find heroically battling it out in the jungle, amongst scenic skies and floating mountain rocks. There’s a QR code as well, which leads to a TV Spot on the Chima website. Finally there are ads for a Brain Attack warping app, and the LEGO club. I won’t spoil the image on the back of the booklet. Now, onto the set! Build First, let’s start with Rocka… Rocka comes together in a matter of minutes, and despite being a simpler build than a normal Hero or Villain set, his construction is interesting in the way it differs, with a long torso bone and multiple reinforced joints on the sets. It’s great to see the useful Technic motor shaft 1/2 offset axle pieces being used as handles for the jetpack. Next up is the jetpack! The first half of the construction process starts off with a confusing array of Technic beams, and it’s difficult to discern the purpose of what you’re making, but gradually as you add the gears and hook up the colour coded red trigger it becomes clear what each beam structure does. Once the Technic frame is complete, you add wings, a tail fin and the display windscreen. The Apple Green swords suit the wings perfectly and demonstrate that even though some of the new Hero Factory pieces feature very little connection points, they are still tremendously versatile and supportive of creative use. We then attach the jetpack to its rider, but it’s still missing something… Of course, jet boosters! Sadly they’re unable to rotate, but they’re fixed at a nice angle and are very well connected. Finally we add weapons, and with that, the build is complete! Finished Set After swooshing it up and down the house, I've found that Jet Rocka is an impressively sized model that looks great and handles fantastically. First let’s look at the two parts individually; Rocka and the jetpack. Rocka ‘n Roll There’s no denying that Rocka is a basic figure – a skeleton of bones with some colour appropriate shells on top. The Constraction system is amazing though, because a simple build such as this yields a completely playable action figure, with proper proportions and 13 points of articulation (18 if you count the visor and core claws). In a way it’s a shame that this set didn’t introduce a Brain Attack form for a character currently lacking one such as Stringer or Nex (or introduce a new character entirely), but Rocka’s colours do suit the jetpack wonderfully. Reinforced Joints It’s great to see that while Rocka has several design oddities, they all exist to allow Rocka to fit into the jetpack better and with less hassle. His reinforced leg joints are great for posing on one leg, but more importantly they support the weight of both Rocka and the massive flight pack. Don't Look Back Rocka suffers from a horrible case of open back syndrome, but it creates more space when connecting to the jetpack, and it’s not a problem once Rocka is installed. The torso shell is also placed further forwards and higher than usual to allow the size 3 shells on the shoulders. It looks odd from the back, but it does provide the set with an extra 3-beam w/ balljoint. Eagle Droid The jetpack can’t stand in an upright position on its own, instead adopting a form that looks a bit like a bird of prey. The jetpack attaches to the back of Rocka via a Phantoka-Matoran connector, and the windscreen fits comfortably over his shoulders. One unfortunate problem with the connector is that it has no preference over whether it will stick to the jet pack or the rider when you detach the two again, but it’s only a minor hassle and you’ll spend most of the time with this set with the two paired up in flight, not continuously linking up and breaking apart. A red trigger on the handle at the back of the jetpack flings the wings up and the Zamor launchers forwards. If you pull the trigger quick enough, the launchers can knock the windscreen closed in the same swift motion. Load up process (Trans-Green under Blacklight! ) Being a Brain Attack hero, Rocka has a core cage and safety visor, which become superfluous once he’s safely behind the jetpack windscreen. Still, they look cool and contain some great parts, so it’s a pro that they’re included instead of not. There is no frictional resistance in the trigger for the wings, so they will fall into a closed position when the jetpack is upright, and an open position when the pack is horizontal. From the side you can see how large the thrusters of this jetpack are! The tail fin ingeniously functions as the handle for swooshing, and the third point of a very stable tripod stand when on the ground. It’s possible for Rocka to balance the jetpack without the tail fin, but the fin allows Rocka to stand normally with no tedious balancing required. Again we see the size of the thrusters, and the impressive wingspan of the set. (The wings have been propped open with a 1x2 plate lodged in the wing folding mechanic.) Flying through the sky! The real highlight of the set is the playfeature that isn’t explicitly directed on the back of the box; swooshing – the art of running a LEGO model around the house while making plane noises. With enough imagination (and recklessness), even the LEGO Taj Mahal can be fun to swoosh, but this set is an absolute joy to swoosh, right out of the box. If you enjoy Hero Factory and swooshing, you owe it to yourself to get this set, because Jet Rocka has the perfect weight, balance and handle controls to provide a fantastic swooshing experience. Alternate Pilots Since Hero Factory has deviated from clone builds, not every Hero fits into the jetpack, but it’s usually as simple as removing the back armour to expose the appropriate connection pins. Ultimately since it’s all made of LEGO, there’s always room to make the adjustments required for any character, set or MOC, to take a joyride through the skies! Final Thoughts Colour Scheme - 10/10 – The colour design on this set is excellent – the aeronautical White and Light Greys of the jetpack neutrally fit with a wide variety of potential pilot colours, while the Apple Green cohesively ties Rocka and the Jetpack together. There is a clear separation between the White aerofoil areas and the Light Grey mechanical underworkings, and while there are the usual blue and red pins, they don’t stand out in garish locations. Parts - 6/10 – At 290 pieces, Jet Rocka definitely gives you an appropriate amount of pieces for your dollar, but it isn’t a good parts pack for most builders. There are a lot of Technic beams and connectors, but there are better Technic set part packs for Technic builders, and the set doesn’t offer as many useful Hero Factory bones/shells/special parts as what an individual Hero Factory figure would include. The primary recoloured part – the windshield would be easier to pick up on Bricklink, for the System builders that might find it more useful. Design - 10/10 - Text Articulation - 9/10 – Rocka comes with all the standard points of articulation you’d expect from an action figure, and the jetpack only lacks rotatable thrusters, something which I’m sure was considered but was ultimately deemed unfeasible for a model this size. Quality - 10/10 – There are no problems with the quality of the joints or plastic, and the set is sturdy enough to take a good beating from many ill-fated Buzz Lightyear dives from the second story railing. Overall - 45/50 – As a model, this set is fantastic, and I would highly recommend it. It has a solid, functional design that is extremely fun to play with, and looks fantastic as well. It carries a bug-like vibe that suits the Brain Attack theme, but it would work well for a Hero on any mission, either Rocka or any character of your own choice. The set falls down with the parts that it offers, but only because the design is so tight that there is no room or need for superfluous and extravagant pieces, other than on the pilot who is generic by design, since he’s not the focus of the set. If you’re looking for pieces, opt for buying a couple of the smaller sets instead, but if you’re looking for a high speed jetpack swooshing adventure (and let’s be honest, who doesn’t want a jetpack? ), Jet Rocka is definitely the answer. HQ Brickshelf Gallery
-
So we all know about TLG's design for it . So I tweaked the design and added some non-Lego parts to it, such as the wire on the back. I also changed it so you could fit 2 minifigures in it (a BIG problem on TLG's part) and painted the BTTF3 wheels. You can see the photos starting here : http://www.flickr.co...tream/lightbox/. Sorry I couldn't just put them up on here, but I ran into some problems, maybe I can't yet because I'm only a Vassal .
-
I've been wanting to get the funny lettered tiles for quite some time now, and this year, with little interest in other theme sets, I decided the time had come to explore this 'Office & School Supplies' section of the LEGO S@H website. I must admit the set did look a bit too colourful and childish at first glance, but the price was good, and it had a nice pieces selection. So, let's see how the set grades fro parts, appearance and 'playability'. Theme: Gear/Office & School Supplies Set name: Business Card Holder Set Number: 850425 Price: 14.99 $, 11.39 £, 12.99 Euro Pieces: 151 (+ 1 gear) Minifigures: 2 Year of release: 2012 Links: Bricklink and Brickset The Box Front Matching the set name, the box has a pretty clean, business-like design. The almost plain yellow background is split in the upper portion by a wave-y white line which separates the LEGO logo and set name from the rest of the info. I suppose this is a standard box for all countries (contrary to usual sets which have regional differences between NA and European versions); in fact, the set information include age range, pieces count and the words 'Building toy' (in three languages), just like the North American standard. On the other hand, the set number is conspicuously absent from the front of the box, probably due to the fact that this is a 'Gear' set and is sold in a different category from the normal themed ones. The size of the box is approximately that of a medium-small standard set. Back The back is quite bare as well, with only the set name (in 5 new languages this time; of course, Italian is not there!) and a shot of the minifigs and business card together with the parts callout. LEGO designers really wanted to keep things simple in this design. Sides Not much to say about the sides. The upper one (the only I photographed), sports a 1:1 mug shot of the smirking male minifigure, the LEGO logo and the usual info about production. Apparently parts in this set come from Denmark, Hungary, Mexico and China. Surprise! You may have notice the standard 'Put your finger here to open the box' spot on the back of the box. Well, that's a totally useless addition, as this box comes with not-glued side flaps and can be open normally, without any need to indent the back side. I can only suppose the box designers simply used a common template and did not bother to check the actual product they where working on... Contents Inside Inside the box, we find three thick polybags, one for the instructions and business card, one of the lettered tiles and one for the other pieces. All the polybags are made of recyclable plastic, but the bigger one includes some more ink for the usual LEGO safety warning in a plethora of languages. The parts' selection isn't spectacular, for the normal bricks, but includes ever useful parts in a number of colours. Of course, the raison d'etre of this set are the printed tiles, and there's plenty of those! New pieces The new pieces include all the special characters and number tiles (all of which in Black): Tile 1 x 1 with Silver '-' Pattern, Tile 1 x 1 with Silver '.' Pattern, Tile 1 x 1 with Silver '@' Pattern, Tile 1 x 1 with Silver '_' Pattern, Tile 1 x 1 with Silver Number 0 Pattern, Tile 1 x 1 with Silver Number 1 Pattern, Tile 1 x 1 with Silver Number 2 Pattern, Tile 1 x 1 with Silver Number 3 Pattern, Tile 1 x 1 with Silver Number 4 Pattern, Tile 1 x 1 with Silver Number 5 Pattern, Tile 1 x 1 with Silver Number 6 Pattern, Tile 1 x 1 with Silver Number 7 Pattern, Tile 1 x 1 with Silver Number 8 Pattern, and Tile 1 x 1 with Silver Number 9 Pattern. I'd also like to notice that , for some reason, the set includes (or, at least, this particular one does) 3 Q tiles, whereas the parts list only shows 2. It's also interesting that you cannot write a whole web address with these tiles, as there are only 2 W there... Maybe next version will include a special 'www.' tile as well. Instructions Upon opening the instructions and card polybag, I felt a rush of nostalgia for the old times, as the instructions 'booklet' is no booklet at all: it's an old style folded sheet. Now, I'm well aware we get plenty of these in polybags of all themes, but I haven't see something like this in bigger sets for a very long time. The back of the business card has blank spaces where to write your name, address, e-mail/web address, phone number and (I suppose) birthday. The instructions have a nice and relaxing light-blue background, almost no pieces call-outs (see next picture) and are easy to read and follow. Again, as on the back of the box, the last part of the instructions sheet is dedicated to the parts list. Minifigures Nothing spectacular in the minifigs compartment. These business couple sport some plain overalls, very common in the City theme nowadays and cured bill red caps, probably to give them a window-cleaner or bill sticker look to either make you feel as big boss or movie star. The faces, too, are very common, with the smirking male and soft-eyed, cherry-lips female. Always an useful addition to ones collection, but definitely no news at all. The back printing of the torso is no surprise even with such simple designs, nowadays. And, of course, the heads do not sport back printing, since the caps could not cover them. Building We start off by building a sort of small swimming pool-like, tiled box with a rainbow-ish back wall. We go up until al the 2x1 and 1x1 coloured bricks have been used, and top both sides with the 1x12 white plates. Do not worry, though: you won't have to look at the mix-matched wall for long! In fact, the business card will cover up most of the build and you will be able to rest your eyes on those smiling minifig faces (or your own personal info) for as long as you'll wish. Speaking of the two workers, they will have their personal stands to be impaled, well, stand on, while... ...they'll guard your bill-board yellow 6x10 plate. Here, I used up all the Es for the first word, so had to resort to a flipped 3 to complete the second word. Bonus images Let me introduce myself It's quite funny to browse through the tiles to pick up your letters and compose bill-board announcements and such. Just be aware of the limited number of letters at your disposal. Again, I had to resort to a little trick (photoshop, in this case), to complete the second word, having used all the (2) Rs in the glorious Eurobricks name. I would advise people to buy a second copy of this set if you think you'll need many of the same letter for your compositions. Final comments Overall, this is a nice little set, with pretty unique parts and a fine number of more common, ever used bricks and two generic worker minifigs. Design & Colour scheme – 8/10 (Very well proportioned and efficient. The only con is the somewhat too childish colour scheme, considering the business-oriented look of the set, as shown on the box.) Minifig – 8/10 (A happy working couple to set up our business card holder and guard the bill-board. Minus points for the very common parts, though.) Parts – 9/10 (All useful parts here, with the big plus of the printed tiles. The new special characters are an interesting addition, and the letters will be useful in any collection.) Playability – 6/10 (From an AFOL's point of view, this set is pretty poor in sheer playability. I mean, there isn't even a secret compartment of flick-fire missile! On the other hand, I suppose kids can have lots of fun with the little workers setting up and tearing down the bill-board.) Build – 6/10 (Very very simple and plain.) Price – 10/10 (Considering almost half of the parts are printed, this is a very good set price-wise.) Overall: 7.8/10 Very good As always, questions, comments, and pic requests welcome! If you like my reviews, and would like to learn how it's done, please consider joining the Reviewers Academy:
-

Review Quality Custom Bricks Flash & Black Flash figs
LuxorV posted a topic in Minifig Customisation Workshop
While not a cultural absolute (if you haven't read this article by David Morgan-Mar already, go read it; I'll wait), DC comics character Flash is one of those comic book heroes almost everybody have had a glimpse of in one media or another. I must admit I'm a lot less acquainted with Black Flash. Anyway, we're not here to discuss the respective merits of the two characters' PR agents, so let's start with the review of their minifig forms custom produced by qualitycustombricks.com. Theme: Super Heroes Type: Custom printed minifigures Figs names: Flash and Black Flash Price: 20-25 $ Pieces: 3 each (head, torso and legs) Year of release: 2013 The Box Front The Flash's costume seems to have remained more or less the same since the 1950s, save for minor details, mainly in the boots. Quality Custom Bricks designers really captured its style and feel really well, with the big flash on the white disk on the chest and the smaller flash-motives on the belt and legs. Black Flash, also is spot on, and we can clearly see how his costume is a copy/mockery of the original Flash's one. The zombie-like 'grin' is very accurate to the original character, and somewhat reminds me of the original LEGO Venom minifigure. The figures are digitally printed and, I'm assured by TonysBrickVault, they are just as durable as factory LEGO print. The only difference is this printing looks and feels like a bas relief on the figure, but not so much so that it can get off easily with use. Back The back side is equally detailed in both figs, with the 'belts' and boot lines, as well as some backbone and shoulder-bone design to enrich it. The lighter and thinner lines are, of course, more visible on the Black Flash fig, as they are highlighted by the darker background colour. Moreover, both figs have printing inside their legs, or better, inside the lower hole of the legs. You can more or less see it in this picture (believe me, it's quite tricky to photograph) that the two of them share a lighting motive in there, which completes the lining of the boots. Great job with detailing, Quality Custom Bricks! Sides In this side view we can have a better look at the boot and mask detailing. Flash sports his trademark wing-like design, much like a modern Hermes. Black Flash keeps mocking our hero, with somewhat super-sized and more complicated mask 'wings' and lighting-like stripes on the boots. Bonus The Flash minifigure is a great addition to any DC fan's collection, as LEGO is not producing his fig yet. So, Justice League of America... Assemble!? Final comments Overall, these two figs are excellent, in both design and printing. They are very faithful to the original comic design, and the custom job looks durable enough. I do recommend them to any DC or general Super Heroes and comics' fan, as they fill a gap in the current LEGO production with compatible quality and detailing. And for the Marvel fans, don't forget the latest addition to the qualitycustombricks.com collection: Norman Osborn's Dark Avengers Iron Patriot minifigure! As always, questions, comments, and pic requests welcome! -
It's that time of the year again! No, not Christmas, but the time when the new Star Wars Advent Calendar is released. Becoming a bit of a tradition for me reviewing the past two, I bring you our newest Advent Calender which seems to become a new standard, selling alongside the City Calendar. Being released no where near Christmas is strange, but only one/two of the windows are actually Christmas themed, so everything else is pretty nice to have just for the parts or collecting value. Set Name: Lego Star Wars Advent Calendar Set Number: 75023 Pieces: 254 (there are about 20-30 extras) Minifigures: 9 Price: $49.99 CDN $39.99 USD Year of Release: 2013 Onto our review, the box photographs very strange because some of the printing (on Jango most notably) is textured. Making the light reflect off it in quite a positive way. The box does however give away the surprise exclusive minifigure. The top of the box shows us some of the minifigures we'll be getting in their "actual size". The back shows us the proper way to open the box and some of it's contents plus a code for the Yoda Chronicles. So you have two options, cut the tape on the sides and pull out the tray, or cut the tape on the back and flip it open thusly. Sidenote: save the black tray, it's great for sorting pieces in larger sets. The instructions are found on the inside of each door, some of the larger micro models can be a bit difficult at first, but some of them just need a second look. Day 1: Yellow astromech, same guy we got in the most recent Y-Wing. I like him. Day 2: Count Dooku's Solar Sailer (I didn't know what it was at first) Day 3: Count Dooku's Pilot Droid Fitting in with Day 2, this inclusion is a bit weak. I don't see the need for two of these. Day 4: Zam Wessel`s Speeder Seems like a missed opportunity not making a redone Zam, or to build Anakin and Kenobi`s speeder. Bag 5: Cloud Car Day 6: Boro-wait..Endor Trooper Much angrier than any previous Rebel we`ve had. But he does have a reversible head. Settling down. Day 7: Weapon rack. It`s become a theme in Advent Calendars to not supply the minifigures with weapons, but to just throw them all together later on... Day 8 Republic Attack Gunship Ok, so this is a huge pet peeve of mine, I saw many comments praising this model, even though it is a complete rip-off of the other Gunship we got in the first advent calendar except this one has the binocular piece on top. Day 9: Acclamator It`s very tough to build large scale ships in micro, but this is a fairly good rendition. Day 10: Clone Trooper Fitting, seeing our last two builds. Day 11: AT-TE That strange stud on top? Patience grasshopper. Mother and child. Day 12: LAAT Dropship As you probably guessed, these two can hook up, quite well actually. Day 13: Battle Droid Nothing special here. Day 14: Geonosian Fighter Personally I hate this, I feel like the geonosian fighter is just to difficult to re-create in Lego, in any scale. Day 15: Geonosian No wings? Day 16: Another weapons rack. Day 17: Naboo Starship (before it's blown up at the beginning of Episode II Day 18: Scout Trooper Only seen in the new Ewok Village, this guy is a gem. Day 19: Separatist Shuttle. We've gotten one of these in the first calendar as well, but a little different build and different colour. Day 20: Obi Wan's Jedi Starfighter. Day 21: Jango Fett's Slave 1 Built in the same way as the first advent calendars Slave 1...but different colours obviously. Wings can rotate. Day 22: Boba Fett Lovely figure, exclusive to this set and I can't imagine being added into another set in the near future. Plus a reversible head when he's busy shooting Obi Wan. Day 23: A silly rocket sled dealy. Day 24: Jango Fett These seems to fall along the lines of the Santa Darth Maul, having a villain as the Santa character doesn't make any sense to me. The colours go horribly together and the torso is pretty much useless for anything else. Even with Jango being a popular character. I feel having Obi Wan being the Santa making more sense. (he does have the beard after all). Here is the entirety of the calendar all laid out. It's fairly lackluster to me, but oh well. Someone else will like it. Looks like the Kaminoans didn't give Jango enough money to provide his family with a large enough sled. In previous years the Advent Calendars have been a decent mix of the movies, but clearly thing one focuses much more on Episode II. With only 4 days being something other than AOTC related. Overall: Obviously the Advent Calendars are following suit with the regular sets, where the minifigures are the main draw to the set with the sets being less than average. Personally I would be much happier if TLC just hired Legostein to create all their new micro and mini models. Build: 7/10 It goes by pretty quick, but I imagine it being a lot more fun building it one per day like you're supposed to. Design: 3/10 Most of these builds are just awful, not to mention the ones that we've seen already. Come on, we've only had 3 calendars so far. Price: 8/10 I'm impartial to prices Pieces: 8/10 We do get a good array of small pieces, plus lots of extra goodies. Playability: 9/10 One of these days I'm going to make a huge battle scene consisting of micro scale vehicles. A lot of these do go together. LAAT/AT-TE, Clone/Battle Droid, Slave 1/Jedi Starfighter, Solar Sailer/Pilot Droid. Minifigures: 8/10 The plain old battle droid and the pilot droid bring down this mark a bit, but the Boba and the Scout Trooper more than make up for it. Total: 43/60