Search the Community
Showing results for tags 'sails'.
Found 19 results
-
This library contains 1:1 scans for all the sails of the pirate theme. We are counting on you to help complete this library. The ones we still miss are listed below. If you own one of the missing sails and are willing to make a scan, we'll add them. We will also include custom sails in the library. Please use the same dimensions as the ones in the library, so people can give their ships a facelift by changing all the sails with customs. These following images are found in EB Pirates Google Photo Album Official Pirate Sails & Flags Armada Flagship (6280 - 6291): Black Seas Barracuda (6285 - 10040): Brickbeard's Bounty (6243) Captain Kragg's Pirate Boat (7072): Captain Redbeard's Pirate Ship (7075): missing Caribbean Clipper (6274): Missing both square-rigged sails. Digital Sails Coin Bank, Pirate Ship (852748) Cross Bone Clipper (6250): Enchanted Island (6278 - 6292) and King Kahuka's Throne (6262): Imperial Trading Post (6277): Imperial Flagship (6271): missing jib Imperial Flagship (10120) Imperial Trading Post (6277) and Lagoon Lock-Up (6267): Islander Catamaran (6265): Raft Raiders (6261): Red Beard Runner (6289 - 6290): Sails are not 1:1 scale. Renegade Runner (6268): Rock Island Refuge (6273): missing Shipwreck Island (6296) and Pirates Perilous Pitfall (6281): Skull's Eye Schooner (6268- 6286): Sails & Flags from Other Sets Emperor's Ship (7416): Not 1:1 Scale Sea Serpent (6057): King Leo's Castle (6091/6098) Sail dimensions: 127mm x 127mm Dark Dragon's Den (6076), Dragon Wagon (6056), Fire Breathing Fortress (6082), & Majisto's Tower (1906) Custom Sails & Flags Fryslayer - Castle Templates SlyOwl - Pirate Sails & Flags
-
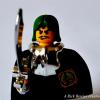
[bloggedcp][/bloggedcp] Hi all, this is my first post here so I hope some of you will find this useful. I have been interested in lego pirates in particular since I got my first set almost 20 years ago. The problem is that as the sets age, the sails become tattered and worn, and can be quite difficult to find. I've been searching for a while now for a reliable technique for reproducing lego sails in as authentic a way as possible, but with little success (maybe I've just been looking wrong?) Anyhow, I've been working on my own technique, and decided I would share it for those who, like me, have been searching for a way to make authentic looking lego sails that are nearly indistinguishable from the originals. The sails I've been working on are those of the Skull's Eye Schooner, the number one ship on my, and half the planet's, wanted list. The problem everyone has when it comes to reproducing sails is trying to work out the material that lego uses. It has a relatively unique stiffness for a cloth that is relatively thin; this is not because a special material has been used, but because a standard linen cloth has been prepared with a sizing/priming agent. What I have done is primed regular calico cloth with a watered down acrylic gesso. When dried, it is a very good likeness of lego's cloth, and is stiff enough to be fed into an inkjet printer. Here's the gesso I used: gesso is used by artists to prime canvases for painting and can be purchased from any art/craft supply store, this jar cost me $10 and will probably make a few dozen sails. They can come coloured, I've chosen white as the base colour of the skull's eye schooner is white, but acrylic paint can be added to make different base colours, such as the tan coloured imperial flagship's sails. Again, just plain calico, very cheap I've cut it slightly larger than A4 here You want to water the gesso down roughly 1 part gesso to 3 parts water, this will help the gesso to soak into the calico. Give it two coats on each side then hang it up to dry. Once dry, I trimmed it down to A4 size. Next up, I got the 1:1 scans from the sails library here: http://www.eurobrick...showtopic=10076 , traced them in photoshop and recoloured them to improve the saturation once printed. As the scans were 1:1, no resizing was needed before printing. I just fed the canvas into the printer carefully and printed at high quality settings. Once the sail is printed it's just a matter of cutting them out: And here's the final result: And here's an armada flagship sail I made I hope someone finds this useful. I will upload my tracings later for anyone who's interested
-
[DIGITAL] TUTORIAL: How to make custom digital sails for Studio.io
Marooned Marin posted a topic in Pirate MOCs
I could not stand idea of using plates or tiles to simulate sails inside digital design of my ships, so I went on and figured out how to make your custom digital sails in 3D and import them into Studio.io which I use for digital design of my MOCs. I will demonstrate step by step process of main sail of my little MOC – Warty Crab. Let’s go! 1. DESIGNING 3D SAILS IN CAD 1.1 We start by opening our CAD software (for this demonstration I used SolidWorks) and in ‘Front-plane’ we draw arch with dimensions as shown on picture 1.2 Next, we use ‘Extrude’ feature to create third dimension. Length 105 millimeters. Be sure to use mid-plane option. Important: check ‘thin-feature’ value 1mm. This makes part solid instead of being only surface. 1.3 Next, we choose ‘Right-plane’ where we draw two circles with dimensions as picture shows. 1.4 We use feature ‘Extrude-Cut’ to cut-out the top and bottom of the sail 1.5 We repeat the process for left and right side – in new sketch we draw two new circles as picture shows. 1.6 Click on ‘Extrude-Cut’ and off they go, both sides 1.7 We need to smooth out sharp edges with feature ‘Fillet’ radius 6mm. We choose sharp edge one by one all around 1.8 We repeat the same for other sharp edges using ‘Fillet’ 3mm. 1.9 Last thing we need to make holes for hanging our sails. In ‘Right-plane’ we draw four holes as picture shows 1.10 Click on ‘Extrude-Cut’ 2. EXPORT TO STL FORMAT 2.1 Click on ‘File’ -> ‘Save-As’ -> and under type we choose ‘STL’ but before saving we must click OPTIONS. This is most important part of the process. 2.2 Inside the options we check ‘ASCII’ ‘millimeters’. If we stay in ‘Binary’ the process won’t work! Ye be warned. Also, we check ‘Coarse’ resolution on purpose. Fine resolution will make file too big for conversion and very hard for Partdesigner to open later on. 2.3 Click on ‘Save to Desktop’ in this demonstration example 3. CONVERSION OF STL TO DAT Partdesigner (the accompanying software of Studio.io) is not able to open STL format, but is able to open DAT format, so next order of business is to convert STL to DAT using one small but crucial script. 3.1 We visit website https://github.com/HazenBabcock/stl-to-dat 3.2 Click on ‘CODE’ on the right side of screen and we choose ‘Download as ZIP’ 3.3 We extract the content of ZIP file on Desktop (it says THIS IS MY DESKTOP) and we copy our STL file inside the same folder 3.4 Inside the folder we drag and drop STL file over icon stlToDat.py as picture shows 3.5 The script will come alive and in one or two second, using the black screen, it will convert the file to DAT. How do we know we succeeded? Inside the same folder a DAT file will appear with some amount of size in kb. Be warned: if created DAT file has zero 0 kb something went wrong (this can happen). If you try to convert too big file the process can take several minutes, but I don’t recommend this since it will be impossible for Partdesigner to manage large files. 4. PARTDESIGNER 4.1 We launch Partdesigner and we click ‘IMPORT’ on the right side 4.2 In new window we chose ‘3D-objects’ and we click ‘Choose a file’ 4.3 We go on Desktop (in this example), inside the folder of little conversion program, and choose our DAT file. Click ‘Open’. 4.4 In preview window we can sometimes see the 3D part. This time no. Never mind, click ‘INSERT’ 4.5 We have our sail successfully opened, but before exporting it to Studio, we can make in red/white colors. We choose ‘Insert’ -> ‘Image’ 4.6 From Desktop we choose RedWhite.PNG pattern picture (image must be in PNG format), and we click ‘Open’ 4.7 Inside Partdesigner we place and position the image the best way we can, and when we are happy we click on check mark. Be patient for few seconds until image appears glued to the surface of new custom part. 4.8 Finally, we can click ‘Export to Studio’ and we rename the part as we please. 5. STUDIO.IO 5.1 We launch the Studio.io and inside we choose ‘Custom Parts’ in left menu 5.2 We find our new sail and we drag and drop it on working surface which the whole process ends. The same process I used when I made custom ropes for ‘rigging’. So now you know how it’s done. I hope it helps. Now go and create! :) THE END -
I needed to make the final sails for HMS BIRCH so I thought this would be a good opportunity to show my method for sail making. I based this technique on tutorials from this forum as well as some model ship forums along with some of my own intuition and experimentation. This tutorial is for making fairly realistic sails. If you are trying to make sails in the style of official Lego sails, I recommend you check out this topic on reproducing Lego sails from which I took inspiration. To start, make paper templates of the sails you want to make. Then trace them onto your fabric. I'm using calico because it has a natural color, it's thin and is pretty inexpensive. Next, cut out your sails being sure to leave at least half an inch around the edges. This border will allow you to hem the edges later but you want to leave more than your intended hem to account for the fraying of the fabric. Then, using a pencil and a ruler, draw lines to mark where you will sew a stitch to represent the seam between panels of sailcloth. In historical ships, panels were usually between 18 and 42 inches wide depending on what country they were made in the type of sail. I spaced my seams at 3/4 inch for square sails and 1/2 inch for triangular sails. Here is a great reference on sails. Now you can sew the fake seams. The pencil lines make it much easier to sew a straight line and it is very obvious on the final product if your lines aren't parallel. I'm no seamstress but I understand that you should backstitch at the ends of the stitch to prevent it from unraveling. I usually go 1/4 inch past the edge of the sail for this. Now we apply art gesso to slightly stiffen the fabric and prevent further fraying. I applied a mixture of one part gesso to 3 parts water to both sides using a cheap paintbrush. Then hang them up to dry for a few hours. I usually hang them outside but it was cold and rainy. I usually iron the sails briefly to make sure they are flat before proceeding. Then, mark a line 1/4 inch from the edge of the final sail and cut it out. This will be our hemmed edge. Fold over the edge using a ruler. This is your last opportunity to make sure the line is straight. I've noticed that tracing on a flexible fabric can lead to lines that are slightly curved but I don't sweat it because I know I can fix it here. Finally, sew your hem. You can also glue or sew in some string to use as attachment points for your sheets and halyards to make attaching your sails to your ship easier later. And you've done it! Your ships will be the fastest on the seas! Please let me know if you have any questions or if anything is unclear. This is my first time trying to make a tutorial so I hope you find it useful.
-

How do you display your sets, with or without sails? If with, how do you keep them clean and crisp?
Lord Valgor posted a topic in LEGO Pirates
Hello, Looking for input/ experience/ advice. As my fleet continues to grow, I'm reconsidering how I would traditionally display my ships. Previously I would display them without sails, because I was too afraid that the sails would become dusty and/or deflated (not crisp). Sails I store in ziplock bags, with silica packets, and beneath books (keep them away from light, dust, and moisture). I'm specifically interested in how some of the 'newer' sails (10210, QAR, 21322) have held up for you so far, but any experience is welcome. Thanks for your input! -

[MOC] The Yago (green and white pirate ship) - 21332 MOD with brick-built sails from 31109
Murdoch17 posted a topic in Pirate MOCs
Captained by a Welsh fellow named Henry Smithfield, this ship, the "Yago", originally operated out of what became one of the Southern-most English Colonies. The mission was as a privateer to harass any Spanish ships coming from the Caribbean to the old world with gold and silver, (plus harass and steal from the French), for around five years, starting in 1705. But eventually, Cpt. Henry grew tired of paying his due of treasure to the English crown, and set off to make his own way in the world "free" of any government. He moved his base of operations to a small abandoned island in the Caribbean with his crew, used by Islanders from years prior. He got his crew to complete a fort, and used it as his base of operations. He plundered many a French, Spanish, and other nations' ships, along with his former comrades in the English navy. In early summer 1717 the Yago was last seen by some trappers on land (near what later became the port of Savannah, Georgia) sailing low in the water, going north, unknowingly into the path of a massive hurricane. The resulting wreck has never been found, and it was rumored to have been loaded to the gun-ports with gold and silver taken from a Spanish treasure ship by Florida's southern coast. (which had been found, incidentally, empty of most of it's treasure in the 1960's.) This could explain the heavily laden shape of the Yago that day in June 1717. As to what happened to the ship after it left the later-day Savannah area is anyone's guess, as it seems to have vanished without a trace off the face of the Earth. In reality, this ship's shape is inspired by set 21332, (Ideas' "Pirates of Barracuda Bay") but with the brick-built sails of set 31109. (Creator "Pirate Ship") The ship features the Ninjago pirate's flag as I don't have a way to make my own. (I don't want to change it anyway, as it reminds me of being inspired to build my original pirate ship by the Skybound sub-theme of Ninjago.) The stern of the ship, features the ship's wheel and flagpole for the ship's flag along with the ship's name, "Yago". The green feathers of my parent's talkative pet bird, Yago, (actually a Nanday Conure we rescued 11 years ago) inspired me to name the ship after him. I also tried to think of a bird shaped figure-head for the bowsprit, but failed to think of a good way of doing him justice. The ship is devoid of any major below-deck features, except for the eight firing cannons. The only place there is any real furniture is the captain's cabin and that consists of a table and rotating chair. The table features a nautical chart, wine glass, and a set of scales for divvying out loot to the crew / ship's purse. (for repairs and "edibles" stocks) Captain Henry Smithfield (in green) and his crew. (he has his old sword here. Need to update this picture!) Here is the Nanday conure my pirate ship is named after. You guys can also build you're own version of "The Yago" and the dock now that the LDD file is available here at my Bricksafe page. NOTE: six parts are missing from the file: Two of this 1 x 2 rounded-edge plate in black, for the rudder. Four of this black part 1x1 bracket, near the bow. There are some pieces placed next to the ship, which are for the rudder, above the amidships ladder on the sides, and for the bowsprit area. UPDATE: The ship is finished, with new pictures and text detailing the ship's history... what do you think of it? Any and all comments, questions, suggestions, and complaints are welcome! -
Hello friends! After so many years of reading and fawning over everyone else's ships, I finally got up the courage to post one of my own. I wanted to make a pirate ship that was playable while still being sort of accurate. So while you won't see any hand-strung shrouds and ratlines, I can assure you that it's a hit with the kids. I call it the Medusa, mostly because of the green color scheme I adopted for this project. Pirate ships look so good in red and black, sometimes I forget that any vessel could have been a pirate ship. I opted to portray this pirate captain before his debilitating injuries. His name is Horatio North, in case you're wondering. Okay, so I'm aware that rudder is garbage. I actually forgot to build a rudder at all until I went to take pictures. It will get revised out when I go to clean up that quarter; it looks o.k. in real life, but the picture definitely doesn't catch its good side. Fun fact: half the cannon doors on this ship are fake! Even though I'm too young to have played with classic pirate sets, I respect the nostalgia with this fancy chap. Besides, he matches the ship! The more attractive, rugged version of that last bloke I think that thing is called a 'cathead.' The figurehead was a pain in the butt, but the end result is worth it IMHO Most of the sails are easy to take down and replace after a fierce battle The very meh stern Yup. This is the innovative, super-useful thing I put in the cabin. Kinda looks like the chair from Blue's Clues. A bookcase, since I failed at making a brick-built map of the world on that wall. I did, however, find room for my favorite detail from The Brick Bounty Okay, so I basically make storage space when I can't think of anything cool to go there. u_u Under the bell and the [fake] scuttle, I included some bunks. Can someone help me out? I know I took this cannon design from somebody on this forum, but I can't remember who it was. Let me know if these look familiar so I can properly thank them. Finally, a shot of the jolly bunch all together. This was my fourth focused attempt to make a brig that was both fun to play with and more accurate than not. Not sure if I succeeded, but I had a blast doing it. I have another ship I built for the Bluecoats that I haven't photographed yet. With your comments and constructive criticisms, perhaps I can coax up the courage to post that piece as well. MAC
-
Hello fellow builders, I present you the Flying Dutchman, the infamous ghost ship from the Pirates of the Caribbean film series, in LEGO! The idea came to me a year ago, while I was sitting at my desk when I cast me eyes upon the 3 official LEGO POTC ships on the top of my shelf: The Black Pearl, The Queen Anne's Revenge, and The Silent Mary. For years I had been waiting for LEGO to release a Flying Dutchman, but to no avail it never came out. Determined to build the ship myself, I embarked on an exciting, challenging but rewarding journey to produce a MOC which would take up its rightful place among my fleet and make it complete. More information can be found here at LEGO IDEAS. If you like it, feel free to support! Here are some renders below (more can be found on my Flickr page): LEGO Flying Dutchman - 1 by Scarvia LEGO Flying Dutchman - 2 by Scarvia LEGO Flying Dutchman - 4 by Scarvia And with the crew: LEGO Flying Dutchman - 6 by Scarvia The infamous triple-barrelled chasers in the bow: Triple-barrelled chasers (Out) by Scarvia Triple-barrelled chasers (In) by Scarvia Thank you for your time.
-
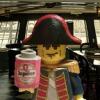
Hey Guys, I searched around on these forums but didn't find anything on this topic, so I figured I would ask in hopes that some of you have some really good advice for future ladies and gents (as well as myself). I am curious how all of you store your lego sails long term. I have the Imperial Flagships (6271 & 10210) and QAR which both use the thinner crisper type fabric, and currently I store them in a ziplock bag (not sealed) at the bottom of a large book. I recently took them out for a special Halloween display, and they felt a bit moist (I don't close the ziplock bag because I am afraid that they will mold). Originally I wanted to ask if you think I should throw some silica gel packets in with the sails, and whether then to close or open the bag, but instead I figured why not open this up for discussion. So, I am curious how you guys store your lego sails, and what you would recommend overall as best practice. Some other questions I have: - Do the IF and QAR sails require differences in storage due to their difference in composition? - Do you guys keep your sails on display usually, or in storage? If on display, how do you prevent or clean off dust? PS- I feel like I remember seeing a thread that had to do with cleaning sails, but I can't find it. Can someone point me to it? It may have some relevant information on this topic too :).
-
Hey all, it's been quite awhile since I was last able to build, but I just couldn't miss the Colossal Castle Contest - especially with a warship category this year. So, Instead of building a handful of rushed entries, I decided instead to pour my heart and soul into a single entry. (Pictures link to Flickr) I decided to revisit an idea I had when I built my first ship a couple years ago. I hadn't managed to make it work then, but I have come a long way as a builder since then. The technique ended up working even better than I had hoped, allowing me to build a sturdy, frustration-free hull with multidirectional curvature and minimal attachment points. This enabled me to make the sides of the hull removable, and to add an interior. The walls you see belowdecks are actually attached to the backside of the ship's frame, meaning that no matter which side is removed, the cabin will always appear as a complete cross-section. In addition, the entire ship is modular, allowing for the removal of the mast and rigging, forecastle, stern decks, hull, and even the main deck, which slides up over the mast. I really wanted to go all-out this year, and, inspired by JKBrickworks' working torsion-spring ballista, I decided to add a functional artillery piece to the deck. This was very challenging, as JKBrickworks' model is over 16 studs wide (much too big for mounting on the ship). Effective torsion springs took up too much space, so I instead lashed together flex tubes and built a scaled-down winding/ratcheting system that is similar to JKBrickworks' original design. It worked, and the ballista you see will wind, hold, and launch multiple projectiles across a desk. Finally, the ship features a working rudder and tiller, all-LEGO rigging (including the rat-lines, which are cut and sewn-together nets), deployable anchors, three projectile types for the ballista (bolt, harpoon, and ball-and-chain), crow's nest mounted crossbow, working doors and hatch, and a full crew including the VIP passengers, captain, navigator, sailors, cook, naval warfare officer, ballista crewmen, marine detachment commander, marine boarder, "Leatherhead" marine sharpshooter, and expeditionary marine. I hope you enjoy this build as much as I enjoyed building it! As always, comments and criticism are welcome and appreciated, and there are (and will be) more pictures on Flickr. Happy New Year!
-
Harr me harties! I mean ahoy maties! I'd like to present you my new ship. I really wanted to do something with my white hull, but at first I thought it was not going to be used. The white and black tops looked so pixelized, I had to do something. So I covered up the black with white tiles. I also got really inspired by Kurigans red walls on the inside of his new brig, but I don't like the use of electrical tape. So I took a look at the brig made by Andersen T. and got the idea of using tiles on the side. This might also be done with the new small 1x2 rounded slopes, but I like the planked look the tiles have now. I haven't put figures on the ship yet, I need to think of a captain and all that but I don't have the DB's to license her at the moment anyway. So I might do that later on, but for now; enjoy the pictures!
-
Trying something new here, join in and show your support! Though I am a proponent of functional cloth sails myself I am still fascinated and often impressed my brick-built sails on Lego ships. For a static model, it’s often a superior way to capture action or suggest motion while maintaining Lego purity in a MOC. Unlike most everything else about Lego ship building though there is little to no convention on the matter. We even give names to the different hull building techniques, write tutorials on cloth sail making and keep indices to categorize all the different ships and elements. So my intent here is to start a discussion and gather examples with which to create that convention for ourselves and encourage the pursuit in future builds. To start things off I’m going to reference two museum displays which, sadly, are no more, but have very impressive sails. I shared this Schooner some time ago and was informed in the original topic that it was no longer there. These are some of the best I’ve personally seen, with very realistic bolster and bellies. The more impressive thing is that it appears to be using all Lego elements to support all that. I stumbled across this carrack the other night and it too was part of a museum's display, but the Canadian Science and Technology Museum has sadly closed its doors. The hull here is rather impressive in its own right but the sails here are very convincing. Form the one image I can find I can’t tell what the masts are made of. LEGO® Ferdinand Magellan by Canada Science and Technology Museum, on Flickr It looks like that same schooner came from or wound up in the same display. Both of my examples here raise the question: can an all Lego rig support all Lego sails? What do you all think? Go ahead and add your own examples. If anyone knows the creator’s of these MOCs, please get us in contact with them or at least make them aware of this post. We’d love to have their input on the discussion.
-
I recently had a look at the index, and I found out there was no tutorial for making sails the way for example Green Hair, Perfectionist and I do it. In this tutorial I will mainly focus on the main topsail because if you know how to do that one, all the other sails will be a piece of cake as well. The first thing when you want to make sails is of course looking for reference. There are some good books about ships but there are also many good drawings on the internet. Then you can (if you want to) put a piece of cotton or other cloth (linen for example) in a bucket with tea or coffee. I used black tea. Coffee will give them more this colour. I use tea because it looks more stained like these sails (although these are a bit too dirty IMO). But perhaps the stained look is achieved because I folded the cloth in the tea. With unbleached cotton this is of course not necessary, and perhaps not smart but I've never tried it. After soaking, it's smart to iron the sails so you don't have all the wrinkles in it. Next thing is to decide the scale of the sail. In this tutorial I'm making the sail twice as large as on the picture: In that scale you can make the outlines of the sail: Then you can add vertical lines. On minifig illusion scale 1cm between each line looks realistic. But Greenhair and Perfectionist are using more space between them and that doesn't look bad either. On the right half of this sail I used a darker pencil than on the left halft to show you the difference. I think the lighter half looks the best. Now on to the horizontal lines, which you can see here: Note: not all sails have these horizontal lines. It depends on the ship you're making which ones do and which ones don't have them. The space between each line is about 1cm, so that makes 2cm on my sail. Next thing is too add spots on the place where usually are ropes. I believe the ropes are used for taking in the sails. Adding all those ropes is too much work IMO (although it has been done), so to give the impression of them, I add these dots. Here are the ropes on a picture: When you're finished with that, the next thing is too make the outlines brown. This is not neccesary, but it looks quite nice. It resembles the rope on the edge of the sails, like you can see on the bottom of this picture. Be sure to make these lines quite thick, so it's easier when you're cutting the sails out. Of course, you want all the lines to be visible on both sides and on exactly the same place. When you're very good in measuring, you can just draw the same thing on the other side. Another (perhaps easier) way is to place the cloth on a window (or a light table), so you can easily trace the lines. Even easier is to trace a few important dots on the edges, so you can connect them on your table. Drawing on a window is quite hard. Now you can cut the sail out. One of the last things is to varnish the edges. This is to prevent the sail from unraveling. I always use revell varnish, but perhaps nail polish or glue works fine as well. If you dont want the sails to be modular, you can also put glue all over the sails and let it bend in a certain shape like wind blowing in the sail. Use about this much: And the final thing of course is to sew the sail on a yard, and put it on your ship: Finally, for making jib sails, there are different line patterns: The one on the left is the most common. The one in the middle is quite rare, and the one on the right is more modern (clipper era and later). Comments and questions are always welcome. Good luck!
-
OK so I think some of you guys might have been waiting for this so here it is...How I make my sails. I will be making an Aft sail for my ship The Lotus which is in desprate need of one. And I am taking pictures step by step. ________________________________________________________________________________ ______ Step 1: So to start I will be making a medium that we can make stencils with. What I am doing is simply taking two peices of basic white print paper and glueing them together with an ordinary glue stick. As so And putting them together Now rub them nicely together... wait a minute or so and on to the next step. ________________________________________________________________________________ ______ Step 2: Now we need to take sails from our previously bought LEGO Pirate sets or what not and trace them onto our medium we made in Step 1. Take your time and also make sure you trace out the holes. Now cut out the outside and poke the holes out with anything sharp (Doesn't need to be perfect) Here is what i got..I am going to be making many little merchant ships from the imperial trading post so I need these and the other of course is my aft sail from the wonderful Armada Flagship. My holes on the stencils are rough as you can see but work just as well. ________________________________________________________________________________ ______ Step 3: Now run over to you grandma's and get some old cloth... Anything you like as long as it is not too thick. Now what we are going to do is trace the stencil we want unto the cloth. I like using a pencil because it is quite easily removed...and doesn't show as much as a black sharpie or a ballpoint pen. Anyways trace that on there along with the holes. Now cut out around the outline, roughly leaving 1 inch of space around the outside. Like this ________________________________________________________________________________ ______ Step 4: In this step we are going to be strengthening the cloth so that it does not shred when we cut it...To do this I use a 1:4, water:White glue solution which I brush around the edges of the cloth and on the area where you will be punching out holes. Like so This is the solution I use...Which I keep in a little ziploc container, so when I need it, it's there. Make sure you apply this to both sides, afterwards let it dry for and hour or so. ________________________________________________________________________________ ______ Step 5: Now that its nice and dry we need to cut out that sail of yours! Use sharp cloth scisors from you moms sewing kit and cut on the inside of the lines (So that you do not see them) The result of a nicely cutout sail ________________________________________________________________________________ ______ Step 6: Now! You have cut out you sails and made everything nice... We are now in great need of holes! To make these I use enscence...I find it is the best way because it burns through nicely, making a good hole the size that u need! Do this on every hole you need, take your time..Do a good job! Believe me its all worth it in the end :D Cool isn't it? You are now done your sails! Hook them on and yell out Arr! For you have done a great job, I hope you're proud ;) ________________________________________________________________________________ _____ Step 7(Optional): And for those of you who want a real old look to the sail(s) then brew up some coffee, enjoy it...And use what is left of it to dye your sail(s). Now what I do is poor it into a tray of some sort (I believe it is ment to make cakes) and soak you sail(s) in it... Hang them up somewhere and let them dry. (If they arn't dark enough for you then dye them again) Dyeing it Aft Sail Front Sails Sometimes you may need to repeat Step 4 after this because the coffee may or may not take away the glue solution. ________________________________________________________________________________ ______ I have now finished making the little merchant vessle's sails..Here it is! ________________________________________________________________________________ ______ Well I hope this has helped you on your quest to making sails for your huge fleet of ships! PM me if this was helpful to you, I always enjoy comments and post pictures of sails that you have made! Enjoy ;) Yours Truly, William Poulin (Evil Willy)
-
Hi togehter, when I am selling Lego ships (I buy them and sell them expansiver to finance my collecting hobby) I wrote in the text that I cleaned the sails and that they are now like new. And every time 100 persons wants to know how I make that. Because of that I made a youtube video with my wife. It is nothing professional but it is enough to learn how it works. German with English subtitles German
-
Hey all, here is my latest build for the Lands of Roawia LEGO role-playing game on the Merlin's Beard forum. This is my first large scale ship and I really hate using LEGO prefab pieces of any kind, so I wanted to create a realistic brick-built curved hull. I present the Spirit of Lenfald: Four Masts Fully Rigged Ship 4A She's a solid 77 centimeters long from stem to stern and all LEGO except for custom sails and rigging. All comments and criticism are most welcome! Aaron
-
This is not pirates per se, but it's about sail ships so i thought it fits here best. If mods think it should be moved to other section of the site, please do so. But we can pretend one of the ships is actually pirate ship ;) General look: It all started on Pyrkon convention Poznań/Poland in 2014. We got some free bricks and among them there were horse hats (sorry, don't know the proper English word) for old horses that were replaced with new design. Someone said the piece is really useless for anything than putting in on a horse. Someone else joined in and said that the piece is as useless as speedor'z bodies from Chima. O'rly? I wouldn't be myself if i didn't accept the challenge and prove them both wrong. So the Sea Horse steam boat was born: Once i had it i had to build some other sailboats. Then my LUG was in need of sea themed dioramas for our exhibition that is now taking place in Swarzewo/Poland, so i built a scene for it: One of the elements i'm most proud of is the Lightouse:: And the windmills: But the main feature of the scene are ships: And some more detailed look at the ships: For more photos please go to http://zbudujmy.to/2...bitwa-na-morzu/ You can also see my other new NPU creation here: http://www.eurobrick...howtopic=107970
-

Imperial Guards logo - Imperial Flagship sail Vector Image
absolutelylez posted a topic in LEGO Pirates
Hello all, I've been busy trying to recreate the sail of the (Original) Imperial Flagship 6271. This is my result so far, below. Do you feel the design is accurate? I have only been working from someone's Brickshelf gallery scan, as I have lost the original. Do you feel the image is representative of the original? Thanks -