Search the Community
Showing results for tags 'winter village'.
Found 201 results
-
Hi all, I am New to Lego trains and bought the Holiday train at a discount at a local store. I have built it and added power functions but the train will not pull any of the cars. The front wheels keep spinning. Can anyone help a new Lego train fan and new eurobricks member?
-
Thanks to everyone who entered the seventh annual Expand the Winter Village Contest. Once again, it has been inspiring to see the additions to the winter village that you come up with. This year, we have 21 qualifying entries! You can now vote for your favorite entries by replying in this topic. Please read the voting rules below carefully and use this thread for voting only. We'd love to hear your feedback on the competition in the discussion thread. Voting closes on Wednesday, 25 January at Midnight GMT. Voting Rules - You have a total of 5 points to award - You may not give more than 3 points to a single entry - Post your votes in the voting format shown below - You may not edit your post (posts edited more than one hour after the vote was placed will not be counted) - Votes that do not comply with these (simple) rules will not be counted - You must have joined Eurobricks prior to December 6, 2016 to be eligible to vote Voting Format Each voting posts starts with five (no more, no less) separate lines, which list the entry numbers (see below) of the entries you want to award points to. No matter how many points you wish to allocate to any one entry, every line represents one point, as the examples below illustrate. Example 1 If you'd like to award 3 points to entry number 19 and 1 point to entries 5 and 9 each, use the following voting format: 19 19 19 5 9 Example 2 If you'd like to award 2 points to entry number 17, 2 points to entry number 2 and 1 point to entry number 5, use the following voting format: 17 17 2 2 5 Example 3 If you'd like to award 1 point each to entries 5, 8, 9, 11 and 16, use the following voting format: 5 8 9 11 16 After these five lines you can comment on why you voted for these particular entries if you like, but begin your post with the required five lines that indicate the entries you want to vote for. Thank you for sticking to this voting format and making our lives a little easier. The Entries Take your time browsing through all the entries. Clicking on the link or the image takes you to the thread for the respective entry. The bold number in front of every entry is the entry number you need in your voting post. Chocolate Factory by mouseketeer Train Station by kjm161 Corner Store by CarsonBrick Xmas Tree Steam Train by Viracocha Friends bringing "Christmas Greetings" to Ms Stevens by Carebear Old Church by Jellyeater Gasthaus (Kraków szopka) by parsom 8. The Small Winter Village by BrickMark-I Just an Olde Fashion Butchery & Seafood by Kristin W Fire Station by crayonboi Winter Filling Station by toorayray Globe Tavern and Party by Stebai Big Tool Hardware Shop by robbzy88 Ice House by LittleJohn Glass Blower's Shop and Workshop by eliza Tea 'n Tomes by Palixa And The Bricks Curling Club by twigman Veterinary Clinic & Pet Adoption Center by Ruse901 Petrol Station and Service Garage by dfaminis Department Store by mmclelland Train depot by wooster The Prizes There are three available prizes. First place will choose their preference. Second place will choose between the remaining two sets and third place will receive the remaining set. 10254 Holiday Train 10249 Winter Toy Shop 10245 Santa's Workshop
-
Hello everyone, Here is my entry into the Winter Village competition. Because of the new Winter Village train, we need a station so there is somewhere for the train to stop! I used this train station in my own Winter Village display this year, so I took extra care to make sure the scale of the building matched the other buildings from Lego's official Winter Village sets. This was not as easy as it sounds. There is a tendency for me (and many others, I think) to make our MOCs large and grande. It is difficult to be restrained in the size of our builds. IMG_0511-001 by James Altland, on Flickr For some reason, the system will not allow more photos to be posted. So I will post this one for now, and perhaps more later. Thank you for looking! Okay, I'm new to posting photos on this site. So I'm trying to add a few more photos, even though they may be too late for consideration in the Winter Village competition. IMG_0504 by James Altland, on Flickr IMG_0506-001 by James Altland, on Flickr IMG_0489 by James Altland, on Flickr
-
This is my entry for the Winter Village Contest. The department store has four departments, Food, Home, Clothes and Toys. While it is at the larger end of Winter Village models, I have tried to make its design consistent with the official sets in the series using similar colours and elements such as the black lampposts. The food department has fresh fruit and vegetables, bakery, cans and cereals meat including Christmas turkey and fridges full of cartons. The home department has dishes pots and pans, mugs, a coffee machine, crystal glasses, Christmas decorations, flowers and luggage. The clothing department is mostly made up of mannequins and some other folder clothing The final department is toys, consisting of a teddy bear, space ship, a train set and other toys as well as Santa and his presents. Thank you for looking, and sorry about the bad pictures!
-
Here is my entry for the 7th Annual Expand the Winter Village Contest. It is a veterinary clinic and pet adoption center. The main building comes with three separate rooms. The first room is for the pets to stay warm by the fire (with working light brick) while they wait to be adopted. The second room is the reception area where pet owners wait to be seen by the vet. The third room is the vet's office where she treats her furry patients. The set also comes with an outdoor adoption area where families can come find a precious new pet for the holidays. Additionally, this set comes with a handful of minifigures, pets and two brick-built snow animals. I hope you enjoy it! Main Overview Front Adoption Center Vet's Office Waiting Area Hope you enjoy!
-
Hi everyone, this is my entry to the Winter Village contest: The "Tea 'n Tomes" is the Winter Village's place to read an exciting book and drink a hot cup of tea on a cold winter's day. It's a public library where you can also get some of the finest tea selection. The books on the teapot outside can be taken away for free. I hope you like it!
-
Looking for a ornament for the tree or a unique gift? Here is my entry for this year's Winter Village contest... a Glass Blower's Shop. The Glass Blower is showing off his skills for the village kids. The interior is a shop on the first floor with living space above: The interior of the workshop features a light brick in the furnace. Thanks for looking!
-
Built for the 7th annual Expand the Winter Village Contest. All the doors open, there is a pop out ice block function, and a secret compartment under the house for hiding presents. The building itself was inspired by this model. It was quite an enjoyable build process, especially the wooden porch section. The ice house is particularly busy in the winter months, as blocks of ice are cut and then put into the storage shack to await delivery via truck to customers’ homes. Lots more pictures on Brickbuilt Thanks for looking, C&C welcome!
-
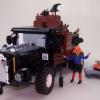
Get ready for winter with the Winter Village Hardware Store Winter Village Hardware shop features 6 Minifigures, 3 Store workers, 2 male and 1 female shopper. Includes 1 vehicle, Vintage Dropside Steam Truck inspired by a 1930s Sentinel S4 Steam Waggon. Looks pretty plain doesn't it, Wait until you get inside. Looks like the delivery driver is off to deliver some gas canisters so the townsfolk can keep warm. I see a female customer looking to purchase a fine looking Christmas tree. Where to begin with the Fully enclosed interior, Features a wide range of tools and a (brick built)? Clothes rail where you can purchase workwear. Including a full range of 5 different fire extinguishers. And a topdown view showing the floorplan of the Building and the truckbed, I think that is everything, Thanks for looking :)
-
Another X-Mas competition, another entry. I do love this compo :) The Globe Tavern always holds the best Christmas & New Year parties. The fancy dress New Years Eve party is huge in the Winter Village, even the staff get involved! The two stalls always do a brisk business in Mulled Wine & Hot Dogs for the journey home afterwards. As you can see the party is in full swing! The red light brick hits the disco ball and the Christmas mix fills the dance floor. The ground floor features a lovely fireplace (working light brick), spiral staircase & dart board - Oh and don't forget a fine selection of beverages ! The Upper Floor is where the banging tunes of MC Santy keep everyone happily dancing. The two stalls - who doesn't like a Hot-Dog or Mulled Wine on a Winters night? Anyway thanks for looking. I wasn't sure about entering a tavern in the compo but after the success of last years brewery, it seems the townsfolk like a warming nightcap! I'd usually wish all a Happy Christmas at this point but as tonight is 12th night, maybe a belated hope that all had a happy holidays will suffice!
-
Winter Village First Station Prepare to save the day at the Winter Village Fire station! Winter Village Fire Station by crayonbricks, on Flickr Winter Village Fire station Includes 6 minifigures: 4 male firefighters, a female cat owner, and little boy, plus a cat. Includes 2 vehicles: fire truck Snowmobile, fire scooter. Door can be swing open to allowed the fire truck Snowmobile and fire scooter to dash out! Interior view of the fire station A Dustbin have caught fire and the Firefight with his fire scooter is out to put out the fire A cat is stuck on the tree! The fire truck Snowmobile and the fire fighter is out to save it.
-
The Small Winter Village Dive into the heart of winter thanks to the small village made up of two houses and many other decorative objects! DSC_0164 by Marc Irion, sur Flickr The model includes: -10 Minifigurines with a dog: 4 children, the grocer, a skier, a teenager (keeping the hot drink stand), a man removing the snow, a woman cooking excellent biscuits in the house made of dark orange bricks, and another woman. -Two buildings: a blue grocery store and a small house with a wall of bricks -A small Christmas market stand with mulled wine (this small stand is with the house made of dark orange bricks) -Two ornements -A snowman -A street lamp with a bench -A Mailbox -A decorated Christmas Tree without thorns -Tree small pine trees -Many gifts -A decorated bush -Barriers decorated between the two houses -Multiple accessories (ice skates, two barrels, cups, glasses, cupcakes ...) DSC_0188 by Marc Irion, sur Flickr The blue grocery store contains: -A grocery store (of course) on the ground floor, including crates filled with food (carrots, apples, cherries, bananas, bread ...), a cash desk with a cash drawer and a superb black fireplace surmounted by a statue (which is actually a microfigure) -The grocer's apartment, including a Christmas tree to decorate, Christmas balls, a table with a tart and a cup, a chair, a desk with a drawer and pen, a painting, various objects under the Roof, and a Christmas decoration. The grocery store is fully decorated (inside and outside), and there is even some ice falling from the roof! DSC_0192 by Marc Irion, sur Flickr The House (the dark orange bricks house) contains: -a decorated kitchen on the ground floor, with an oven, cakes, a chimney decorated for Christmas, a shelf, a small gift, and a carpet. The hot drink stand is also on the ground floor of this house, but outside. -A small room upstairs with a sumptuous decorated bed. The small house is decorated, inside as well as outside in the same way than the grocery store. DSC_0202 by Marc Irion, sur Flickr DSC_0212 by Marc Irion, sur Flickr More Pictures: https://www.flickr.com/gp/137651629@N07/7gn43L Thanks everyone and ... Happy New Year !!!
-
Hi, This building is stuffed with power functions and lights, so please take a look at more pictures and movies on my flickr. Short movie: see here. More detailed shots (but poorer quality - I have some problems with camera): see here. I was inspired by special kind of nativity scenes called "Kraków szopka" (see here). However final result looks rather like "Gasthaus". I should mention that all elements are powered by one Lego motor. And they could be driven manually by one crank. And this is my first creation where Lego Technic parts (gears etc.) are doing their proper work (they are not used just for decorations).
-
Hi everyone, I'd like to share with you my diorama for this year, It's the first time I've created such a thing and it's been a lot of fun and joy..and some frustration, because I wasn't sure I was going to finish it before Christmas. Luckily, I did. For some reason, I wasn't able to upload the photos here, but here's a link to my flickr album. The quality of the photos could be better, but I still hope you'll enjoy them, Happy Holidays!
-
Hi, this is my entry for this year Expand The Winter Village Contest. Church is slightly slower than 32 x 32. Base plate is just about 40 x 32. This year I made an interior. :-) Details are available in this gallery.
-
Winter Village: Friends bringing "Christmas Greetings" to Ms. Stevens
carebear posted a topic in LEGO Town
Hello Everybody! I made this for the winter contest ( Friends bringing "Christmas Greetings" to Ms. Stevens ) - Just Love Lego Friends ( the colours, the nice faces the animals ) Just Great! Hope you like it! Happy Holidays and have a Great New Year! - Singing "Christmas Carols" to Ms. Stevens - the wood keeps dry enough to put in the fireplace - the water-pipe is not frozen yet - as a surprise for the girls, there is a present for everybody ( and donuts!!! ) More pictures here : http://www.brickshelf.com/cgi-bin/gallery.cgi?f=567380 -
Xmas Steam Train by Dmitriy and Anna, on Flickr Metropolitan Street Journal Announcement The week before Christmas our correspondent Helena Kuznetsova has visited N town. According to the old tradition the best spruce is being chosen there and sent to the Metropoly to decorate the main square every year. Specially grown tree was carefully packed and loaded to the flatcar. The mayor Mr. Lebedyansky has personally observed the loading process. As the locomotive the L class 2-10-0 freight steam locomotive was selected. It is the best steam train using modern innovations as boxpok-type wheels and steam dryer pipe covered with casing. Very soon the valuable cargo will be on its way to the Metropoly with the highest speed of 53mph. Read more in the evening issue of Metropolitan Street Journal by Helena Kuznetsova. * * * Xmas Steam Train by Dmitriy and Anna, on Flickr Xmas Steam Train by Dmitriy and Anna, on Flickr Xmas Steam Train by Dmitriy and Anna, on Flickr
-
I've been working on my Christmas village the past couple months and I've finally finished (at least for this year ;). I've been coming to this site for about a year or so and I've really enjoyed seeing everyone's creations and they definitely helped inspired me for this village. Special thanks to @mouseketeer's Holiday Train additions and @alex54's sidewalk idea, they both added so much to my scene. I used the major Lego Winter sets like the Post Office, train, bakery, toy shop, cottage, and market, but then also added some City sets and just winterized them like the train station and corner deli. The big thing I added was the ski slope with train tunnel underneath. First time building something like that and it came crashing down quite a few times as I was learning how to make it sturdy. Here is a video of the village as well as some of my favorite pics. If you want to see all my pics, you can look at the album here: https://www.flickr.com/photos/42918210@N02/albums/72157673805943793/with/31192649580/ Holiday train pulling into the station: A good look at the additional train cars designed by @mouseketeer This is a good look at how I winterized my train station and you can see my traffic signals and the sidewalks inspired by @alex54. Christmas tree farm Winter bakery with a bench outside Skating area and village market area Post office and bus stop My ski slope with train tunnel underneath: Santa taking off for Christmas Eve deliveries: One final shot of the train heading into the tunnel Let me know what you think.
-
Here's my entry for the Winter Village contest! I hope you guys like it! Happy Holidays!!!! (Also, just as a little comment: I'm from Southern California where there is no snow. This is my depiction of a not so white Christmas!) Winter Village: Corner Store by Carson Hart, on Flickr
-
Every rail line needs a train station and this one lets passengers from Eastern Ontario, where my Winter Village is located, travel to the North Pole to visit Santa’s Workshop. There are a few old Canadian Pacific and Grand Trunk Railway Stations in Ontario that have a large round architectural element to them and this was the inspiration for my MOC. A cast iron wood stove warms the inside of the train station that is decorated for Christmas. I have included some photos of my Winter Steam Engine train as well. Hope you enjoy and have a very Happy Holiday Season! image by Karen Metz, on Flickr image by Karen Metz, on Flickr image b y Kareimage by 2 by Karen Metz, on FlickrKaren Metz, on Flickrn Metz, on Flickr image by Karen Metz, on Flickr image by Karen Metz, on Flickr image by Karen Metz, on Flickr There is no indoor plumbing so an outhouse was required. Winter Village Outhouse by Karen Metz, on Flickr The Train Winter Village Train Station by Karen Metz, on Flickr Winter Steam Engine Train by Karen Metz, on Flickr In keeping with the rules of the contest I have deleted 3 of the photos that were originally posted. If you want to view more photos of this MOC you can follow the links to my flickr page. Thanks.
-
Although a Winter Village Contest doesn't seem to have popped up this year There is a Winter Village competition after all! I decided to spend my afternoon and evening today coming up with my attempt to expand the LEGO Winter Village. I'd been collecting pieces for this for a while, and it finally seemed time to sit down and do something with them! Earlier this year I got the one WV set I was missing (the Post Office), and had the realisation that if I want my Winter Village to keep growing by more than one set a year, I'd have to design some things myself! I've already built a Winter Village Church (https://www.flickr.com/photos/146006635@N03/albums/72157672738224763), now here's my second addition: a Winter Village Chocolate Factory. My goal with this was to make it as close to what an official Winter Village set might be, so I made sure to match it in scale and part count to the official sets, and include some supplementary builds with the hot cocoa van, the chocolate house sculpture, and the festive lights. There are also play features! The handle on the interior makes the Christmas wreaths rotate above the door outside. I've also included chocolate bars for sale on the shelves, mugs hanging behind the counter for hot cocoa, and even a chocolate fountain with marshmallows on sticks! And just like the official sets, it includes a light brick! In this case it lights up the boiler, used to melt the cauldron of chocolate pieces ready for the hot drinks! Just over a month ago I had a go at making some extra cars for the Winter Holiday Train (http://www.eurobricks.com/forum/index.php?/forums/topic/142031-modmoc-expanding-the-10254-winter-holiday-train/#comment-2682886) and got some great responses to my Hot Cocoa Tanker. I like to imagine this van works for the same company, shuttling hot cocoa around the Winter Village! More images are available on my Flickr at https://www.flickr.com/photos/146006635@N03/albums/72157673365615964
-

Who had the Winter Village scene with a Yeti's cave?
TokerSays posted a topic in General LEGO Discussion
Last year I found pictures of a really cool Winter Village display that had a ski mountain. In a cut away of the mountain you could see inside and there was a cave with the Yeti mini-figure and the Ice Fisherman mini-figure. It was really cool, the cave had a small pond that the Fisherman was fishing in. Does anyone remember this display and have a link or pictures of it? Or has anyone else built a Yeti's cave they'd like to share? -
SET REVIEW: 10254 WINTER HOLIDAY TRAIN (including Power Functions) Introduction It is my pleasure to present to the EB community a review of the 10254 Winter Holiday Train. This is the latest yearly installment in the Winter Village series of sets from The LEGO Group and promises to be an exciting addition to Winter Village collections which do not have the previous winter-themed train 10173 Holiday Train released in 2006. Since the release of that earlier set, we have seen many other trains released that fall outside the standard LEGO City theme, such as the Emerald Night and Horizon Express. I have been impressed with those models and so my hopes for this set were very high on hearing of the release. For many fans, a winter train that doesn't cost a small fortune on the secondary market is to be welcomed. I hope that this review will assist you all with considering whether to add this set to your collection. I have also included a segment on the adaptability to use with Power Functions, which I think is a really well thought out part of this set, although the set DOES NOT come with the Power Functions parts necessary to motorise it; these are sold separately. My thanks to EB LUG Ambassador CopMike and the LEGO CEE Team and Designers for the opportunity to review this set for the EB community. Set information Name: Winter Holiday Train Number: 10254 Theme: LEGO Creator / Winter Holiday Theme Year: 2016 Pieces: 734 Price: USD $99.99, GBP 69.99£, EURO 89,99€, NZD $179.99 Resources: Brickset, BrickLink Packaging I'll begin with some images of the packing for this set. The box is of moderate size (479x282x89mm) and features great detail shots on the back. One side features a layout of the included track including measurements of the size of the train and diameter of the circular track. The close-up shots on the back of the box give a good indication of the various play features this set has, which will be discussed later in this review. It also makes it clear that the set can be motorised with certain power functions sets, sold separately. Box Front Box Rear Box Close-Ups Box Contents The box contains 7 plastic bags of parts, 1 for part 1, 3 for part 2, 2 for part 3 and a separate one containing wheels and couplings. There are also 4 sets of 4 curved track pieces and two instruction manuals contained inside plastic packaging to prevent creasing. No cardboard behind the instruction manuals but they were unbent and in good shape. The set contains no sticker sheet. Contents Overall Individual Contents Instruction Booklet There are two instruction booklets with this set. The first is a small half size booklet containing instructions for the first part of the build: the station and presents. The second booklet is A4 opening along the long edge not the short edge and contains instructions for the full train. First Booklet Booklet Size Comparison Inside Sample Pages Minifigures The set comes with 5 minifigures, two children and three adults: the train conductor, engineer and a passenger. There is a nice variety of colours and unique prints here, with one face printed on both sides and four of the five torsos printed on both sides. The train conductor has some nice details such as the gold pocket watch. The choice of face for the conductor is my one criticism of this selection. While he could look old and serious, to me he looks grumpy, and this is particularly evident in some of the box art where we see him waving from the back of the train and helping load presents; he doesn't look like he wants to be there at all! It does at least add some variety to the usual cheery faces however. The female adult minifigure has the dual-sided face. The first side shows a big enthusiastic smile, perfect for posing with the playing children. The opposite side tells a different story; here we see a peaceful sleeping face, likely happy to have a moment to rest (I'm sure most parents can understand this one!). It works quite well in the box art with the woman sleeping on the train station bench while the children play around her. There is a good variety of head accessories with several different types of hair, so this set will add a bit of diversity to a Winter Village collection. Minifigures Front Minifigures Back Minifigure Alternative Face Interesting Train Parts I thought some of the train parts deserved a picture of their own before we get to building the set. There are a couple of different sizes of train wheel, with the biggest driving wheels in red and the engine leading wheels in red also with some black ones for one of the carriages. The rest of the carriage wheels are standard black train wheels that connect with a thin metal rod. The picture below shows one of each size, as well as a couple of other train parts such as the not so common pilot piece (cowcatcher) which will go on the front and the magnetic couplings, of which there are 5 in the set (1 for the back of the train and 2 for each carriage). I also included the white leaves because why not, I like them. Train Parts (and white tree piece) The Build - Part 1: Platform and Presents Now let's get on to the build. Part one contains the small station platform, two minifigures and all of the presents in the set. There are some interesting parts including a clear 2x2 domed piece, roller skates, a printed 1x1 tile with a number pad on it and a nice assortment of small coloured pieces. And of course we can't forget an orange brick separator! Parts contained in Part 1 We then move to building the station. The station is quite small but has a couple of nice details such as the snow tiles (always nice to have white 1x3 tiles) and the lamp post. As far as lamp posts go I wouldn't call this one my favourite, but it is nice enough and seems to be a compulsory requirement of most Winter Village style sets. This improves on previous single-lamp posts from Winter Village sets, trying a different piece for the glass rather than the two-part sphere pieces and uses the green life saver piece as a wreath, which is nice, with a touch of gold as well to brighten things up. The simple bench finishes the station off. Overall a simple little build, not intended to be a major part of the set but nonetheless it is a necessary one. Railway Station Next we have the present,s which are always a bit of fun. There is a nice selection of presents in the set, with three wrapped gifts, a robot, a boat, a spaceship, a fire engine and a windup toy. The robot is very cute and can hold items with its "hands". The child minifigure also comes with a radio piece suggesting the toys can be remote controlled for a bit of added play/imagination value. I like the design of these presents; they are recogniseable and also sturdy. Presents The whole first part to the build makes for a nice collection of items that will add to a Holiday-themed scene. There is a nice assortment of colours and presents in here, plenty to be delivered by train to the waiting children! Completed Part 1 Build Let's not forget the spare parts, this section comes with a few. Spare Parts for Part 1 of the Build The Build - Part 2: Locomotive Part 2 of the build is my favourite as now we get to build the locomotive! This part contains the engine and tender. The selection of parts for the locomotive presents a nice range of shapes and colours, primarily black, green and red. Some of the interesting train parts have already been noted. Parts contained in Part 2 The engine build was fun, not too complex but with some interesting parts used to create the shape of the train, such as axes and goblets. Build in Progress The driving wheels are on their own block, which includes a technic brick for the pin connection with the tender; no coupling here. Attaching the Driving Wheels The floating leading wheels have a couple of decorative features that stand out from the usual, including multiple colours (red and some small gold 1x1 round plates for a little extra bling) plus the distinctive pilot piece (cowcatcher) which makes the shape of this loco stand out. The Leading Wheels Now we just need to add the cab and finish the boiler! Completed Chassis with all Wheels The completed engine is a polished build with lots of colour and a distinctive small steam engine silhouette. The locomotive is categorised as a 4-2-0 with four leading wheels and two driving wheels. The design is based on a Jervis type engine. The scale is too small to replicate many steam engine features like the Emerald Night manages, but the shape has many distinctive features such as the cone-shaped funnel and distinctive pilot on the front. I particularly like the curve of the boiler which is a nice improvement from the 10173 set with its very angular boiler. The Finished Engine Some of the details include a smoke plume, domed safety valve, a gold bell and the cylinders for the pistons (although there are no moving pistons unfortunately). Engine Side The cab of the engine is quite cozy, with just enough space to fit a single minifigure. There are two brackets for tools and a generic printed train control panel which doesn't really fit the steam locomotive that well. An attempt at some valves and a safety glass would have been nice, although difficult in the limited space (potentially the white bar near the top could be a safety glass, use your imagination!). Engine Cab All in all I do like the profile of this engine, it has some neat colours and details for the size and the shape is easily recogniseable. One or two improvements could be made but on the whole it is an attractive build to have at the front of the train. Engine Front Profile Next in this Part is the tender for the engine. As far as tenders go, I again really like the side profile of this, it has a good shape that compliments the engine,as we will see. The Tender Looking inside, there is a little less detail. We have a single sloped plate with some black round pieces near the top to represent coal. The engine doesn't have anything resembling a firebox inside the cab anyway! The coal is only near the top edge, to be visible over the sides I imagine. Inside the Tender The back end of the tender has a few nice pieces to add some texture to what would otherwise be a black plate, so this adds some interest to the build. Her we have our first magnetic coupling piece to connect up to the wagons. Back of the Tender On the whole the tender has some nice colur and details; it serves its purpose. The inside is not as exciting as the outside, but to add any more detail to the coal piles would require a lot of smaller piece (which, with the part to cost ratio, may not have been impossible). Let's see what it looks like all connected up. Complete Engine and Tender Overall this locomotive is a great build. It looks good on display and will definitely look impressive with other Winter Village sets. It may be quite small compared to other Lego trains, but it fits well into the theme. I mostly like the colour scheme, although the white at the front stands out at me a bit much. In the design, the biggest flaw in my opinion is the coupling between the engine and the tender, which can be seen more clearly in the next picture. I really dislike that to uncouple the tender from the engine it is necessary to lift the tender off the tracks (unless you are really set on pulling that pin out of the tender piece). Two more magnetic couplings would not have gone amiss here, like on the Emerald Night between the engine and tender. Locomotive Side View Coupling aside, I do like this engine, and it is just the right size for a circular track too (often the bigger trains look very long on a simple circle). Here are a couple of pictures of it on some track before we build the carriages. Some of the genius of this design will become evident in the final segment of this review when I adapt the train to motorise it with Power Functions elements. Locomotive goes Choo Choo Choo Choo Off into the Distance And let's not forget the spare parts! Part 2 Spare Parts The Build - Part 3: Carriages The last part of the set is the build for the two carriages; a flatbed for presents (with a Christmas-train twist) and a small caboose. There is a wide assortment of pieces, shown below. Pieces in Part 3 We start building the flatbed first. I like the intricacy of this build for what is essentially a flat wagon, it packs some neat design features. Flatbed Build Progress The gold and dark blue elements on the sides (using a Studs Not On Top building technique) are nice touches, but what I really like about this carriage is that the Christmas Tree and miniature train on top rotate as the carriage moves along the tracks! This is so much fun and uses a worm gear to make sure it doesn't spin too fast. Christmas Tree Spin Mechanic The miniature train itself is very cute and curves around under the tree like so. Train on a train folks, does it get better than this? The presents from part one can be stored in the section on the right. With the tree added, it is a nice carriage, far more interesting than most rolling stock flat beds, the Christmas vibe is impossible to miss (although perhaps not the most practical carriage at other times of year!). Flat Bed Complete Next up is the small caboose, which is a nice carriage to sit at the back of the train. Inside is a small table with two chairs, a cup and what could be a lamp or a flask full of hot chocolate if you have that on your mind! Caboose Build in Progress The completed carriage is nice, small but with features including the raised roof in the middle, gold lanterns at each end and the white leaves with coloured baubles, replicated from the tender. The roof is easily removable to place minifigures inside. Completed Caboose As for swoosh-ability around the track, it gets a pass. Choo Choo Caboose! That completes part 3, so we'll end with the two carriages together. The carriages are good builds and fit the Christmas theme well; we have a tree, a place to store presents and a cozy table to sit around and drink a warm drink (ignoring that it may be a bit drafty with the gaps around the doors with the train is moving!). The single tan axle on the flatbed train really bugs me in terms of colour scheme, but other than that I don't have any complaints. Completed Part 3 Carriages Complete Set There we have it, all done! Before I move to the conclusion however, I would like to throw in the optional Power Functions elements, all sold separately. Power Functions (Sold Separately) One thing that really impressed me about the design of this set is how easy it is to motorise it. To do so, you will need the following four Power Functions pieces/sets which are ALL SOLD SEPARATELY. Alternatively, if you own a recent Lego City train set, you can raid the parts from that, like I did. For those of you looking to purchase these separately, the set numbers are 8879, 8884, 88000 and 88002. Power Functions Parts (Sets 8879, 8884, 88000 and 88002) The set includes instructions for pulling the locomotive apart to fit in the Power Functions elements. For such a small train, they manage to cram these parts in really well! Here is the disassembled engine to show what needs to be removed so that you can add the powered wheels and remote control hub. Disassembled Engine The modules come apart quickly and easily and the whole thing can be motorised within a couple of minutes. There is a hole in the floor of the cab for the cables to come up through, and then the rest of the cables just.. sort of fit in there. That's the only downside to motorising this set; some of the design features are lost and, due to the size, the grey Power Functions parts can't easily be hidden without changing the shape or using a lot more parts, so some of the aesthetic is lost. Motorised Train That said, the designers did a great job of not only incorporating the Power Functions but making it easy to do so, and easy to switch back too. As noted though, it is quite hard to hide, particularly the cables, which mostly do manage to fit inside the cab with some spillage. Cables After motorising your train, you are also left with a few parts to do with as you will, or to swap back into place for display purposes. Motorised Train with Spare Segments Overall, very impressed with the Power Functions conversion considering the size of the build. Conclusion It is necessary to come up with a score for the set, so here are my thoughts below overall. Design: 8/10 – The set is well designed and has some interesting play features. The spinning tree is notable and there are a lot of accessories to increase play value. This was a 7 as I do think improvements could be made, but I have given it an 8 as the quick adaptability to Power Functions really blew my mind a bit! Parts: 8/10 – An interesting selection of parts with some good colour options for use in future building. Build: 9/10 – The build experience is fun and engaging but not too complex. This would be a good set to build in an afternoon with the kids at Christmas. There is nothing repetitive and there are lots of fun features to discover as you build. Price: 6/10 – The price per piece is unfortunately a downside to the set, coming in at 0.136 USD per piece. That said I still value the build and design so I would not let this discourage you. It is a bit too costly I would say just to buy for parts, but certainly worth it for the build experience and display model (certainly an improvement on last year's Winter Village re-release...). Overall view: It's a great addition to the Winter Village series in my view. There are a lot of features, a lot of interesting and colourful parts, and the build is fun to do. One more carriage would have been a nice addition but other than that and the few design points noted throughout, the set is a great build and the adaptability to Power Functions is quick and easily done in a few minutes. Of course if you are more traditional and wish to push the set around yourself, it also works well for that. I would recommend displaying without any Power Functions on it if possible as they do remove some of the details and the battery box in particular is not at all concealed. As with many train sets, it does not come with much track (so as to keep the price down), but this can be expanded with additional track sold separately. Thanks for reading and do let me know your thoughts on this Winter Village installation in the comments below. Will you be buying it? Or have you already bought it? Feel free to share your views and your own pictures!
-
Not sure if anyone else is getting into the Holiday spirit already or if it's too early for many of you, but I surely am. Here is my updated Winter Village Cider Mill, so far in digital version, and still needs interior built out, but here is the reveal of it. I will post updates with more pictures to come. Winter Village Cider Mill Revisited cheers all, Miro
-
This is my year's Winter Village addition, a train station. Something that has been missing from the Winter Village, so I chose to build one. The station consists of a clock tower and a cover platform, with an extension platform that can be removed if so desired via technic pin connections. The interior is furnished with a counter, a register, newspapers to buy, a mailbox on the right side and a Christmas tree, bench and an old style phone on the left. There are stairs for entry and a clock to finish it off. Winter Village Train Station Emerald Night arriving to Winter Village Train Station Winter Village Train Station (back section) and lastly the same Xmas tree with a micro Emerald Night Micro Emerald Night Miro