Search the Community
Showing results for tags 'knight'.
-
I already had the concept of "little castles from different subthemes" last year, but I didn't have the time to build it. Not long ago, I realised that the Yellow Castle will be 40 years old in 2018. I've put the two things together, and created a Lego Ideas project to commemorate this anniversary of the Castle theme. The concept of this MOC is similar to the 4002016 set: recreate some of the iconic castles of the Lego Castle history in smaller size. I've chosen a castle set from each decade from the 1970s to the 2010s and created a little tower that resembles that set. It was built in LDD and rendered in Bluerender. It was the first time I tried Bluerender, and I'm quite satisfied with it, but the texturing of the missing minifig and shield decals was pretty time consuming. You can see more pictures here: https://www.flickr.com/photos/149157518@N03/albums/72157680073276641 If you like my MOC, please support it on Lego Ideas: https://ideas.lego.com/projects/171709
-
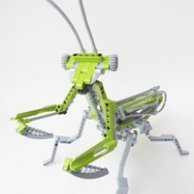 My 6th alternate of 70312 features moving head, fully poseable arms and legs, opening chest cockpit that can fit Lance's bot. The Mecha Knight can hold the shield and lance in his hands, has a protective neck shield, shoulder cannon and armpit missiles. The whole figure can be seated and his left leg can kick some butt. Scroll down for tutorial.
 -
This is my project of K.I.T.T.: 250 pieces, 2 minifigures can sit inside, De Lorean (CUUSO/Ideas) scale. Now I must place the orders of pieces to build it :) UPDATE: This is the real MOC :) Full album: https://flic.kr/s/aHskTyAXHH
-
Just a nice web find I wanted to share.
-
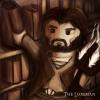
He arrived at last. Memory after memory came to the warrior's mind as he traversed the ruins of what was once his kingdom. Although the marks of disaster reigned about him, not a clue could be found on who the guilty one was. Clenching his fist, The Knight stoutly resolved to seek out the truth... Here's my first MOC entry on Eurobricks! After about three to four different attempts, I finally managed to get this one built. The door arch was originally going to be the floor, but it just wasn't working out. Once I made it an archway, everything went together pretty quick. Getting the lighting to fit the mood was just as fun as building it! Ruins_2 by The Loreman, on Flickr Ruins_3 by The Loreman, on Flickr Ruins_7 by The Loreman, on Flickr Ruins_4 by The Loreman, on Flickr Ruins_6 by The Loreman, on Flickr I can already see a few things I would have done differently, probably tidying up the back to be more presentable, and raising the tile floor a little higher. I'm always looking for ways to improve my skills, so if you all have any advice I would love to hear it! - Loreman
-
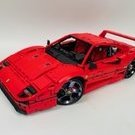 "Volvo Trucks reset its own two year-old record for heavy trucks with shockingly fast speed runs by its latest track-focused creation, the "Iron Knight." This big rig blasted to 60 mph in just 4.6 seconds thanks to its unbelievable 2,400 horsepower." iron knight by lachlan cameron, on Flickr Flicker: https://www.flickr.com/gp/139930963@N04/8xb6HX Video: Dugald has created a custom Iron Knight out of Technic Lego to pull my Ferrari FXX. (Unfortunately this MOC did not blast from 0-60mph in 4.6 seconds ) IMG_9090 by lachlan cameron, on Flickr This build is massive, 31 stud wide x 72 long x 35 tall. IMG_9127 by lachlan cameron, on Flickr The trailer can load and unload the 6 pound Ferrari with a winch and a clever sliding mechanism that slowly lowers the car down. IMG_9096 by lachlan cameron, on Flickr The trailer can switch from the winch to the lowering mechanism with a single switch powered by 1 XL motor. IMG_9100 by lachlan cameron, on Flickr The side panels flip up to reveal the battery packs. The Inline6 is located just behind the cabin. I've got to say, this truck has curves never seen before in Technic Lego truck. IMG_9092 by lachlan cameron, on Flickr This build took a month to create, some of the more difficult aspects to build was the tilt cabin with the working steering wheel and the 2wd - 4wd switch. IMG_9204 by lachlan cameron, on Flickr IMG_9206 by lachlan cameron, on Flickr IMG_9082 by lachlan cameron, on Flickr
 -
Hi everybody! :) Here is by some one of the most beautiful LEGO castle sets. I would agree with that statement and add a twist to it, my twist :) So here is my "upgrade" (hopefully not a downgrade) to the classic Black Knight's Castle set (Btw the big boxy tower in the background is an electrical switch cover for the lighting actually and not directly connected with the castle, but built in more or less the same style) Hope you enjoy it and give comments and/or ideas
-
Hello! This is my first MOC, created a few months ago using LDD. The idea is an adventuring party has set up camp for the night, and while the members make their preparations for the journey ahead, the bard plays by the fire to entertain them. I hope to build this scene "in the brick" one day, and I know there are several things I want to change already. But what I'd love is to hear from some of the expert MOCers here on ideas to improve. Please, feel free to rip it to shreds - you can't hurt my feelings. I'm just looking for ways to improve my skills. Thanks in advance everyone! Lindulan Around the Campfire by Lindulan Halcyon, on Flickr
-
Hi all! I wanted to share three custom figures I made and posted previously to Flickr. The first is a minifig recreation of an English soldier from the Battle of Azincourt, 1415. I made sure that all his gear was used by both English infantry and archers on the field. He sports a shortsleeved gambeson (red) and a brigandine (white). Gambesons were heavily padded defensive jackets, often quilted, and brigandines were close-fitting vests with series of steel plates riveted to the inside. The hand-and-a-half or "bastard" sword is homemade using various parts of plastic. Next is a German knight from 1272 AD. This knight wears a Templar's Helm, a style of Great Helm or heaume. Under this is a hauberk, a mail tunic which often extended over the head (or onto a metal skullcap worn beneath the great helm) and hands and hung down to the knee. His legs were protected by chausses, mail leggings, and leather thigh padding which was the ancestor of cuisse armor. Over all of this was a surcoat (green) with belt and scabbard. He carries an arming sword, a single-handed versatile sword of Viking origin, and a classic heater shield. To save space on this post, here is a link to a secondary photo where he is not wearing the surcoat!: https://www.flickr.c...eposted-public/ Last is my proudest. This figure is modeled on a soldier from the fictional country of Aedirn from The Witcher series, but the designers for that game were on-point with their historical accuracy, so all of his gear is very realistic. In fact, the helmet is modeled after a real Burgundian helmet from around the 1470s that is now in the Metropolitan Museum of Art, and I modeled the gloves after recreations of brigandine gloves found in the Battle of Visby (1365) excavations. Thanks for reading! Click on any of those pictures to see more complete descriptions on Flickr!
-
Hey guys , My first MOC when I came out of my late dark ages one and a half year ago was the Batmobile from the first two Arkham games ( well , technically it also cameos in "Origins" ) . It was ok for a first creation after years of absence I guess , but not that great . Some days ago I stumbled upon the LDD file , and I thought " Why not revisit it , make it great and actually build it with real bricks as well this time ". I'm posting this as a WIP because I've finished 80-85% of it but I'm kind of stuck and I need some opinions and suggestions . Here is what I have so far : The tooth piece is supposed to go between the 1x1 plate and 1x1 tile right behind the "tubes" , LDD won't let me put it there but I think I'll be able to squeeze it in there when I actually build it . The tubes / hoses will be flexed so that they're closer to each other and have the angle like the "real" model . As you can see ,the front part is complete , but the back , specifically behind the driver's seat is only a rough draft . So here comes the part where I need your help . I've created two versions of the back "afterburner" area as well as I need your opinion on which looks more accurate , and as many ideas and suggestions as possible for the part behind the driver's seat . Here is the second version of the back area . And , since 2D screenshots can never truly express the 3 dimensions , I'm attaching the LXF file . The one on the right with Batman next to it is what I've been showing so far , the one in the middle has the second version of the back area and the one on the left is the one on the right without the roof , whatever you see there is "complete" ( but of course can be changed if needed). Note : I know some parts don't exist in the colours I use , but I don't like to be limited by the colours TLG produces their parts in , so I'll probably paint them . Also , you may find some "silly " bits in the LXF file , like three 1x1 plates on top of each other instead of an 1x1 brick etc , obviously this won't be the case for the final model , just didn't pay attention to this kind of things and concentrated only in replicating the vehicle's look . Thanks for viewing and please leave a comment of your opinions/ suggestions , it will help a lot .
-
 Update october 2023: After abandoning this MOC about 7 years ago, I felt it was time to revisit it after years of brewing ideas to make this work. I am getting close to a full functional model, but not sure I can eliminate the last few issues completely. Currently the transformation works flawlessly, drive works, brake flaps work, steering wheel in the cab works, actual steering works somewhat, 360 turning works somewhat. The problems with steering is mainly in the arms for the wheels, the part above the wheel with the small turntables has too much flex, I need to tackle this while trying to keep the look of the arm as close to the source material as possible (and I already took some liberties there as you can see). It houses 2 XL for drive. There is 1 wheel at the front under the cockpit and one behind the exhaust each with their own XL. A concept was made to put the motor besides the wheel, like how the "real" model has an electro motor there, but it gave similar problems like the steering arm flex problems. 2 L- motors to steer these wheels 4 L-motors to steer the wheels at each arm 1 L-motor to act as a switch for "360" turning with 3 PF switches it inverts 1 drive motor, 1 steering arm motor at the rear and 1 at the front. I also use this setting to turn the wheels close to completely sideways for the transformation (I didn't do this in the picture above) 1 Servo for the brake flaps 2x (train) battery boxes. Also to be clear: the arms do not carry the weight of this model. I cheated, those 2 wheels for drive under the model+4 bogey wheels placed directly under the battery boxes carry the weight. One of my biggest mistakes from 8 years ago, was thinking Lego could handle this, so that was abondoned instantly for this. I also figured it would be nice to have a vehicle that's basically a tank, build like a tank, so it has about 40 5x7 frames, flip-flop beams and I tried to secure every panel into position. This makes it very heavy, but quite sturdy. Special note to https://www.eurobricks.com/forum/index.php?/profile/21067-hass-kabal/ He made a system bricks model of this batmobile long ago (2015) and I used some of his solutions, like the wheel arches on the side of the front arms, the steering wheel in the cab and I pretty much sized up his "electro" motors on the inside of the wheels. I hope to make a video of the whole thing within the next month, but no promises More pics will probably happen sooner than that. Original post from 8 years ago: Hardly finished anything on this model, but felt like sharing the progress so far anyway. Building this is the goal: Here's a video which shows various functions of the batmobile in the game: I am planning to add the following functions: -2x XL motor for 4WD (I expect the total weight to be about 3-4kg, so I reckon I could use their power. I am a little afraid of breaking gears/axles, so still have L motors as a backup plan. -2 servo motors which are going to provide 3 ways of steering: Normal drive with airflaps to assist steering (as seen in the video) 360 degree turn on the spot (unfortunately not in the video but it can do this) Battle tank mode with crab steering -2 M motors for the turret and opening the cockpit for Batman to get in (I expect to add that function anyway besides the 2 functions I want for the turret) -9 PF lights, among which 1 set for the afterburner in "normal drive mode" I wanted to built this model since Januari, I even briefly considered it for TC7, but Jim and I both agreed that this vehicle fails the "looks like a normal car in non-battle mode" Meanwhile some other people on Eurobricks had a crack at the model (click en clicker) I liked the first topic alot for the CGI pictures of the batmobile like this, because seeing all the details on a model that's mostly black ingame is kind of hard. The fact that Warner Bros cancelled the version of the game that came with a scale model of the batmobile didn't help either, luckily these pictures also help for getting the scale right in the MOC. The second topic is pretty nice for some of his brickbuild solutions. An area I am not too familiar with since I built mostly Technic and lack knowledge of normal Lego parts. Two things I don't like about the second model: the wheels are too small (or the model too big for the wheels), especially shows around the wheelarches, but the wheelarches on my model are too thick too, but not as much as this one I think. The other thing is that he cut and drilled some parts to fit the model. I like to find solutions within the Lego system, so modding is a big no-no for me. Anywho, time for some pictures. It isn't much (not even in time invested, since I just did a little every moment I had time for it), but at least I can copy-paste to the other side instantly, assuming I don't have to make adjustments (as if lol) The midsection is just for me to get a rough idea of how it will look (leaning on a BB so it won't fall over). So it's lacking details just about everywhere in that section. Wheels and stuff missing some details too, but I want to get a functional model first. Every wheel needed to have 3 things: drive, steering and lights. The real model has electro motors on each wheel, I briefly considered mounting a M or L motor on the side and have it drive the wheel, but getting it locked in place there wouldn't look right with the actual model (wire of the L motor basically going over the inner tire). One thing I haven't looked into though is making my own rims for the tires, I will see how this works out first. The wires for the lights have been in many places and this is just about the only place where they don't interfere with the steering and driving gears. Here you can also see the main reason why my wheelarch is too thick: I needed 2 studs to fit those functions above the wheel. I am afraid the structure holding the wheels proves to be too weak for the full model, so might have to reinforce that later on. XL motor's spot is up for the debate. It will probably end 2 studs lower. Gear ratio at the moment is 1:1 (I think), not sure which way I am going to go with that since the XL is known to break gears and axles Battle tank crab steering mode. My model won't make 360+ turns with the wheels, nor even 180 degrees for 2 reasons - 360+ I am not feeling because of the wires getting tangled up - 180 degrees isn't going to really work with the servo. I want to use the servo for snappy steering like the real thing. The liftarm for the steering is a stud closer to the middle of the car than i'd like, but this was the spot to at least get a 100-120 degree turn. One servo will function as a gearbox between the different driving modes while the other servo just steers. I chose this setup to be able to switch quickly between steering modes, just like in the game. Lights had to be used on this model. I am still looking for a way to get the lights to turn red when he enters battle mode, but I don't know where or how (open for suggestions). The reason the rear doesn't have 3 lights on the wheel (does ingame), is because these are rarely shown (battle mode only, and only with the wheel at an angle). In case you wonder about some angles in this model. Pretty early in the build I lost track of what's 100% clean so I just began testing stuff by fixing a liftarm on 1 side and lining it up with the hole I wanted to use on the other end. If I could spin an axle freely in this hole, I gave it the thumbs up, if not, back to looking for another solution. One funny spot on the model where there is pressure, is at the rear, thanks to the freaking 12L soft axles, which quite frankly aren't acting so soft! If the soft axles aren't locked into to place the triangle above the rear lights aren't pushed into the 5x7 panles on the top, they push them slightly in when they are connected Some panels are only fixed in 1 spot, to give them room to move slightly around another panel/axle/liftarm if needed. I noticed a little late that some photo's are a little blurry, sorry, will check it next time. Next up: the actual chassis.
 -
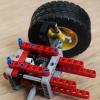 This is 3rd thing I tried to build for TC13. For my own surprise, this was very fast (started just yesterday afternoon). Volvo Iron Knight (if somebody here doesn't know) My model has two pullback motors working fake 4cyl engine it is almost in scale with tyres Some bad video
 -
Hi Everyone, Let me share with you my latest creation. I designed it to my brother for his birthday. He's a big Monty Python fan. It's the the Black Knight from the Monty Python and the Holy Grail movie. The knight is a simple black figure (with black head) with a custom printed torso. I've placed it into an IKEA Ribba picture frame. Hope you like it!
-
Here is a fight practice video that we did the other day, enjoy!
-
The Irish legend goes, if you hear your name called out in the night, the Dullahan has come to collect your soul. Made for Bio-Cup 2020: Round 2 Theme: Western Europe Enjoy! Check out my flickr and Instagram pages for more! Flickr: https://www.flickr.com/photos/102848133@N04/with/50035364061/ Insta: https://www.instagram.com/awesomenessborn/ ~Borne
-
 First off: I did not design this steam engine! I modified it heavily to suit my tastes from this Eurobricks post (link here) from user @damangos. I did, however, rework my original 7 wide Emerald Night tender from 2014 instead of the 6 wide tender used by damangos in the original model, and I also reworked his model to suit my tastes and be cheaper on BrickLink. The engine in question is modeled in LNER dark green, and is numbered one higher than the A3 engine series ever went, though it is still called the the Emerald Knight. (just the set 10194's name with an added K, as you may have noticed.).... and yes, it's a bit dusty. I just noticed, and it's too late to retake the pictures now. (It's been sitting in a open-top bin waiting for the coaches to be built for a while, and I thought I dusted it thoroughly.) LNER is the name of the railroad that built the locomotive (like it's real-world inspiration, the Flying Scotsman, 4472), and it stands for London North Eastern Railway. The number 2509 was chosen because the A3 class of engines never went that high in numbering. (2508 was the highest, and was the last one built in the mid-1930's.) These four regular coaches, (and one guard's coach, seen below) are inspired by the recent Hogwarts Express cars, to save money on wheels and train car bodies / frames. They don't have any of the interior details the Hogwarts Express has, though. I based the colors of the coaches on a inverted set 10194 (Emerald Night) coach color scheme. I always thought the colors looked better like this, and it avoids the problems of the tan 1 x 4 x 3 train windows used in the original set. (which are very expensive!!) Fictional locomotive backstory: Fictional locomotive backstory: This is loco 2509, built January 1936 as the very last A3 to roll out of the factory for London North Eastern Railways (LNER). It was given the name Emerald Knight, a name which, while being the name of a wining racehorse from the mid-1800's also matched it's dark green paint job. The engine was usually assigned the the Kings Cross to Scarborough line, hauling the Scarborough Flyer until being withdrawn in 1965. The engine survived WWII in remarkable shape of maintenance during those hard years due to the heroic actions of it's engine and shed crews who were said to have taken a shine to "well-riding" and "good tempered" engine. Steaming never was an issue, and the fire was always roaring right when you wanted it according to a fair amount of it's crews from 1940 to 1947. British Railways (BR) took over in 1948 and the engine was painted "Express dark blue". Loco 2509 soldiered on for 17 more years until 1965 when it was deemed unnecessary for future use and sold for scrapping. Thankfully, unlike 99% of the rest of it's class (except for the Flying Scotsman, which was also saved), it was not condemned to the scrap line for very long, as it was saved in 1966 by the Lego Rail Transportation Society (LRTS), a preservation group with aims to restore the trusty engine to it's former glory. LRTS backdated the loco to it's original 1936 exterior specifications, while keeping abreast of any interior improvements made to it's sister loco "the Flying Scotsman" (loco number 4472) over the next forty years. In early 2018, the engine was rolled into the shop for it's new boiler ticket tear-down, when it was announced it would wear LNER dark green again instead of the BR dark blue. The engine rolled out of the LRTS shops on December 26th, 2019, just in time for the engine's 84th birthday celebration in January 2020. Well, that's all I got for now... just need to get my layout up and running again! Comments, questions, and complaints are welcome as usual!
 -
Hy Guys!! Today, I show you my first own design of Batmobile! The shapes are simple. I turned around my BTAS Batmobile I took ideas from different Batmobiles : - BTAS Batmobile - Rebirth Batmobile - White Knight Batmobile The interior is fully detailed and the Bat of Gotham himself and a passenger can fit on it. You can add energy effect or a flame for a dynamic look! YouTube Video (Showcase) : Building Instructions : https://rebrickable.com/mocs/MOC-26146/BricksFeeder/brickfeeders-batmobile/ More shots!! I hope you enjoy this MOC! Let me know what you think about, if you want more information about or if you have advice ! See you soon!
-
Disclaimer. This is not my original idea. Full credit for the idea goes to Shadowgear https://www.youtube.com/watch?v=GyGhIB3zIrk I just took the idea and modified it to be more sturdy. Along with making the head into a headmaster. So here are pictures. Dino Form. Headmaster is called Tyrant. Knight Form Transformation pics are in the gallery http://www.brickshelf.com/cgi-bin/gallery.cgi?f=578204
-
 Hi, Here I'm posting all my custom minifigs the days to come. I started back in early 2017 with building again and between builds I started with the customization of minifigs. If you like what you see give me a follow on Flickr, Instagram, Facebook and/or Pinterest. First attempt The Knights Templar Sergeant By Barthezz Brick 4 by Barthezz Brick, on Flickr Second attempt The Knights Templar Pikemen By Barthezz Brick 2 by Barthezz Brick, on Flickr Third attempt Templar Longbowman By Barthezz Brick 6 by Barthezz Brick, on Flickr You can find more detailed pictures in the album on Flickr. Greetings Barthezz Brick
 -
This time an unusual project. Four different builders, including me, built one story. Everyone built one scene and photographed it like a movie frame. Read more » 1. Red Orcs raided the church - Hero takes quest from the priest to kill Orcs in the dungeon (by Liwnik) 2. Hero slays his way to dungeon's entry (by jetboy) 3. Killing Orcs in the dungeon (by Kalais, that's me ;) ) 4. Quest complete - Hero taking rewards (by BHs) Bigger photos and full story here: LEGO Gallery - [MOC] Collaborative Quest WIPs, Behind the scenes and other extras at my: Instagram | Facebook | Flickr
-
The story is I wanted to make one mech for one of my mini figures. But I did not like it, and then I started to think what if "her" friends made some mechs too. And I stared to use my Mixel sets to make the Mechs for other mini figures. I had laying around (or spares). So here their are (a group shot or two)... The individual mechs are... Kappa Mech - Piloted by Leo, technically this might be the second one I made using Glorp Corp Mixels. But the first one I made I was not to happy with and it got remade more on that later. I did think making the limbs bigger / longer but I just settled on making the arms longer. Goblin Mech - Piloted by a Orc, using Spikels Mixels, it looks like some thing a goblin would make. You would noticed that I gave this (and a few others) a "door" to get in and out of the mechs easier. Thunder Mech - Piloted by Jay Walker, useing the Musical Mixels to make this one. I am thinking thunder is a noise and Jay is a lighting ninja it seemed like a good mach. Stitch's Mech - Piloted by Stitch, using Frosticons Mixels. This might be another one I had trouble making at first until I put Stitch as the pilot and then it just came together. The back story on this mech is Stitch got tired of "people" making fun of his size, so he ended up building this thing. Mystical Mech - Piloted by Lance, using Wiztastastics Mixels. I eventually put Lance in this mech wanting to use the first figure in some thing else. And I even put some "Wing Blades" on this mech to make it a little better and give it a slightly different attack than the other mechs. (The others using their "claws" for attacking.) Beetle Mech - Piloted by a Rogue / Archer (from the mini figure collectable series). I used Glowkies Mixels for this thing, putting the "horns" it made me think it look similar to a beetle. I even think the "teeth" holds a type of cannon. Plus this one has an odd way to get in an out of the mech. Snow Owl Mech - Piloted by a Chima Polar Bear. This one is very different from the others because is does not use any Mixels. What I am using is a Nexo Knight's Mech (Lance's) and a Chima Legend Beast (Eagle) plus a Ninjago poly bag (Dragon Hunter). You are probably wondering why I am calling this a "Snow Owl" one of the earlier versions the feet reminded me of a Snow Owl's feet. But I wanted some wings on the mech so I ended up using the Chima Eagle for parts. Plus If you look at one or two of the pictures it is holding a boomerang (from the Dragon Hunter) for a extra attack, along with it's "forearm blades" witch can flip around for a slash attack. Not to mention I was trying to make a mech for this figure I was not to happy with the other versions until this one came about. Also, I kinda figure with a Polar Bear Pilot in an Snow Owl Mech it might make this a feared "Bear Owl" from D&D. A gallery of the individual mechs... http://www.brickshelf.com/cgi-bin/gallery.cgi?f=579327
-
A Castle designed by me for my Kids i such a way as to be as playable as possible. Detailed description and more pictures You'll find on my entry on Lego Ideas. I'll be grateful for Your comments. If You like it, please support on Lego Ideas leave Your comment and don't forget to share with Your Friends :)
-
So I have (slowly) begun working on a castle, the Castle of Syndrifel. I started on the great hall and kitchen, because let's be honest, even minifigures get hungry. After building the great hall, I began to realize just how big this thing will be. I'm planning on building it in modular secutions due to the real estate it will take up. Do the colors look ok? Too much dark grey? Etc. The first two photos are the great hall and kitchen, sans furniture for the most part. A minifigure is there for scale. The white arch there is also just a place holder, as are the transparent bricks behind the royal table. Some furniture I've been working on. The far left might be counters, but I'm really not fans. The middle tan and black will probably be shelves and tables in the kitchen. Far right are 99% sure to be benches. Should I start building from the ground up? Right now I have ane idea of the walls. Ignore the white bricks, they're place holders, as are the full on dark gray. I'm thinking 12x12 for the towers, aside from the main gaates which might be 12x14 or something to give a bit more room. The center 4x4 will be filled in as well. I have six of those built, which are the amount of towers I plan on building.
-
Chinese company is selling minifigures based on Game of Throne. I'm not sure if they got a proper license, but to be honest the design looks really nicely.