Search the Community
Showing results for tags 'power functions'.
-
 INDEX: Introduction (just below) 42099 Turbo Pickup (just below on this same post) 42095 Racing Buggy RC Black Roadster 8048 RC Roadster 42140 Rally Car RC Subtractor Racer RC Small Scale Dump Truck 42109 Le Mans Prototype 42099 Sand Runner 42095 Baja Racer 8048 RC Dune Buggy 42037 Quad Bike 42140 Racing Ripsaw 42049 Telehandler 42109 Racing Cabriolet 42099 Terrain Explorer 42095 Battle Tank Introduction: Hey everyone! I'm Dave, and I've been around Technic long enough to remember when the 8880 Supercar came out and amazed me! It was unlike anything I'd seen so far: the independent suspension, the gearbox, the V8 under the hood... I was hooked immediately and picked up a few other sets from that era, but life got in the way and I started my LEGO dark ages, which lasted for about twenty years. Coming back after such a long gap is a strange experience. The joy of building is still there, if anything it's sharper now because I'm choosing to do it rather than just being a kid with bricks, but the design philosophy has shifted substantially from what I grew up with. The vintage sets I knew had everything exposed, that was the way! You could see everything working. Modern Technic tends to wrap the whole structure in bodywork, which changes the building experience considerably and, honestly, I'm still learning how to think in this studless style. It's a different puzzle. I'm into RC, so most of my builds end up motorized if the source set allows for it, combining a limited parts inventory with remote control functionality is where the problem gets interesting for me. I see that alternate building (taking an official set and rebuilding it into something completely different) is quite a big thing now, with many people publishing their creations under a designer name and growing their following on social media, amazing stuff, how things have changed since I last checked... I don't have any fan base and I couldn't care less about that: I build to have fun, and the problem-solving keeps my brain busy. If anything I put here is useful to another builder, that's a bonus, but it's not the point. The point is the build. This thread will serve as a sort of behind-the-curtain look at my design process, the decisions, the dead ends, the things that worked and why, or at the lack of those, just a simple presentation about the model, and also as a discussion hub for all of my MOCs. If you're interested in my finished designs, all my published MOCs with PDF building instructions and parts inventories are over at davejsptechnicmocs.com. What you'll find here is more about how they came to be. First one up: 42099 Turbo Pickup This is an alternate build for the Lego Technic 4×4 X-treme Off-Roader (set 42099), rebuilt into a Turbo Pickup. Functions: Remote-controlled drive and steering Independent suspension on all four wheels A few things worth noting: The drivetrain ended up being RWD with a gear ratio of 1.4:1 -> The two PU XL motors drive the rear differential directly, one on each side. That turned out to be a clean and efficient layout, and it's probably the part of this build I'm happiest with. Ground clearance is decent for light off-roading: 4 studs at the front axle, 6 at the rear. The planetary wheel hubs aren't used on the rear wheels. The power button for the hub is accessible from inside the driver's cabin without flipping the model over, which matters more than it sounds once you're actually using it. One thing that made this easy to get running: it uses the original Control+ profile for the 42099 set. No app setup, no reprogramming, you can drive it straight out of the box. Full parts list, a vieo, and the pdf bulding instructions are available at davejsptechnicmocs.com Photos: Let me know what you think!
 -
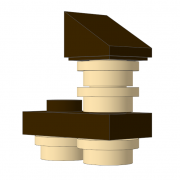 I’m excited to share that Interface C is now available. It’s a modern take on the classic LEGO® 9V Train Controller (4548), designed to give builders precise speed control and versatility — perfect for powering Technic creations, Great Ball Contraptions, and custom motorized builds. Interface C with Dark Bluish Gray, Light Bluish Gray, and Orange - LEGO® Power Functions colorway. 🔧 What It Does Provides six-speed precision control — forward or reverse — with a smooth rotary dial. Connects directly to LEGO® Power Functions motors, letting you breathe new life into old builds. Remote control via web interface, allowing you to manage motors wirelessly over Wi-Fi. Fully compatible with Windows and Mac through the Interface C Utility for firmware updates and configuration. USB-C port for firmware flashing and diagnostics. 🛠️ How to Get It Interface C is available in multiple options depending on how hands-on you want to get: Full Kit A — includes the microcontroller. Full Kit B — without microcontroller, for those who already own an Arduino Nano ESP32. Fully Assembled Unit — ready to use out of the box. Each kit includes high-quality parts, assembly instructions, and access to digital resources — even STL files to 3D print your own housing. Learn more and get your kit at 👉 https://interface-c.com LEGO® 9V Train Controller (4548) compared to the Interface C with Light Bluish Gray, Black, and Yellow colorway.
 -
 BrickController2 is an Android and iOS application that allows you to control your Lego models using a compatible gamepad. It supports the following devices: - SBrick - BuWizz 1-2 - BuWizz 3 (basic support) - Lego Powered-Up devices: Boost, PUP HUB and Technic HUB (or Control+) - PF infrared (on Android devices having infrared emitter). Features: - Multiple profiles for a single creation - Multiple motor (or output) assignment to a single controller event - Different types of devices can be used at the same time - The same motor (or output) can be assigned to multiple controller events - Different joystick characteristic settings - Different button modes: normal button, simple toggle, ping-pong toggle, carousel toggle, ... - Train mode on joysticks - Normal and servo mode for the new Control+ motors - Sequences (like for flashing light) BrickController 2 on the Google Play Store: BrickController2 android BrickController 2 is also available on the Apple App Store. BrickController2 iOS Video tutorial created by @kbalage (many thanks for this): And another great video by @kbalage: Older versions: BrickController Android application. It lets you to control Lego creations via Lego infra-red, SBrick and BuWizz V1 and V2 using any Android compatible game controller: Current version: BrickController 0.6 User guide: BrickController User Guide Minimum system requirement: Android 4.4 and bluetooth low energy support on the phone (or tablet) Video on the older SBrickController application:
 -
Soo, I finally managed to finish one of my W.I.P.s - the Mid trophy truck. Here are the final specifications: 2x buggy motors for the rear drive and 1x PF servomotor/ 1x PU L motor for the steering (I still need to test the PU L front chassis) stock gearing is 1:1, but it can be modified using the 2x 12T and 2x 20T gears independent suspension at front and a realistic 4-link axle at rear with a total of 2x hard 9L, 2x soft 9L and 2x hard 6.5L shocks a fairly easy-to-detach bodywork, that will reveal the detailed roll cage both the headlights and the taillights can be illuminated space for 2x BuWizz 3.0. The PF version is already on Rebrickable.
-
 A 1/30 LEGO Technic replica of an American Heavy Duty Truck with Steering Axle Trailer. Features drive, steering and tri-axle trailer with fixed or steerable axle. Available in different motors configurations (Manual, PFS, Control+) in a single download, all upgradable. Specs : Model inspiration : Western Star and International Truck models Dimensions : 24cm (52.5cm with trailer) x 8.5cm x 11cm Øwheel : 37mm Three versions available : Manual, Power Functions or Control+ Rear wheel drive with a L-motor and differential Small turning radius steering with PFS Servo motor or Control+ L motor, rack and pinion Battery source : PFS+Buwizz 2.0 or PFS+2.4GHz battery or C+ and C+hub or C+ and Buwizz 3.0 On manual version, the steering operated by Hand of God on the top of the cab All versions are included in a single package and are upgradable from and to each version Middle axle with trailing arm suspension to avoid losing traction on uneven ground Tri-Axle Trailer with fixed or automatic steering axle using linkage and a locking pin Landing gear on the trailer with friction gears Openable doors and hood (no fake engine) See in action : Design Process : This model was created for a Truck Exhibition in France to show the possibility of LEGO Trucks in a functional and fun way, either manual or motorized. So I started designing the truck to be the smallest possible with the two motors, that is why I chose the 37mm tire to fit all electronics needed. Plus they have the perfect tire ratio for Heavy Duty Truck looking. Because of the tight space, only the rear axle is powered, and the rack and pinion of the steering is placed in front of the front wheels. Speaking of the steering, I wanted to maximize the turning abilities so I design in a way the range of motion is maximal without colliding with anything, which contributes a lot to the playability. After a few tests, I noticed that the truck could get stuck on small bumps because the central axle was lifted and the rear wheels lost contact with the ground. So I added a rudimentary suspension system in the form of a trailing arms on the central axle, which absorbs bumps that could otherwise cause the rear wheels to lose traction. On the Trailer, I wanted to experiment with steering axle trailer for a while so I was inspired by the Mini Scania R420 and Steering Trailer by TechniMocer which I reused the functioning principle : a lever connected to the saddle operate the trailer axles. Nevertheless, I have improved it with a smaller height for the mechanism, enabling to have the trailer near the rear wheels without any collision. Plus increasing the range of motion of the steering primarily due to extended width. The Truck / Trailer articulation can achieve ±75°. An other functional addition is the locking pin mechanism which enables to choose between two mode of steering for the trailer : fixed or steerable. Simple but effective, as it can be difficult to drive backward the trailer with steering axle mode. For the details, there are quite standard with interior, seats, lights, mirrors and exhausts. The doors can be opened as well as the hood but reveal nothing (no fake engine). The most difficult parts was to reproduce the original form of the cab in a clean look with has many variation in width. For instance the chassis is in 9/11 stud wide, while the cab is only 8 stud, the grill 6 and the mudguard 10, so as you assume there is a lot of half-stud offset inside. I added a minifig inside because I find it funny, even if it is a bit small for the truck (1/43 instead of 1/30). The Rebrickable model do not include it, but the cookie and mug is here ! Instructions are available on my website, as well as rebrickable (3x versions, Manual, PFS and control+), with PDF tutorial for Buwizz and PoweredUp App Profile : 📲 Instructions : https://www.nico71.fr/product/heavy-duty-truck-and-trailer/ 🧩 Bill Of Material : https://rebrickable.com/mocs/MOC-246143/Nico71/heavy-duty-truck-and-steering-axle-trailer/#parts Let me know what do you think about it and if you have questions !
 -
 Improved 42042 Crawler Crane. Banana Man for scale. It's hard for me to overstate how much I love the Technic Crawler Crane 42042. I've been constantly tinkering with it and making improvements since I got it about 6 months ago. My method is basically to lift heavier and heavier stuff until it falls over or something breaks. Then I rebuild. This is how it got to where you see it today. I don't really care about the tracks or the slewing. I want to lift heavier stuff, higher! So far my mod/improvement list reads like this: Upgraded the block & tackle harness for better mechanical advantage Added a quick-adjust system for efficient rigging changes to the harness, main hoist, and hook Beefed up gantry or A-frame: wider, taller, and much stronger Improved existing back hitch and added a second back hitch Counterweight box Strong, longer boom Paid almost (!)$20 for stupid Technic metal hook Integrated claw storage on gantry XL Motor upgrade Boom foot return damper thing Replaced LEGO string with synthetic cable (from Chin-a) Here it is in action. Read on for a more thorough description and photos of each mod/improvement. Click through on the photos to view them at larger sizes. Block & Tackle The first thing I did was add blocks to the block & tackle system allowing me to really turn up the mechanical advantage the motor has over the load when raising and lowering the boom. This of course comes at the cost of speed, but I'm OK with that. The nice thing about this is I don't have to actually use all the blocks. Quick Adjust Rigging on Harness and Main Hoist You can see my bright red and yellow-handled quick adjust axles with the red and yellow grips on the side of the harness assembly. This makes it easy to slip the rigging in and out of the blocks to fine tune my power/speed balance for the specific load. I also have these at the end of the boom and on the pulley so I can adjust the speed/power tradeoff on the hoist line. I added this quick disconnect system after I'd re-strung the rigging for the hundredth time. I can re-thread the rigging on both the harness and the main hoist line to go from "high gear" with max lift speed to "low gear" for max power in just a minute or two. (I had originally made these with axles that have stoppers on the end, but ended up using regular axles, because I have a ton of them.) A couple of timelapse (YouTube) videos of the quick change. Stronger & Wider Gantry The gantry in the stock model is really weak. It is wholly comprised of 4 Technic lift arms held in place with 6 friction pins. As I added heavier loads this system was quickly outgrown. I was bending lift arms and even popping the entire assembly off the superstructure. So I rebuilt. The new gantry is wider, allowing for more blocks in the harness. It is many times over more rigid and is taller, allowing the harness mount to be further back over the body, which in turn allows the main boom to be drawn up higher to a much steeper final angle. This piece took a long time and has been through the most revisions over the months. I did a lot of research by looking at other LEGO models, other and peoples crane MOCs. Both arms of this gantry are heavily inspired by the gantry on LEGO Crawler Crane 8288 (http://brickset.com/sets/8288-1), which I would love to own a copy of someday (not today). Improved Back Hitch The back hitch (the two black lift arms supporting the gantry) also quickly became insufficient. The anchor it was tied into was bending and getting stress cracks, so I created a stronger attachment system for it elsewhere. I also added a second back hitch that ties directly into the improved counterweight... Counterweight Box One of the challenges with cranes is counterweight. As the amount of load it can lift and move improves, their is a corresponding increase in risk of tipping. The original model cleverly uses the battery box mounted all the way at the back edge of the body. It's literally the furthest element from the tip of the boom. I added a weight box behind it that is open and easily filled with ballast of my choosing. C Batteries work extremely well because of their density and modularity. It has an open design so it's easy to adjust the weight on the fly as needed depending on the load and the angle of the boom. After building it, I added a the second back hitch directly attached to the gantry to remove stress from the body connection of the weight box and from the first front back hitch (heh). When the gantry starts carrying a lot of load, I don't know that the front hitch bears any at all. Stronger, Longer, Better Boom Maybe the most noticeable feature is the length of the new boom. The original is 30 studs long, not counting the butt and tip, with an optional section to extend it to 45 studs. This booms main section is 75 studs long. At this length, it had some really concerning droop/bending at full extension. However, I was also able to easily reconfigure the inner supporting structure to be much stronger since I didn't care about the ability to easily add and remove sections. I also added the outer white panels to help with rigidity as they span the weak links between the blue 15L lift arms that are the main defining component of the boom. The boom tip received an upgrade in the form of a smoother operating block and tackle system (with quick disconnect axle just like the harness) controlling the main hoist. I also added an aviation warning light, obviously the most complex and impressive mod thus far :) Main Hook/Claw Storage I purchased a Technic Large Metal Hook (http://www.bricklink.com/v2/catalog/catalogitem.page?P=70644#T=P) for like $15. It's easily the most I've ever paid for a single LEGO piece. Considering the time I've spent on this model, though, I thought it was worth it. It's mounted to the main hoist with the smallest of my quick adjust rigging axles. I can attach the hook directly to something of course, or I can use it to hang the functional claw the system came with. When the claw is not in use, I have a storage peg for it that can be placed on either side of the gantry. I built this after I got tired of it sitting on the bench next to the crane most of the time. Much like the quick adjust rigging system, it's a simple mod that has a high convenience impact when moving this thing around for play, improvements, and storage. More Power (XL Motor upgrade) After removing the clutch gears and incrementally strengthening everything else to lift progressively heavier and heavier loads through probably hundreds of lifts at this point, the 9V Power Functions L Motor (99499) that came with the system finally died (predictably). To LEGO's credit, they're already shipping me another. They didn't even ask if it had been systematically subjected to increasing levels of abuse since purchase. Rather than wait for the replacement to arrive I hooked up an XL I had laying around. It's slower, but has more torque. As you can see it is mounted almost all the way at the front of the body, which is not ideal considering the weight. I may end up routing it further back if I can figure out a way to that looks this good. I did have to git rid of the ladder that was here on the original model, but this is Technic, so whatever. It's not like I'm bouncing minifigs around and doing voices when I play with the thing. Boom Return Damper/Helper If you increase the mechanical advantage of the harness too much, the boom has trouble releasing from very high angles. There just isn't enough weight to pull the cable off the spool on the base. I added this spring mechanism to the butt of the boom to help push it out when there is very little lateral load. I may be swapping these gray Technic springs out soon for the stronger yellow ones as it could be more effective. They will also look better matching the contrasting yellow parts of this assembly against the blue. Rigging Cable Through many rounds of adjusting and rebuilding I replaced the rigging cable several times. As I added to the superstructure more cable length was needed. Going down certain oaths and backtracking also had me replacing the cable with different lengths over and over. LEGO string is expensive, so I ended up buying a small spool of this stuff off Amazon: https://www.amazon.com/gp/product/B00LDIKURQ/ref=oh_aui_search_detailpage?ie=UTF8&psc=1 after seeing it recommended elsewhere on these boards. It works well. It's thicker than LEGO string, so be aware, but it's also stronger and it has a bit of a metallic shine, so it looks more like the steel cable you'd see on the real life inspiration for this model. Conclusion That's about it. The major takeaway is that this thing can now lift 750 grams up off the floor below my bench and place it on the bench right next to it (from up to 80 cm away). Good stuff. I also think I retained most of the good looks of the original set. I'm not done tweaking yet, but I wanted to do this write up and show it off a bit before I break it again, because my next mod is likely going to happen in the gear box, if at all.
 -
Hi, This building is stuffed with power functions and lights, so please take a look at more pictures and movies on my flickr. Short movie: see here. More detailed shots (but poorer quality - I have some problems with camera): see here. I was inspired by special kind of nativity scenes called "Kraków szopka" (see here). However final result looks rather like "Gasthaus". I should mention that all elements are powered by one Lego motor. And they could be driven manually by one crank. And this is my first creation where Lego Technic parts (gears etc.) are doing their proper work (they are not used just for decorations).
-
 Brickshelf user "lukasz7792" has just posted an interesting comparison picture of an older & newer PF Polarity Switch. The one on the left has a black reversing switch and the one on the right does not. Does anyone know why it was omitted?
 -
 I've been lurking here for a while but have never been satisfied with any of my MOCs enough to post them here. The nearest I came was an MLRS that worked well but looked rubbish :P Anyway, I'm in the process of designing a Grave Digger monster truck replica (approx 1:15 ish scale). Features: - 4 wheel drive - 4 wheel steering - Steering modes: 2-wheel, 4-wheel, crab - 4-link, very long travel suspension - Suspension travel is also to scale. Almost. - All motors contained in the chassis (no servo-on-axle affairs) - SBrick control - Tyres from a Tamiya Lunchbox I'm designing this in Sketchup and rendering with the Twilight Render (free) plugin. Note that I've drawn all the pieces myself, and they're all drawn to have a low polygon count so that my machine doesn't croak to a halt. Some of the pieces aren't very accurate atm (e.g. the XL motors). So far, I think I've got the chassis designed: And here's a couple of closeups: Issues I can foresee so far: - Friction from so many knob wheels - Bump steer (but I don't want to sacrifice suspension travel by putting the servo on the axle) - Not sure whether having the steering upside down like that will have any negative effects. - Not sure if I can get all of the parts in green that I want Can anyone see any other potential issues with this design (before I start putting in BL orders)? Thanks
 -
I am looking for some suggestions. My daughter is building the Mars Rover set (go here for the details: http://www.eurobricks.com/forum/index.php?showtopic=98222) for a presentation at school and I told her I would help make it operate by remote control with one of the power function kits. Problem is that it is a lot more complex than I thought. (I have no experience at the expert LEGO building). I think I can maybe get it moving with a remote, receiver, and simple motor attached to one wheel, but I do not have any idea how to do the steering and don’t know how to move any of the other functions (camera, antenna, robotic arm). see It was not designed to be converted to power functions / motorized. Here is a photo of the underside: I am not sure the easiest / best way to add power for drive and steering. It just has to move a little bit in the classroom, not drive outdoors in all terrain. I posted in another forum and a member suggested that I post here. Any suggestions to help me figure out what I need to do and what to buy to easily make this work would be much appreciated. Thanks much!
-
Nuclear Building is a round modular building whose shape resembles a mushroom cloud. Model characteristics: Building comprises 3 stories and has a height of 40 bricks. Fits into 32 x 32 modular standard and can be put near any other modular building not taller than 28 bricks. Building is equipped with a functional elevator. Model consists of over 4100 parts. Some of the architectural features: Model consists of 4 modules: The following picture shows how the modules are connected together: The building is equipped with a functional elevator: Despite its oversized top floor, the building can be put near any other modular building not taller than 28 bricks. The connection points are embedded in the fences. Additional links: Photo album on Flickr. Building instructions are available on Rebrickable.
-
 So I prefer to build small. I managed to miniaturize all the functionality of a standard forklift (driving, lifting, tilting) into a chassis only 11 studs wide. One of the advantages this offered me (among better strength, speed and maneuverability) is that I was able to build an entire warehouse to muck about in. This wasn't always the plan. I thought I'd just build two or three containers to show off its functionality, and that would be it. Then, the Android Sbrick app crashed and burned (or at least, it did on my phone) and it took two months for them to update the thing into relative functionality again. So I had plenty of time to build some scenery. For the enthusiasts; I've uploaded a LXF file to Vayamenda.com so you can tinker with it. (By the way, if you're a person who has built a forklift, could you link me to a picture of your forklift in this view? https://www.flickr.com/photos/28134808@N02/26063611241/ I'm very curious to see how it's scaled relative to other people's MOCs.)
 -
 Hi! This is my first (maybe second) post on this forum, but I've been following it for quite a long time now. I started building with Lego Technic about five years ago and now I would like to share with you the video of my latest creation which is this Motorized Bus. This model features: Drive, powered by two L-motors Steering, powered by a Servo Motor Opening front and back doors powered by two M-motors It also has a very detailed fake V6 engine in the back. I started building this model about a year ago. My spare time is rather limited since I'm a student, and I've been working on other projects as well, but there's still a lot of work behind this creation. The doors were the most challenging things to build and it took a very long time to get them right, I've rebuilt that mechanism at least five times. It was also very hard to make a mechanism that would fit under the roof of the bus and not be visible through the windows. Well, now it's finally finished and I'm quite happy with the end result so I hope you like it too and enjoy watching my video!
 -
 I finally had time to play with the Powered Up elements from the new Train sets. They surely don't represent the complete PU system yet, but we can draw a lot of conclusions from them:
 -
 Hello Eurobrick. Let me introduce you my "holidays' MOC" : the tracked loader. It is the merging of a traditionnal articulated wheel loader and the tracks I build few months ago for the Cossack. In the main lines: it is a 4x4 vehicle with a steering by articulation and a rear pendular axle. The bucket is elevated by a pair of linear actuator and tilted by a single actuator. The rear hood is openable and reveals a functionnal mini V6 engine and an easy access to the BuWizz. The loader is equipped with a minimalistic cabin (seat and fake steering wheel) and has access ladder and platform with handrail. All the images are available on FlickR There is 4 PF-M motor used in this MOC, one for each function: – Propulsion – Steering through two mini-LA – Elevation of the bucket through two LA – Tilting of the bucket through on LA All the functions are controlled through a single BuWizz. Special note regarding the engine : The V6 engine has been designed once all the motor and Buwizz were installed. As a consequence, only a 5×8 studs hole was available. The V6 engine fits in this space and is functional. See the video here below for more detail. Thank you for reading ! If you're interested, the complete review of this MOC is available on Superk-Technic.com
 -

[MOC] Unimog 437
Thirdwigg posted a topic in LEGO Technic, Mindstorms, Model Team and Scale Modeling
I guess you could say I couldn't make up my mind about the kind of Unimog I wanted to make next. So I decided to make a platform that would support multiple versions. Features: Interchangeable platform Long and short wheelbase options Standard and Doka cabs, removable Manual control PF control (drop in) Front and rear suspension Steering 4x4 with I-4 fake motor Opening doors and hood Tipper bed options Feel free to check out thirdwigg.com to learn more about the build. Manual SWB with tipper bed. Manual LWB Doka with tipper bed. Power Functions (XL drive, Servo steering) LWB with cover. Manual LWB with canvas bed showing the suspension travel. You can find more pictures on my flickr. I have been adding instructions for the various versions here, and more will be added over the coming weeks. Someday I'll make a camper, because, everyone needs a camper. This was a fun project, and I loved the way it turned out. I have the LWB on my desk right now, and I keep getting distracted from work. I hope to add additional options for the system at some point, and will take other suggestions for versions to add. Hope you enjoy. -
If anyone can help me out, will this work? Motorization by Henrik Lorentzen, on Flickr I am working on a large steam engine now and trying to find a way to motorize it. Do you think this will work, will add some more support to the technic cross axles, but the gearing? L-motor. I plan on putting another L-motor using the same technique on of the other wheels. But I want to check with some experts before I test this on a real build.
-
hello decided to start my BR Class 08 project and when sourcing parts I came across my PF powered wagon. I am planning in putting all the PF components into the Class 08 body, but having this push it around might be a good option while I sort out the mechanics for the 6 wheels. (PF train motor only has 4 wheels) Anyways for anyone interested heres my PF wagon and pushing my "Ruby Night"
-
 Hello, Technic, Mindstorms & Model Team people. I asked this question over at the Town forum (I'm trying to motorize some Fairground sets), but I think it might be better suited for his forum. Is there a difference between the technic-styled battery box (the one with the two sliding DBG panels for the battries) and the system-styled one? I only own technic-styled battery boxes, and I don't know if the system boxes give the motors different speeds or what. I already know there's an expensive system battery box that lets you regulate the speed, but I'd rather regulate the speed by using different cog sizes than shell out around 70CAD for a battery box.
 -
Hi, I don't own any of the fairground sets, but I'll be adding a couple to my collection pretty soon and want to motorize them. I own the power functions battery boxes that are better suited for Technic sets. Is there a difference between this battery box and the system one that shows up in the new Rollercoaster video? I don't know if the speed of the motors will be different depending on what battery box is used.
-
 Hey guys, sorry I haven't posted in a while. I've had the clips to make this video for 2 months now, but not enough time to edit. Anyhow, with that said, here's what I have done. I have rebuilt both of the rear axles so they can be driven by 2 L-Motors, and rebuilt the front axle so that it can be steered by a servo, and still be able to fit an engine and have room in the cab for other motors. I also rebuilt the front of the truck since it seemed too sparse to me, but I've left the rest of the truck (besides some of the internals) original. I decided I only wanted to use a single Sbrick, and I had only one port left, since there was already an M-Motor in the model to drive the functions connected to the distribution gearbox, so I built a custom sequential shifter that I could fit in the cab, and access the axles of the changeover catches in the gearbox, and thus shift through the functions sequentially. This is done with one M-Motor. All of the internal mechanics of the gearbox were left stock, besides the elimination of any white 24 tooth clutch gears. I did not change the rest of the model that much, though I did think having an inline-4 seemed kind of lame, so I put in a V8 instead. i will not release any instructions due to the extense of the modifications. Please enjoy the video and photos below, and feel free to leave a reply!
 -
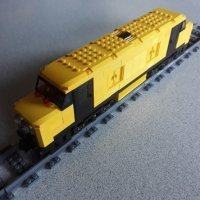
This is my DIY LED lights on a budget. White 5mm LEDs are 2 cents each and resistors are 4 cents each on eBay. A large spool of wire-wrap wire costs around $5-7. Do-It-Yourself LEGO LED Light by dr_spock_888, on Flickr I tapped into the 9V and GND lines of the IR Receiver for power. Note this will void your warranty. Do so at your own risk. I fed the wires through the pin holes on the receiver. No drilling or cutting needed. I sandwiched the LED between two Technic 1x2 bricks. The 5mm sized LEDs fit right in the Technic hole. I decided to try wire-wrapping instead of soldering. It might be easier to disassemble later on. The LED turns on when the battery pack is turned on. It makes a good reminder to turn off the battery pack when done playing. Little Yellow Locomotive by dr_spock_888, on Flickr The hard part was calculating what size resistor to use to limit the current to the LED. Too much current will blow the LED. Tools used were small Philip head (+) screwdriver, wire cutter & stripper, soldering iron, wire-wrap tool, and tweezers. Plus a multimeter to verify polarity.
-
 Lego RC E-100 super heavy tank by Tommy Styrvoky, on Flickr I have been busy with my latest model, the WWII German prototype vehicle E-100. This one being my second rendition of it since 4 years ago, when I started building MOCs. This one is smaller and greatly improved scale accuracy. more information and photos on my blog. http://tommystyrvoky.blogspot.com/2018/02/e-100-super-heavy-tank.html instructions https://www.rebrickable.com/mocs/MOC-13061/TommyStyrvoky/rc-e-100-super-heavy-tank/#comments The process of rendering all of the animations for this video took some time, as I rendered all of this on my laptop, the end result, each frame requiring about 5 minutes at only 720p , and well there are a few thousand frames rendered for the animations, and I also completely redid my channel outro with the new PBR shaders from Meccabricks. Lego RC E-100 super heavy tank by Tommy Styrvoky, on Flickr And after all of that time rendering I realized that I forgot to include the second turret hatch... This is probably one of my most accurate vehicles so far, given the constraints of lego, and the mechanical challenges. Though I am still striving to do better in the future. Lego RC E-100 super heavy tank by Tommy Styrvoky, on Flickr and a comparison with blueprints from the real one. E-100 Blueprint overlay by Tommy Styrvoky, on Flickr
 -
For those who are interested, I put together a review and Lepin vs LEGO comparison on my blog. Details are here.

-
 Just found this new video of a Polish Pm36-1 steam locomotive by Fasolic ( @solic ). I've not seen any coverage given to it, and it is a marvellous model, very much got LNER A4 vibes! Love the Dark Blue colour and the integration of full PF in the loco! Anyone know its history?