Search the Community
Showing results for tags 'steam'.
-
 This 0-6-0T (which in LEGO form can only have four wheels under the side covers, making it technically a 0-4-0T) steam tram is based on London and North Eastern Railway J70 type steam tram as used on the Wisbech & Upwell tramway. This specific engine is better known to Railway Series / Thomas and Friends fans as North Western Railway No. 7, AKA Toby the tram engine. (Of course he is accompanied by his ever-present coach Henrietta.) The design for Toby was originally a 7-wide model designed by @ScotNick. I first made the loco in real life back in 2014 in tan, before tearing it apart due to the issues with structural strength. I revised it digitally in 2020 to be 6 wide and have better magnetic couplers, as the original Technic pin one (as built way back in 2014) would them pull right off if handling a train. Toby's faithful coach Henrietta was digitally designed around 2020, and now has finally been finished in real bricks. NOTE: This MOC marks the end of my journey across Sodor making the eight famous engines in LEGO - Thomas, Edward, Henry, Gordon, James, Percy, Toby, Duck - along with a few extras engines as well, like Diesel, Lady, Murdoch, and Diesel 10 and some road vehicles and coaches. Time will tell if I ever get enough room to take a group photo like I really want to!
 -
Hello everyone, attached is a brief preface: This post was actually supposed to be published back in March, but I have only just uploaded it now. Therefore, you will find Update #2 immediately following this. Best regards, Niklas Hello everyone, Today, I’d like to introduce you to my latest project. After building several locomotives in 1:22.5 scale, I decided to try my hand at narrow-gauge rolling stock designed for 4-wide narrow-gauge tracks (21.5mm gauge). Naturally, this time around, it just had to be the HSB again! ;-) Down the road, I also plan to build a small (modular) layout to go with it—we’ll see how that goes. Kicking things off is my favorite locomotive class: the 99.23. For this build, I chose the specific prototype locomotive 99 7239-9. When scaled to 1:45—a scale widely adopted by "Gauge L" railway enthusiasts—the Class 99.23 (which has a real-world width of 2,645 mm) translates to a width of 7.4 studs. (I personally consider the width to be the most critical factor for a locomotive's visual appearance; if certain components appear disproportionately large relative to the overall width, the locomotive can very quickly end up looking too narrow. Therefore, I decided to let the width of the 99.23 dictate the specific scale for my model.) I ultimately decided to build at an 8-stud width rather than 7 studs, as a 7-stud model of the 99 7239 would have resulted in a scale of 1:47 or 1:48. The consequence of that would have been that minifigures would no longer be correctly proportioned relative to the locomotive (given an average adult height of 1.73 meters, minifigures actually correspond to a scale of 1:41). Furthermore, working at an 8-stud width allows me to implement most of the details in the first place—such as the lights using "Tile Round 1x1 with Bar (20482)," the snowplows using standard tiles, or the windows using specialized molded parts (60592 and 60032). This would not have been possible at a 7-stud width, as the individual bricks would have been too large, resulting in a model that was neither true to scale nor nearly as detailed. Likewise, I would not have been able to fit the full, true-to-prototype valve gear—complete with all its connecting rods—underneath the locomotive at a 7-stud width without it protruding beyond the sides of the chassis. The 8-stud width establishes a scale of approximately 1:41 (or 1:41.32, to be precise) for the locomotive; the length and height were adjusted accordingly to match this 8-stud width and the 1:41 scale, ensuring that all dimensions remain proportional to one another. The track system that best complements a 1:41 scale is the 4-stud gauge (with a track width of 21.5 mm); consequently, the locomotive is fully operational on standard 4-stud narrow-gauge tracks. I take a particular sense of pride in the lamps, which I was able to recreate with remarkable fidelity to the original prototype. In theory, LEDs could even be integrated into these lamp assemblies. As with my other models, both the windows and the side panels of the tender feature the characteristic inward taper seen on the prototype. Furthermore, by utilizing a combination of brackets and slopes, I was able to shape the cutouts for the leading and trailing wheels to mimic the appearance of the original locomotive as closely as possible. The air reservoirs located beneath the boiler have also been included in the design. The locomotive is designed to negotiate curves with a radius of R84. In the real world, this corresponds to a radius of approximately 35 meters—a figure well below the 60-meter minimum radius permitted on the HSB (Harz Narrow Gauge Railways) network. To ensure it can handle such tight curves, only the two outermost driving axles are fitted with wheel flanges. Initial running tests have yielded very positive results. The gap between the snowplow and the tracks is also prototypically narrow, yet remains wide enough to ensure safe operation. Due to the frame being only 2 studs wide, I decided against installing a motor inside the locomotive; doing so would have rendered the frame extremely unstable (even now, with the clear line of sight between the locomotive and the tender, the structure is quite delicate—though still sufficiently sturdy). Furthermore, I intend to use Powered Up (PU) motors for propulsion, in order to remain within the "Danish" ecosystem. Consequently, my next project is to build a baggage car equipped with its own drive unit. Shunting the locomotive at the terminal station will be done manually—which, frankly, I find genuinely enjoyable and therefore perfectly acceptable. For couplings, I use the familiar magnetic couplers featuring an exposed magnet (parts 73092 or 2920). If necessary, thin Liftarms can also be installed using pins to serve as rigid couplers. Additionally—for aesthetic purposes—I have the option to install a brick-built coupler (featuring a Jumper Plate [15573] and Minifigure hands acting as coupling hooks) on either end of the locomotive, or whenever it is displayed in a cabinet, to enhance its visual appeal. The cylinders and valve gear have been replicated as faithfully as possible; however, certain sections of the linkage could only be implemented as static, non-articulated parts. Nevertheless, the entire assembly has been fully reconstructed and features the correct, prototypical width. For both aesthetic and technical reasons, it was impossible to complete the model entirely without custom parts. For this locomotive, I utilize custom-designed wheels, a custom-developed crosshead, and custom-made connecting and coupling rods. All of these components were produced using an FDM 3D printer. All other bricks are genuine parts from Billund. I have endeavored to replicate all other details as accurately as possible; however, any piping or lines that would have been disproportionately small were omitted—as, in my opinion, it is better to leave something out entirely than to represent it using parts that are visually too large. For this locomotive, bricks are used (wherever possible) to reduce the total piece count; I resorted to using plates only where there was no other option (unlike with my Gauge II models). In the cab, I was also able to place an engineer and a fireman, who are clearly visible from the outside as well. I hope you enjoyed this excursion into the world of the Harz Narrow-Gauge Railways. Perhaps my Class 99 will make it to the BSBT someday ;-). Best regards, Niklas ----------------------------------------------------------------------------------------------------------------------------------------------------------------- Hello everyone, Attached is the update regarding my Brocken locomotive that I announced back in March: I have now reached Version V8 of my 99 7239-9. Compared to the last version shown, the following modifications have been made: - A completely new front boiler section - A more prototypical mixing preheater, now offset by half a stud and recessed into the boiler - A more accurate smokestack, now modeled using a tire element - Corrected positioning for the upper headlight - Rear lighting that now sits flush with the tender, with no visible gap - Valve gear/linkage in Light Bluish Gray - A revised staircase leading to the cab - More prototypical snowplows - A sturdier mount for the front headlights - Added piping/lines to the boiler and frame - The tender, which was previously one stud too long, has been corrected (it is now just 5 studs long) - New, more detailed coal load - Stickers featuring text rather than solid colored fields - A more prototypical radio antenna on the roof - The ashpan is now also represented - Revised running boards around the smokebox You can find the video featuring the latest images here: I will also be uploading the images to my Flickr channel shortly: https://www.flickr.com/photos/201318707@N05/ Best regards, Niklas
-
Originally, me and my dad made me a passenger train way back in the early 2000's as my first train MOC. At my request, he got rid the bright colors of the original 1980's train sets it was inspired by with more subdued tones. The black and red are what became the standard color scheme for my fledgling railway for a good many years. In 2024 I added the newer windows and a different 4-6-2 'Pacific' steam loco... well, now I added bogies to all the coaches (they were originally just two wheeled cars) so they roll better and put a brand new 4-6-0 'Ten Wheeler' steam loco at the head end. I decided to downgrade the loco from a fast main-line express loco of the 4-6-2 variety to a more laid-back 4-6-0 because the train isn't an express - it's a local on a branch line. You can see the original Pacific-type loco here. The whole train together. This oil-burning 4-6-0 steam engine is in a throwback livery that's based on my first custom train from way back in 2002-ish. The MOC is also slightly based on my first steam loco MOC I designed and built (circa 2012) that was constructed for the same train this engine pulls. Granted, that original MOC was technically a 4-4-0 and a total failure (no real world pictures exist of it), but I learned a lot from it! The rear of the loco. This baggage car is inspired by set 7722 (steam cargo train set) and the red / yellow guard's van. These three coaches were inspired by the red and blue coaches of set 7715. (Push along passenger train) The observation car is my own design. ...and here is what it all looked like originally. (picture circa 2017) The diesel at bottom left is long scrapped, but the original 0-4-0 steamer survives to this day. This tiny loco was inspired by set 7722 (steam cargo train set) while the steam engine's tender was inspired by 3742 (My Own Train series) from 2001. Thoughts? Post updated 6/26/26 with new steam engine and updated passenger cars. The whole post has been changed around too.
-
So Decapods, and now I`m not speaking about crustations. I`m a big fan of vehicles with lots, TONS, ABUNDANT amount of wheels, but like with spices and many really good things in real life, too much isn`t good (Yeah AA20 I`m talking bout you) So I was wondering, looking and researching about European and mostly British(I don`t know why, maybe coz Tomas and friends raised me, but this is a topic for another route) engines with a large number of driving wheels and European engines were kinda lacking (as I thought) in this subject, not like `MERICAs engine and some if were with more then 4 axels/8 wheels was not so intresting for that moment and thanks for train of thought i discovered BR 9F and i fall in love. And I decided to try to make it as much as I could. Here is the first version, and choose to use the dark green as it was the nation's racing colour for it So Behold The Iron Sovereign V1.0 made in 2025 The Iron Sovereign from BrickLink Studio And time flies by, and in my local RLuG is preparing for the Fancon(after the falls/outums event that prolongs till the new year) event that will be this summer with a LEGO stand, and I choose to make him. And then problems start to appear. Bricklink will be unavailable for my region... So, time goes by, and I adapt to Brickowl and start to make MODs for some sets and decide to bring to life some of my digital models. And when I upload his parts in BrickOwl, many parts and colours are unavailable or very hefty in price, and this model must be motorised. So needed changes: more affordable parts, colours and motorisation.
-
"Masterpiece" Spending so much time at the Age of Steam Roundhouse Museum, one will really begin to appreciate everything in their collection, not to mention the facility itself. Everything from the extraordinary to mundane will find its way into your mind and heart. I must admit that in my years of steam locomotive research and enjoyment, the Nickel Plate 700's did not strike me. For whatever reason, they just didn't click with me. I'm not sure what it was, but obviously, that's changed now. Cale and I modeled 765 way back in 2017 when we were still figuring out Brick Model Railroader. It took some convincing, but we eventually decided that Nickel Plate Road 765 would be our first collaborative steam locomotive model. We had a running model that needed some adjustment, but quickly became disinterested in the project due to external factors. We were never quite happy with where we left this project, and vowed to each other that we would return to the model some day to do it again, properly. Several years later, in late October 2021, and on a whim, I laid out a scaled wheelbase in stud.io, just to see what it would look like. I left the file alone for a couple more months until the Holiday season of 2021. I began thinking about a Nickel Plate Berkshire running around a Christmas tree, inspired by the amazing "Travel Refreshed" speculative project: https://www.youtube.com/watch?v=h2mU6jVcv4w&ab_channel=FortWayneRailroadHistoricalSociety This set my mind racing with thoughts of the late 1940's when large mainline superpower led "hotshot manifest" trains through the heart of America. If there was ever a perfect depiction of postwar steam railroading, it was this, and the Nickel Plate Road was the poster child. The Nickel Plate Road connected the farms of the Midwest in St. Louis and Chicago to Buffalo in the east. The road took a fast, level route along the southern edge of the great lakes. A direct competitor to the New York Central, it was purchased by the Vanderbilts in an effort to remove competition. As such, the line was never optimized and operated with older and slower equipment. The Nickel Plate was purchased by Oris and Mantis Van Sweringen, brothers from Cleveland who had controlling interests of several other roads including the Chesapeake & Ohio, Wheeling & Lake Erie, Pere Marquette, Erie, and more. The "Vans" would lead efforts to completely transform the Nickel Plate into the powerhouse bridge road it is remembered as today. One of those efforts included the creation of the Advisory Mechanical Committee (AMC), which served as a design bureau for the roads under control of the Vans. One of the first projects for the AMC was the design of the C&O T-1 class 2-10-4 engines, the largest two cylinder steam locomotives when built. Continuing in efforts to rejuvenate the Nickel Plate, president John Bernet assigned AMC officer William Black the task of designing a super-power locomotive. The result was the Nickel Plate S class of 2-8-4, built by ALCO Schenectady in 1934. The AMC, capitalizing on their winning formula for the T-1, maintained the factor of adhesion just above 4 while scaling down the rest of the locomotive: eliminating the fifth pair of 69" drivers and creating a locomotive with 70% of the tractive effort and 70% of the weight. Unbeknownst to Bernet, Black, and the AMC, they had just captured lightning in a bottle. To truly appreciate why the 700's were such good locomotives, the operating mentality of the Nickel Plate must be understood. The road was a masterpiece of engineering, maintaining a very flat right of way along the mainline, running shorter but faster trains handling bridge traffic over the line. Operating conditions like these coupled with the high-horsepower 700s, there has hardly been a more perfect match of locomotive and railroad. The Berkshires were so effective and loved, the Nickel Plate laughed away EMD diesel demonstrators multiple times until the end of steam in 1958. Even still, several of these locomotives were stored serviceable in anticipation of a traffic spike that never occurred. 763, part of the third batch of Berkshires in total (S-2 class) and second batch from Lima (Works #8671), was one of these locomotives. Officially retired a few years after the end of steam, it stayed in Conneaut, Ohio until 1966 when it was purchased by the Virginia Museum of Transportation in Roanoke, Virginia. 763 remained in Roanoke for several years until it was towed to New Jersey for inspection to pull the American Freedom Train, but other locomotives were selected., and 763 returned to Roanoke. Ohio Central and Age of Steam founder Jerry Jacobson purchased the locomotive from the museum in 2007, returning the engine home to Ohio. It is currently stored inside the Age of Steam Roundhouse Museum in stall 4, a regular favorite part of any regular public tour. All that to say: I never expected to have such a deep, genuine understanding and appreciation for these engines. It says a lot when someone can connect with a piece of machinery in such a way, and gain understanding of its purpose and reason for existing. The 700s were truly magnificent machines. So, in deciding that I was going to model one of these amazing locomotives, I began working in stud.io, and over the course of several months, I came up with what must have been at least a dozen iterations of the rough shape of the engine solely to achieve "the look." With 765 currently operating and with countless fans of the locomotives, the 700's are well recognized and people are going to be able to pick out the details, so any model of one has to be done properly. Once I had the correct shape and proportions, I filled in gaps and rebuilt section after section until I had a completed digital model in June of this year. By then, I had just seen 765 operate in person for the second time and was feeling inspired, so work on the custom wheels and connecting rods progressed alongside. Refining, trial, failure, adjustment, and testing continued until December 2022 when I completed the physical model. Naturally, I had to model 763 specifically, being the preserved example at Age of Steam. Under the hood this model is identical to my Mohawk: a pair of Power Functions L motors geared 1:1 driving the third axle, each operating from its own Power Functions IR receiver, and powered by a Tenergy 7.4v 2200 mAh battery. 763 operates smoothly and without issue thanks to the drive train design and high-quality printing of the wheels, rods, and valve gear. Drivers and trailing wheels designed by me and printed by Rob Hendrix, all rods and valve gear designed by me and printed through Shapeways. All artwork was faithfully recreated by Cale Leiphart. Decals printed by OKBrickWorks and UV printed number boards and bearing caps are from Richard Glatter. Thank you all for your help with this project. Having completed and published Buffalo Creek & Gauley 13, Morehead & North Fork 12, and now Nickel Plate Road 763, my Age of Steam collection grows. Those who know me personally understand that I'm not one to brag about my work. However, I feel I must say that I think I've outdone myself with this model. I would say this is the most new, ground-up design of locomotive I have built in a while. I've achieved detail and accuracy that I haven't seen on even some traditional scale models, and it all works together to make 763 perhaps my best model yet. A masterpiece of a masterpiece, if you will. As 2022 winds down, I'm elated to publish this locomotive and check it off the list. As I mentioned earlier this year, I've had a lot in progress recently so wrapping something up feels fantastic. There's a bit more in store for the immediate future, but we'll get to that later. As always, thanks for reading, and thanks to everyone for their support of my work through comments, questions, and compliments. It is always sincerely appreciated and I am thankful to be a part of such a fun community. More photos here: Video here: Merry Christmas and Happy Holidays, Glenn Holland
-
This is a MOC of the last Missouri Kansas Texas Railroad (also called the 'Katy') steam locomotive left in existence. The real 4-4-0 numbered 311 was built in 1890 by Baldwin Locomotive Works, and was heavily rebuilt in 1923. Among the upgrades at that time were: new steam chest with piston valves, new steel cab, and a new tender with an oil tank. (Basically only the 1890s frame survived!) In 1945, it was dressed up to look like an old Western engine as it pulled a four-car demonstration train called the 'Katy Flyer' in celebration of them "Winning the West" in 1870 by being the first railroad into what was then called Indian Territory, which is now the state of Oklahoma. The train toured the Katy system, and was later delivered under her own power in late 1952 to the National Museum of Transportation in St. Louis. It was later partially disassembled in the 1980s in a still-born effort to return the engine to operation on Museum property (after which a bunch of parts went missing), though they are trying to restore the loco cosmetically at this time. The MOC version is inspired by 2010 set 7597 (Western Train Chase), but was so heavily modified that basically nothing remains of the original set except the wheel arches over the driving wheels. The rear of the locomotive. I couldn't figure out how to do the shield logo on the tender, so I just let it off. The restoration of the real engine looks mostly complete. Thoughts? EDIT 5/23/26: Pictures updated to reflect the updated paint scheme of the real world engine and MOC.
-
Trying to make a steam train with a train motor as a base of motion. With mostly common and cheap parts (I hope) Type-442 'Cobalt' from BrickLink Studio [BrickLink]
-
This early-2000's style Wild West / 1860s 4-4-0 steam locomotive was heavily inspired by pictures of @SavaTheAggie's 4-4-0 from 2007 to which I then added a tender inspired by another Sava loco (his 4-6-0, also from 2007). I made the tender a bit longer. made the front bogie actually connect to the front of the loco, (whereas before in the original Sava design it was totally free-floating and loose) among several other structural / style tweaks here and there to make it my own. The engine is intended to go with the four My Own Train green passengers car (set 10015) MOD's that I own. The front of the locomotive, which is modeled after a coal burning type rather than the wood burner you usually see in Western scenes. The rear of the engine. The printed '10' piece is the dime part from the Minifigure vending machine, and it works rather well here! Much like real a 1860s locomotive, there are not many details inside the cab. The baggage car which is completely my own design. Two of the three coaches. The third coach carries the red marker lights for the rear of the train. Thoughts?
-
The Spirit of Legoredo was my one of my first big trains, and was built in 2011 with a baggage car, three passenger coaches, and observation car. It looked good to me at first, in nearly all black with a red stripe at the base, but over the years was quietly forgotten about, as it was quite dull-looking to others and hard to take pictures of. Then I switched magnet types to the newer ones, and it became even harder show off as it didn't match the rest of my newer train fleet. That is, until I added a new locomotive to the head end and one more passenger car. (changing the colors up a bit from mainly black to mostly red doesn't hurt much either!) In reality, this 7-wide loco began life as a 2-8-4 Berkshire type built by @Plastic_Goth and purchased from Rebrickable a seen here. I upped the wheel count by another leading axle, (making it into a 4-8-4 Northern-type) and I then decided to imitate the famous South African Railways 'Red Devil' in color-scheme. The pistons are entirely my own work, as is the tender. More details can be seen here on the SAR Red Devil locomotive. The rear of the engine has a slightly changed coal bunker side walls compared to the 2-8-4 Berkshire MOD I posted earlier in the week. The baggage car. These cars were all inspired by The Santa Fe Super Chief cars (10022 and 10025) and the Emerald Night's coach. (10194) The four streamlined coaches of the train. Each car on this train is 28 studs long, which is longer than my usual 24 studs long standard. Observation car of the Spirit of Legoredo passenger train. The original way these cars were styled had them all black and with a red base stripe, but I have added dark bluish gray fluting and a lot more red to the mix to make them easier to take pictures of. Comments, questions, and complaints are always welcome! EDIT 4/23/21: Added a different steam loco to the fist post.
-
Greetings, Train Tech. It's been about a year since CommanderWolf and I built the GE boxcabs, so here's another "boxcab": ... "glass box", that is. These locomotives were originally built for the Royal Bavarian State Railways with the designation "PtL 2/2". The unusual design featured a semi-automatic coal feed system, which did away with the fireman and allowed single-person operation. The boiler was surrounded by a cab with many windows, leading to the nickname of Glaskasten ("glass box"). During nationalization they were lumped into class 98 ("branch line locomotives"). Some survived the war to join the Deutsche Bundesbahn, which is the livery I've chosen to model here. This is another model with a large amount of SNOT-work; there are studs pointing in all directions. The frame is built studs-forward, the body features studs facing left/right for the doors and sides, and the side windows are upside down. Did I mention it's powered? The entire thing is powered by a micromotor driving the front axle: Note that the jackshaft doesn't actually extend through the locomotive; the 2x2 round plates on either side are carried along by the connecting rod between the front and rear axle. I used this technique to try to give extra grip to the BBB medium wheels. The battery box is in the cab. The smokebox comes off for access to the power switch: Here it is with the two-axle passenger car I posted a couple months ago. This loco struggles a lot more in turns than the 23-ton boxcabs did... Brickshelf gallery here (pending moderation). Thanks for reading!
-
This loco is a 1926 oil burning 4-8-2 "Mountain" type, (4 leading, 8 drivers, 2 trailing) that was made surplus in 1951, donated to the Museum of Transportation (of St. Louis, Missouri) in 1959, and restored to working order in 1988 for it's excursion career. It's new lease on life lasted until 2002 when insurance costs and a failing boiler made the engine enter it's second retirement, while will be probably be forever. This may not be the best interpretation of the Frisco 1522, but it seems to be the one of the few I've seen built out of Lego. (this loco is the only other 1522 I've found and it really blows mine away. ) The model you see here has been my dream ever since I was 5 or six years old and rode behind the steamer on one of it's last public trips. (I don't remember much of the trip, but I do remember the sense of awe and respect for the power of steam after seeing the loco pull past us on it's journey back to the museum and into what looks to be permanent retirement.) The cab walls on both model and real engine have the name of the railroad (Frisco) on it's side, while the number of the loco (1522) goes on the tender sides. The way to do this is using printed 1 x 1 tiles. The real engine is publicly displayed at the Museum of Transportation in St. Louis, Missouri. The Lego model of the loco is sitting on the front of the loco, just above the cowcatcher. Here is the most recent LDD file for the engine and tender. NOTES: Hopefully next year the Frisco 1522 and Milwaukee Road Bi-Polar will be built in real bricks, ready to be displayed beside the Southern Pacific 4460 and the GM Aerotrain that I already own. Please, if you have any complaints, praise, questions, or anything like that, please post it below. Feedback is always welcome, and I would like some advice on things I could improve on. Thanks in advance! EDIT 9/28/17: Updated ldd file and added new pictures. The device in between the two domes (I forgot it's technical name, "feed water heater" maybe?) is now more like the real engine, with two cylinders instead of none like I had before. This engine should be built by early next year. EDIT 10/6/17: the parts for the Frisco 4-8-2 steam loco + '57 Plymouth Fury parts are finally here! NOTE: Two tender wheels and all the letters / numbers are not here because I need to place that order separately later on by myself. So it's really not all here, but it's about 99% arrived. EDIT 19/29/18: Here we can see my newest brick-built model, Frisco 1522 (4-8-2 "Mountain" type) meeting my long-built Southern Pacific 4460 (4-8-4 "Northern" type). Above you can see it next to my other already-built Museum of Transportation models. Ever since I went on the last Kirkwood to Hannibal trip behind the Frisco 1522 in early 2002 at age 8, I've wanted to own a model of the famous burly Baldwin. I've tried many times over the last 16 years (mostly in the last 8) to recreate her, until finally getting it right in late 2017, in LEGO 6-stud-wide format. Then, the museum in which the engine resides opened up the cab for the 16th anniversary of the last ride on the 22nd of September of 2018 (they had never opened up the cab to the public before then and may never again). I tried to get in, but didn't due to unforeseen complications. That is, until a helpful employee let me into the cab to take a couple pictures with me and my model this Saturday, the 29th. All I have to say is, thank you to Sam, who helped me out to get the above photo of me and my model in the cab of the Frisco 1522. Here is a closeup of my LEGO model of the 4-8-2 steam engine in the real-world Frisco 1522's cab it is modeled after. I believe the model is sitting on the diesel link-up computer that allows for the steam loco's engineer to simultaneously control the following diesel locomotive that provides electricity to the train and emergency motive power in case of steam breakdown. Any thoughts, comments, complaints, or suggestions are always welcome!
-
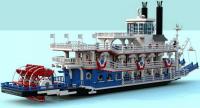
Ready for an incredible journey on the Mississippi aboard the vessel "Mississippi Princess"? The paddlewheel steamboat has 4 bridges: -The lowest includes sessions for passengers, a sofa and the engine room with the 10-cylinder diesel engine 20000HP -The first deck includes 1 suite, 1 double, 1 twin bedroom, 1 shared bathroom and the emergency room and service. All cabins have windows with portholes. The bathroom has a toilet, sink and shower. The second deck is home to the central control of the funnels and the terrace He sees the presence of a service area equipped with 2 high power LED headlamp for lighting at night and "the BELL ". The last deck on the other hand has a small rooftop and the cockpit. The control center is equipped with radar, sonar and computer. The vessel is equipped with two drawbridges for the boarding and alighting of passengers, both controlled by articulating arms and driven by pulleys. In navigation access to drawbridges it is controlled by gates. The paddlewheel is equipped with 8 blades for pushing. I published this project on LEGO Ideas, where you can find more detailed picts.<p>I used LDD to build and Bluerender for rendering. I hope you like it <span style="color: #76787A"><span style="font-family: arial, helvetica, sans-serif"><span style="color: #222222">
-
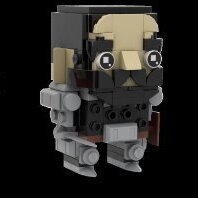
Can't get enough of steampunk so I figured I'd give it a go with a mech this time (my first try at that particular build). Hope you guys like it :) Steampunk Mech (6) by Andreas Lenander, on Flickr Steampunk Mech (5) by Andreas Lenander, on Flickr Steampunk Mech (4) by Andreas Lenander, on Flickr Steampunk Mech (3) by Andreas Lenander, on Flickr Steampunk Mech (2) by Andreas Lenander, on Flickr Steampunk Mech (1) by Andreas Lenander, on Flickr
-
Good Evening All, What happens when you smash your 60098 red cargo train into a vintage 7725 then rebuild it as one train? I have been trying to work out what to do with my new 60098 red cargo locomotive as it is just not, well, how can I put this kindly? Coal fired enough. It was a great little loco but those curved red 2x2s on the roof were crying out to be turned into a red 0-4-0 saddle tank engine! I used the same basic layout as my dark blue engine but gave her a sturdier (in appearance but not structurally) smoke box, new bunker and static side rods. The side rods are a compromise as I need her to run reliably at Brickexpo in Canberra in July. The added benefit is that this is all unmodified bricks (this time)! After Brickexpo I will look at moving side rods… Fans of 7777 may identify the culprit wielding the spanner. Thank you to Bricksmith, Rail Co, Paperballpark and Chromeknight for giving me the motivation to complete this project. It would be great to have all our little shunters running together one day but I fear they are all a shade too geographically dispersed. Sorry Modified 60098 With Lowered Roof and Extra Train Weights. It is time to become a steam engine... by Canvas Rails, on Flickr Sorry Modified 60098 With Lowered Roof and Extra Train Weights. It is time to become a steam engine... by Canvas Rails, on Flickr Lego Power Functions 0-4-0 saddle tank steam locomotive in red by Canvas Rails, on Flickr Lego Power Functions 0-4-0 saddle tank steam locomotive in red by Canvas Rails, on Flickr Lego Power Functions 0-4-0 saddle tank steam locomotive in red by Canvas Rails, on Flickr Lego Power Functions 0-4-0 saddle tank steam locomotive in red by Canvas Rails, on Flickr Lego Power Functions 0-4-0 saddle tank steam locomotive in red by Canvas Rails, on Flickr Lego Power Functions 0-4-0 saddle tank steam locomotive in red by Canvas Rails, on Flickr Lego Power Functions 0-4-0 saddle tank steam locomotive in red by Canvas Rails, on Flickr Lego Power Functions 0-4-0 saddle tank steam locomotive in red by Canvas Rails, on Flickr As always, more photos on Flickr Suggestions for improvements are most welcome and I have plenty of time to make modifications
-
Hi Eurobrick Train fans =:) Im trying to find if anyone knows where I can buy these steam train instructions under this listing on ebay 281956356126. The seller mentions printed instructions in the listing notes. I have tried to contact the seller but I have had no reply. Ive looked on railbricks and have downloaded the BR23 instructions there but model is not very robust. Any help appreciated :) Kind Regards Yogi from Oz !
-
Long before the Iron Giant began hurtling towards Rockwell, there was a prototype model, which landed on Earth close to 64 years earlier than the Iron Giant's 1957 landing. They were very similar robots, made by an Ancient race of beings that wanted to gather as much information about the Universe as possible. They first created this prototype model which was made mostly of brass, copper, and iron, but was powered by a highly advanced Fusion reactor that was powered by metals the robot consumed, usually uninhabited asteroids floating through space. Unlike the Iron Giant, this prototype was not able to re-assemble itself as it had a error in it's programming. In the year 1893, the then un-named Brass Automaton landed in the Pacific Ocean near the long-forgotten Dino Island. It created a tsunami and unhinged the island from the Earth's crust and as such the land began to slowly sink. The robot was first sighted by nearby Australian military sailors, who upon seeing the giant being arise from the water, tried to describe the being the best way they could through their wireless telegraph: they named it the Brass Automaton. Johnny Thunder and his Adventurers crew would later go looking for this great metal being after saving as many dinosaurs as possible from the sinking primeval island in 1923, but never saw it, as it was hiding in South American coastline to gather information on the dominant beings of Earth, also known as Humans. After staying relatively hidden in various secluded ocean floor places around the globe for around thirty years, the Brass Automaton was finished reading the minds off people for information on humans as a species: Our past, our present as of 1924, our origin (as it was then known), and our many languages, along with defenses, politics, and technology. After gathering all that intelligence, the Brass Automaton headed to the North Pole along the sea floor to transmit the required information to it's home planet using a faster-than-light sub-dimensional beacon. (Basically, a fancy radio) That is just about when a major solar storm hit the Earth, with the radiation hitting the atmosphere of the Earth and scrambling the outgoing signal into nonsense. Now the garbled signal was received by the home base, and as a precaution, the Iron Giant version of the Brass Automaton was dispatched as fast as possible to earth. (That would take it nearly 35 years for it to get there at all possible speed, which would require it to refuel once arriving on Earth, which is why the Iron Giant was at the power plant at the beginning of the movie, whereupon it's memory was scrambled by the high-voltage electricity.) After sending the garbled message and being struck by a passing icebreaker-ship on his trip southwards, the Brass Automaton was temporarily incapacitated. It was then discovered washed ashore at the southern tip of Greenland by Dr. Harold Wormwood and brought back in pieces to his stately laboratory / mansion in Legorado, Colorado, where he ran test after test on the alien visitor. By 1926, the mad scientist-type Doctor Wormwood had the resembled robot nearly reassembled, and was preparing to restart it when a Lord Sam Sinister came upon rumors of the robot and wanted it for his own nefarious desires, with Johnny Thunder close on his heels... This steampunk version of the Brass Automaton a recolored and modified version of Build Better Bricks' Iron Giant with the head of my previous @hachiroku version of the model (seen above) of the same robot's head added on... I consider it a mashup of the two models. I made it into steampunk colors (black, brown and dark gray) with an exhaust steam pipe at the back of the neck, and yes, that is a monocle / targeting computer over the right eye for use with the gun arm (it was included in the Build Better Bricks instructions) that I'm still considering trying to use. You also may have noticed, the model is incomplete in places - some things just don't lineup properly in LDD like they do in real life. When fully assembled IRL, it should look much better though. Here is the Brass Automaton's laser gun... probably not going to build this, but I MIGHT place it on a tank or something. This is what I've found so far for this model.... 100 parts down, about 650 left to go. Comments Questions, Complaints are welcome!
-
Update - she's built and pics added! These 4-4-0's were so popular in the US from the mid-1800's to the mid-1900's that they are referred to as a 4-4-0 American. They were a mainline work horse until the early 1900's when larger engines replaced them but they continued service on shortlines and spurs until the 1950's. My particular engine was inspired by #185 of the St.Louis-San Francisco Railway, nicknamed Frisco. It has 1050 bricks between the engine and tender and took me over 50 hours to make in LDD. It's 8 bricks wide and I tried hard to capture many of the important details without making it too super detailed. I focused mainly on scale and proportions. I did add good detail to the boiler in the cab and gave the tender good detail behind the cab to include the coal shoot and working coal doors. It's powered by a PF train motor under the engine with the battery and receiver housed in the tender. The very top of the coal heap serves as the button for the battery and you can look straight down and see the battery light glowing green. The cable for the motor runs under the floor of the engine and tender, but just above the coupler, keeping it out of sight. The .lxf file is quite detailed with over a dozen different groups making it easy to take the engine and tender apart allowing you to make modifications, change colors or just to examine my building technique. I have not run it through Bricklink yet, so there could be some parts in certain colors that are not available, like all the metallic gold in the cab for example. Here's a link to more history about the Frisco Railway... https://www.american-rails.com/the-frisco.html Here's a link to the .lxf file... https://bricksafe.com/pages/sed6/4-4-0-american-locomotive And here's some pics (click on each for bigger)...Hope you like!
-
Hi all, Embarked on this project after having a bunch of green wheels left over from giving my Flying Scotsman black ones instead. The P2's were built in the 1930's and designed by Sir Nigel Gresley. They went through many looks throughout their time, but the most unique and original was the one i've built below. All were scrapped, but two new ones are being built for mainline running! The first, No 2007 'Prince of Wales' is due to be finished in 2020, built by the same folks who built No 60163 'Tornado'. The build is 6-wide with Power Functions in the tender. I'm looking into ways of detailing it with stickers and prints in future! This started as a digital design, like many engines I build: A photo of the engine with my Scotsman and Mallard builds:
-
This is my first share on here but I've been hanging around for a while sucking up inspiration. Here are some MOC's made purely for fun and for play. First up a British 0-6-0 saddle tank steamy. It comes with it's own coal truck and brake van in which I've hidden the power functions so they all work together as a set. http://Lego_Train_MOCs_2018-1 by karen chappell, on Flickr http://Lego_Train_MOCs_2018-2 by karen chappell, on Flickr http://Lego_Train_MOCs_2018-6 by karen chappell, on Flickr The brake van hides the battery box and sits on top of the motor. This attaches to the IR receiver cleverly hidden in the coal truck. The whole set pushes rather than pulls but at sensible speeds this hasn't proven to be a problem. The drive gear is from Trained Bricks over on Bricklink. http://Lego_Train_MOCs_2018-3 by karen chappell, on Flickr http://Lego_Train_MOCs_2018-4 by karen chappell, on Flickr Next up is a simple modern tram set. 3 cars with the all the power functions hidden in the central car. http://Lego_Train_MOCs_2018-7 by karen chappell, on Flickr http://Lego_Train_MOCs_2018-8 by karen chappell, on Flickr http://Lego_Train_MOCs_2018-11 by karen chappell, on Flickr http://Lego_Train_MOCs_2018-9 by karen chappell, on Flickr Here's a diesel electric goods engine, not modelled on anything in particular, hauling a short train of logs for the lumber yard. http://Lego_Train_MOCs_2018-12 by karen chappell, on Flickr http://Lego_Train_MOCs_2018-15 by karen chappell, on Flickr http://Lego_Train_MOCs_2018-14 by karen chappell, on Flickr http://Lego_Train_MOCs_2018-13 by karen chappell, on Flickr This was my first MOC, a blue shunter obviously inspired by 60052. Everything power functions related is squeezed inside. The wagon behind is a refrigerator truck. http://Lego_Train_MOCs_2018-20 by karen chappell, on Flickr http://Lego_Train_MOCs_2018-22 by karen chappell, on Flickr http://Lego_Train_MOCs_2018-21 by karen chappell, on Flickr http://Lego_Train_MOCs_2018-23 by karen chappell, on Flickr And finally some short container wagons. http://Lego_Train_MOCs_2018-17 by karen chappell, on Flickr http://Lego_Train_MOCs_2018-18 by karen chappell, on Flickr Hope you all like them and apologies for the mammoth post. Thanks.
-
OK, so I have never made any secret that I think Emerald Night is crap. Odd proportions, terrible tender, complete lack of understanding of what several parts actually represent, looking *nothing* like the source material,.... I also know (from bitter experience) how difficult (and expensive) making a decent replacement is. After having built some really nice Pullmans, and building a disappointing pacific (which was miles better than EN), taking it apart, starting again, running out of inspiration, then getting made jobless so I couldn't afford to buy bits had I come up with an improved design, I decided to finally do something about my Emerald Night that had been sat in a corner with no wheels for at least 2 years. Things that I wanted to change: Give the front a footplate. Use the cylinder fix. Do something about that god awful (lack of) dome. Raise the cab so it doesn't look too daft with my coaches. Build a completely new tender (seriously, f**k that tender, that city cattle wagon was less lazy). Add lights and S Brick (which I had done a long while ago). So here are the results: Loco The new footplate, added tiles to the front bogie, replaced the green 1x6 plate with a black one, and the improved cylinder innards. New dome with S Brick underneath. Slightly raised cab. Tender The tender was a complete rebuild, but used basically the same chassis. It was however, a little lazy, and relied heavily on what I happened to already have. New Tender Completed Engine with Train. I intend to replace it with an actually good loco one day, but until inspiration and funds allow, this is a vast improvement.
-
Since the 2018 Hogwarts Express (set 75955) is lacking in realism, (with the engine and tender in particular!) I decided to revise my custom version with ideas from the set, including printed 1x4 curve tiles with Hogwarts Castle printed on them. The locomotive is a heavily modified version of LDDModelmaker's Black 5 model with some parts from set 79111, Constitution Train Chase. The tender features a three wheeled bogie design modified from the one in Anthony Sava's ALCO MRS-1. The middle axle moves side to side, as to allow going through switches and curves without issue. The inside of the cab features two gauges and the firebox. In this false-color image, the red parts slide, the blue ones stay put to allow for the loco to go around curves and switches. (BTW: There are parts underneath that keep the sliding bogie from falling out.) The roof and side wall of each coach come off independently from each other, to reveal four seats for students and / or the occasional teacher. The Hogwarts Express is usually made up of four corridor BR MK I passenger coaches, although sometimes a special fifth coach is attached with an open floor plan. (however, in this Lego design, they are all open floor plan!) Also, the end car is not accurate to the films, but is what I prefer to the alternative: a gangway leading nowhere with no red light on the end. In-universe / Film History for the Hogwarts Express: Leaving from Kings Cross' Platform 9 & 3/4 to Hogsmeade Station at exactly 9 AM, the Hogwarts Express carries students (and sometimes faculty) to and from Hogwarts' School of Witchcraft & Wizardry in the Harry Potter series of books and movies. It has been seen in every Harry Potter film, from it's first appearance in the beginning of Philosophers Stone to it's (so far) last at the end of Deathly Hallows. (part two) The Hogwarts Express is usually only in the film for a short while, and it is generally a pleasant journey from Kings Cross to Hogsmeade, although Harry Potter, Ron Weasley and a certain Flying Ford Anglia might beg to differ! This 100% fictional version of Hogsmeade station (as in, not really based on any of the Harry Potter films) was inspired by several sets, mainly set 21324 (123 Sesame Street) and bits of my older Hogsmeade station MOCs from years past. The model is modular, and features a detachable track-side platform, ground floor, second floor, and roof. The platform is five tracks long, and starts three studs away from the rail head, making it a breeze for larger engines with wider pistons to pass through unrestricted. The street side features the same basic look as the other side, but in this case their is a staircase.... which could cause a problem for luggage trolleys as their is no ramp! As also used on the rail side, this Hogsmeade 1 x 4 tile should be placed on the four exposed studs on the second floor. The upper floor features the station master's office with an little break room for an off-duty engine crewman to sleep in. Also up here is a fireplace and two desks, one of which has an oil lamp on it. The lower floor features a bench for passengers out of the Scottish fog and rain. Also, the two ticket booth's share a single cash register, so the two ticket agents best be extra sure how much money goes where and who did what! Every floor & platform is grouped separately in LDD, as shown here. As usual, comments, questions, suggestions, and complaints are always welcome! EDIT 10/27/2020: Hogsmeade station LDD model replaced, screenshots and words updated accordingly. Real life pictures coming eventually. (Hopefully soon!)
-
This type of geared type loco is called a "Shay" (specifically a type "A", which means two pistons and two trucks) and were named after their original inventor of the type, Ephraim Shay. These loco's could only go about 20 miles per hour (or about 32 Kilometers per hour, if that's your thing) at top speed, and were very steady on rough track, hauling logging and mining trains up grades that would easily stall conventional steamer types. You can read more about Shay geared steam locomotive's at Wikipedia. Please NOTE: The design of the original Shay I redid into my version was by Stephan Pakbaz over on Flickr, as seen below. (His LDD file allowed me to build my version) as seen here. The 1 x 1 tiles on either side of the coal bunker are supposed to be printed with the number "4" The Shay type only has pistons on one side, with the other side being kinda sparsely decorated. Usually, their would be various accessories and such on this side, but i liked it better devoid of any clutter. The Shay geared steam loco bends in a odd way... but at least it works. NOTE: The angle shown is quite a bit more severe curve than the loco will ever have to handle.... but it looks pretty cool! This raw ore car was modeled after a custom Brick Link item by @wildchicken13 except mine is narrower and uses two wheels for a Wild West flair. You can see the original item that inspired me here. The caboose follows my standard pattern for my Western trains, with only a few color swaps and a missing cupola on top to set it apart from the others. Here we see the mining train consisting of four silver ore cars and a caboose, without the Shay. This is my latest (and most likely last) Western styled train, and it will join my other four steamers and their trains in my Wild West collection sometime later in 2018. (The reason I say "last" is that I've run out of railroad-related ideas for my Wild Western layout and am planning on focusing on the updated Native American camp, revised Fort Legoredo and the remaining frontier town buildings after this.) As you may have suspected, the ore the mining train holds comes from my well-protected silver mine, which can be seen in it's own topic. ...and as usual, comments, questions, complaints and suggestions are always welcome!
-
I've been on a steampunk kick recently... here are the fruits of my digital labors. The building's a WIP in the real world, while the rest will come later. From a WHAM product brochure (circa late 1909): "Here at WHAM (Wayne Highly Advanced Mechanisms) we always have our eyes on the horizon of the future. From our humble beginnings designing our first line of industrial hyper-reactors, to our more recent ideas of regular rockets to the moon, we here at WHAM are always striving to make our world - and beyond - a better place for us, our children, and so on out into the great unknown of the distant future. I should know, because as son of founder of WHAM, Dr. Lucius Wayne, I, Floyd Wayne am here for YOU. Don't believe me? You can see inside this brochure of our upcoming products for 1910 and decide for yourself. If you have any questions or requests for specific machines, please write to our Marketing and Public Relations department as shown on the back page and I'll see your special needs are filled. Remember: Don't buy a scam, buy a WHAM!" Here are the models I've worked on / revised: the giant robot, frog translator chair, laboratory building, automobile, and personal rocket. Because why should you not have a steam-powered mobile translator device for your highly intelligent pet Frog? Oh, and the inventor of this and much more is Lord Floyd Wayne, an eccentric Victorian inventor with whom failure is not an option. (In case anyone couldn't tell I was listening to Pink Floyd songs while creating these as that's where the inventor's first name came from. Oh, and as a fun note, the frog's chair actually began life as Davros' (creator of the Daleks) chair from Doctor Who. ) This rocket (named the Golden Bullet) is designed for atmospheric travel only, as it does not have a complete canopy nor air tanks for outer space travel. (actually, it was inspired by LEGO Universe' steampunk rocket, but with more recent parts and several recolors) The ship is powered three smaller booster motors and one larger main engine. (The rocket's original inspiration was taken from the first LEGO MMO from 2010, LEGO Universe.) The Golden Bullet comes apart in three sections, with the nose cone, cockpit and engines all being removable from each other. (NOTE: This print is missing from the dark tan 1 x 6 tiles on the driver's compartment.) This giant robot (named the Brass Man) was created by Lord Floyd Wayne as an tool for outer space exploration. Everything the robot sees is transmitted back to it's home base via a hyperspace sub-channel to be recorded and viewed for scientific study. The Brass Man is powered by a experimental hyper-matter reactor, which gives off steam as a safe and harmless by-product. (The robot was originally inspired by @hachiroku's Iron Giant, seen here) The monocle seen here is supposed to have this print. as a sort of targeting computer for weapons and for long-distance magnified viewing. The robot's main weapon is this laser pistol that disintegrates on contact. Only Lord Floyd (it's inventor) knows how it works, as he doesn't want any Earth governments to discover it's dark secrets. This device is only to be used for self-preservation and at that only as a last resort. I plan on using my version of the 2018 Marvel Comics 'infinity War" set 76108 (Sanctum Sanctorum Showdown) for a 1920's-flavored steampunk take on a mad scientist trying to open a time doorway into the beginning of the universe. What he doesn't know is that creatures from before our universe began were destroyed at that moment, so they will come through the doorway to the mid-1920's as a way of sheltering themselves from that fate. Unfortunately, being from that time frame, of course they want to end our Universe so they can live again in peace. As this takes place in my Adventure-verse, Johnny Thunder is tasked with shutting down the doorway before our universe sinks back to before the big bang... and Sam Sinister is trying to use the time / space doorway to achieve vast riches by robbing ancient cultures of their valuables using the Time Window, which draws the attention of the giant robot seen next to the building, leading to a cascading domino-like series of events that have not yet been written. The rear of the building has a ground-floor conservatory. The rearmost window on the bottom floor opens up 90 degrees to allow for figure placement in the conservatory. As a side note, the original Marvel model's exploding walls and drop-floors have been removed. The means from getting from one floor to another is a spiral staircase, and a small skylight has been added to the roof. The inside feature the following: The lower floor has a fireplace with clock on mantle, table with a pizza, and lamp on a side table. The middle floor features a marble bust on a printed safe, and a bed. The dark red thing in the greenish jar is a beating human heart. The upper floor features a desk with some sort of electricity storage machinery, several flasks, two bookcases, time portal computer and microscope. This early-1900's automobile was designed with the tan off-road model in set 76003 (Battle of Smallville) in mind, with a bit of 7628 (Peril in Peru) thrown in for good measure. I was aiming for continuing my Steampunk theme, but ran into a mental roadblock with regards to this car, and about four other prototypes that didn't make he cut. (Sadly, they were accidentally saved over and are now gone) The rear of the model with the spare tire, brake lights, and dual exhaust pipes. ...And that's it for now! Any questions, comments, complaints, and suggestions are always welcome!
-
"In 1972, a crack commando unit was sent to prison by a military court for a crime they didn't commit. These men promptly escaped from a maximum security stockade to the Los Angeles underground. Today, still wanted by the government, they survive as soldiers of fortune. If you have a problem, if...." No wait, that's not what I meant!! In 1990 a group of people came together to share an extraordinary ambition – to construct a brand new Peppercorn A1 Pacific. They formed The A1 Steam Locomotive Trust and after nineteen years of incredible effort that locomotive, No. 60163 Tornado, moved under its own power for the first time in 2008. - https://www.a1steam.com Having created my first MOC (link), I was keen to improve. Mostly the running performance (the pistons never worked that well), the look of the engine, the carriage, its ability through switches and the playability.... so, basically everything. Looking for inspiration on the 'net I came across 60163 in her blue livery and loved it. I had found my Emerald nights' partner steam train. 3 years later, I'm very happy to present my Blue Tornado! Full Flickr album here - Link The dual axles for the smooth running of the pistons isn't very realistic compared to the original, but this was a trade off between usability (kid proofing), smooth running and accuracy. 7 Wide for the train and carriage allows for so much more detail and usable space, but presents some tricky issues. The white lines are thin modelling stickers the rest is all genuine lego, with no modifications. Only two parts aren't in current production (in the right colours) the 6L grey axle and 'Roof tile 2x1x2' in blue. I liked the challenge of production parts only, and the lower BL cost, even though the proportions are now off. Design details: The driver wheels are inset by about 1/2 a plate into the body to make them appear bigger than they are. It also allows for a lower centre of gravity to make sure it doesn't derail at full speed around corners! The second picture also shows how I kept the top 'rail' stable whilst maintaining the colour scheme. The two single black studs on the left side are '1x1 with hole' with a 'Technic, Axle Pin 3L with Friction Ridges Lengthwise and 1L Axle' through the whole section. 3 3x2 black tiles were removed, along with the whole 'boiler' and roof of the cab (it's all one assembly). Front and rear bogies have vertical and lateral movement for non flat lego track. Couple of Youtube videos: (Part 1 (below) and Part 2) Finally I've added it to LEGO ideas. More in the hope of trying to get another Creator Expert train out of LEGO or to show that there is still love for trains in general. It'd be great to get your support :) https://ideas.lego.com/projects/fc675426-9e80-4c8b-bab3-b99be6983312
-
Hello fellow builders! I felt that it was finally time to share with you all something that I've been working on/ playing with for a while now: My L-Motor Frame. L-Motor Block Types by Nick Jackson, on Flickr The concept for this project was to create a stable platform on which (primarily) steam engines could be produced with less motor& cable obstructions. L-Motor Block Types by Nick Jackson, on Flickr This would then allow the engine's body to be built relatively free of electrical components, or crammed with them in the case of tank engines. L-Motor Block Variants by Nick Jackson, on Flickr I think that the most interesting part of the frame is the fact that it is easily modifiable, and can essentially go from 2 to 7 axles! At the time of writing this however, I've only dared to go up to 4 axles for a related project. L-Motor Block Variants (2) by Nick Jackson, on Flickr Hopefully these frames and their different gear ratios will inspire you to make a steam engine! Although, there are a great many European engines that are not steam, but employ connecting rods for their drive wheels. L-Frame with Medium-Large wheels by Nick Jackson, on Flickr Lastly, here are some alternative wheel sizes that you may be interested in. These are made possible by the work of BigBen Bricks and @Shupp. The smallest feasible size would be the Medium-Large drivers by Shupp. These would need a bit of reworking from a standard L-Frame in order to clear switches and such. New Wheels!!! (2) by Nick Jackson, on Flickr Here, a set of XL wheels from BigBen fit nicely on a standard frame. L-Frame with XXL wheels by Nick Jackson, on Flickr And, by upgrading to the longer frame size, you could even accommodate 6 of Shupp's XXL wheels! Hopefully this post will benefit everyone, but moreso people who've had a difficult time getting into trains, and especially steam! Please, let me know your thoughts, and definitely share your ideas for a potential future build that might benefit from this design! Oh, and here's the link to the files: https://drive.google.com/open?id=0B9xAgBdzDImZaFFsM2lGVkdmcEk Thanks for reading, ~M_Slug357~




.thumb.JPG.1493565333fc74a41021a3de1870838e.JPG)